curt hitch install
#1
 02-22-2009, 12:51 PM


curt hitch install
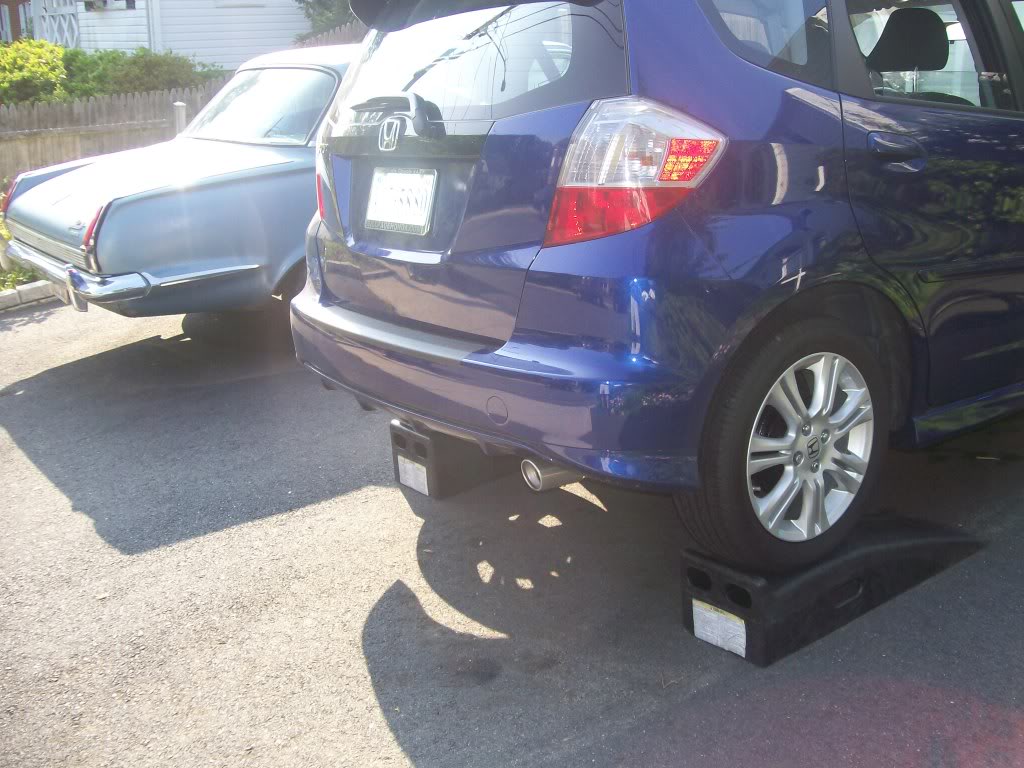
Bought and installed a curt hitch a few weeks ago. The install was very easy and everything lined up and looks good. I went with this hitch over the others because of the 3 points of connection to the car. I thought that to be a little better at withstanding excessive tongue loading and twisting. Haven't used it yet but it seems pretty sturdy when you put a load on it.


#3
02-24-2009, 09:23 AM
The only mod was drilling a small hole in the bumper mount under the car.
No part of this hitch disturbs or covers anything on the car. Before you drill you might want to remove the plastic inside the wheel well for better drilling access.
No part of this hitch disturbs or covers anything on the car. Before you drill you might want to remove the plastic inside the wheel well for better drilling access.
#4
03-01-2009, 02:34 PM

You mean the frame rail. I really don't want to drill holes in metal frame rails if I can avoid it. Did you do anything to seal it up after drilling or do you figure it won't matter when it rusts since you can't see it?
#5
03-01-2009, 04:38 PM
Holes need to be drilled in the bumper mounts or end of the frame rails
After drilling I sprayed some primer over the holes before bolting- might help with the rust.
After drilling I sprayed some primer over the holes before bolting- might help with the rust.
#8
08-07-2009, 08:21 PM

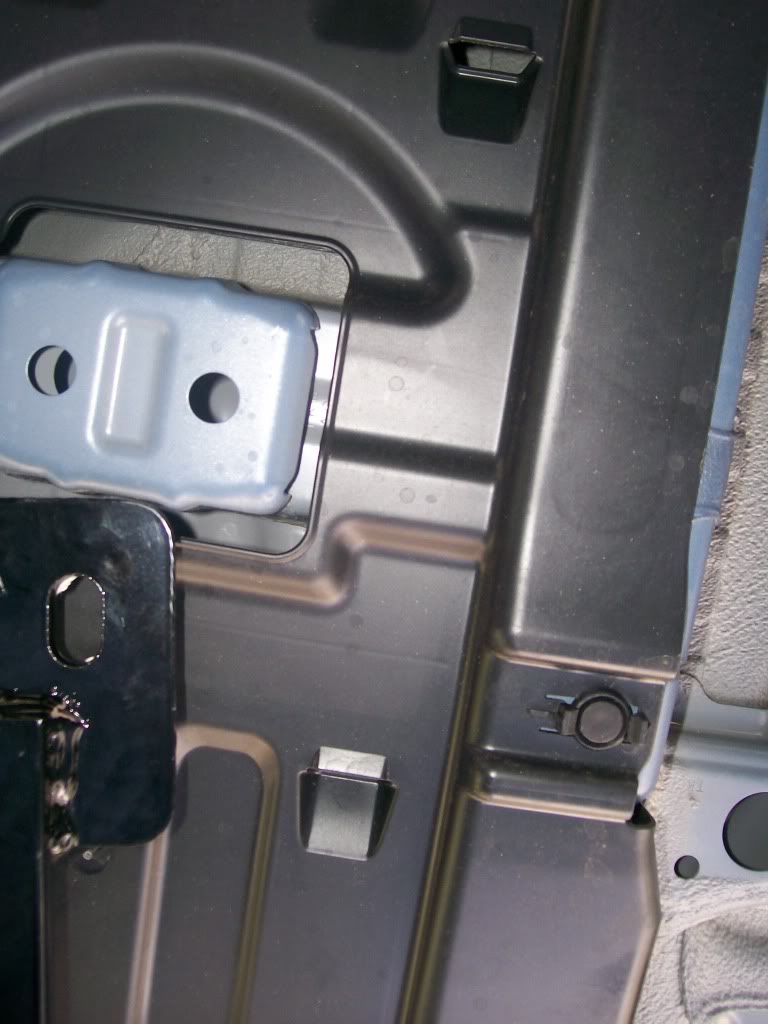
I thought I would resurrect this since I just installed a Curt hitch for use with a bike rack. The one hole that has to be drilled does NOT go in the main unibody (frame rail) of the car. It goes into the reinforcement brace that is inside the plastic bumper cover and bolted to the unibody on each side.
This made me feel better about going with the Curt since the hole is in a replaceable component.
A note for anyone installing this hitch. The instructions tell you to drill a 17/32 hole (1/2 works) and modify the hole "using a carbide bit and rotary tool". You actually don't need to modify the hole. If you feel around towards the rear of the brace you will find a large opening that you can fit the bolt and spacer through with the fish wire.
#9
08-08-2009, 11:10 PM
I don't have a curt hitch but I do have a install thread.
https://www.fitfreak.net/forums/2nd-...tml#post611620
https://www.fitfreak.net/forums/2nd-...tml#post611620
#10
05-31-2010, 03:03 PM


I agree with Schadenfreude. I just installed the Curt hitch and it requires drilling only one 1/2" hole (not the odd-size 17/32") in the bottom of the broad, boxed unit that is connected the bumper to the frame rail on the driver's side (the box on the passenger side already has a hole). And access to the hole IS available from an open port to the box, located near the bumper, so the reinforcement plate and bolt can be fed through the top side, with the aid of the (supplied) fish wire.
Last edited by phogroian; 06-02-2010 at 06:55 AM. Reason: typo
#11
06-01-2010, 09:18 AM

DrawTie makes a hitch for the fit with no drilling required. Same design as the curt pictured. Fairly cheap at $120 or so. This was the route I took. The Curt above looks good also.
#12
06-01-2010, 07:55 PM
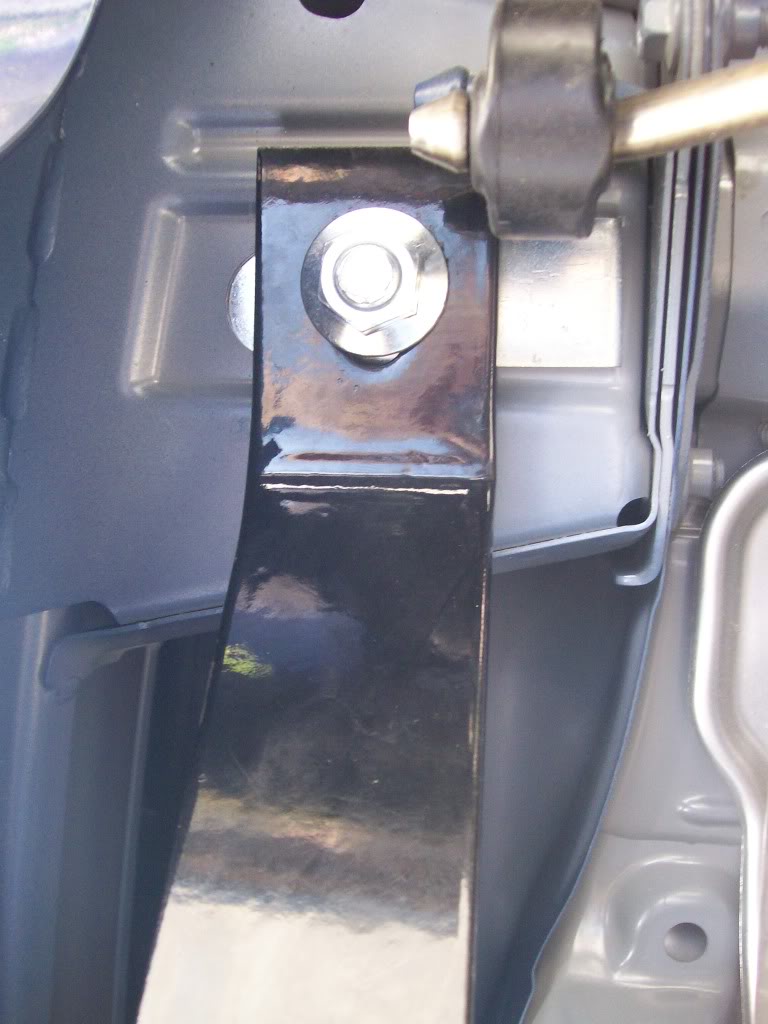
I was looking at Drawtite # 24826, but it mentioned trimming the wheel well, which i did not want to do. I opted for the Curt 11064 because it required drilling only one hole (there is an existing hole on the passenger side in the same corresponding place) and I felt that the mounting points were strong (the two weight bearing mounts left and right are located far to the rear, for less flexing and leverage, and are in the strong bumper box that is directly attached to the rear frame rail terminus. If the hitch is ever removed it will look as if the hole was always meant to be there, since there is one on the other side.
The instructions are not good, though. Here's how to get it done:
1) put the car on ramps, if you have them. It makes the job much easier. Use a blanket to make the ground more comfortable.
The instructions are not good, though. Here's how to get it done:
1) put the car on ramps, if you have them. It makes the job much easier. Use a blanket to make the ground more comfortable.
Last edited by phogroian; 06-03-2010 at 08:19 AM. Reason: added text
#13
06-01-2010, 08:04 PM
.
2) You will need:
a) A drill with 1/2" drill bit (and probably a few smaler ones to get the hole started).
b) a medium size flat and Phillips head screwdriver
c) A ratchet wrench with 3/4" socket
d) Safety goggles, if you don't like hot, sharp shards of metal in your eyes.
3) using the screw drivers, remove the plastic mud guard on the driver's side. This will give you better access to the bumper support box.
4) Temporarily mount the hitch at the pan lug and the passenger side so you can mark where you want to drill the driver's side with a permanent marker.
Last edited by phogroian; 06-03-2010 at 08:19 AM.
#14
06-01-2010, 08:13 PM
5) After marking where the driver's side mounting bolt will go, remove the hitch and drill it with a 1/2 inch drill (not 17/32 like the instructions say).
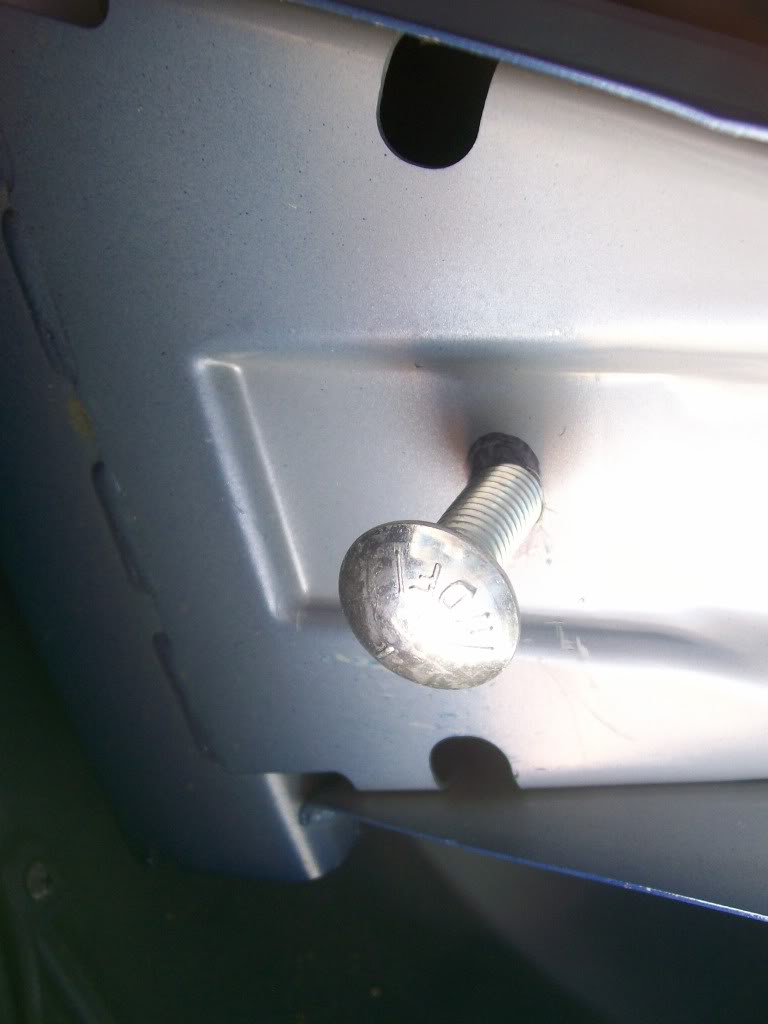
6) fish the nuts and reinforcement plates into the frame box with the supplied fish wire. No need to grind open the hole you just made to make it big enough to fit the plate through; there is an opening in the back of the box big enough to fish the hardware in there. Just thread your fish into the hole and out through the back of the box, thread on the reinforcement plate and the carriage bolt, and pull the whole thing into place. Put on another reinforcement plate, THEN the hitch. That's right, you make a reinforcement plate sandwich for your bumper box!
6) fish the nuts and reinforcement plates into the frame box with the supplied fish wire. No need to grind open the hole you just made to make it big enough to fit the plate through; there is an opening in the back of the box big enough to fish the hardware in there. Just thread your fish into the hole and out through the back of the box, thread on the reinforcement plate and the carriage bolt, and pull the whole thing into place. Put on another reinforcement plate, THEN the hitch. That's right, you make a reinforcement plate sandwich for your bumper box!
#15
06-01-2010, 08:21 PM
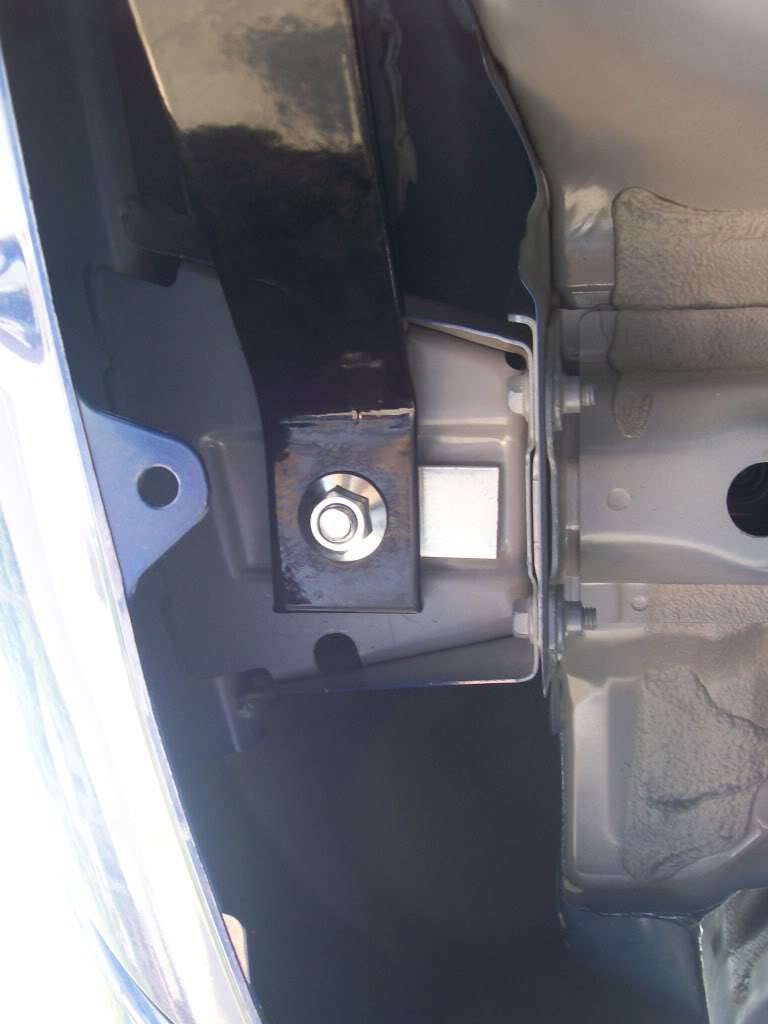
7) replace the mud guard, and you are done! Note: two tabs have been welded to the rear nuts to hold them in place when threading the screws. You can cut them off or simply fold them under, as shown here.

Torque everything down TIGHT! Using Locktite would not be a bad idea.
From this:
To this:
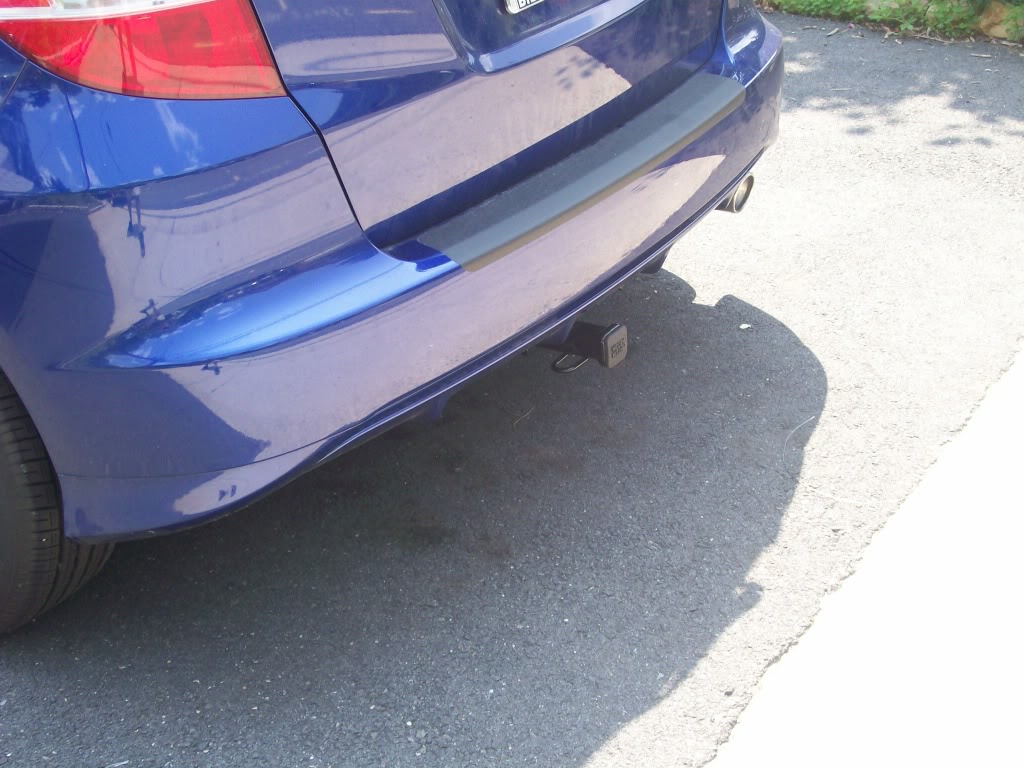
Sweet.
Torque everything down TIGHT! Using Locktite would not be a bad idea.
From this:
To this:
Sweet.
Last edited by phogroian; 06-01-2010 at 08:29 PM.
#16
06-01-2010, 08:32 PM
P.S. No clearance issues, plus if it did scrape, it would be the hitch, not the car. With the draw bar and ball attached, it protects your bumper, Ben-Hur chariot race style!
Last edited by phogroian; 06-01-2010 at 09:35 PM.
#18
06-09-2010, 08:29 PM
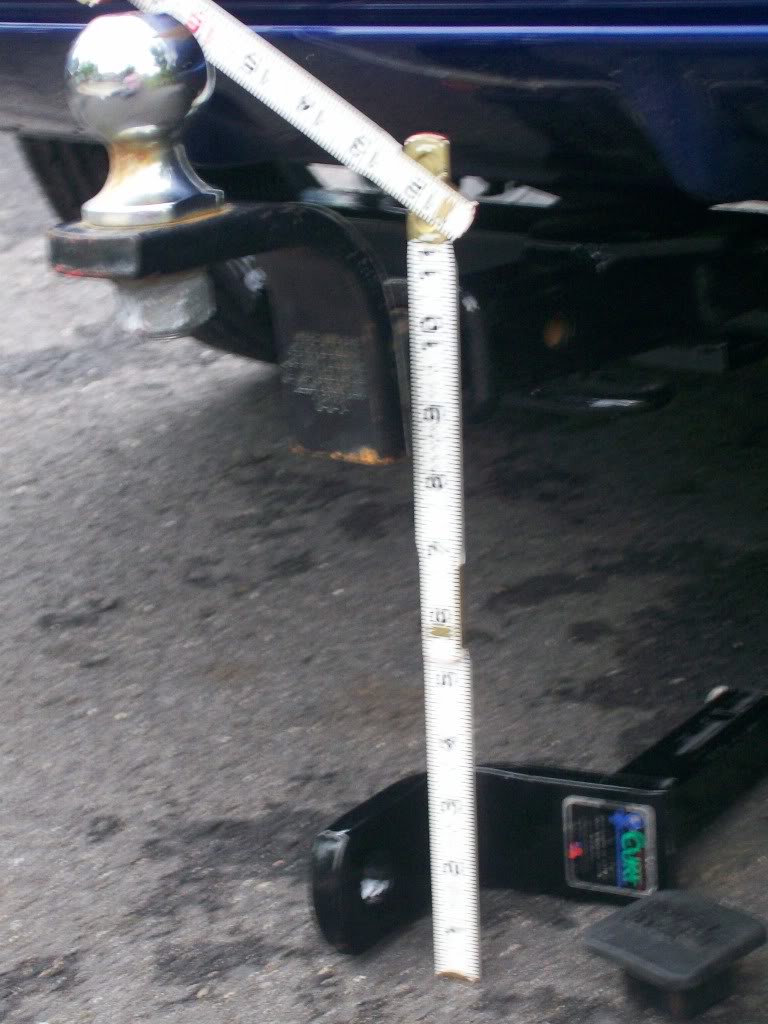
I just took some measurements. The frame rail in the rear of the car is lower than the bumper- only 9 inches off the ground. The hitch is 8 1/2 inches off the ground, and 8 1/4 inches off the ground at its lowest point. The hitch ball stands 12-14" off the ground.Center of receiver tube is 9 3/4 ".

#19
06-09-2010, 11:06 PM
Thanks phogroian nice posting. Thanks for the dimensions too. I'm still deciding if I want to set one up or not, and this does help. BTW who is that behind the foster grants??
K_C_
K_C_
#20
06-16-2010, 08:19 PM

Follow the instructions for the reinforcement plates. There are 3 sizes. A big one for the passenger side, 2 medium ones which should have gone 1 on each bolt on the middle mounting point, and 1 small one for the drivers side. This is clearly shown on the instructions and the parts list.
phogroian you might want to pull half of your sandwiches off and put them on the middle mounting bolts. Don't know if it makes that big a deal, but thats how it was designed.
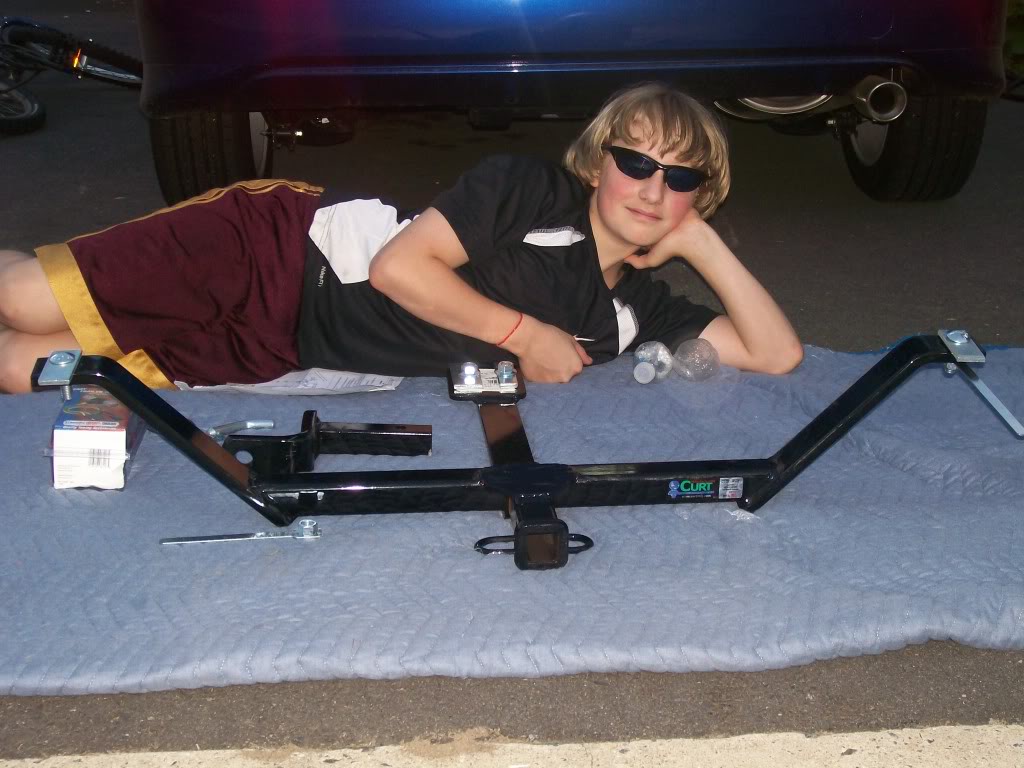
The hardest thing while doing the install is getting the hitch up there and aligned right to mark the hole to drill. Once you get that done its easy breezy. I feel like they should just go the extra step and put a template in there that you just sit on the frame rail, mark, and drill.It took me a little over an hour, but some of that was getting tools rounded up, car on the ramps, etc.
phogroian you might want to pull half of your sandwiches off and put them on the middle mounting bolts. Don't know if it makes that big a deal, but thats how it was designed.
The hardest thing while doing the install is getting the hitch up there and aligned right to mark the hole to drill. Once you get that done its easy breezy. I feel like they should just go the extra step and put a template in there that you just sit on the frame rail, mark, and drill.It took me a little over an hour, but some of that was getting tools rounded up, car on the ramps, etc.