DIY: 11 Pin Door Mirror (Folding, Heated, Smart Key)


#22
 05-06-2013, 11:49 AM


No, I am NOT going to install a Japanese Smart Key, I think it will be too complicated but
but turn out that the Sensor/Receiver for this Japanese Smart Key are located on the Door Mirror.
If you look at the picture above, you will see a rectangular black component on the rear part near the LED blinker.
That is the Japanese Smart Key/True Key Less System Receiver...
basically you don't have to press anything to open the door.
You just had to be standing close enough to the car, and the car will unlock it self.
but.......
if any of you know about installing Japanese Smart Key system,
and if it is not that hard hmmm,
when I have free time, I think I should do more research on this,
perhaps it will be easy to do...
What I know is, the key it self is different shape than ours...
nah... I think this will be too hard...
#23
05-06-2013, 12:18 PM
that's what i'm saying... but it looks like too hard would stop you... just saying all the projects your up to
#24
05-06-2013, 02:29 PM
Yah, the Smart key would be a difficult install, if it's even possible... might need dealer HDS for the ECU programming of the key 
I think I asked this before to ryu, but I can't remember...
The Insight Tilt down module (from Honda), does that tilt down both mirrors (driver & passenger)?
......
oh, I also think that the insight auto tilt wiring that you had point out to me before will work with just one modification for the 3 wire for the power mirror since the wiring were for RHD car and we are LHD drive car (passenger door mirror on right side for USDM model)...
.......
oh, I also think that the insight auto tilt wiring that you had point out to me before will work with just one modification for the 3 wire for the power mirror since the wiring were for RHD car and we are LHD drive car (passenger door mirror on right side for USDM model)...
.......
The Insight Tilt down module (from Honda), does that tilt down both mirrors (driver & passenger)?
#26
05-06-2013, 04:23 PM
Yah, the Smart key would be a difficult install, if it's even possible... might need dealer HDS for the ECU programming of the key
I think I asked this before to ryu, but I can't remember...
The Insight Tilt down module (from Honda), does that tilt down both mirrors (driver & passenger)?
I think I asked this before to ryu, but I can't remember...
The Insight Tilt down module (from Honda), does that tilt down both mirrors (driver & passenger)?
and from the CR-Z forum where the person had to swapped the pin because LHD and RHD differences, (the passenger mirror on JDM is at the left side, while ours is on the right side)...
it looks like it only tilt down ONE SIDE,
so you had to choose either Left or Right side...
Usually it is the Passenger side (right side for ours) that tilt,
because it will be hard for us to see the curb on the passenger side,
while on the driver side, it will be easier for us to see the curb...
but maybe, if we wire them in Parallel we might be able to make both mirror tilt...
still, I think that would be confusing for our eye,...
so I am going to stick with just one mirror tilt (passenger side).
Just return from Fry's and Radio Shack to buy some 18awg cables, and molex connector...
will start fabricating the wiring soon...
#27
05-06-2013, 10:16 PM

I don't know if you saw this DIY on installing heated folding mirrors or of any help "Google translator" will work
DIY 2009 USDM HONDA FIT SPORT - MUGEN
DIY 2009 USDM HONDA FIT SPORT - MUGEN
Last edited by cjecpa; 05-06-2013 at 10:28 PM.
#28
05-07-2013, 03:19 AM
I don't know if you saw this DIY on installing heated folding mirrors or of any help "Google translator" will work
DIY 2009 USDM HONDA FIT SPORT - MUGEN
DIY 2009 USDM HONDA FIT SPORT - MUGEN
Hi,
Thanks for the Link,
I think those DIY were done by a member of fitfreak.net,
which is FITMugen,
but he post it on Thailand Forum. He even use the same name there "FITMugen".
Nevertheless, what he post on the Thai Forum is more complete
compare to what posted on fitfreak.net,
so those post from Thailand Forum are a GREAT HELP , especially for connecting the Heated Mirror
Thanks "cjecpa"
#29
05-08-2013, 06:59 PM
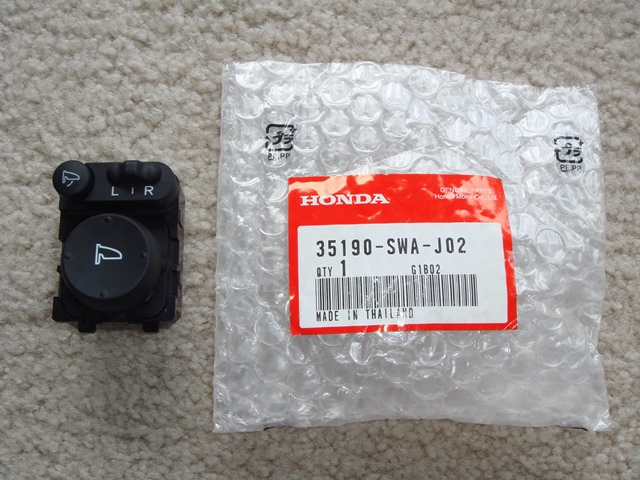
Honda CR-V BACK LIGHTED Switch just arrived few minutes ago
I also had bought the Molex and 18AWG wires needed for this application,
and I had ordered NEW Rear Cover with Taffeta White Paint from Japan from a company called Amayama (simlar to Japan Parts.com).
Hopefully it arrived by next week...
I also had bought the Molex and 18AWG wires needed for this application,
and I had ordered NEW Rear Cover with Taffeta White Paint from Japan from a company called Amayama (simlar to Japan Parts.com).
Hopefully it arrived by next week...
#30
05-08-2013, 08:52 PM
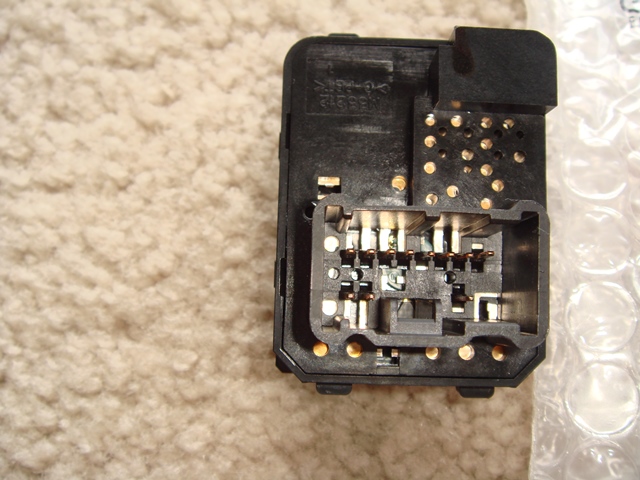
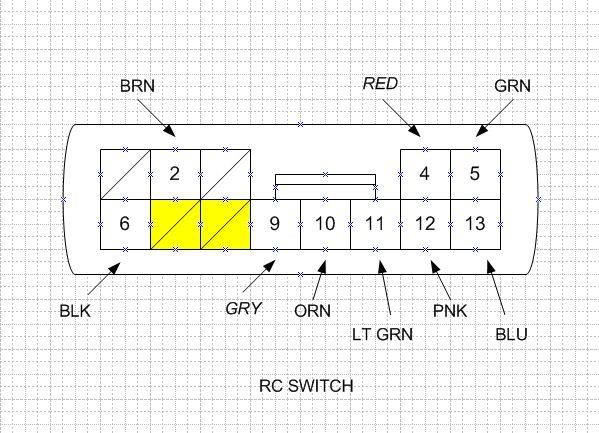
The CR-V Switch had BACKLIGHTING, but we need to add more wiring
to the switch.
so you need to add 2 PIG TAIL 04320-SAA-A00 into the socket that connect to the Switch.
You connect the Positive Signal from other switch on the dashboard that had back lighting to Pin #10
and you connect the Ground to Pin #2.
I have not tested this on the car because I had not install it yet,
but I had tested using 12 volts battery, and the Switch really light up !!!
I got this info from a Japanese DIY and here are the pictures that indicate the PIN, please note that the way this Japanese DIY mark the PIN# is different then the way DIY in one of the forum on fitfreak does his.

If you are using the "other" PIN map for the RC Switch,
then for the lighting you got to insert the pigtail to Pin 4 and Pin 9 on the diagram below:
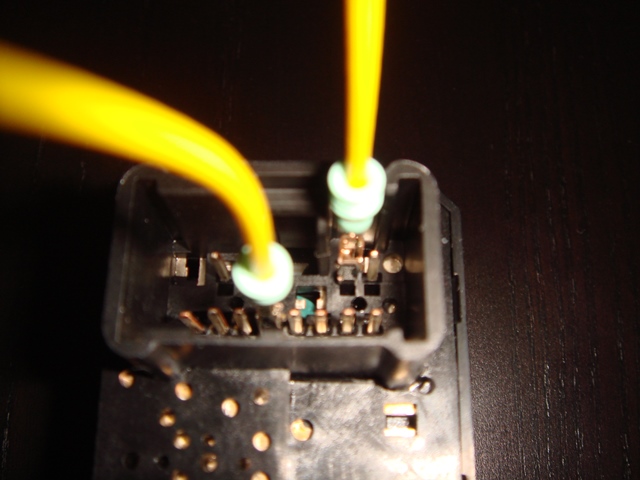
and now this is the picture of MY SWITCH connected directly with the pigtail so you can further understand which PIN to connect to:
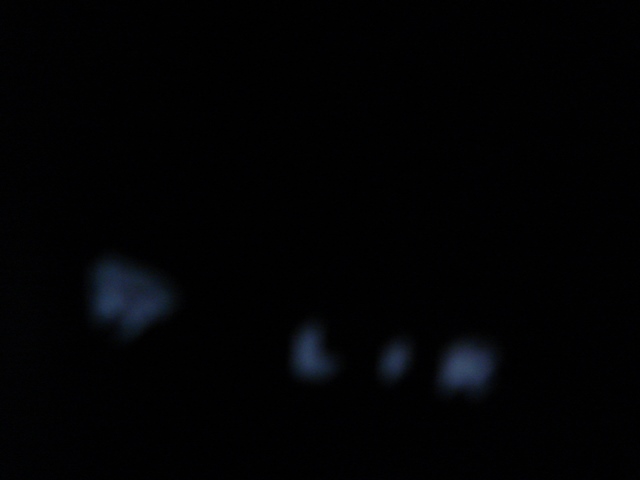
and this is the pictures of the LIGHT turn on (remember I am testing using a 9 volts battery so the light is not bright, and my camera is out of focus cause I took this in the complete darkness of my walk in closet hahaha, but with the car 12 volts , this light should be brighter)
to the switch.
so you need to add 2 PIG TAIL 04320-SAA-A00 into the socket that connect to the Switch.
You connect the Positive Signal from other switch on the dashboard that had back lighting to Pin #10
and you connect the Ground to Pin #2.
I have not tested this on the car because I had not install it yet,
but I had tested using 12 volts battery, and the Switch really light up !!!
I got this info from a Japanese DIY and here are the pictures that indicate the PIN, please note that the way this Japanese DIY mark the PIN# is different then the way DIY in one of the forum on fitfreak does his.
If you are using the "other" PIN map for the RC Switch,
then for the lighting you got to insert the pigtail to Pin 4 and Pin 9 on the diagram below:
and now this is the picture of MY SWITCH connected directly with the pigtail so you can further understand which PIN to connect to:
and this is the pictures of the LIGHT turn on (remember I am testing using a 9 volts battery so the light is not bright, and my camera is out of focus cause I took this in the complete darkness of my walk in closet hahaha, but with the car 12 volts , this light should be brighter)
Last edited by BMW ALPINA; 05-08-2013 at 10:25 PM.
#32
05-08-2013, 09:50 PM
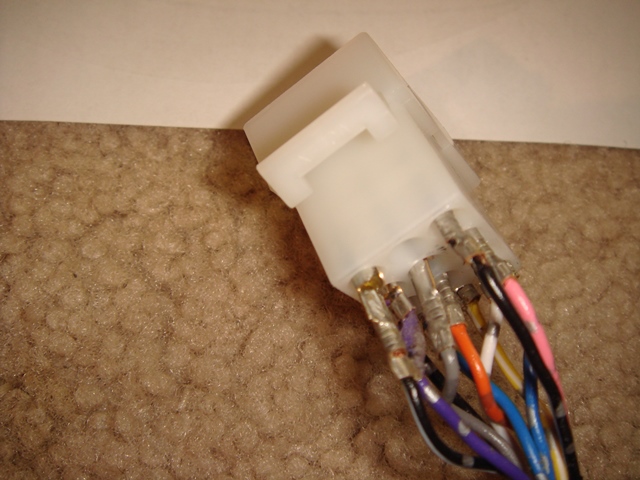
Power Mirror Function Wiring,
so you know which wire color do exactly what,
and you know which wire color from Door Mirror connect to which color from factory wiring/switch
This is the way I put the Color and Polarity:
The Wiring on the Mirror - (Wiring from The Car/Switch) : (Polarity)
For LEFT Mirror:
Downward Movement:
Yellow/White - (Green) : (Polarity Negative)
Yellow/Red - (Orange) : (Polarity Positive)
Upward Movement:
Yellow/White - (Green) : (Polarity Positive)
Yellow/Red - (Orange) : (Polarity Negative)
Right Movement:
Yellow/Red - (Orange) : (Polarity Negative)
Yellow/Black - (Pink) : (Polarity Positive)
Left Movement:
Yellow/Red - (Orange) : (Polarity Positive)
Yellow/Black - (Pink) : (Polarity Negative)
For RIGHT Mirror:
Downward Movement:
Yellow/White - (Green) : (Polarity Negative)
Blue - (Light Green) : (Polarity Positive)
Upward Movement:
Yellow/White - (Green) : (Polarity Positive)
Blue - (Light Green) : (Polarity Negative)
Right Movement:
Blue - (Light Green) : (Polarity Negative)
Blue/Black - (Blue) : (Polarity Positive)
Left Movement:
Blue - (Light Green) : (Polarity Positive)
Blue/Black - (Blue) : (Polarity Negative)
We need to know the color connection above because
later we might need to adjust the PIN on the Auto Tilt Wiring since the JDM Auto Tilt the Left Mirror while
we want to Auto Tilt the Right Mirror, but this is not confirm yet since we are going to use
the Insight wiring...
Last edited by BMW ALPINA; 05-08-2013 at 10:37 PM.
#33
05-08-2013, 10:30 PM
For Folding and Unfolding Function you need to connect it this way,
so it won't go backward.
When you PRESS the button on the switch IN, it mean you are folding the mirror.
It also mean that you give the White Wire on the mirror a Positive Charge
and Black Wire on the mirror a Negative/Ground Connection.
Vice Versa.
You should connect the White Wire from the Mirror to Pin 7 on RC Switch
and Black Wire from the Mirror to Pin 8 on RC Switch
Using this RC Switch diagram as guidance:


#37
05-09-2013, 05:57 AM
Thank You for your kind words,
but actually, this is NOT my original DIY,
what I did here is just collecting pieces of other's people work,
combining other's people DIY into a DIY that will help me reach my goal,
so again I am not the pioneer in this...
anyway,
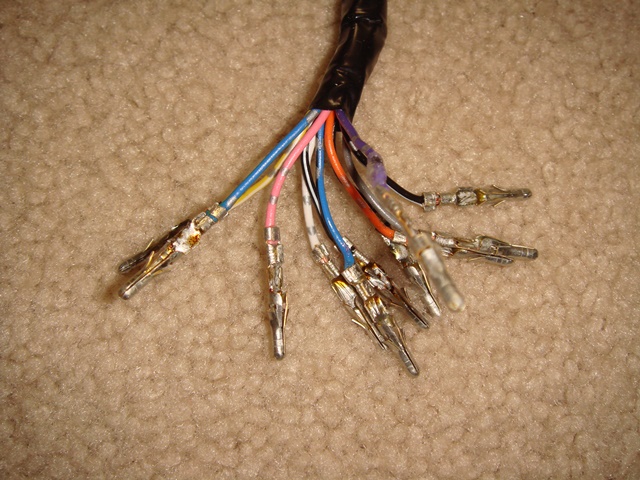
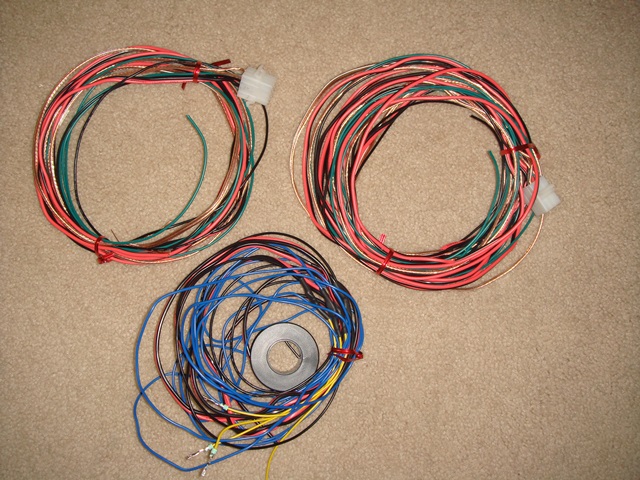
I have trouble sleeping so I just finished my wiring cables
I make 3 wiring,
First one consist of 6 wire from Left Mirror to Fuse Box (connect Heater/2 wire, Blinker/2 wire) and also to switch's pig tail/2wire for folding function,
and since the Left Mirror is close to Fuse Box, I pre cut the wire at 2 meters in length (still not use to feet/inch, so I use meters instead hahaha).... if 2 meters turn out too long, I can just cut it later...
Second one again consist of 6 wire from Right Mirror to Fuse Box and of course to switch pig tail for folding function. But since Right mirror is far from fuse box, I make the wire length pre cut at 4 meters.
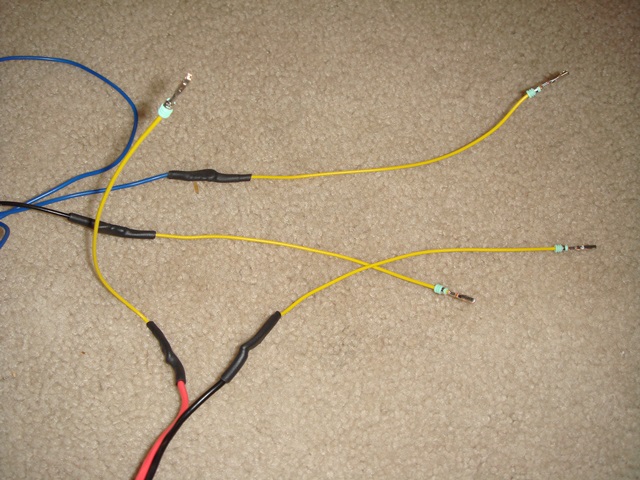
Third one, From Switch pig tails. This one had 4 pig tails added,
2 for the back lighting, and 2 for the folding function. the pig tails for folding function will later be joint with the wiring form the first and second wiring above (for the folding function).
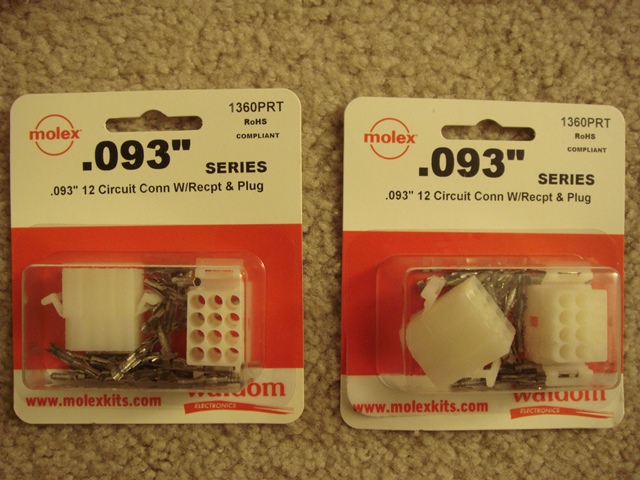
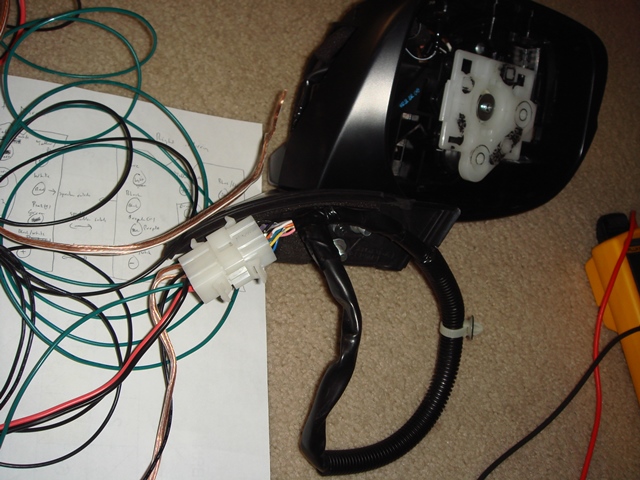
The first and second wire also already terminated into the Molex Connector. The Molex Connector replace the JDM connector that came with the mirror and also will replace the USDM connector inside the door.
The reason is, I don't want to use the USDM connector because it only have 6 holes, and I need 9 holes for 9 wire anyway, so
if I use the USDM connector I still had to use another molex,
beside, I plan to sell my USDM mirror and the best way to sell this USDM mirror is if I sell them ready to install with the USDM connector intact with USDM mirror.
When I connect the molex, I don't just crimp the wire but I soldered every wire to make sure a good connection. Also when I joint the wire to the pigtail to make them longer, I soldered the joint and then cover them with shrink tube.
Here are the pictures:
Crimp and Soldered :
About to be inserted into the Molex:
Wiring from Mirror and Wiring to Fuse Box for LEFT mirror being tested
to make sure the Molex connection works fine:
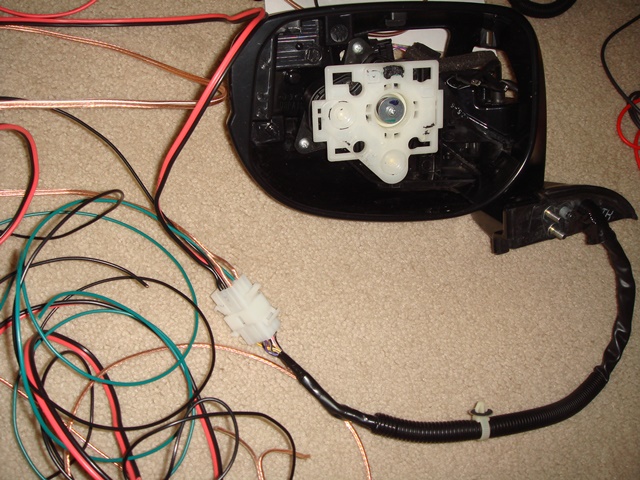
Wiring from Mirror and Wiring to Fuse Box for RIGHT mirror being tested
to make sure the Molex connection works fine:
Pig Tail and its wire extension, soldered and covered with Heat Shrink Tube:
After done testing I disconnect the male and female molex, roll the wiring and put it back into the box, until I am ready to install on my car:
Notice the left one is the left wiring (2 meters only),
Right one is the Right wiring (4 meters)
Center one is the Pig tails wiring from Mirror Switch:
Now remember that we are going to have to push this wiring through the Rubber Tube between the door and chassis frame using some kind of hard wire or coat hanger.
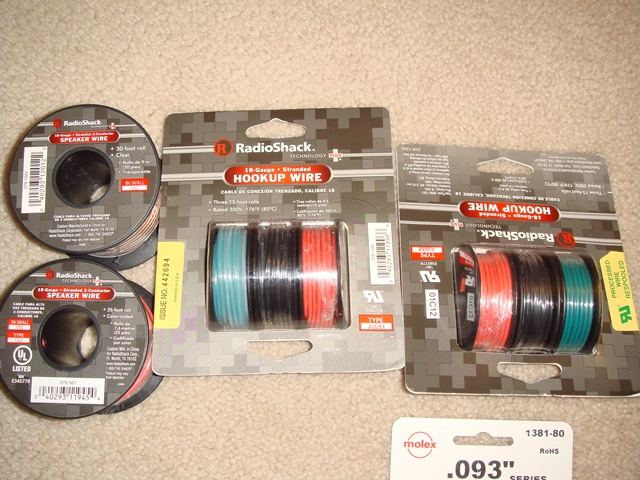
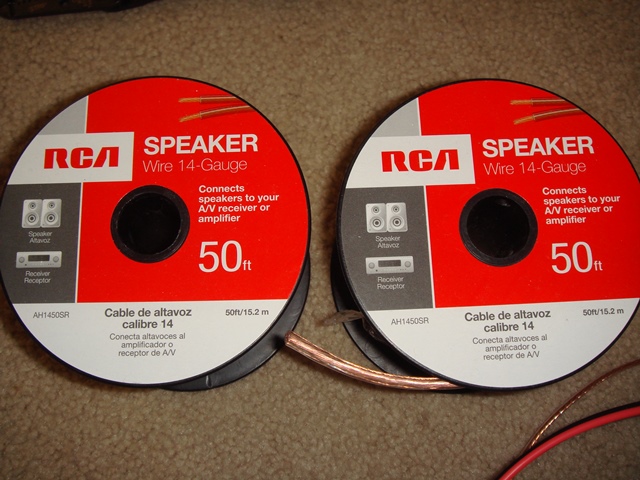
and since in the future I plan to upgrade my front speaker and use external Power Amp,
I think that I should PRE WIRE so I bought this Speaker wire and I am going to bundle this speaker wire with the rest of the wiring so I can fish them out together using the hard wire/coat hanger,
this way I don't have to fish them out again.
Here are the speaker wiring, it is an 14AWG cables.
(forgot to mention the rest of the wiring is done on 18AWG cables):
#38
05-11-2013, 01:06 AM
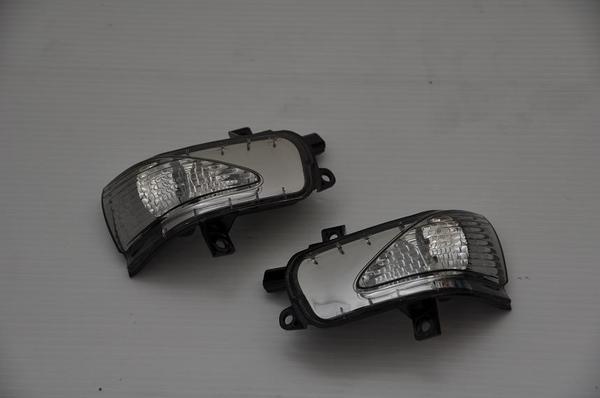
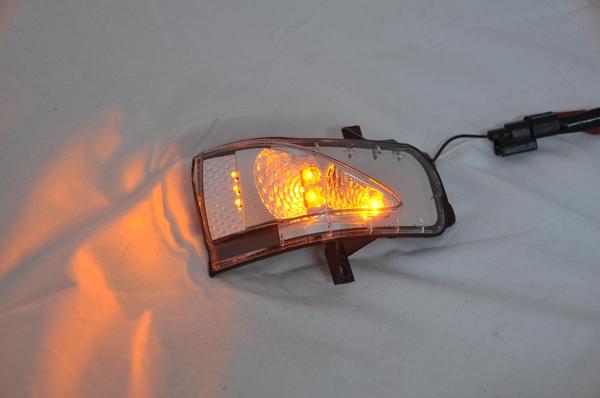
so I try to search and I found the aftermarket LED Blinker and some different Aftermarket Heated Mirror which even have LED on the mirror it self.
Here are the link to my search:
http://auctions.search.yahoo.co.jp/s...mmerce&fixed=0
after I found those, I think I pass on the aftermarket LED blinker,
they might be brighter but I prefer the more understated factory LED blinker look.
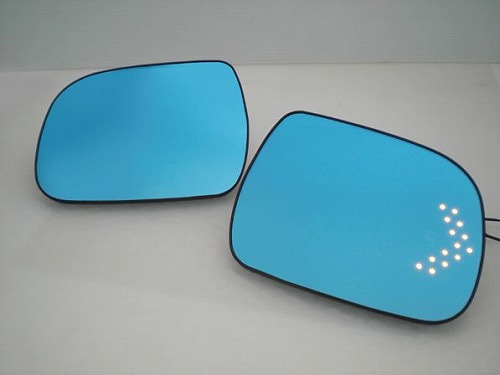
The Aftermarket Heated Mirror with the LED light on the surface of the mirror (glass) is more interesting though... I really like them...
but I worry that the LED on the glass surface might distract me when I am looking at the rear view during the night,
so as nice as they were, I think for now I stay with the stock factory heated mirror.
After market LED Blinker:
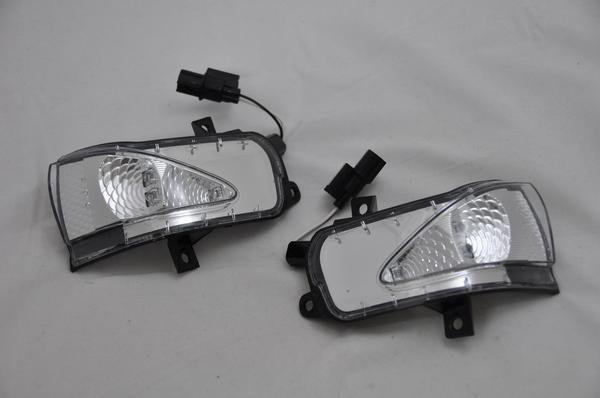
SMOKED Colored one:
Aftermarket do looks brighter when Lighted:
Now this is NICE, but as I said, I worry the lighted LED might distract me during the night... :
#40
05-11-2013, 01:23 AM
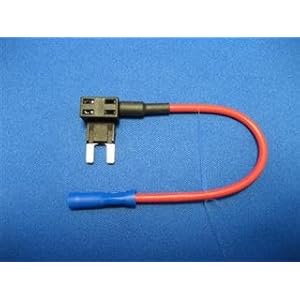
I just order this because I think, we are going to need this when we want to install the connection for HEATED Door Mirror on the fuse box.
From what I read so far, The Heated Mirror should be ON when you turn on your Heated Rear Window (defroster),
so we can do this by connecting the HEATED Door Mirror to a fuse connection on the Fuse Box.
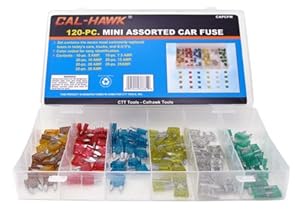
so I order this:
and this:
The 2 items above were the cheapest and best value one I could find so far at amazon.
here are the pictures:
and
should be here by next week, hopefully at the same time with the
JDM Mirror Cover in Taffeta White that I ordered from Amayama Trading.
From what I read so far, The Heated Mirror should be ON when you turn on your Heated Rear Window (defroster),
so we can do this by connecting the HEATED Door Mirror to a fuse connection on the Fuse Box.
so I order this:
and this:
The 2 items above were the cheapest and best value one I could find so far at amazon.
here are the pictures:
and
should be here by next week, hopefully at the same time with the
JDM Mirror Cover in Taffeta White that I ordered from Amayama Trading.