Project Air Flow (including JDP Carbon Fiber Vented Hood)
#1
 08-28-2016, 09:30 PM


Project Air Flow (including JDP Carbon Fiber Vented Hood)
Hello,
Since I install my Sprintex Supercharger, I realized the biggest enemy my engine face is the heat soak that affecting the Sprintex and the engine temperature that make it prone to knock/detonation.
When I tune it at Church, I specify that I want the most reliable tuning that I can comfortably drive my car to the desert in Arizona/Death Valley and my car engine will still survive.
So the tune are very rich, but this make my car upper end feel sluggish...
so I experimented by leaning it just 1 step (on the AEM F/IC-6 Fuel Map Table), the result is, my engine now is much more responsive from bottom to the top rpm.
Still I worry about knock/detonation in high heat ambient temperature, so I currently add octane booster each time I fill up my gas.
I was ready to move to my Recaro project but then I decide Recaro need to wait because I need to make sure my engine is safe, reliable and can last as long as possible.
First step:
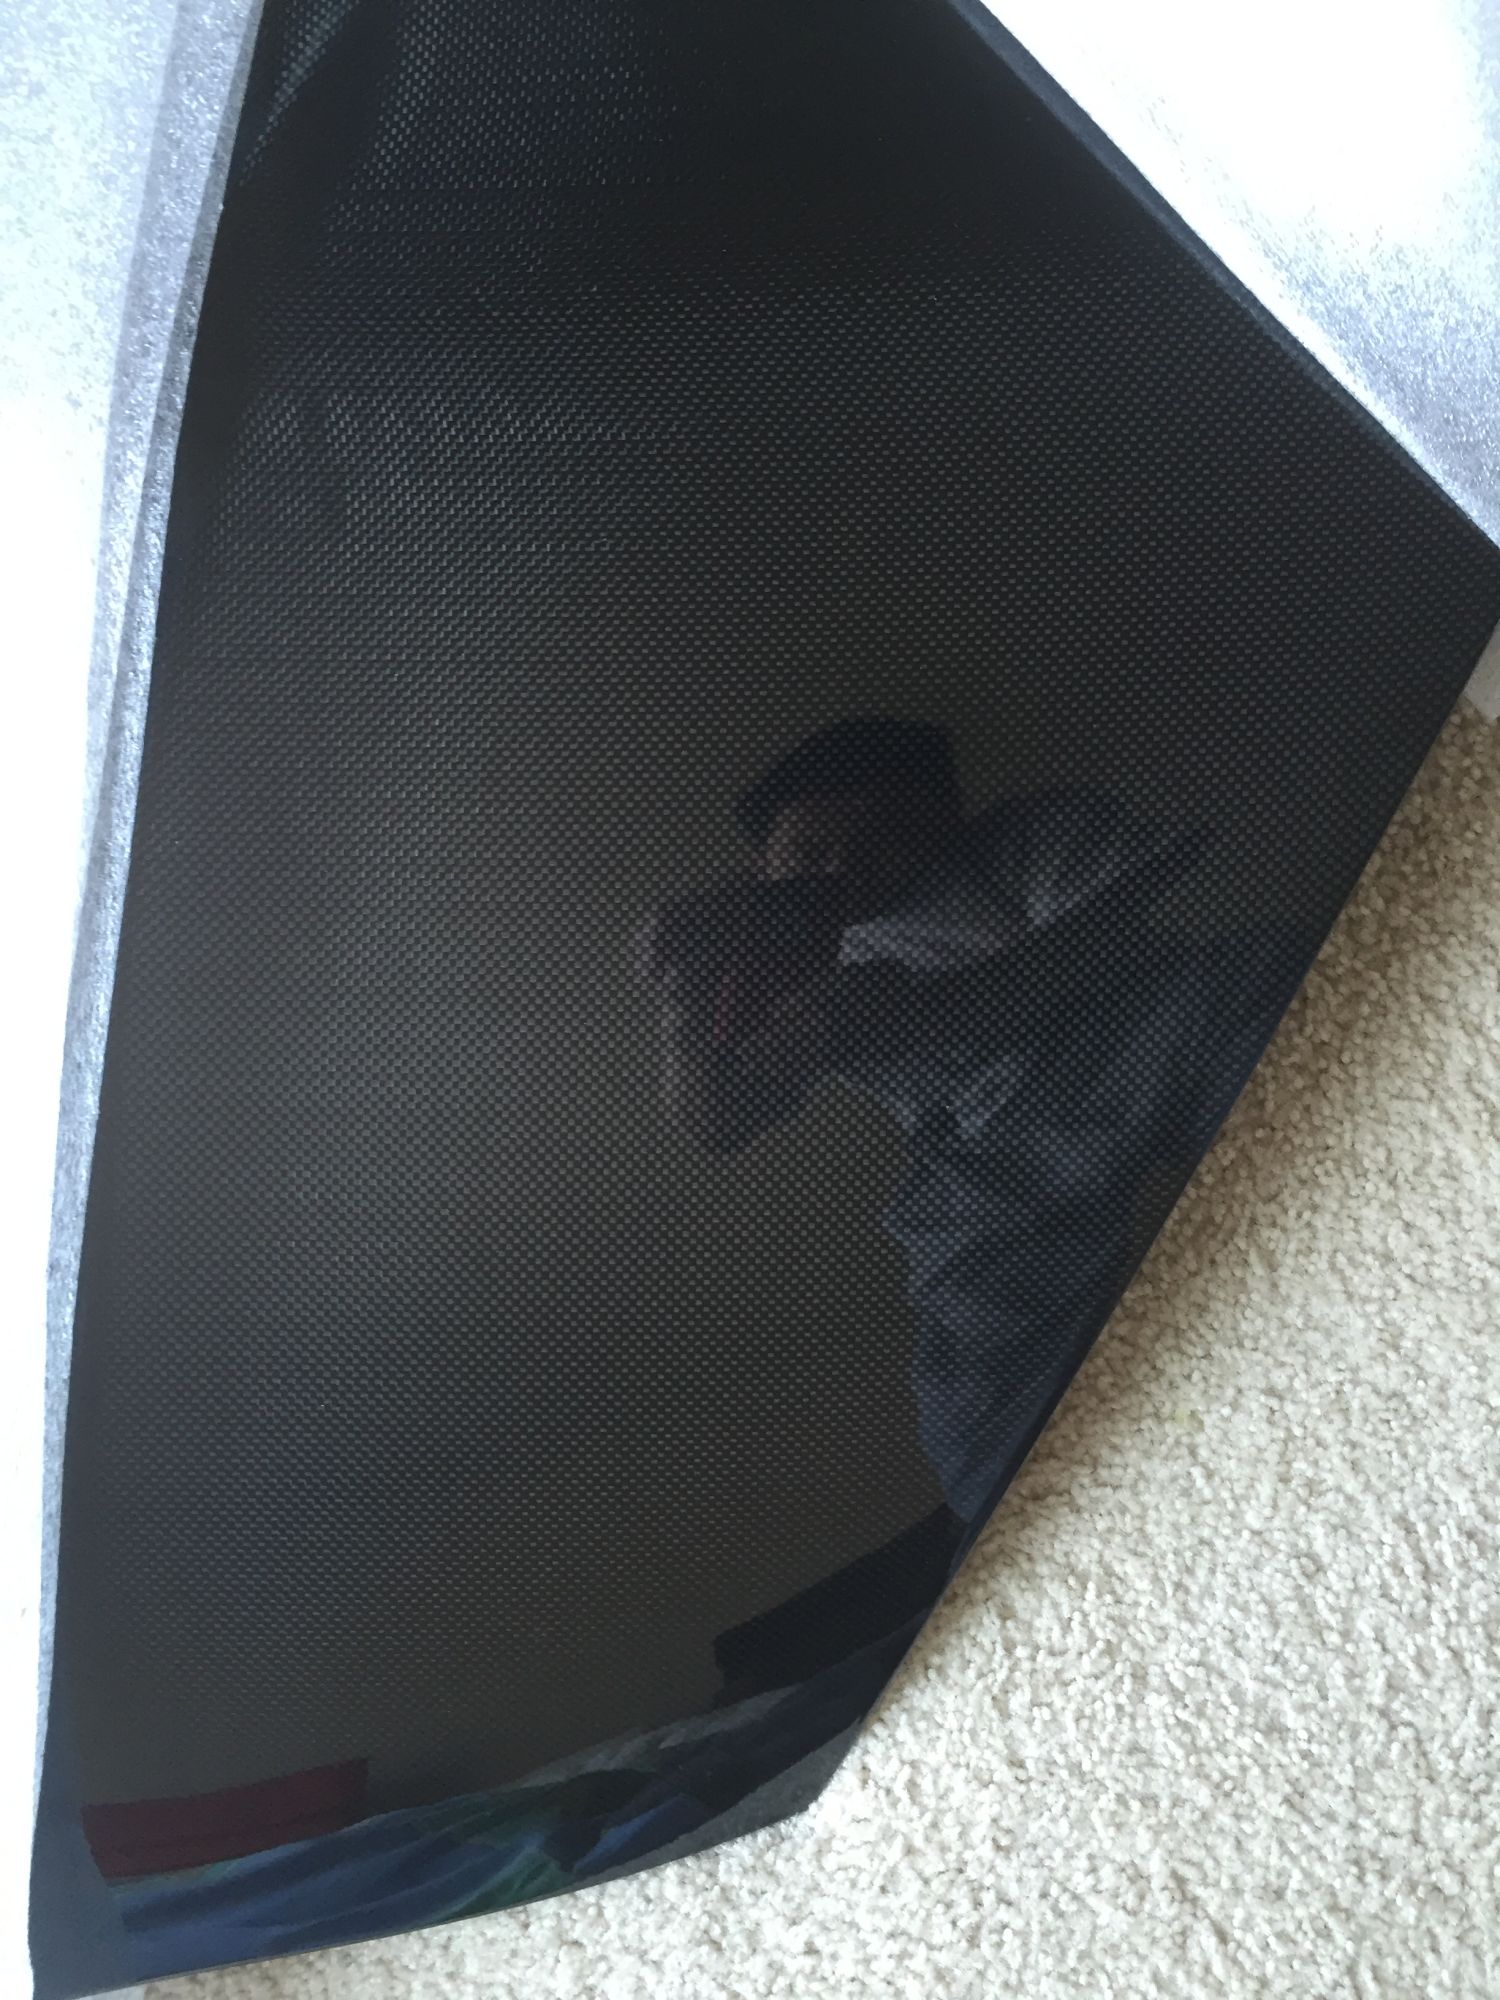
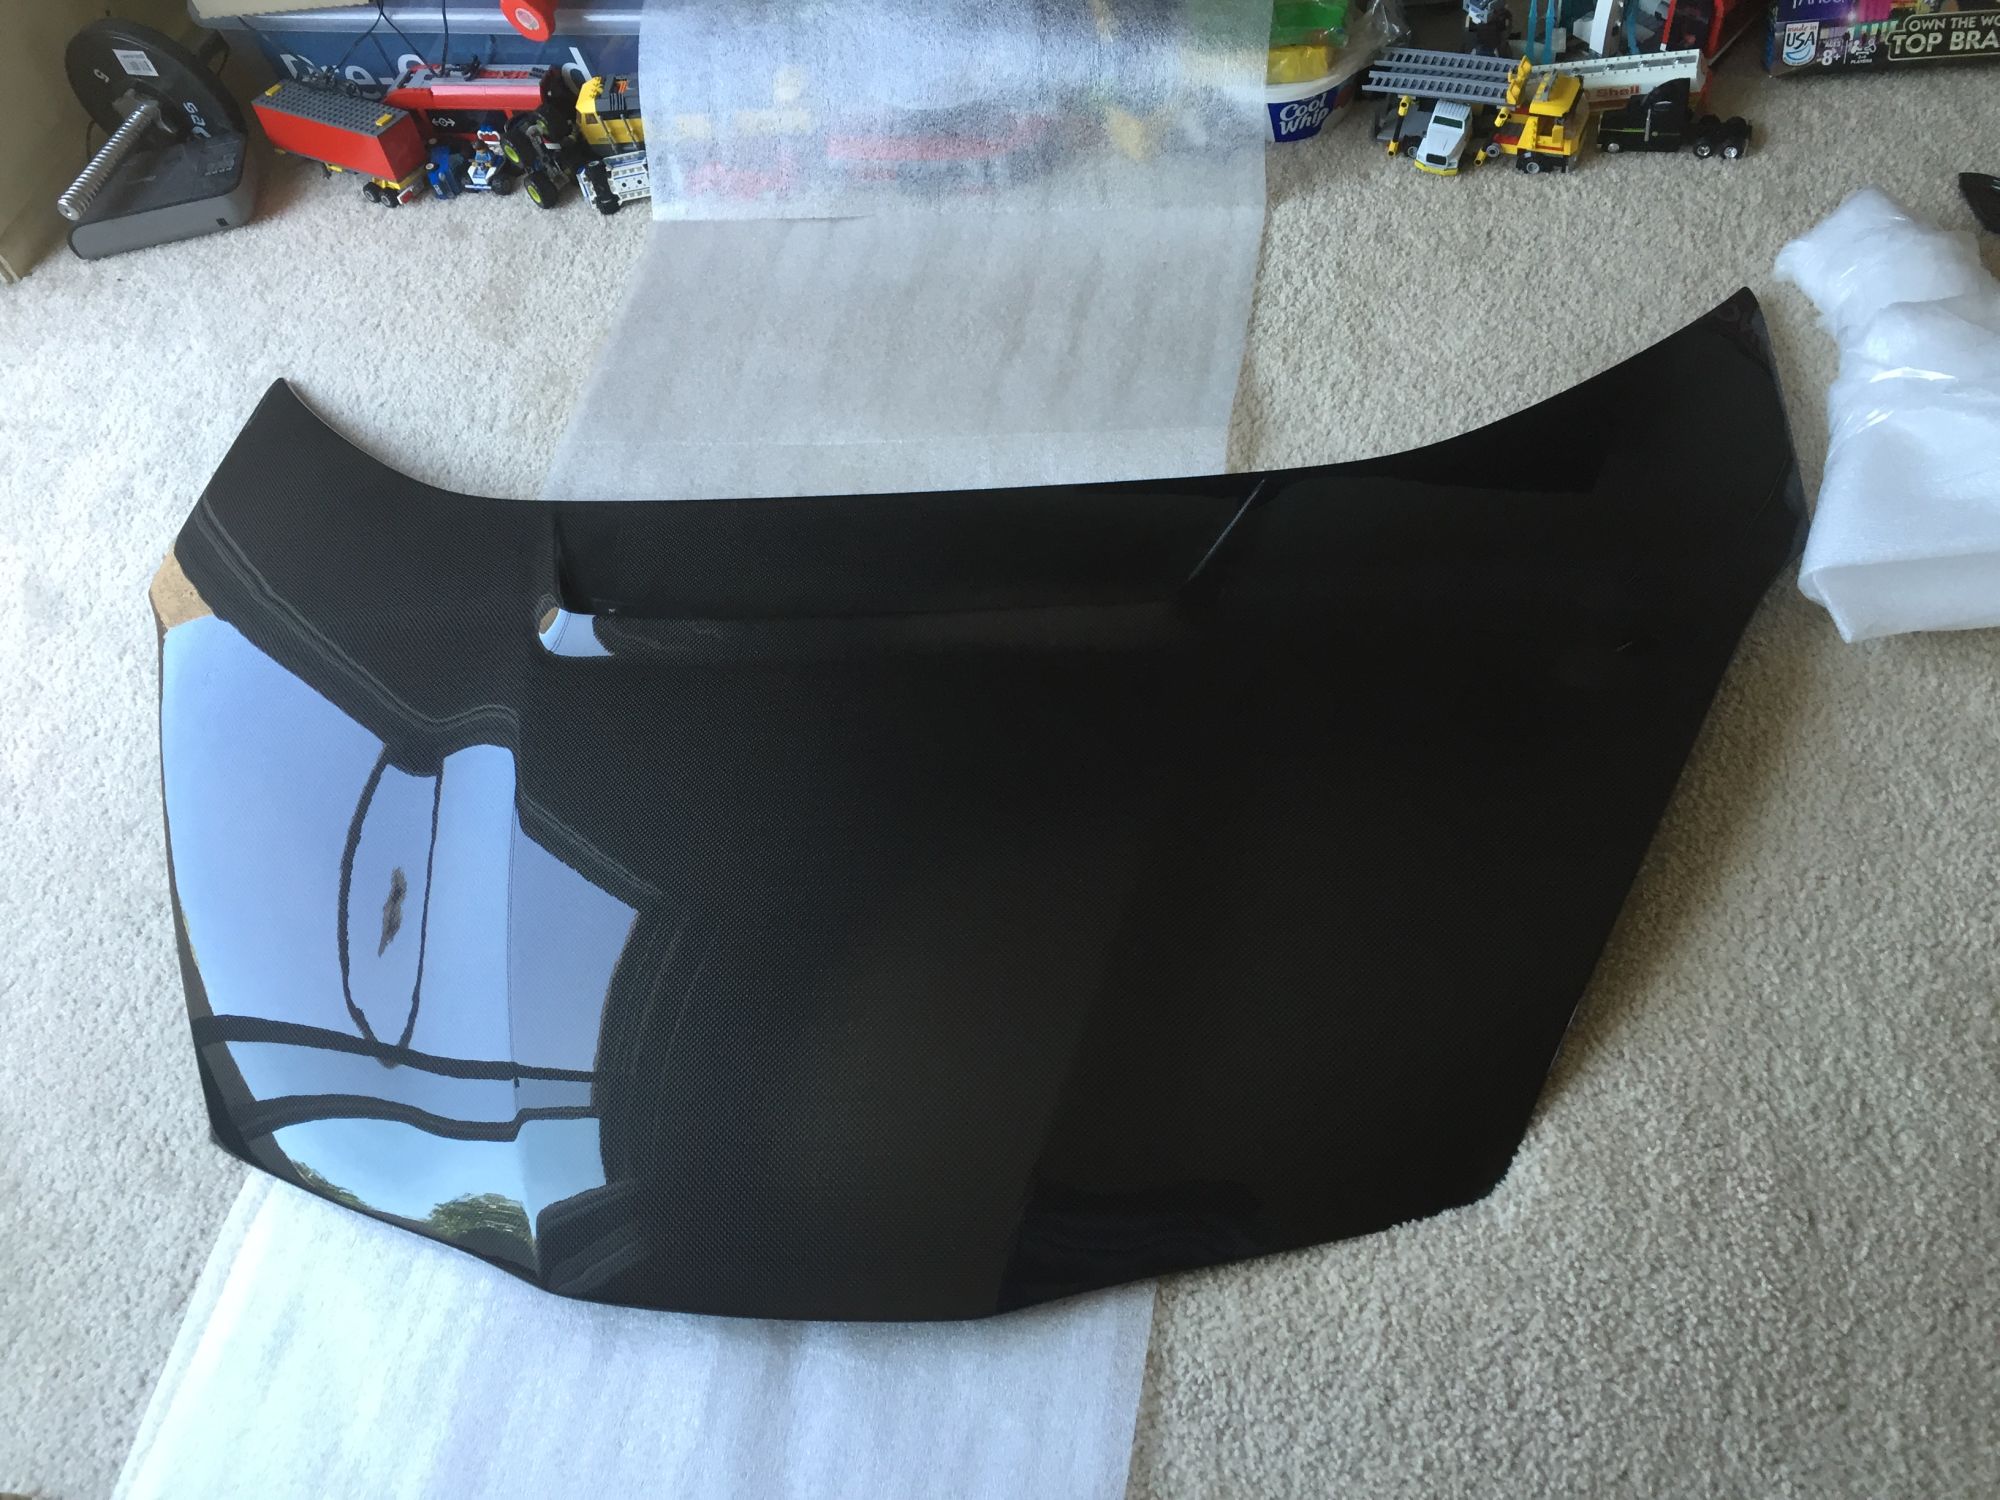
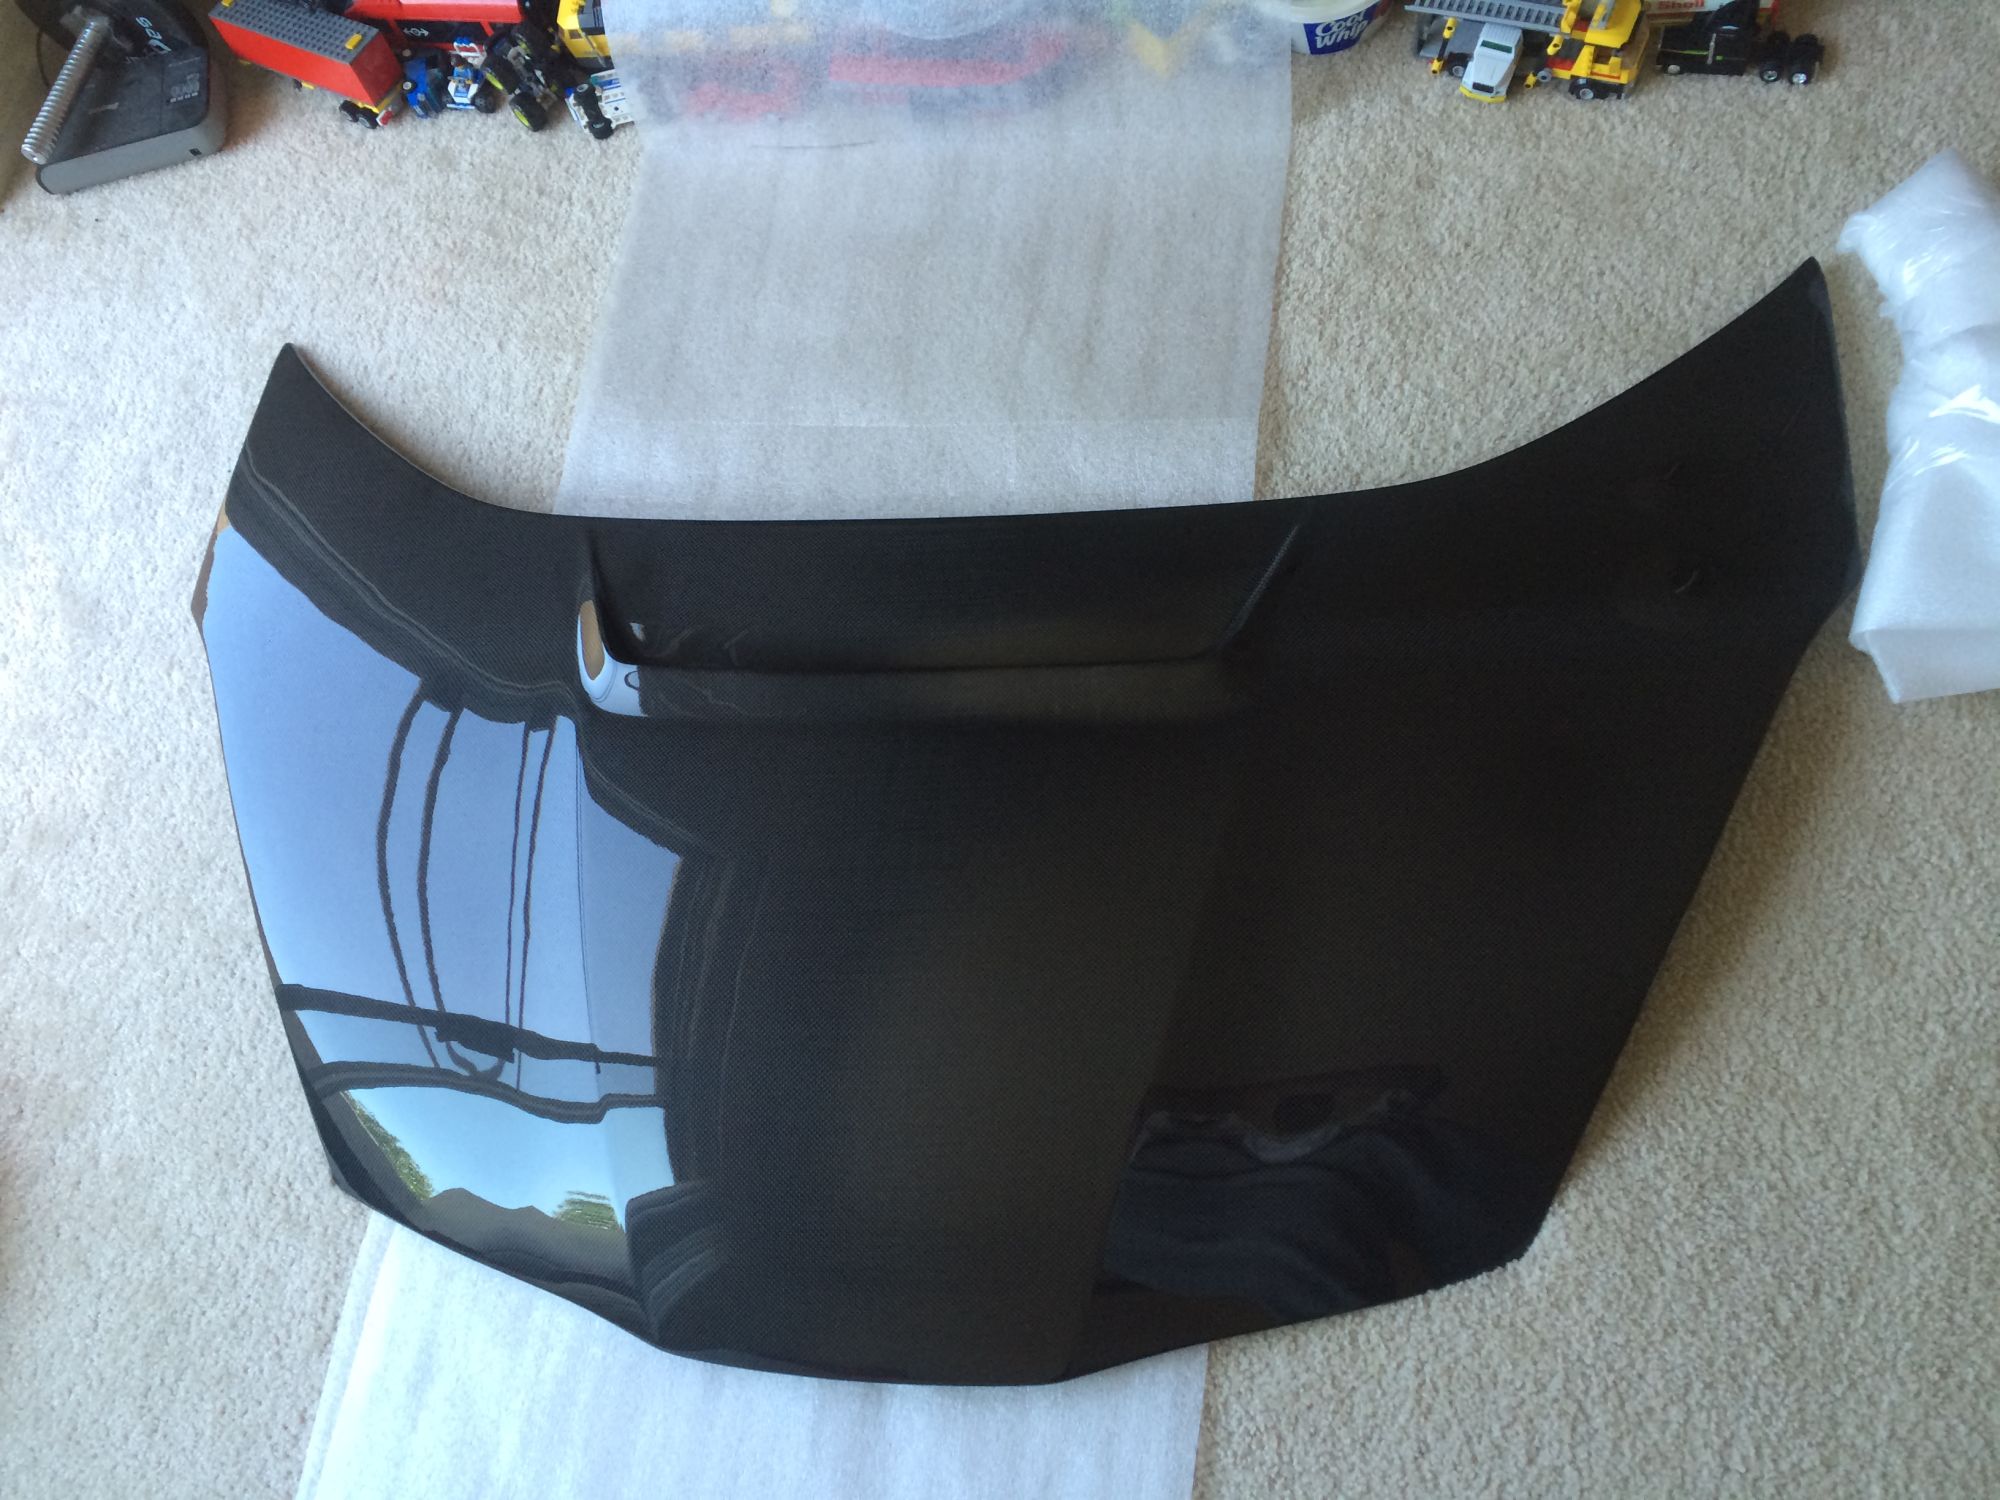
Order JDP Carbon Fiber Vented Hood with JDP Carbon Fiber Radiator Plate Cover.
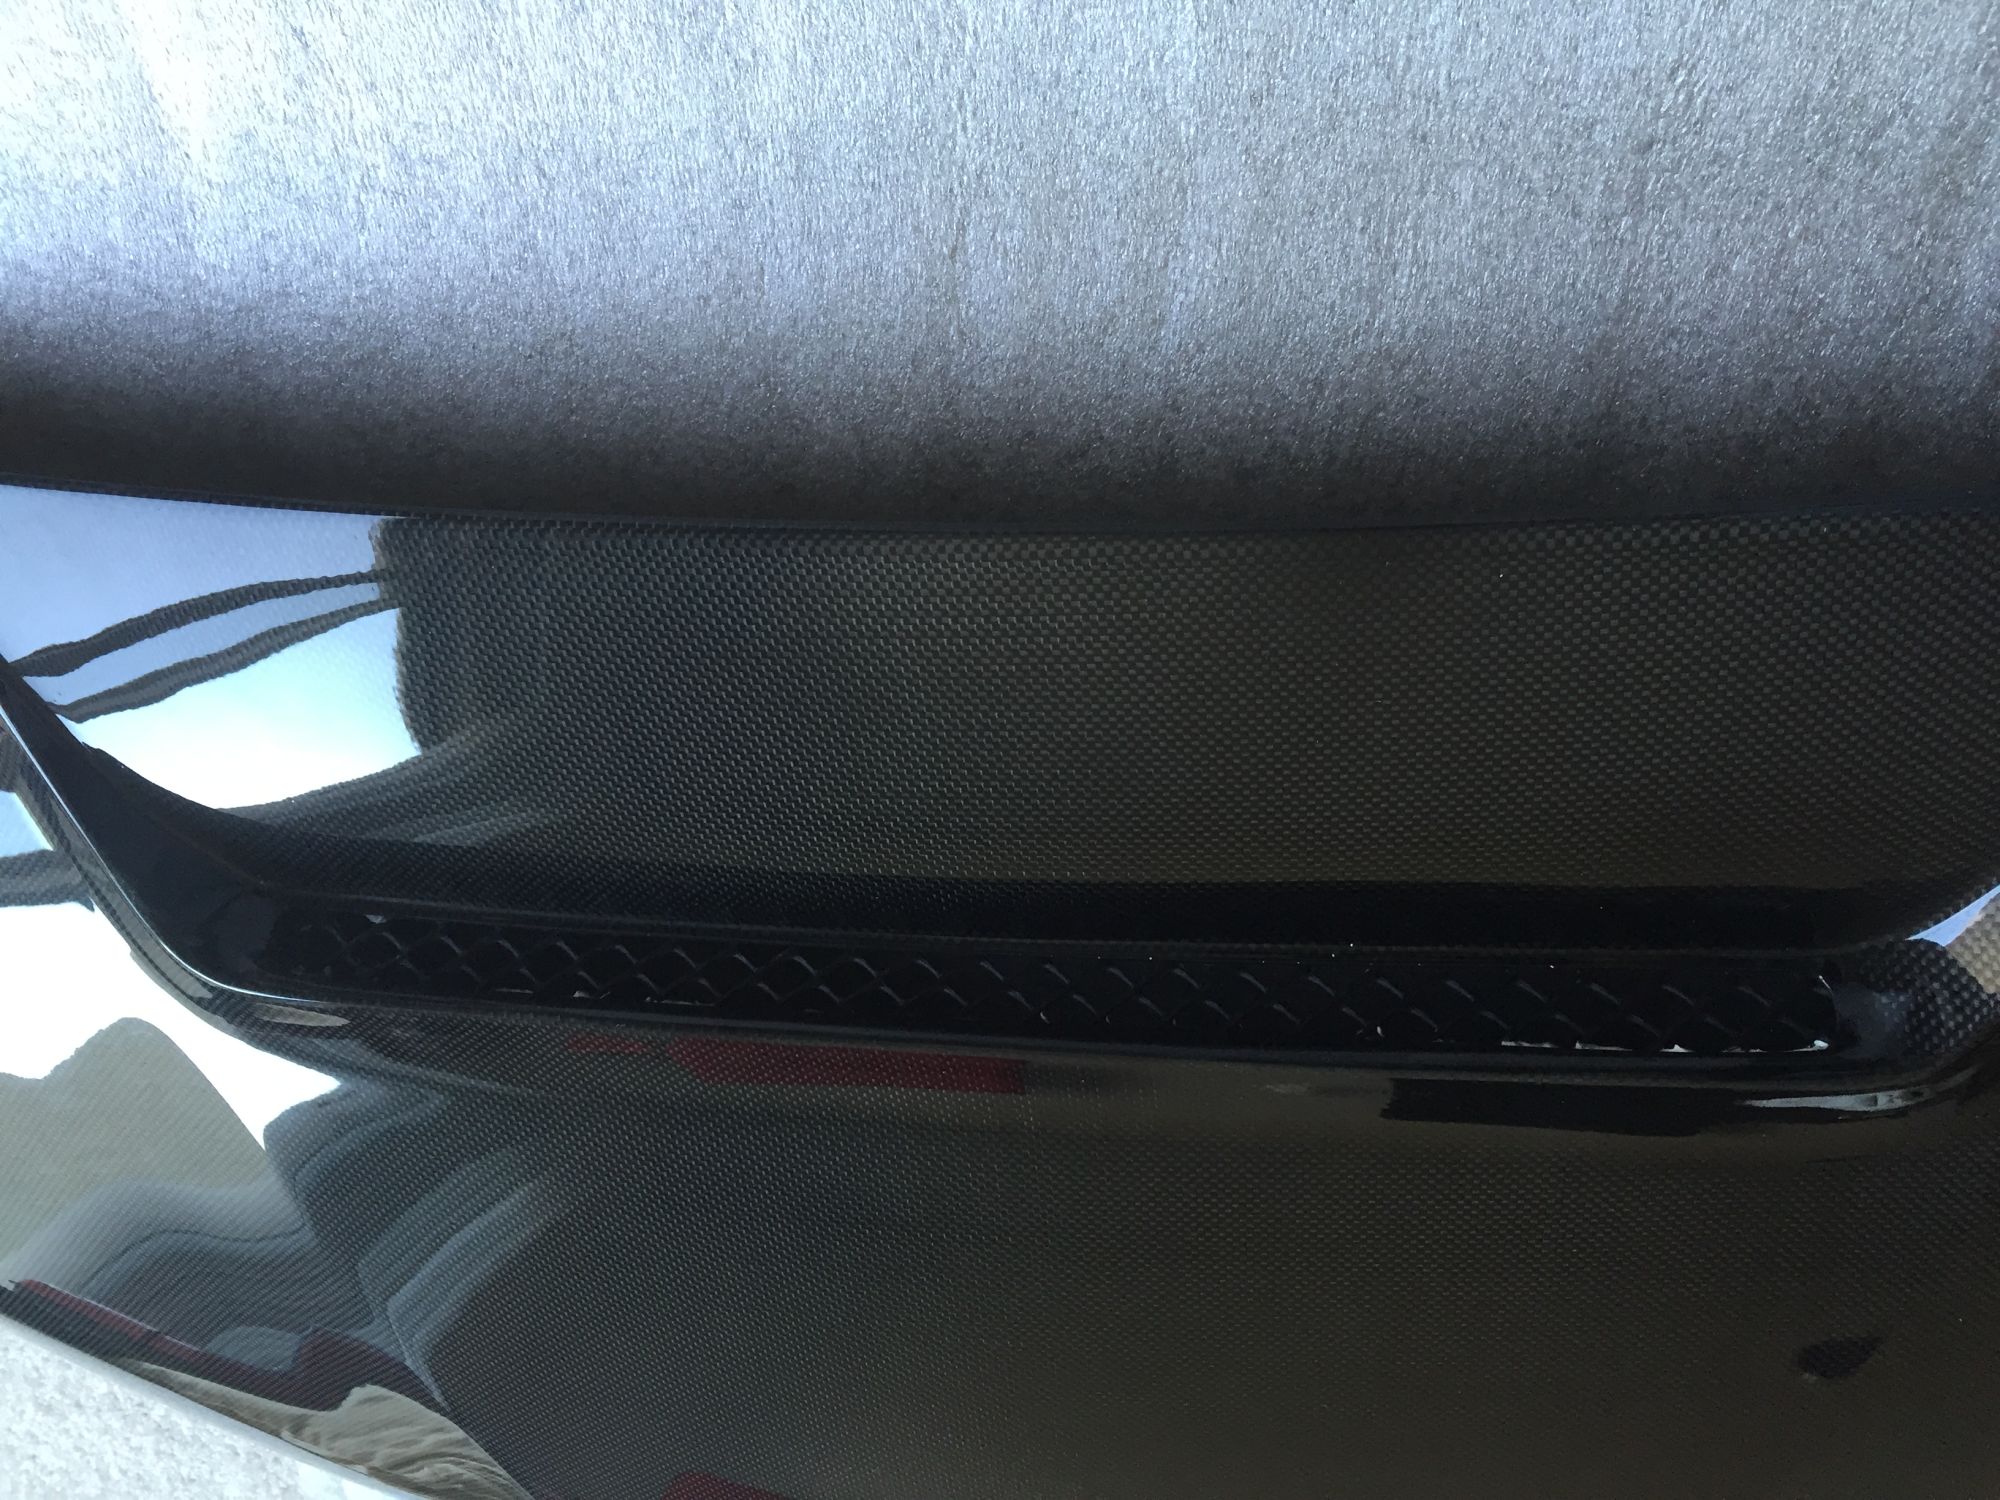
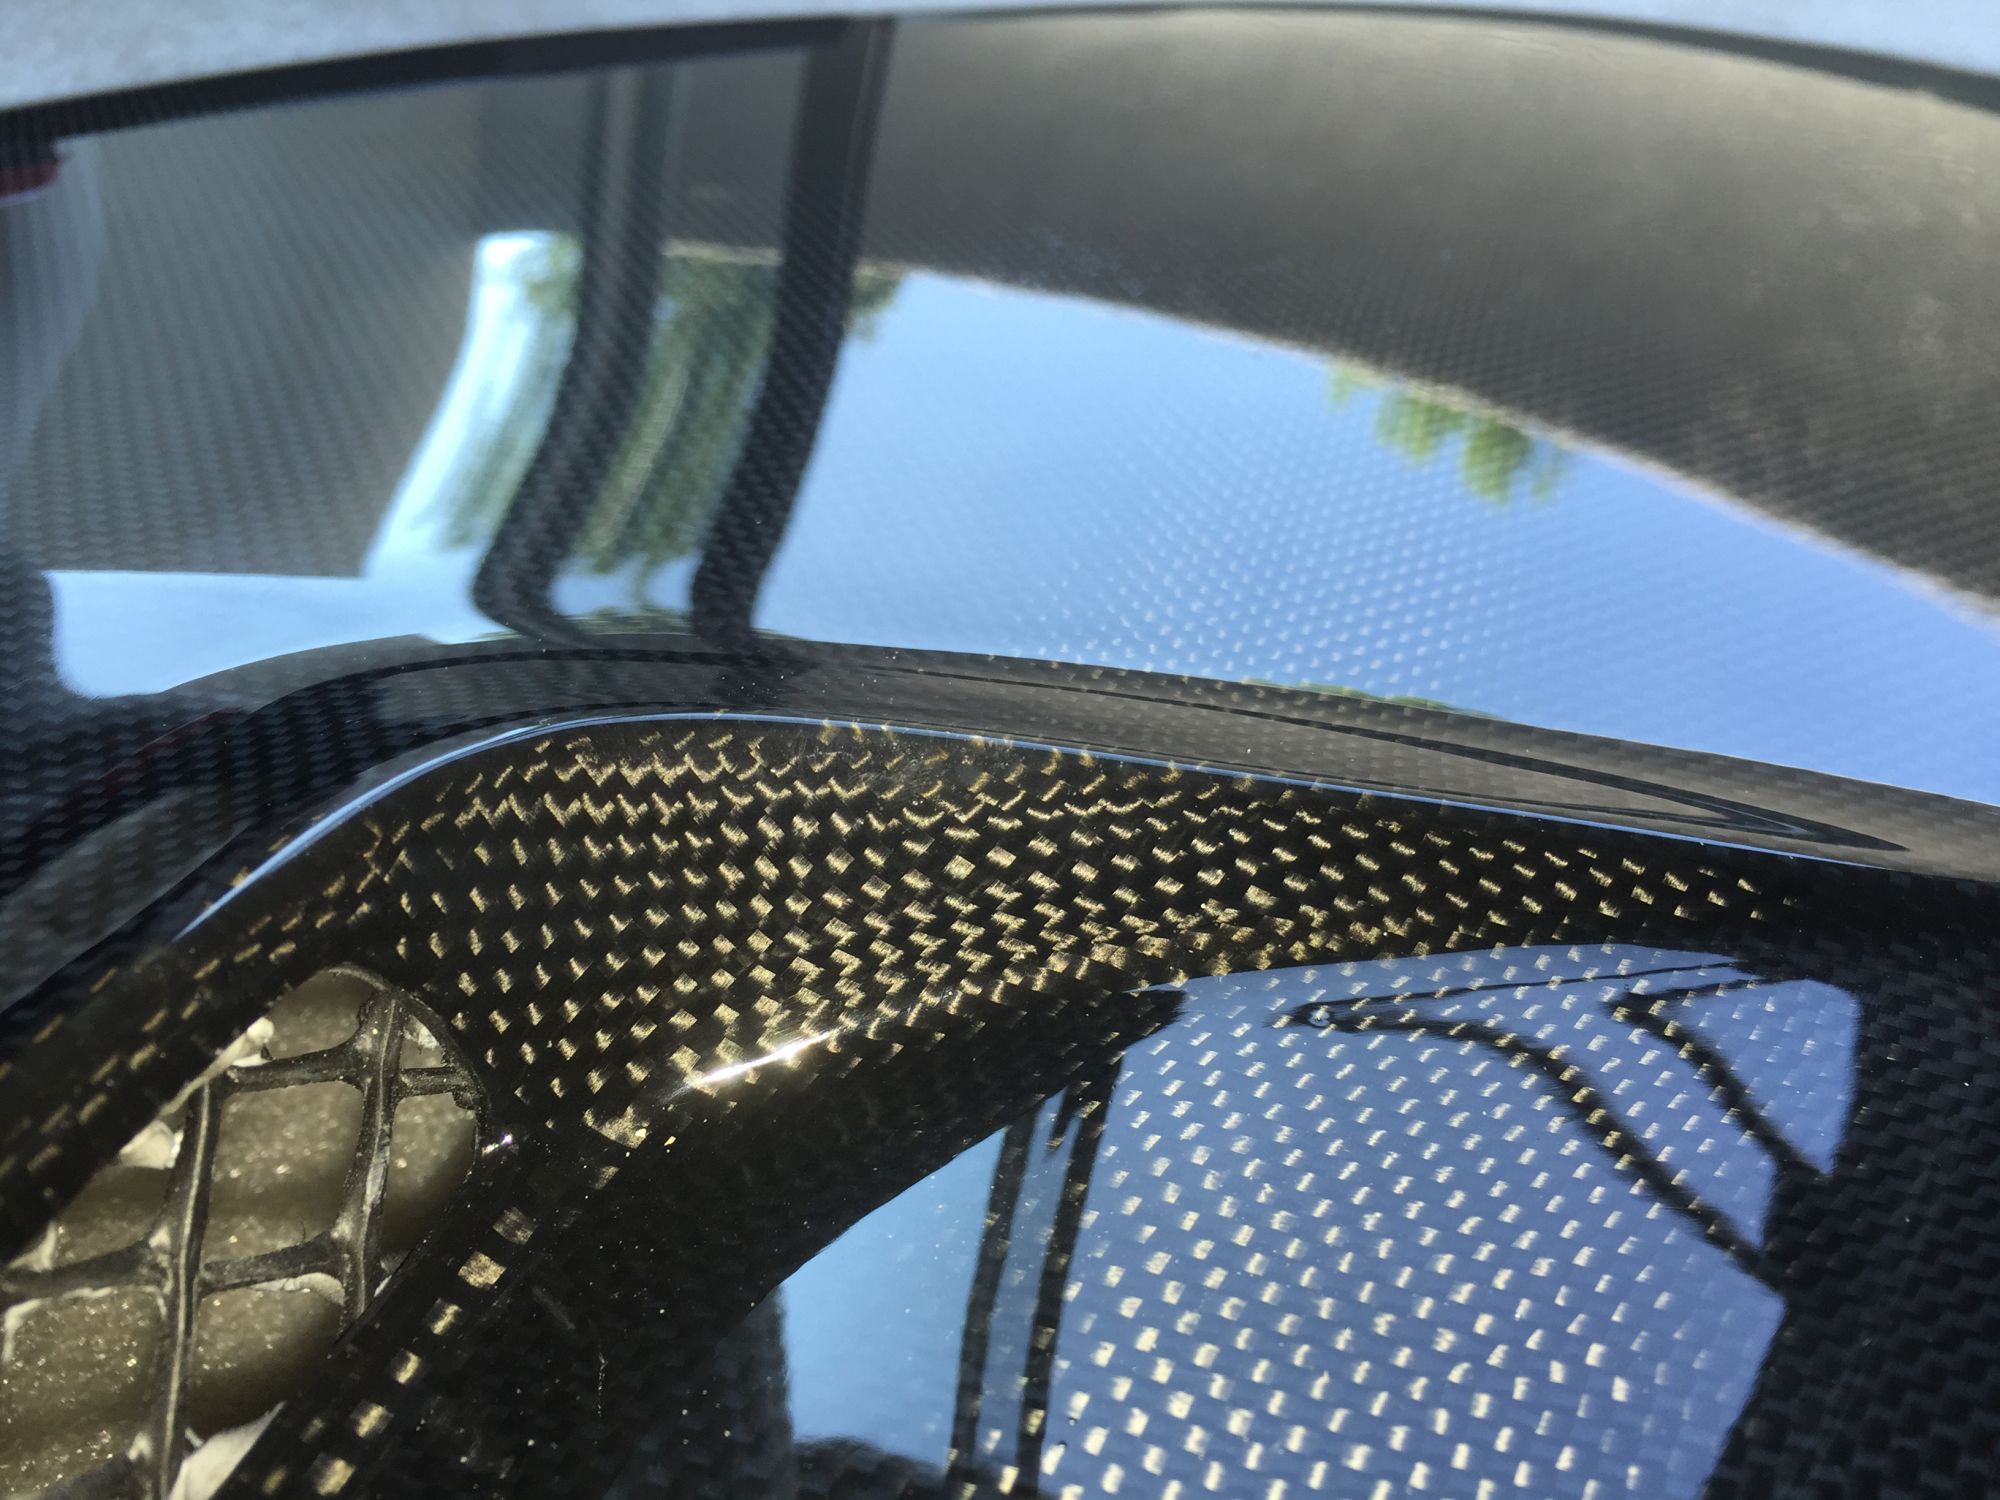
The JDP Carbon Fiber Vented Hood have a large grill opening that can suck air out of the engine bay while the JDP Carbon Fiber Radiator Plate Cover have larger hole opening to help feed even more
incoming cold air to my CR-Z Mugen Airbox with snorkel from CR-Z.
I will need to wait 2 to 3 more weeks since JDP is currently fabricating my orders above, and I will update it here once I got both items above.
I also plan to paint most of the JDP Carbon Fiber Vented Hood in my Taffeta White color except the square parts behind the ventilation grille.
I don't like the look of a carbon fiber hood on a white car, and I prefer low key look but at the same time I still want to have a little of the carbon fiber surface area expose, just to show that it is Carbon Fiber hood

Second step,
Now I have a method to vent the hot air out from the engine bay and ram more cold air into the engine using the 2 items above,
I need to optimize the INCOMING Air Flow.
I notice that 2013 Honda Fit Sport OEM Grille have many of the honeycomb shape opening BLOCK... must be to improve aerodynamics,
but I need more air !!!
So I decide to DRILL/DREMEL those holes.
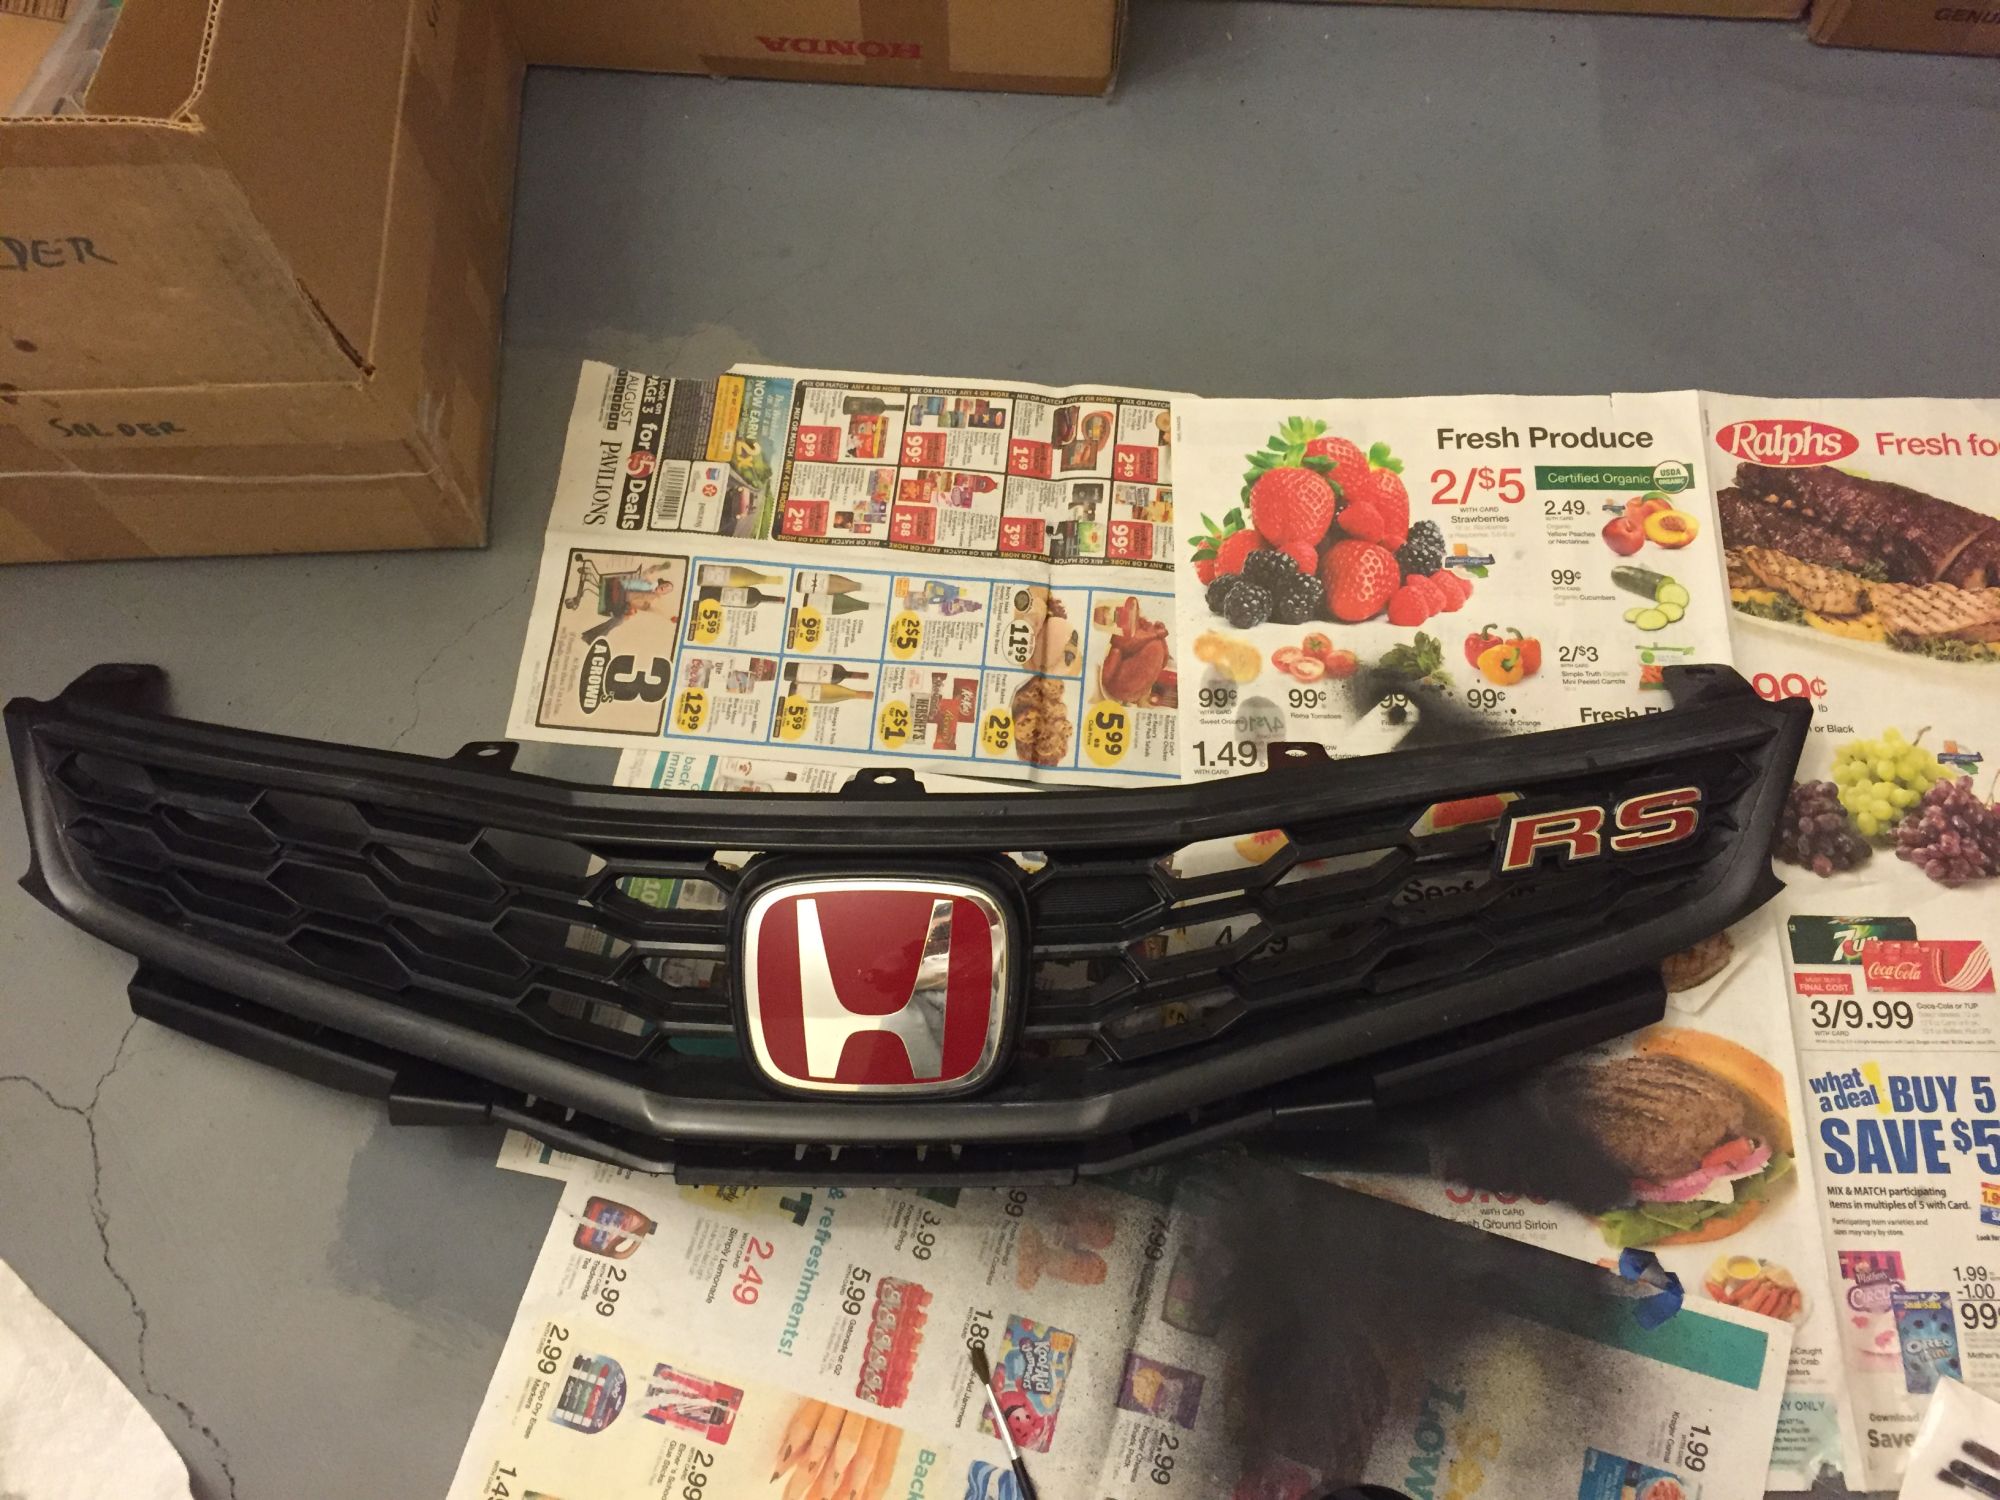
I was having a dilemma regarding my "RS" emblem on the grille...
at the current location it is right in the middle of the opening where it feed the cold air into the air box...
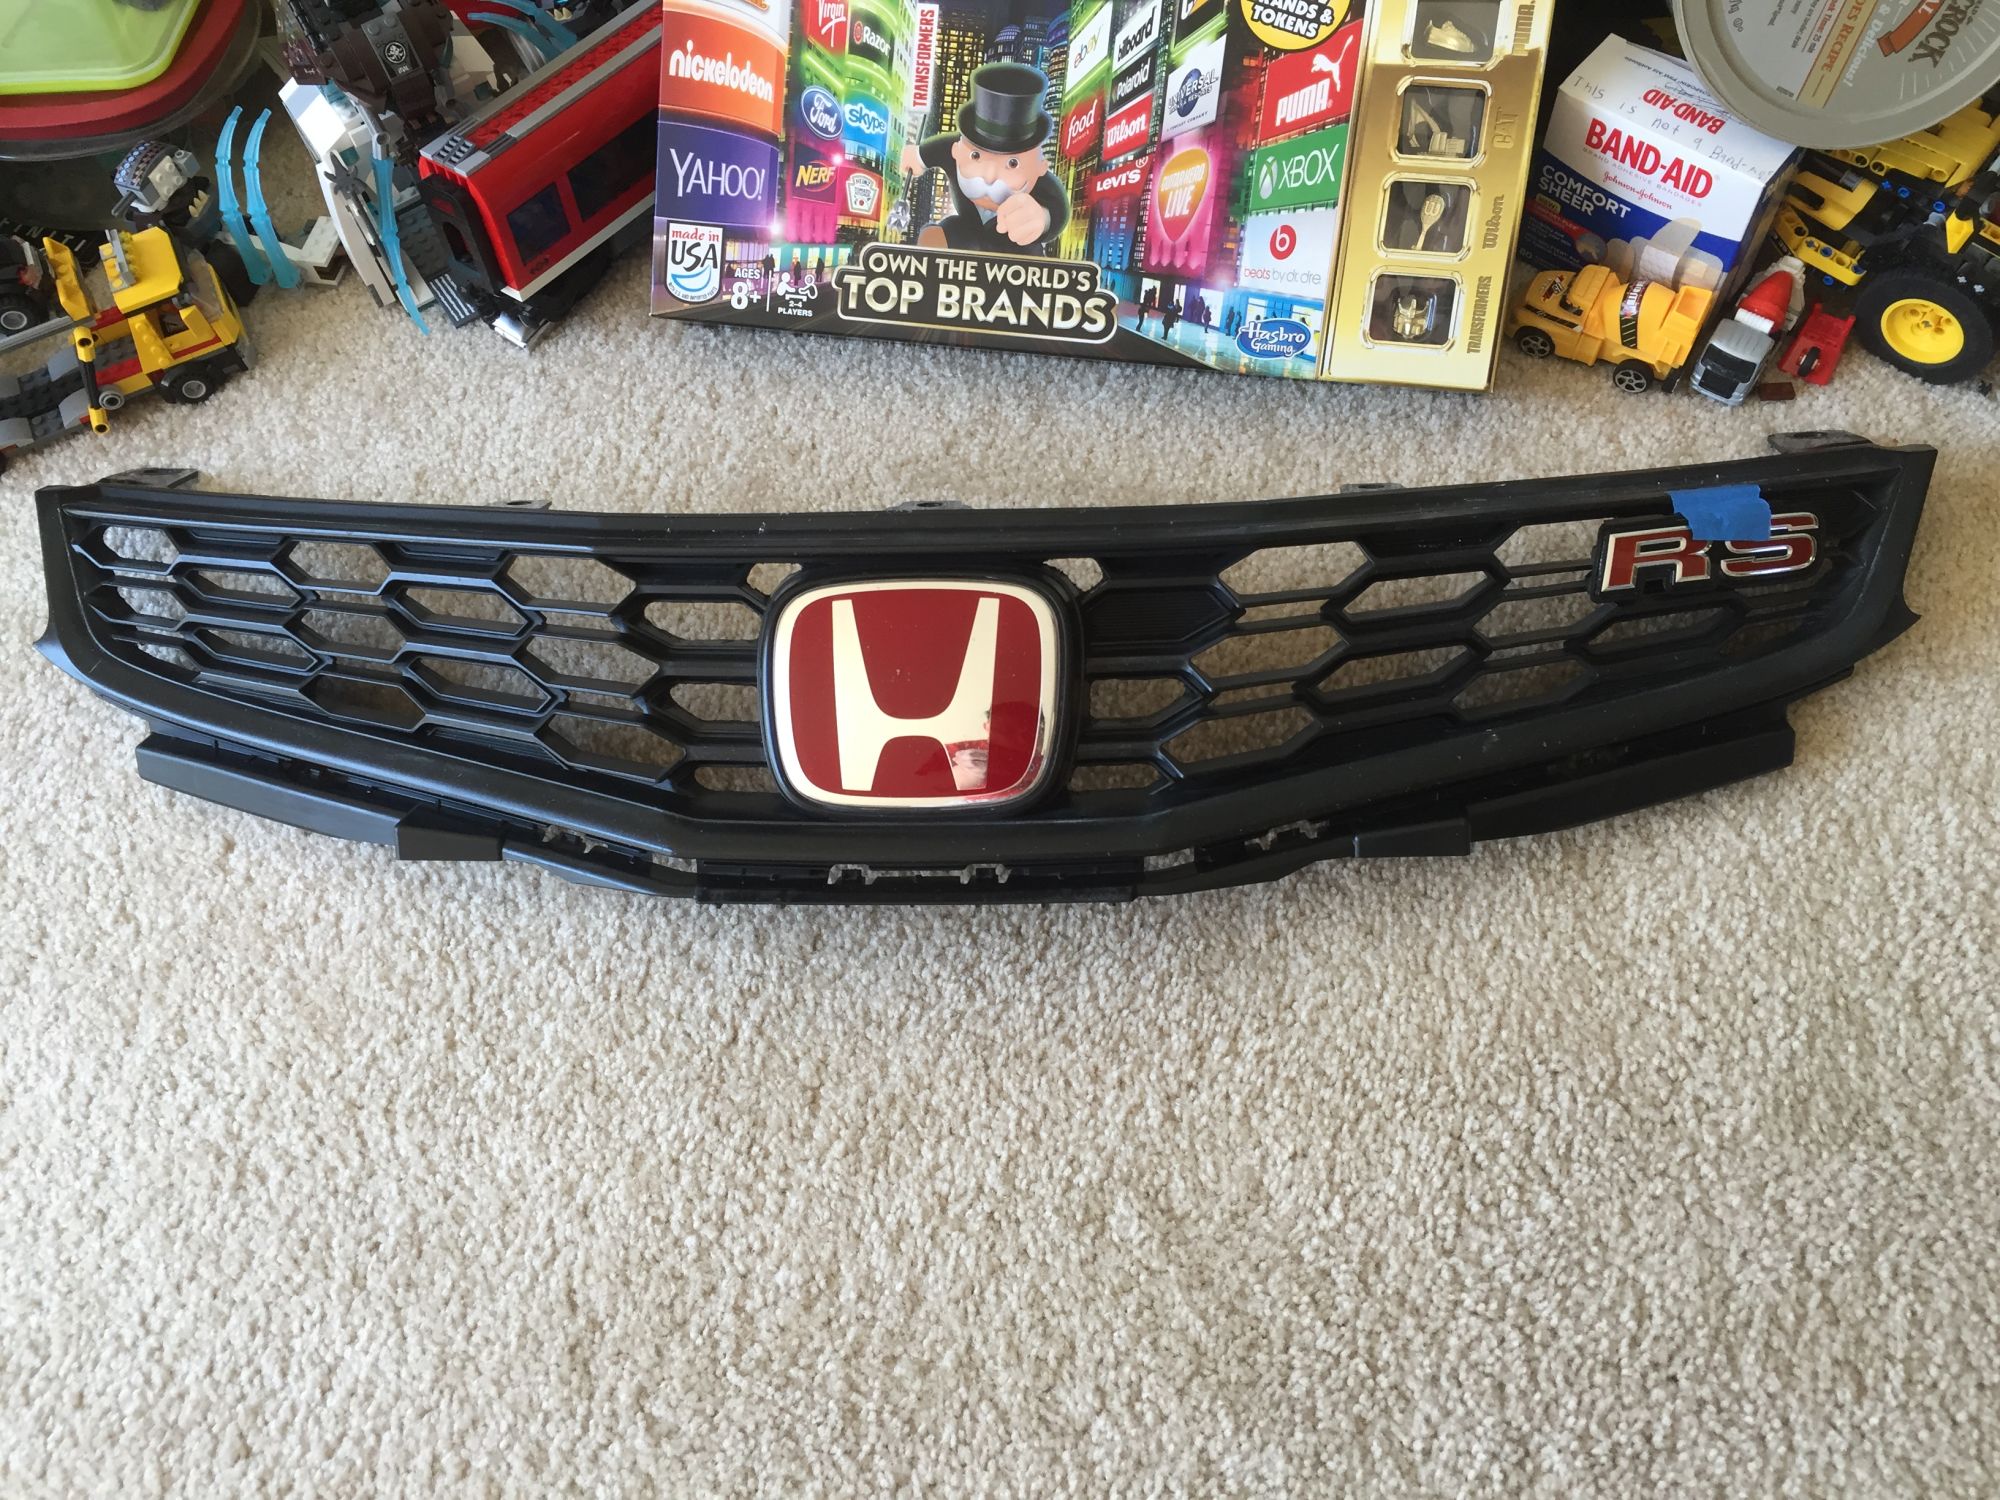
I try removing it from the grille but now my car looks too bare, not enough spices, so I look at JDM RS Fit and I notice the JDM RS Fit have the RS emblem located in the far right upper corner of the grille...
It still block 1.5 honeycombs holes but it do not directly in the way of the cold air feeding the airbox... so I settle for this compromise...
well usually Form follow Function but sometimes Function need to compromise for Form hahaha
Here are the pictures:
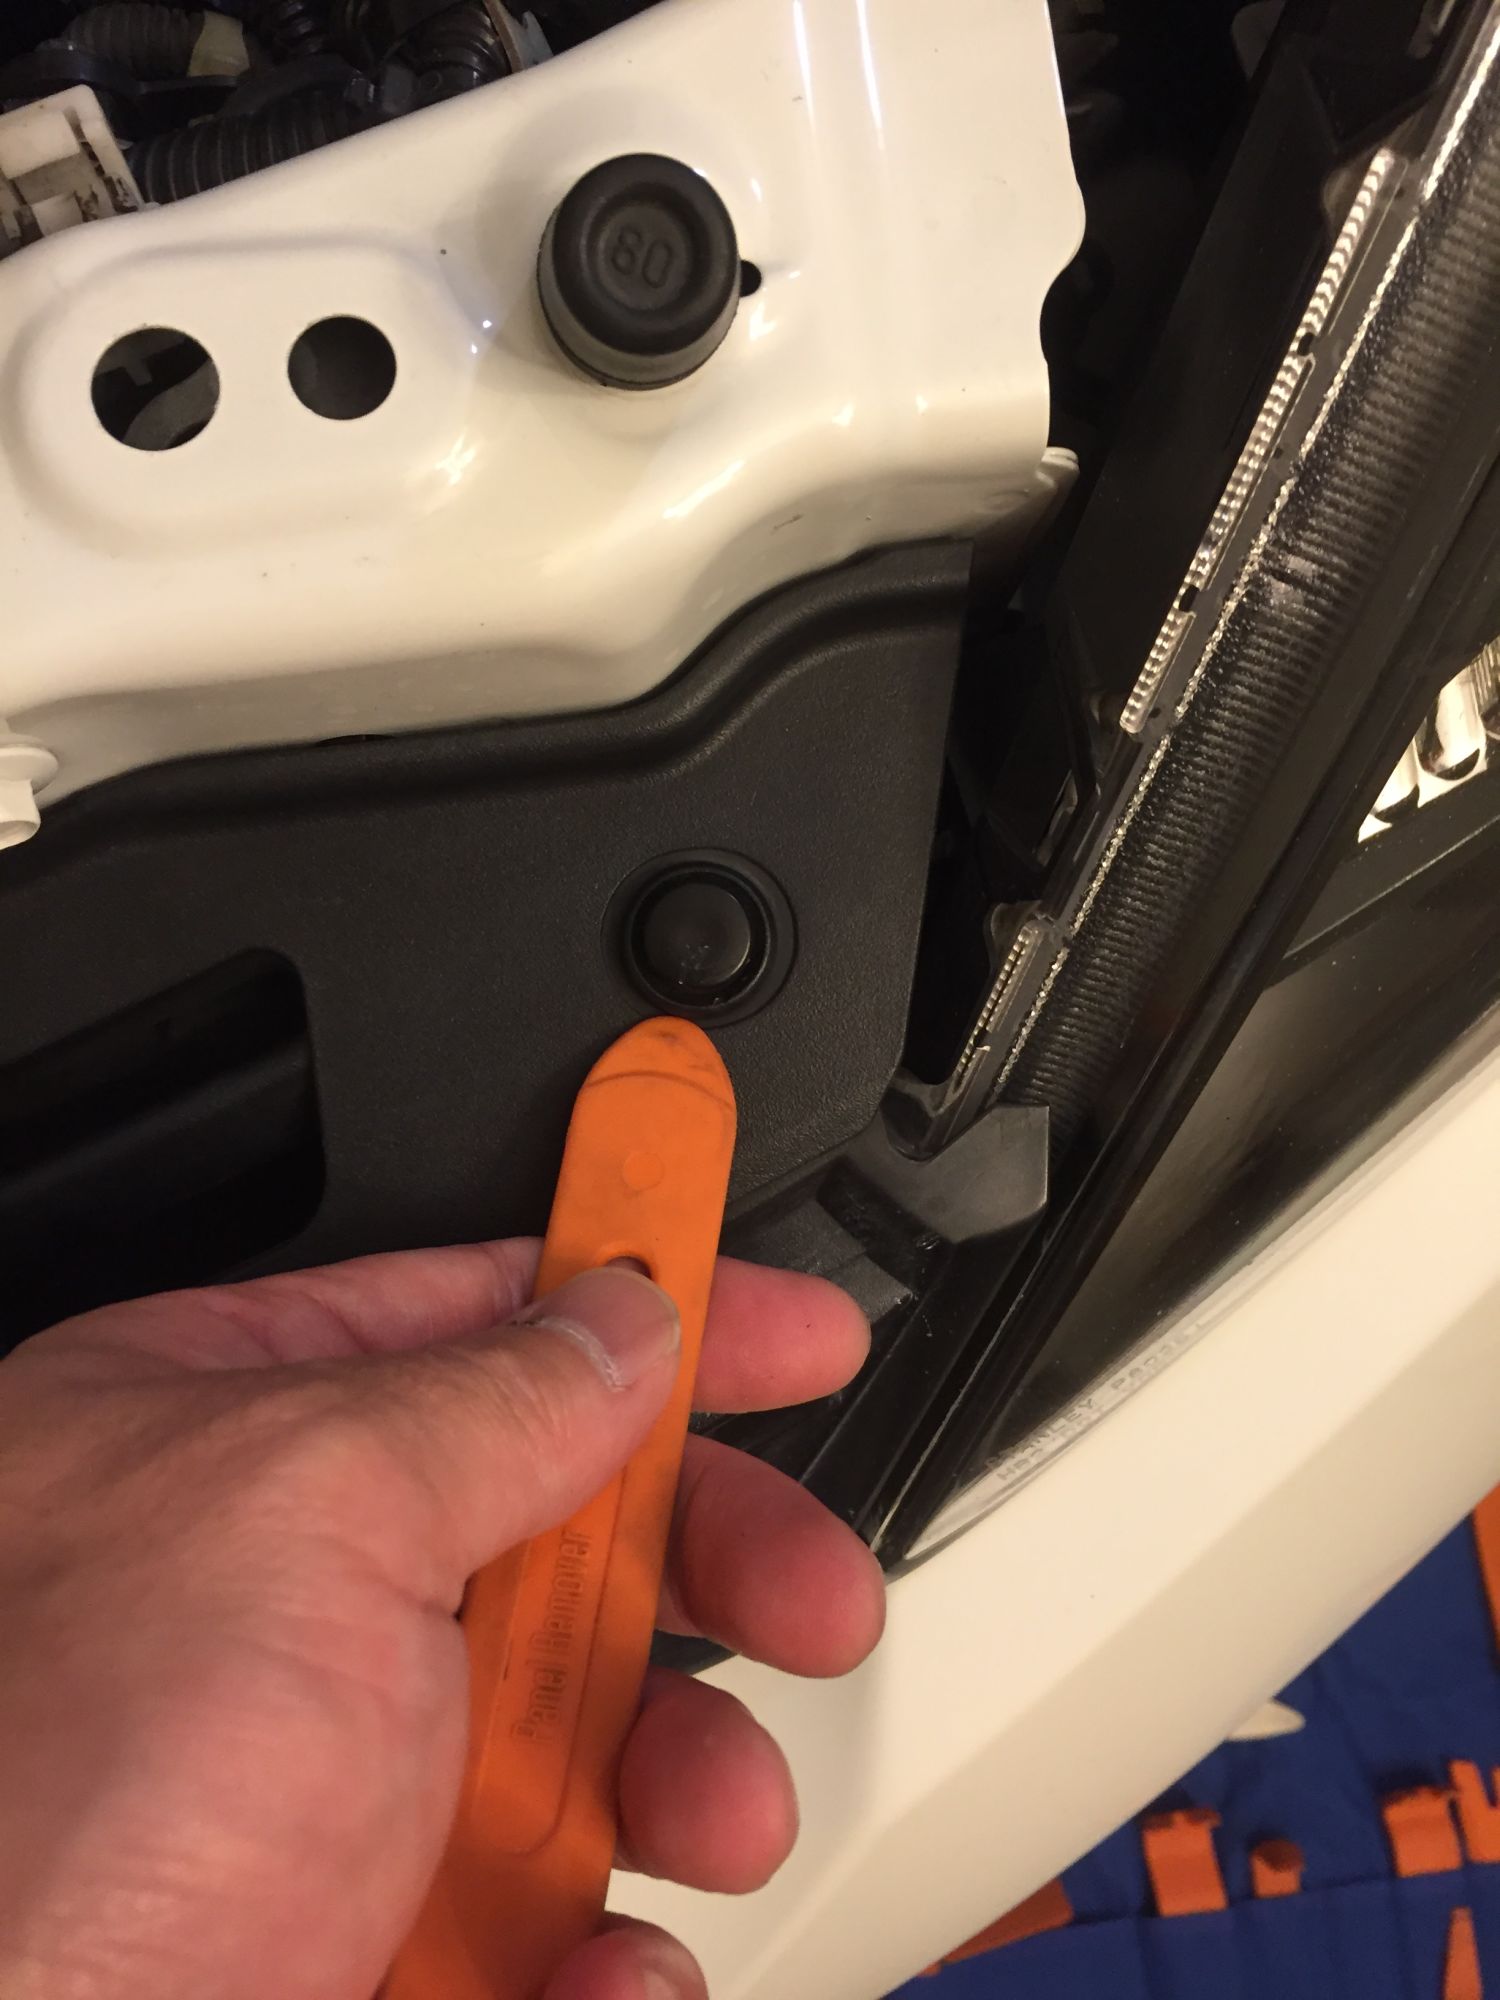
Start by taking out the upper radiator plate cover:
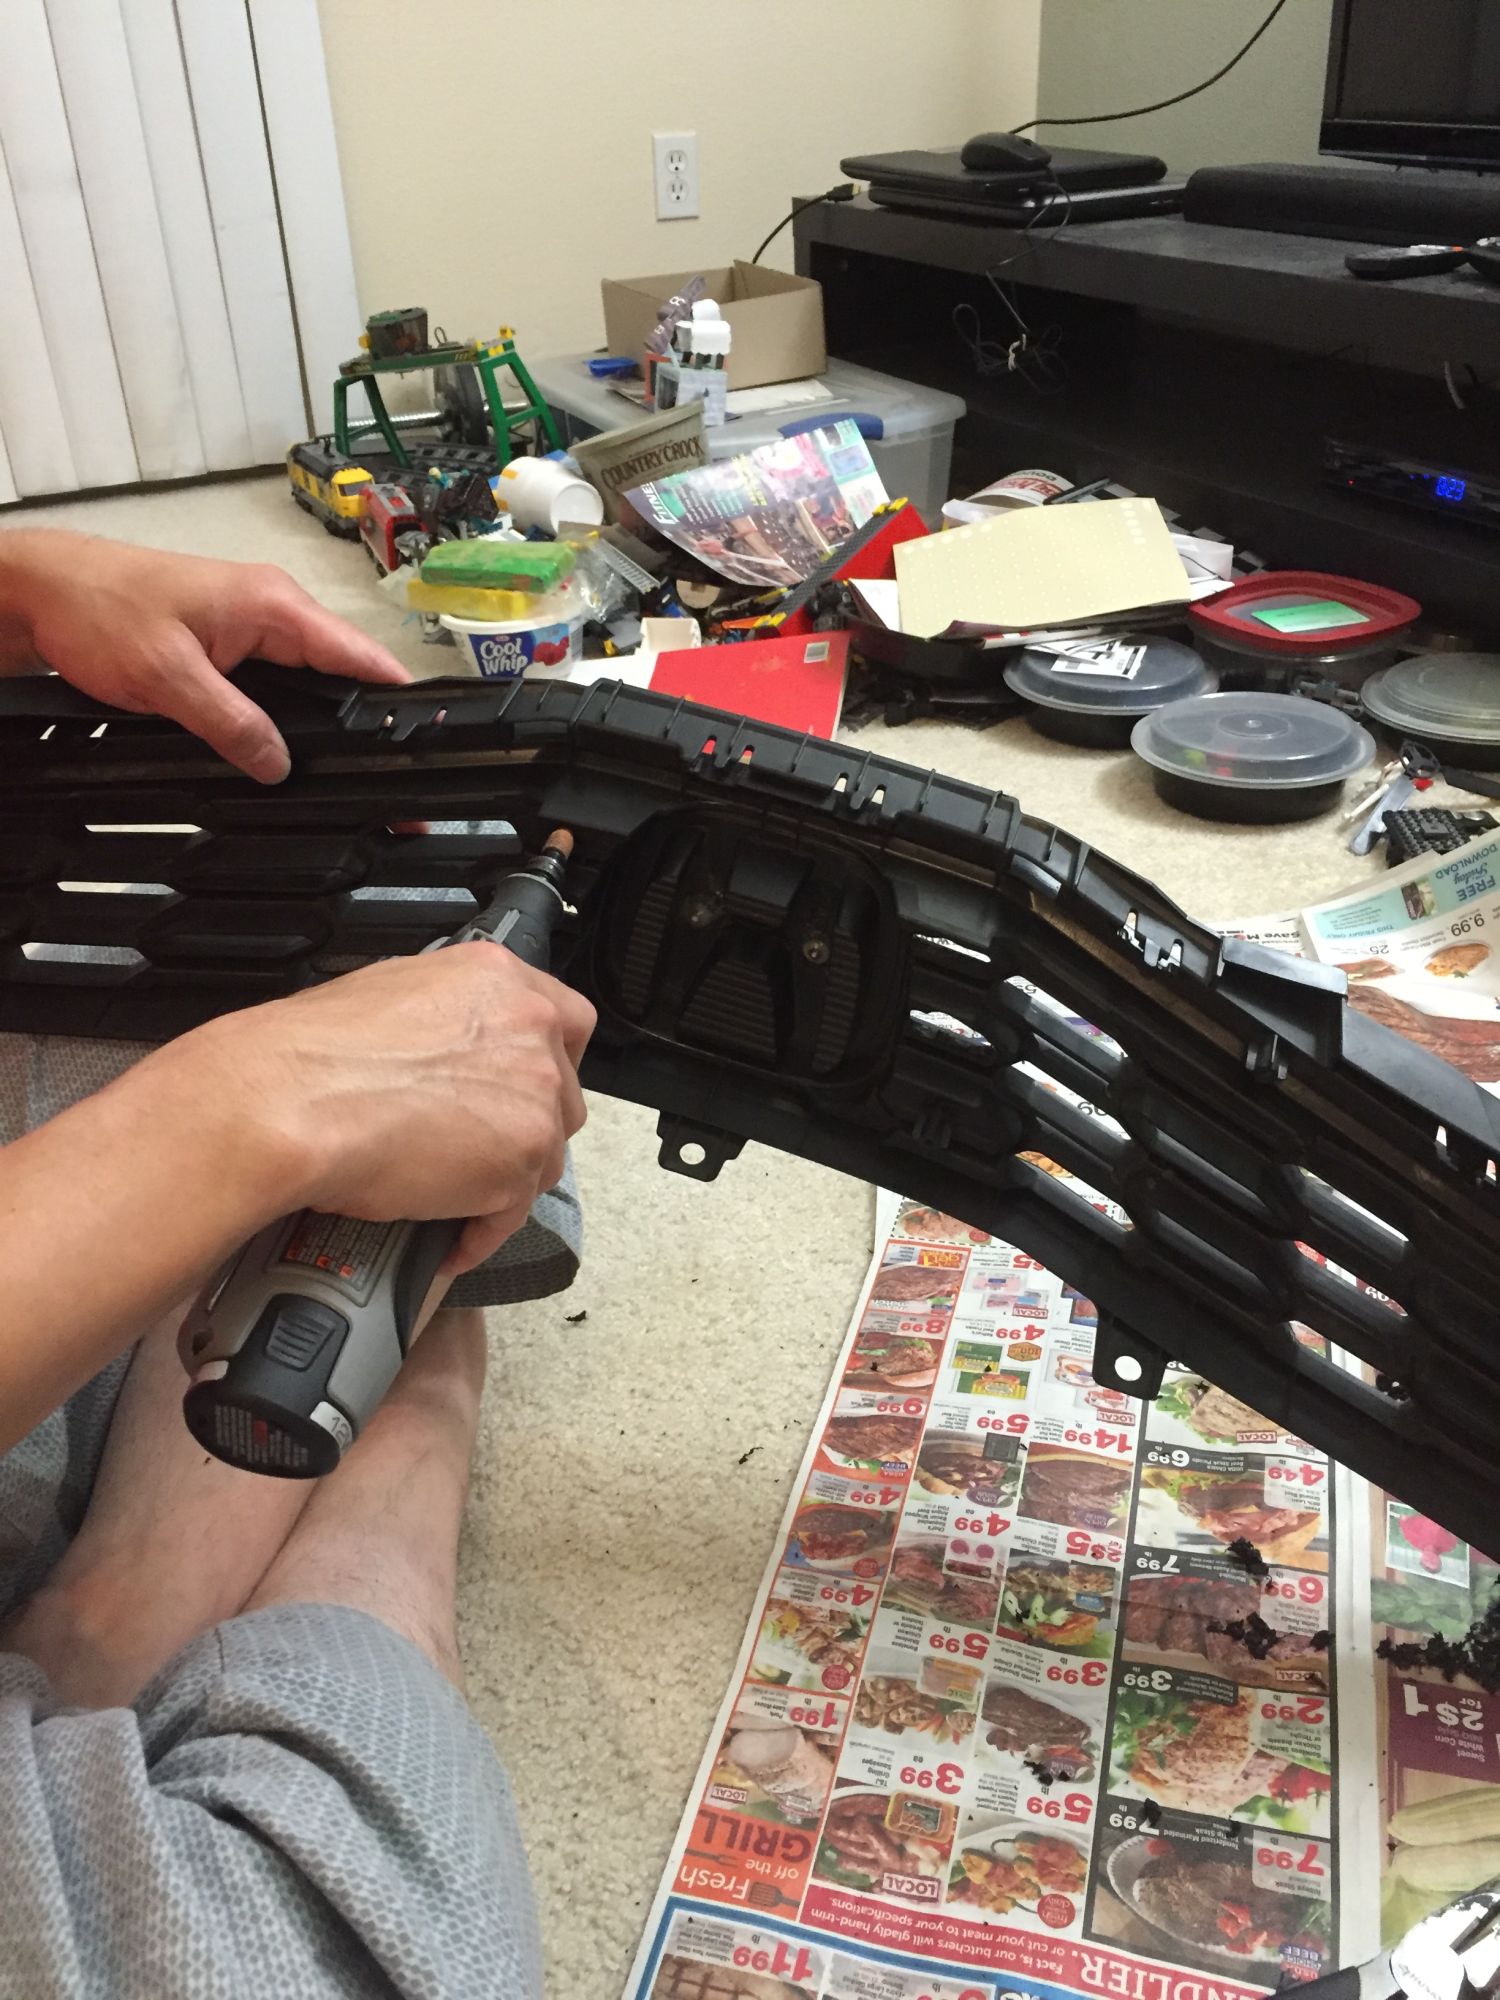
Start Dremeling:
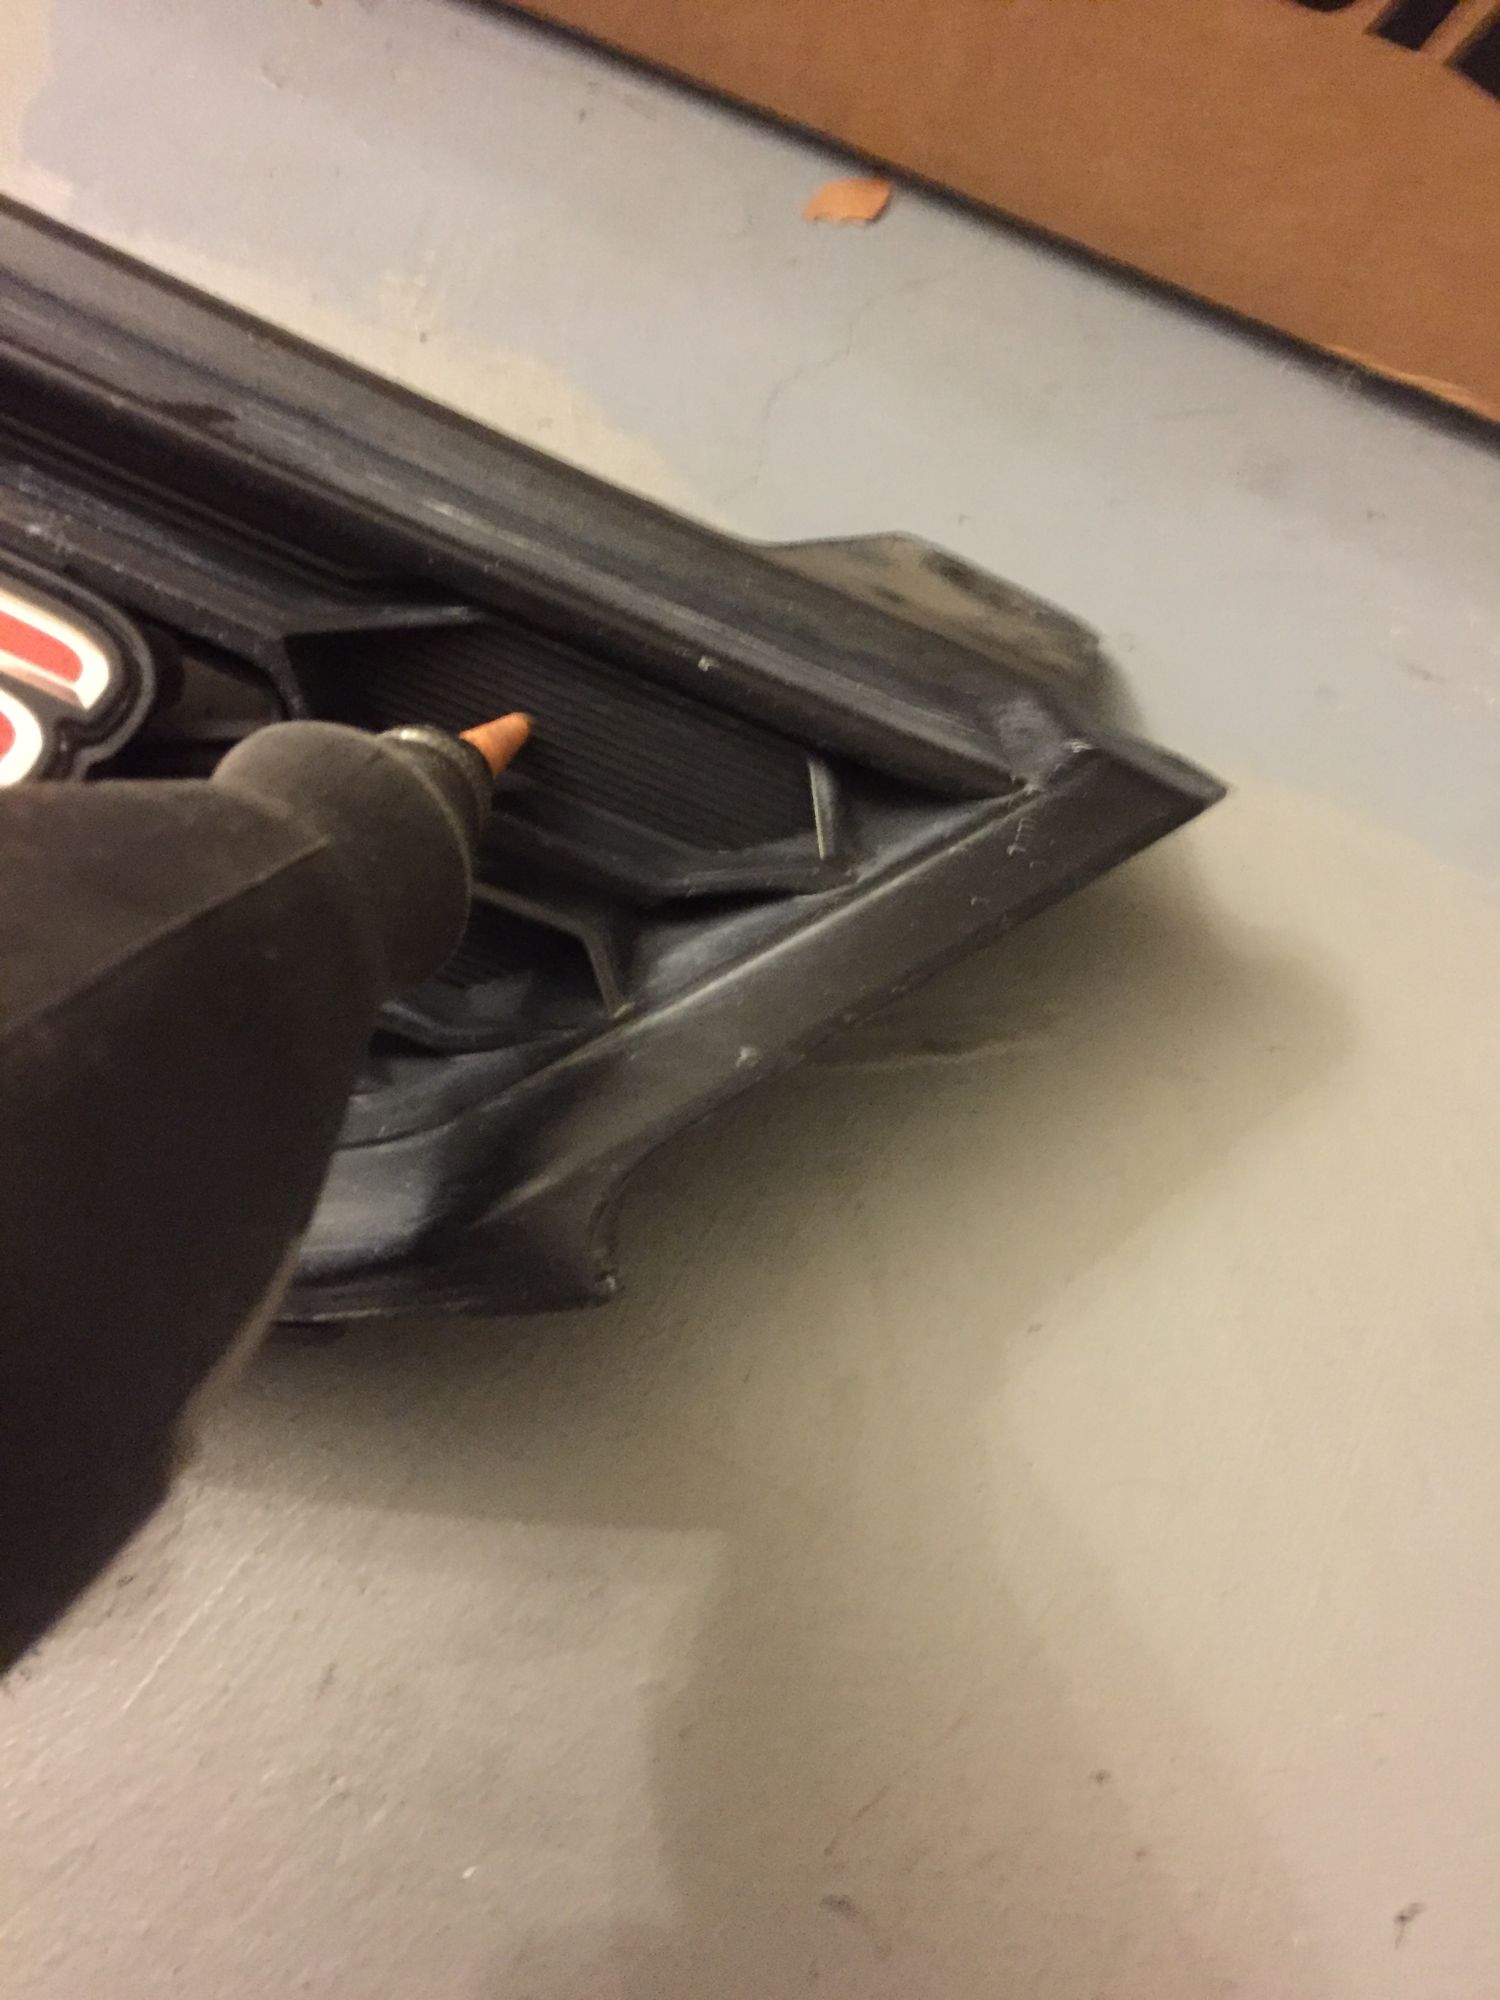
This is how I previously secure the RS emblem and I am going to remove it now:
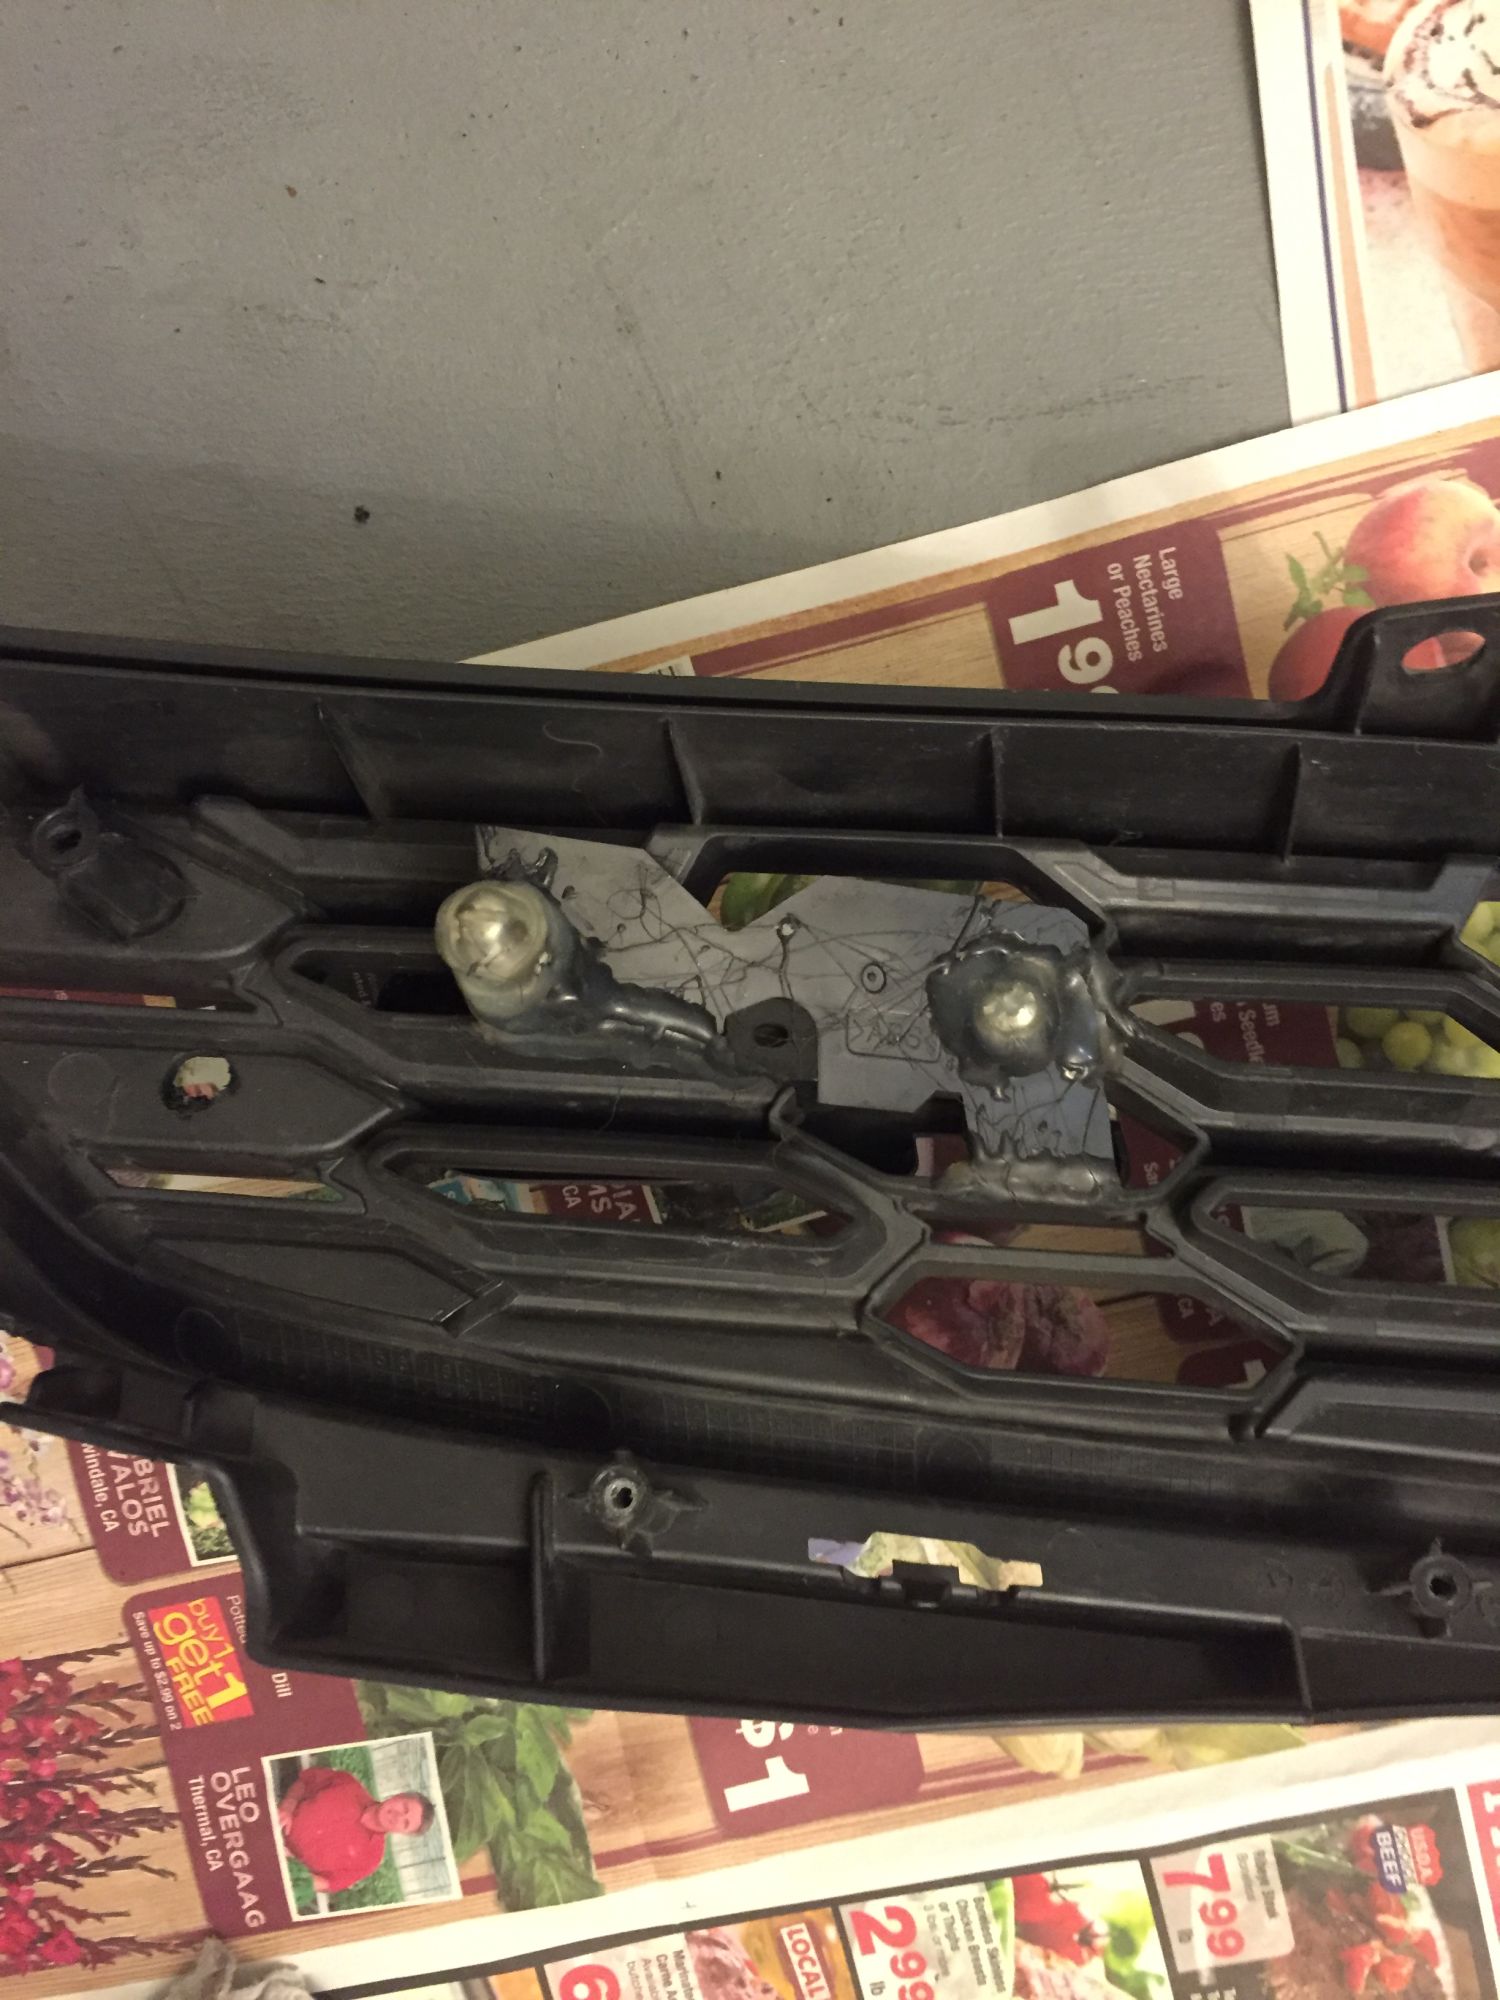
Dremel using the larger grinding stone and later going to use smaller stone for finishing touch:
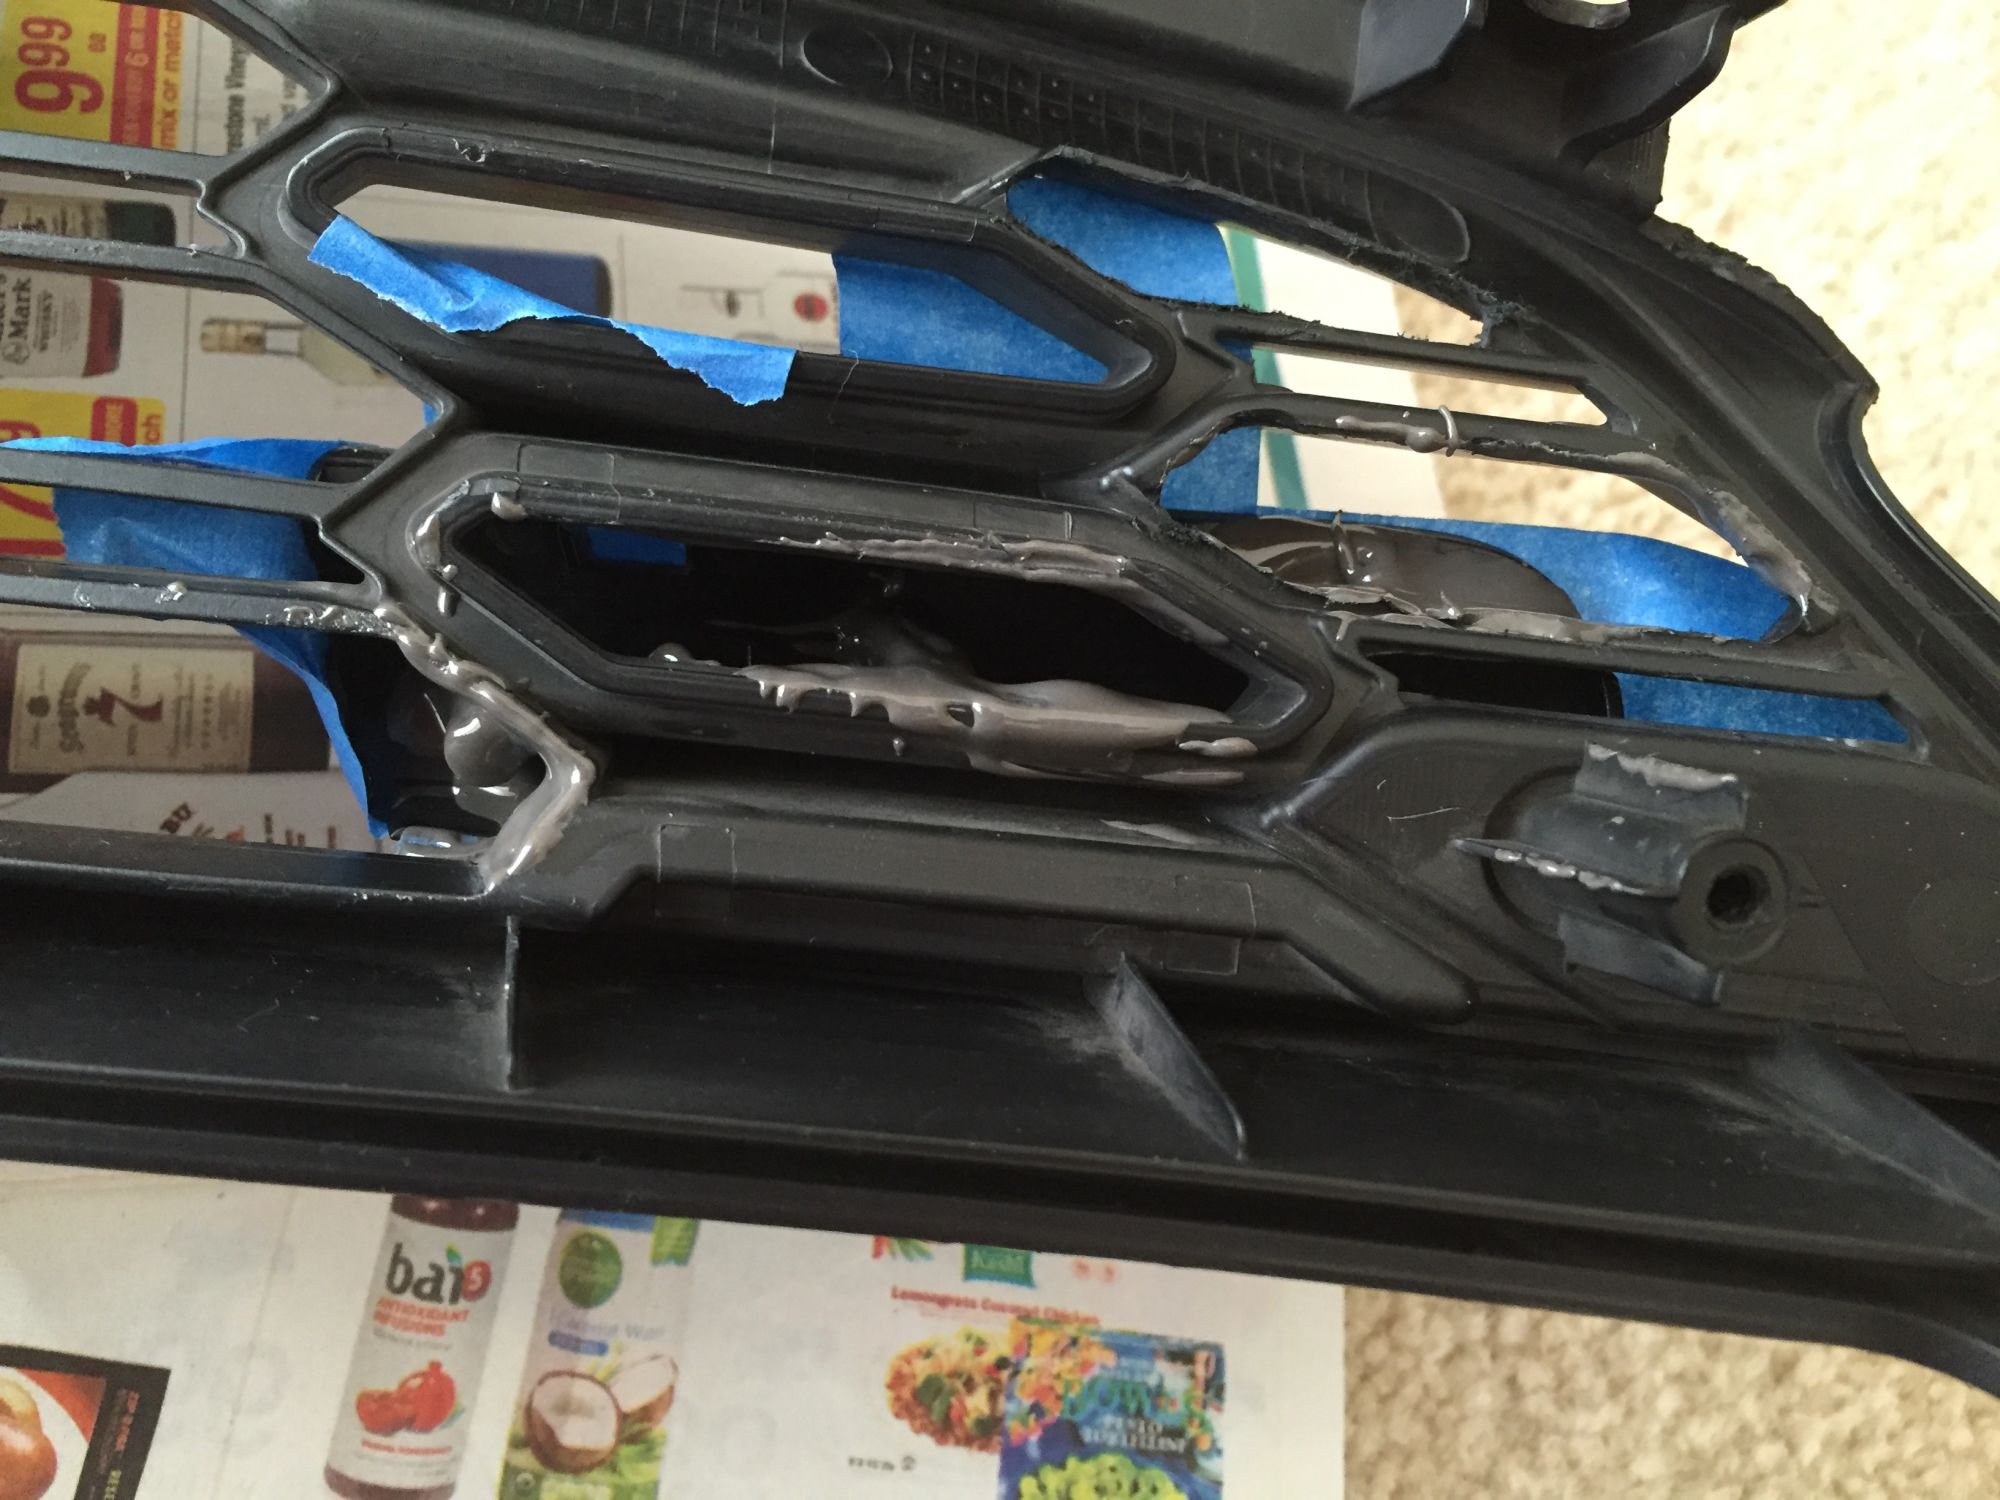
Dremel some more holes (total I drill 12 honeycomb holes),
there are 2 large honecomb that I can't drill because it function as the mounting for the air duct that feed the intake...
but next time I remove this grille again (when I install my oil cooler,
I will drill 2 extra honeycomb (smaller one), and there are some honeycomb holes that is just too small or have ribs as reinforcement...
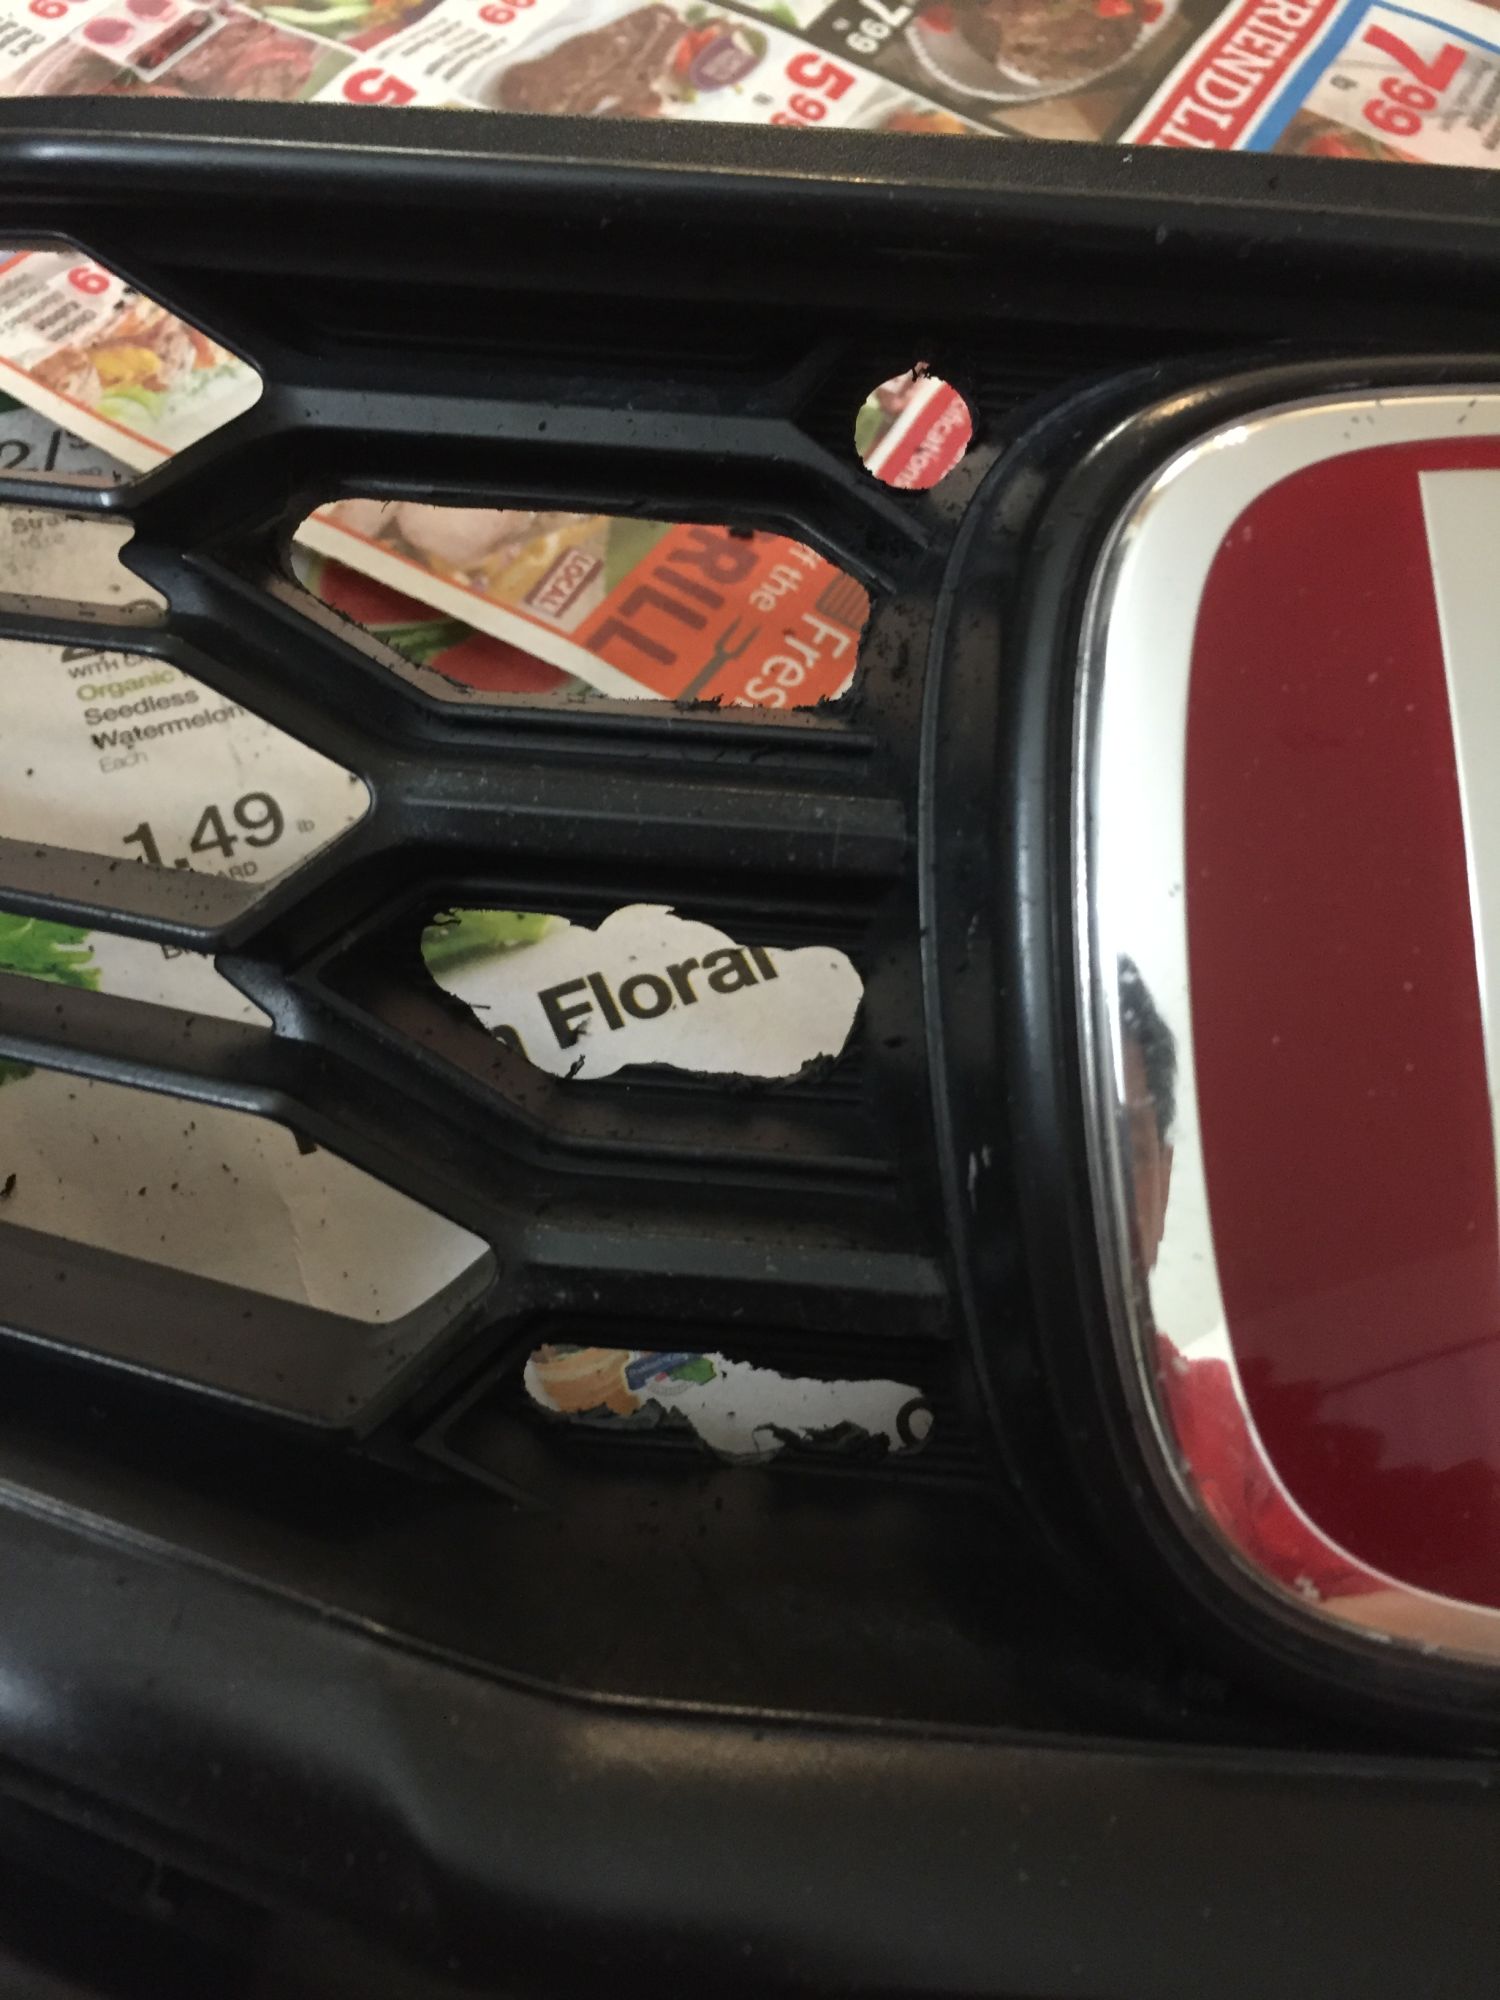
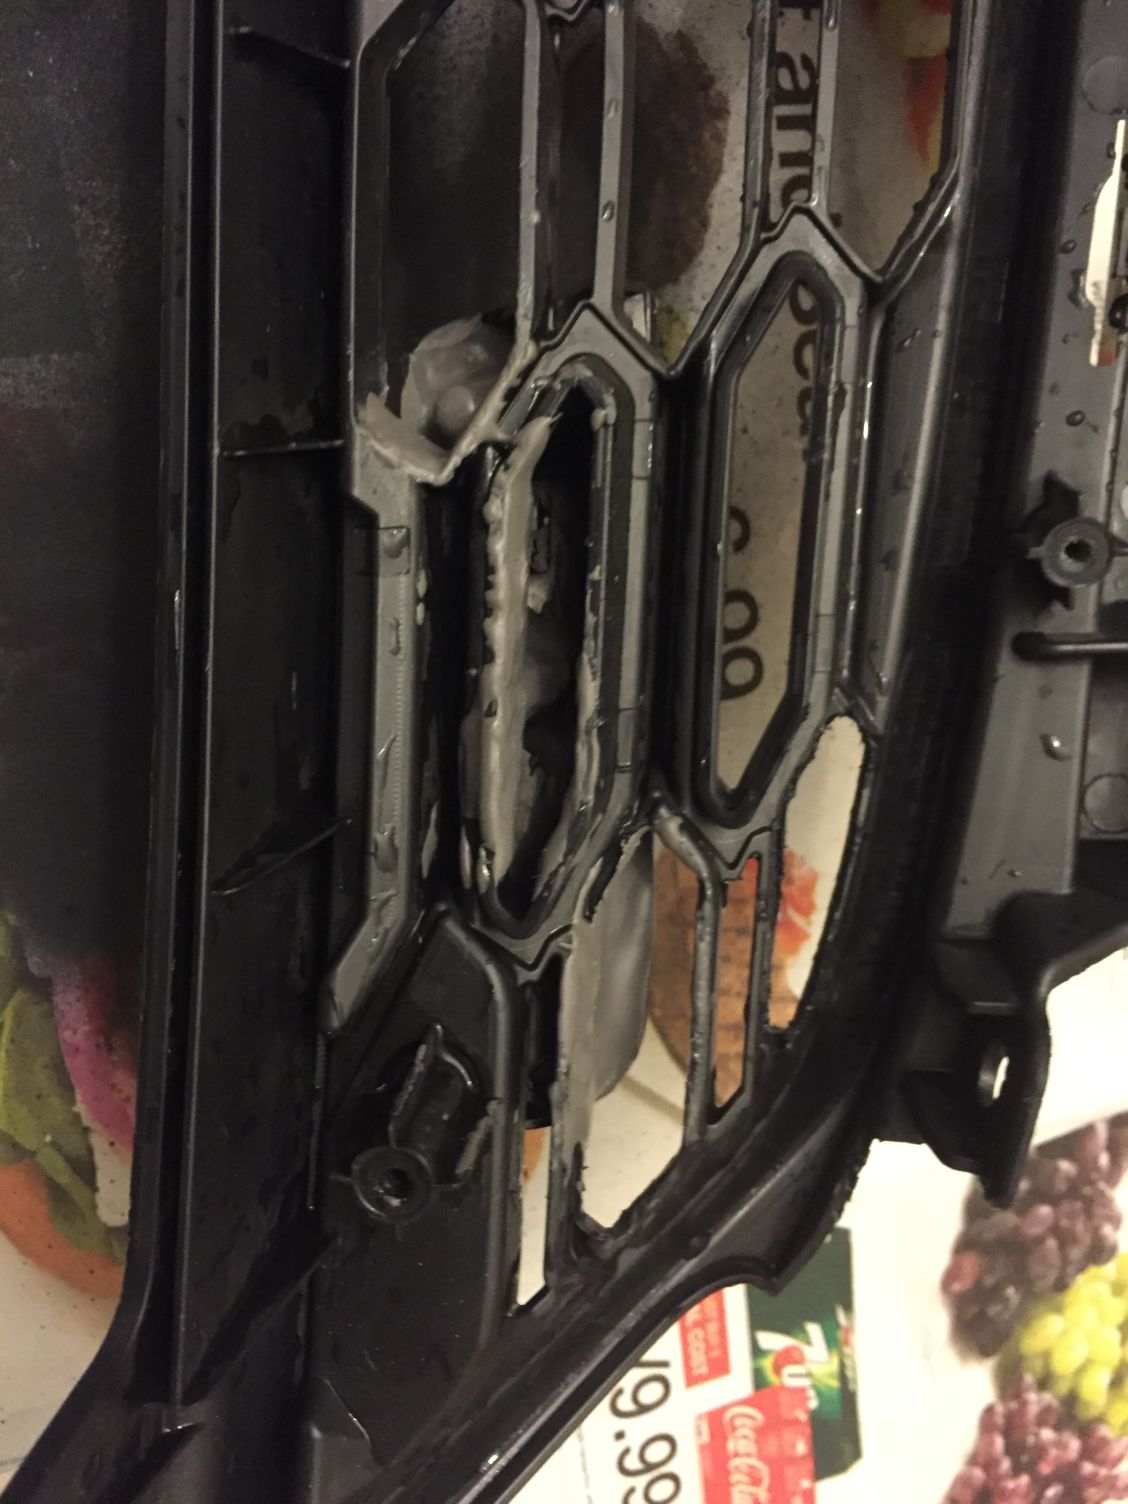
All holes that can be drilled (except the 2 extra small one that I plan to drill later) had been drilled and now preparing to mount the RS emblem on the top right upper corner using Epoxy:
Epoxy applied:
Grille ready to be installed back
Will continue in few minutes
Since I install my Sprintex Supercharger, I realized the biggest enemy my engine face is the heat soak that affecting the Sprintex and the engine temperature that make it prone to knock/detonation.
When I tune it at Church, I specify that I want the most reliable tuning that I can comfortably drive my car to the desert in Arizona/Death Valley and my car engine will still survive.
So the tune are very rich, but this make my car upper end feel sluggish...
so I experimented by leaning it just 1 step (on the AEM F/IC-6 Fuel Map Table), the result is, my engine now is much more responsive from bottom to the top rpm.
Still I worry about knock/detonation in high heat ambient temperature, so I currently add octane booster each time I fill up my gas.
I was ready to move to my Recaro project but then I decide Recaro need to wait because I need to make sure my engine is safe, reliable and can last as long as possible.
First step:
Order JDP Carbon Fiber Vented Hood with JDP Carbon Fiber Radiator Plate Cover.
The JDP Carbon Fiber Vented Hood have a large grill opening that can suck air out of the engine bay while the JDP Carbon Fiber Radiator Plate Cover have larger hole opening to help feed even more
incoming cold air to my CR-Z Mugen Airbox with snorkel from CR-Z.
I will need to wait 2 to 3 more weeks since JDP is currently fabricating my orders above, and I will update it here once I got both items above.
I also plan to paint most of the JDP Carbon Fiber Vented Hood in my Taffeta White color except the square parts behind the ventilation grille.
I don't like the look of a carbon fiber hood on a white car, and I prefer low key look but at the same time I still want to have a little of the carbon fiber surface area expose, just to show that it is Carbon Fiber hood
Second step,
Now I have a method to vent the hot air out from the engine bay and ram more cold air into the engine using the 2 items above,
I need to optimize the INCOMING Air Flow.
I notice that 2013 Honda Fit Sport OEM Grille have many of the honeycomb shape opening BLOCK... must be to improve aerodynamics,
but I need more air !!!
So I decide to DRILL/DREMEL those holes.
I was having a dilemma regarding my "RS" emblem on the grille...
at the current location it is right in the middle of the opening where it feed the cold air into the air box...
I try removing it from the grille but now my car looks too bare, not enough spices
, so I look at JDM RS Fit and I notice the JDM RS Fit have the RS emblem located in the far right upper corner of the grille...It still block 1.5 honeycombs holes but it do not directly in the way of the cold air feeding the airbox... so I settle for this compromise...
well usually Form follow Function but sometimes Function need to compromise for Form hahaha
Here are the pictures:
Start by taking out the upper radiator plate cover:
Start Dremeling:
This is how I previously secure the RS emblem and I am going to remove it now:
Dremel using the larger grinding stone and later going to use smaller stone for finishing touch:
Dremel some more holes (total I drill 12 honeycomb holes),
there are 2 large honecomb that I can't drill because it function as the mounting for the air duct that feed the intake...
but next time I remove this grille again (when I install my oil cooler,
I will drill 2 extra honeycomb (smaller one), and there are some honeycomb holes that is just too small or have ribs as reinforcement...
All holes that can be drilled (except the 2 extra small one that I plan to drill later) had been drilled and now preparing to mount the RS emblem on the top right upper corner using Epoxy:
Epoxy applied:
Grille ready to be installed back
Will continue in few minutes
#2
08-28-2016, 09:52 PM
Grille ready to be install:
Third Step,
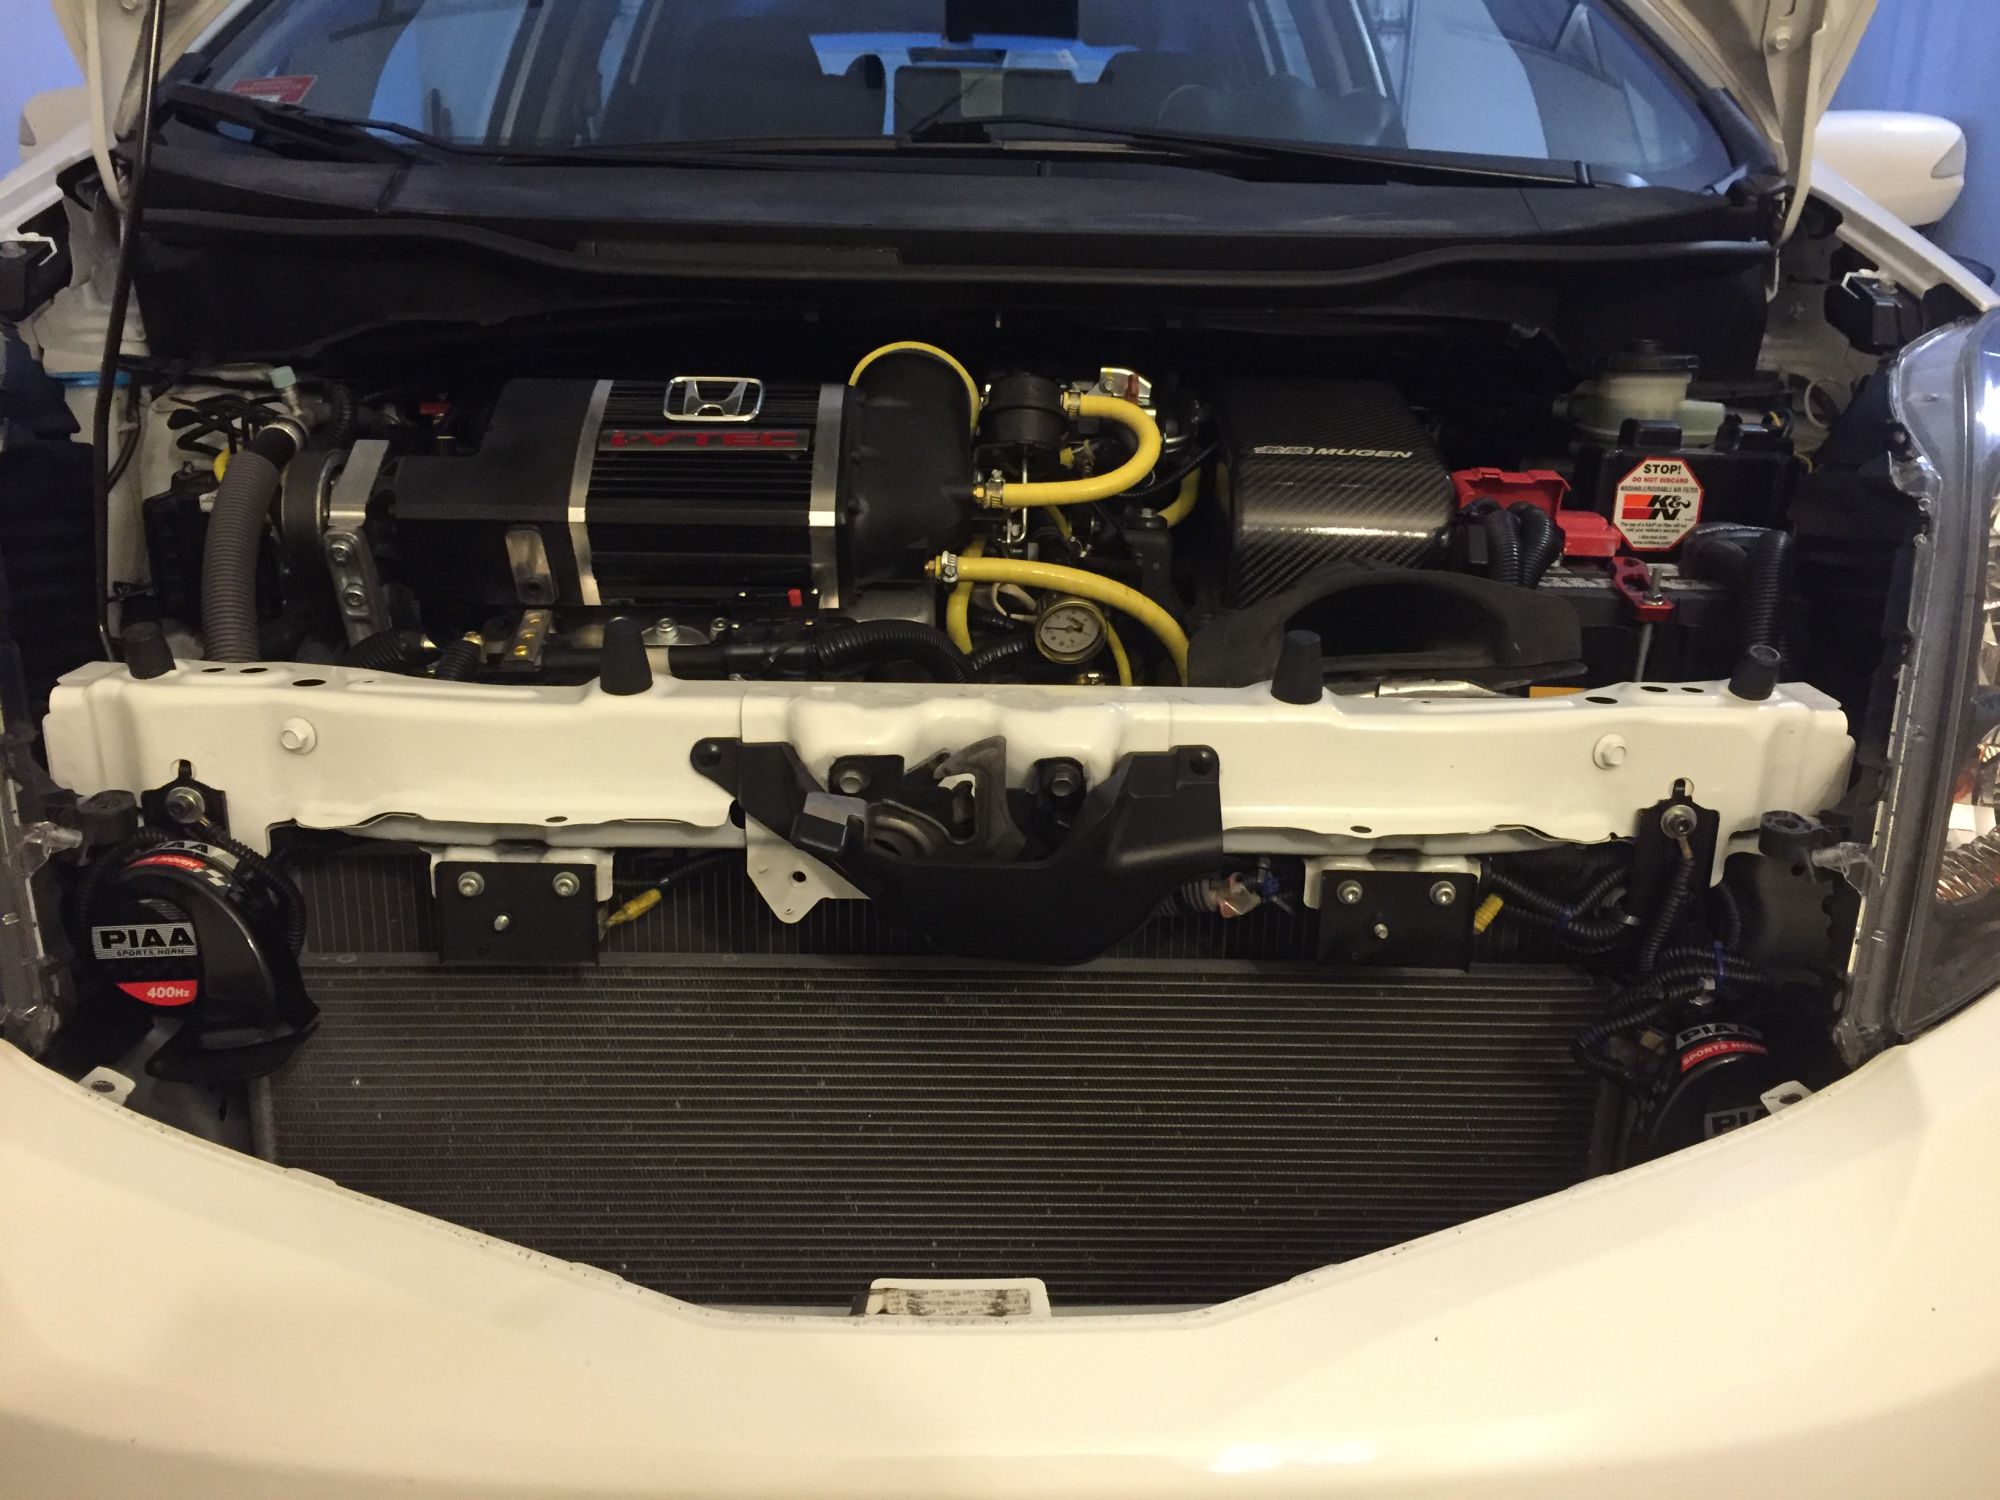
When I am about to install the Grill,
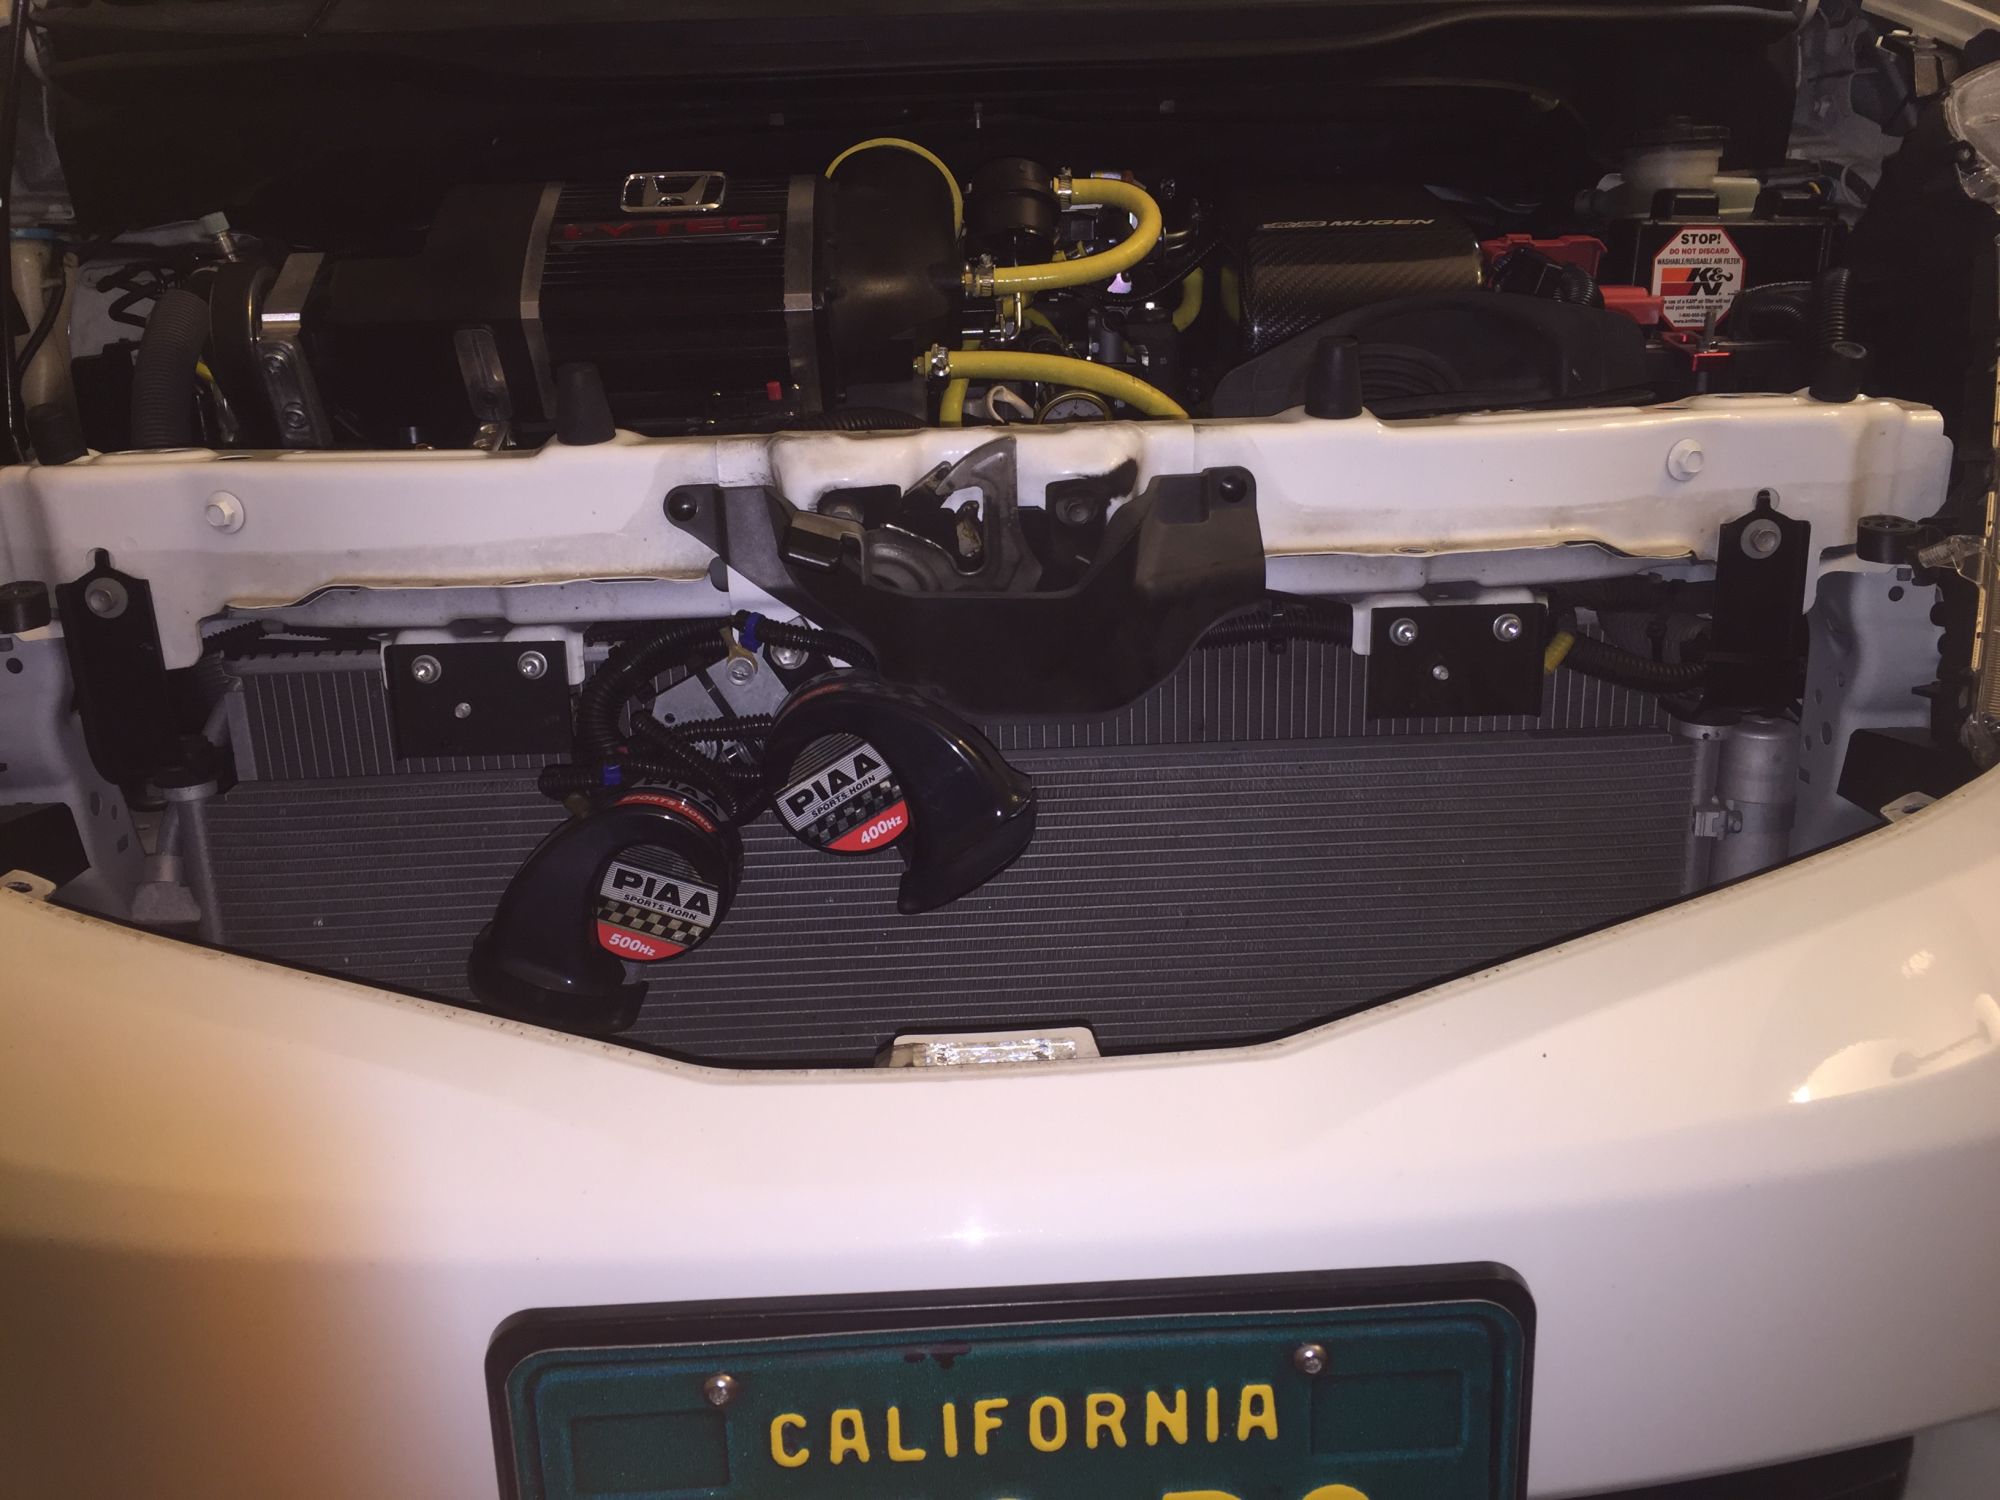
I notice that my PIAA horns is BLOCKING a large area of the radiator,
and this is NOT acceptable for Project Air Flow
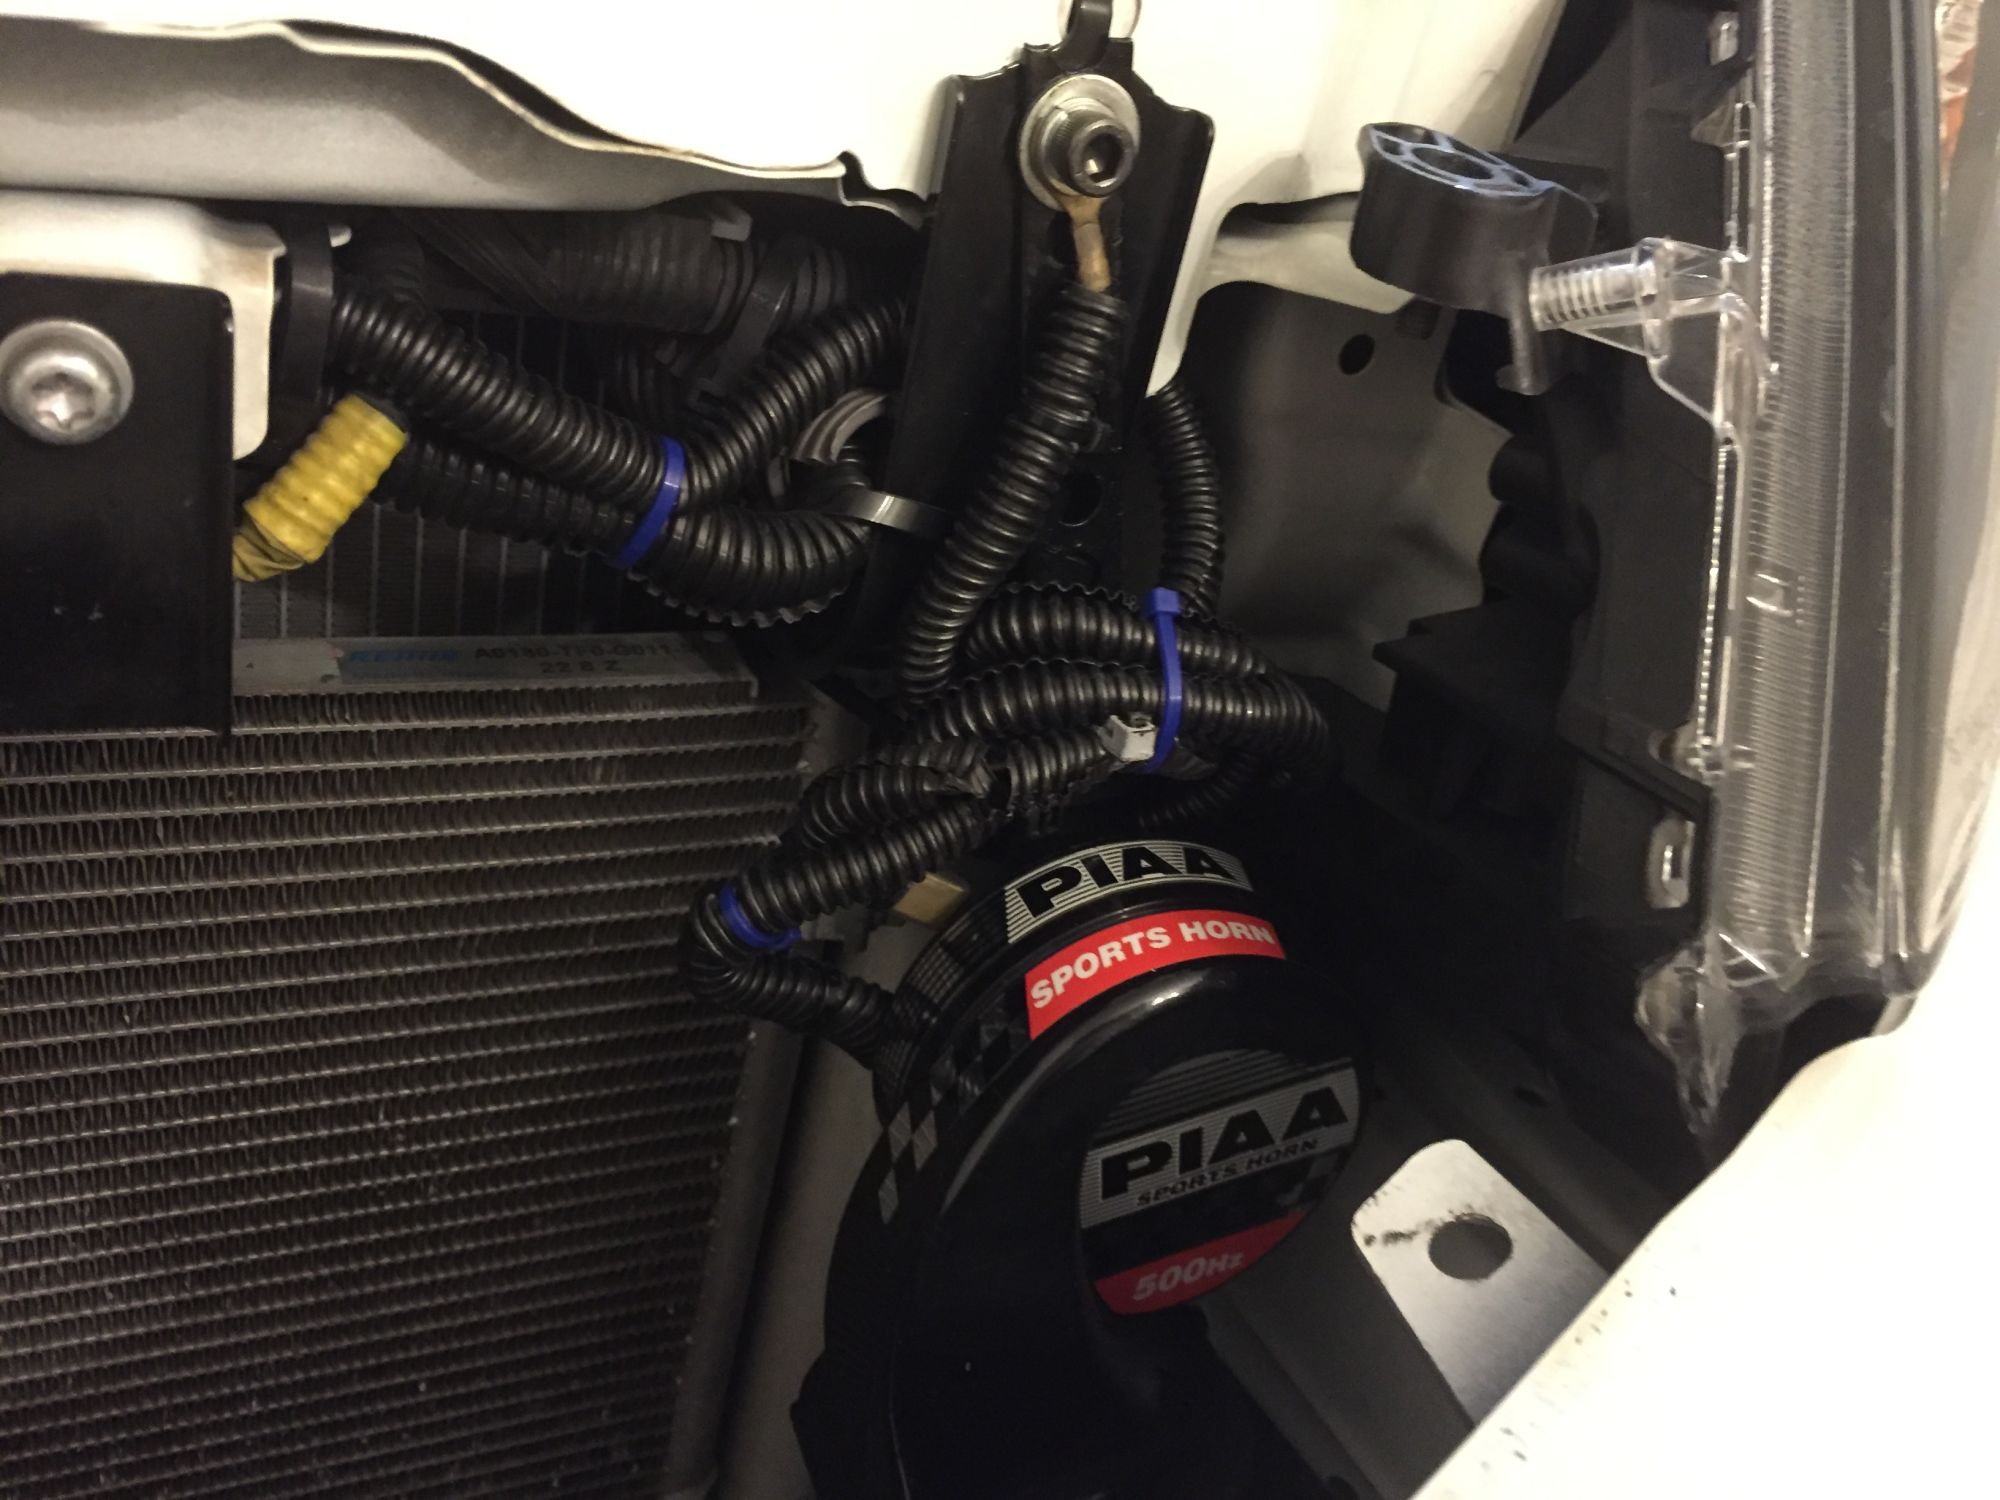
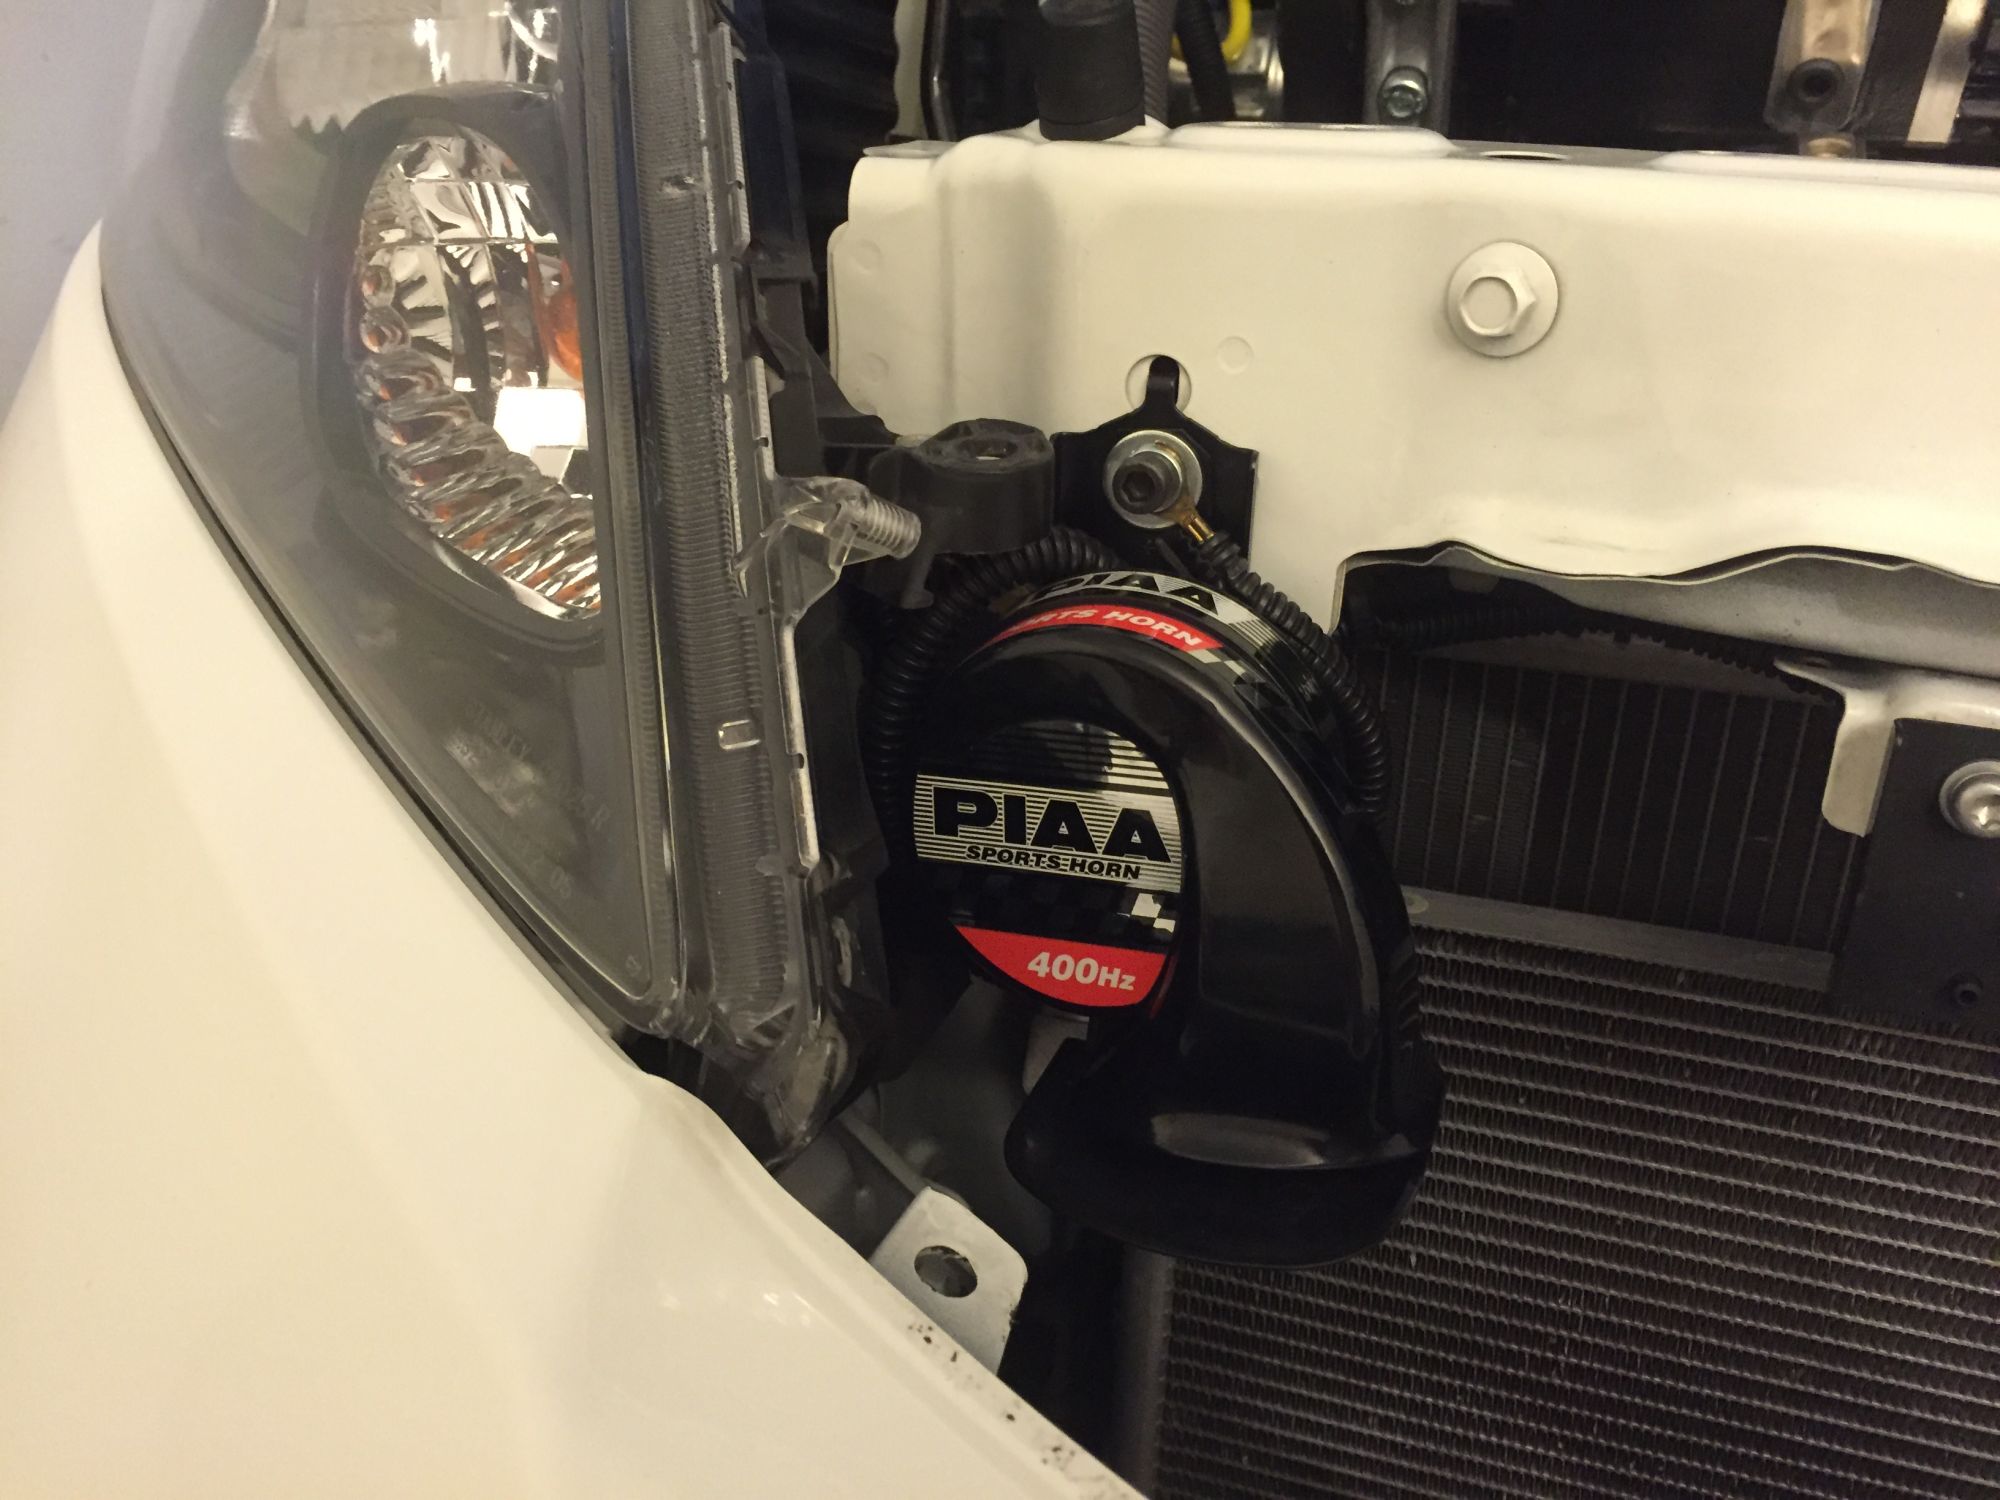
I move one to the Right side, and on this right one, due to the way the wire terminal, I had to lower it using an extension bracket:
The left one don't need an extension bracket so I just move it to the left,
oh, both of them mounted piggy back on the bolt that secure the A/C condenser bracket:
Finished result... but wait, not only it look imbalance,
but I just notice the left side that is not lowered actually blocking the most left honeycomb holes that I just drilled on my grille, making it a waste of time... and this is NOT acceptable for Project Air Flow 
So I lower the left horn too using another extension bracket, (both extension bracket painted black of course for the stealth look)
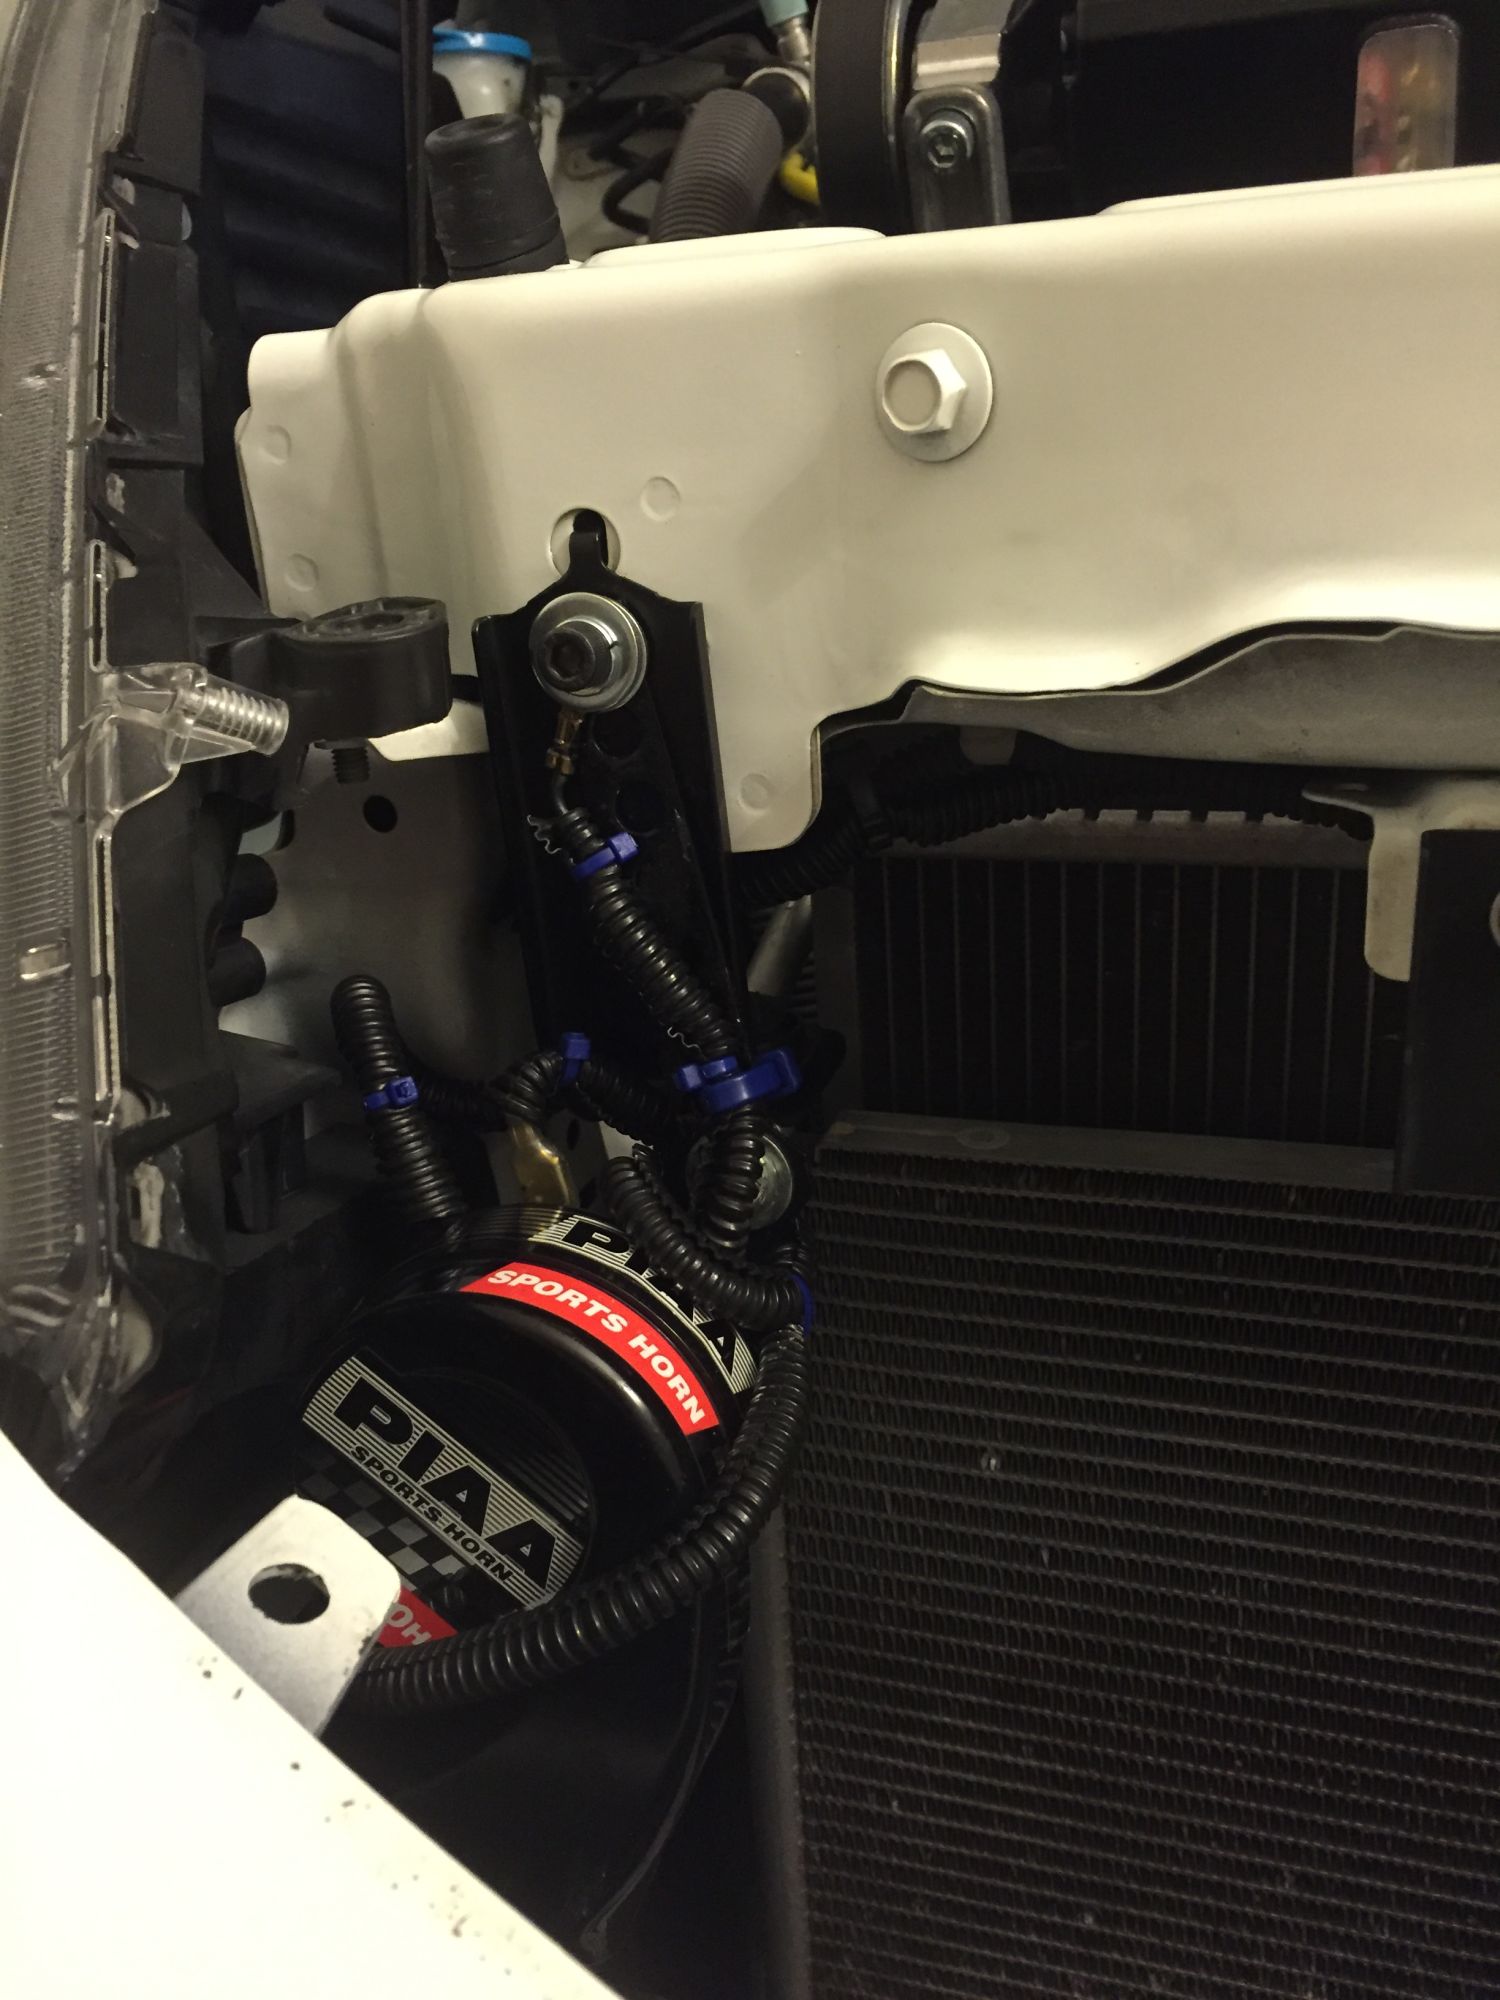
Finally both horns now looks balance and no more blocking air
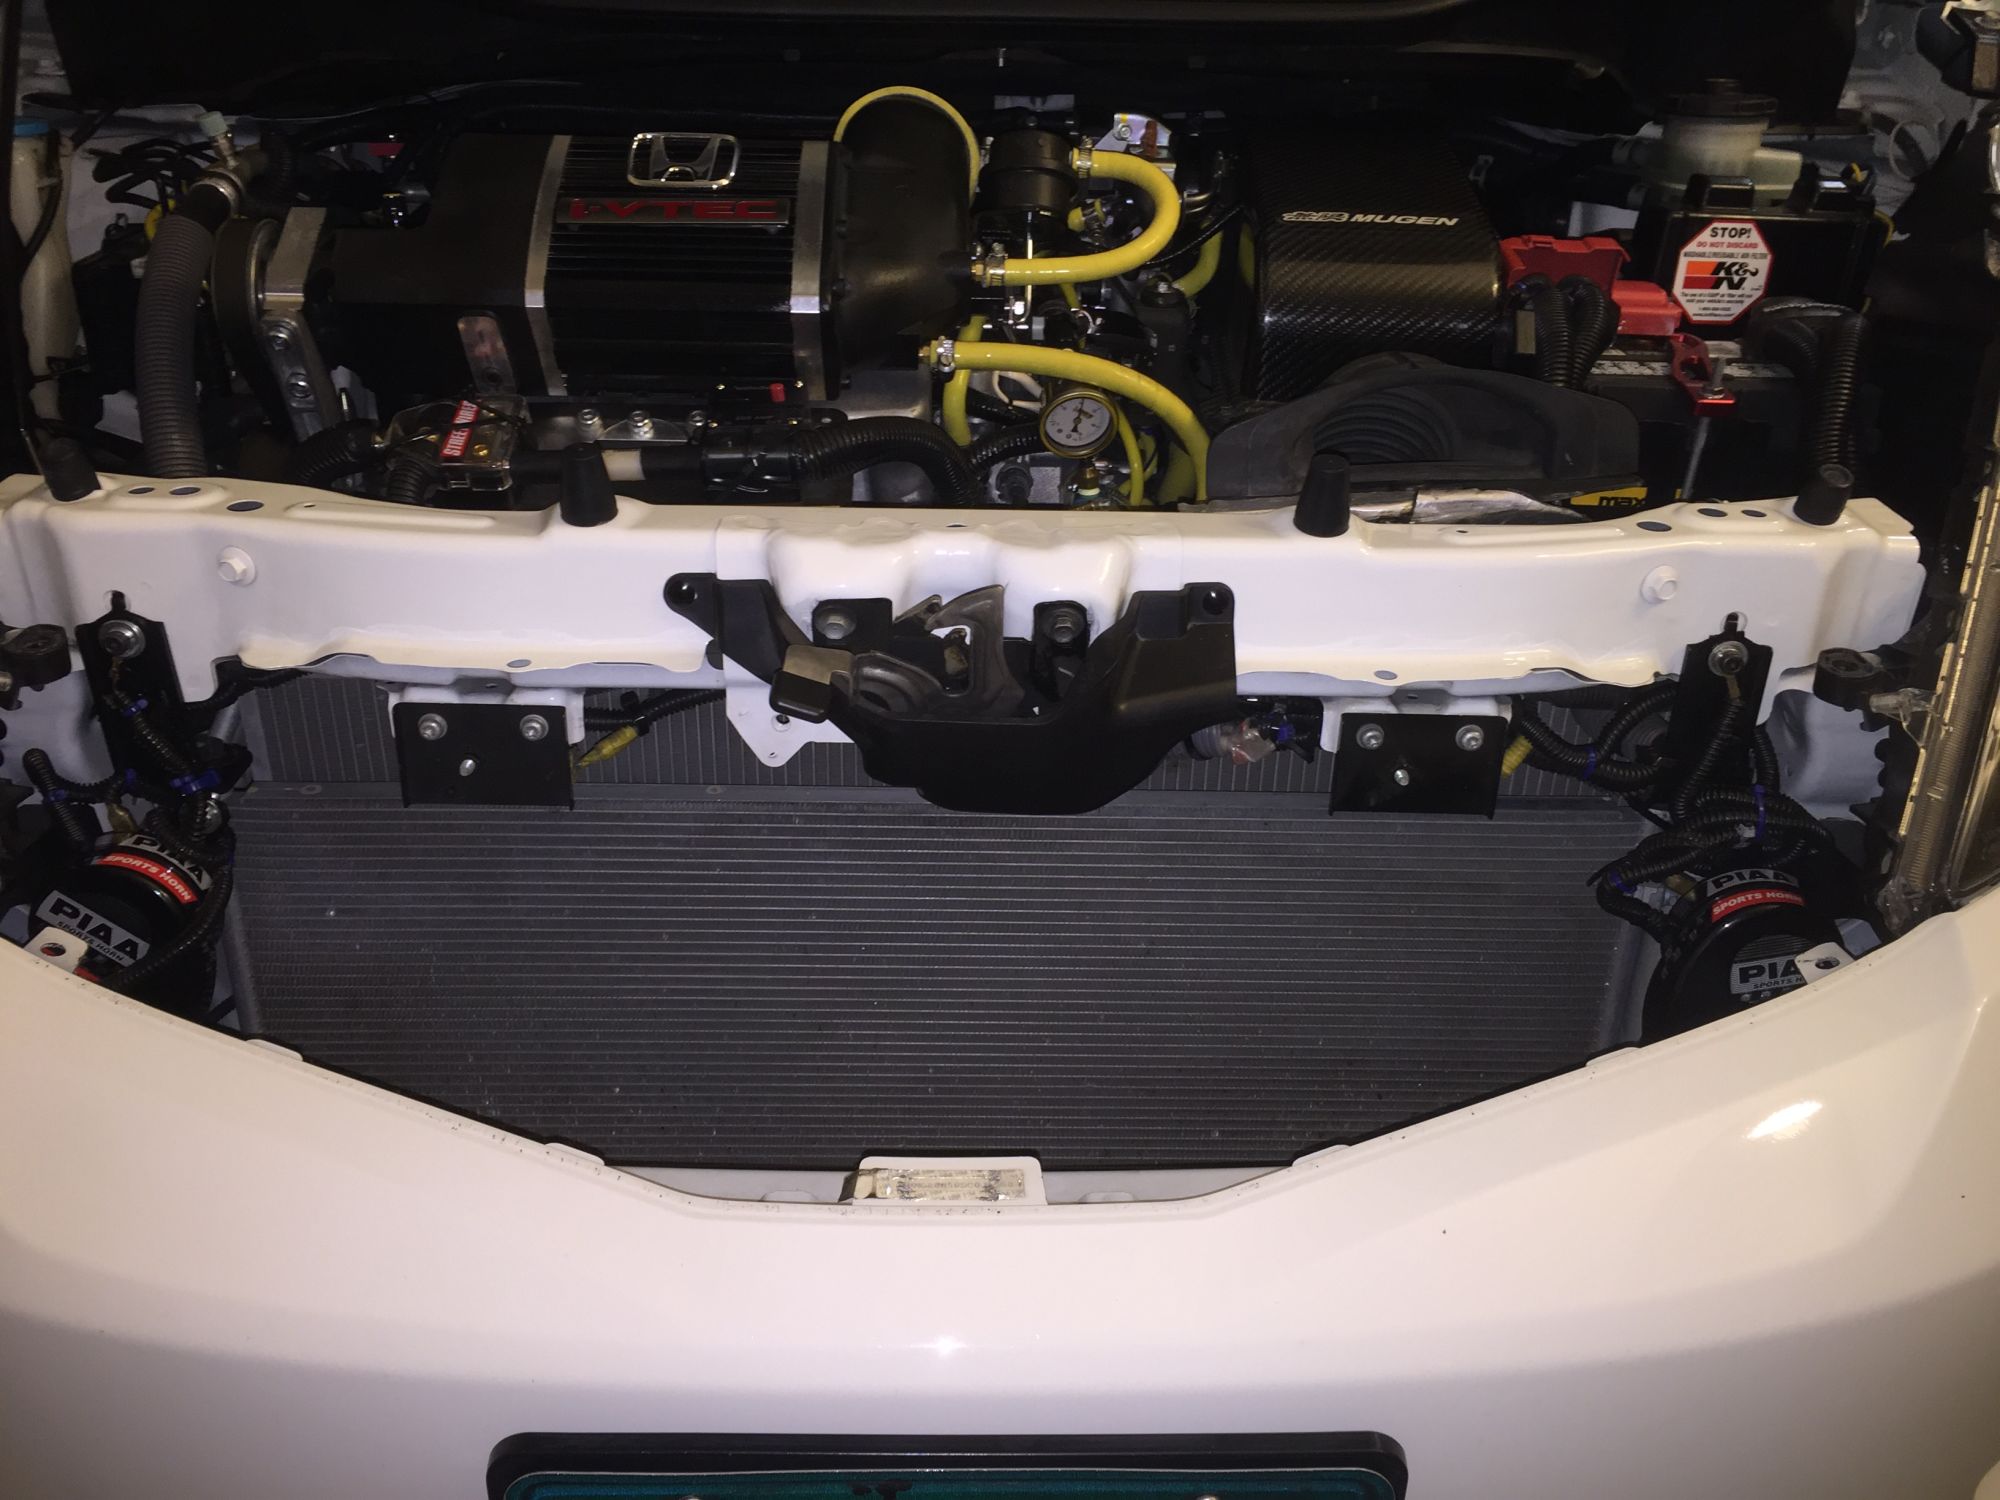
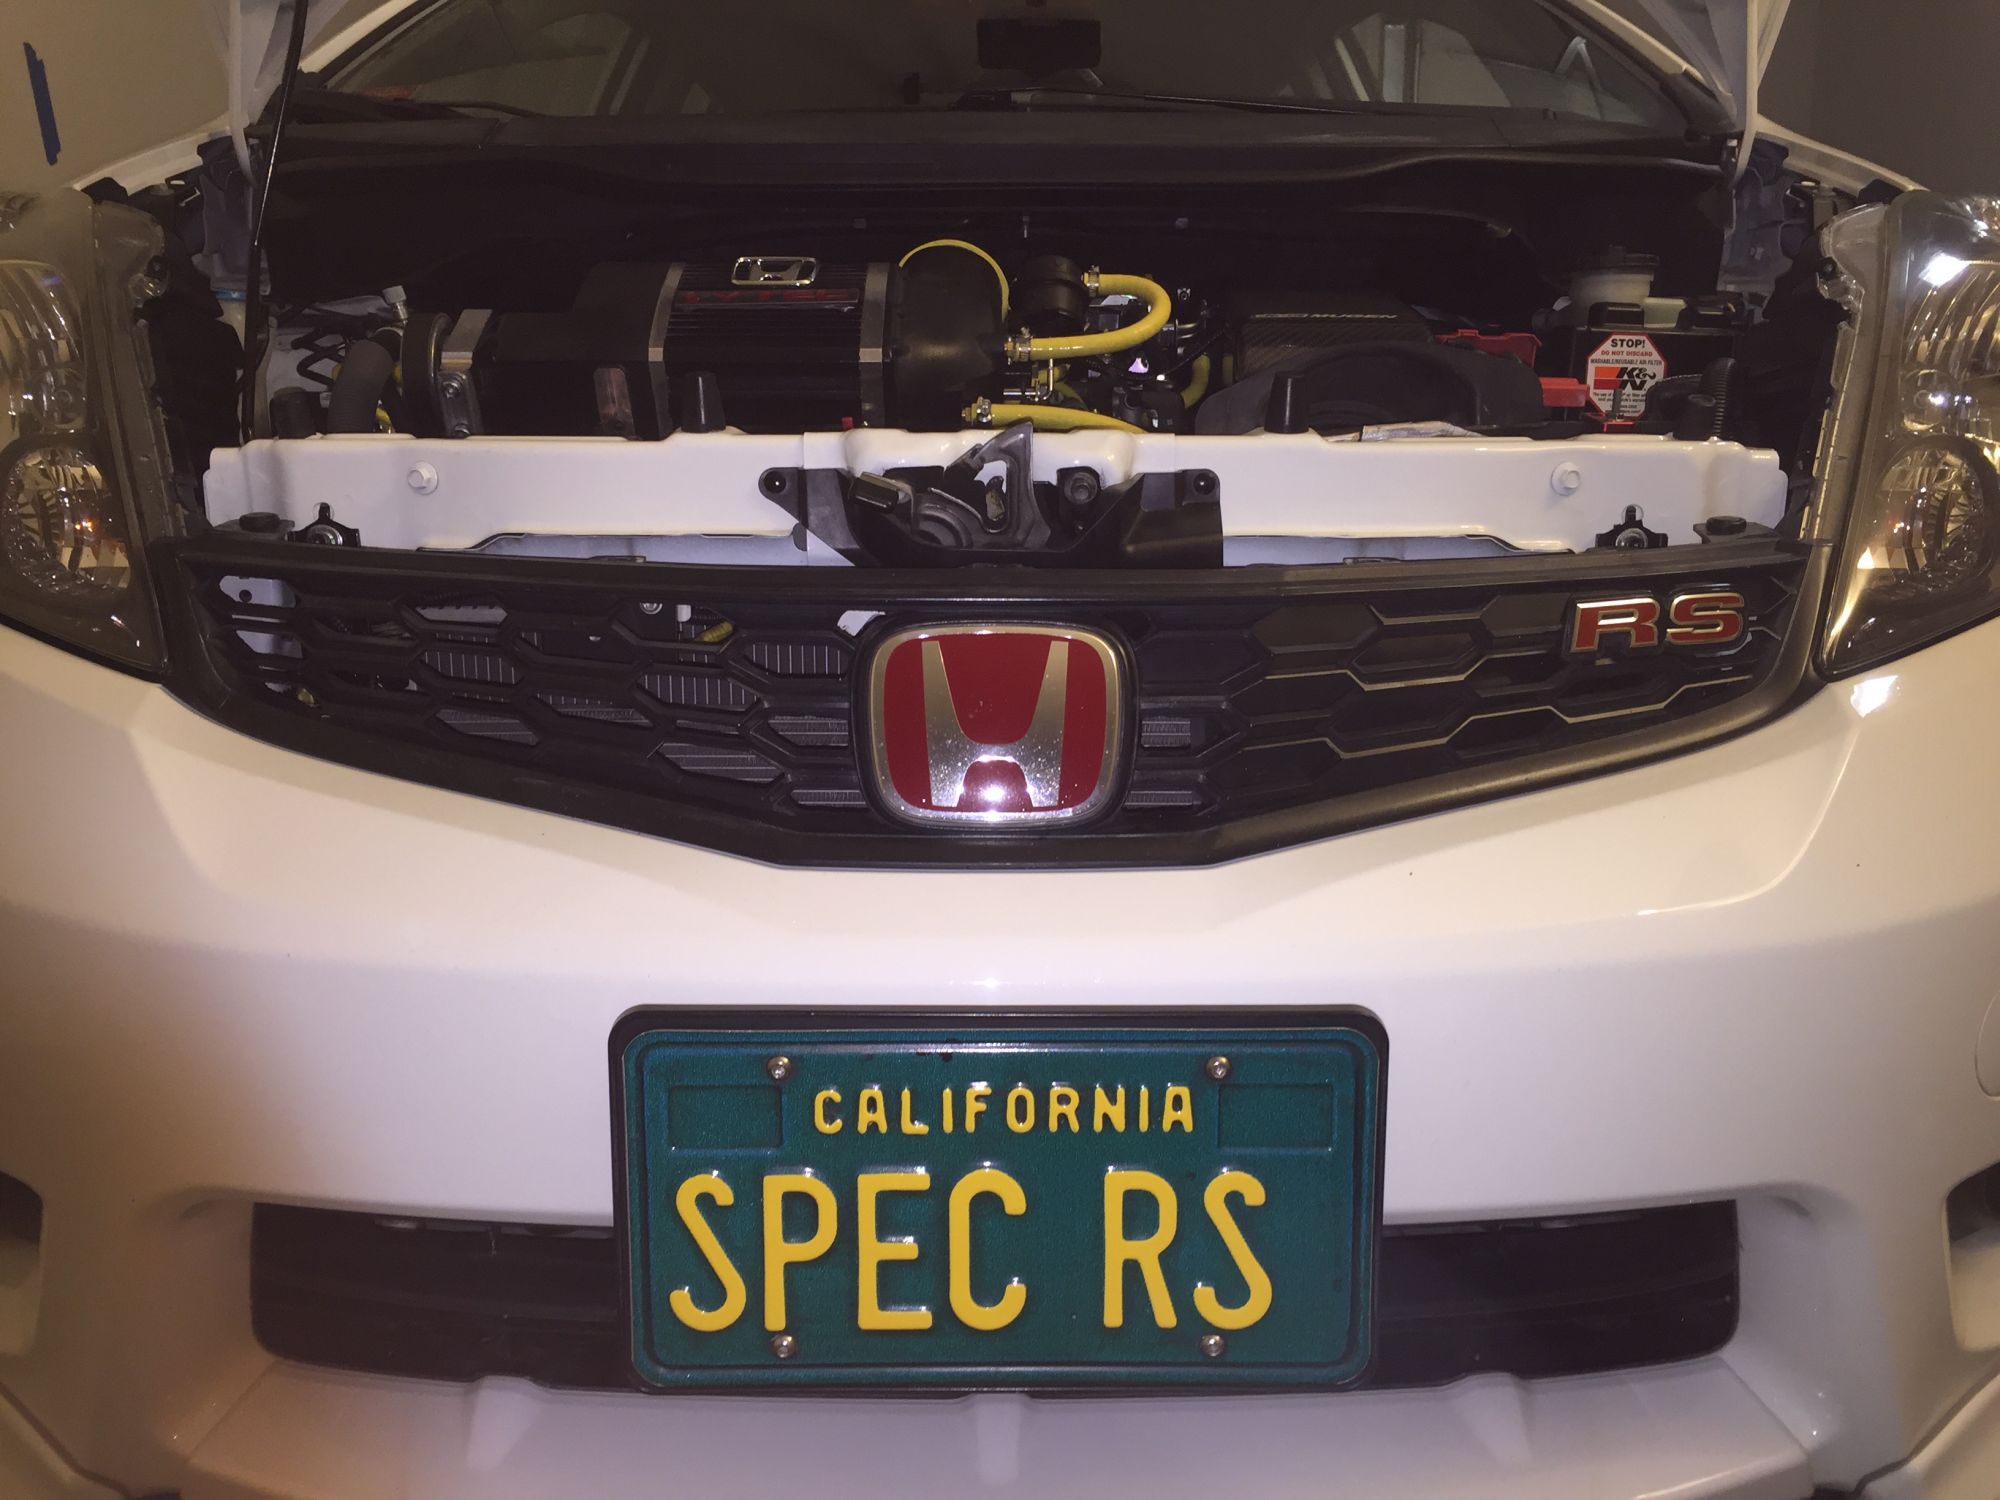
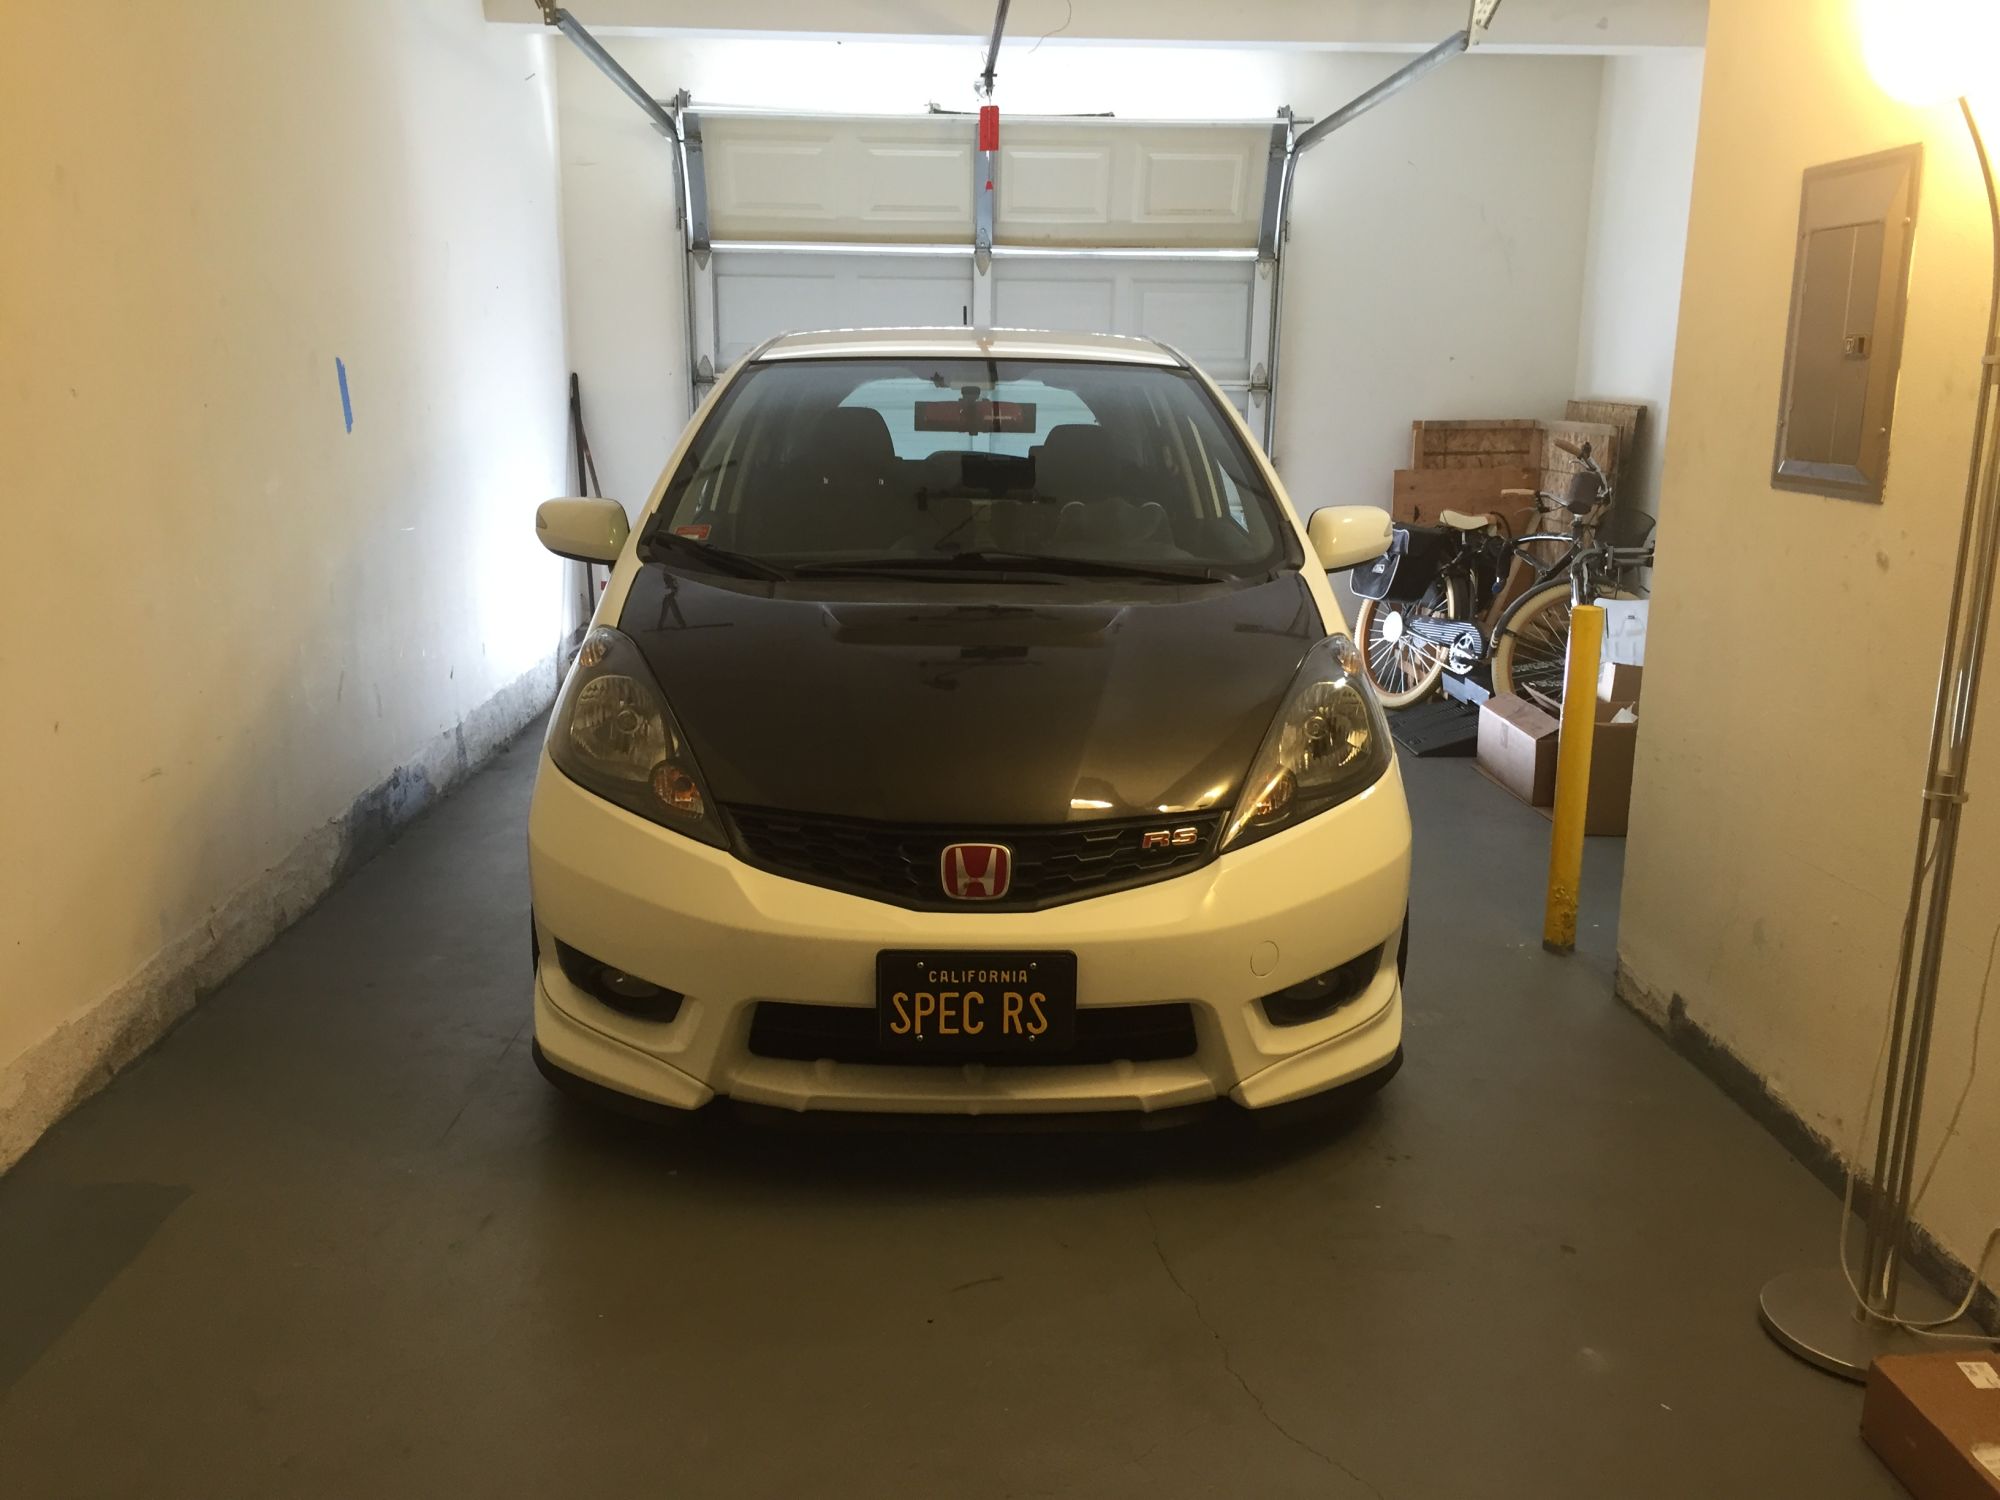
I install the grill back on the car, and this is how it looks from the front,
notice there is so much available holes for air to go through now and feed the engine bay and my Mugen Air Box... the JDP Vented Carbon Fiber Hood now have enough incoming air flow to escape through it's ventilation
Next step as part of Project Air Flow will be the addition of Louvers on the CR-Z lower engine panel cover (ala BeatRush/Laile lower engine cover) so it can vent the hot air using the stream under the car while keeping the car aerodynamics with the lower engine cover (for upper speed benefit).
at this moment, I have not install back my CR-Z lower engine panel cover because I worry it would make the car engine hot...
I am going to order the Louvers soon
Hopefully this Louvers available in time for the JDP Vented Carbon Fiber Hood and JDP Carbon Fiber Radiator Plate Cover so Project Air Flow will be complete...
I will also start ordering parts needed for Setrab Fan Pack Oil Cooler,
this way the full Active and Passive Cooling system will be complete...
All the above is a prelude to 70mm smaller pulley and Aquamist Water/Meth Injection system... I can't move to 70mm smaller pulley now since it will make the Sprintex have more heat soak with higher engine bay temp...
Stay tune for more updates on Project Air Flow
Looks like Recaro still have to wait even longer...
Third Step,
When I am about to install the Grill,
I notice that my PIAA horns is BLOCKING a large area of the radiator,
and this is NOT acceptable for Project Air Flow
I move one to the Right side, and on this right one, due to the way the wire terminal, I had to lower it using an extension bracket:
The left one don't need an extension bracket so I just move it to the left,
oh, both of them mounted piggy back on the bolt that secure the A/C condenser bracket:
Finished result... but wait, not only it look imbalance,
but I just notice the left side that is not lowered actually blocking the most left honeycomb holes that I just drilled on my grille, making it a waste of time... and this is NOT acceptable for Project Air Flow
So I lower the left horn too using another extension bracket, (both extension bracket painted black of course for the stealth look
)Finally both horns now looks balance and no more blocking air
I install the grill back on the car, and this is how it looks from the front,
notice there is so much available holes for air to go through now and feed the engine bay and my Mugen Air Box... the JDP Vented Carbon Fiber Hood now have enough incoming air flow to escape through it's ventilation
Next step as part of Project Air Flow will be the addition of Louvers on the CR-Z lower engine panel cover (ala BeatRush/Laile lower engine cover) so it can vent the hot air using the stream under the car while keeping the car aerodynamics with the lower engine cover (for upper speed benefit).
at this moment, I have not install back my CR-Z lower engine panel cover because I worry it would make the car engine hot...
I am going to order the Louvers soon
Hopefully this Louvers available in time for the JDP Vented Carbon Fiber Hood and JDP Carbon Fiber Radiator Plate Cover so Project Air Flow will be complete...
I will also start ordering parts needed for Setrab Fan Pack Oil Cooler,
this way the full Active and Passive Cooling system will be complete...
All the above is a prelude to 70mm smaller pulley and Aquamist Water/Meth Injection system... I can't move to 70mm smaller pulley now since it will make the Sprintex have more heat soak with higher engine bay temp...
Stay tune for more updates on Project Air Flow
Looks like Recaro still have to wait even longer...
Last edited by BMW ALPINA; 08-28-2016 at 10:02 PM.
#3
08-29-2016, 04:57 PM
Project Air Flow works well
I drive on freeway today, usually my Defi Water Temperature Gauge show around 80 to 85 Celsius under steady crusing speed today it show between 73 to 75 Celsius.
So an improvement of around 7 to 10 Celsius on average just by drilling more holes on the grills combine with relocating the 2 large PIAA horns really help my car run cooler.
Another important clue is the Scangauge show the timing on average above 20 to 30 (advance), while before the timing was around 15 or below.
I can't wait for the JDP Vented hood to arrive couple with the louvers for the CR-Z lower engine cover.
That should help improve and manage the air flow even better.
#4
08-30-2016, 10:49 PM
as part of Project Air Flow, I also want to add protection for my A/C condenser and future Setrab Oil Cooler which will be located in front of the A/C condenser thus even more prone to damage from flying rocks.
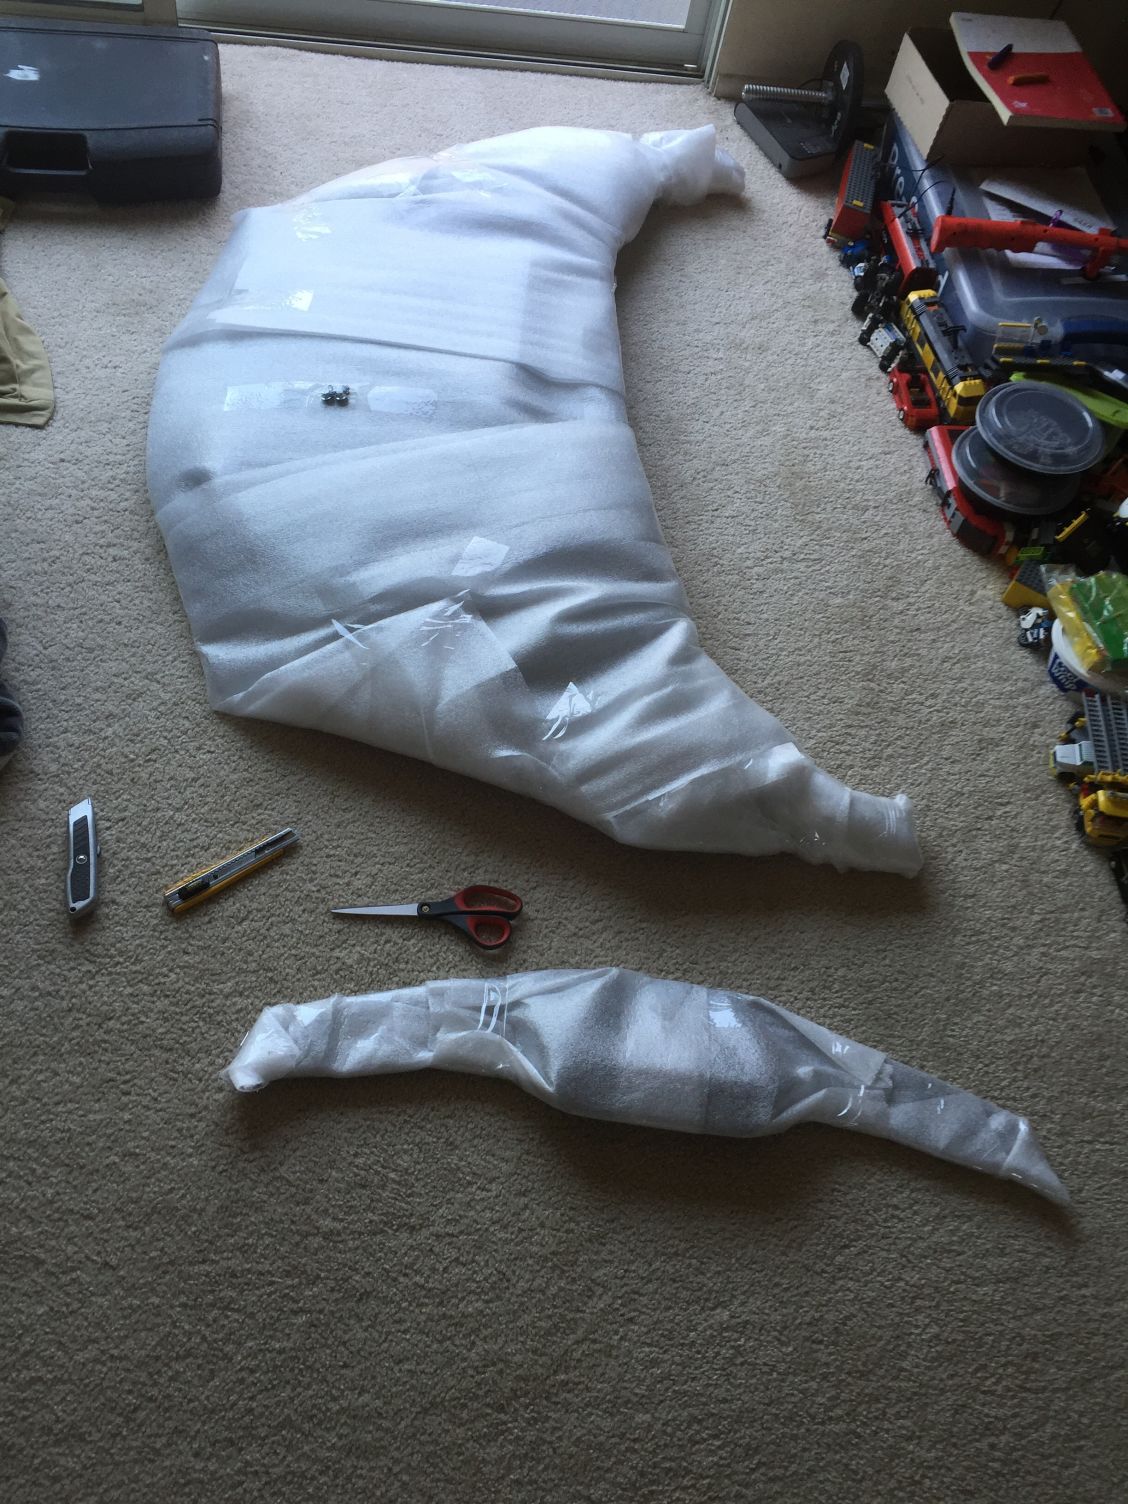
I bought this Stretchable Molded Polyethylene Mesh Screen from McMaster-Carr, below is the link and just arrive today and ready for install:
McMaster-Carr
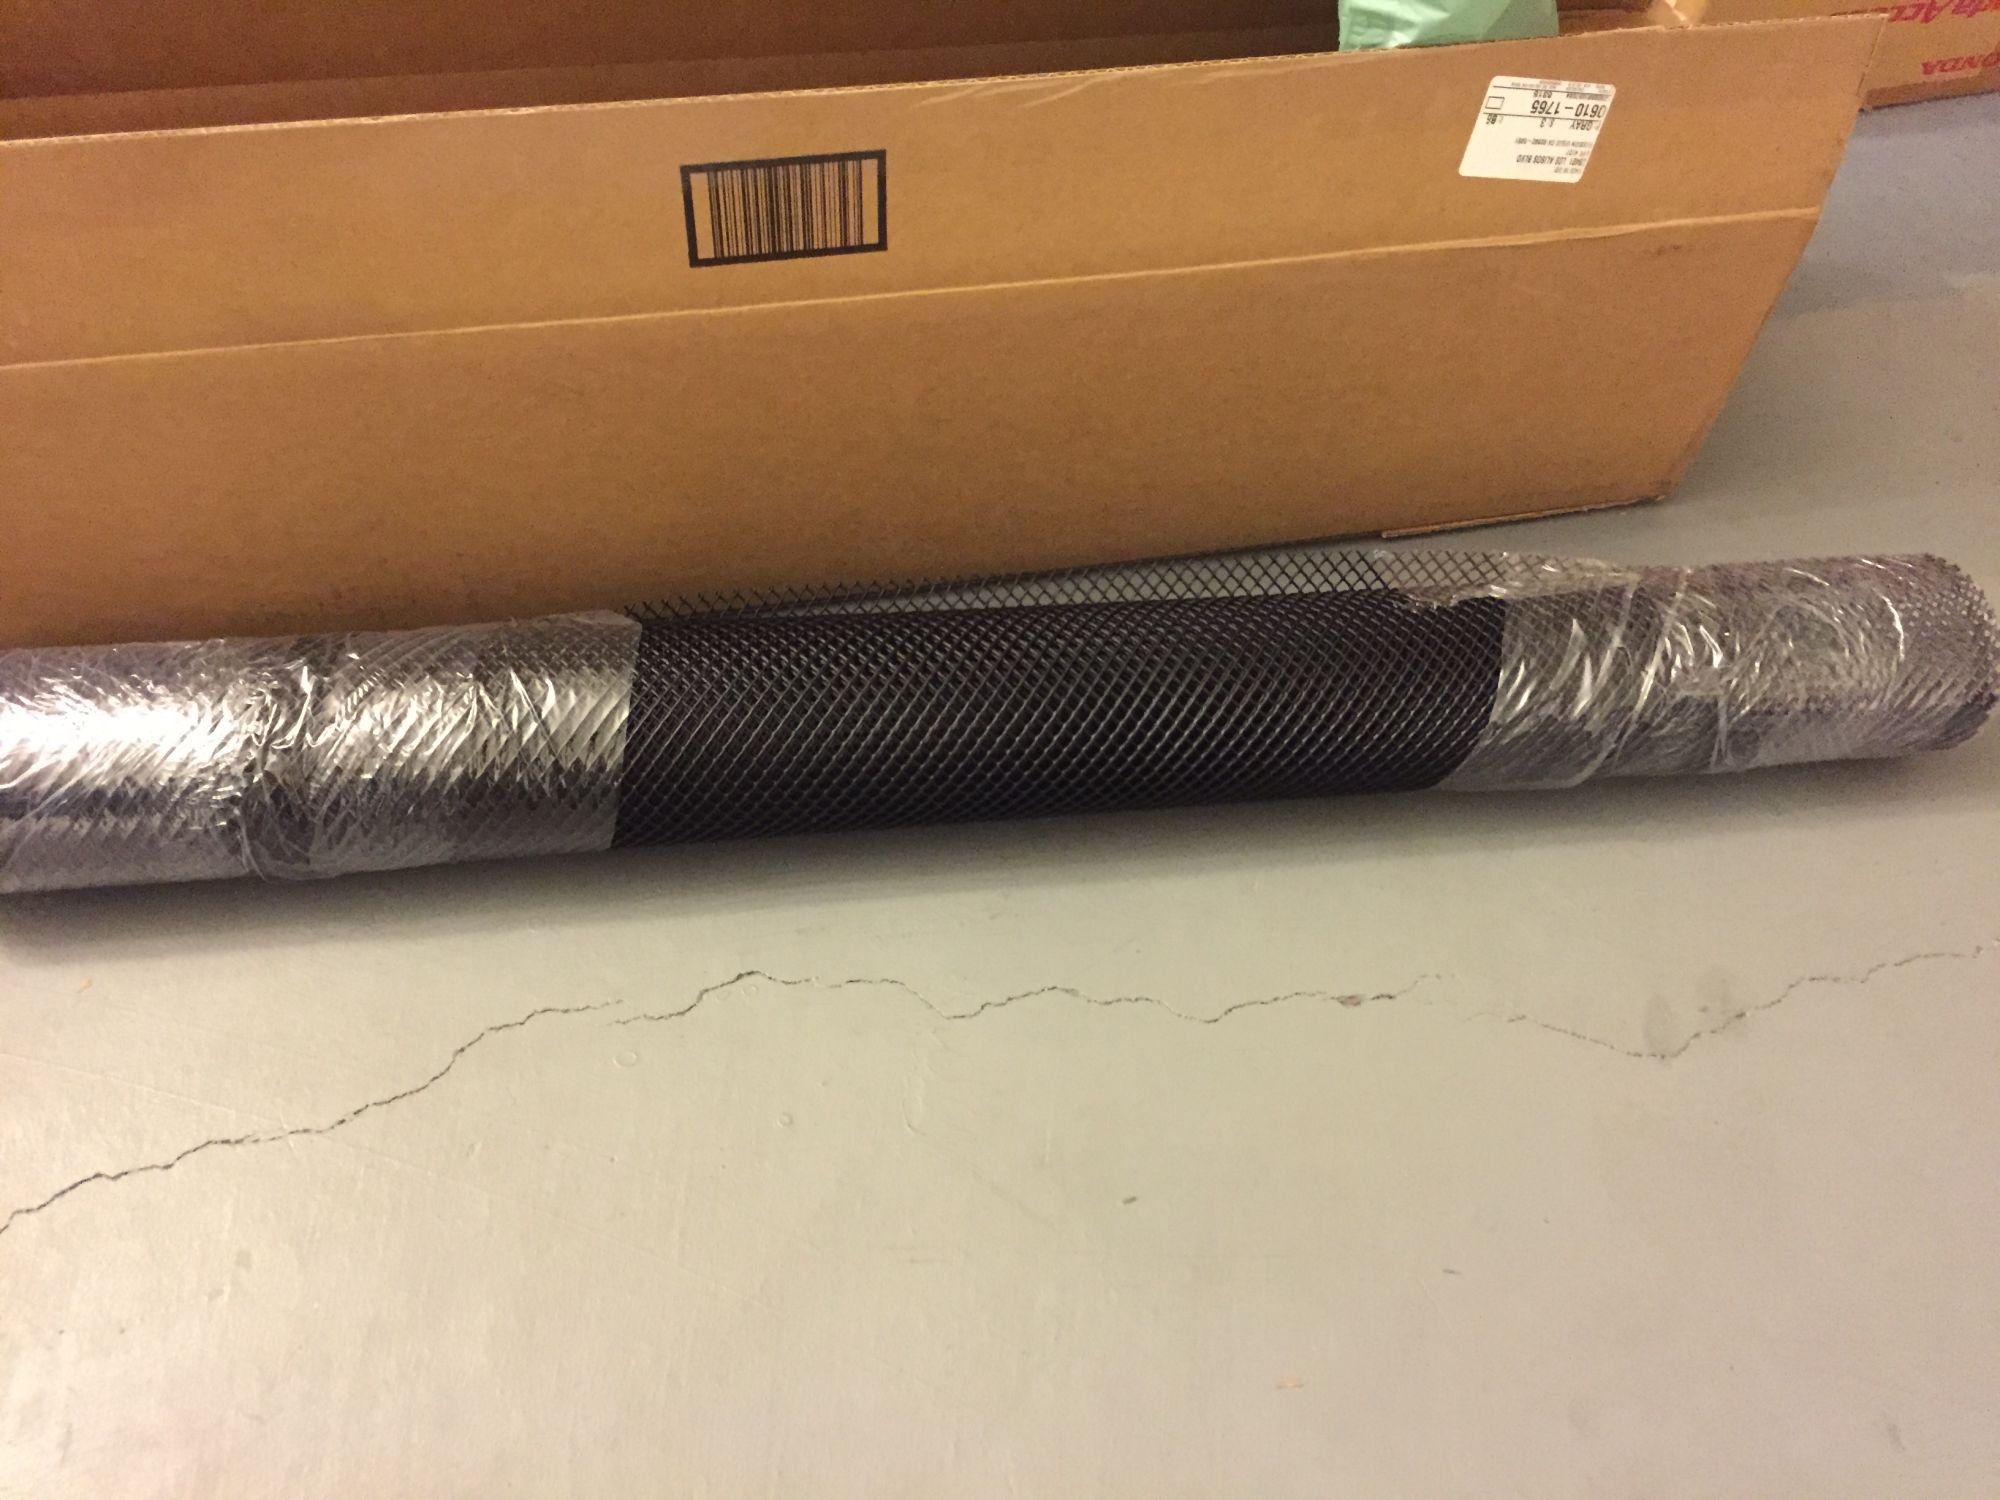
You have to take off the upper radiator plate cover and upper grill,
and then you can easily slide the mesh screen from the top and then use tie lock to secure it.
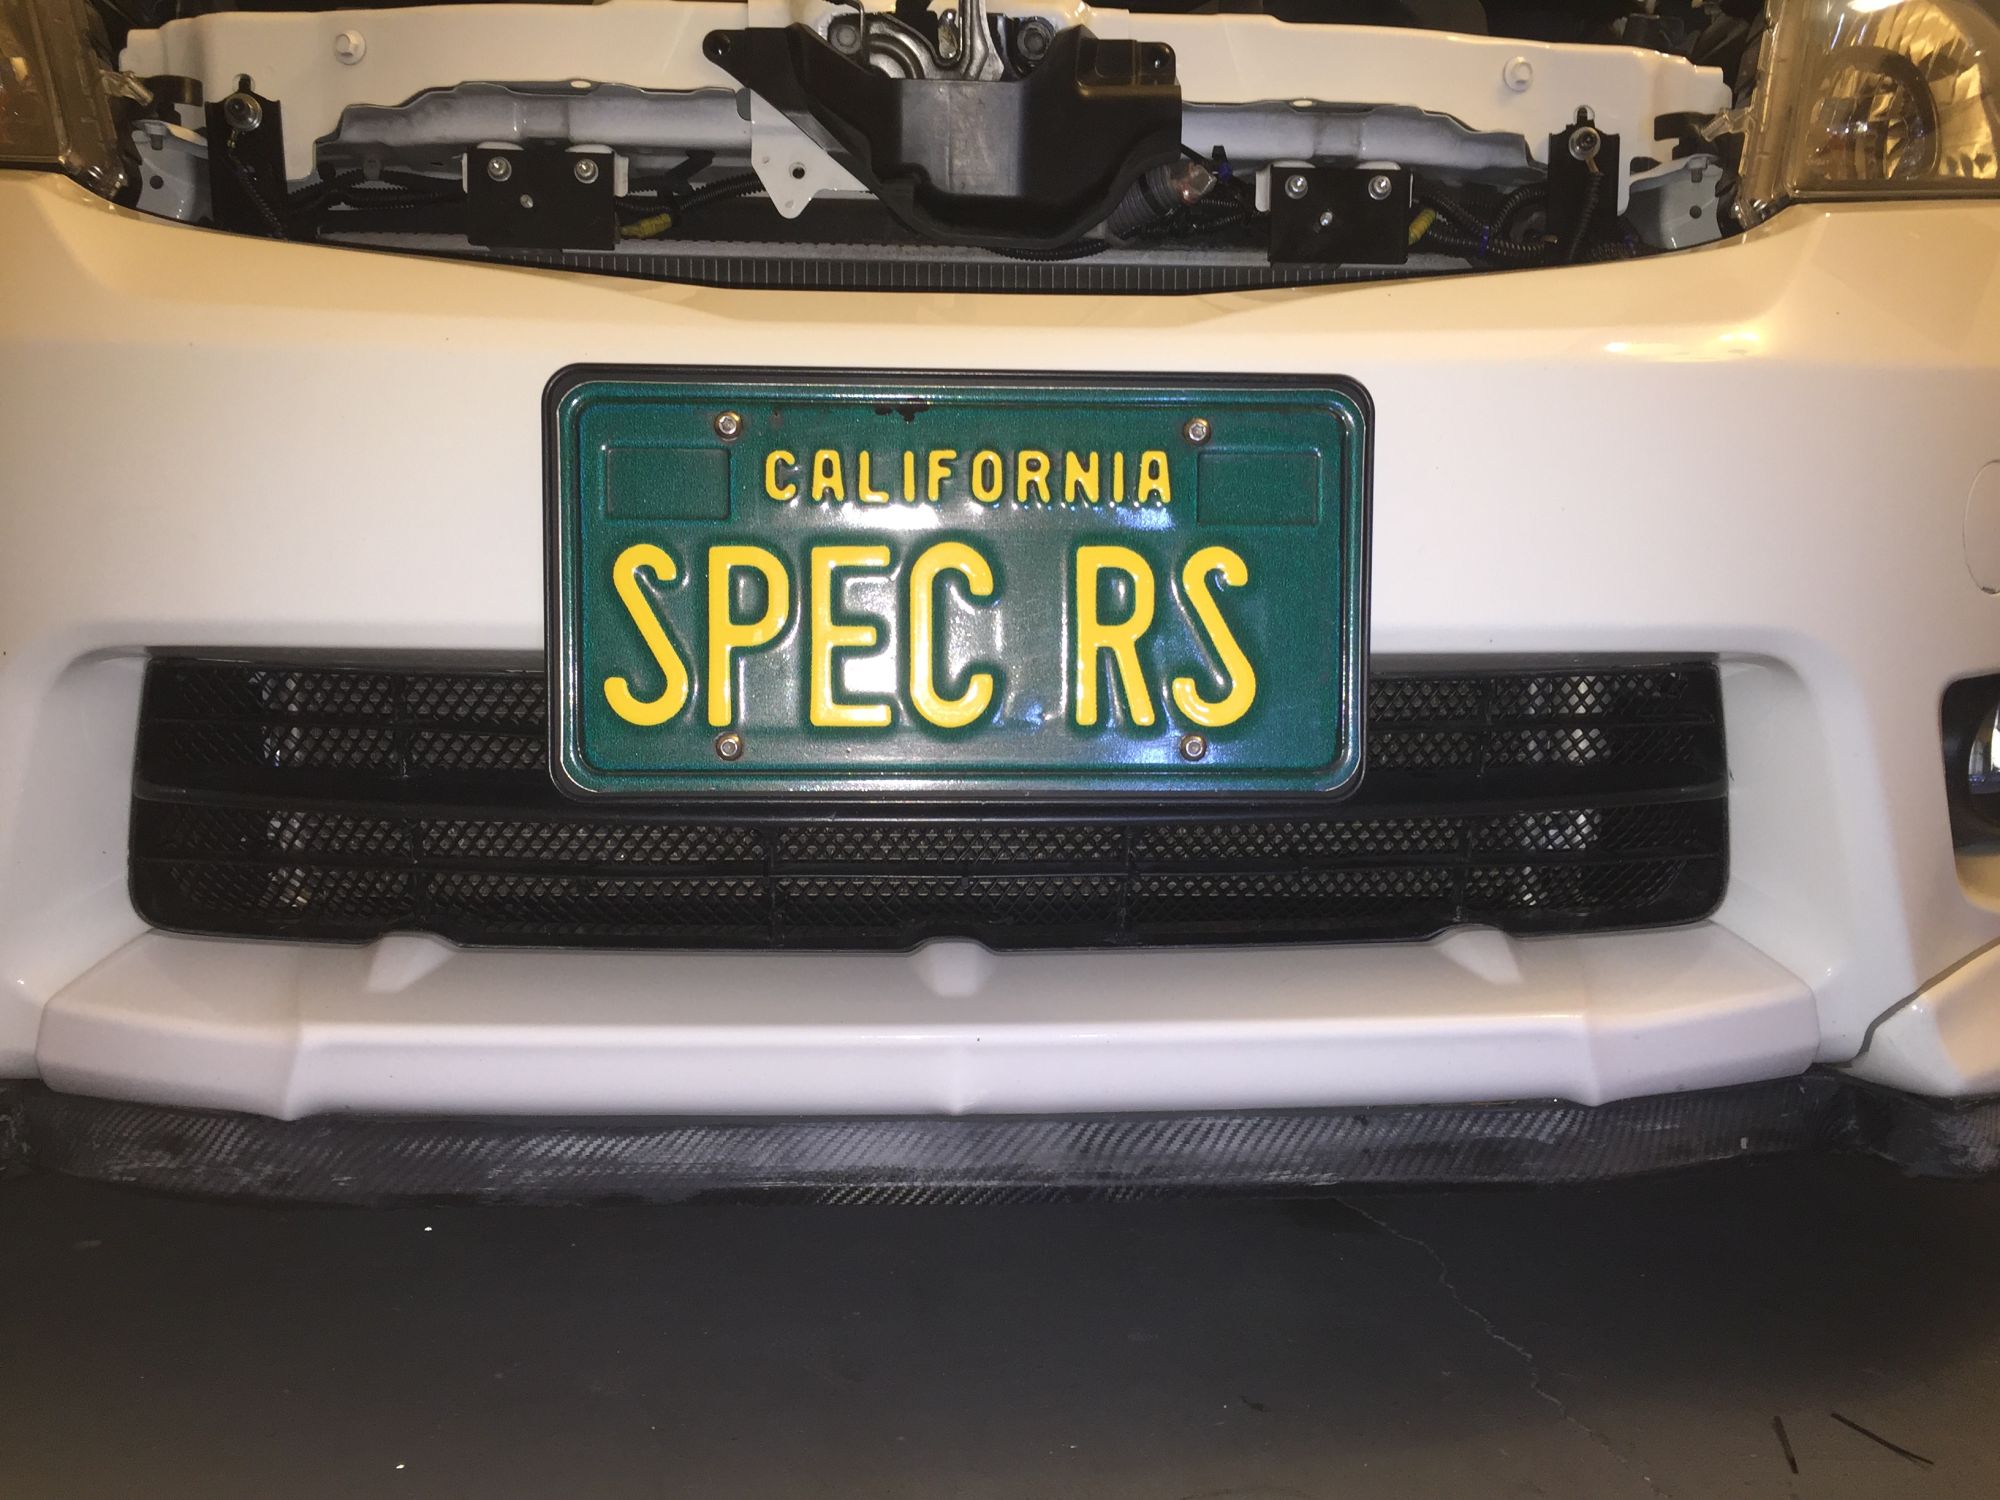
It also make the car looks nicer like a higher end car
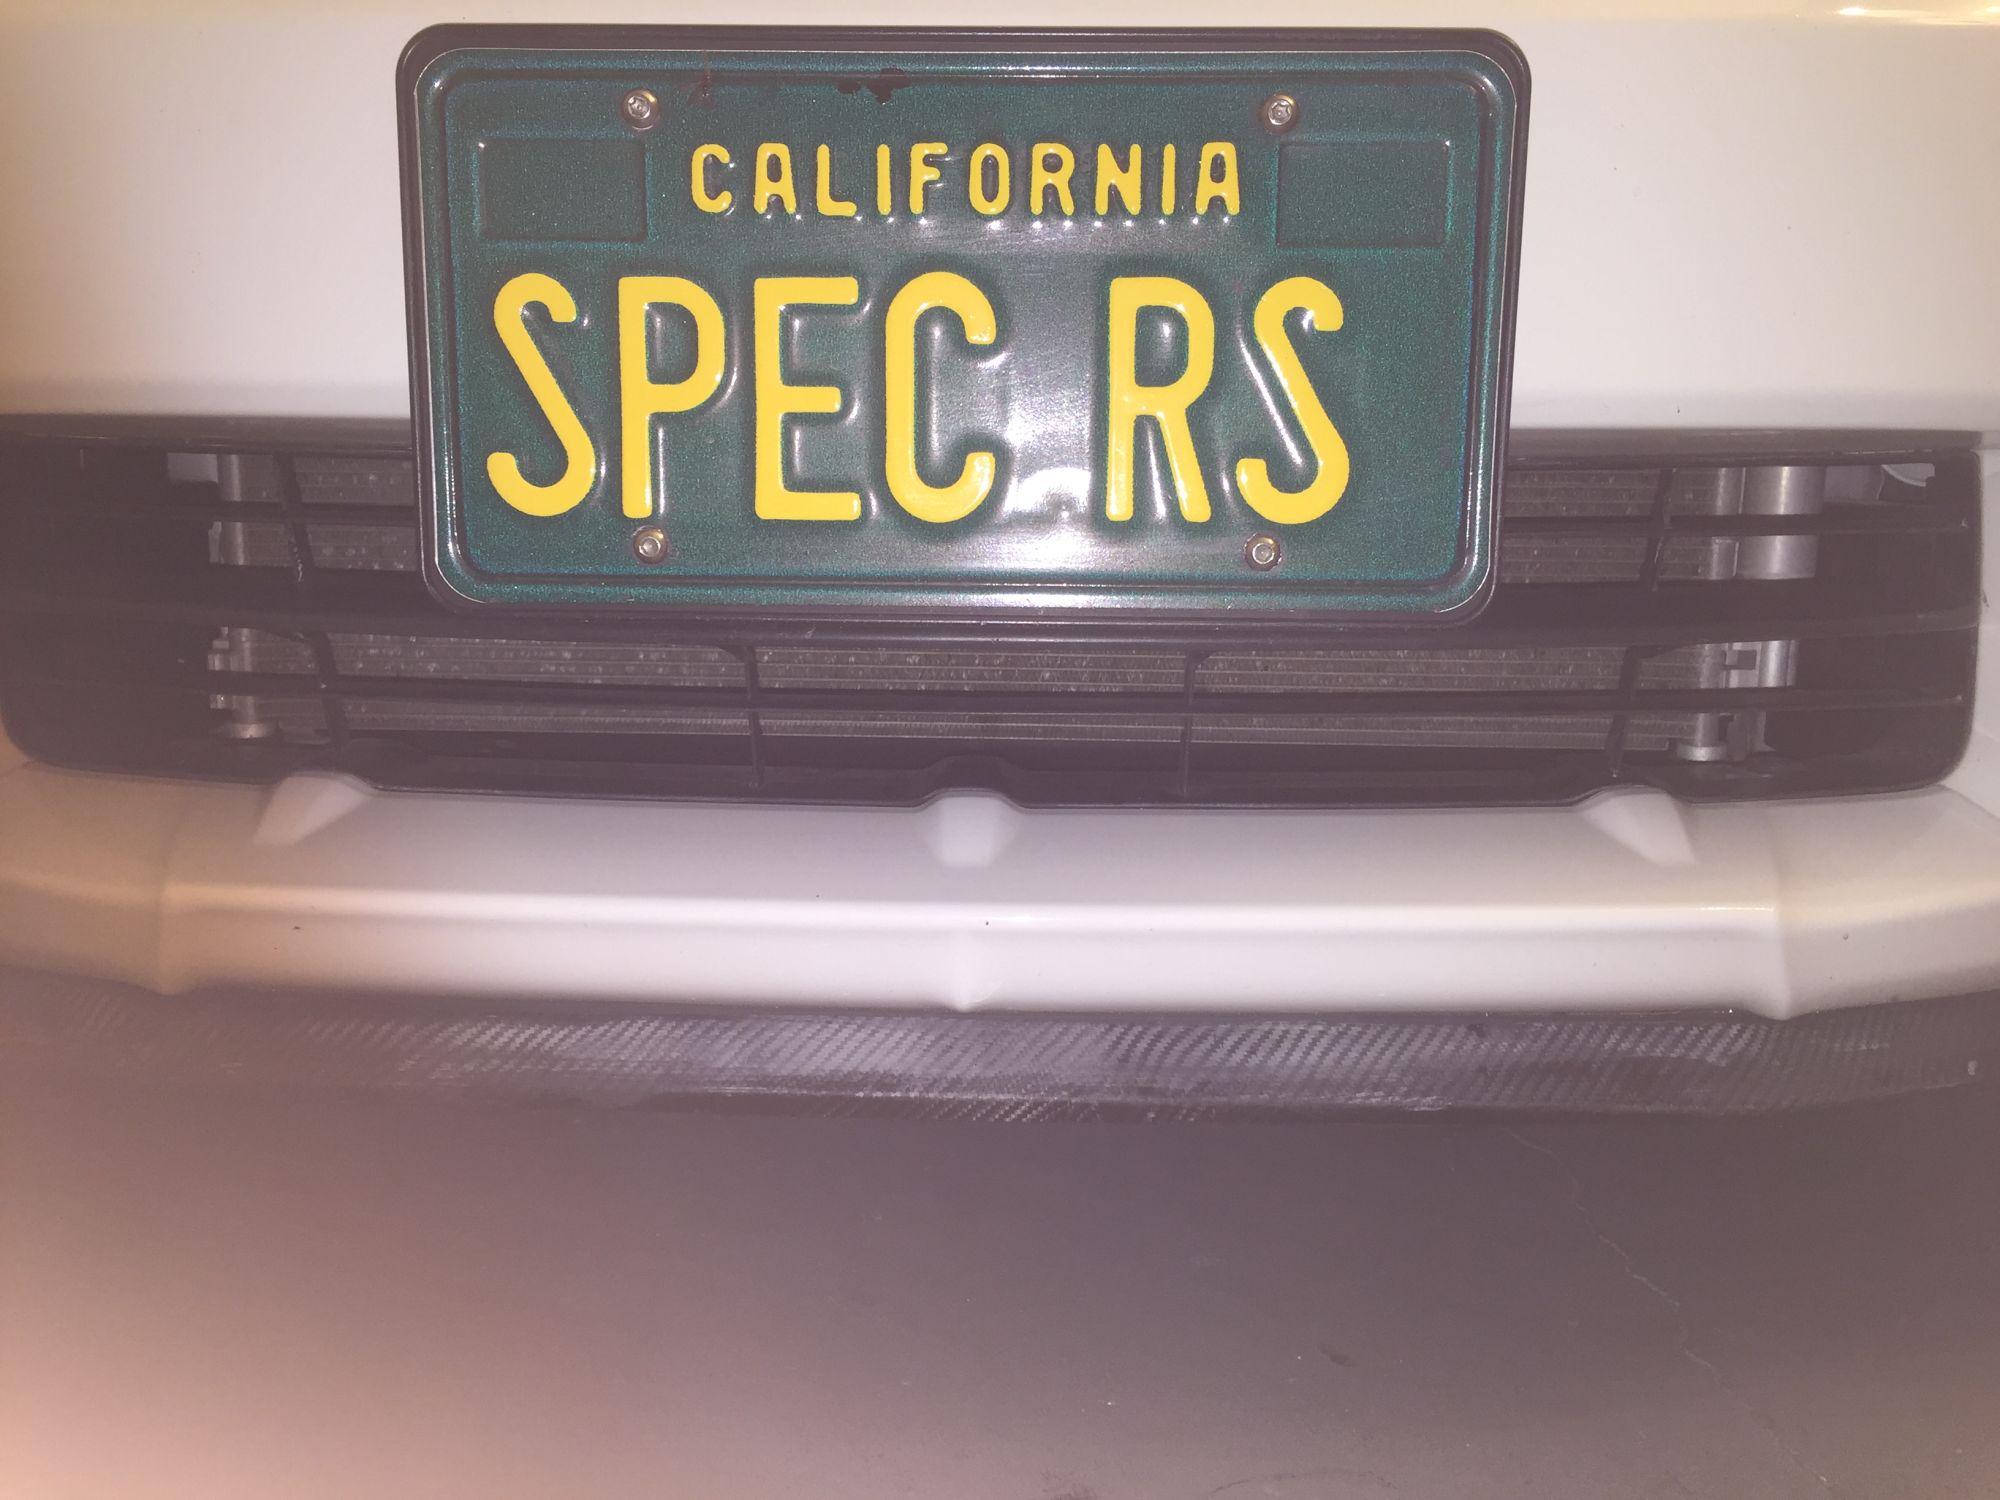
Before:
After:
Ah, I need to put a new 3M wrap on my lower rubber lips... next time, too tired today
I bought this Stretchable Molded Polyethylene Mesh Screen from McMaster-Carr, below is the link and just arrive today and ready for install:
McMaster-Carr
You have to take off the upper radiator plate cover and upper grill,
and then you can easily slide the mesh screen from the top and then use tie lock to secure it.
It also make the car looks nicer like a higher end car
Before:
After:
Ah, I need to put a new 3M wrap on my lower rubber lips... next time, too tired today

#6
08-31-2016, 02:06 PM
Hi,
I don't have a build thread, because I prefer to share my DIY per topic so if someone google that exact topic they will the exact DIY that I did so far.
The other way to find all my modification is if you search all the thread I had created so far on this forum from my profile pages because most of the thread I created are DIY of my modification.
Thanks
#7
09-01-2016, 04:51 PM

I once had to fix a large AC system that was not flowing enough air, they had bird screens with 1" wire mesh, kinda like chicken wire, by removing it I got 40% more air flow through the system. (It was installed by their on site maintenance tech without checking with anyone because he had swallows getting in.. ) We replaced it with a special laminar screen that only hit it for about 8% flow resistance and problem was solved..
#8
09-01-2016, 05:06 PM
I once had to fix a large AC system that was not flowing enough air, they had bird screens with 1" wire mesh, kinda like chicken wire, by removing it I got 40% more air flow through the system. (It was installed by their on site maintenance tech without checking with anyone because he had swallows getting in.. ) We replaced it with a special laminar screen that only hit it for about 8% flow resistance and problem was solved..
Thanks for the information,
Could you please give me the brand/type of that special laminar screen?
and where can I purchase them?
Thanks
#9
09-02-2016, 10:26 AM

It looks like there's a few inches of clearance between the S/C and the hood. Do you think it's possible to fabricate some kind of aluminum heatsink like computers use to mount onto it?
#10
09-02-2016, 10:37 AM
Hi, the clearance there are very tight,
there are ARC Cooling fins (stick on heat sink),
but since the top of the supercharger already cooling fins, it won't have much area to stick on top of it for proper heat transfer.
I am ordering the vented JDP carbon fiber hood that should let air flow more right on top of the supercharger...
#11
09-02-2016, 10:42 AM
I didn't know those arc cooling fins existed thanks.
My thought was that the 'fins' on the s/c are running perpendicular to actual air flow under the hood.
My thought was that the 'fins' on the s/c are running perpendicular to actual air flow under the hood.
#12
09-04-2016, 02:35 PM
I pick up JDP Engineering Carbon Fiber Vented Hood and Carbon Fiber Upper Radiator Plate today


I will install it today
I will install it today
#13
09-04-2016, 06:01 PM
I just got my hood and have some fitment issues. Had to drill out 2 hinge holes, remove the 2 middle bumpers, lower the outer 2 bumpers all the way and remove the plastic cover for the radiator / hood latch
#14
09-04-2016, 07:43 PM
The drilling out of the 2 hinge holes, you must mean drilling the holes on the factory metal hinges to adjust more right?
Can you please take picture and post it here?
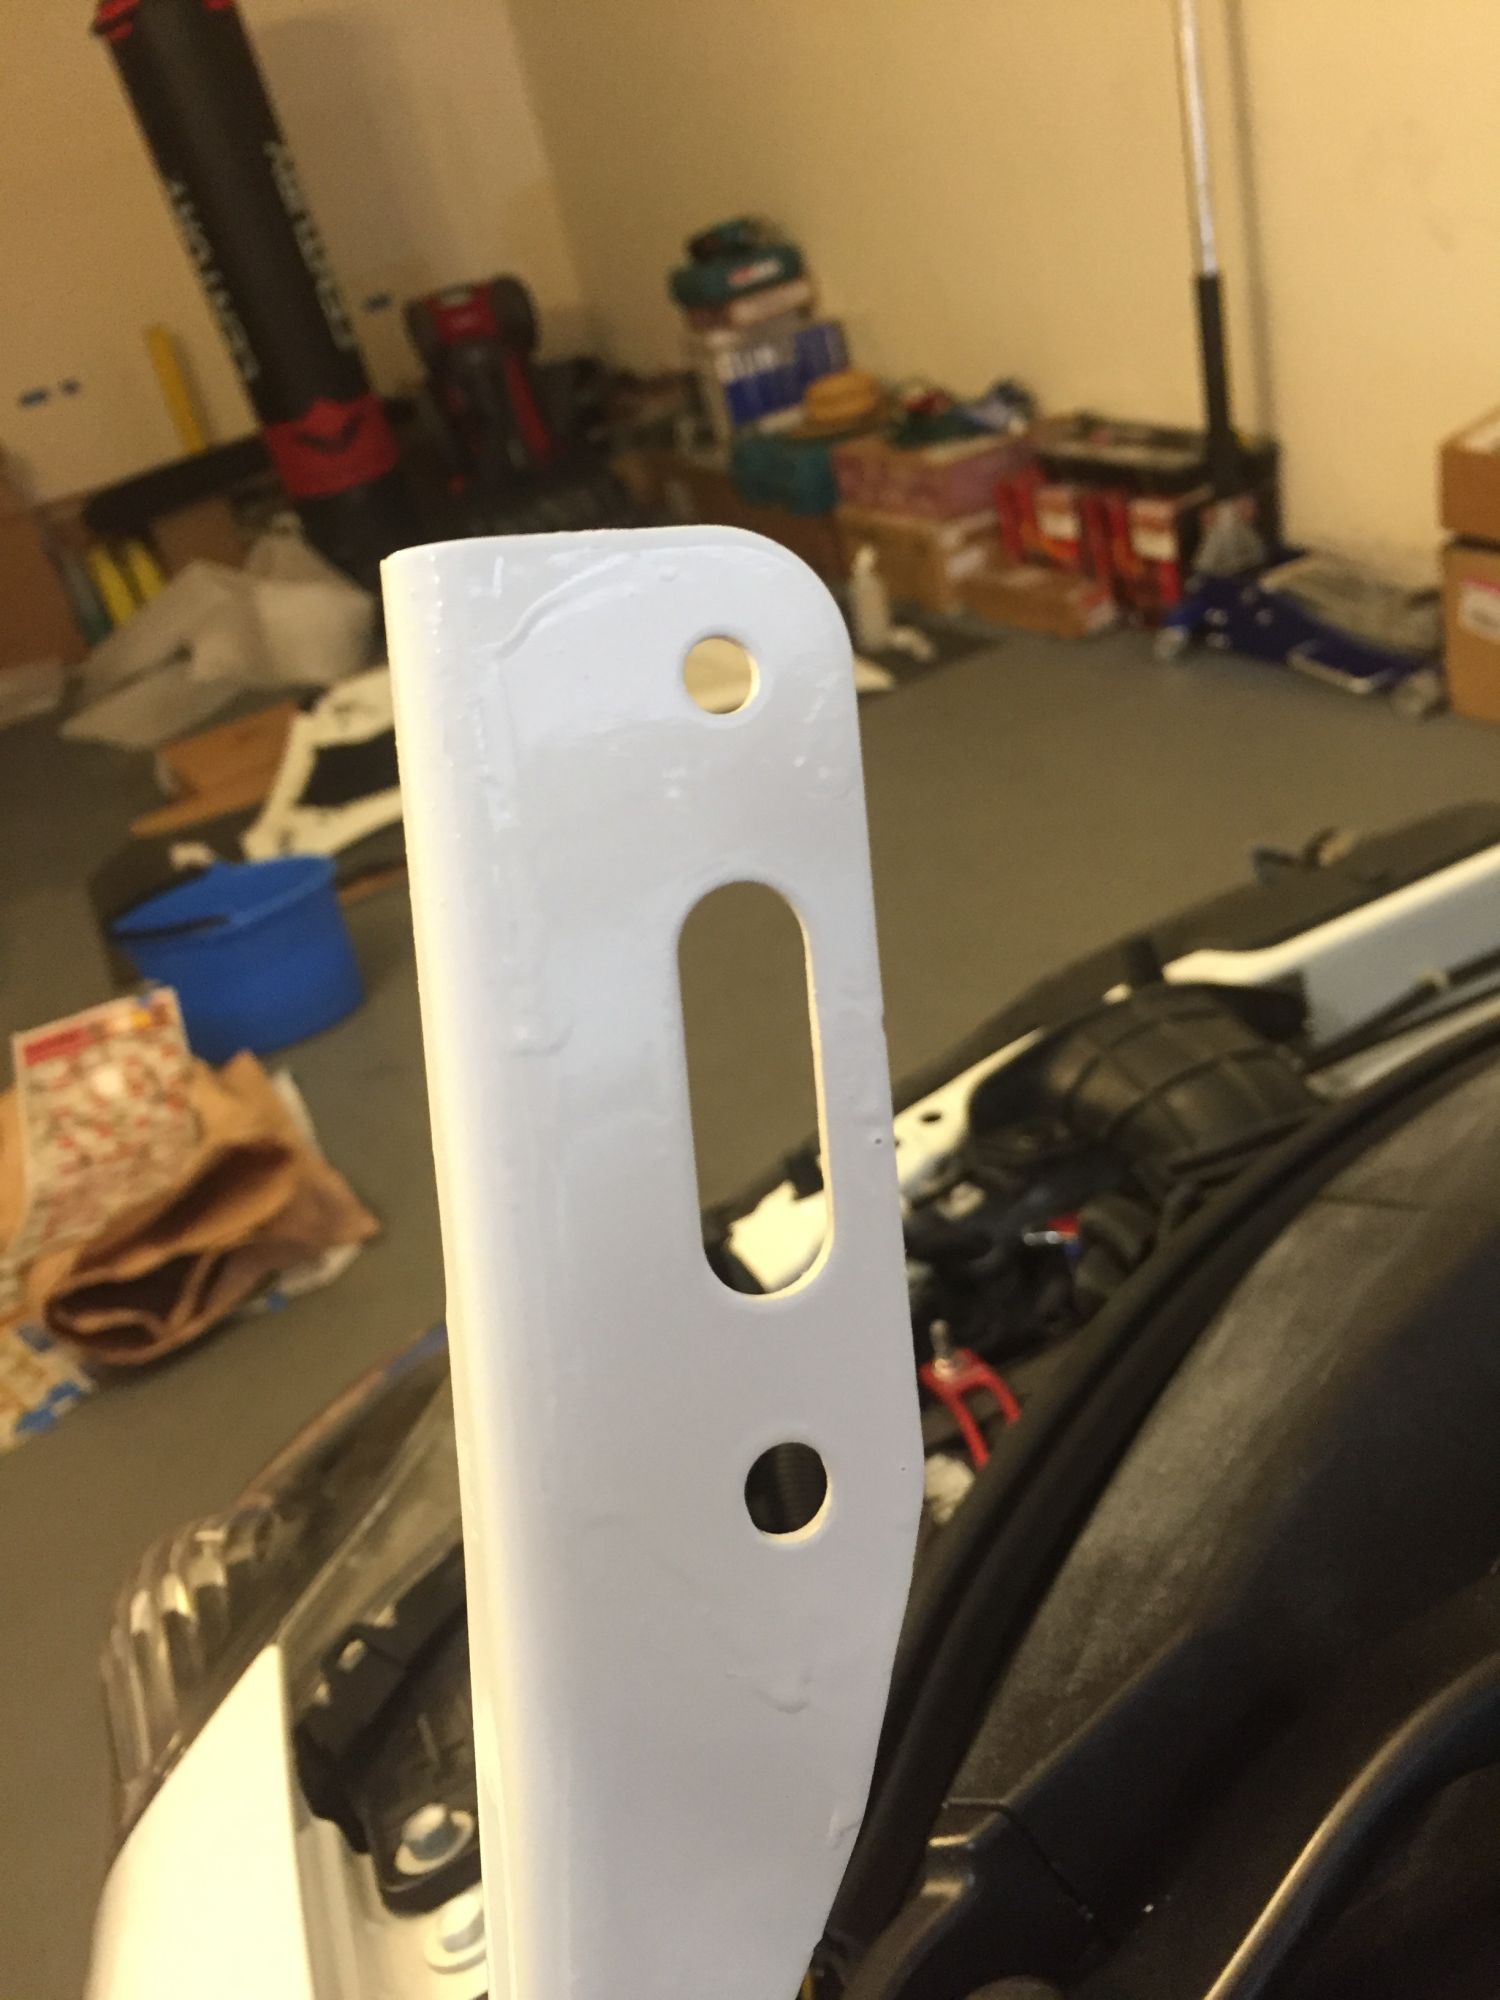
I am going to install mine tomorrow because I just painted the factory hinges (and need to wait until it dry...
since the flat surface of the hinges that meet/bond with the factory OEM hood were bare metals... looks like the Honda factory in Japan connect the hinges to the hood first before they paint it then bolted the lower bolt of the hinges to the body during assembly lines...
Thanks
here is the picture of the factory hinges that I paint:
Last edited by BMW ALPINA; 09-04-2016 at 07:49 PM.
#15
09-04-2016, 08:32 PM
I have the same vented hood as you.
I'll get pictures tomorrow. I want to email them and see what they say.
Yes the top bolt hole of the hinge had to be drilled out. That didn't bother me so much as the fact that the hood barely latches shut and when it does there's a lot of tension. I think the hood bends a little. When you pop the hood it pops up with a lot of force. It sits a little lower than the edge of the headlights. This is my first cf hood so I don't how common this is. I can live with it as long as the hood doesn't break from the tension.
#17
09-04-2016, 09:40 PM
that replace the plastic that you remove to make your hood able to shut...
so it my vented hood had the same problem as yours, then I will not be able to use that piece...
it is fully functional just like the original plastic cover...
this CF one is just more beautiful plus it remove the middle slat on the flow for the airbox vent... so it will flow slightly more air to the air box...
#18
09-05-2016, 12:29 AM
Ok, I just read the Honda Factory Service Manual on how to align the hood.
The 2 hinges are adjustable left right front rear, the bolt that have this adjustment is the bolt on the hinges that connect to the body of the car (not the bolt that connect to the hood itself).
So to do this, first remove the wiper and plastic cowl cover, then loosen the 4 bolts that connect the hinges to the body of the car.
after that, you might need to adjust the locking mechanism itself,
of course you need to remove the upper radiator cover plate to do this,
the locking mechanism can be adjust up down left and right...
Once you are done, you need to touch up pain the exposed metal that is not painted
that is now exposed after the hinge adjustment.
I will report more when I install my hood tomorrow.
#19
09-05-2016, 06:10 PM
Ok, continue with the install process:
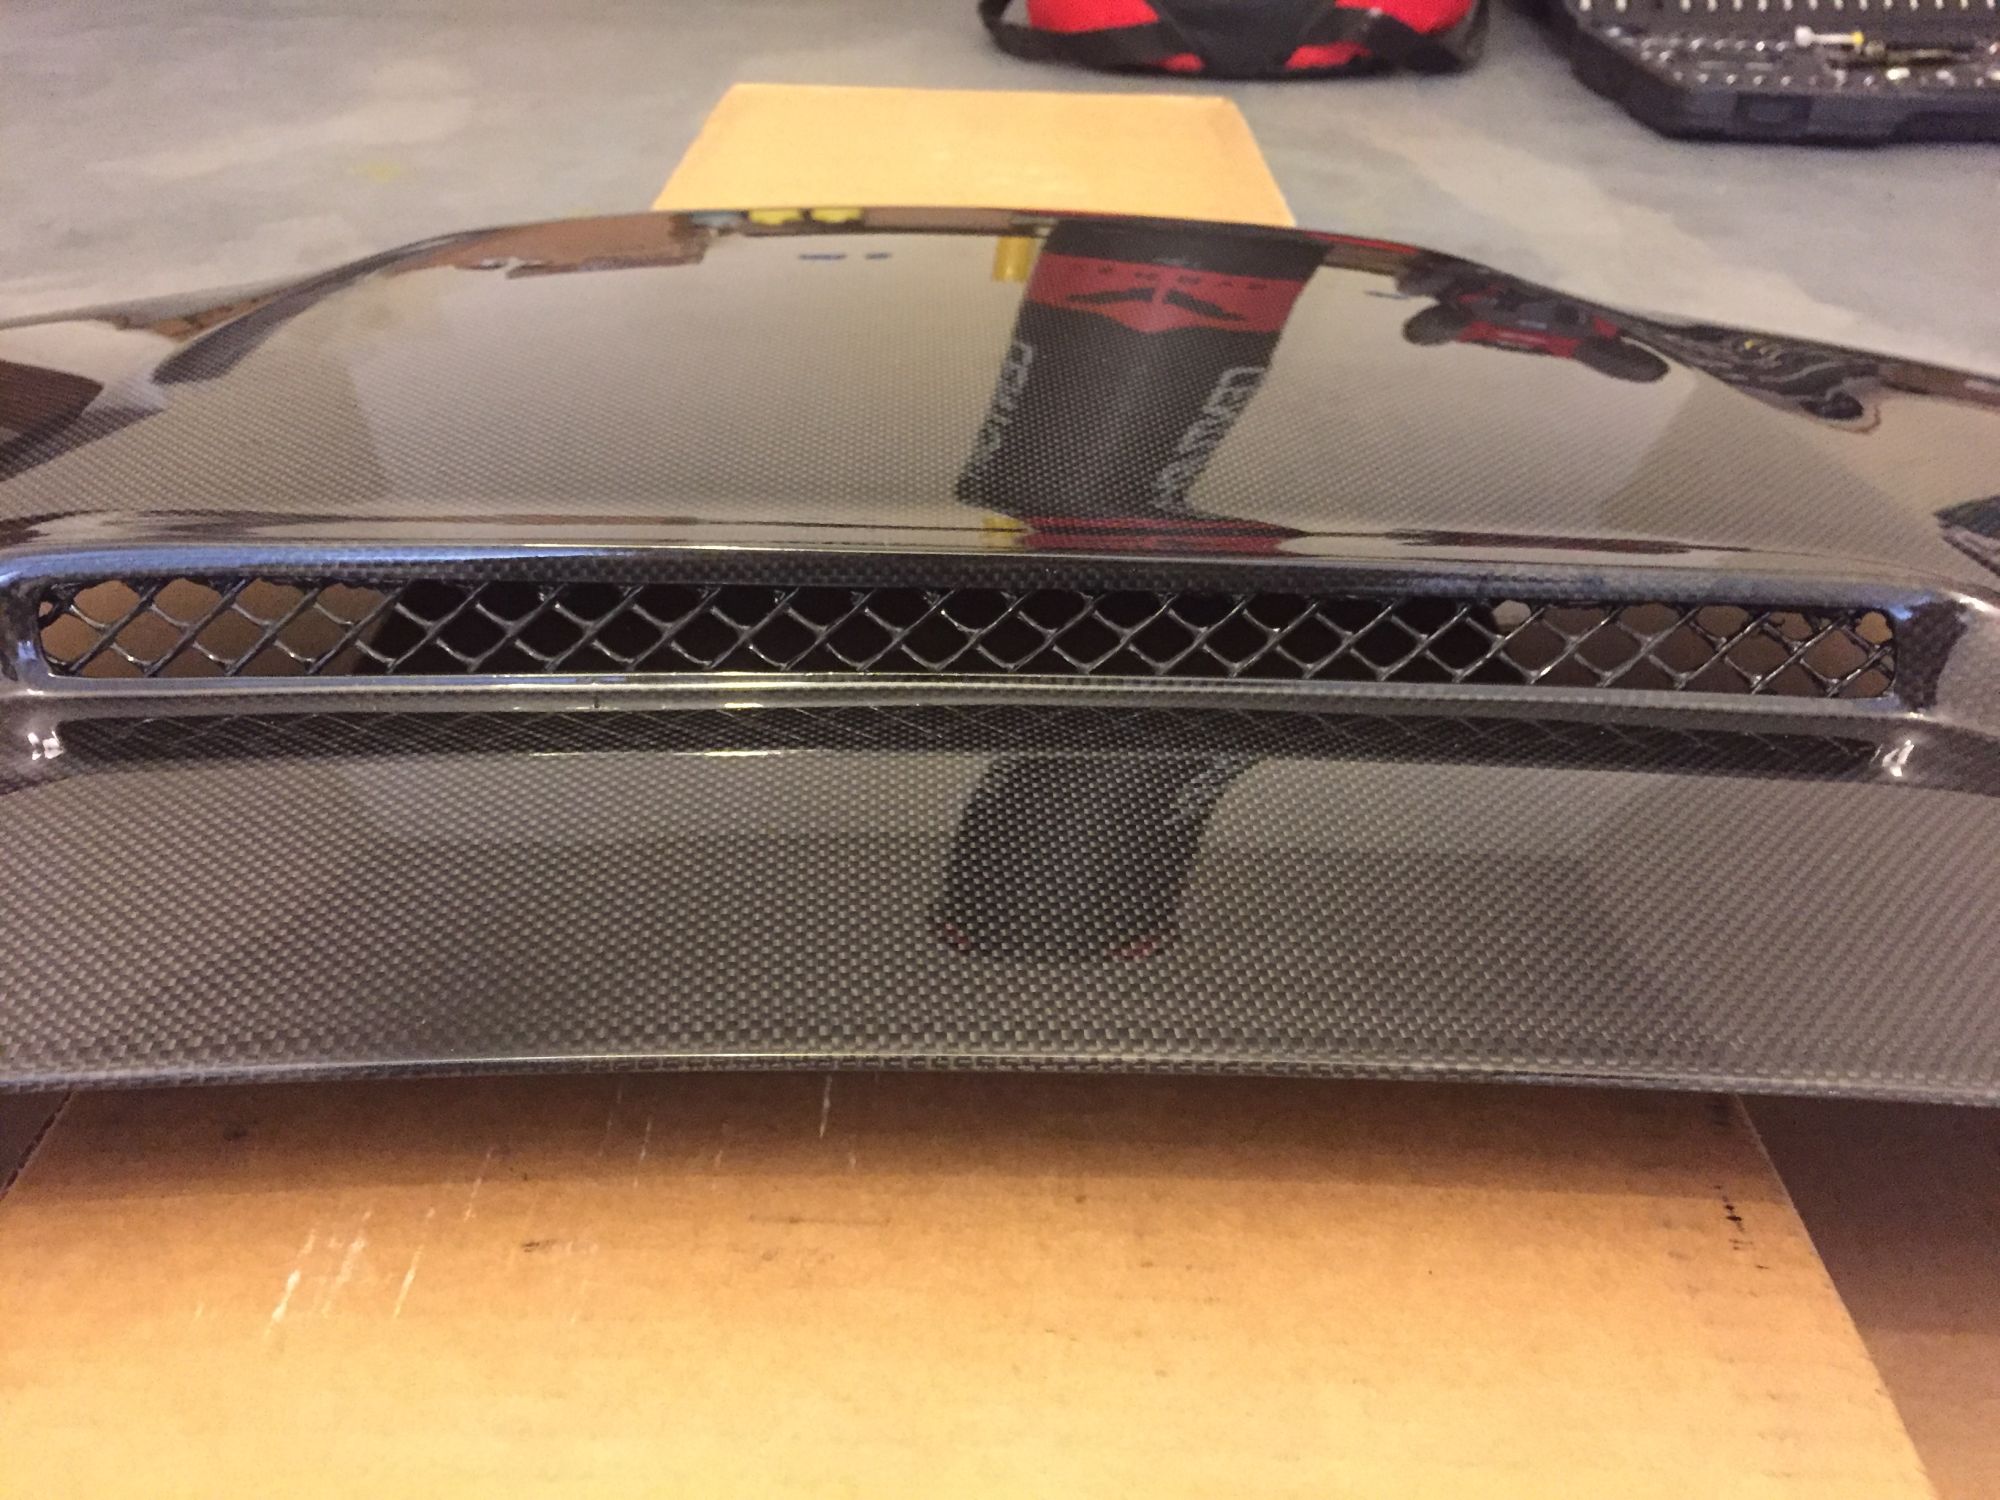
I notice some missed paint of the epoxy used to attached the honeycomb grill to the ventilation holes:
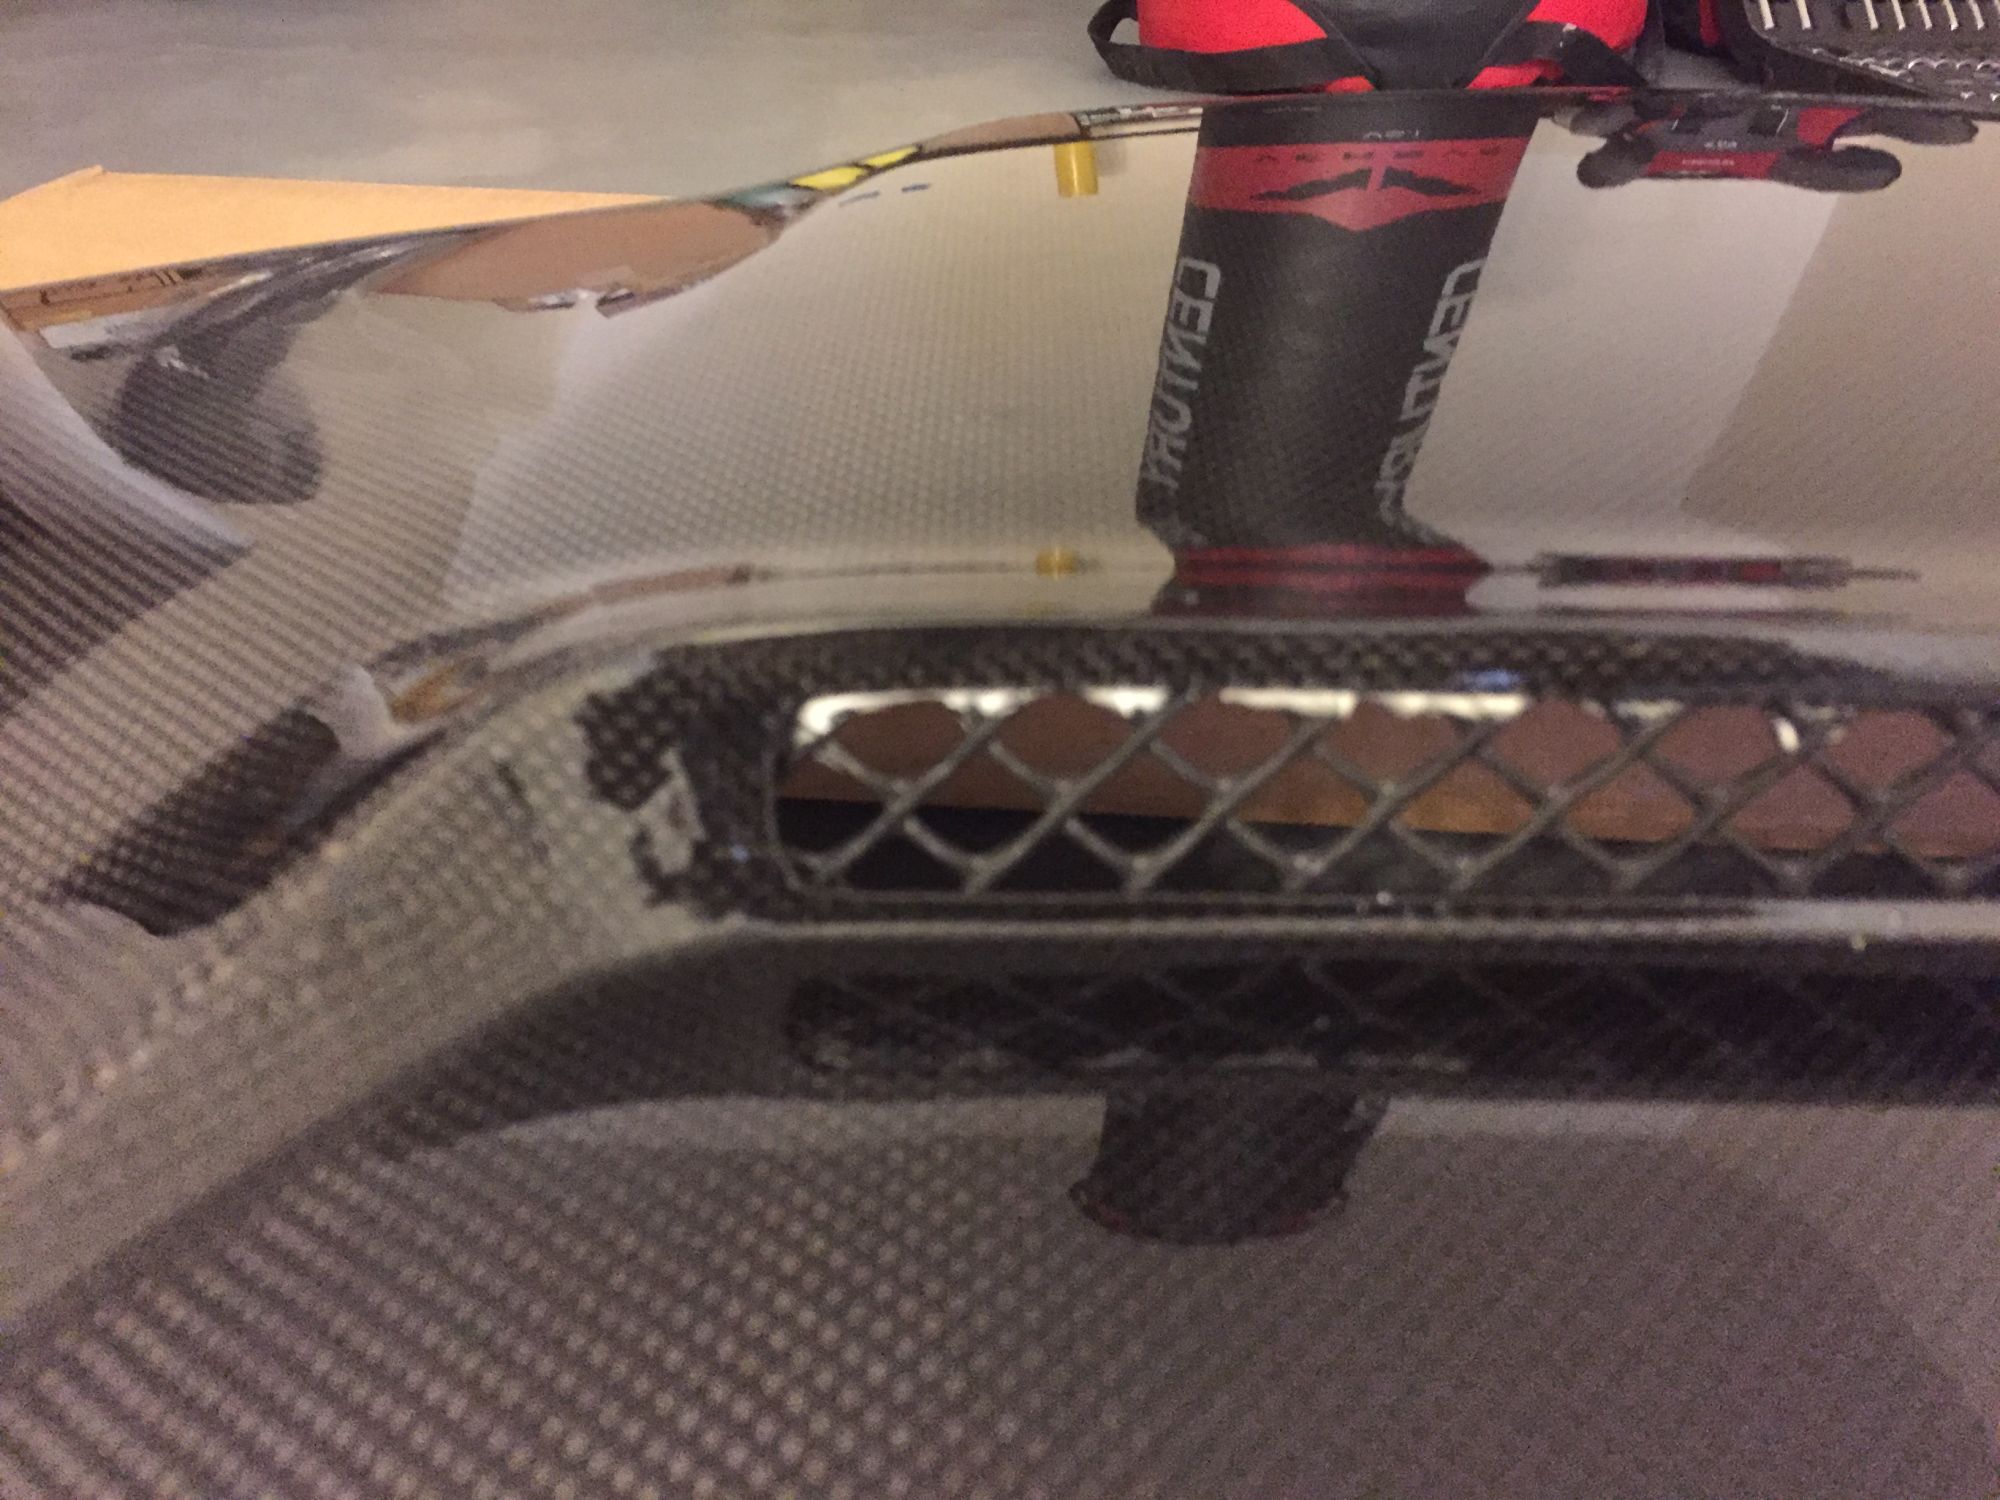
So I paint them with black paint:
After I install the hood to the hinges, I try to close the hood and it won't close... I then proceed to loosen the 4 bolts that hold the hinges to the car body, it you don't have a long rachet like what I have on the picture below,
you will need to take out the wiper arm than the wiper cowl plastic cover,
but I happened to have this long 10mm rachet with flexible head so I can access it from the side, the picture below will show what I mean:
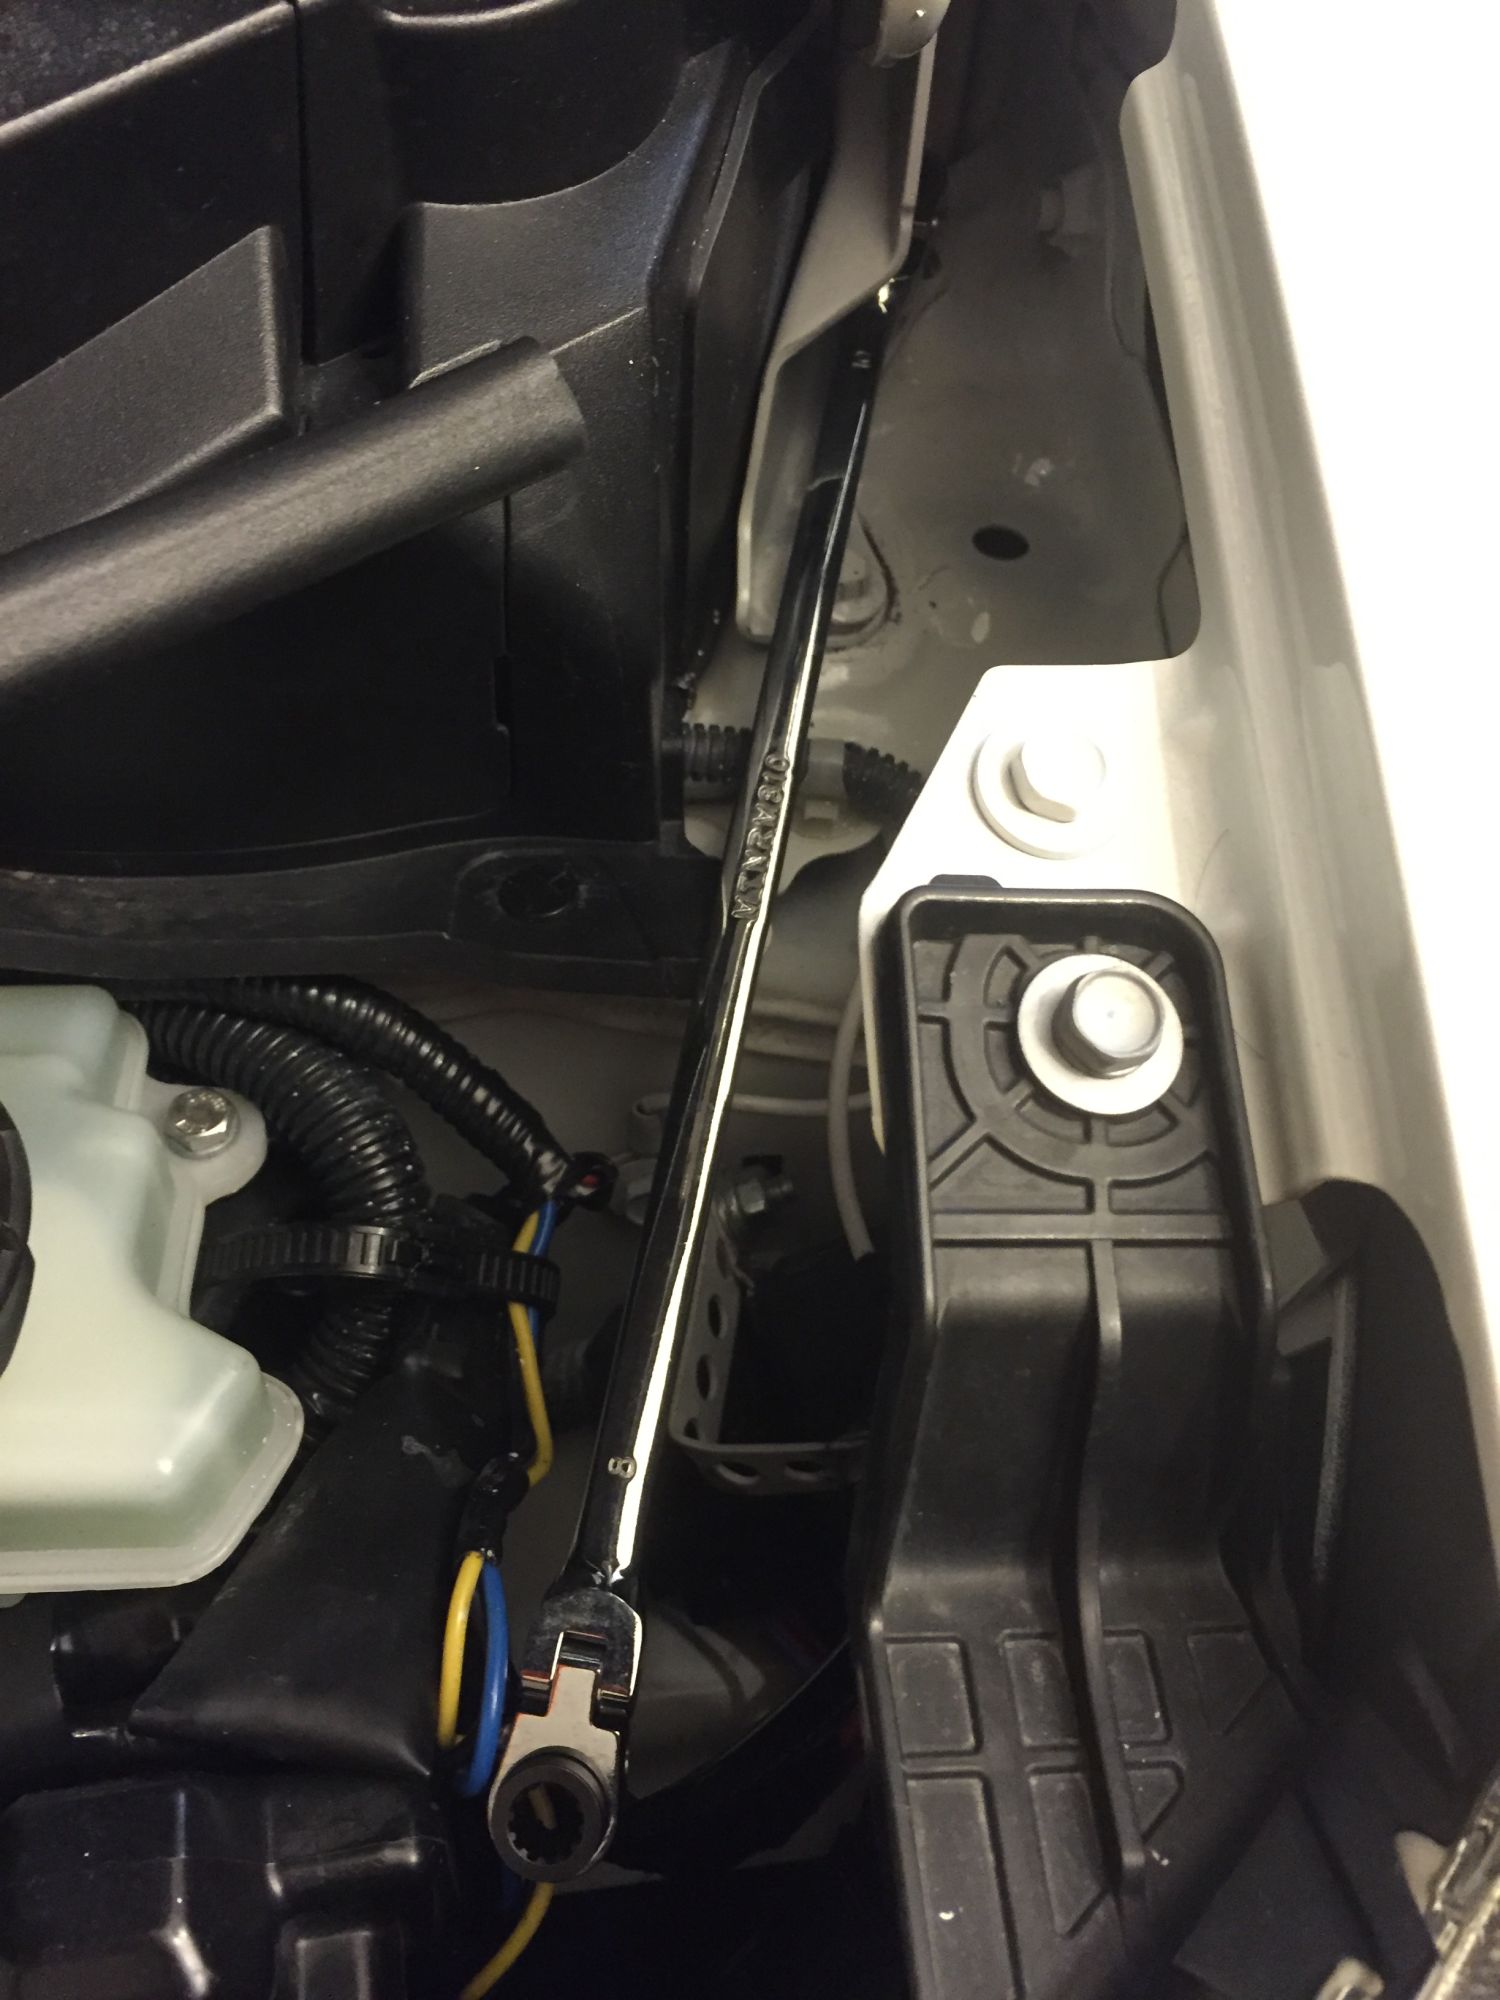
So what I did is move the hinges toward the front and slightly to the right (towards the passenger side).
I also need to move the front locking mechanism UPWARD and to the Left (towards the driver side).
Again since I have this long rachet with flexible head, I don't have to open the plastic cover that cover the locking mechanism. I do need to take out the upper radiator plate cover though...
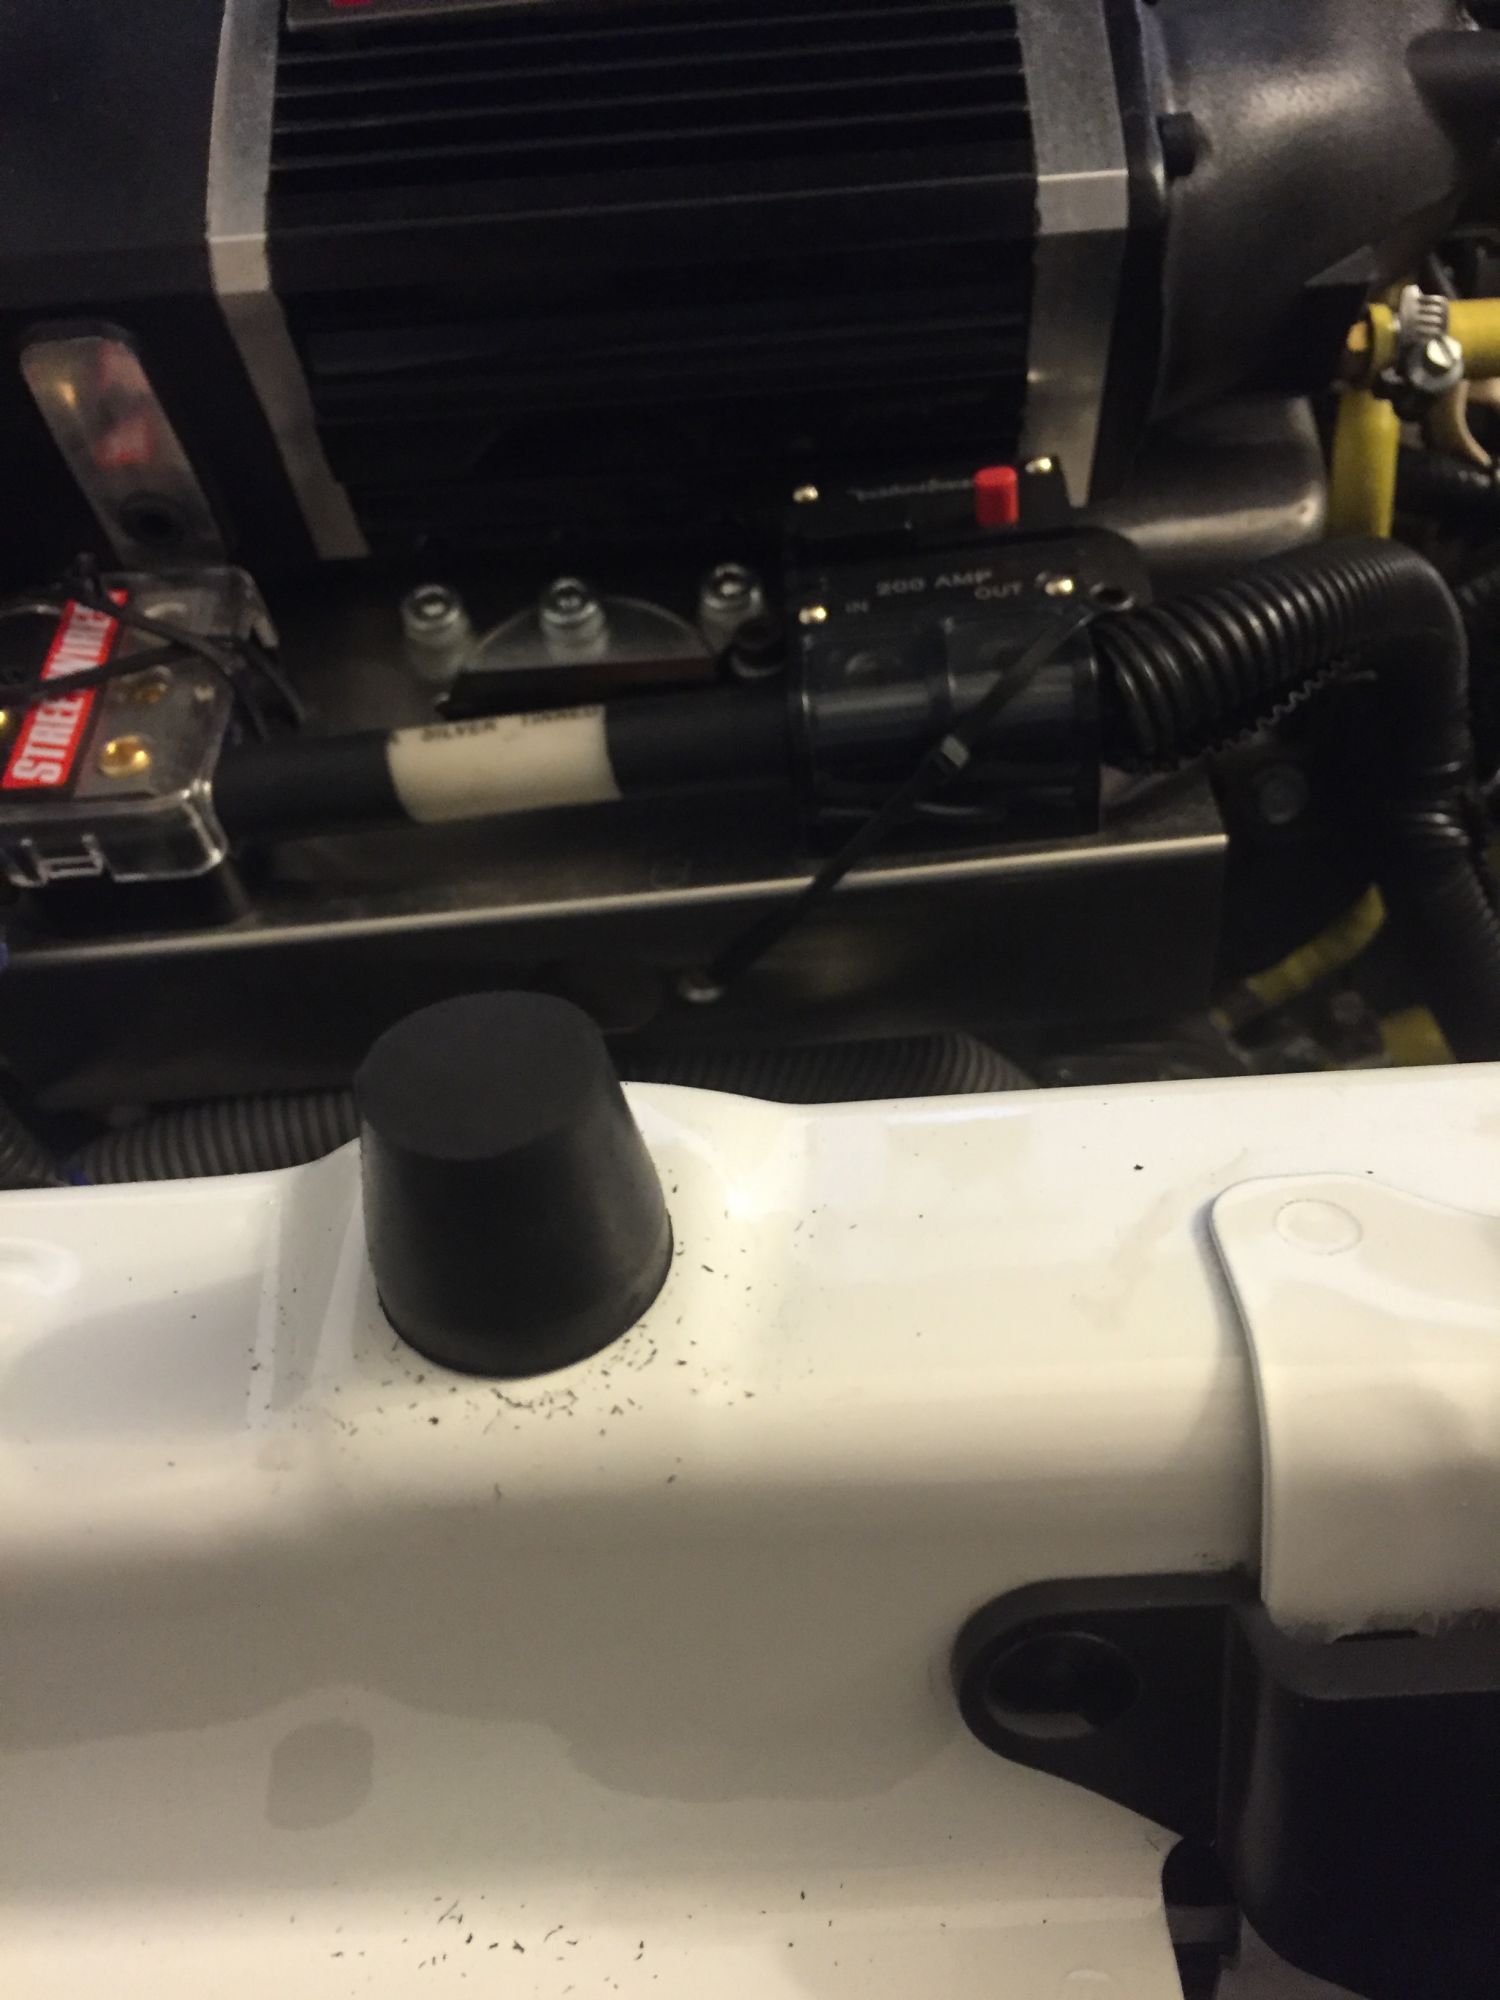
and then I put both the most left side rubber spacer to the lowest point,
while the right rubber spacer almost but not at the lowest point.
I then CUT the 2 center rubber spacer, here is the picture of the 2 CUT center rubber spacer:

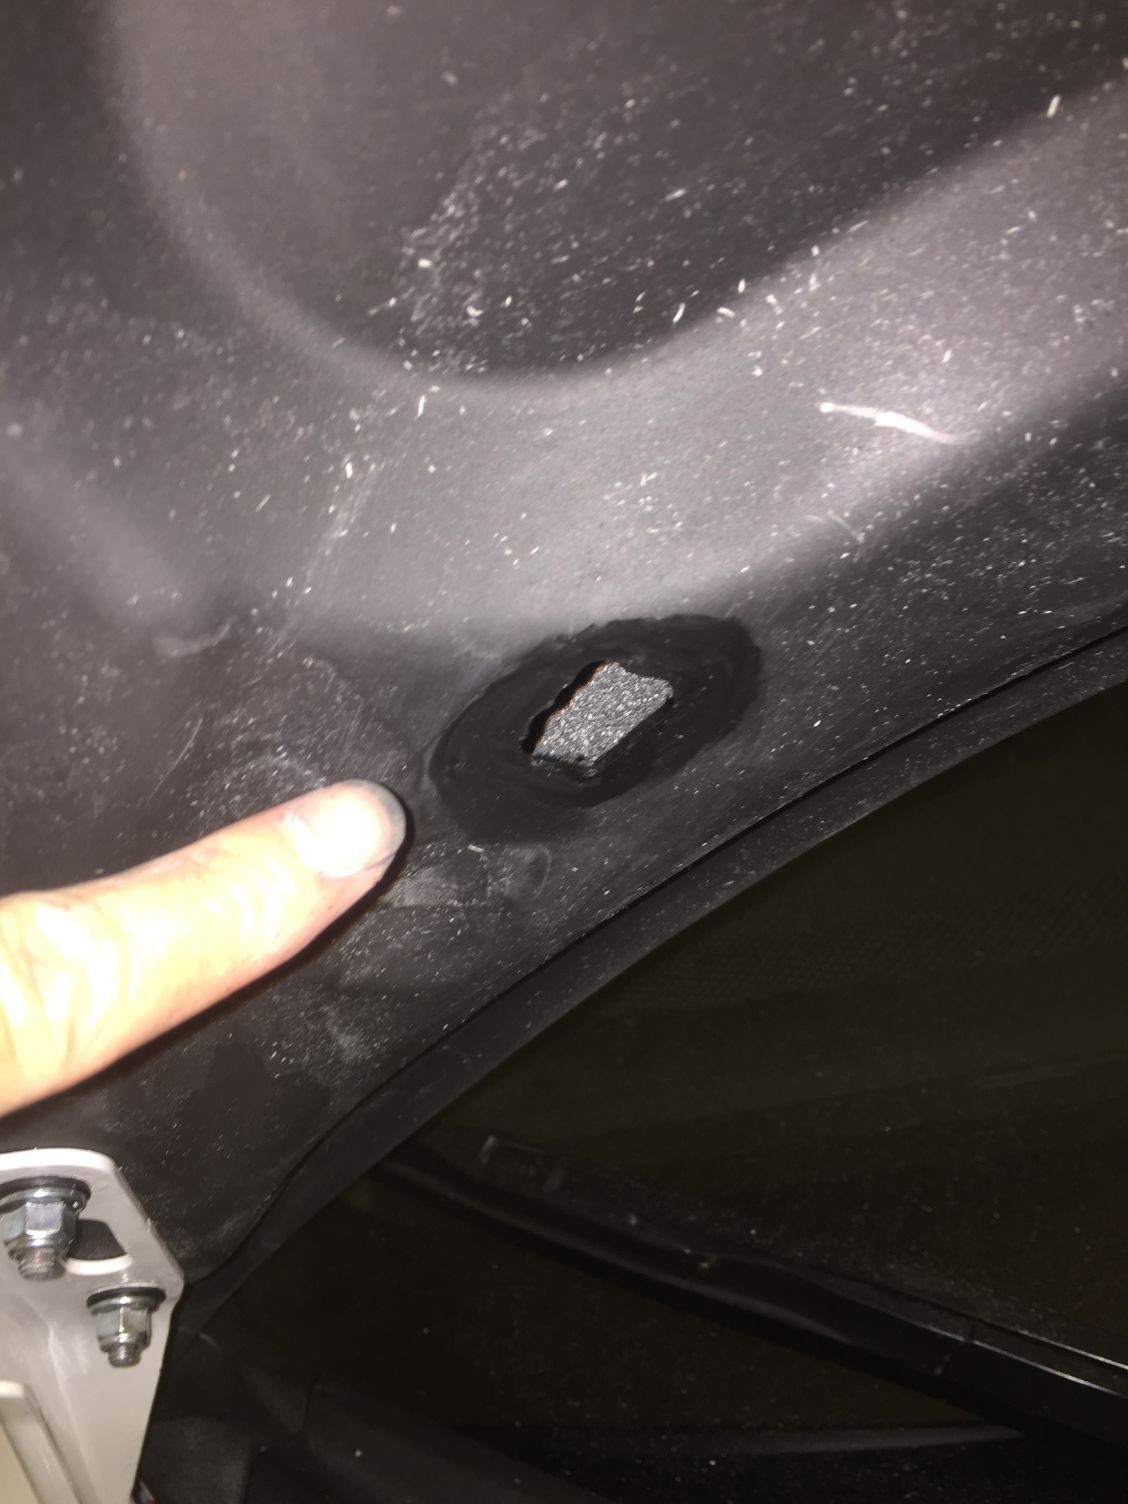
I also drill the second rectangular hole for the hood stand because JDP hood do not have the second hole drilled. this second hole is to position the hood at it's highest opening (90 degree position:
I manage to have equal spacing on every corner accept the driver side front corner where the hood meet the head lamp,
that corner is lower than the head lamp... this must be the same problem
other had experience... it's look like the mold that JDP made this hood had this imperfection, but it is not really noticeable unless you are the one who install and align the hood so it is ok...
It also have a bit of gap between the rubber seal near the winshield,
but this is ok for me because it also provide extra room for hot air to escape so this imperfection is good for me
and here it is installed:

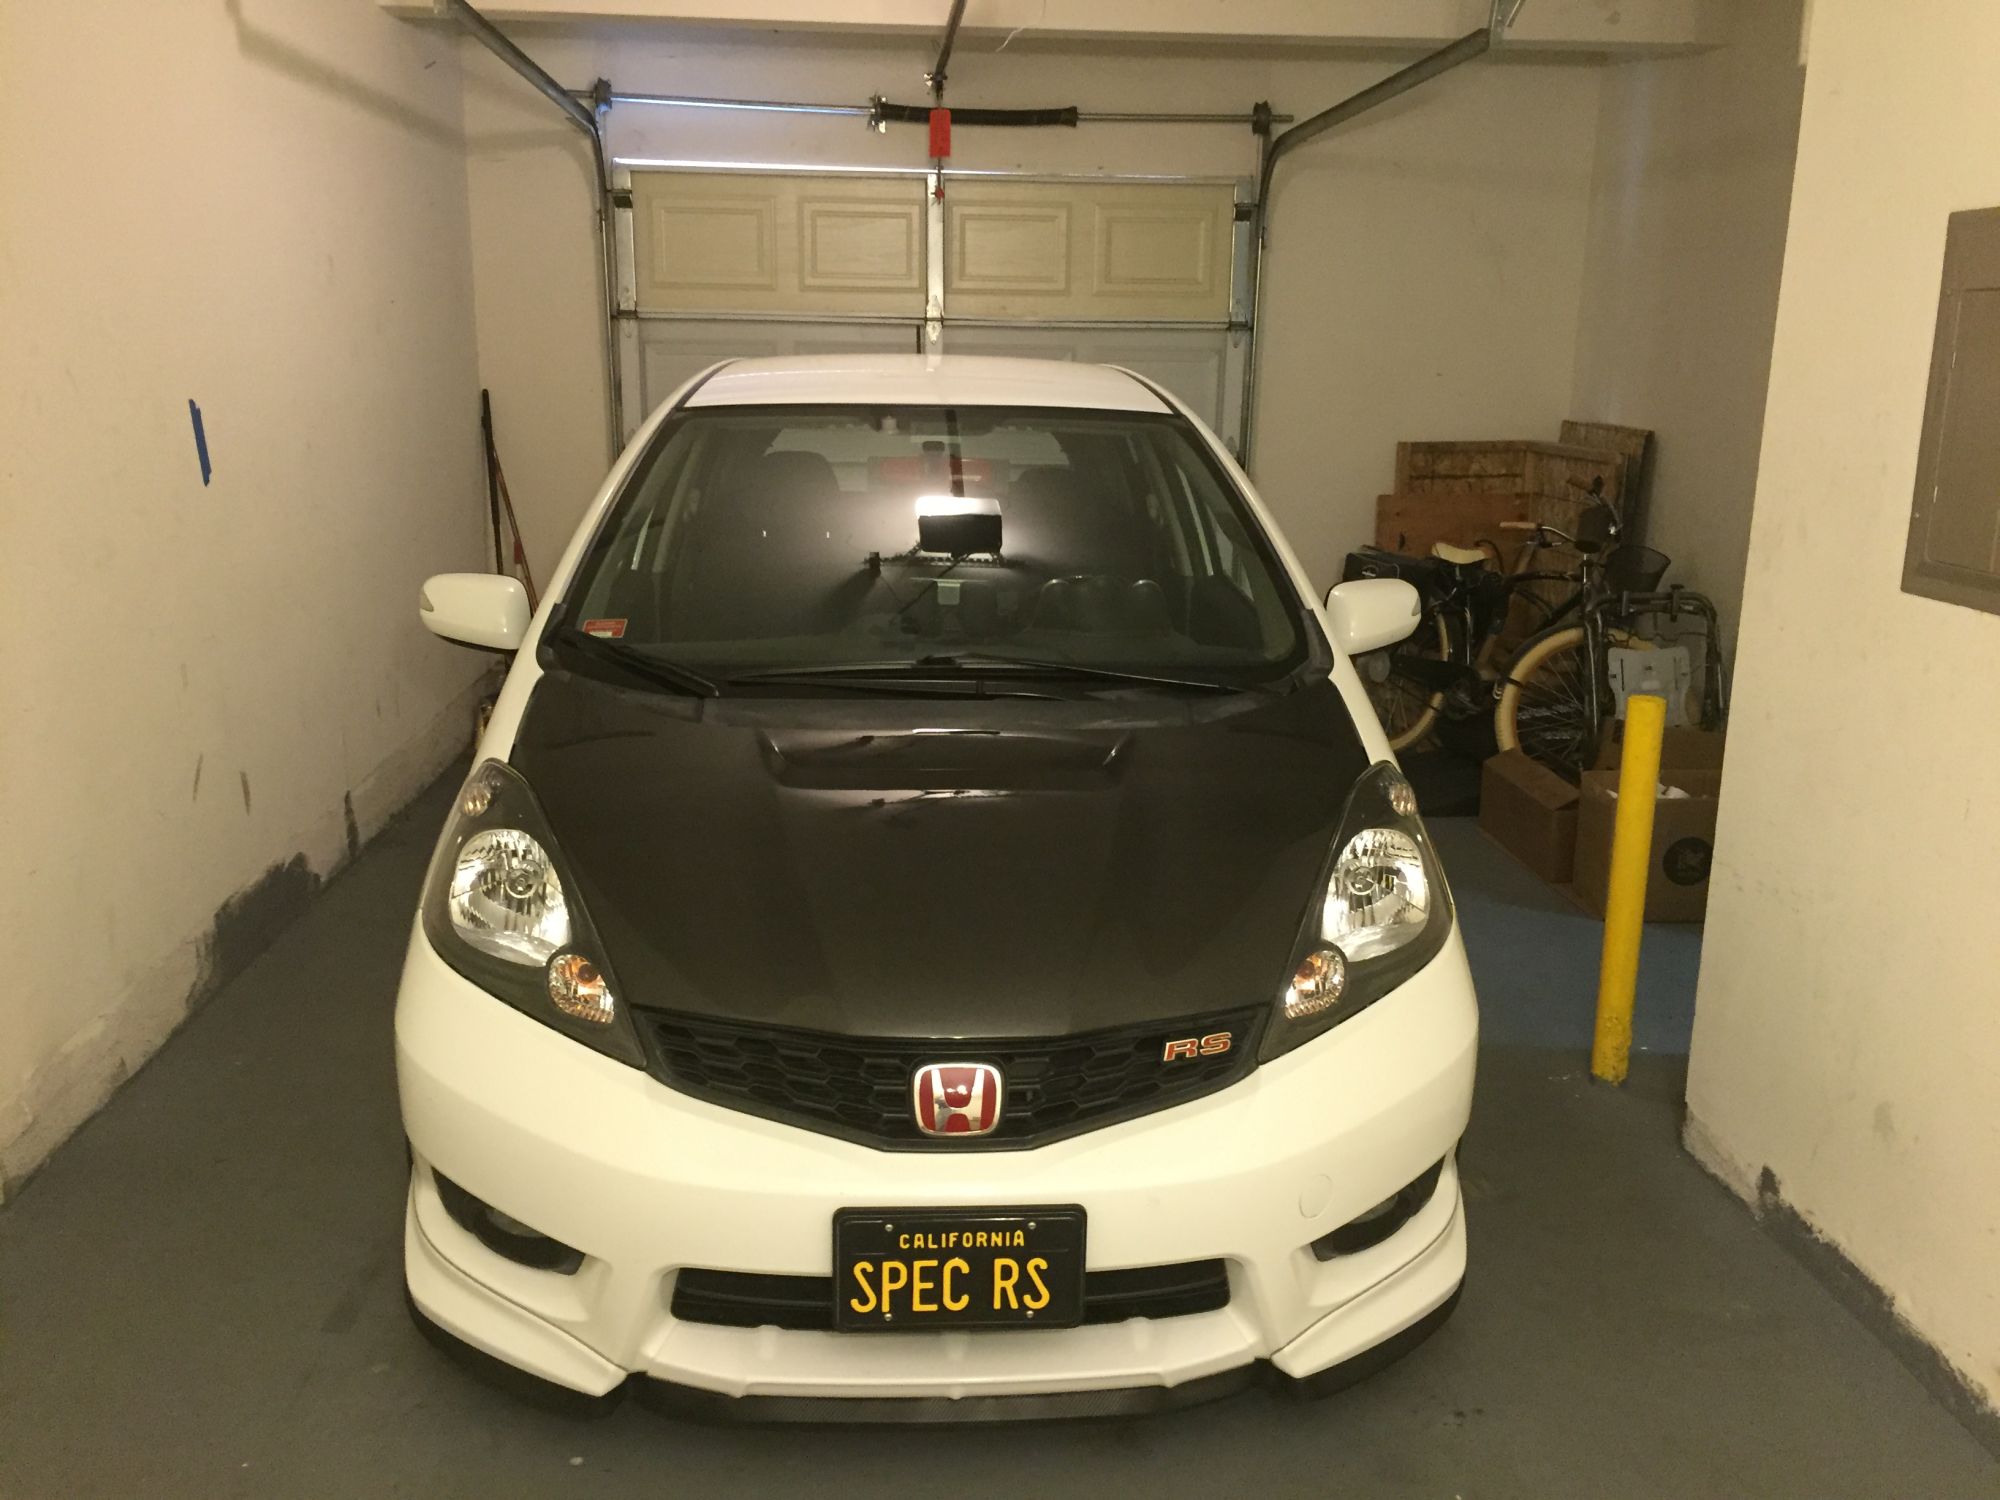
Next step is painting the hood
I notice some missed paint of the epoxy used to attached the honeycomb grill to the ventilation holes:
So I paint them with black paint:
After I install the hood to the hinges, I try to close the hood and it won't close... I then proceed to loosen the 4 bolts that hold the hinges to the car body, it you don't have a long rachet like what I have on the picture below,
you will need to take out the wiper arm than the wiper cowl plastic cover,
but I happened to have this long 10mm rachet with flexible head so I can access it from the side, the picture below will show what I mean:
So what I did is move the hinges toward the front and slightly to the right (towards the passenger side).
I also need to move the front locking mechanism UPWARD and to the Left (towards the driver side).
Again since I have this long rachet with flexible head, I don't have to open the plastic cover that cover the locking mechanism. I do need to take out the upper radiator plate cover though...
and then I put both the most left side rubber spacer to the lowest point,
while the right rubber spacer almost but not at the lowest point.
I then CUT the 2 center rubber spacer, here is the picture of the 2 CUT center rubber spacer:
I also drill the second rectangular hole for the hood stand because JDP hood do not have the second hole drilled. this second hole is to position the hood at it's highest opening (90 degree position:
I manage to have equal spacing on every corner accept the driver side front corner where the hood meet the head lamp,
that corner is lower than the head lamp... this must be the same problem
other had experience... it's look like the mold that JDP made this hood had this imperfection, but it is not really noticeable unless you are the one who install and align the hood
so it is ok...It also have a bit of gap between the rubber seal near the winshield,
but this is ok for me because it also provide extra room for hot air to escape so this imperfection is good for me
and here it is installed:
Next step is painting the hood
#20
09-05-2016, 10:08 PM
Sounds like you ran into the same issues I did. I haven't cut the center rubber pieces yet but it's on the list.
After having my hood on for 2 days in the hot sun, I found that I was able to put the plastic radiator cover back on and close the hood with a bit of precise force. I wasn't able to close it at all with that cover on before.
After having my hood on for 2 days in the hot sun, I found that I was able to put the plastic radiator cover back on and close the hood with a bit of precise force. I wasn't able to close it at all with that cover on before.

