English DIY maplight in base GE
#21
 07-09-2010, 07:53 AM


I'm in Sask. and I completed the map light DIY myself using these instructions. Not to worry, even the Canadian models have the mounding screw holes in the roof. THe only other sudgestion I have is to run 2 wires in stead of one. Both the Blue and the Pink because then you have both the function of the individual lights, and they also come on when the doors are opened or the keyless entry is activated.
It works in Canada!
It works in Canada!
With only the one wire do the lights come on with keyless entry or when door is opened?
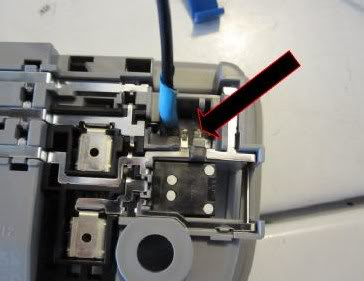
Where did you connect the blue wire in the map base? On the pin to the right in the pic that follows
Thanks
Oh where did you get your light?

#22
07-09-2010, 12:16 PM

New Member
Join Date: Aug 2009
Location: Prince Albert, Sk, Canada
Posts: 12
wires
ok with only one wire, the lights only come on when you push them on. With the second wire they actually come on with the doors or keyless entry. from what I can remember the blue wire went to the pin on the right in the pic attached. This is only what I can remember though. Just try it. If it doesn't work try another pin.
I also got all my parts using the part numbers listed in the thread and then went to a web site www.1sthondaparts.com. they're in washington, but had the best prices I could find for OEM parts.
I also got all my parts using the part numbers listed in the thread and then went to a web site www.1sthondaparts.com. they're in washington, but had the best prices I could find for OEM parts.
#23
07-09-2010, 02:51 PM
ok with only one wire, the lights only come on when you push them on. With the second wire they actually come on with the doors or keyless entry. from what I can remember the blue wire went to the pin on the right in the pic attached. This is only what I can remember though. Just try it. If it doesn't work try another pin.
I also got all my parts using the part numbers listed in the thread and then went to a web site www.1sthondaparts.com. they're in washington, but had the best prices I could find for OEM parts.
I also got all my parts using the part numbers listed in the thread and then went to a web site www.1sthondaparts.com. they're in washington, but had the best prices I could find for OEM parts.
bill
#24
07-26-2010, 12:17 PM

When hooking up the second wire to the map light. which post does it get connected to? Or are the other 2 posts electrically the same?
Thanks,
Jason
Thanks,
Jason
#25
07-26-2010, 02:16 PM

Inner most pin (prewired pink on GE8 Sports) is a constant 12v (for GE8 Base - tap into dome light pink wire), middle pin is a chassis ground through the mounting bolt, outter most pin is the negative you'd need to tap into the dome light MICU controlled GND (blue wire) to make the map lights turn on with door open.

#28
07-26-2010, 03:53 PM
#31
09-05-2010, 10:47 AM

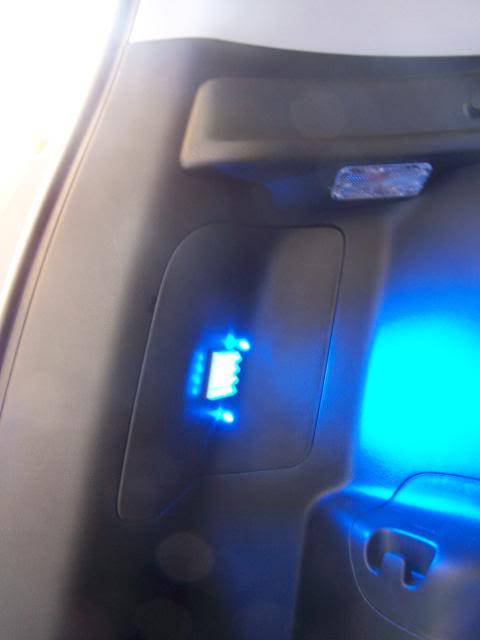
I would like to thank dela, and everyone else who contributed to this DIY. I installed this yesterday and wired it to come on both ways like some of you have done. I did not have to solder as I was able to find a small female connector to fit onto the male fins, at my local hardware store. Makes a huge difference when opening the doors at night or having the ability to use the maplights at night. After installing my interior is so brite that when I open the hatch it seems so dim in comparison. So now onto my next project making the cargo area brighter. I use the cargo cover so putting a light up top would not help. I would like to add another light on the right side of the cargo area, but I don't think anyone has done this yet. I may have to investigate this myself, but first I'll try to put A brighter bulb in the cargo area.

#34
09-05-2010, 11:37 PM
#35
09-05-2010, 11:50 PM
That looks great, but I need the ability to take the cargo cover out and off easily. I can't believe noone at Fitfreak has installed another cargo light for the right side. I'll probably start by changing my cargo bulb first to a brighter LED bulb and go from there. Is the bulb # 31mm or 168? Have any bulb recommendations? Thanks.
Bulb is a 31mm.
#36
10-15-2010, 11:03 PM
John
#37
02-03-2011, 09:05 PM

did this today, i will add an easy way to get proper alignment is to make a conservative cut, then thread in (2) 40mm M5 bolts, tighten the bolts until only the heads are sticking out beyond the headliner. the 8mm heads on the M5 bolts will fit snugly into the bolt openings on the map light base. you can then trace around the map light base with a pencil ... remove the map light base, and viola you have a template in the right place.
#38
02-03-2011, 09:21 PM
It is really very easy. Just start with a small hole and then increase the size of the cut incrementally. There is enough overlap on map light base to cover any inconsistencies in cut. Cut is easiest part, just hook up wiring as stated earlier and the map lights will work in conjunction with other lights. Great install and wonderful lights within car. Let me hear how it goes. John