yet another sound deadening thread
#1
 11-06-2015, 03:19 PM


yet another sound deadening thread
OK so this is something I wanted to do for a long time, and naively jumped into a few weeks ago. Stupidly time consuming and is bringing out the worst of my OCD. I should have started taking pics earlier, so heres a thread on my progress and some more detailed tasks.
Some other people have done some excellent work prior to this:
https://www.fitfreak.net/forums/2nd-...lots-pics.html
https://www.fitfreak.net/forums/2nd-...cld-tiles.html
https://www.fitfreak.net/forums/2nd-...door-seal.html
I went nuts with the dynomat, its actually running really far up the pillars on the inside as well. that is the 110mil thickness rather than the 80. Definitely much more time consuming to work with.
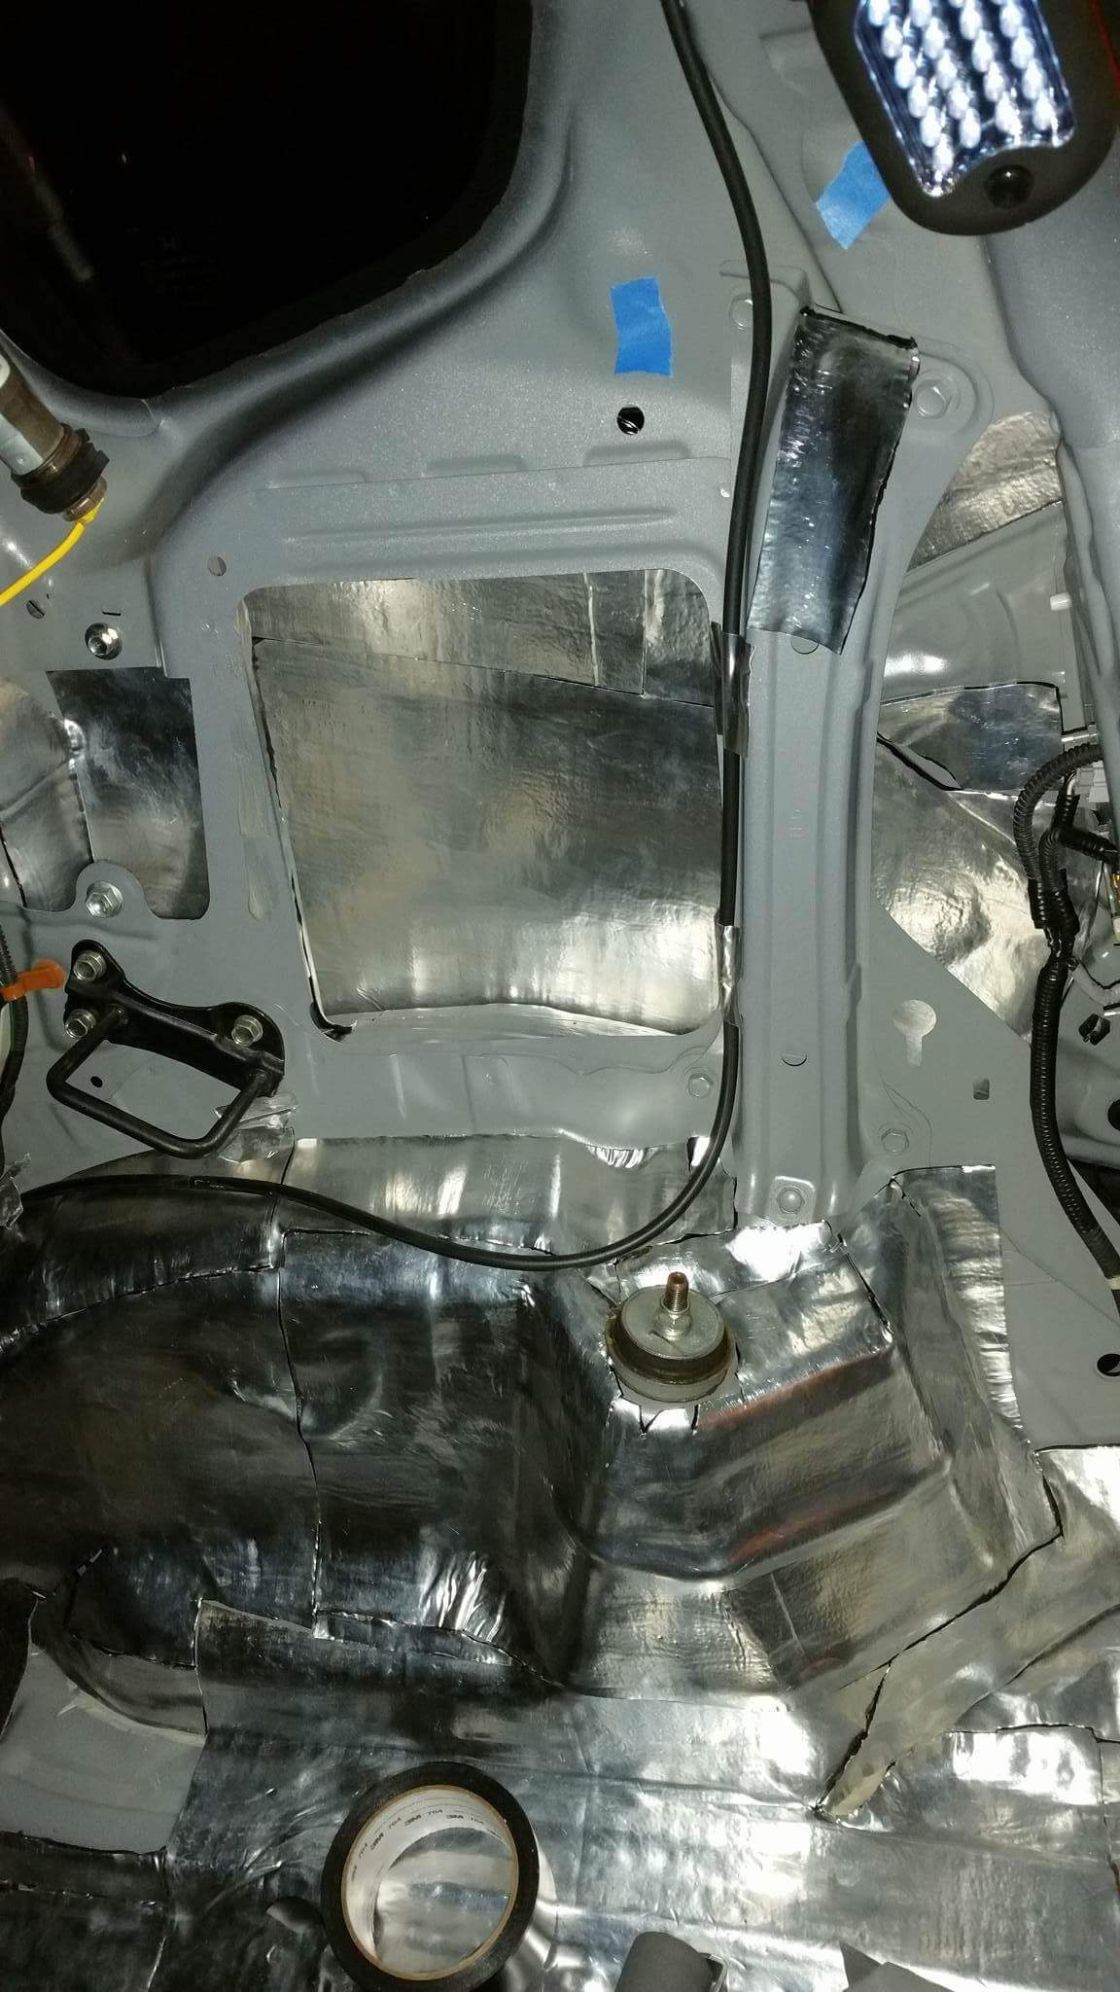
I really like working with the foam.... so easy to lay and cut!
that MLV mat is equally not fun to work with considering how thick it is.
I know the tape really isnt neccisary with the foam, but I just like Z taping all interlocking pieces. It took a while to get the hang of working with the MLV mat and cutting patterns that fit well in place.
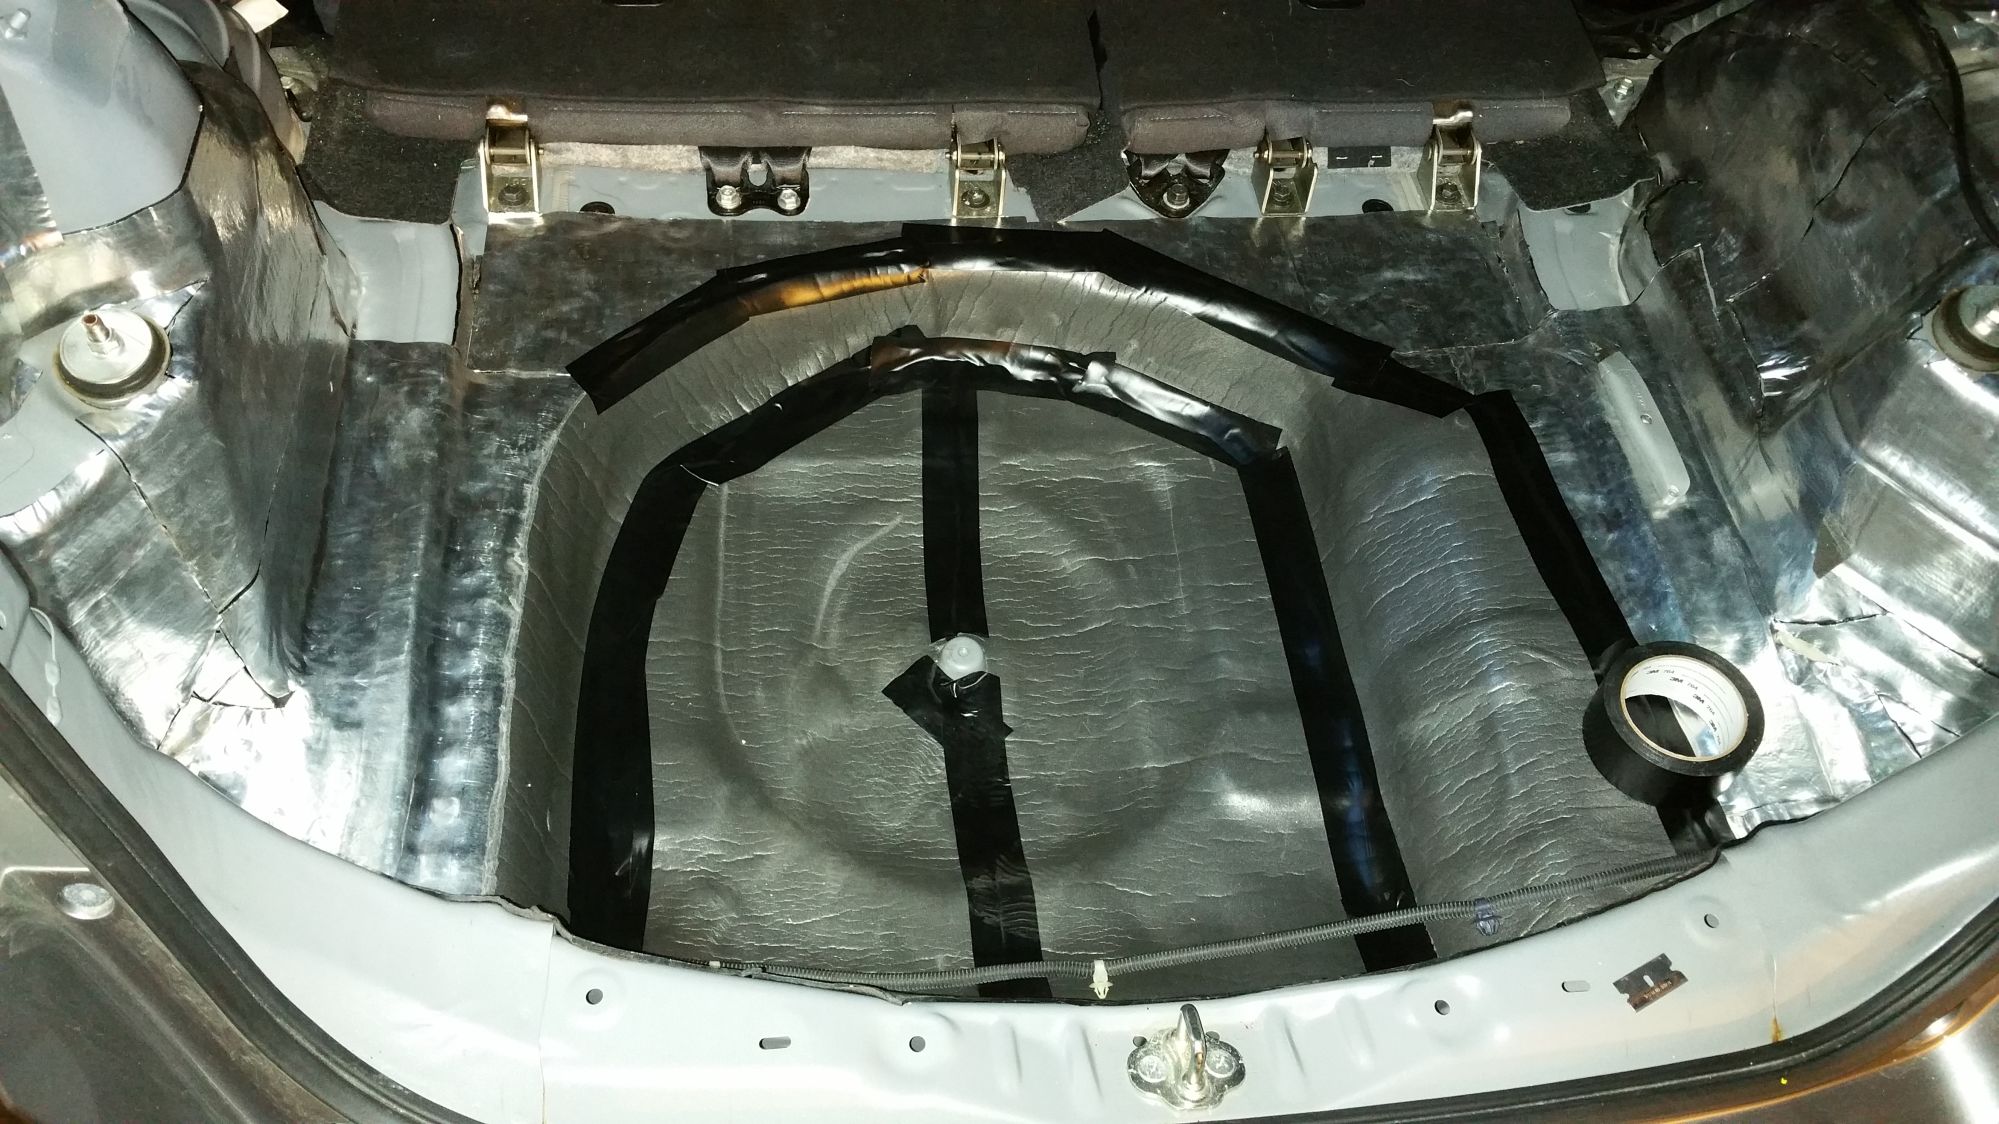
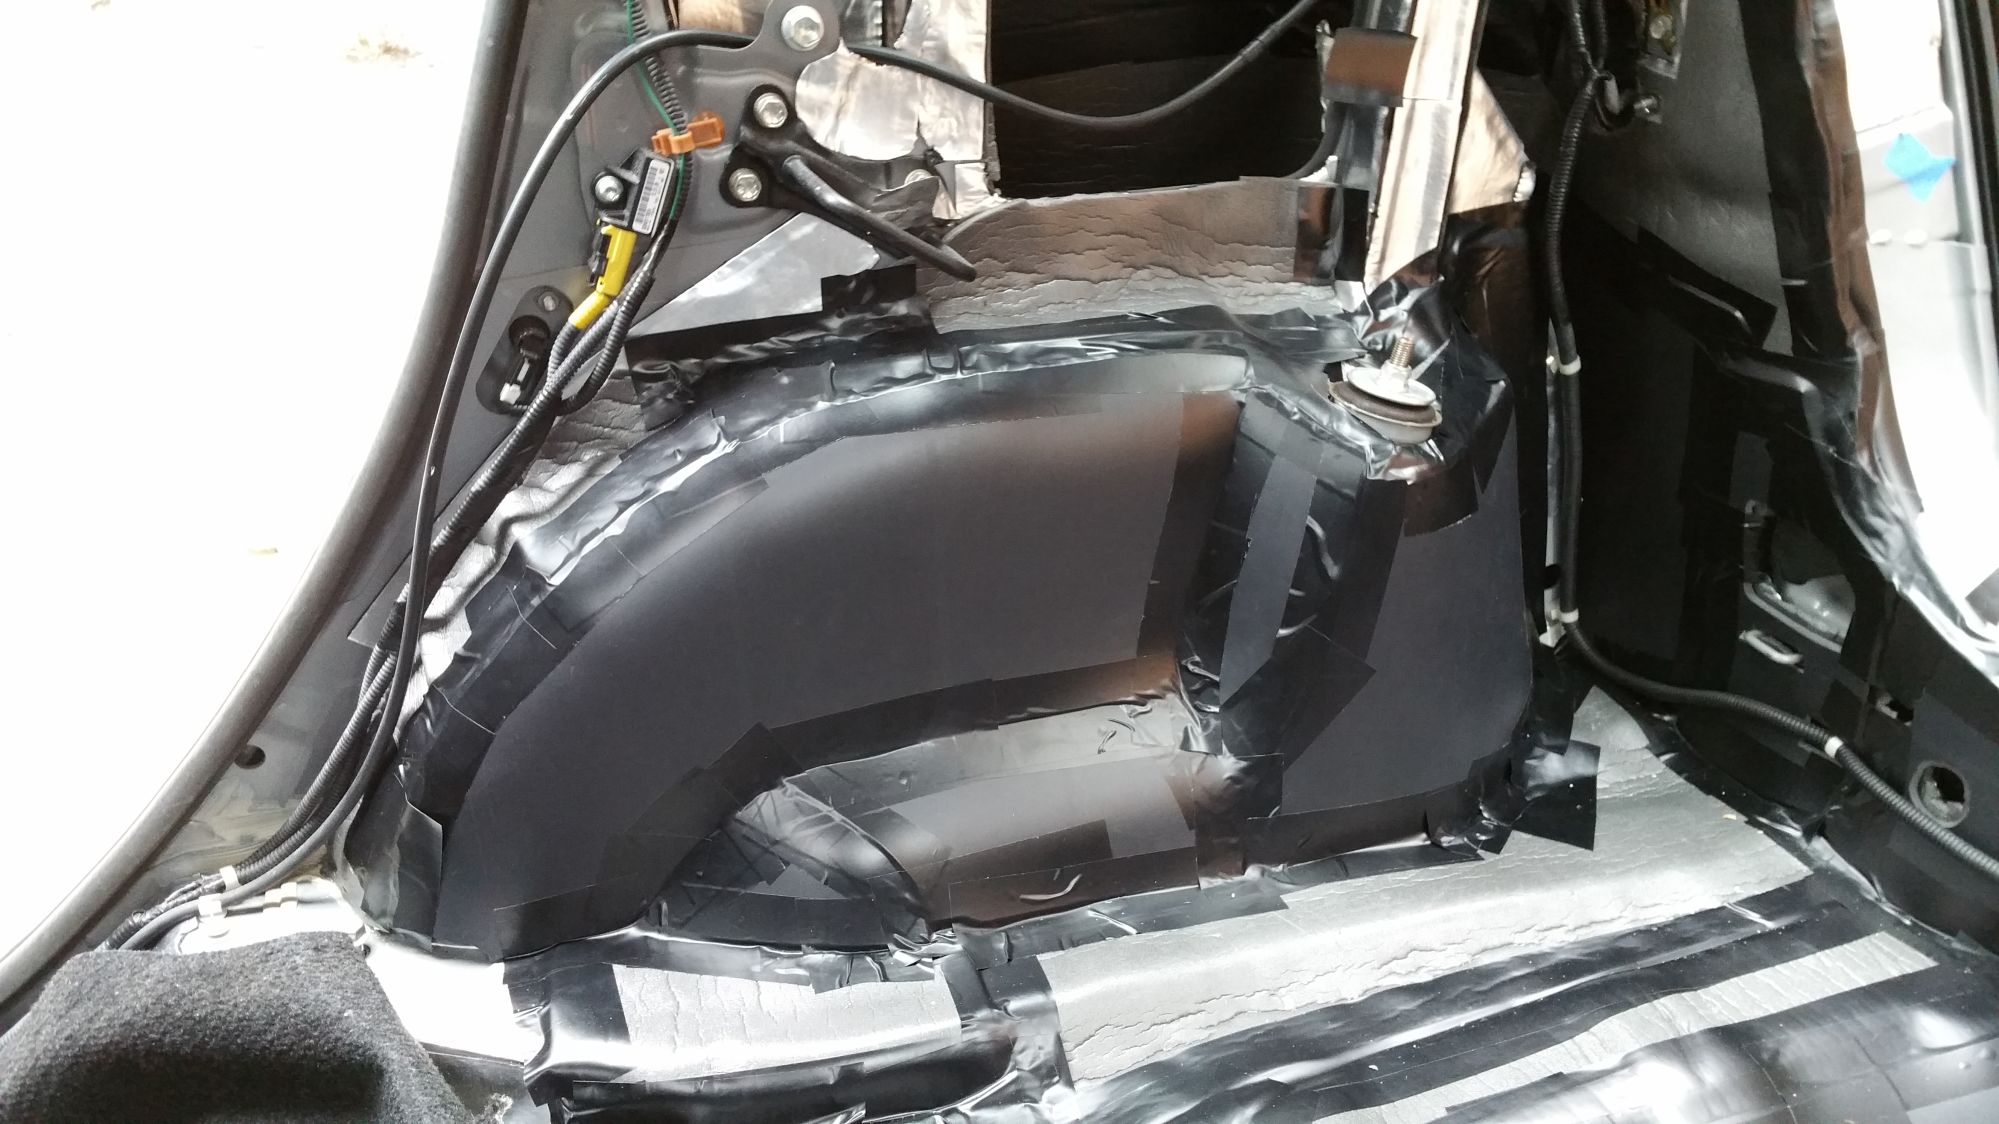
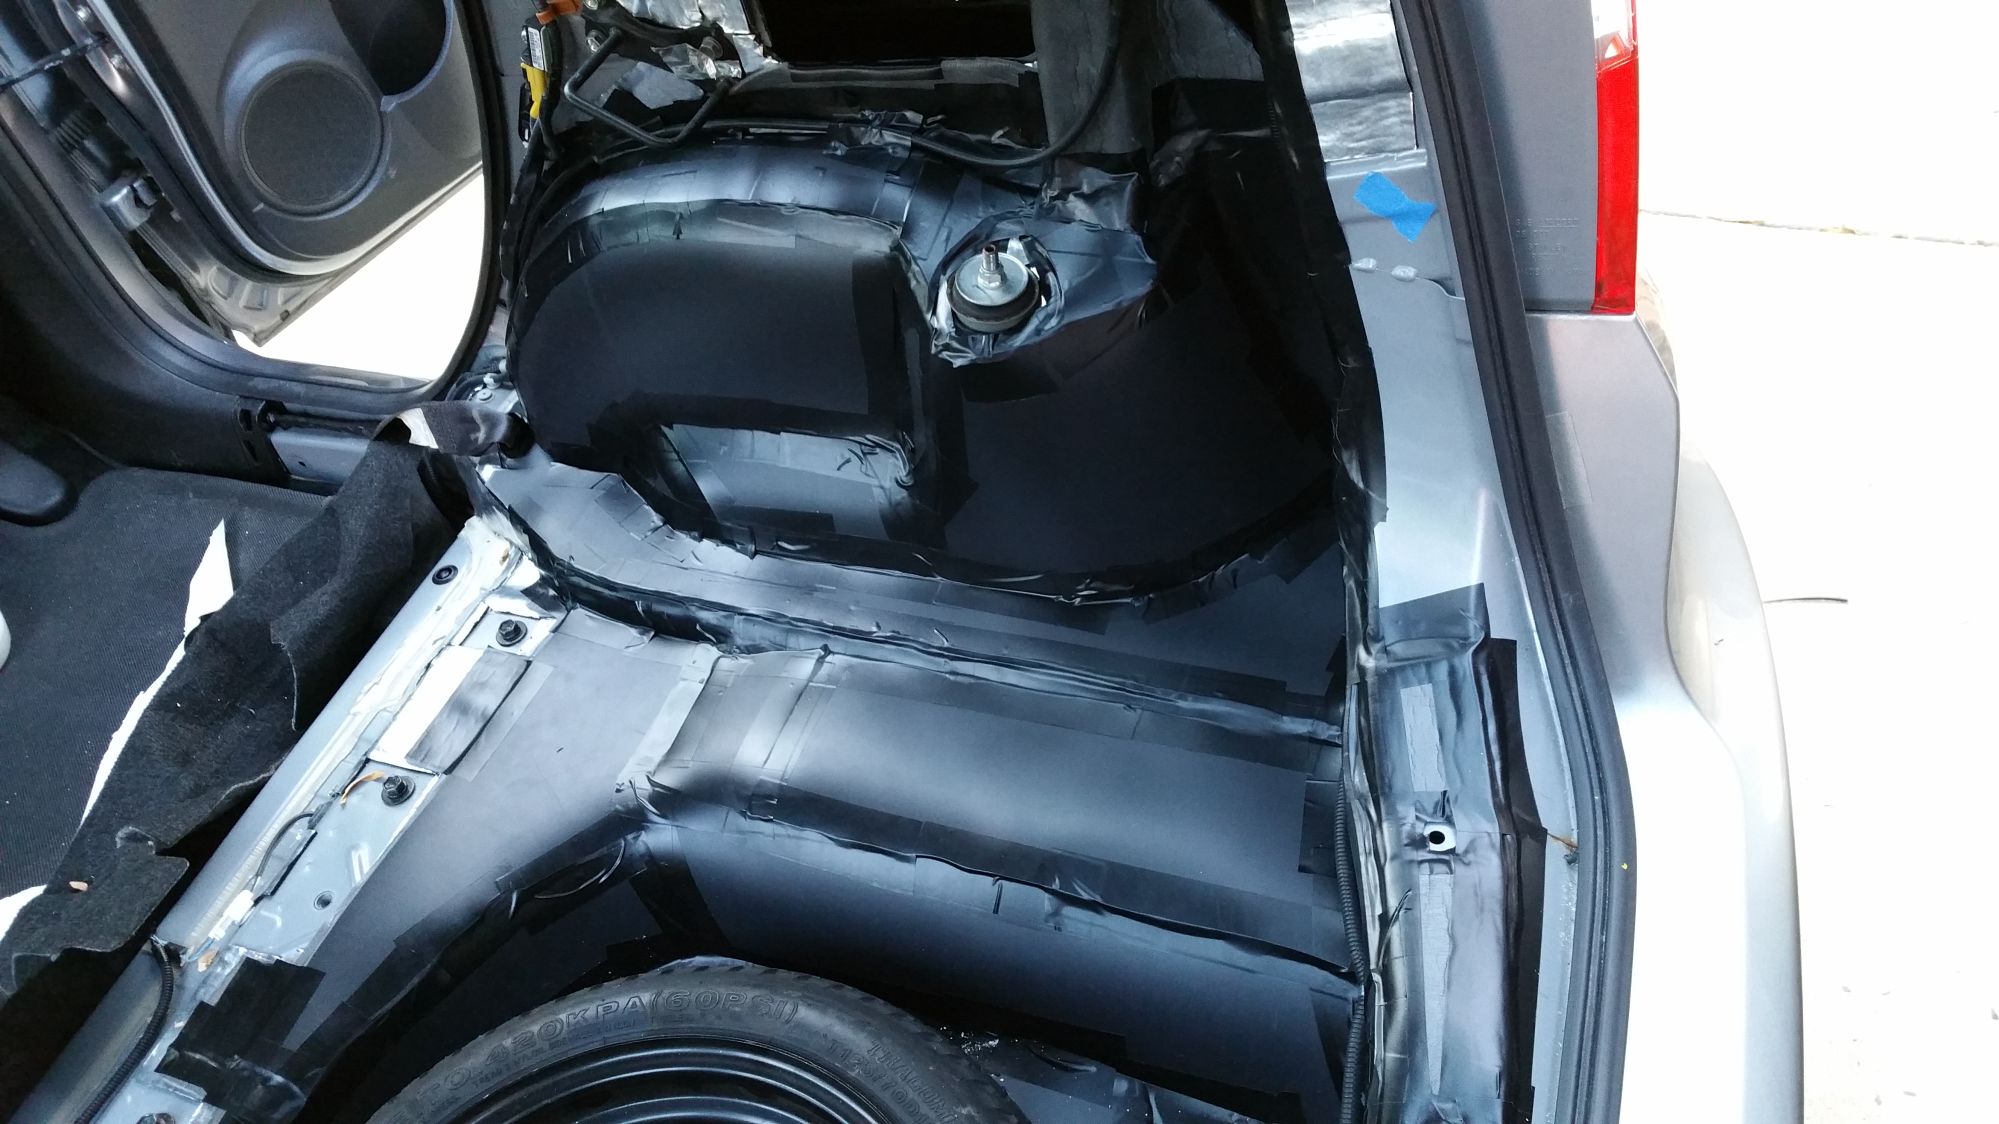
so working with the mat, seeing as you'll only get one axis of contouring out of it, heres kinda my thought process for making it fit really snugly. I kinda rough out some of the larger pieces, then I can cut and shape the more technical pieces. You can see I already did the bottom 2 pieces. and so everything fits better, all the edges are knife edged so they fit snugly against each other. This photo was taken when I was trying to make that vertical wedge piece.
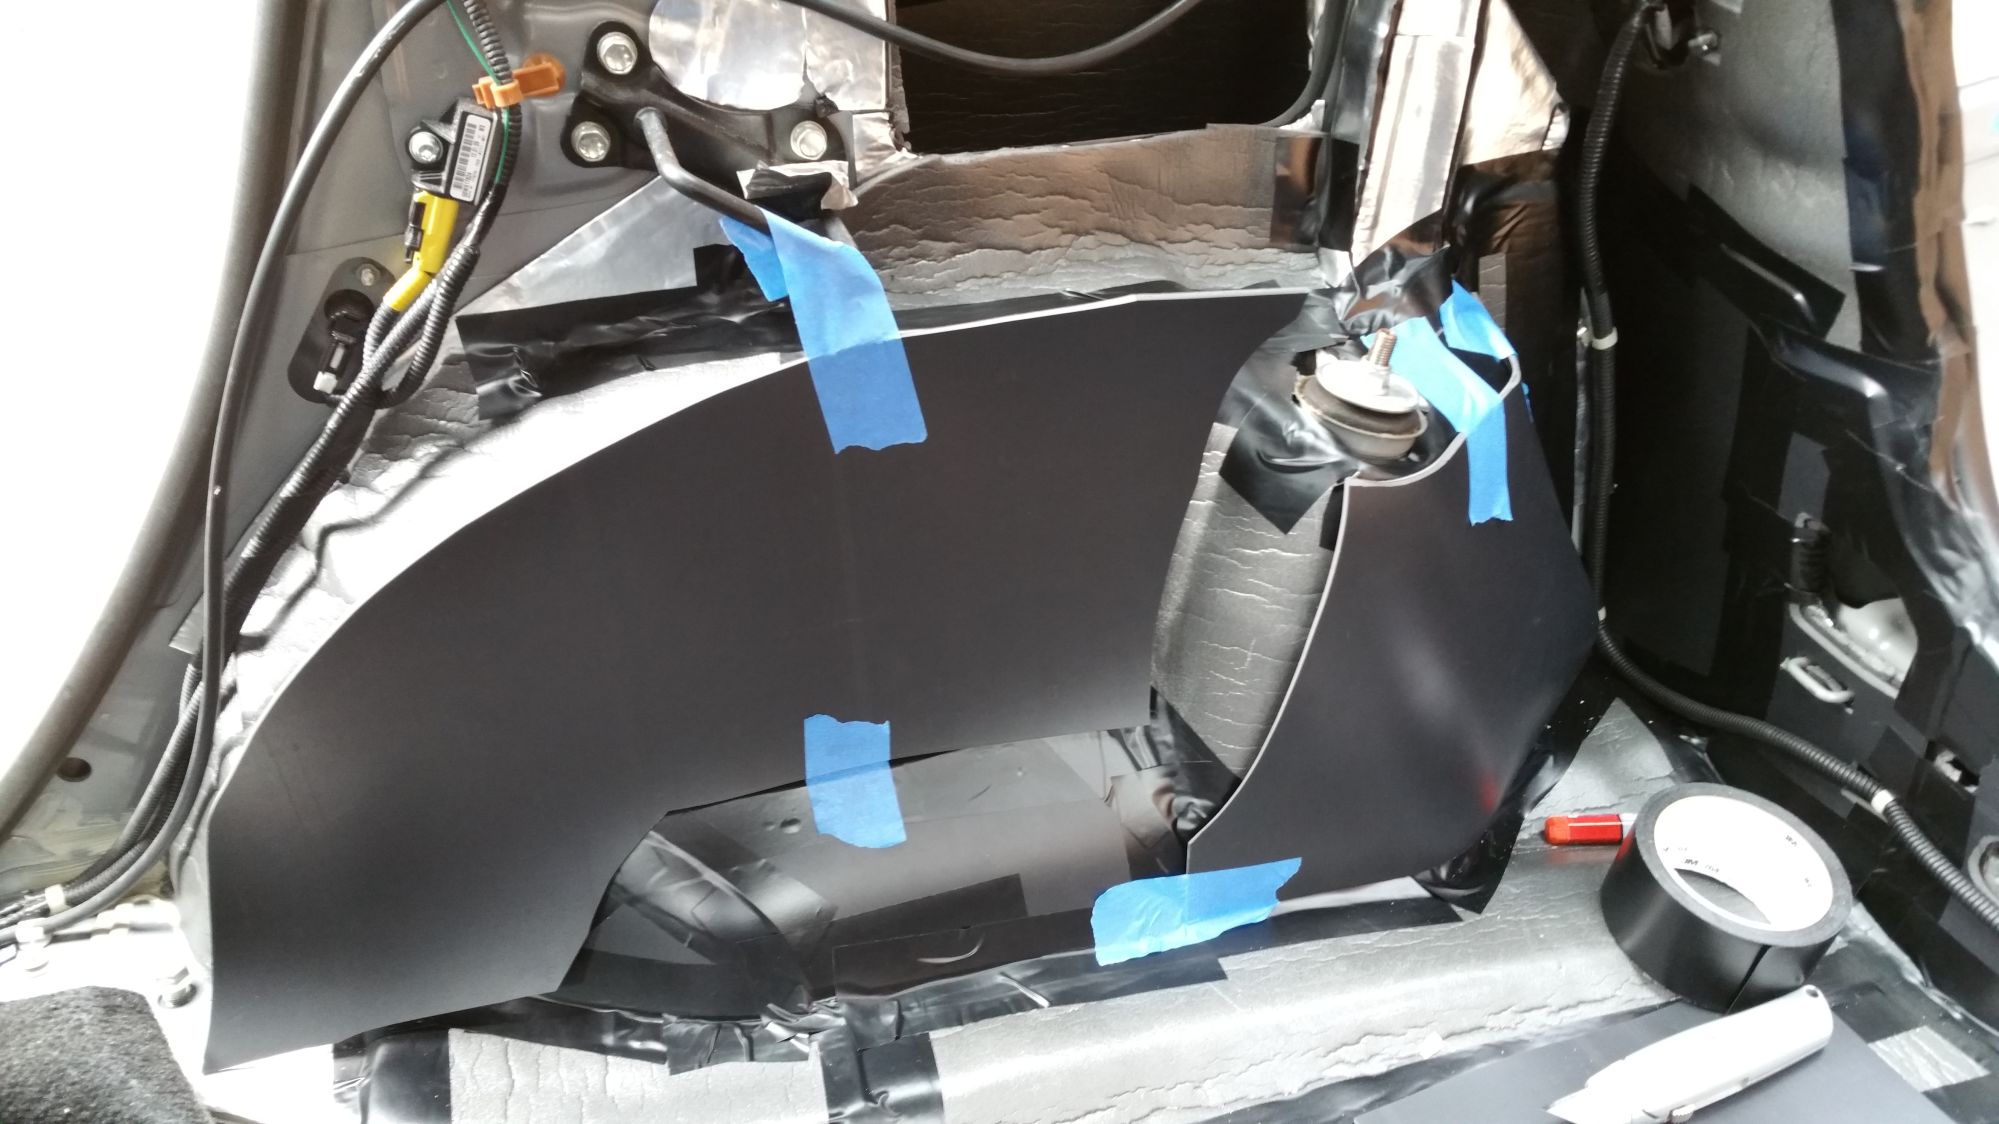
Vertical wedge made and being taped down. Note the edging (for the sides already taped, they are edged on the underside. complete overkill.
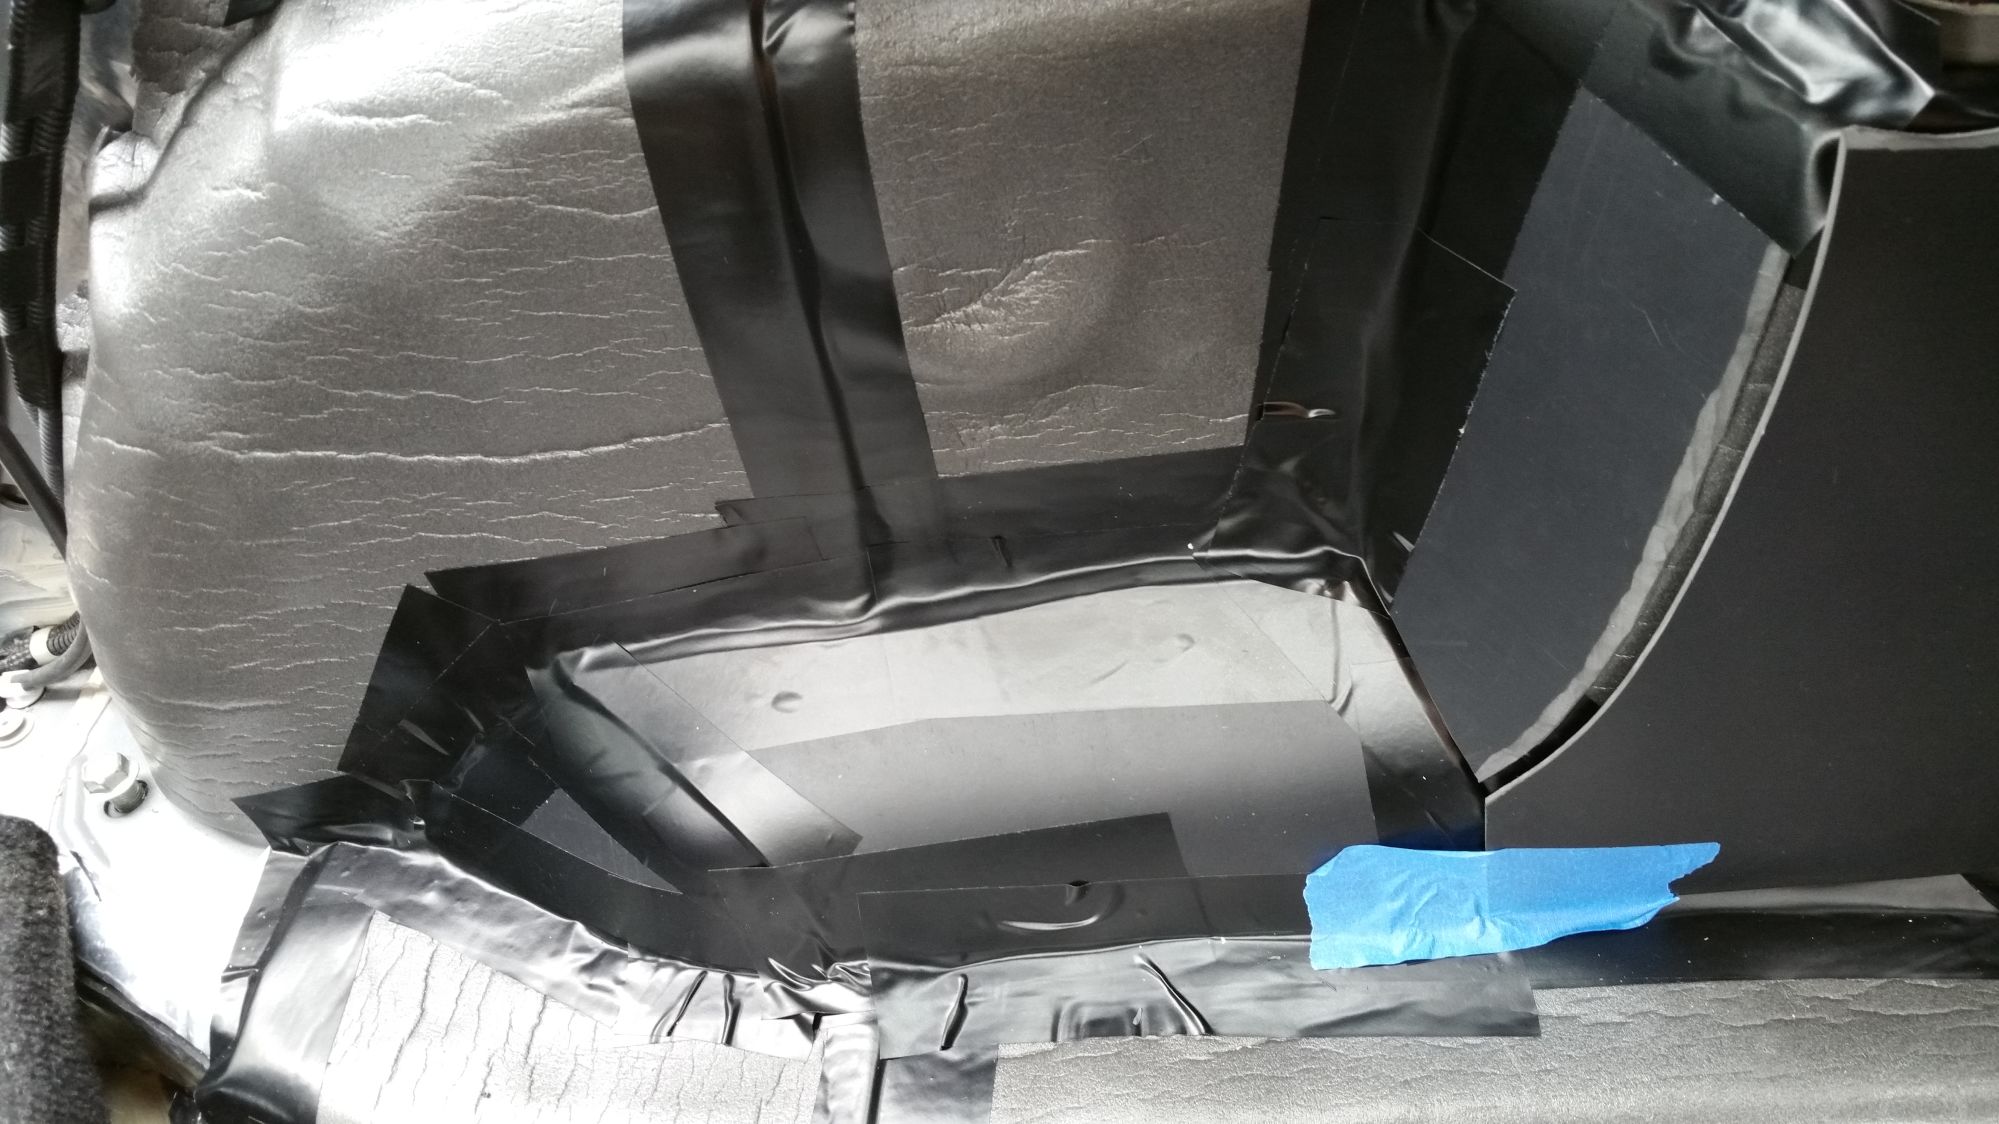
Now I just have the top strip to finish up.
Some other people have done some excellent work prior to this:
https://www.fitfreak.net/forums/2nd-...lots-pics.html
https://www.fitfreak.net/forums/2nd-...cld-tiles.html
https://www.fitfreak.net/forums/2nd-...door-seal.html
I went nuts with the dynomat, its actually running really far up the pillars on the inside as well. that is the 110mil thickness rather than the 80. Definitely much more time consuming to work with.
I really like working with the foam.... so easy to lay and cut!
that MLV mat is equally not fun to work with considering how thick it is.
I know the tape really isnt neccisary with the foam, but I just like Z taping all interlocking pieces. It took a while to get the hang of working with the MLV mat and cutting patterns that fit well in place.
so working with the mat, seeing as you'll only get one axis of contouring out of it, heres kinda my thought process for making it fit really snugly. I kinda rough out some of the larger pieces, then I can cut and shape the more technical pieces. You can see I already did the bottom 2 pieces. and so everything fits better, all the edges are knife edged so they fit snugly against each other. This photo was taken when I was trying to make that vertical wedge piece.
Vertical wedge made and being taped down. Note the edging (for the sides already taped, they are edged on the underside. complete overkill.
Now I just have the top strip to finish up.
#2
11-08-2015, 09:27 PM
ok so I am getting much faster at this. I have been gifted with some really incredible weather the last two weeks in chicago so I have been pushing hard to get the trunk wrapped up before it gets cold (there is definitely a huge difference with working with the materials and the temps).
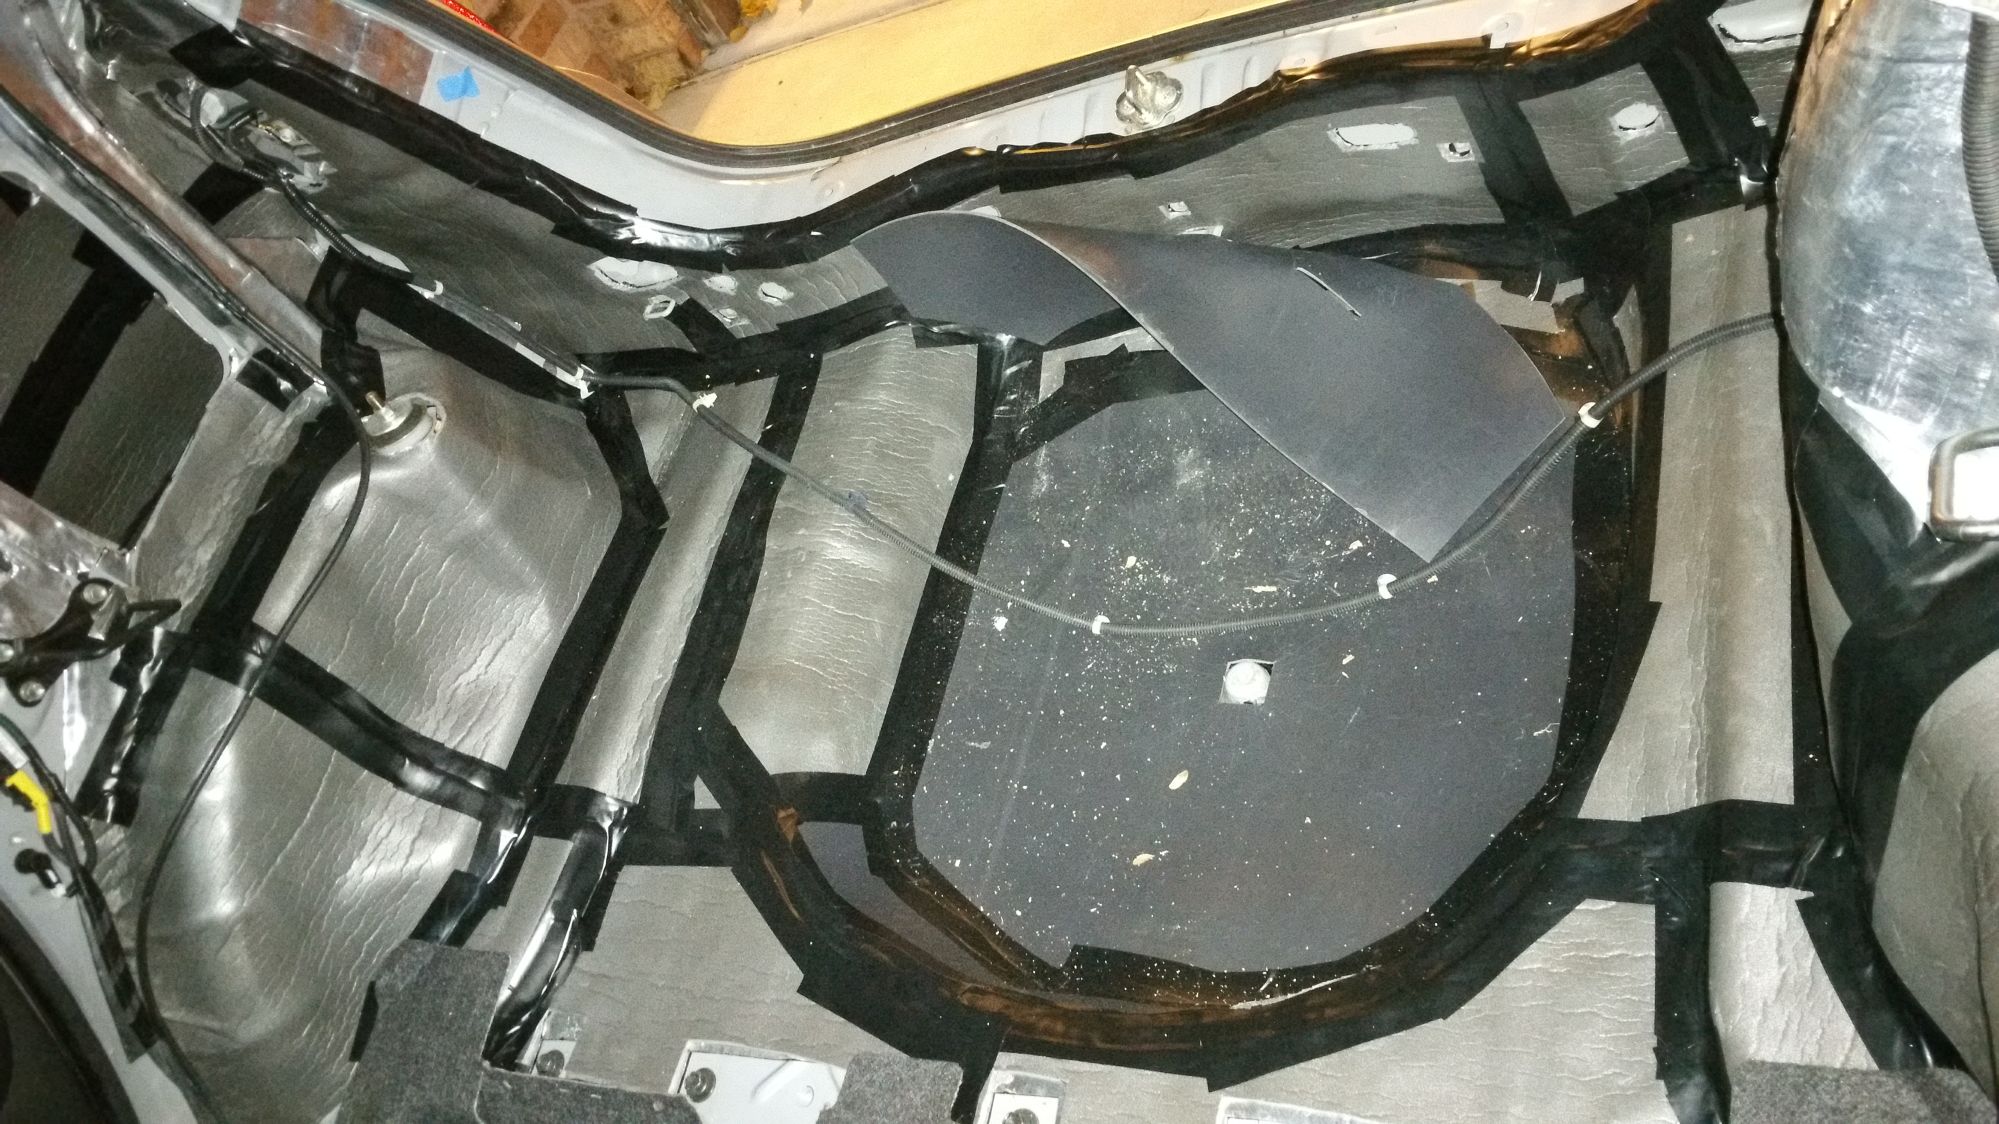
proud to say I got all the interior panels back in on the passenger side just as the sun was setting.... All I have to say is it is a VERY tight fit with the panels but they did clip in. I think most of the fitment issues are due to me rasing the height of the floor. Next time I take the side panel off, I'll make some adjustments to it so it fits more true. But moral of the story with the MLV is that you definitely need to be very exacting with how snugly and accurately you make it fit.
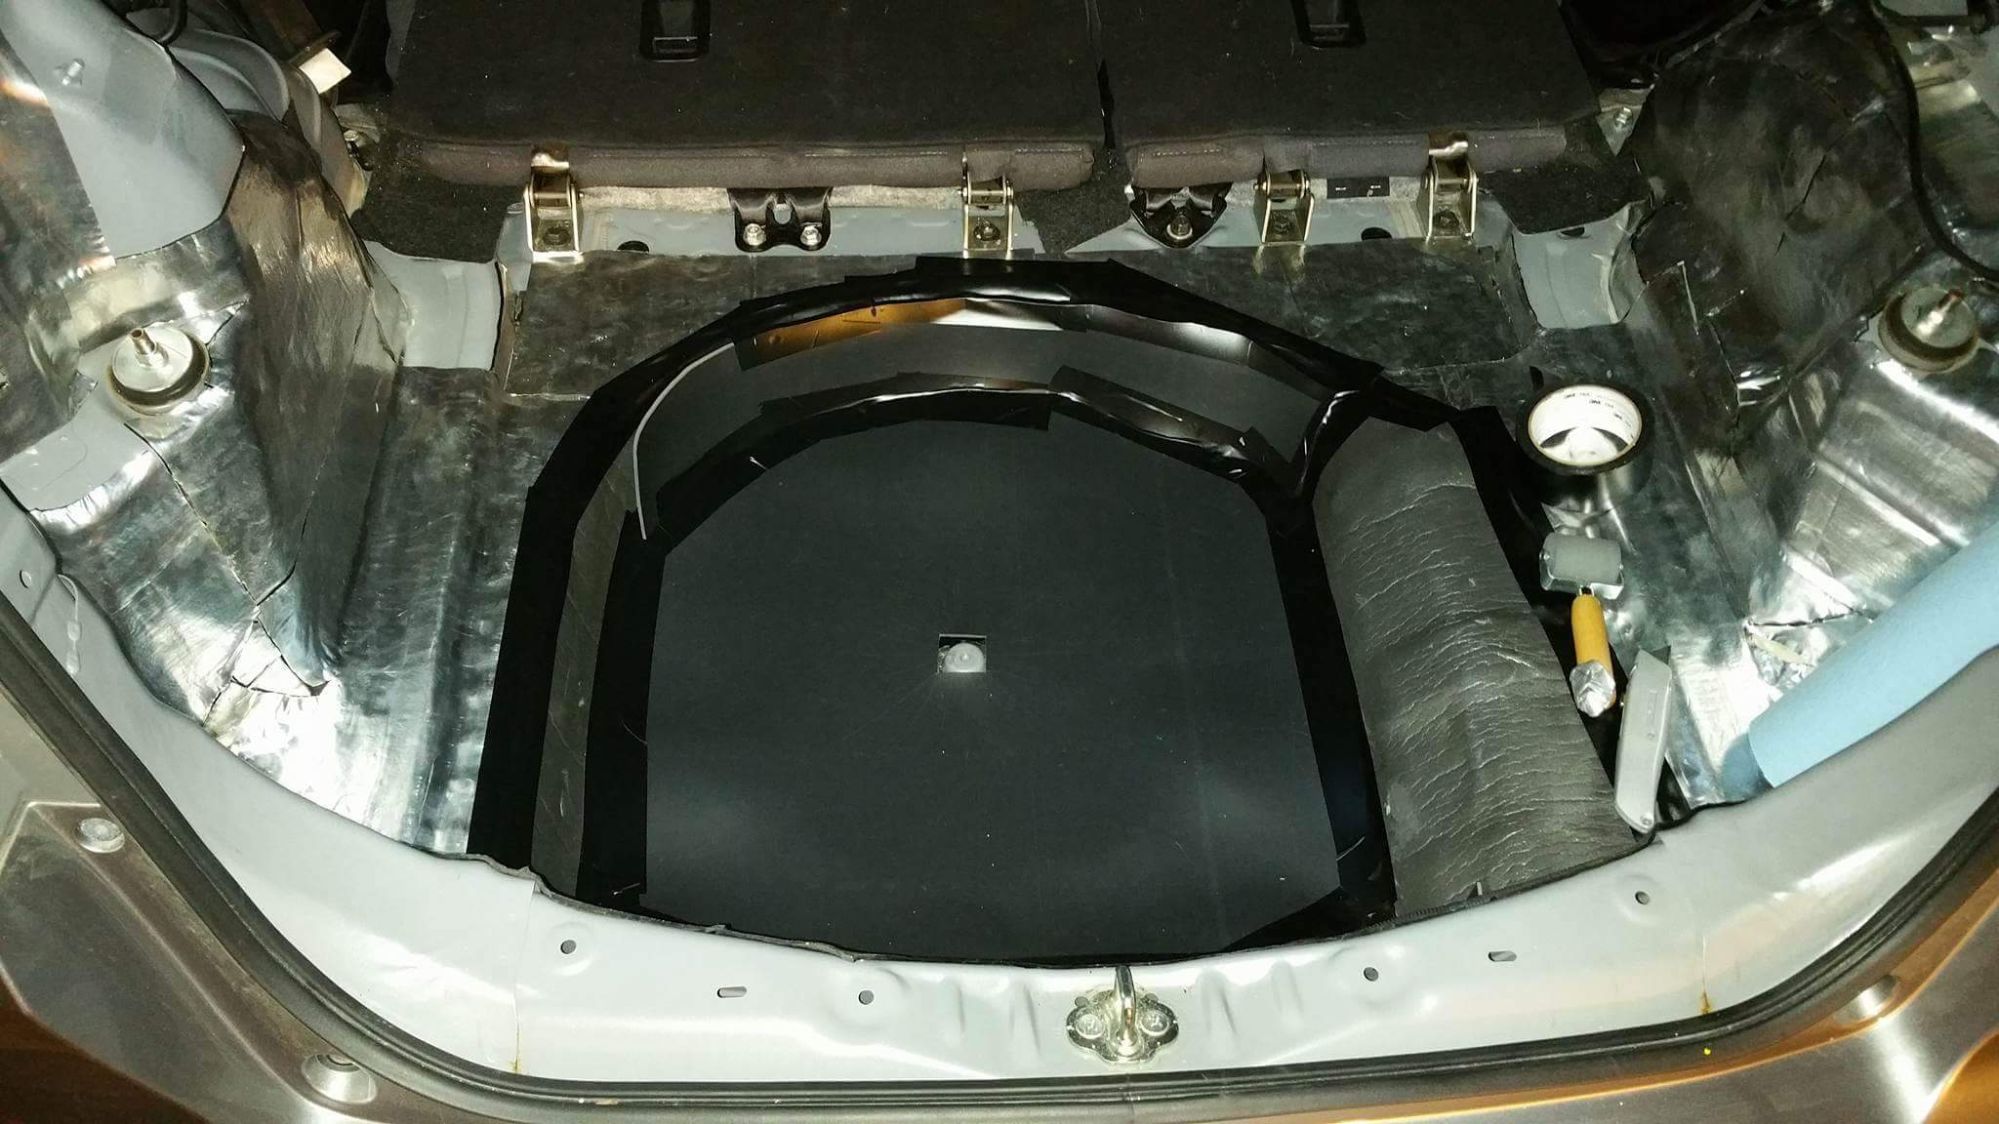
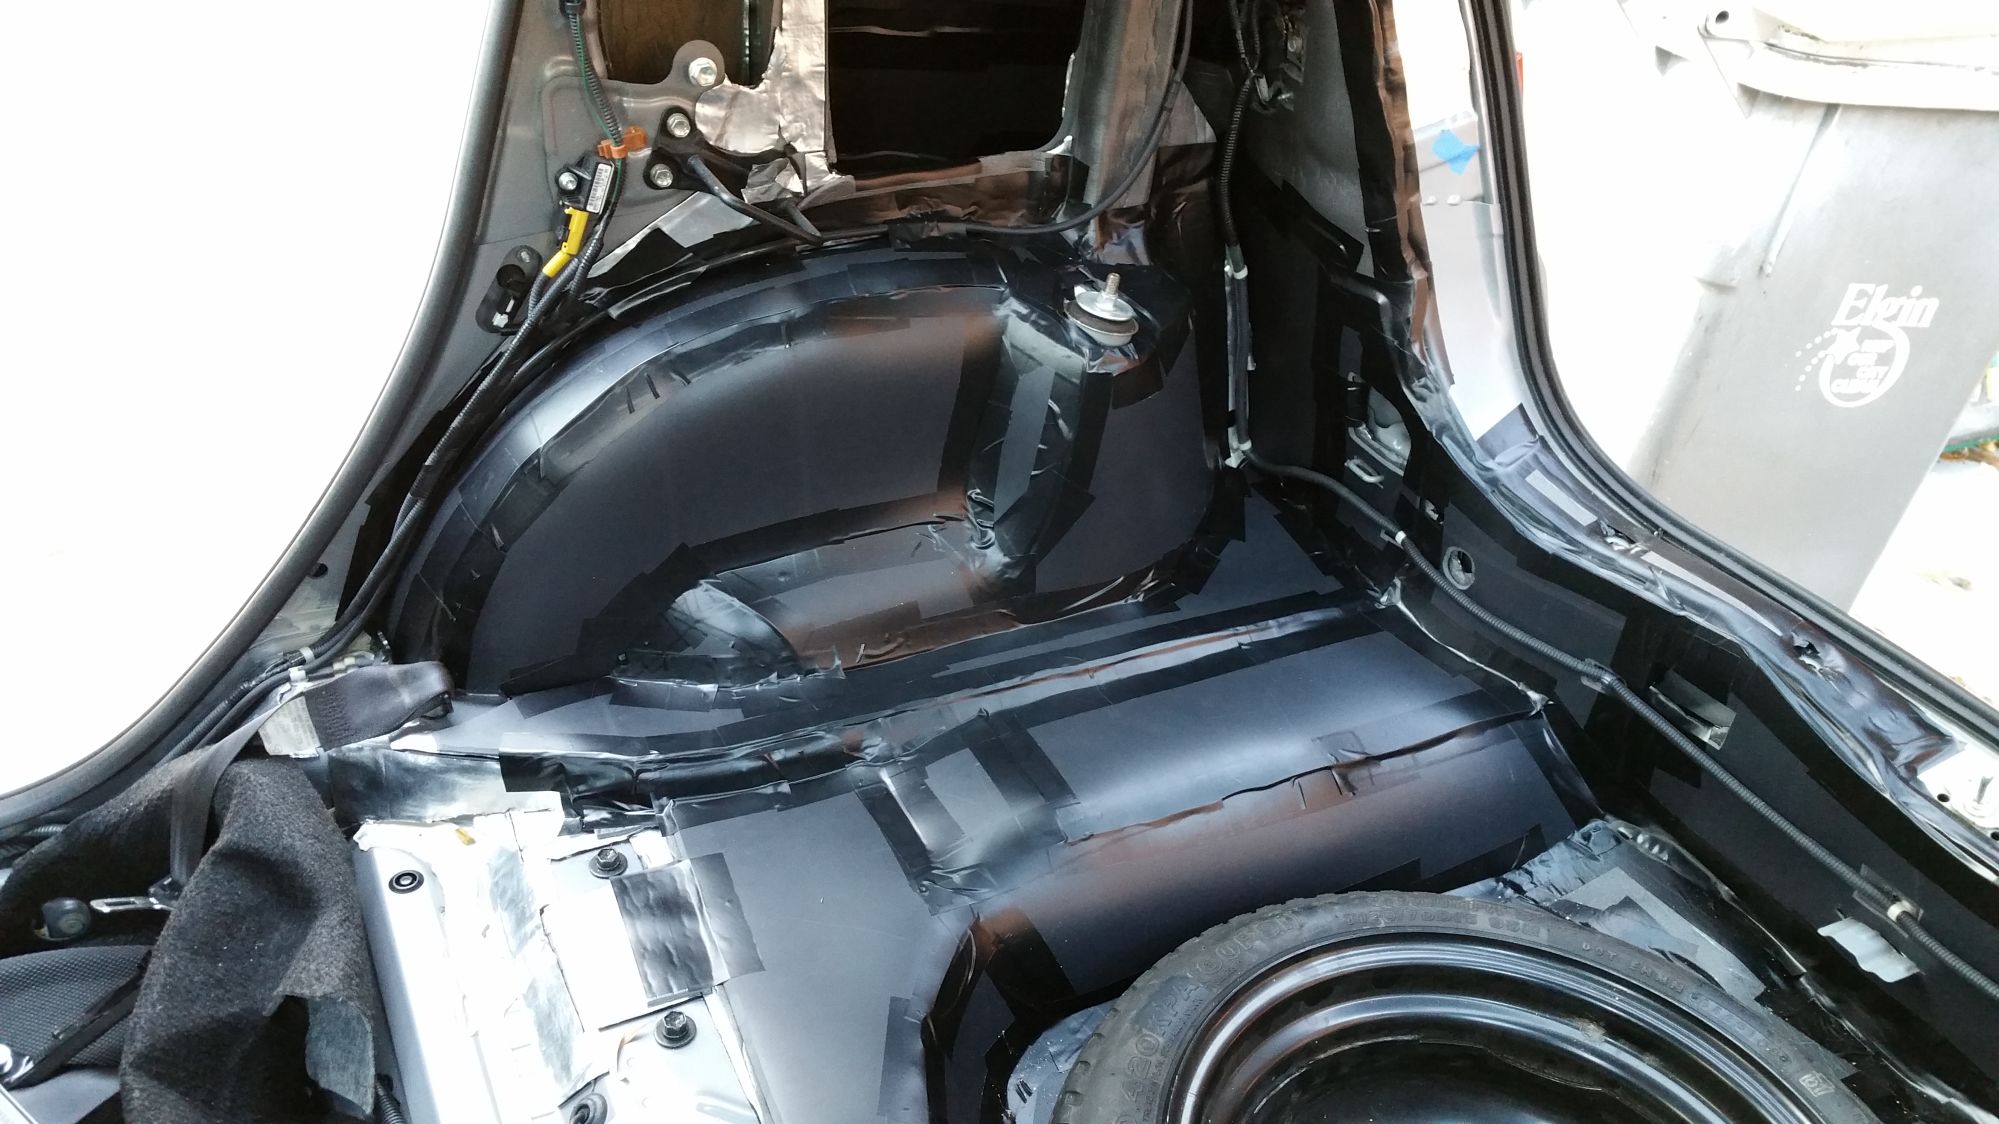
Here is me fitting in the first of the floor bits. Small hint, I used gift wrapping paper to build a template to cut out. Everything else I have been able to shape by hand with the MLV (best part is you can flip it over and it works to cut out the drivers side). Definitely need to be careful on the floor because that is the closest forming part of the side panels to the car body.
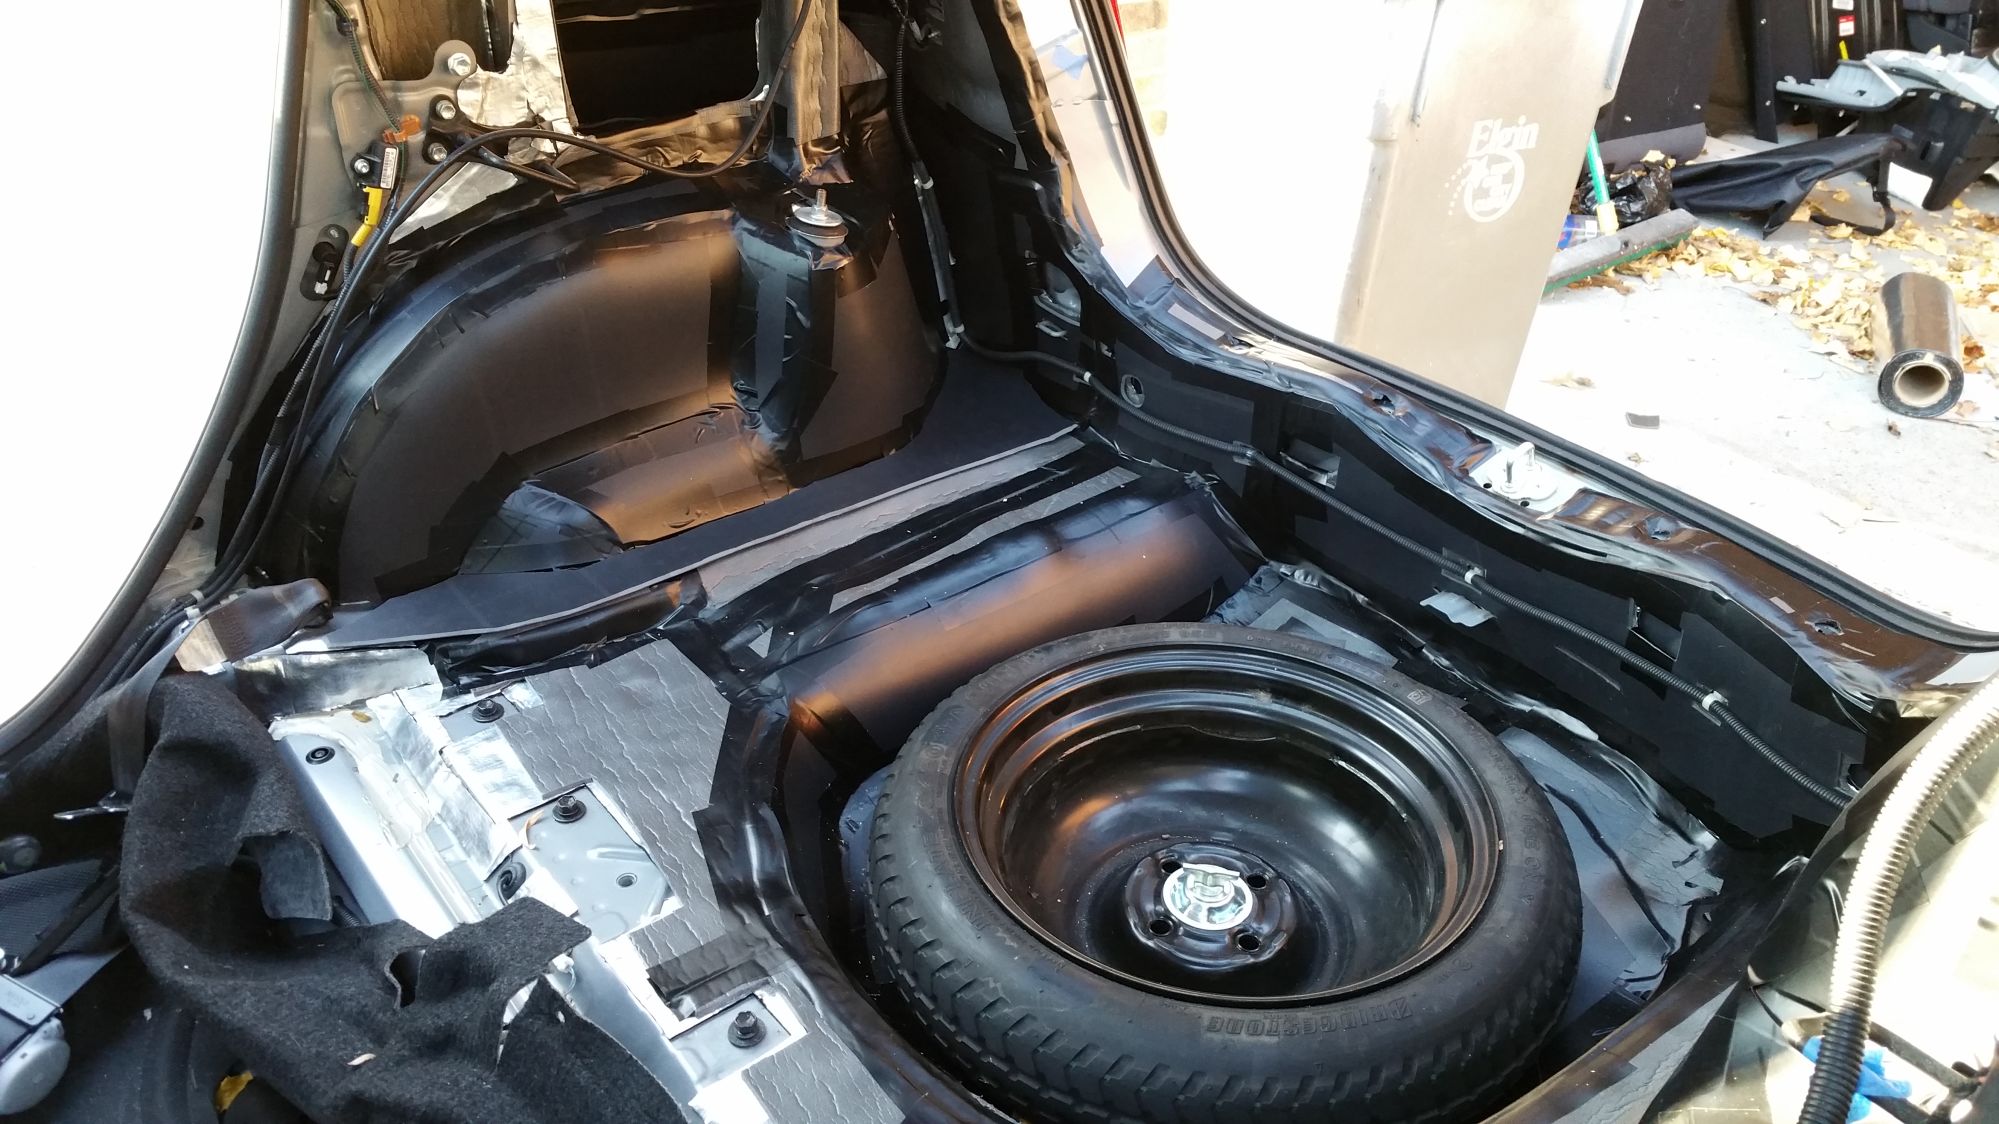
So here is the passenger side all said and told. I only consider this complete to just over the wheel wells. I'll come back in the spring and pull all the side pillars and headliner and finish the upper half of the car. I did pull egg crate foam all the way up to the roof line and very thoroughly stuffed it in every nook and cranny (only leaving the pathway along the rear bumper for airflow to the external vents). Also of note is that while I never took pictures clearly of it, the outer wall is also 3 layered lined and fit just as tightly as the inner wheel well.
Th driver's side isn't far behind and I have some pics but I'll wait to post that side until I have it finished tomorrow.
I have to say the whole time of doing the project, I never was able to enjoy much of an improvement. Today was the first day driving around in it that it was positively notably for road sound levels. It is positively about the complete package!
proud to say I got all the interior panels back in on the passenger side just as the sun was setting.... All I have to say is it is a VERY tight fit with the panels but they did clip in. I think most of the fitment issues are due to me rasing the height of the floor. Next time I take the side panel off, I'll make some adjustments to it so it fits more true. But moral of the story with the MLV is that you definitely need to be very exacting with how snugly and accurately you make it fit.
Here is me fitting in the first of the floor bits. Small hint, I used gift wrapping paper to build a template to cut out. Everything else I have been able to shape by hand with the MLV (best part is you can flip it over and it works to cut out the drivers side). Definitely need to be careful on the floor because that is the closest forming part of the side panels to the car body.
So here is the passenger side all said and told. I only consider this complete to just over the wheel wells. I'll come back in the spring and pull all the side pillars and headliner and finish the upper half of the car. I did pull egg crate foam all the way up to the roof line and very thoroughly stuffed it in every nook and cranny (only leaving the pathway along the rear bumper for airflow to the external vents). Also of note is that while I never took pictures clearly of it, the outer wall is also 3 layered lined and fit just as tightly as the inner wheel well.
Th driver's side isn't far behind and I have some pics but I'll wait to post that side until I have it finished tomorrow.
I have to say the whole time of doing the project, I never was able to enjoy much of an improvement. Today was the first day driving around in it that it was positively notably for road sound levels. It is positively about the complete package!
#3
11-08-2015, 10:12 PM
also for note now that I think of it. consumption for just the trunk has been 40' of dynomat and 40' of the foam and not sure the MLV mat because it is a much larger roll. Also 15 square feet of eggshell crate foam. I've doubled my order of the first 2 layers and expect I will have to re-up my order one more time before all is said and told.
#4
11-16-2015, 12:41 PM
it took exactly a month for me to finish the stupid trunk and get all the interior back in. I must say that the difference is significant for road noise. With everything back in place, it is the equivalent to unplugging the rear speakers on your surround system.
some notes:
the egg crate foam probably makes the BIGGEST difference.
between the 110mil CLD, the CCF and MLV, those trunk panels BARELY fit back on. You definitely have to be super careful on how you apply them and how exacting you are.
use a heat gun for the CLD/Dynomat.
Screw using a roller, just get one of these instead You need garage space for this, removing the panels and rear seats and such take up a lot of space and expect this whole process to take a while.
You are going to use more material than you think.
It is easy to break clips. search out photos of where these clips are on the panels before you haphazardly try pulling things out. take your time and use common sense.
where I'm going from here:
still a lot to do but I'm burned out on it for the moment and probably wont do much more until the spring. I do own enough material to do the entire car and it sits in my garage as a reminder that I need to finish this because I already invested in it. I am excited though.

Thread
Thread Starter
Forum
Replies
Last Post