When you click on links to various merchants on this site and make a purchase, this can result in this site earning a commission. Affiliate programs and affiliations include, but are not limited to, the eBay Partner Network.
Install android head unit Xtrons TD696AS to GE 2010
Installation of Xtrons TD696AS in Honda Fit/Jazz GE 2010 from beginner
The following instruction is the installation at the level of DIY from beginner like me. So, hopefully, this article might help lot of stressful persons who are in the installation of the same kind of this head unit I have (as I write this message, Xtrons is releasing the new head unit with more advanced hardware with new user interface ,tire pressure monitor function ,higher resolution display, and the 8 Core hardware with 64 bit). You can go and check out for more information fromhttps://xtrons.com. Actually, I�m an architect and product designer also part time Professor at a university in Thailand. I�ve never done any complicated stereo job before so don�t worry, everyone can do this. I did the first installation in my W211 Mercedes Benz.
This is the second car which I want to try because I want to know the format of the wiring of the Japanese car. I just hope that everyone can enjoy working with your car like I did.
You can watch the movies of after installation this head unit at
They are the videos from what I have once I finished the installation. The telephone mode and the reverse camera function can be seen in the 2nd clip. Once you finished the following instruction. You will be able to use all modes without any problem.
Why don�t I go hiring some local car stereo shop to do this?
I�m always feel nervous when I see someone pulling part or uninstall any piece from my car. So, instead of seeing any of them broken by the installation guy, I think I try to keep it at the minimal rate by doing it myself. This might hurt me less than seeing some of them broken and still have to pay a lot of money to hire someone.
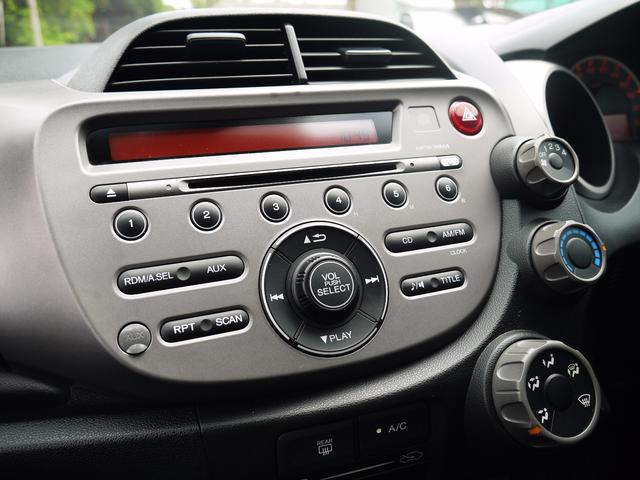
The existing Honda head unit
My car is the Honda Jazz GE 2010 with the Honda SV optional decoration package. It comes with the CD-mp3 player with USB connector. Mostly, it was used to listen to the radio. I didn�t even bother to put any cd to play with. Only, the RS version comes with 2Din size radio-dvd player with navigation system. I was looking for the replacement head unit from the other aftermarket brands like Alpine, Sony or Pioneer for years but to get all the options I want, it won�t be a cheap installation. What I was looking for are
- Built in GPS
- Voice control
- Dvd player
- Radio
- Internet access
- Updateable software
- Obd reader
- Built in ipod interface
- Mp3 reader ( USB)
- Video file reader ( USB)
- Telephone via Bluetooth
- Digital TV compatible
- Affordable price
- Not complicate installation for a beginner like me Double DIN Car Stereos, 2 DIN DVD Players | Xtrons
**The head unit can install the 3Gwifi dongle and DAB radio tuner receiver but I don�t have them � they are options that I don�t want at the moment.
I search through websites and E-bay to find what I want and I see the appearance and specification of the head unit from XTrons website. There are so many types and options to choose but after I did the first installation with my W211 MB car. I feel it should be easy to get the same options for the little Japanese car so I choose this model TD696AS. 6.95" Android 5.1 Lollipop Quad Core 64-Bit Operating System Double Din Car DVD Player | Xtrons
[IMG]http://i624.photobucket.com/albums/t...0/IMG_5067.jpg [/IMG]
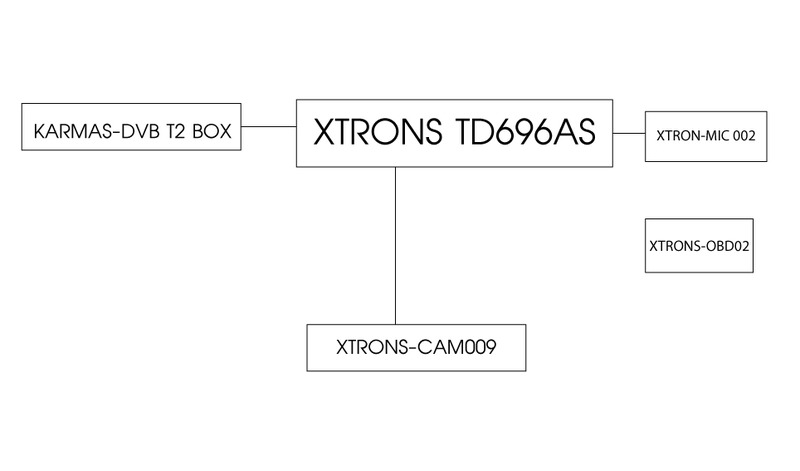
Diagram of the installation
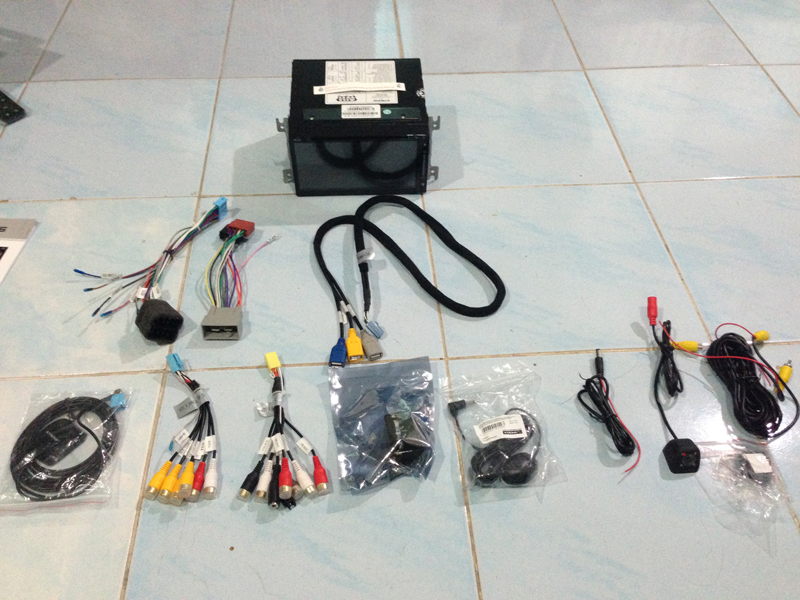
Part list for my installation?
1. Xtrons head unit TD696AS
2. Xtrons Mic002
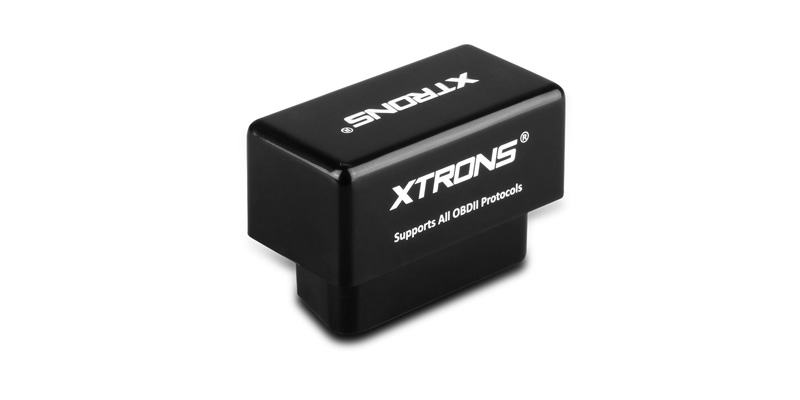
3. Xtrons OBD02
4. Xtrons reversing camera CAM009
5. Xtrons-ICE/ACS/12-029
Honda 2008+ Stereo Radio DVD Wiring Harness Cable Lead Loom
6. Local brand DVD-t box- (I use KAMAZ brand , the same one I installed in the Mercedes.)
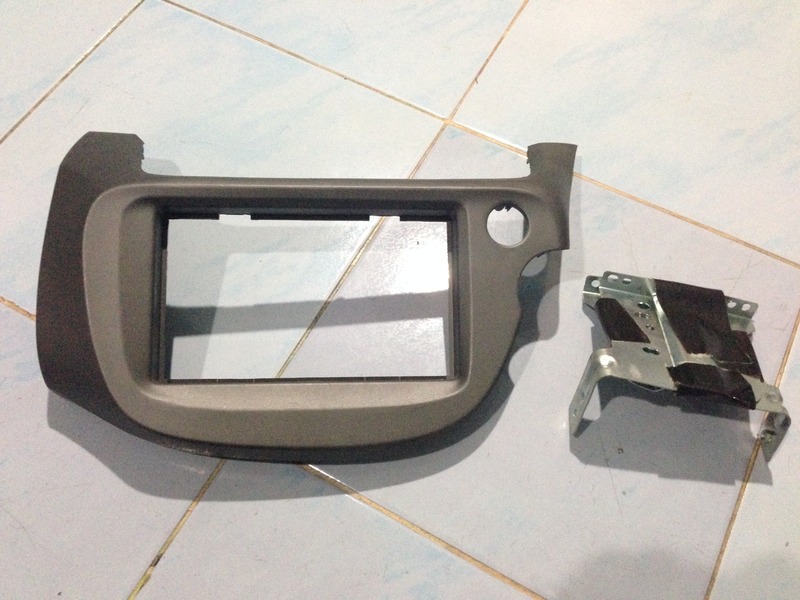
7. Honda 2 Din size radio frame - You can use either the aftermarket or the one from Honda.
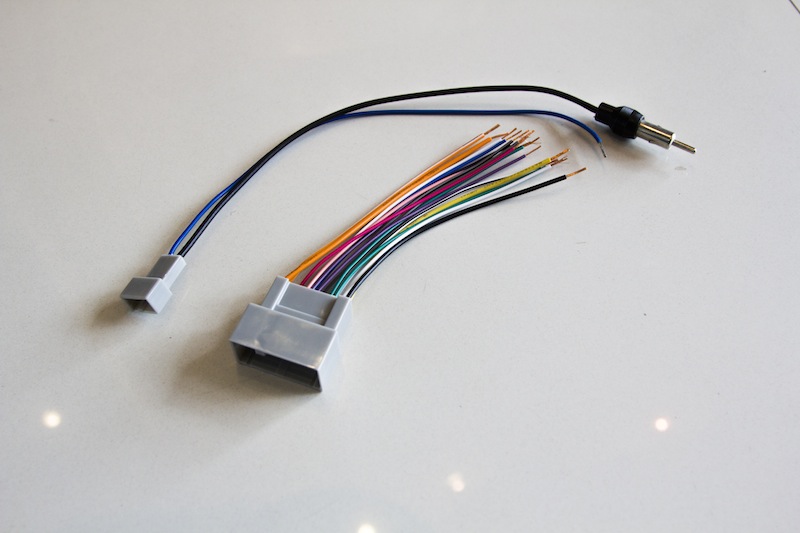
8. FM-radio antenna plug
The one on the left is radio antenna plug. The right one with grey socket is the ISO harness socket that I use to savage it for the 2 extra pins that I will add them to Xtrons-ICE/ACS/12-029 Honda 2008+ Stereo Radio DVD Wiring Harness Cable Lead Loom for connection to the head unit ISO harness. This will make the existing steering wheel control buttons work.
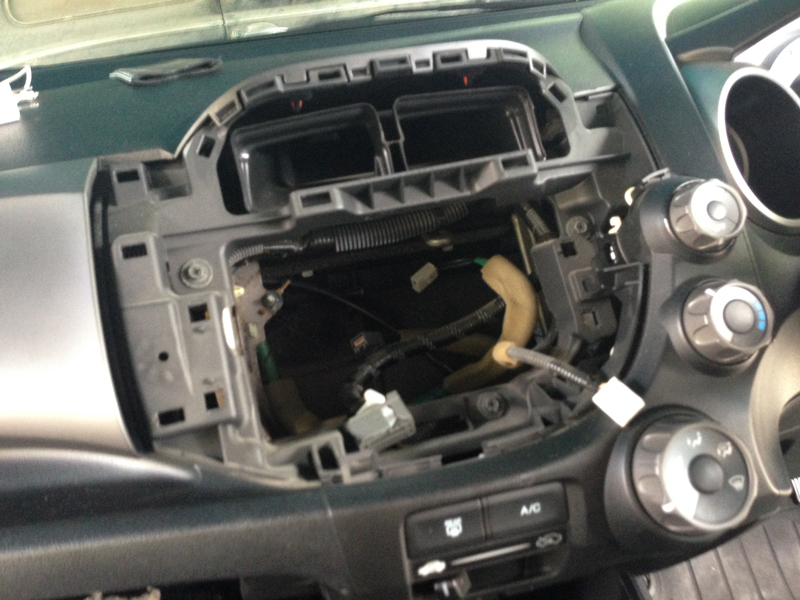
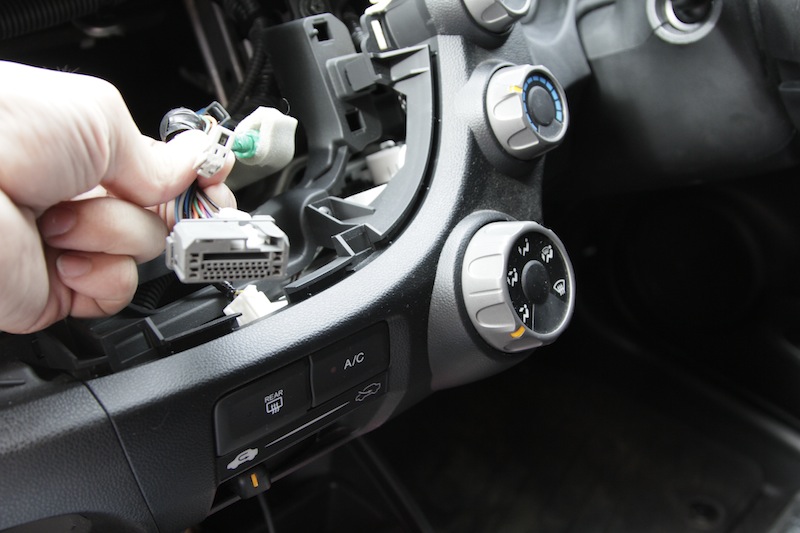
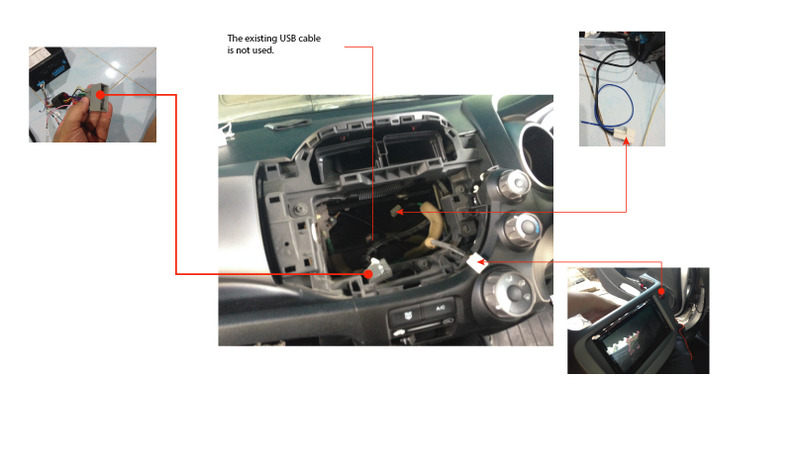
I will not put the removal process of the old head unit here. You can find the procedure throughout the internet websites and You-tube. I will focus on only how to install the unit, wiring and its options. The image of the head unit area after removing the existing head unit appear as the following image.
There are 4 existing cables after you remove the old head unit.
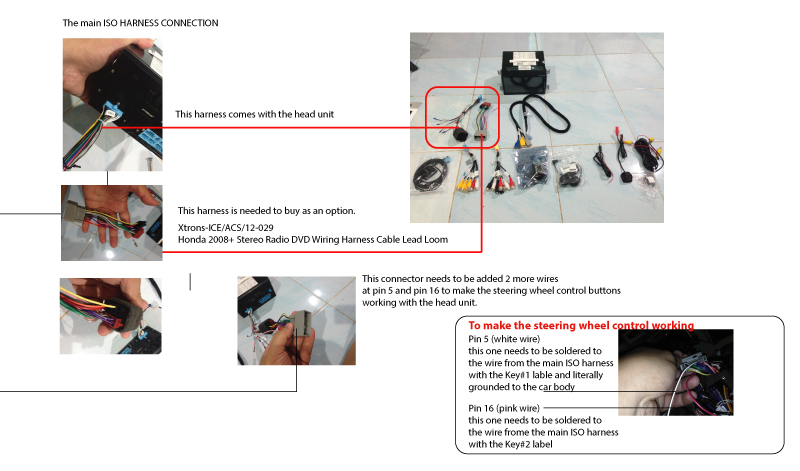
1. The main ISO harness plug (the one with the white lock clip)
2. The FM radio antenna socket
3. The emergency (hazard) light button cable
4. The USB cable-This one won�t be used in this installation.
*Only cable no.1-3 will be used for the connection with the new head unit.*
There are 2 areas of the car that need to be worked with, the head unit area, and the trunk. In the MB, I chose to work with the trunk first but for the Honda I started with the head unit area. The list of the wiring harness sets that are needed to work with are.
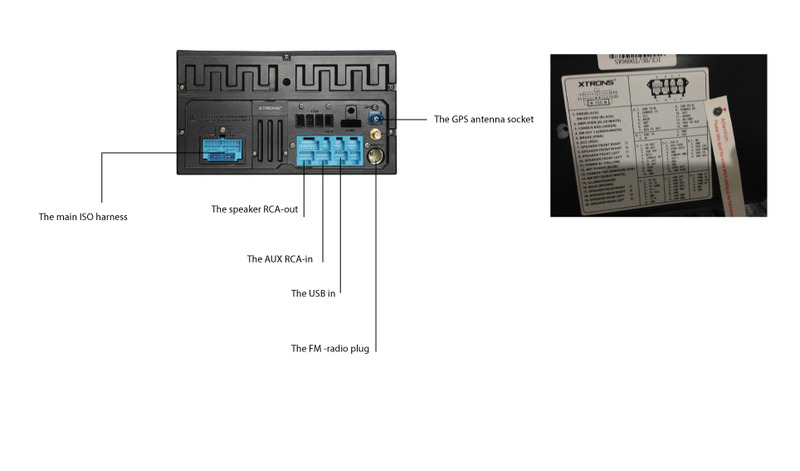
1. The main ISO harness
2. Xtrons-ICE/ACS/12-029 Honda 2008+ Stereo Radio DVD Wiring Harness Cable Lead Loom
3. The optional AUX RCA -in harness. Including the rear camera wiring.
4. The optional speaker RCA-out harness
5. The USB harness
6. GPS cable
7. FM-radio plug
Let�s start THE HEAD UNIT AREA 1. The main ISO harness
Connect the ISO harness to the head unit then connect the other end with Xtrons-ICE/ACS/12-029 Honda 2008+ Stereo Radio DVD Wiring Harness Cable Lead Loom.
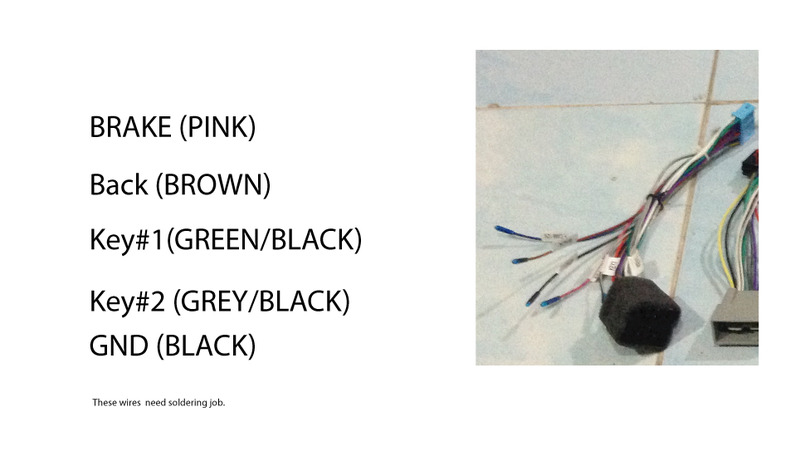
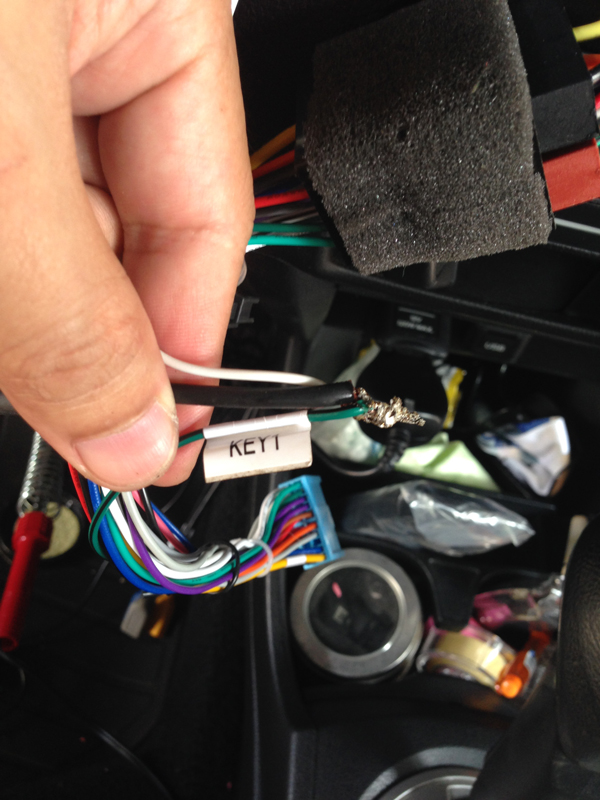
There are 5 wires that needed to be soldered.
- Brake
- GND
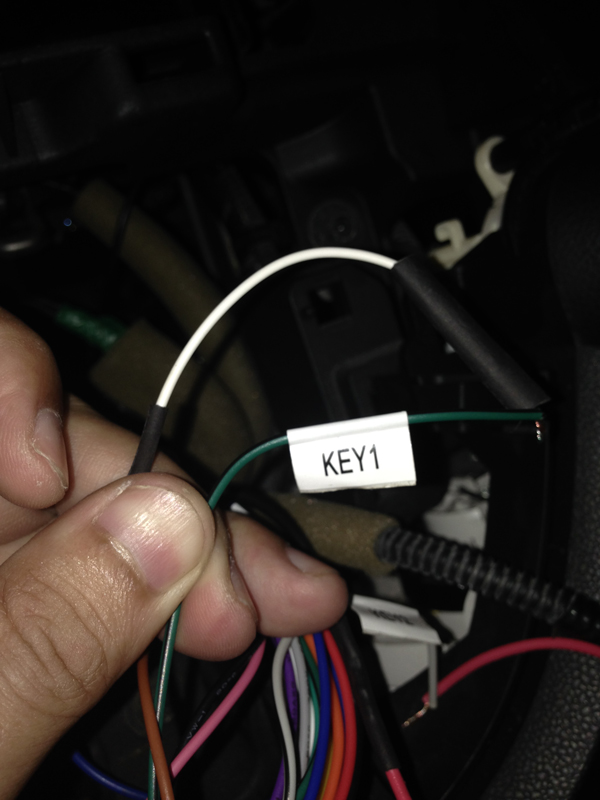
- Key#1
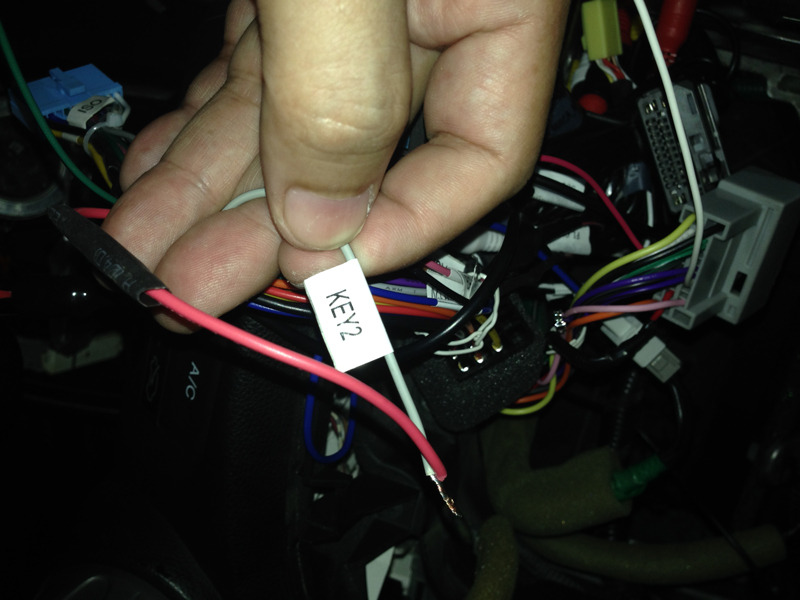
- Key#2
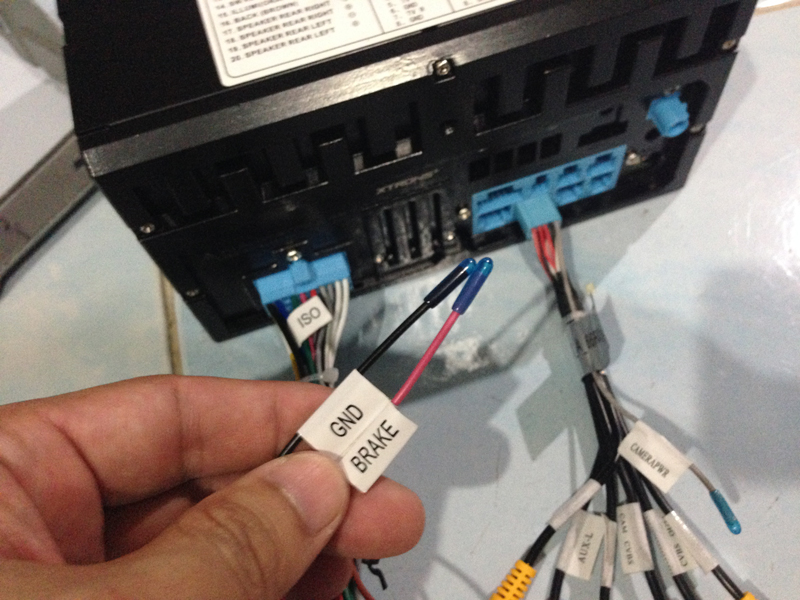
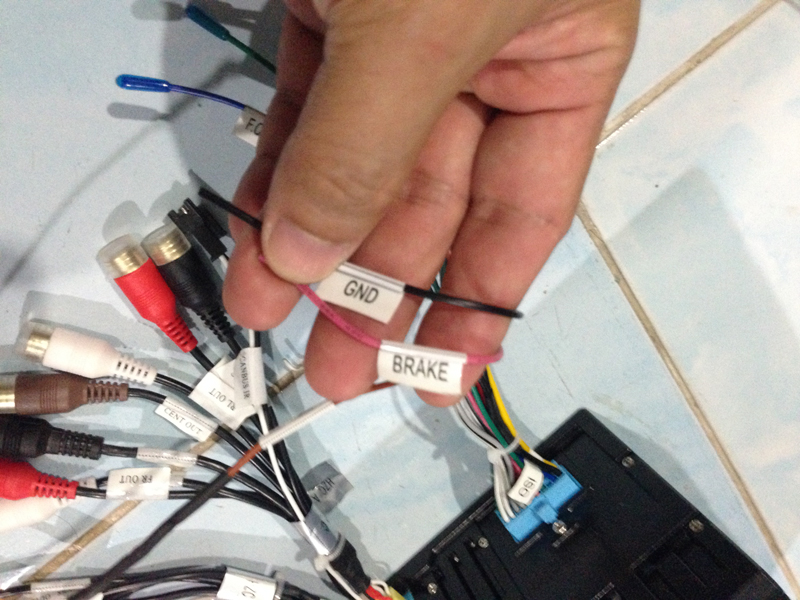
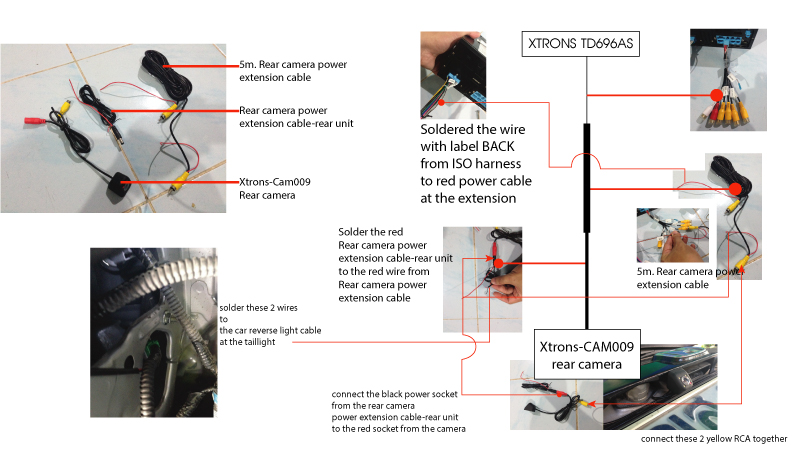
- Back Brake wire + GND : These 2 wires must be soldered together then grounded to the car body-this will allow you to play dvd player while driving. Key#1: Need 6 in. extension wire and then pin it into Xtrons-ICE/ACS/12-029 Honda 2008+ Stereo Radio DVD Wiring Harness Cable Lead Loom at the pin#5 - this is for steering wheel control buttons. Key#2: Need 6 in. extension wire and then pin it into Xtrons-ICE/ACS/12-029 Honda 2008+ Stereo Radio DVD Wiring Harness Cable Lead Loom at the pin#16 - this is for steering wheel control buttons. BACK: soldered it to the red wire from extension camera cables � this will activate the signal of the rear view camera into the head unit display.
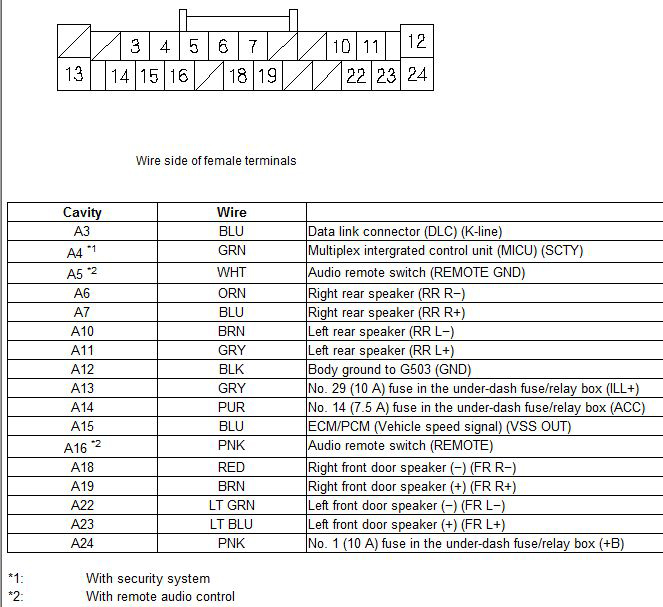
2. Xtrons-ICE/ACS/12-029 Honda 2008+ Stereo Radio DVD Wiring Harness Cable Lead Loom
Pin wire code from the existing harness from the car
The grey socket that will be connected to the existing main ISO plug from the car (the one with white clip) is needed a little modification.
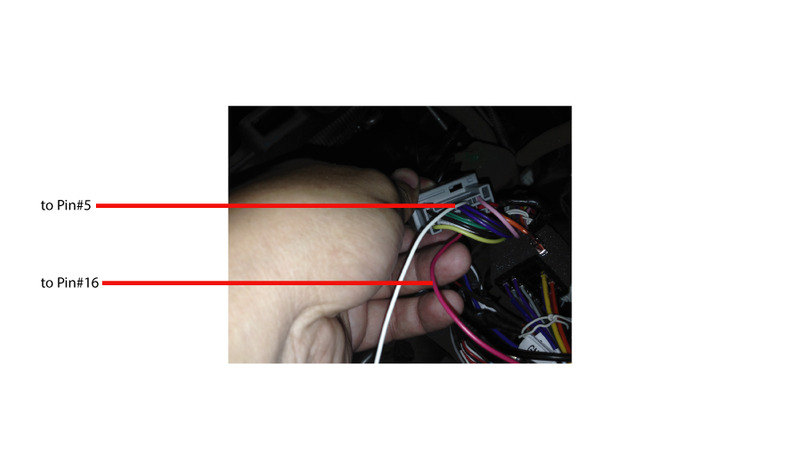
You need to add 2 more wires to pin no.5 and pin no.16. These will make Xtrons head unit working with the existing Honda steering wheel buttons. There are a couple soldering jobs to this ISO harness. Once you put these 2 new cables, you need to do as the following.
2.1 soldering the wire with lable Key#1 to the new wire that goes into pin no.5
2.2 literally grounded the 1.1 wire to the car body
2.3 soldering the wire with lable Key#2 to the new wire that goes into pin no.16
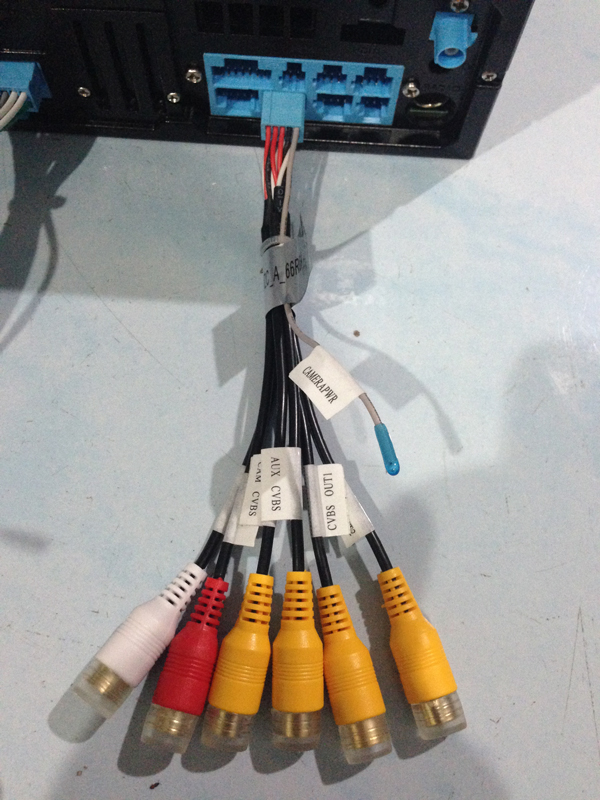
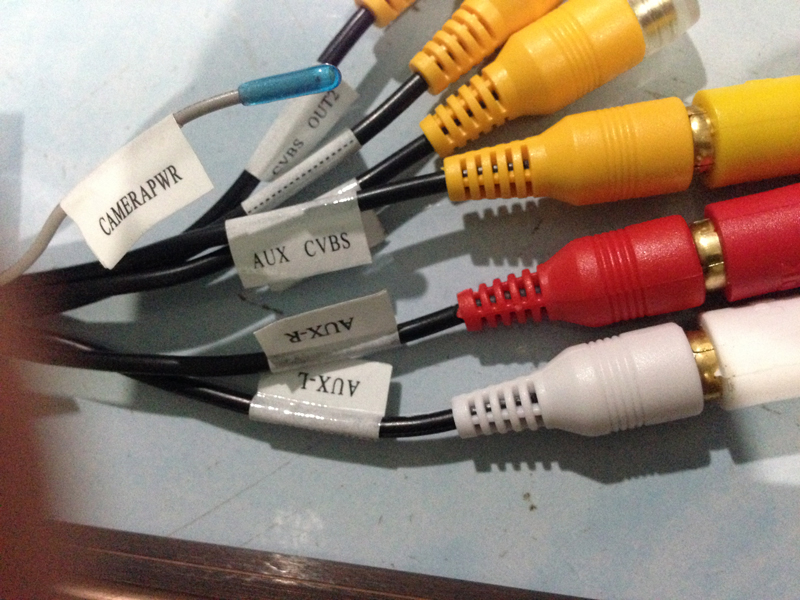
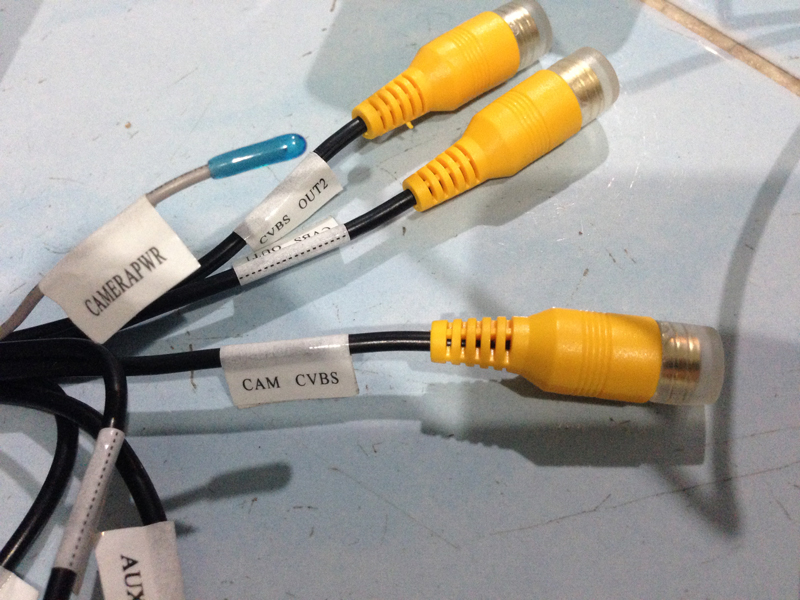
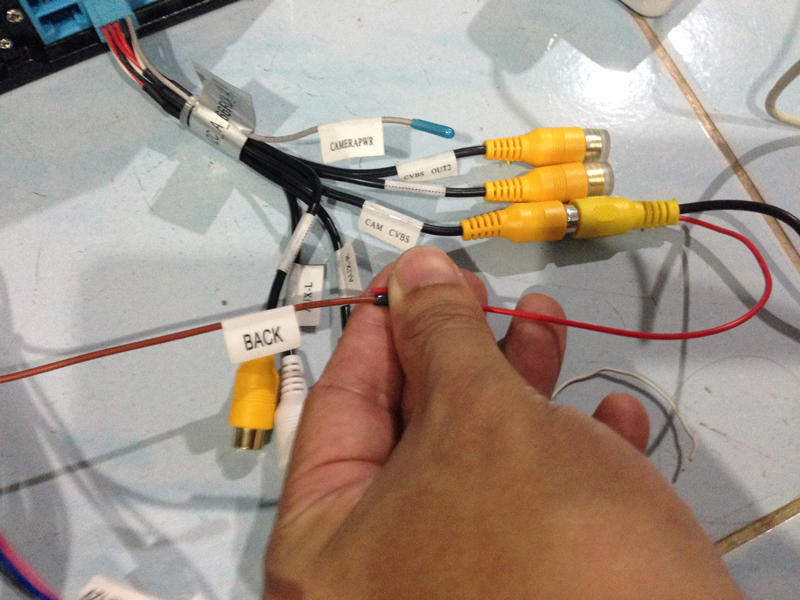
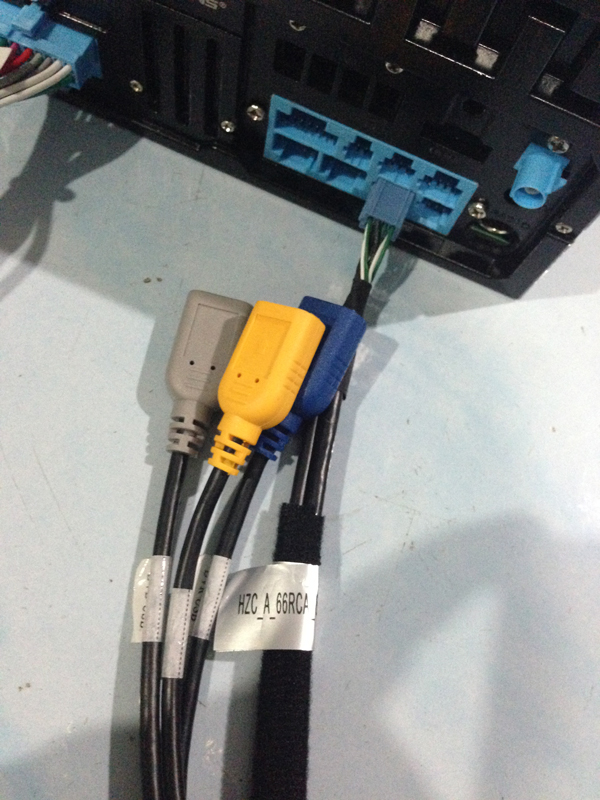
3. The optional AUX RCA -in harness.
This harness is the will be connected to the following options.
- Kamaz DVB �T2 box-connect 3 RCA AUX in from DVB-T2 box
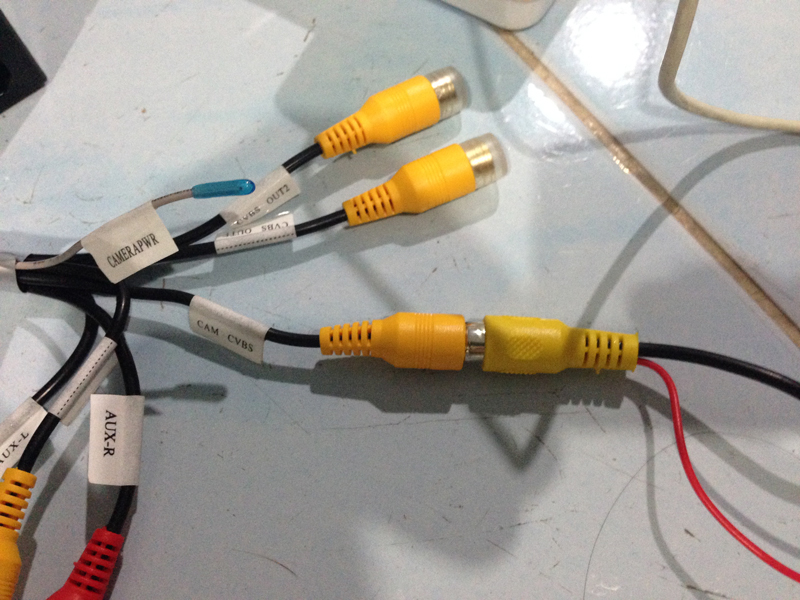
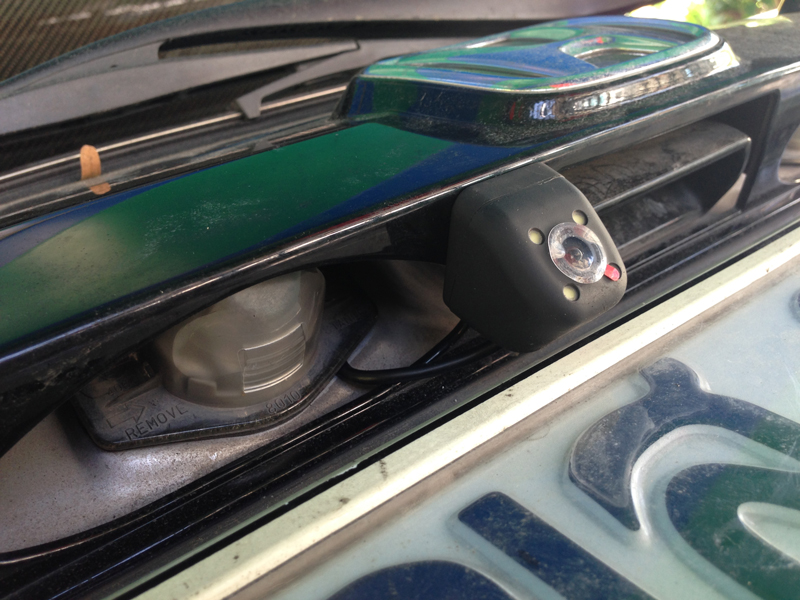
- Xtrons reversing camera CAM009- connect the 5m.camera extension cable to CAM CVBS RCA. Please check the following diagram for the rear camera installation.
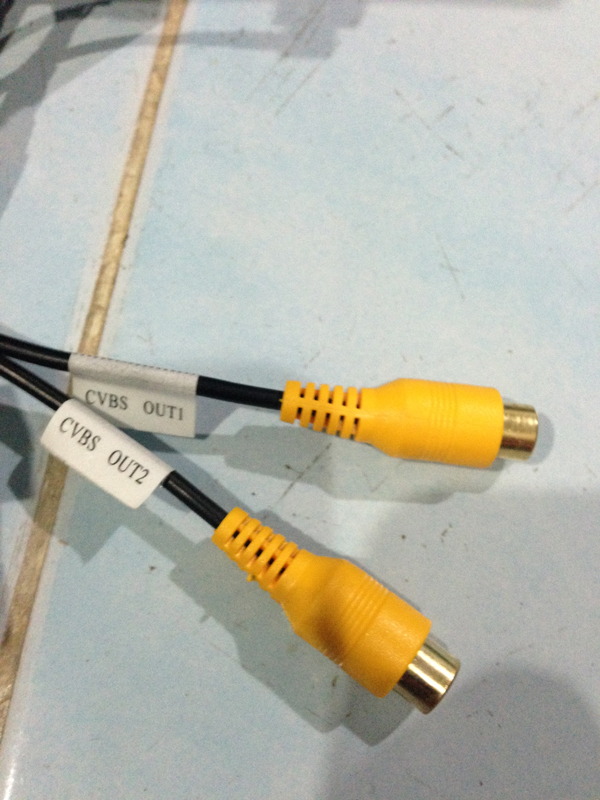
- RCA AV out for future rear head rest monitors- connect CVBS out1 and CVBS out2 to RCA for rear head rest monitors
For the soldering job at this harness, you need to solder the red power cable from the 5m.extension rear camera cable to the BACK (brown) wire from the main ISO harness. Then we are done for this harness.
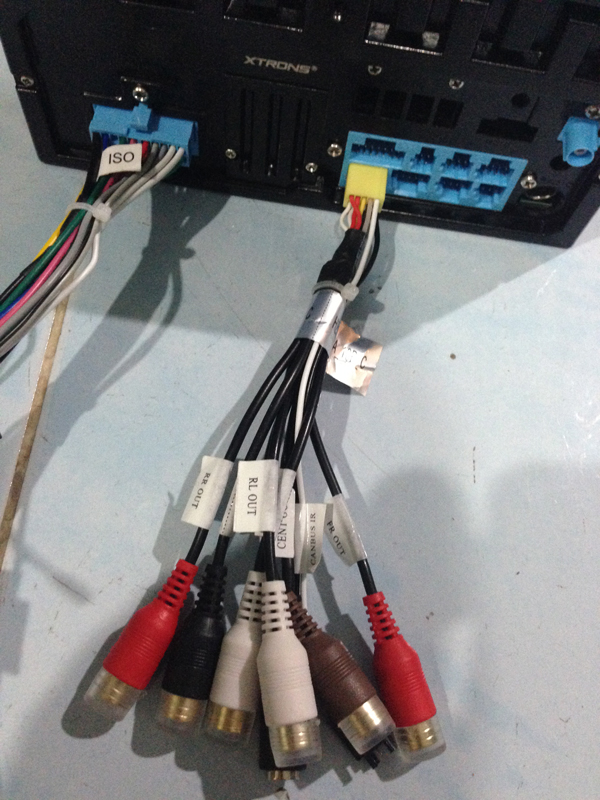
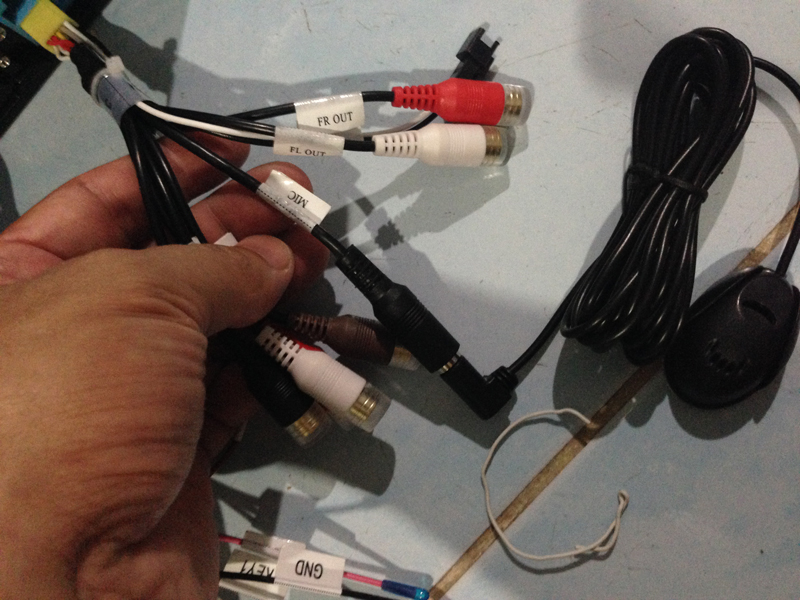
4. The optional speaker RCA-out harness
For those who want to add the amplifiers, this is the harness that you need. It�s come with the RCA out sockets. I don�t have any amplifier at the moment so the only job for this harness for this installation is to connect the 3.5mm. Microphone connector. Just simply plug it in then you are ready. I put the mic near the cluster meter.
5. The USB harness
This one just simply plug it into the head unit then you need to rearrange the wire through the console.
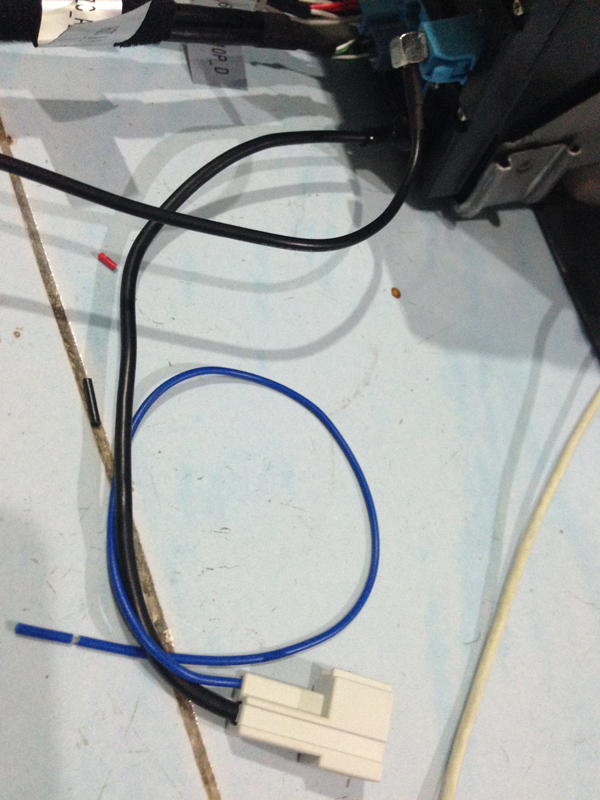
[IMG]http://i624.photobucket.com/albums/t...IMG_5096_1.jpg [/IMG] 6. GPS CABLE
This cable is also simple plugin cable. You need to arrange the cable through the back of the head unit and knee bolster. I place the GPS receiver box at the lower left corner of the front windshield.
7. FM-radio plug
To make this new Xtrons head unit work with the car antenna, you need to buy a FM-radio antenna plug. I got this plug from my local car stereo shop. It�s only 2 US.dollars.
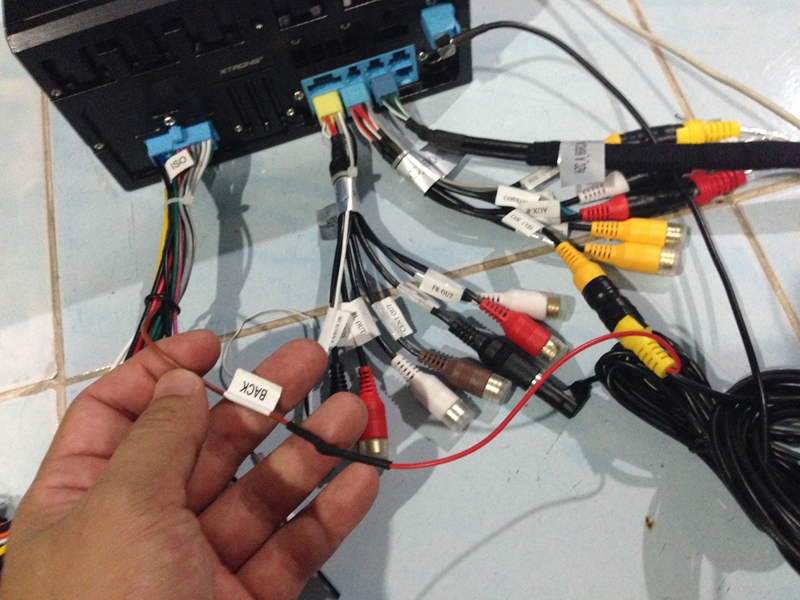
That will be all your head unit working area. You can have almost all the soldered wirings be connected to the head unit (of course not the ground wire that is needed to connect to the car body) and put everything into the head unit area at one time. After that connect the following socket to the ones from the car.
1. Xtrons-ICE/ACS/12-029 Honda 2008+ Stereo Radio DVD Wiring Harness Cable Lead Loom - to car ISO harness plug
2.FM-radio plug to car male radio plug
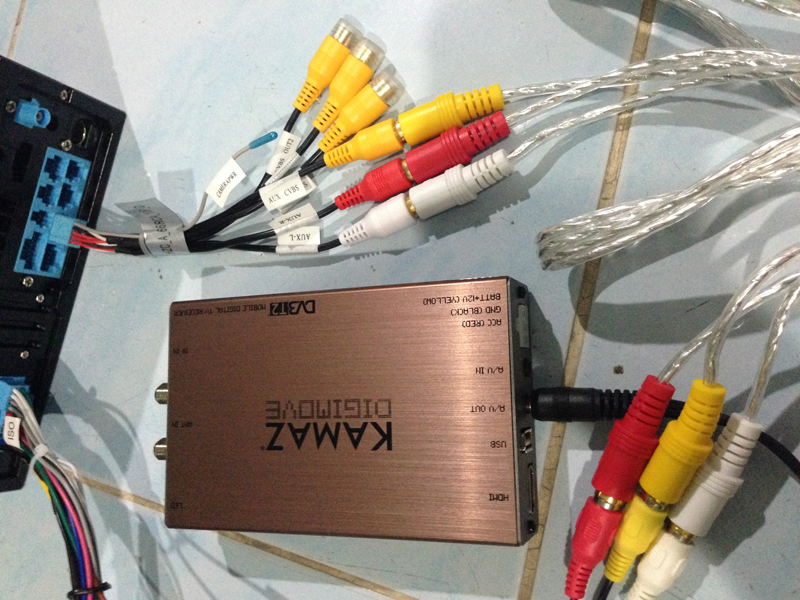
3.Emergency (hazard) light button cable. DVB-t2 box installation
The unit need the a couple soldering jobs.
1. The power cable 12 volts
2. Ground
3. ACC
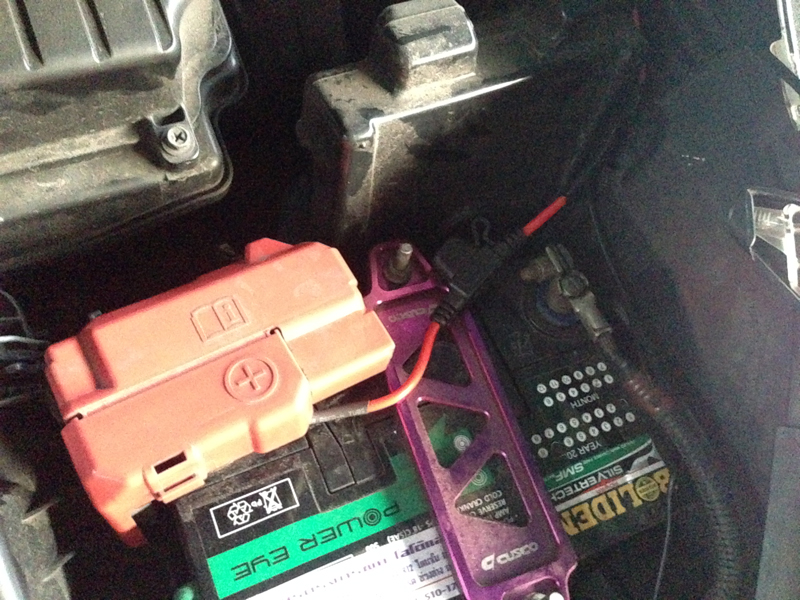
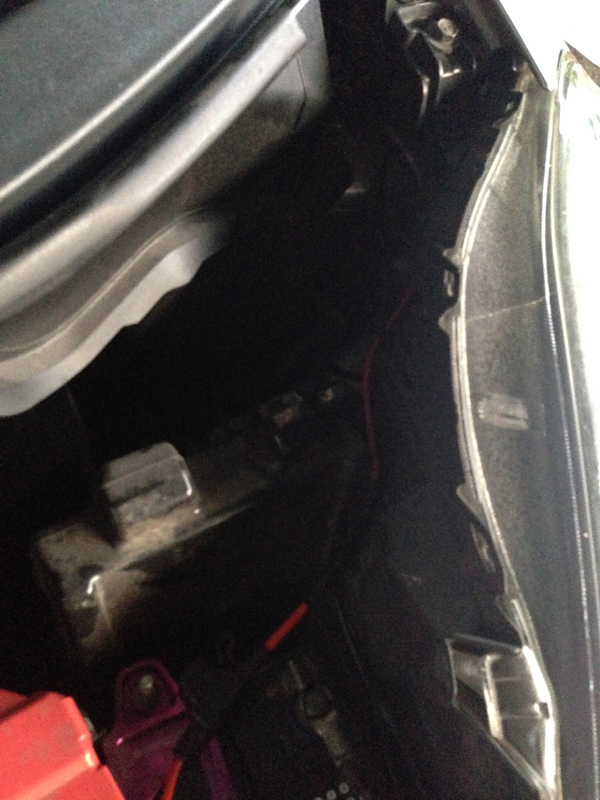
This is how I route the power cable into the car cabin. For the ACC cable I soldered it to the ACC cable from the head unit main ISO harness (the red one that connected to pin no.6). There are 2 antenna cables. I ran the front cable through the whole at the same place I route the power cable. I put the first antenna under the front bumper near the front license plate. The remote control receiver will be place near the GPS receiver. After all the wirings are done I put the DVB-t2 box inside the knee bolster at the left passenger side. THE TRUNK AREA
The image is only the temporary set up wires. After you finish all the connection, you need to think about how to make it look good.
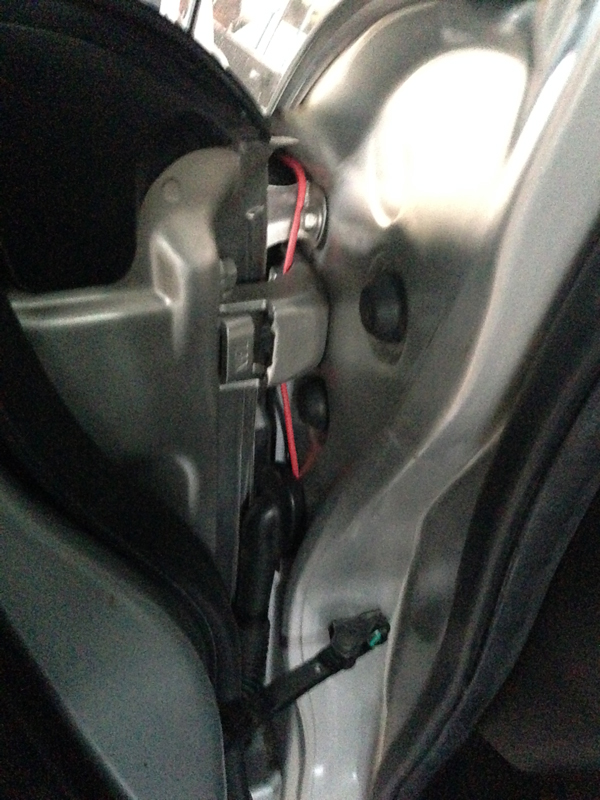
The second antenna cable is put along the headliner trim line. Because the whole rear door is hold up when it is opened, this give me a little trouble for arranging the wires (antenna cable, rear camera cable and rear camera power cable). I place the second antenna at the lower left rear windshield. The signal is quite ok. This is all the installation I made.
For summary, installation the Xtrons TD696AS with Honda Jazz/Fit GE 2010 is easier than doing the installation to MB especially the steering wheel control part. Honda has no need for the CANBUS system. It needs a little understanding about which pin and wire of the existing harness from the car doing what. Once you have all the information. It�s just simple soldering job and plug in. I�m thinking about adding the center speaker, subwoofer, head rest monitors and a couple amplifiers to the head unit but at the moment I will leave it like this.
Jirawat Gaewpusri
Thailand
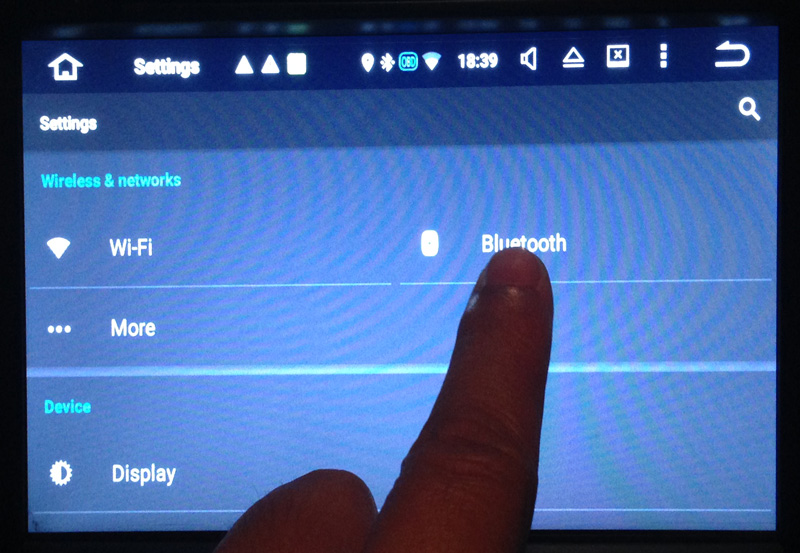
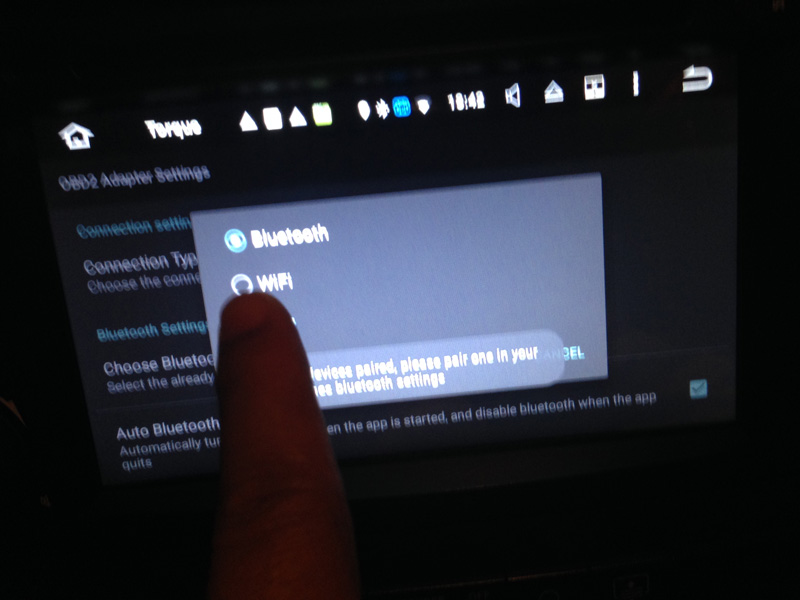
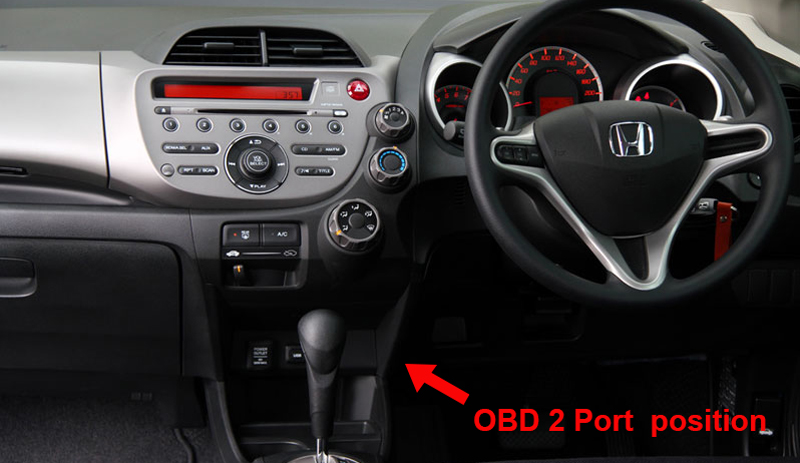
Some one might wonder how to use the Torque app with the car. First, you need to buy the OBD2 reader. You can check it from here. Bluetooth OBD2 II Car Auto Diagnostic Scanner Tool | Xtrons. You will see the OBD 2 port near the console at the knee bolster. For my car which is right steering wheel, it will be at the position as appear in the picture. What you have to do are appeared as the following. 1. Download the Torque pro app from googleplay store. 2. Simply put the OBD2 reader into the car OBD port. 3. Open the Bluetooth set up in setting and pair the OBD2 reader with the head unit. Please make sure that you pair the right tool not just connect by checking the number.
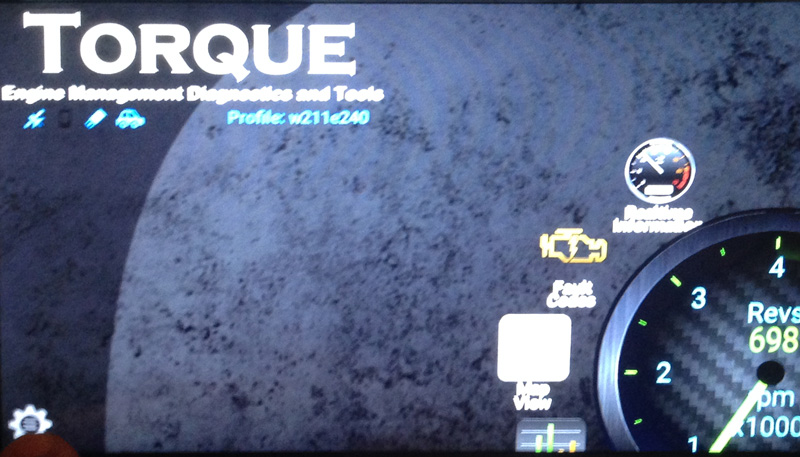
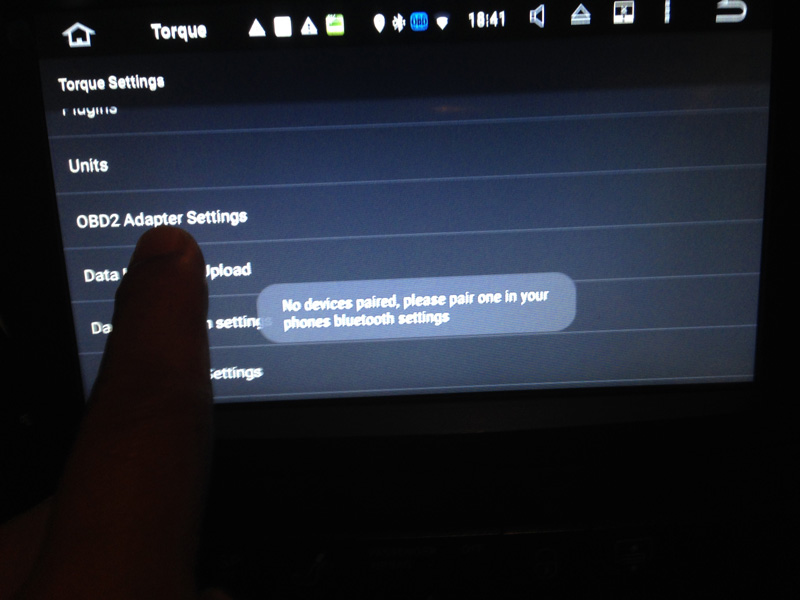
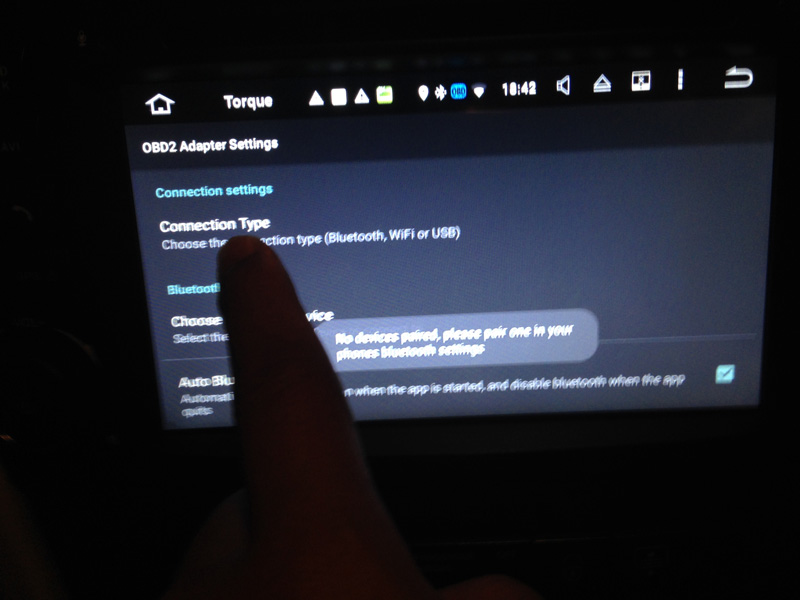
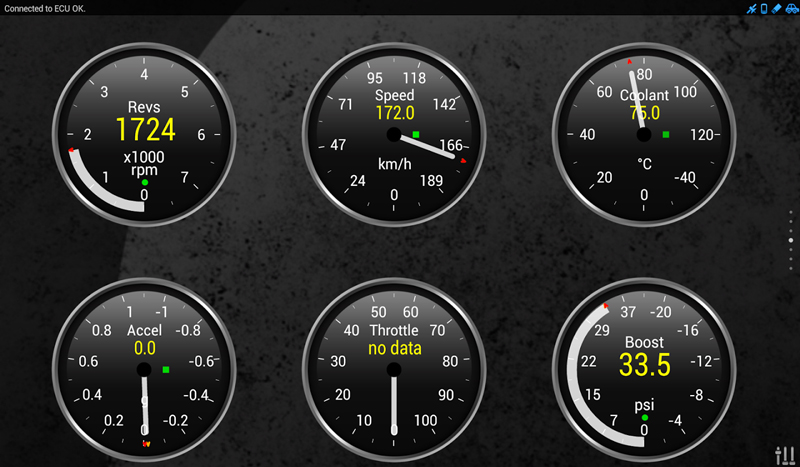
4. Open the Torque pro app. You might need to set up your car profile first. Once everything is done. You should be able to use the app. The activation of the app might has some delay but not for long. You can follow the process by the following images.
The OBD2 needs to read the information while the engine is running. I run the engine all the time during the download and connection or set up the information. I haven�t tried that with the stopped engine since this way is working why the risk, right?
 04-16-2017, 06:54 AM


 What you have to do are appeared as the following.
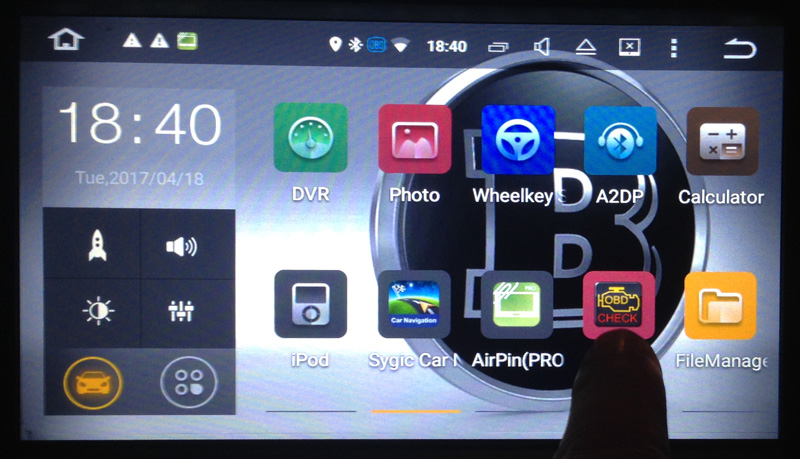 1. Download the Torque pro app from googleplay store.
 3. Open the Bluetooth set up in setting and pair the OBD2 reader with the head unit. Please make sure that you pair the right tool not just connect by checking the number.