Broken Fog Light Glass
#1
 11-02-2008, 07:18 PM


Broken Fog Light Glass
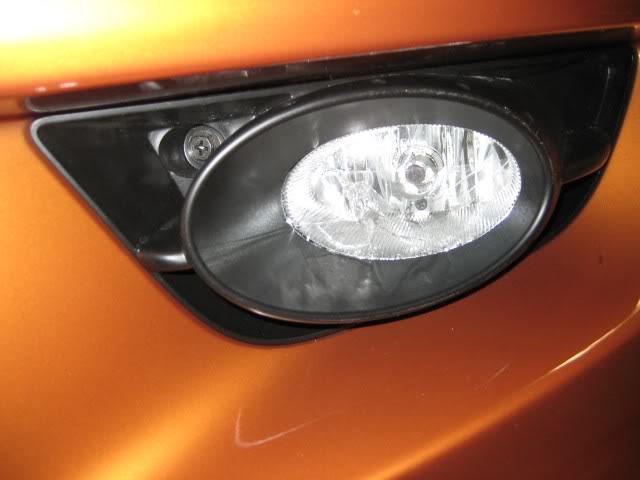
The low positioning of the fog lights seems susceptible to picking up rocks 
My driver's side lens broke in the first week I had my Fit. I was waiting until the service manuals came available, but I found detailed install instructions for the fog light retrofit kit on College Hills' website.
I am seriously hoping I can remove the fog light similar to a bulb replacement without having to pull the whole bumper. In any case, does anyone have a part explosion to show whether the glass is a separately replaceable item or if I have to replace the whole fog light assembly. Any part numbers appreciated. Thanks!
#2
11-02-2008, 07:23 PM


You have to replace a whole assembly - you can buy just one side. Its gonna run you around $140-150 incl. shipping I think. The assembly is easy to get to - just one 10mm screw to remove, it pops out and you unsnap the harness. I did it to adjust the angle of the beams.
But yes - this is always a problem. The only solution is really to put on some foglight protection film (but they can yellow out over time) or to dremel a piece of plexiglass maybe and fit it snug as a 2nd layer ahead of the actual lens. I think that might work best, plus a small hole drilled to allow any vapor to get out. You could use something like window screen rubber to surround the plexiglass. Yes its something I've been thinking about.
But yes - this is always a problem. The only solution is really to put on some foglight protection film (but they can yellow out over time) or to dremel a piece of plexiglass maybe and fit it snug as a 2nd layer ahead of the actual lens. I think that might work best, plus a small hole drilled to allow any vapor to get out. You could use something like window screen rubber to surround the plexiglass. Yes its something I've been thinking about.
#3
11-02-2008, 07:43 PM
Arrrgh. I was afraid I would have to replace the whole assembly. At least I don't have to pull the bumper -- although that would be a good excuse for sport grill and a horn 
From the College Hills instructions for the fog light kit (Fit Base), there is an access hole from below to adjust the beams. To remove the assembly, it looks like there is a clip and a screw to undo the wheel liner. Then, it looks to be held into a frame by 3 screws. The frame is held to the bumper by 4 self-tapping screws. There are also 4 more screws for the external shroud. This doesn't quite match your reply, but maybe the fog light retrofit kit is a completely different animal. (Mine is a Sport.)
Thanks!
#4
11-02-2008, 07:52 PM
For future reference, there is a product out there, like a clear film 3M kind of thing, that can be put over susceptible lenses to help prevent this from happening again. It isn't 100%, but works pretty well to mitigate 80% of rock vs. light disasters. My wife used to have a VW New Beetle, and those have foglights that are notorious for taking rock hits. I got some of this film and put it on the fogs, and never had a problem again. This film is also used to protect motorcycle gas tanks from scratches, etc. You can get it in different thicknesses, lengths, sometimes even precut to fit headlights, etc. I'll bet someone who searched a little online could turn this stuff up. I think Griot's Garage used to carry it for one.
Various products like this, but here is one example:
http://www.xpel.com/products/headlight.asp
Various products like this, but here is one example:
http://www.xpel.com/products/headlight.asp
Last edited by 75r90rider; 11-02-2008 at 07:55 PM.
#5
11-02-2008, 08:00 PM
I believe the Sport kit is different - we have underbody spoilers/etc too. Its just one 10 mm screw to get the light assembly and plastic housing out. Thre might be more screws to undo the assembly from the plastic - should be really easy to replace.
I know about the films but some people have reported they do yellow over time though.
I know about the films but some people have reported they do yellow over time though.
#6
11-02-2008, 08:10 PM
Great suggestion. XPEL sells a full kit for headlamps and fog lights on a Fit Sport for $69.99, but rate it as expert installation only. I'm not sure how well this stuff does on curved surfaces. The also sell bulk material for about $10 shipped. I'll contact them about the fog lights only. Thanks!
#8
11-02-2008, 08:16 PM

Crap, I was worried these lamps would be vulnerable. I'll have to rig up something.
This was an issue with the 1st gen Fit too I think.
This was an issue with the 1st gen Fit too I think.
#9
11-02-2008, 08:21 PM
i've used 3M film and it eventually burns and turns brown but the lamin-x ( www.lamin-x.com ) i've used hasn't and thats with higher wattage bulbs too, i change it every 3 - 4 months just to keep it fresh and new looking as it gets hard water marks from driving in the rain and such - check it out it'll work and it's easy to install
#10
11-02-2008, 09:00 PM
but the lamin-x ( www.lamin-x.com ) i've used hasn't and thats with higher wattage bulbs too
#11
11-02-2008, 09:08 PM
Wow. The Fit Sport is completely, COMPLETELY different than the base fog light retrofit kit which is described here: http://www.collegehillshonda.com/ins.../foglights.pdf The base ones install from behind the bumper. See the above PDF for 14 pages of installation instructions.
The Sport ones install from the front of the bumper. Changing bulbs also is done from the front. As mentioned, simply undo the 10mm bolt, and they practically fall out. Just release the wiring harness, and it's out.
A minute later:

Also, both Base and Sport fog lights adjust through one of the holes in the bottom of the bumper. The following is a pic of the outermost hole looking directly up:
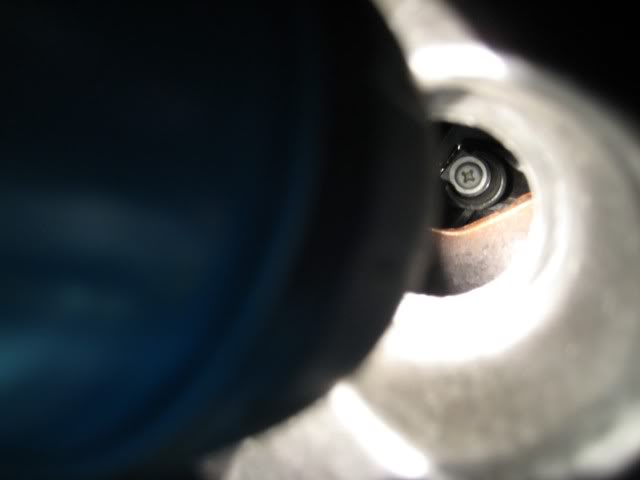
So, neteng101, you don't have to remove the light at all to adjust. Thanks for all the tips.
Other info, the fog light assembly removes from the trim with 3 Phillips screws. The glass is part of the assembly and cannot be replaced separately. As long as I had it out, I put some clear packaging tape on it (ghetto-style) to at least keep the rain out.
The Sport ones install from the front of the bumper. Changing bulbs also is done from the front. As mentioned, simply undo the 10mm bolt, and they practically fall out. Just release the wiring harness, and it's out.
A minute later:
Also, both Base and Sport fog lights adjust through one of the holes in the bottom of the bumper. The following is a pic of the outermost hole looking directly up:
So, neteng101, you don't have to remove the light at all to adjust. Thanks for all the tips.
Other info, the fog light assembly removes from the trim with 3 Phillips screws. The glass is part of the assembly and cannot be replaced separately. As long as I had it out, I put some clear packaging tape on it (ghetto-style) to at least keep the rain out.
#13
11-03-2008, 06:22 AM
Join Date: Jan 2006
Location: San Diego, CA
Posts: 2,804
Damn.. that sucks.. do you have a picture of the rear of the fog light mount points..?? you might be able to buy just the light assy..???
#14
11-03-2008, 11:12 AM
It looks like the three screws are the same mounting points/screws on the base, so I would imagine the lamp assembly itself is the same and is a separate piece. If not, the front shroud/trim is nothing fancy -- probably not more than $5 or $10. The lamp assembly is pretty heavy duty and appears to be made out of some metal composite (pot metal) and beefy enough to handle the heat of the bulb.
Both XPEL and Lamin-X sell bulk material for about $10 to $20 which is what I'll probably use.
Both XPEL and Lamin-X sell bulk material for about $10 to $20 which is what I'll probably use.
#15
11-03-2008, 11:29 AM
put film on this weekend
I put invisible mask on this weekend, hood and lights. The headlights are a little tricky - you need a lot of patience and don't be afraid to stretch or trim the material as needed. Fog light protection was easy. The hood kit came with side mirror protection which I haven't put on yet - it looks like it needs quite a bit of stretching.
Paint Protection and 3M Clear Bra for your vehicle. Also known as Rock Guard.
Also, if you have pets make sure there is no fur on your clothes as it will end up under the film just when you're about finished.
Paint Protection and 3M Clear Bra for your vehicle. Also known as Rock Guard.
Also, if you have pets make sure there is no fur on your clothes as it will end up under the film just when you're about finished.
#16
11-03-2008, 12:09 PM

Yeah, I remember reading some threads where GD owners complained about the same problem. Looks like I'm gonna have to try that clear lamin-x film.......
#17
11-03-2008, 11:54 PM
I ordered this. It was tempting to get a set in every color, in the end I got the clear. 
09 Honda Fit Fog Light Protection Kit
09 Honda Fit Fog Light Protection Kit
#18
11-04-2008, 08:17 AM
I ordered this. It was tempting to get a set in every color, in the end I got the clear.
09 Honda Fit Fog Light Protection Kit
09 Honda Fit Fog Light Protection Kit
#19
11-08-2008, 12:53 PM
Ended up going for the Headlight Armor stuff - a bit expensive at $26 shipped, but I suppose that's what you pay for pre-cut. It is cut to the hollow size of the glass, not all the way to the edge of the glass though.
I pulled out my fogs, pulled the 3 screws holding the smaller inner housing from the plastic black shroud and then installed the film. Did warm it up a bit with a hairdryer first and did clean the glass with some alcohol swabs. Some of the adhesive does seem to show up close on the glass but it does overall look clear as clear should be.
Now it feels like plastic when you tap on the glass+film, where it felt like fragile glass before. Should save the fogs.
Oh - and rather annoying - Headlight Armor ships USPS with signature confirmation required - I had to go to the post office to pick it up since I missed the delivery attempt.
Last edited by neteng101; 11-08-2008 at 12:56 PM.