DIY lower your GE8 Fit
#1
 11-01-2008, 02:58 PM


DIY lower your GE8 Fit
BEFORE WE START I AND FITFREAKS ARE IN NO WAY RESPONSIBLE TO DAMAGE OR LOSS OF WARRANTY DUE TO LOWERING YOUR CAR.
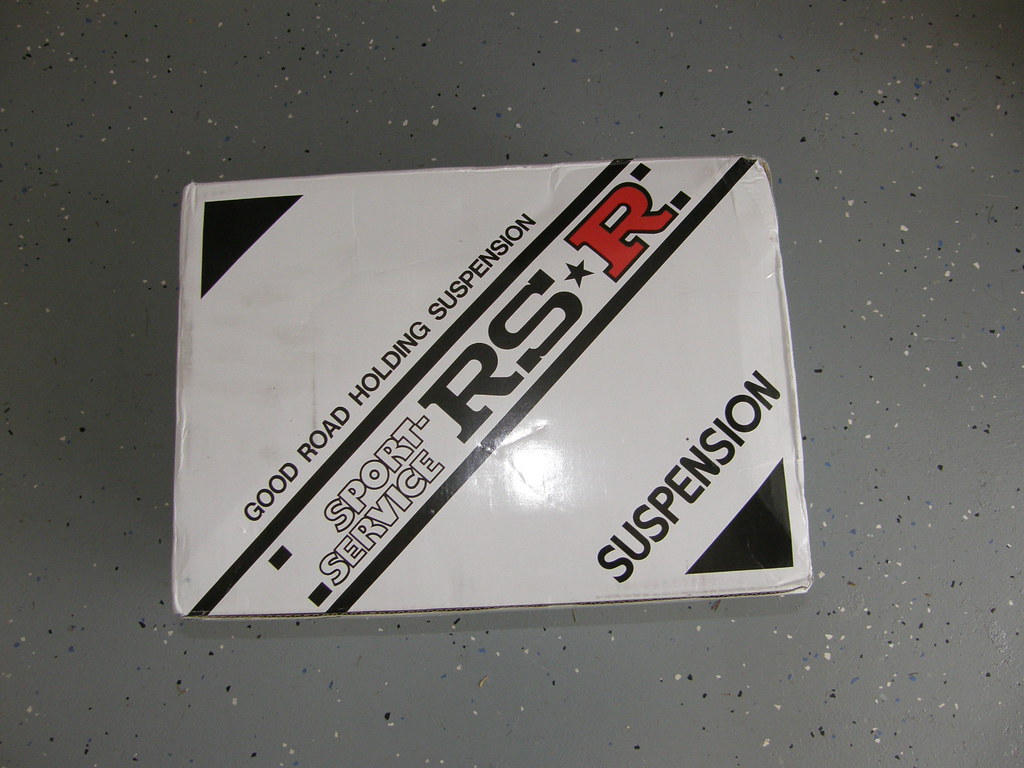
For this install we are using the RS*R suspension sytem.
this install can apply to all springs also.
Thank for the early christmas present Dave
one thing just amke sure you have lots of tools just in case
more coming soon
For this install we are using the RS*R suspension sytem.
this install can apply to all springs also.
Thank for the early christmas present Dave
one thing just amke sure you have lots of tools just in case
more coming soon
Last edited by niko3257; 11-07-2008 at 01:20 AM.


#5
11-01-2008, 04:09 PM
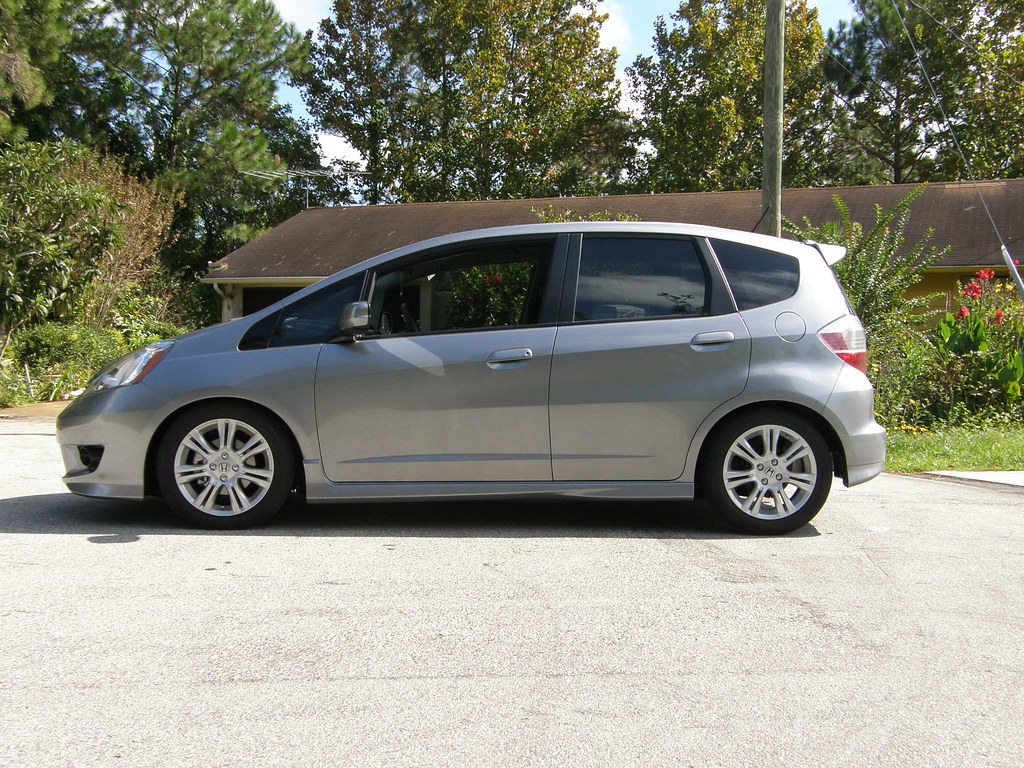
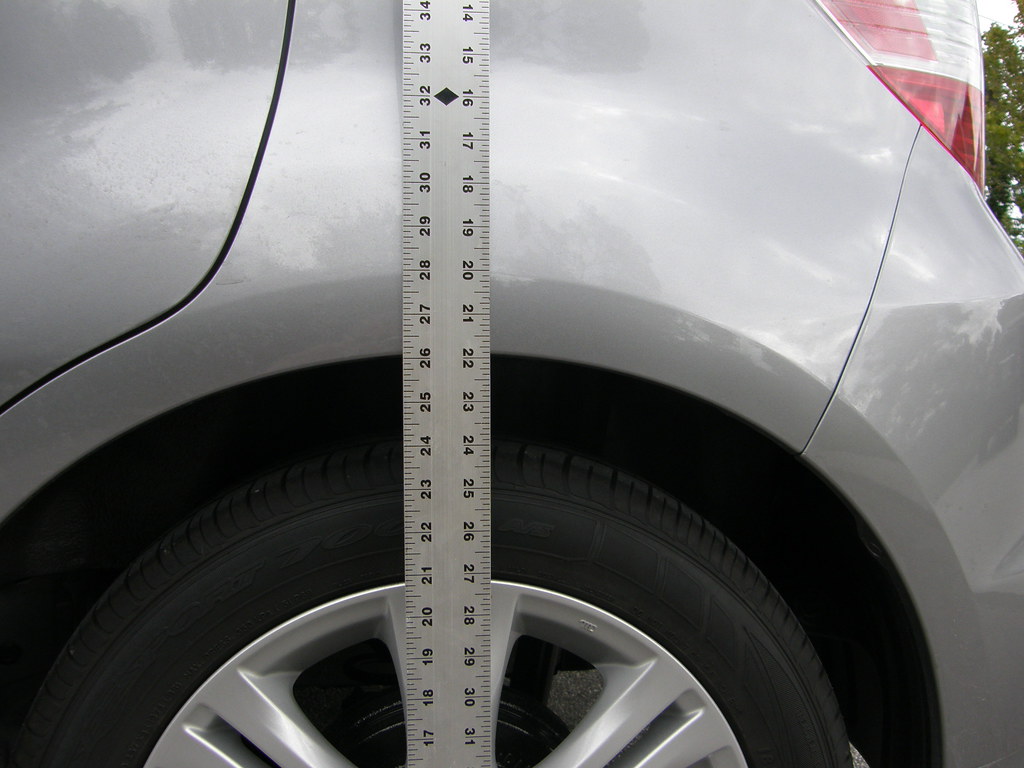
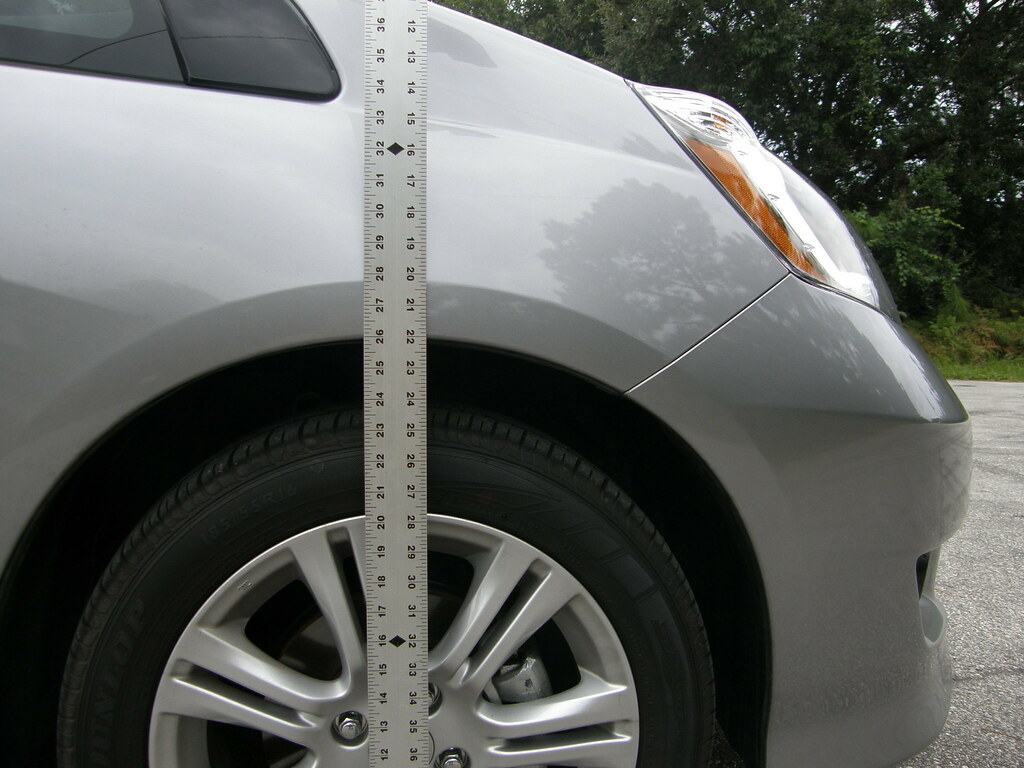
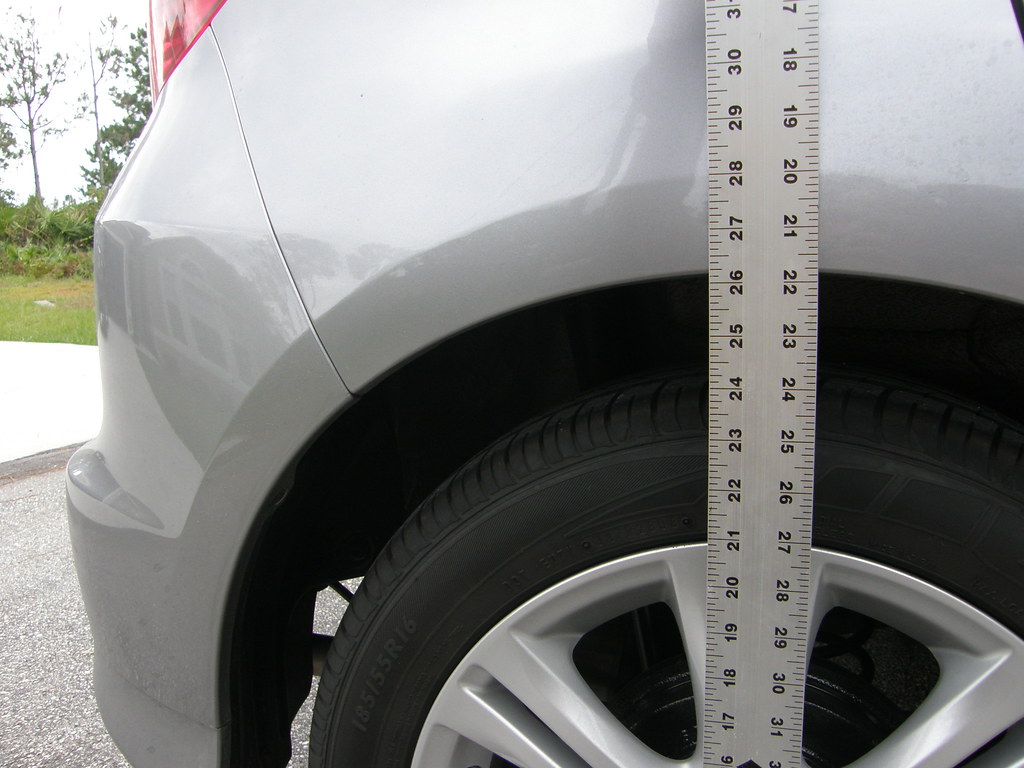
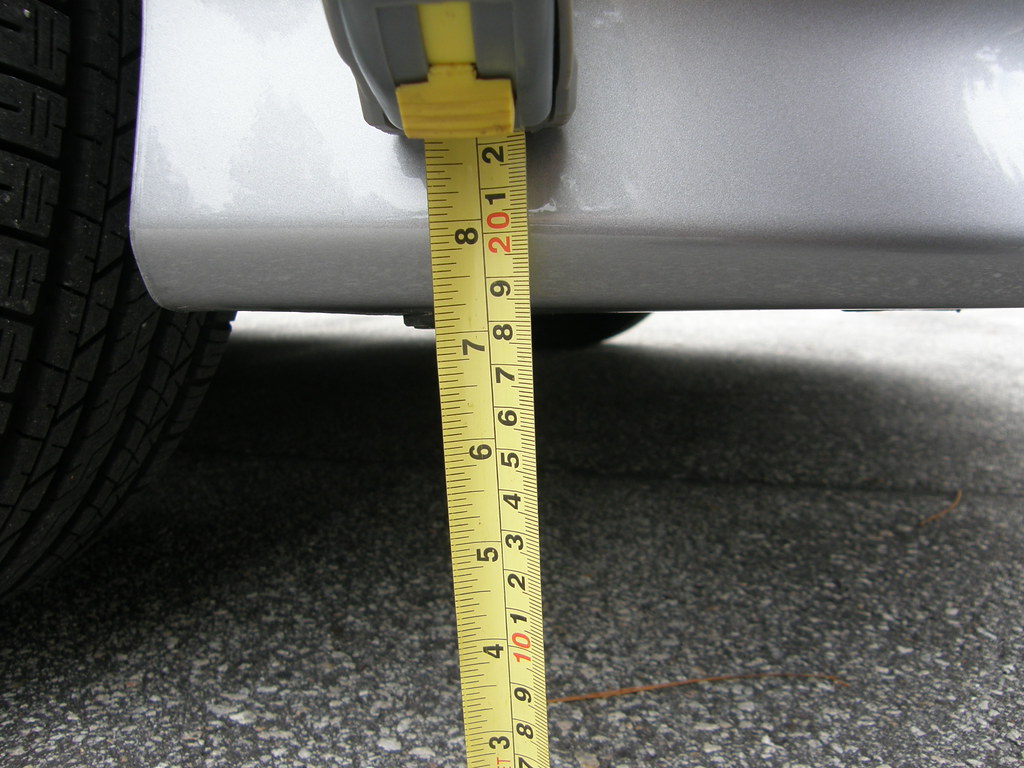
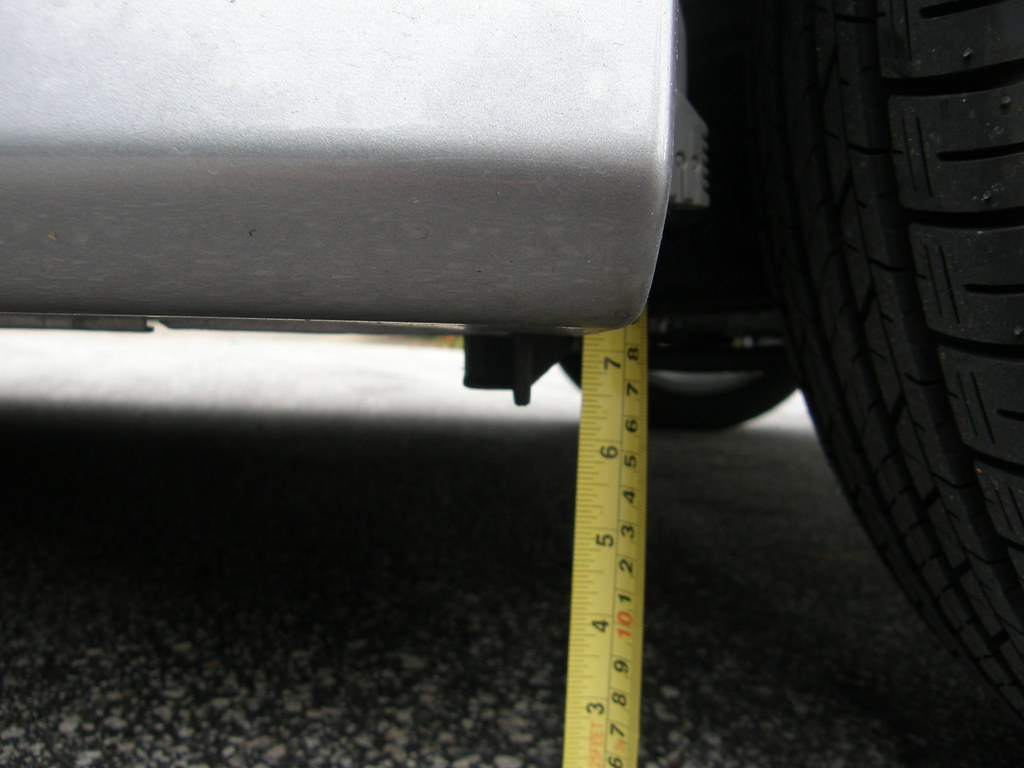
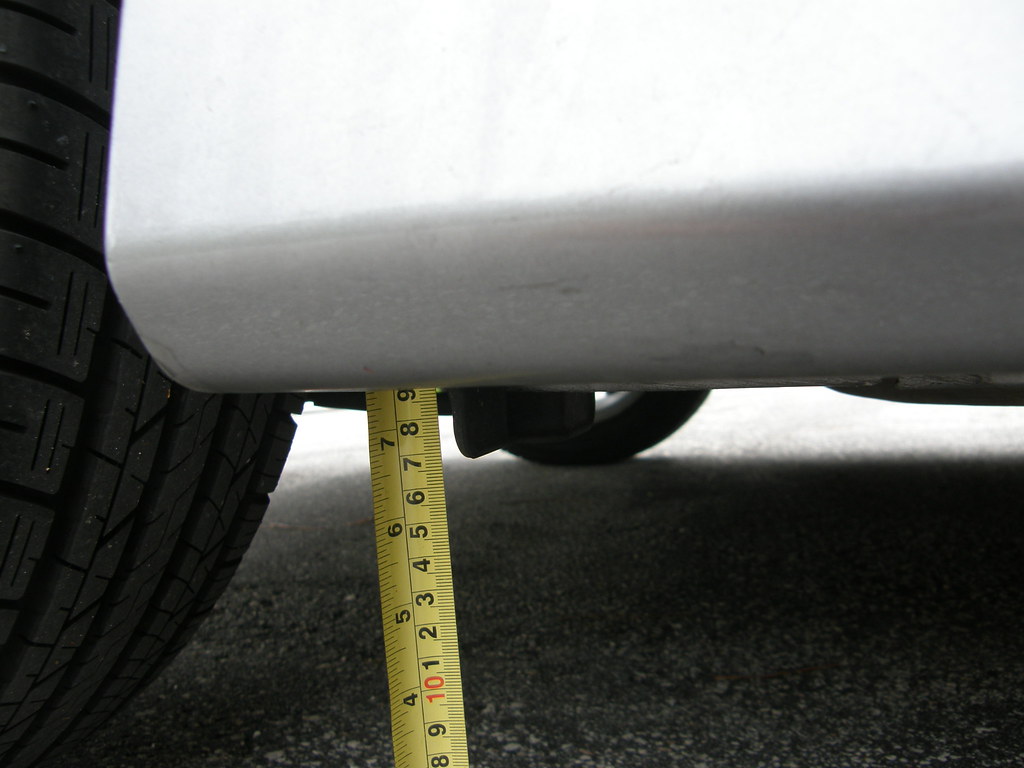
first things first. i like to know what i did so here are the measurements before we start.
left rear before
left front before
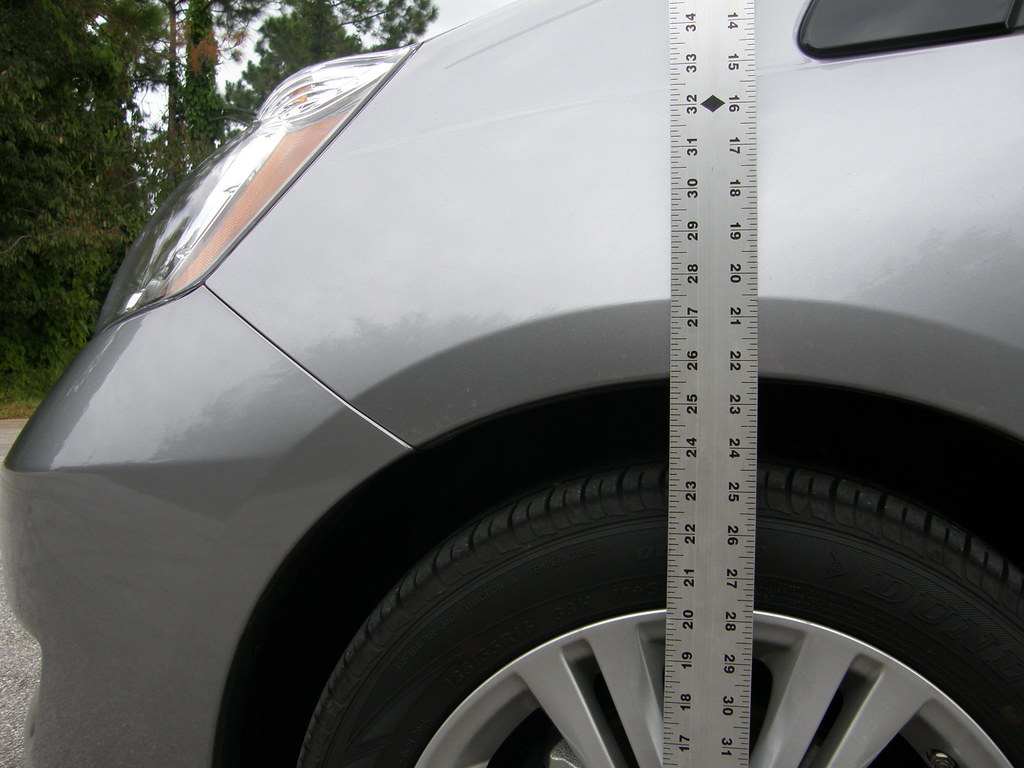
right front before
right rear before
left rear before
left front before
right front before
right rear before


#9
11-01-2008, 04:35 PM
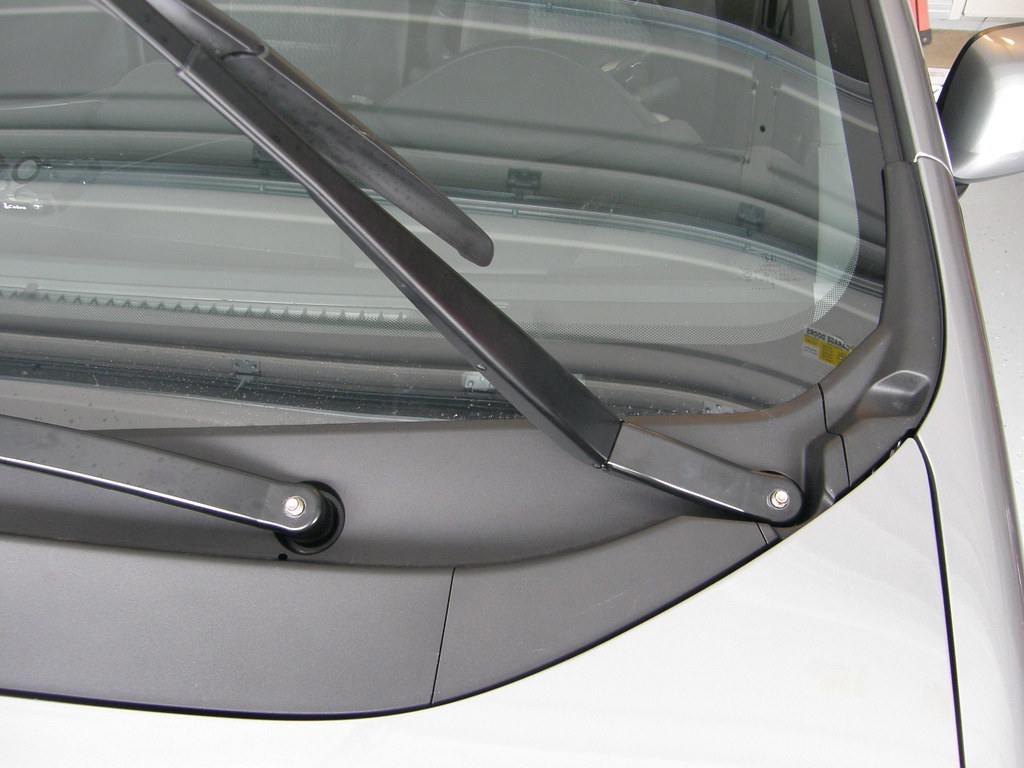
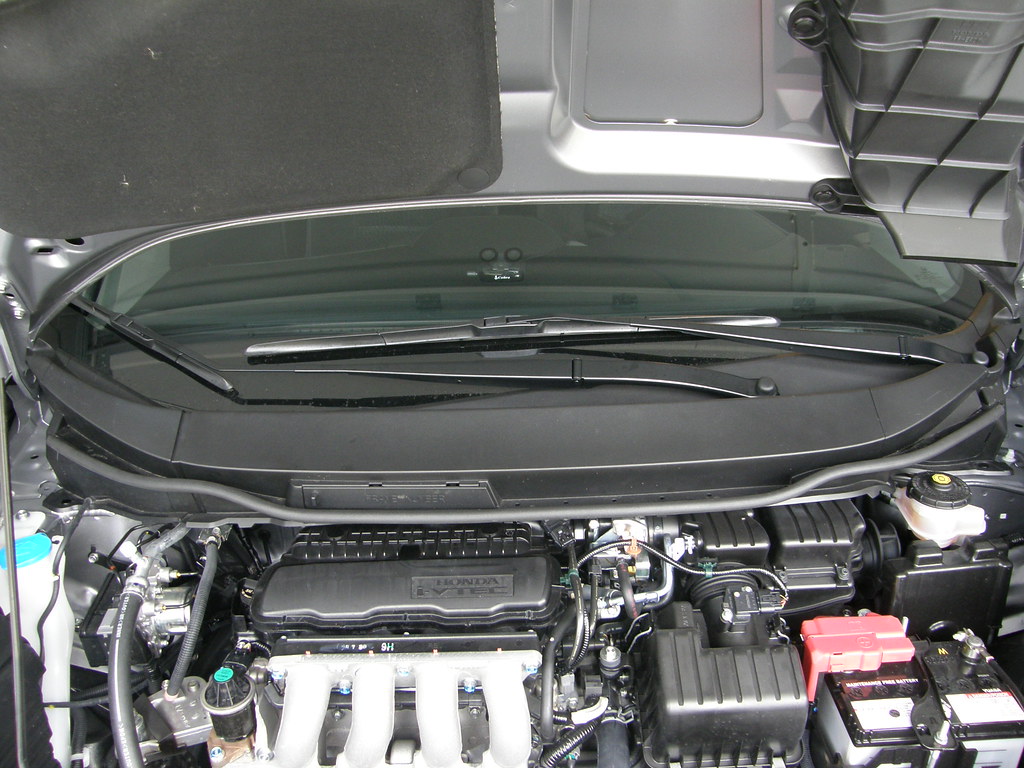
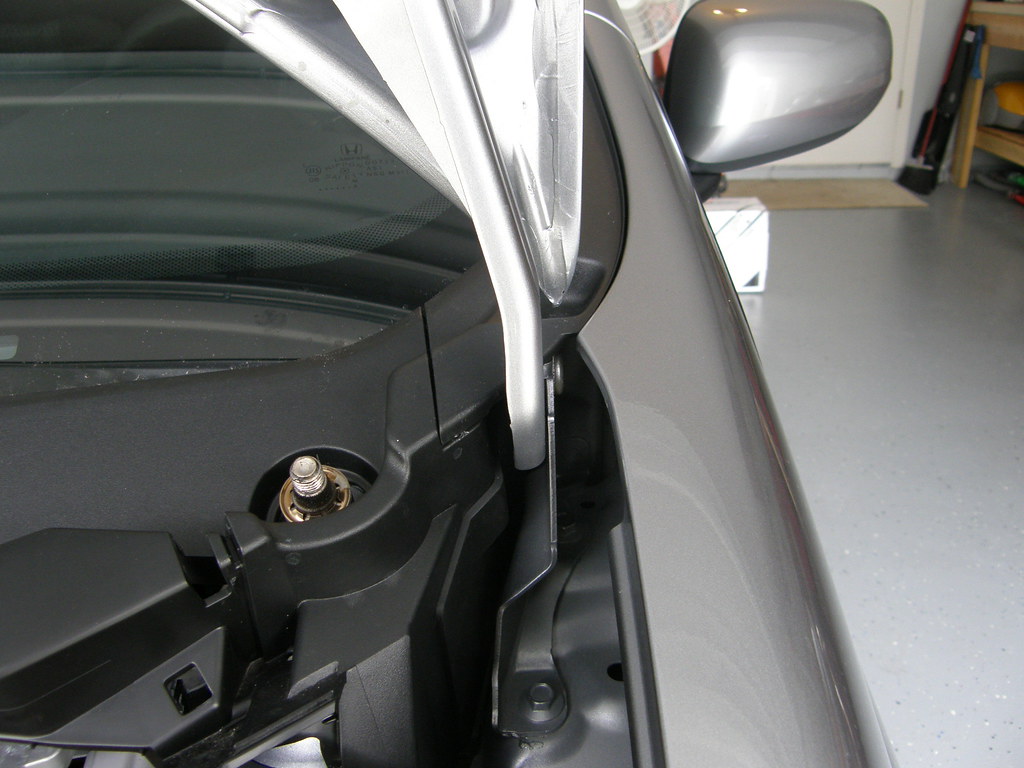
first we have to take the wipers off and all the plastice under
them to gain access to the strut towers.
so take off the rubber caps on you wipers like so
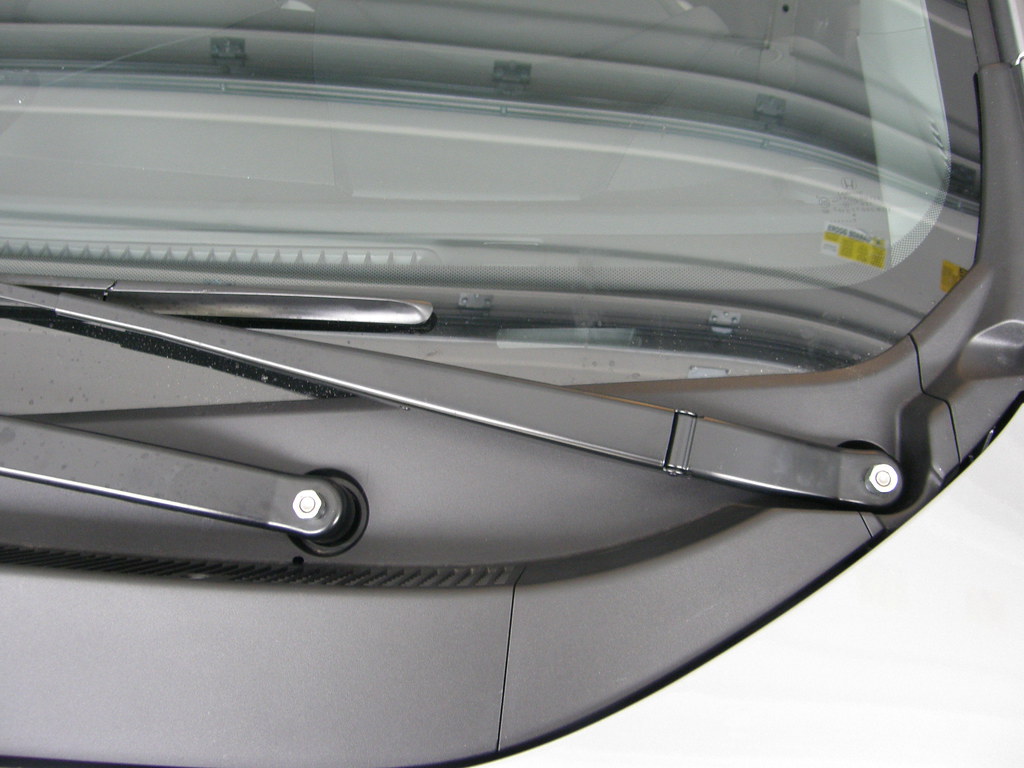
now you can unbolt your wipers via 14mm socket.
make sure you swing the wipers up one at a time
when unbolting the. makes it easier.
now that we have the wiper off prop the hood up to the highest postion
so that the hood is vertical like so.

i didn't even know i had this option untill i did this job
them to gain access to the strut towers.
so take off the rubber caps on you wipers like so
now you can unbolt your wipers via 14mm socket.
make sure you swing the wipers up one at a time
when unbolting the. makes it easier.
now that we have the wiper off prop the hood up to the highest postion
so that the hood is vertical like so.
i didn't even know i had this option untill i did this job


#11
11-01-2008, 04:45 PM
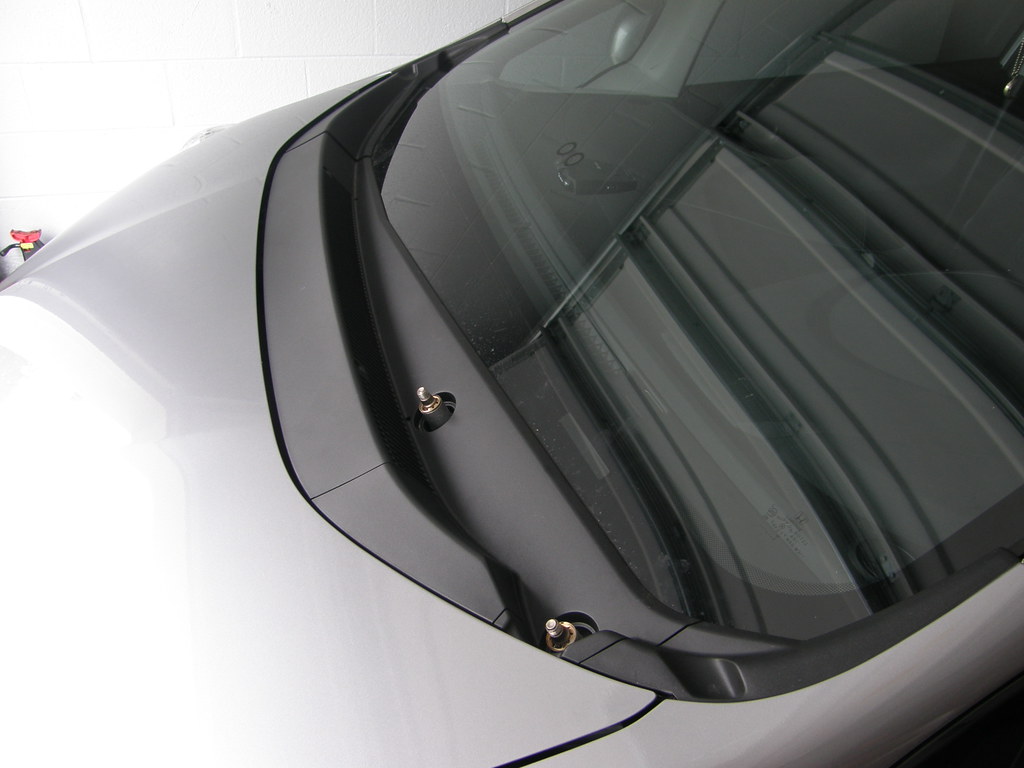
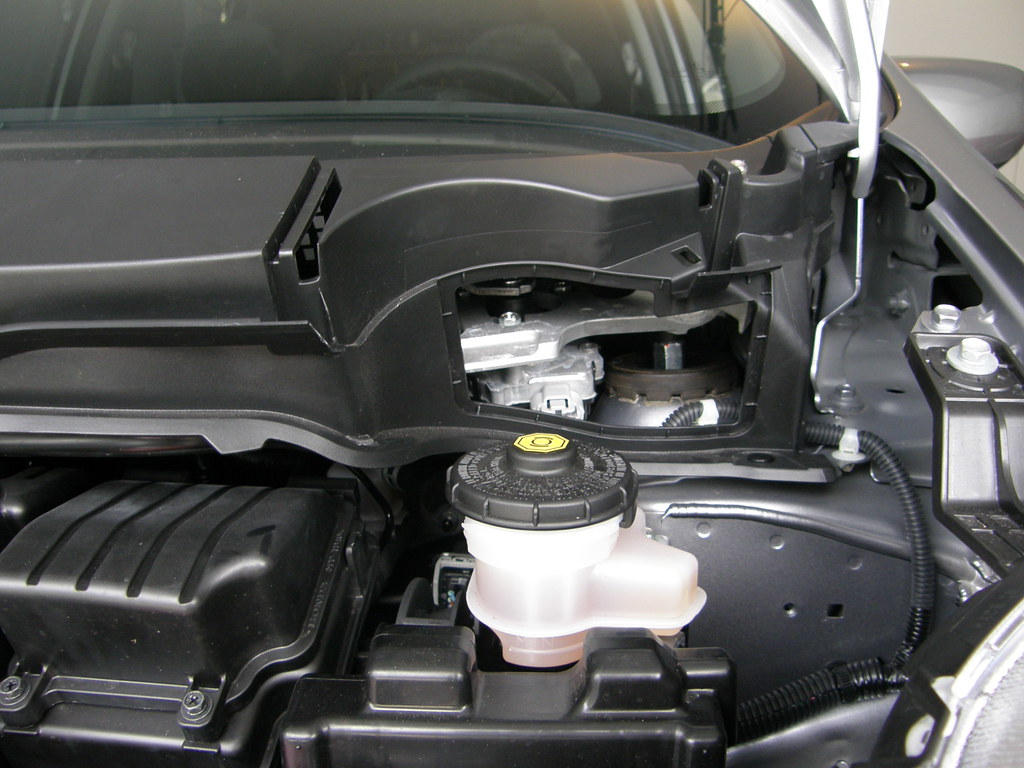
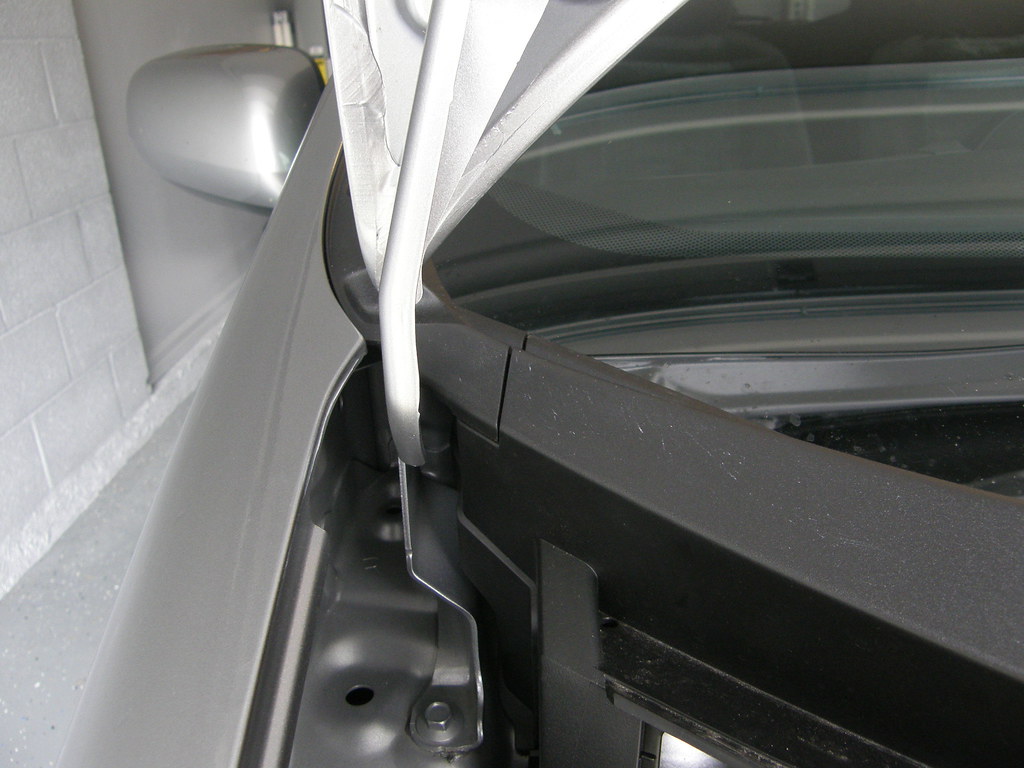
now take off the rubber gasket that goes across the top
now we can take off the three access panels. one to the left.
and two to the right. use a small screw driver here.
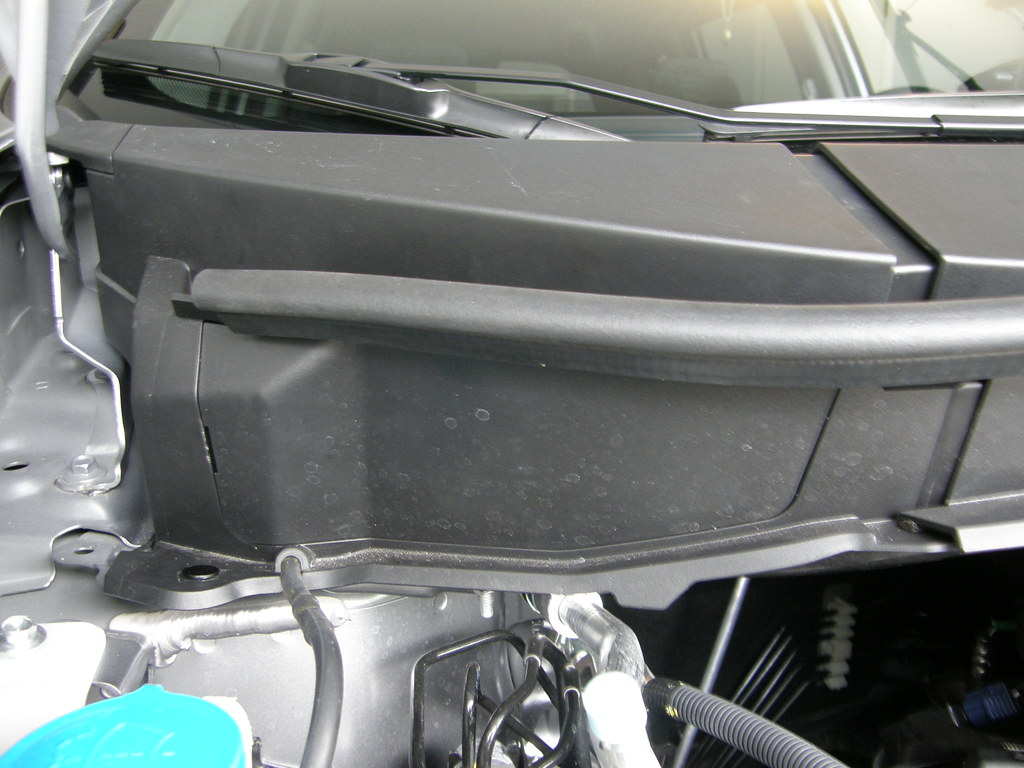
after removed it should look like this.
also while your looking. now we can see the
strut towers and the bolts we have to remove.
now we can take off the three access panels. one to the left.
and two to the right. use a small screw driver here.
after removed it should look like this.
also while your looking. now we can see the
strut towers and the bolts we have to remove.
#12
11-01-2008, 04:53 PM

#13
11-01-2008, 04:54 PM
now take apart the washer hose like so.
note: make sure you do it just like i got.
cause if you pull thw white connector on
the other side it wont come out the whole.
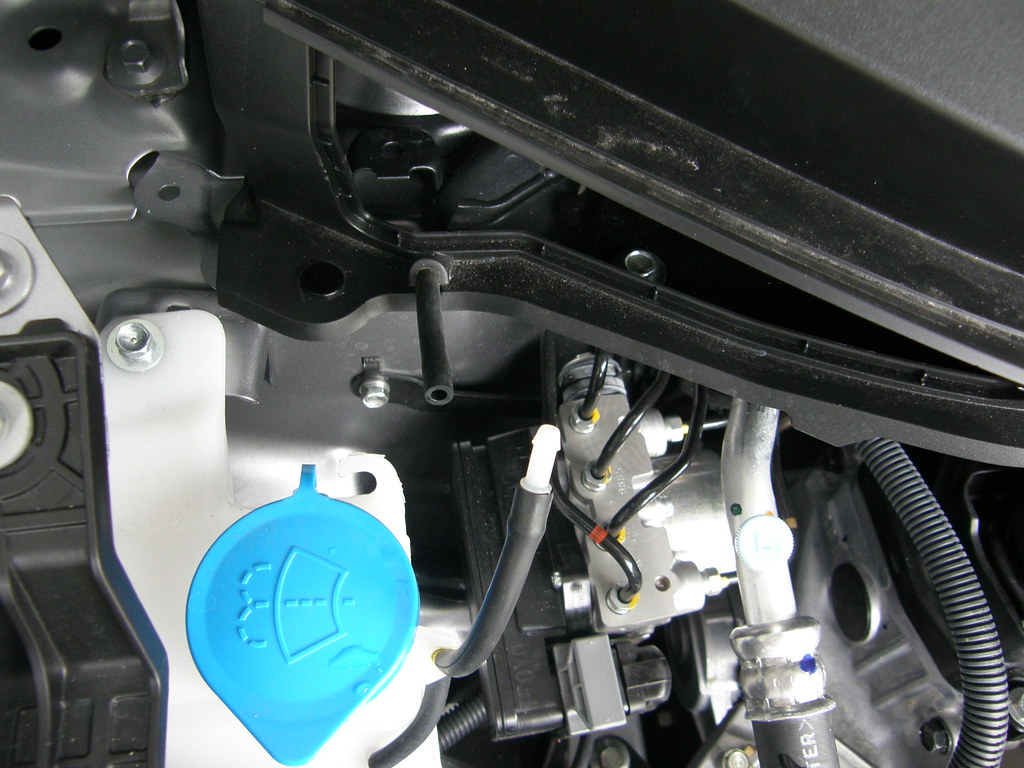
now pull it out like so.
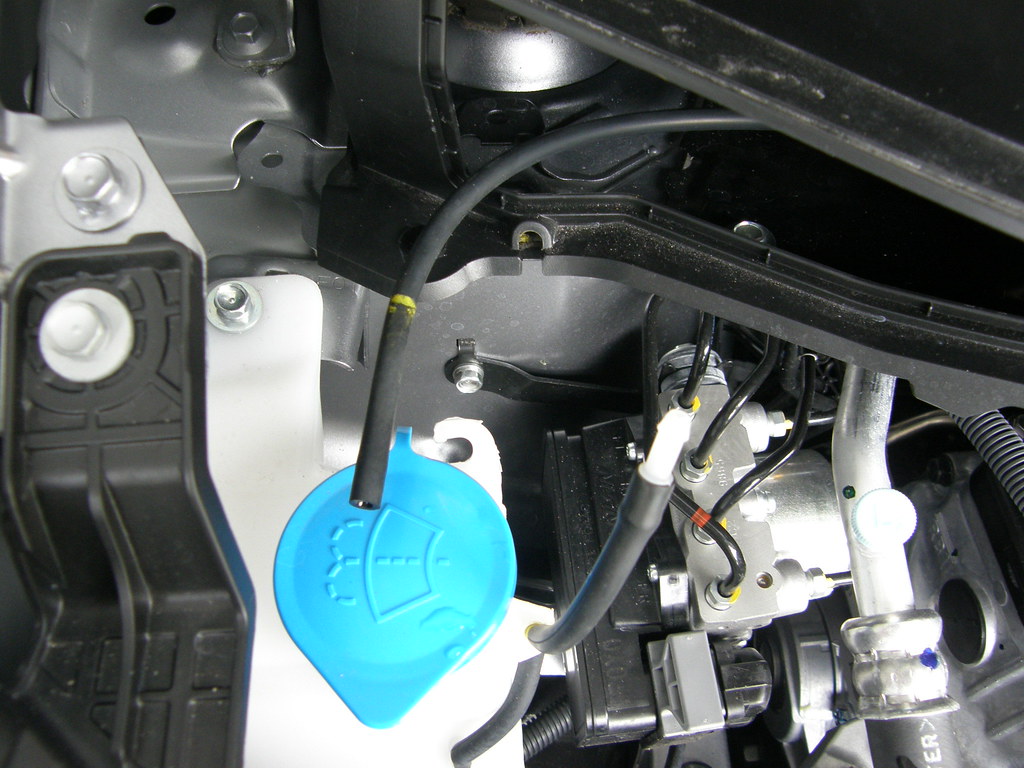
now get small pliers and take these two black snaps
off.

note: make sure you do it just like i got.
cause if you pull thw white connector on
the other side it wont come out the whole.
now pull it out like so.
now get small pliers and take these two black snaps
off.
#14
11-01-2008, 05:06 PM
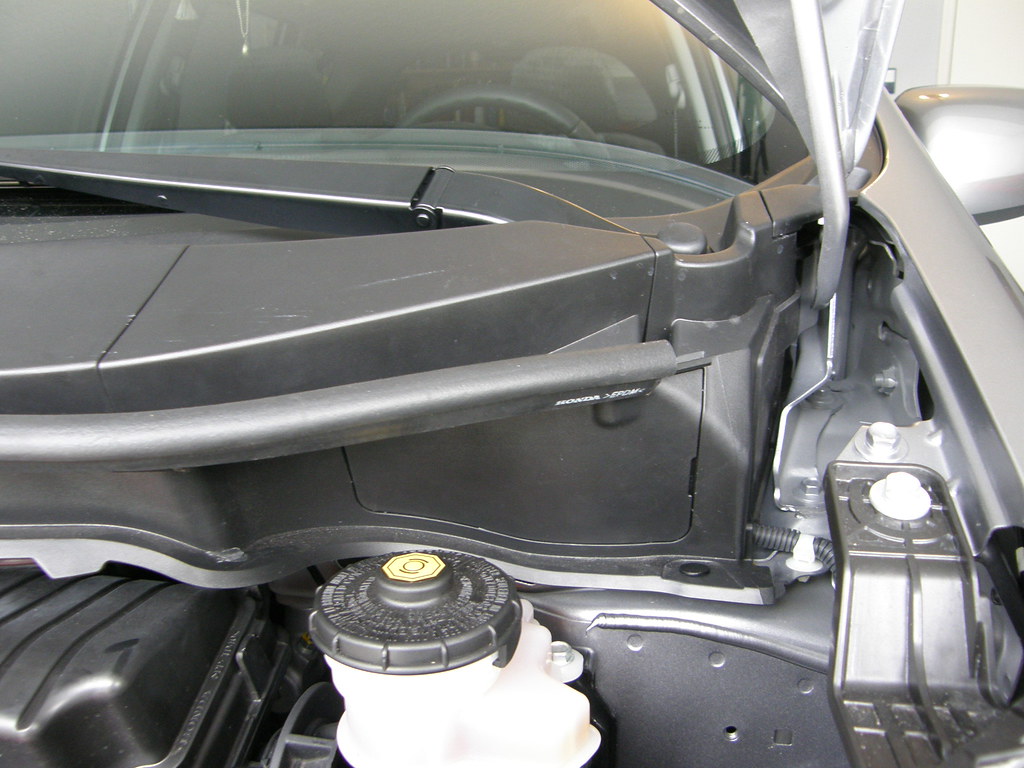
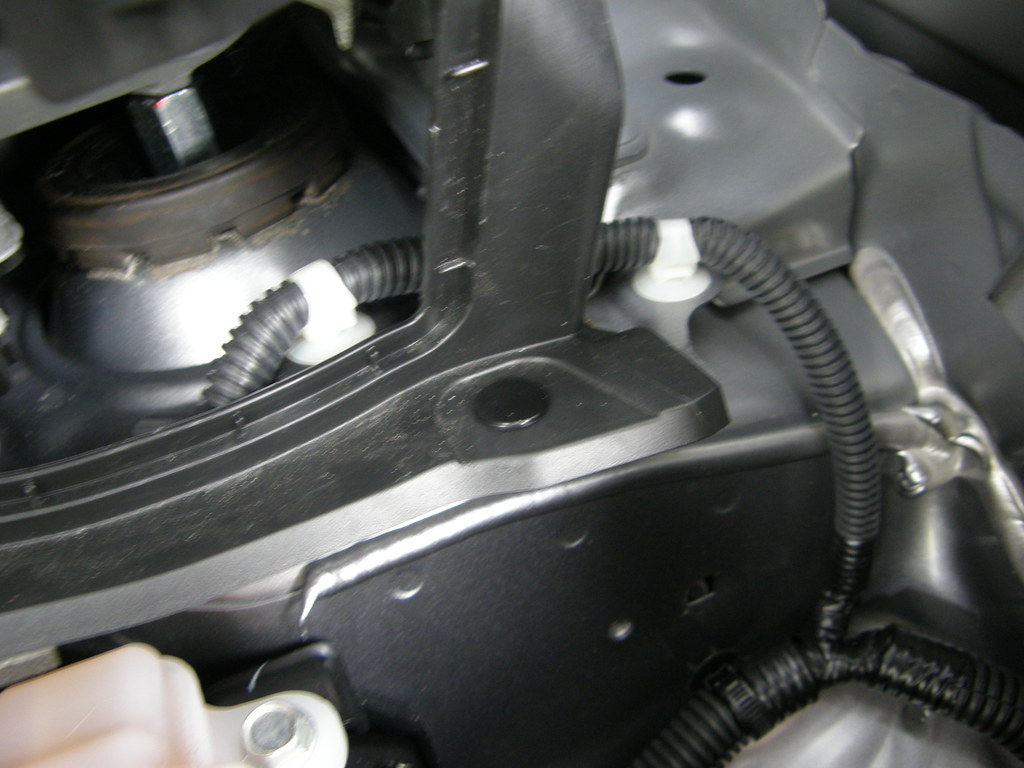
now for the hardest parts be carefull so you don't brake any clips.
undo the two small triangular plastics under the points of the hood.
fare left and right ones
by the piller.
if you look at this picture you will see 3 clips i believe ther is 4.
be carefull you don't snap them.
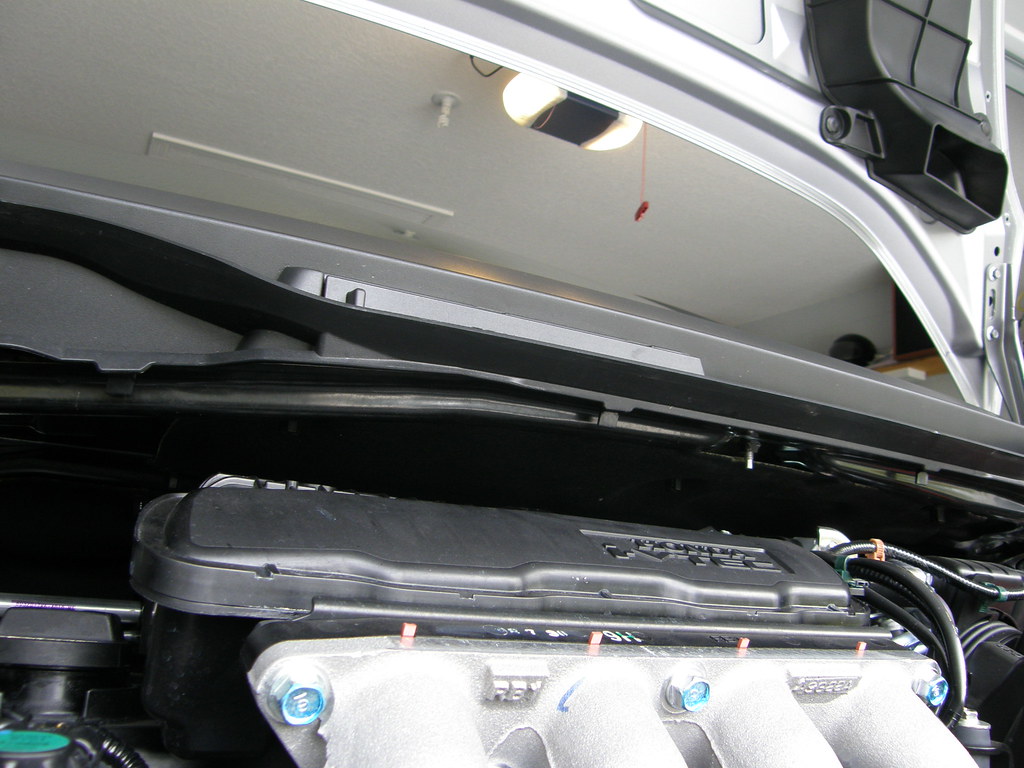
now we can pry off the big piece. start by prying on the windshield
side so you don't damage your clips on the other side that i just
showed you.
this is what you'll get once removed.

undo the two small triangular plastics under the points of the hood.
fare left and right ones
by the piller.
if you look at this picture you will see 3 clips i believe ther is 4.
be carefull you don't snap them.
now we can pry off the big piece. start by prying on the windshield
side so you don't damage your clips on the other side that i just
showed you.
this is what you'll get once removed.
#15
11-01-2008, 05:13 PM
this is by far the hardest part of this job.
i am posting alot of pics so people know
what there up against.
so lets move on.
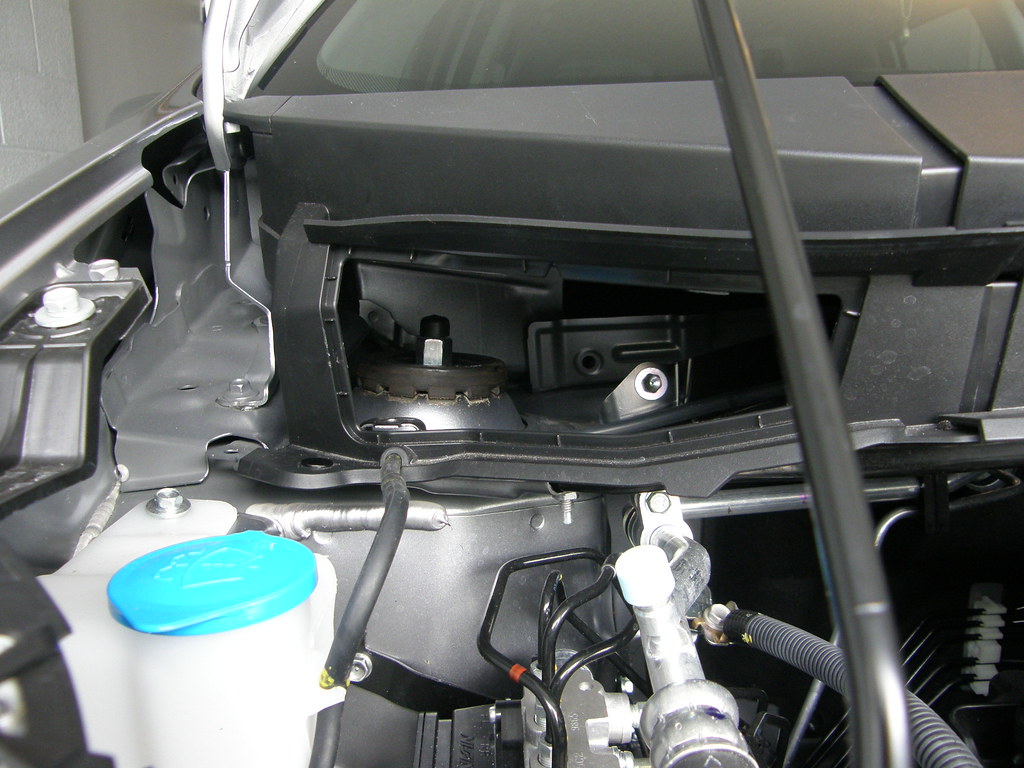
now that we got the big panel off take the
small on off and you will have this. presto.

now lets look at this.
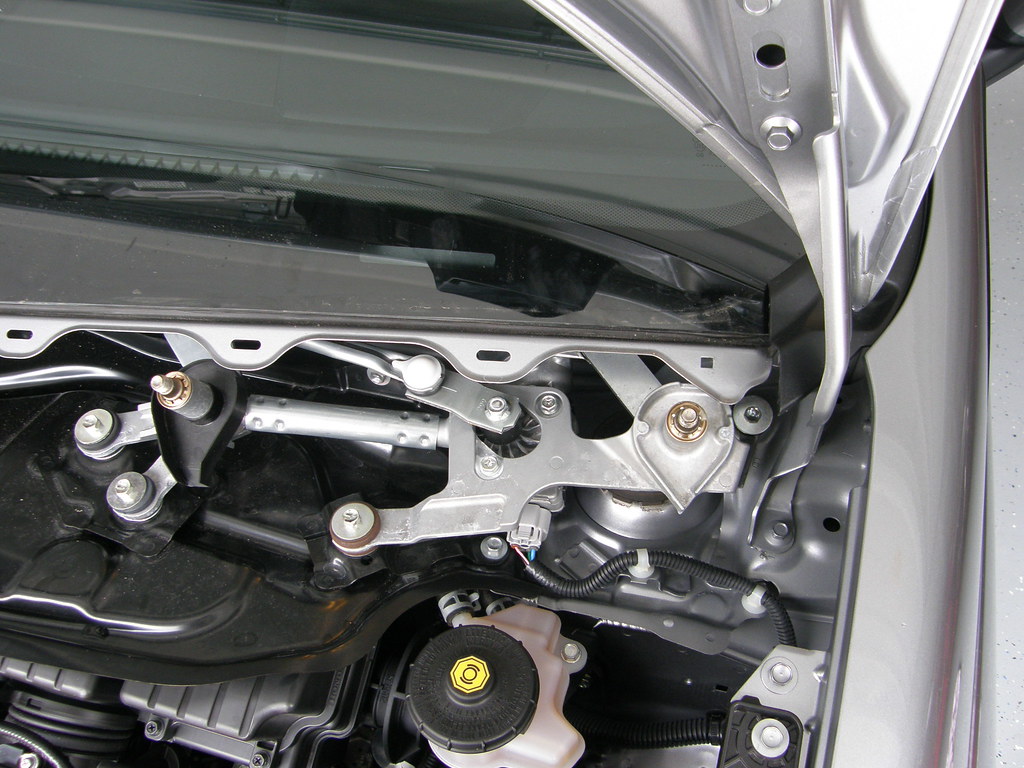
make sure you unplug the wire harness first.
now unbolt it via 4 bolts 10mm.
like so.

now we are finally done with this mess.
we can finally start the really job at hand.
springs.
i am posting alot of pics so people know
what there up against.
so lets move on.
now that we got the big panel off take the
small on off and you will have this. presto.
now lets look at this.
make sure you unplug the wire harness first.
now unbolt it via 4 bolts 10mm.
like so.
now we are finally done with this mess.
we can finally start the really job at hand.
springs.
Last edited by niko3257; 04-29-2012 at 08:27 AM.
#16
11-01-2008, 05:31 PM
also BIG BIG note:
make sure upon removing the strut don't let
the axle come out to far. you will regret it dearly.
make sure you use bungy cords and or a jack to hold the
lower control arm up so axles don't come out to far.
now make sure you take off the rubber caps on the strut tower
bolts. a little hint when putting all back together. if you don't
how much to tighten look at the rubber. should fit on there
perfectly.
whats else. oh make sure before you start break all your bolts
loose first. so there is no surprises.
i did one side at a time. only one jack.
i also started on the drivers side.
with the wheel off and the car jacked up also
wheels are chucked and e-brake is on.
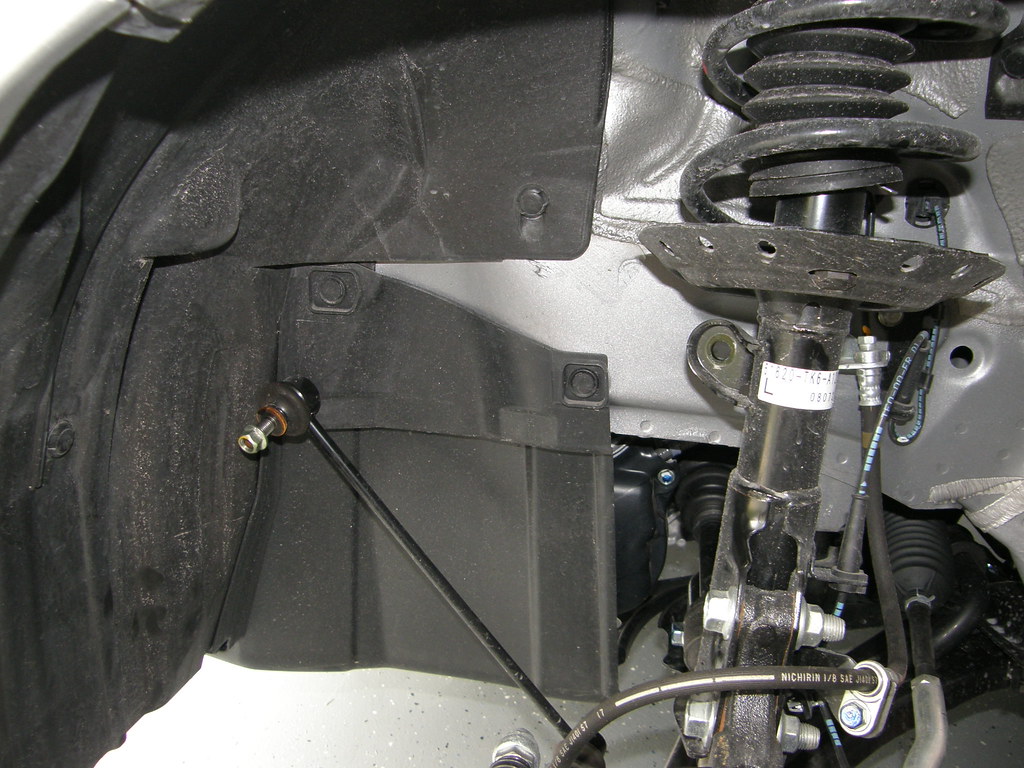
lets see what we have.

as you can see from the pic above there is alot of stuff to unbolt
and pry off to do this job.
first your abs wire. it has two rubber hold that just pull right out
and one clip. you will need small pliers for the clip. unhook all of that.
now take your brake line holding bolt out also i think it 10mm.
thats done.
got to the sway bar link now and remove that.
i think this is a 14mm nut.
now all the stuff is out of the way.
remove now the two strut bolts that attach to the spindle.
they are19mm bolts and nuts.
now remove the bolt on top of the shock
tower 17mm bolt.
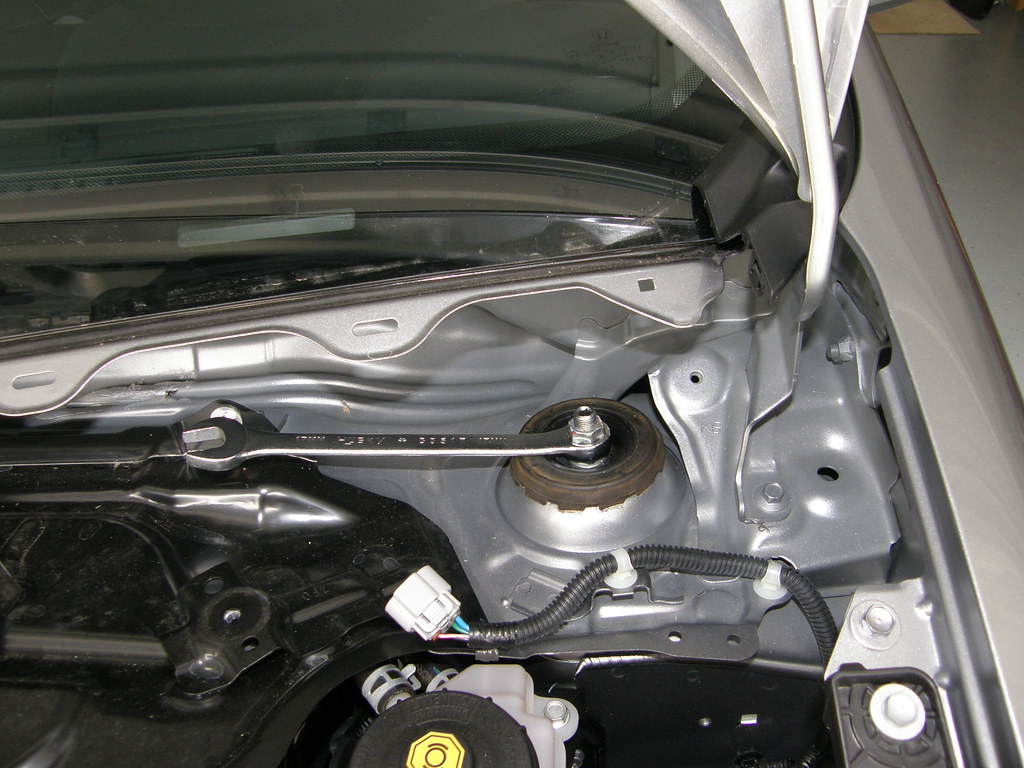
and now you have this laying on the floor.

make sure upon removing the strut don't let
the axle come out to far. you will regret it dearly.
make sure you use bungy cords and or a jack to hold the
lower control arm up so axles don't come out to far.
now make sure you take off the rubber caps on the strut tower
bolts. a little hint when putting all back together. if you don't
how much to tighten look at the rubber. should fit on there
perfectly.
whats else. oh make sure before you start break all your bolts
loose first. so there is no surprises.
i did one side at a time. only one jack.
i also started on the drivers side.
with the wheel off and the car jacked up also
wheels are chucked and e-brake is on.
lets see what we have.
as you can see from the pic above there is alot of stuff to unbolt
and pry off to do this job.
first your abs wire. it has two rubber hold that just pull right out
and one clip. you will need small pliers for the clip. unhook all of that.
now take your brake line holding bolt out also i think it 10mm.
thats done.
got to the sway bar link now and remove that.
i think this is a 14mm nut.
now all the stuff is out of the way.
remove now the two strut bolts that attach to the spindle.
they are19mm bolts and nuts.
now remove the bolt on top of the shock
tower 17mm bolt.
and now you have this laying on the floor.
Last edited by niko3257; 04-29-2012 at 08:29 AM.
#17
11-01-2008, 05:42 PM
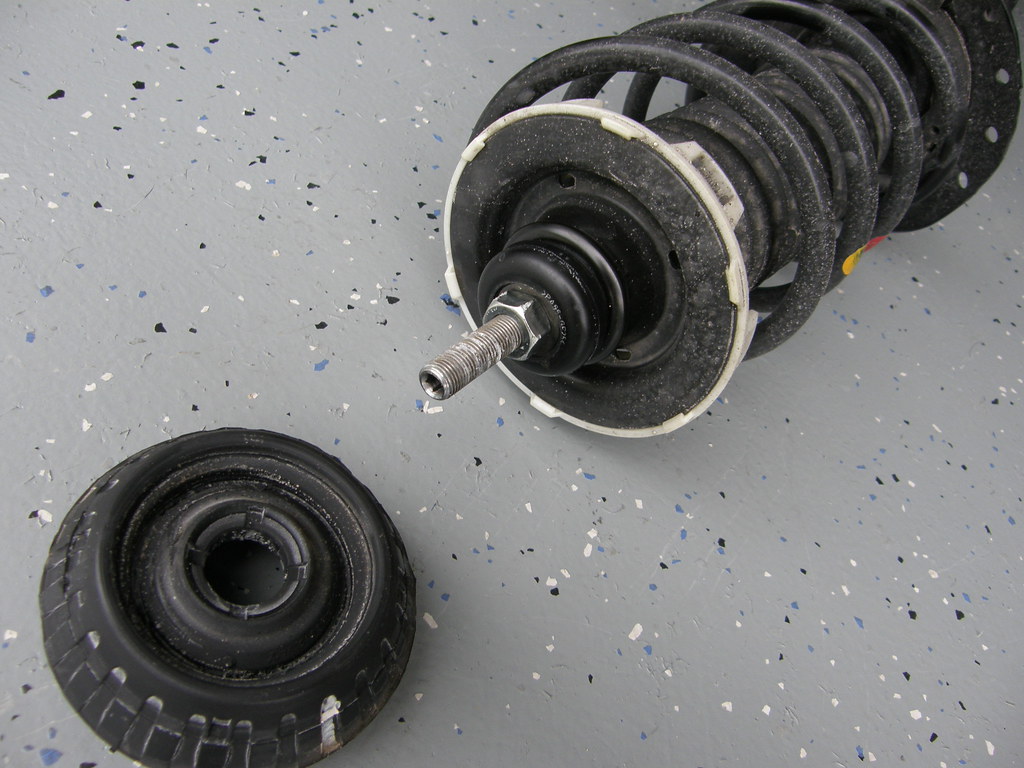
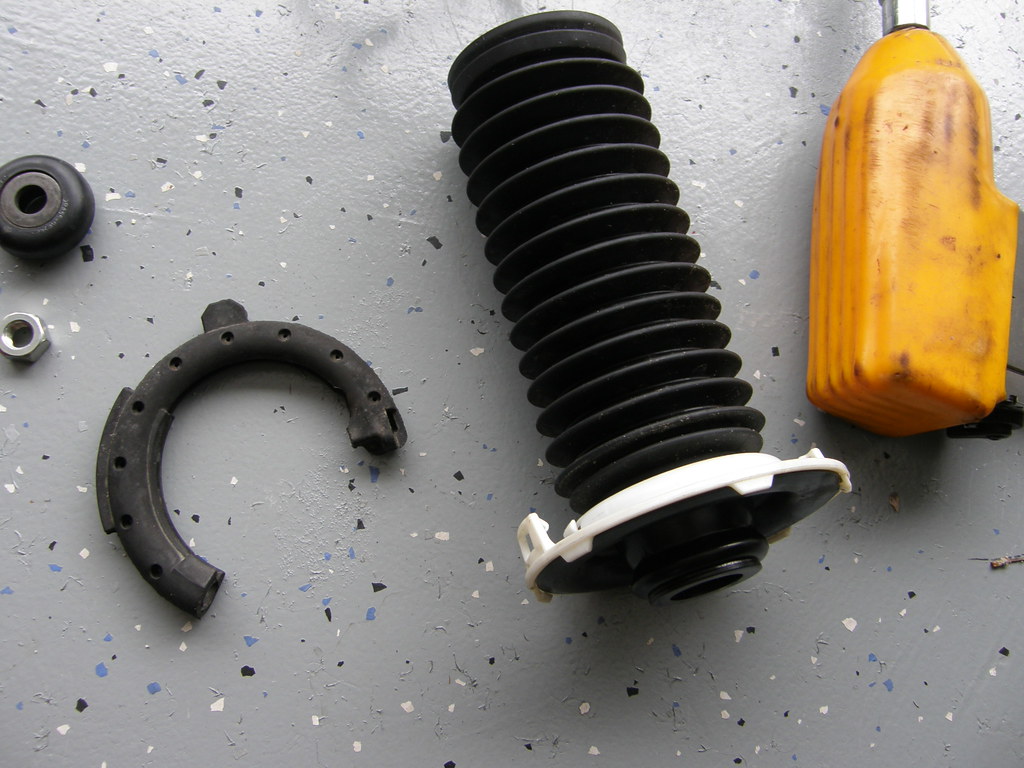
next take the strut tower bushing off.
note: remember which way it goes back on.
now we can attach that spring compressing tool to the strut.
you can get these as rental for free front auto zone or
advance auto parts stores. you get all your money back
upon returning the tool.
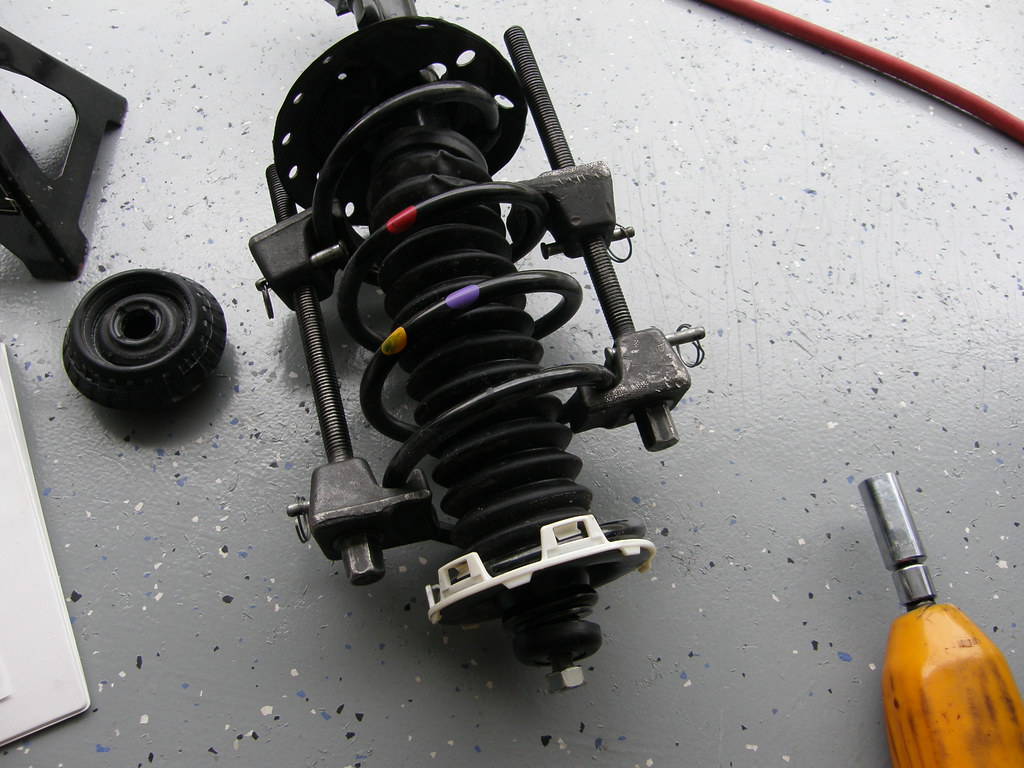
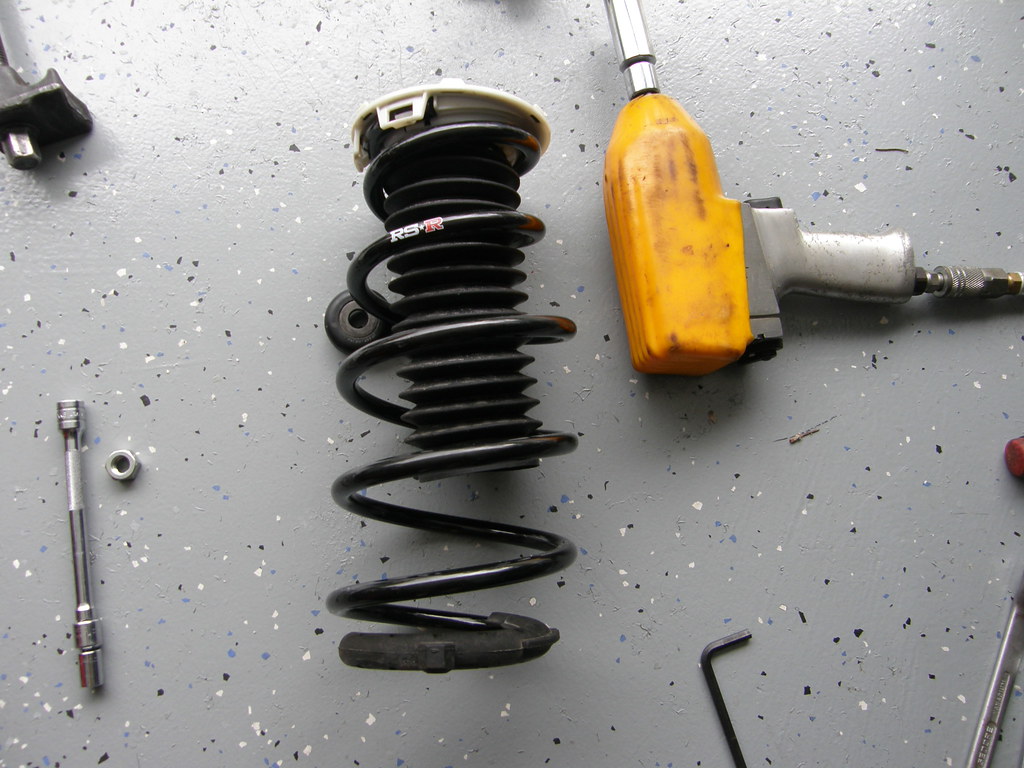
if you have noticed from the pic above i have air tolls.
note: if you have it use it and if you don't and can get
it. i suggest to get it. if you don't have it. then all i can say
is have fun. it can be done but it takes alot of time.
all apart now.

of what you see in the pic above all you need is whats
pictured below.
note: remember which way it goes back on.
now we can attach that spring compressing tool to the strut.
you can get these as rental for free front auto zone or
advance auto parts stores. you get all your money back
upon returning the tool.
if you have noticed from the pic above i have air tolls.
note: if you have it use it and if you don't and can get
it. i suggest to get it. if you don't have it. then all i can say
is have fun. it can be done but it takes alot of time.
all apart now.
of what you see in the pic above all you need is whats
pictured below.
#18
11-01-2008, 05:55 PM
one very important thing not to forget.
make sure you cut these off.
one on the left is for the fronts
the one on the right is for the rears.
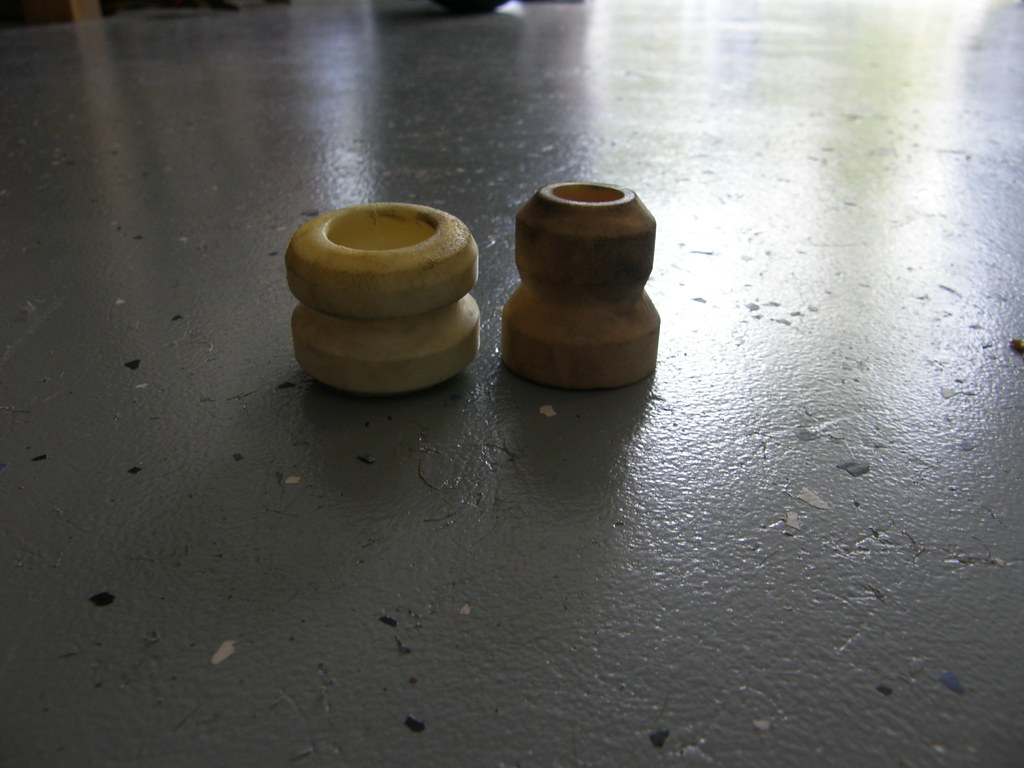
bump stops
pain in the ARSE
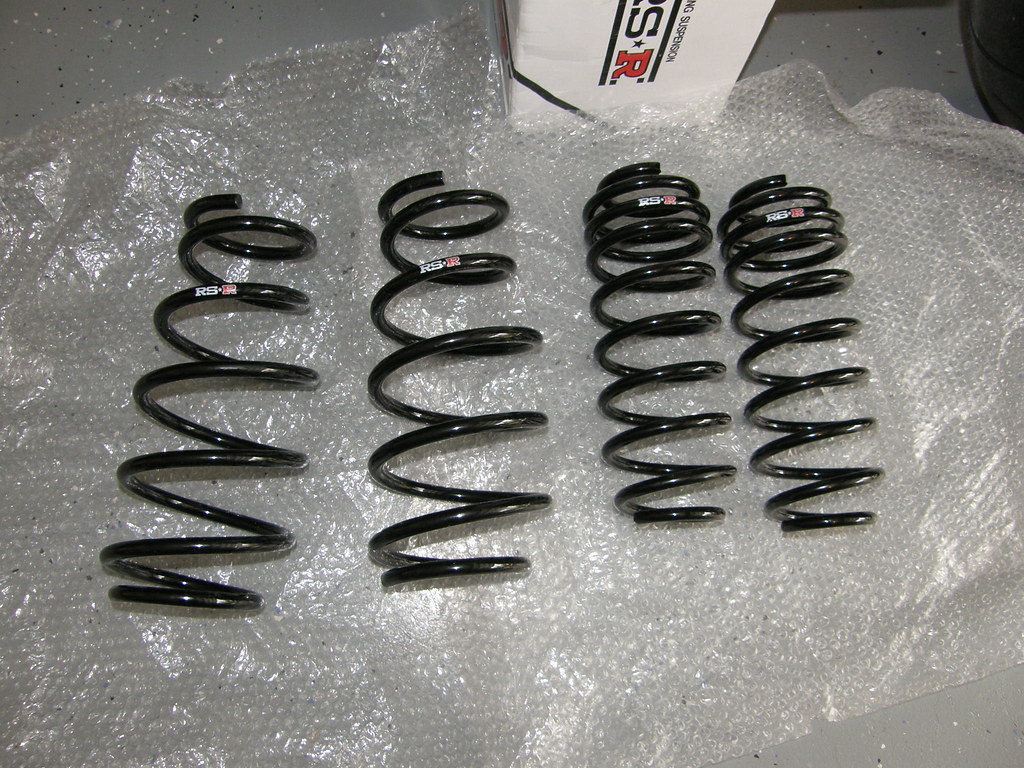
well now we have come to a point where something is missing.
ahh here it goes.
Drool
i cleaned up the drool from the ground and opened the box
and there they were 4 brothers and sisters.
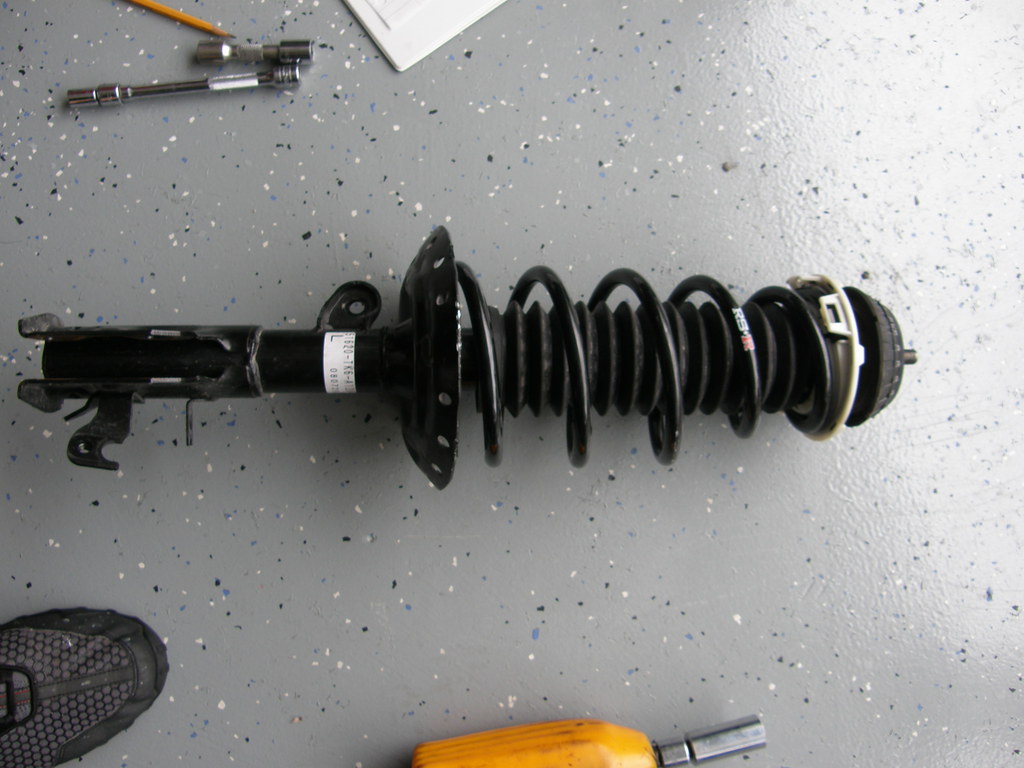
moving on now that we have everything apart we can compare.
stock vs. lowered.
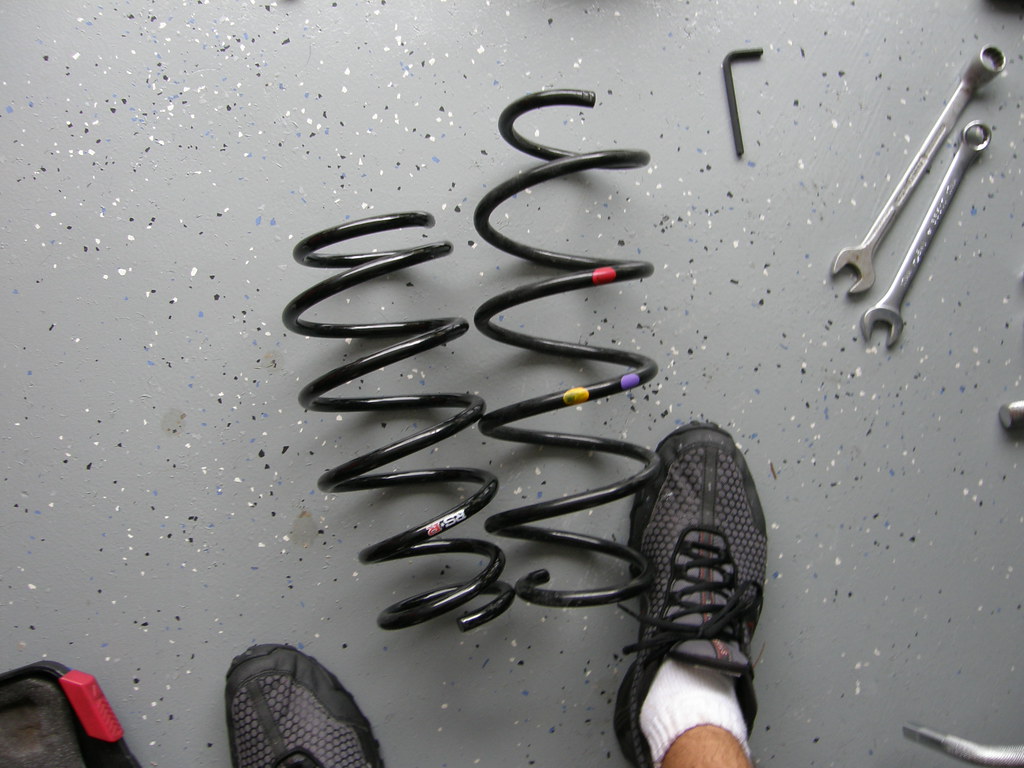
BIG difference can't wait anymore
this is taking to long.
make sure you cut these off.
one on the left is for the fronts
the one on the right is for the rears.
bump stops
pain in the ARSE
well now we have come to a point where something is missing.
ahh here it goes.
Drool
i cleaned up the drool from the ground and opened the box
and there they were 4 brothers and sisters.
moving on now that we have everything apart we can compare.
stock vs. lowered.
BIG difference
can't wait anymorethis is taking to long.
#19
11-01-2008, 06:08 PM
remember the pieces you took off the stock
spring.
put them on the new spring. like so.
put it on the shock now and blot it down.
note: you don't need the spring compressors for this.
spring is much smaller and easier. also make sure you don't
forget to pull the shock protector all the way down so
it snaps back into its place. you need shock protection
nowadays
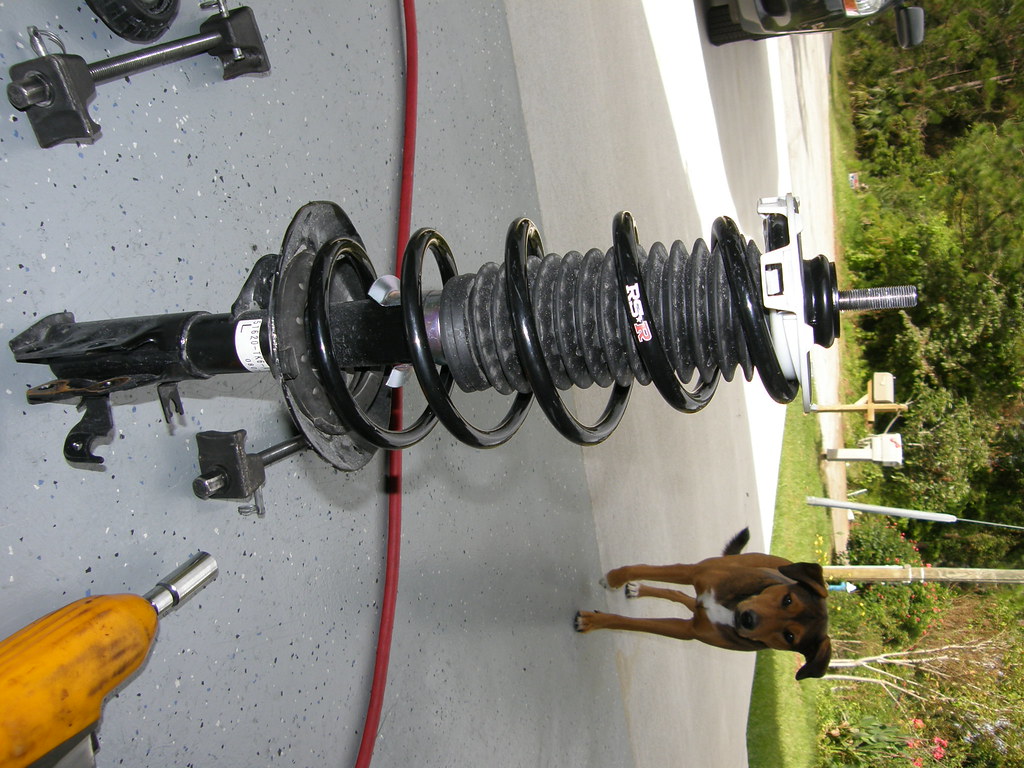
and finally after you have bolted the spring in and
put the strut bushing back on you'll have this.
presto your done one shock of course.
the rest you know. just go in reverse of DIY directions and your done.
same applies for pass side foward and back.
spring.
put them on the new spring. like so.
put it on the shock now and blot it down.
note: you don't need the spring compressors for this.
spring is much smaller and easier. also make sure you don't
forget to pull the shock protector all the way down so
it snaps back into its place. you need shock protection
nowadays
and finally after you have bolted the spring in and
put the strut bushing back on you'll have this.
presto your done one shock of course.
the rest you know. just go in reverse of DIY directions and your done.
same applies for pass side foward and back.
#20
11-01-2008, 06:13 PM
also BIG BIG note:
make sure upon removing the strut don't let
the axle come out to far. you will regret it dearly.
make sure you use bungy cords and or a jack to hold the
lower control arm up so axles don't come out to far.
also so people know. here are the torque settings for some
bolts for when putting back together.
the strut bolt holding the spring on. 65 ft.lbs.
the top strut bolt used to hold the strut on the car. 33 ft.lbs.
the two lower strut bolts 65 ft.lbs.
Last edited by niko3257; 11-01-2008 at 06:30 PM.