DIY pics: Painting rear valence/diffuser (2nd day with the Fit and i painted it!)
#1
 11-06-2009, 10:10 PM


DIY pics: Painting rear valence/diffuser (2nd day with the Fit and i painted it!)
EDIT: UPDATED on PAGE 2, Post# 32
The Update is how the paint looks now, after 7 months, and also better angles to to guide someone with taping if they needed to.
2010 Fit Sport Manual
second day. already thru 120 miles on the car sinse i bought it. and i felt i was about crazy when i took sand paper to perfectly good paint.
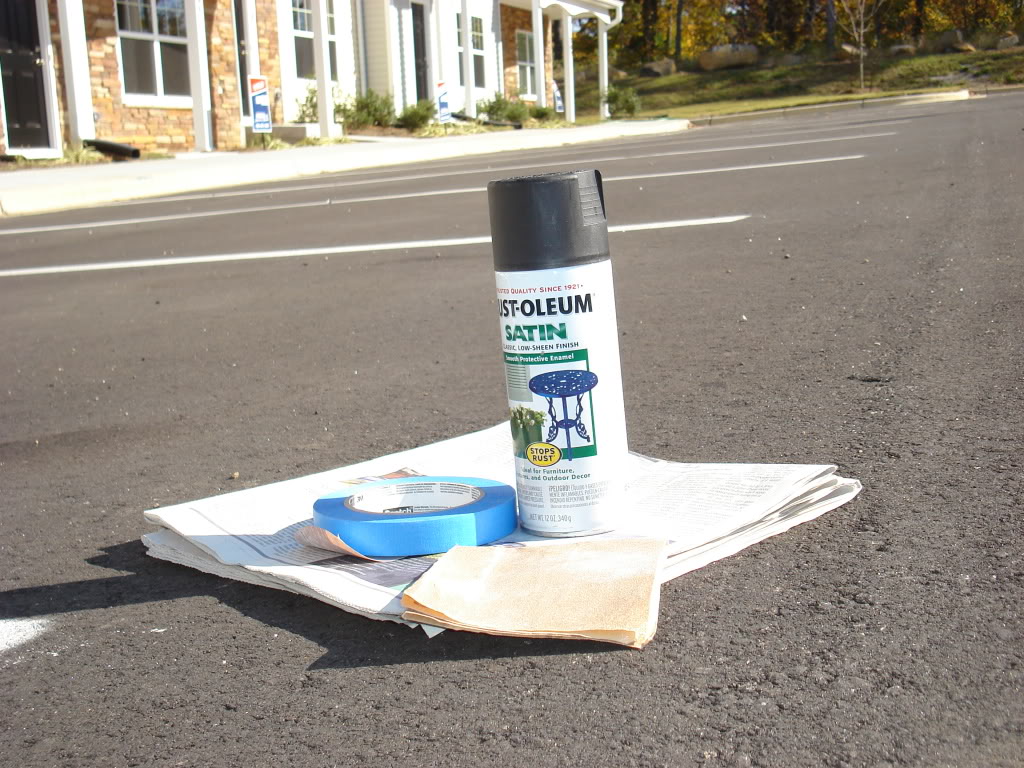
Tools used:
Painters Tape 3/4th inch
Rustoleum Satin Black (kinda like a flat black color) I did about 3 coats, a few minutes apart from each other, just like the directions on the spray paint can.
News Paper
Sand Paper
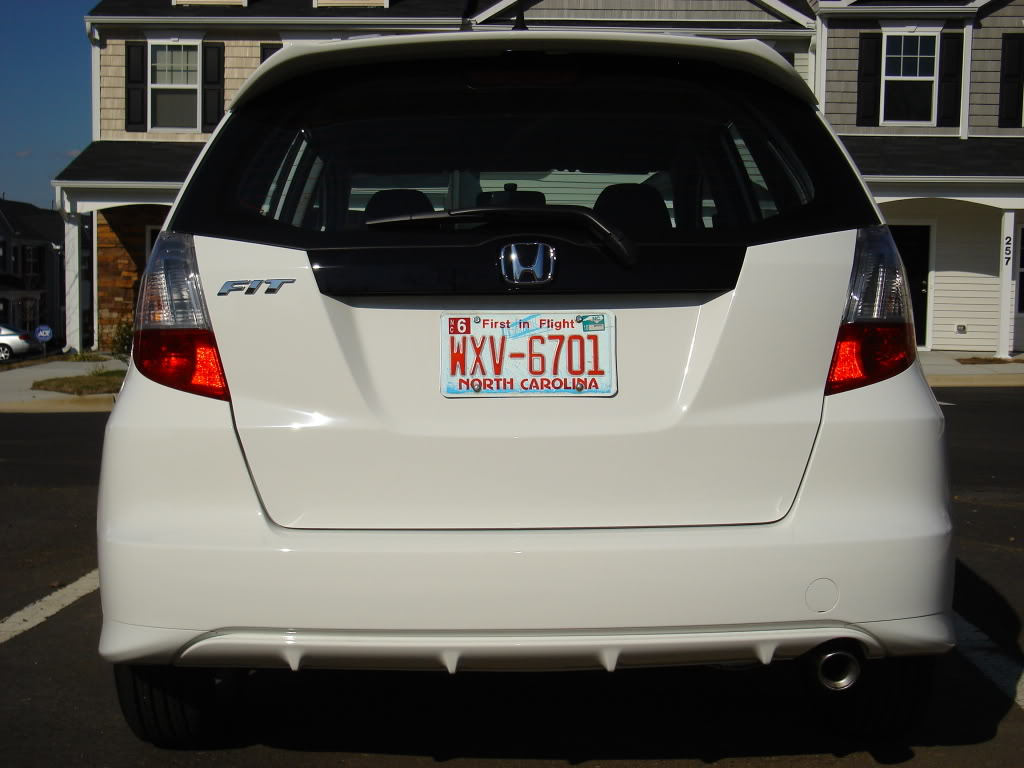
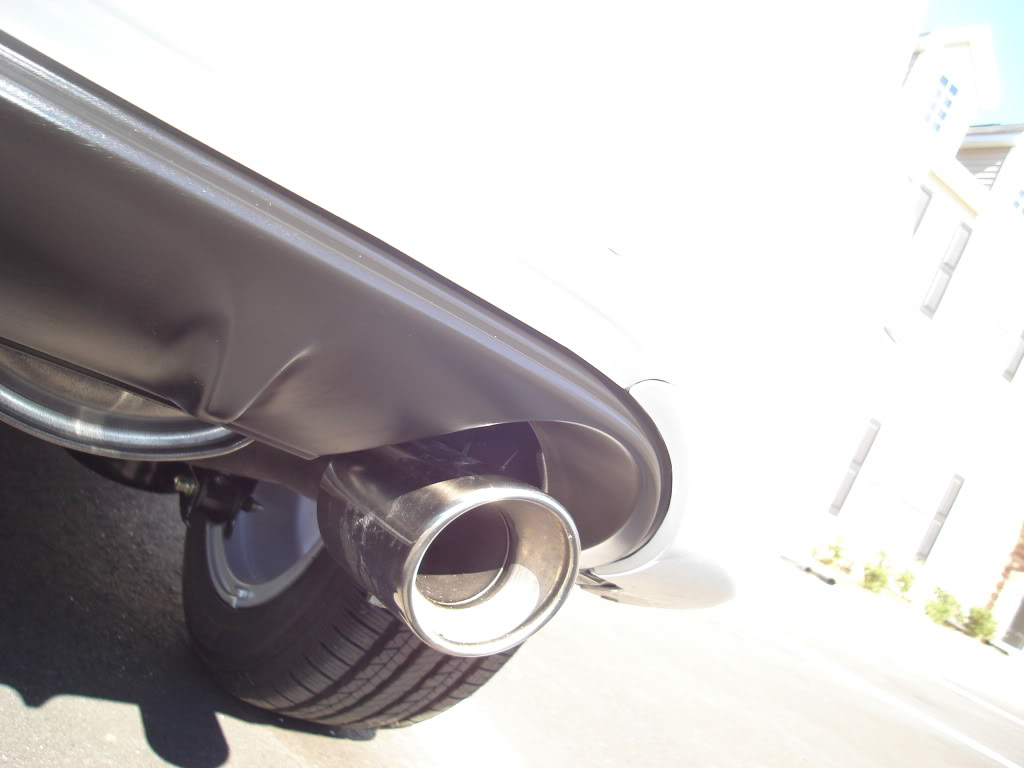
stock:
heres what i used:
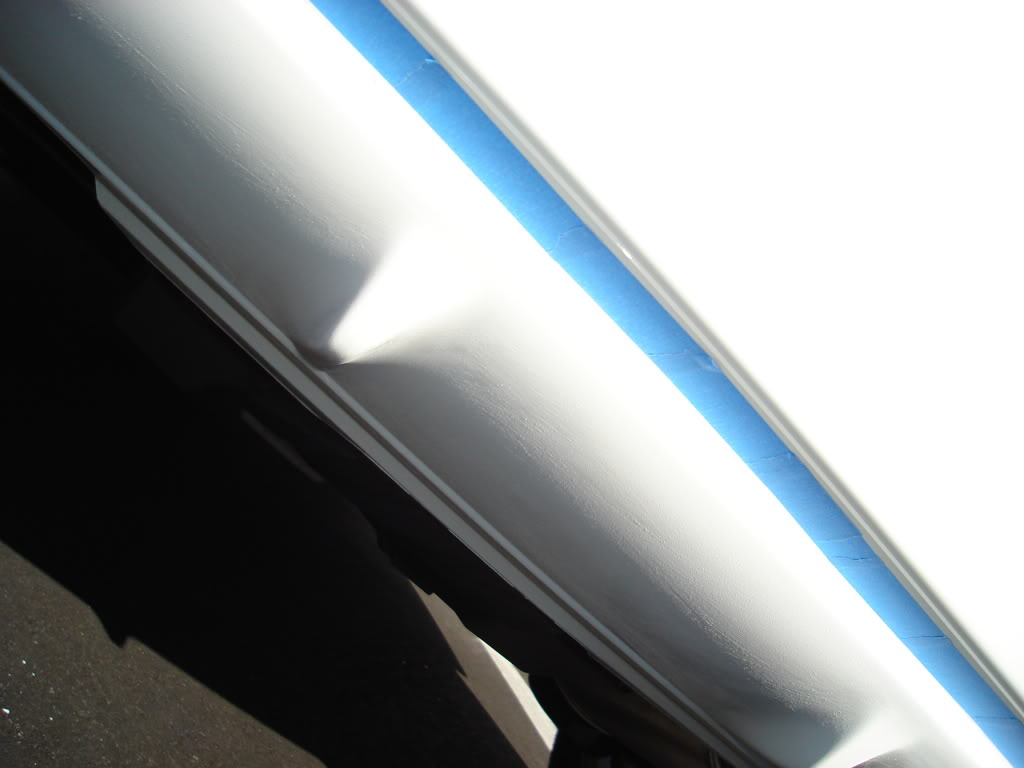
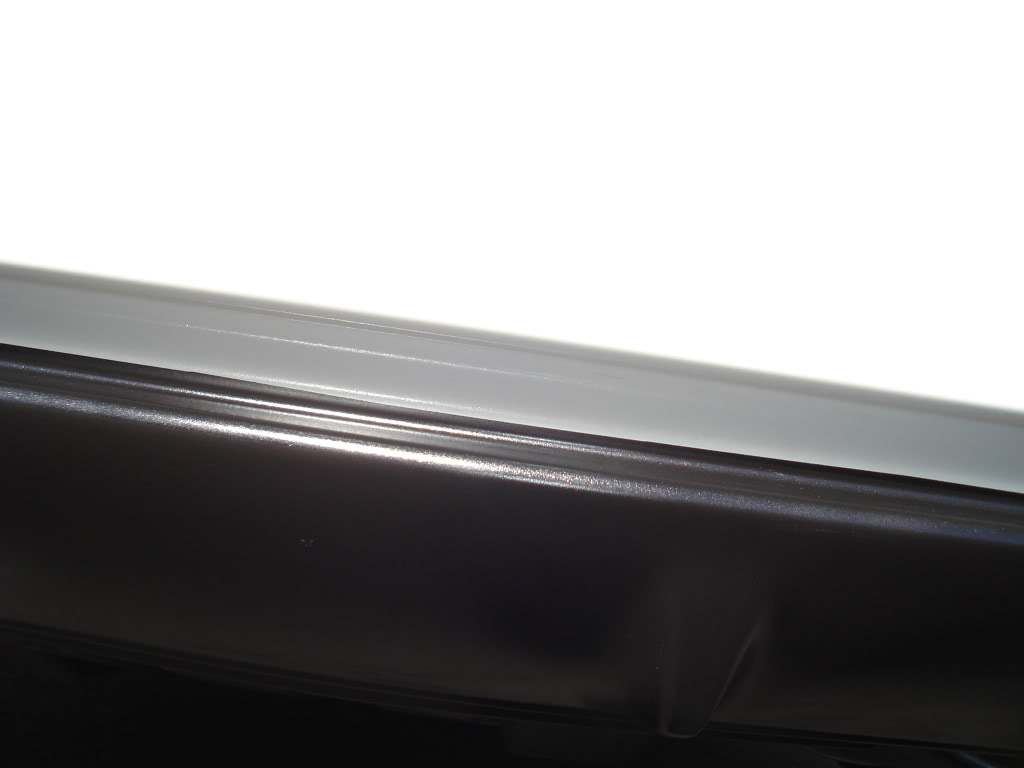
prep (taping and sanding surface to be painted):
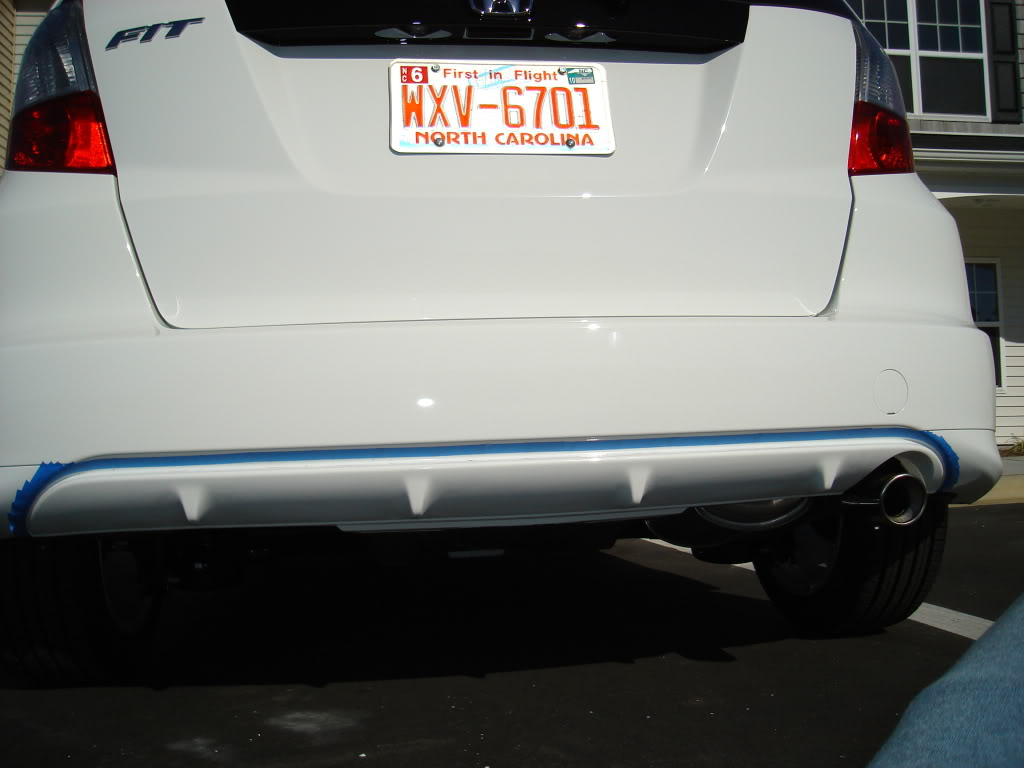
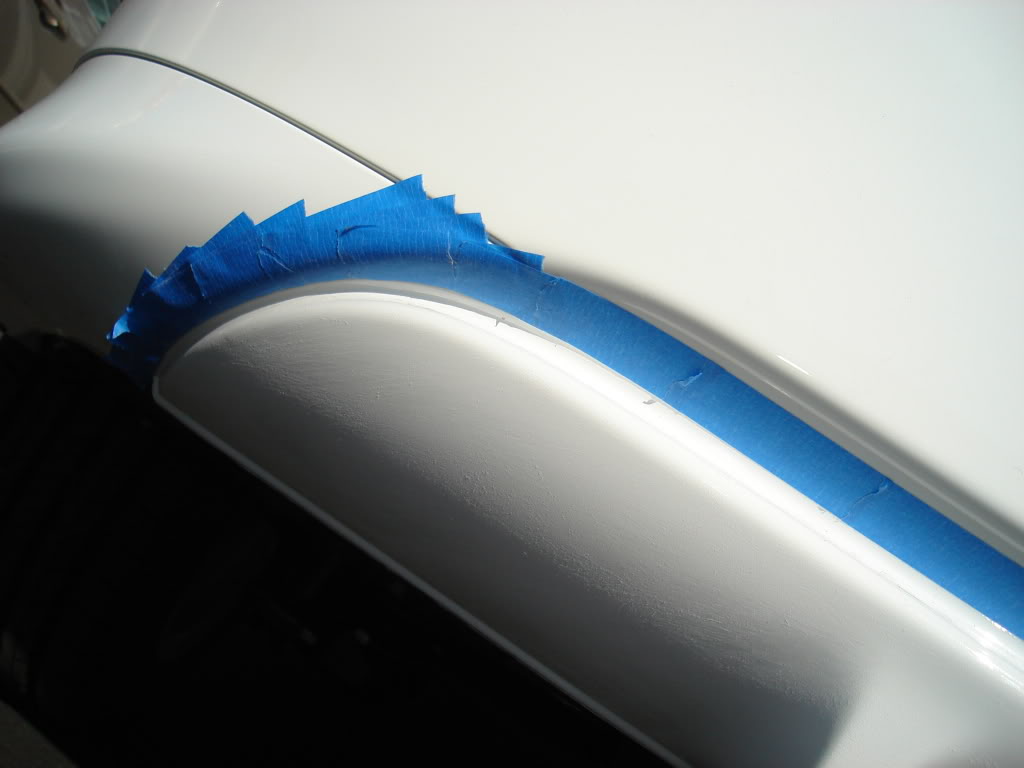
that blue tape is painters tape.. beleive me i done it before without painters tape and alot of the paint will come off when you pull off non-painters tape after painting
spray:
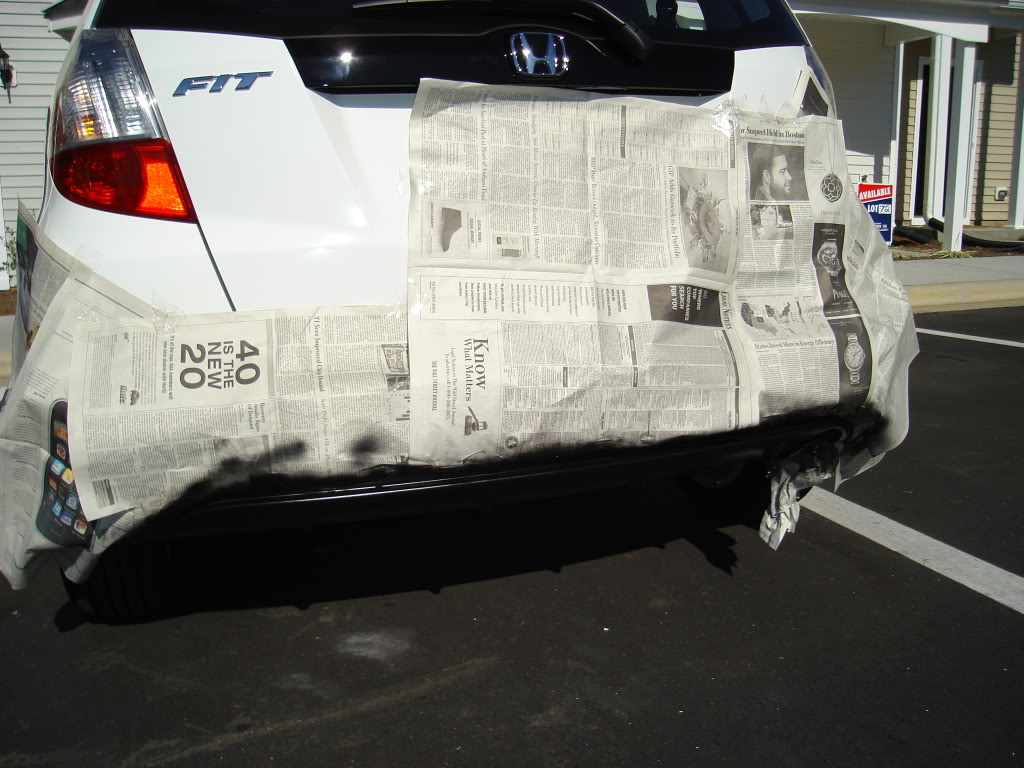
remove:
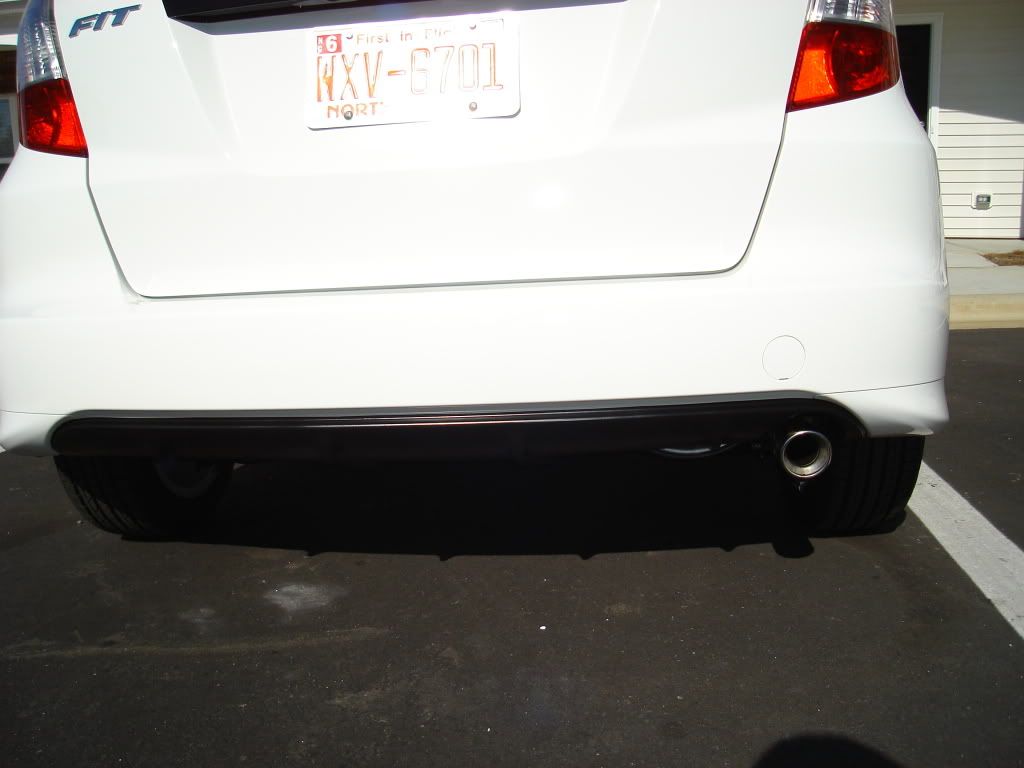
results:
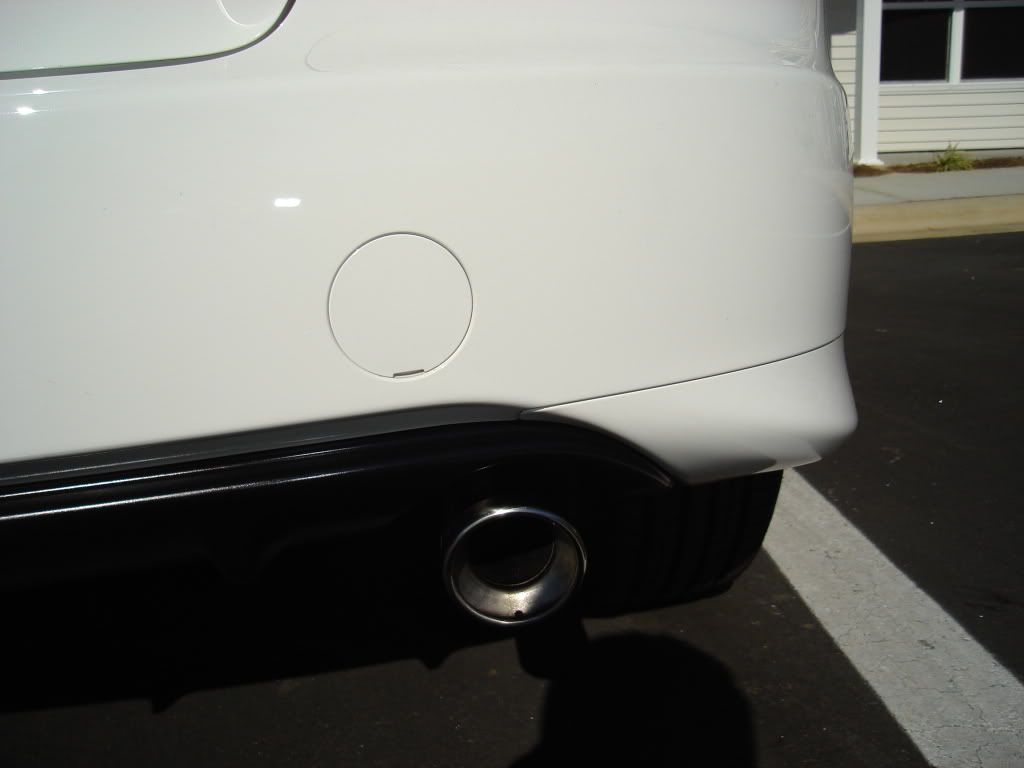
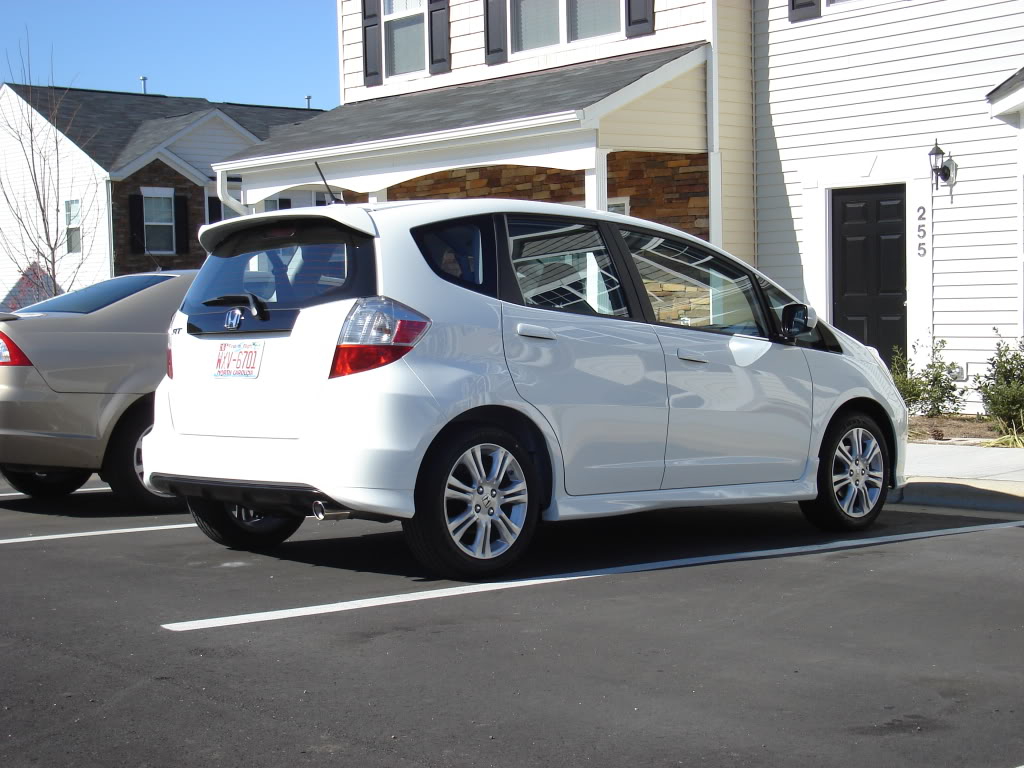
whole car results:
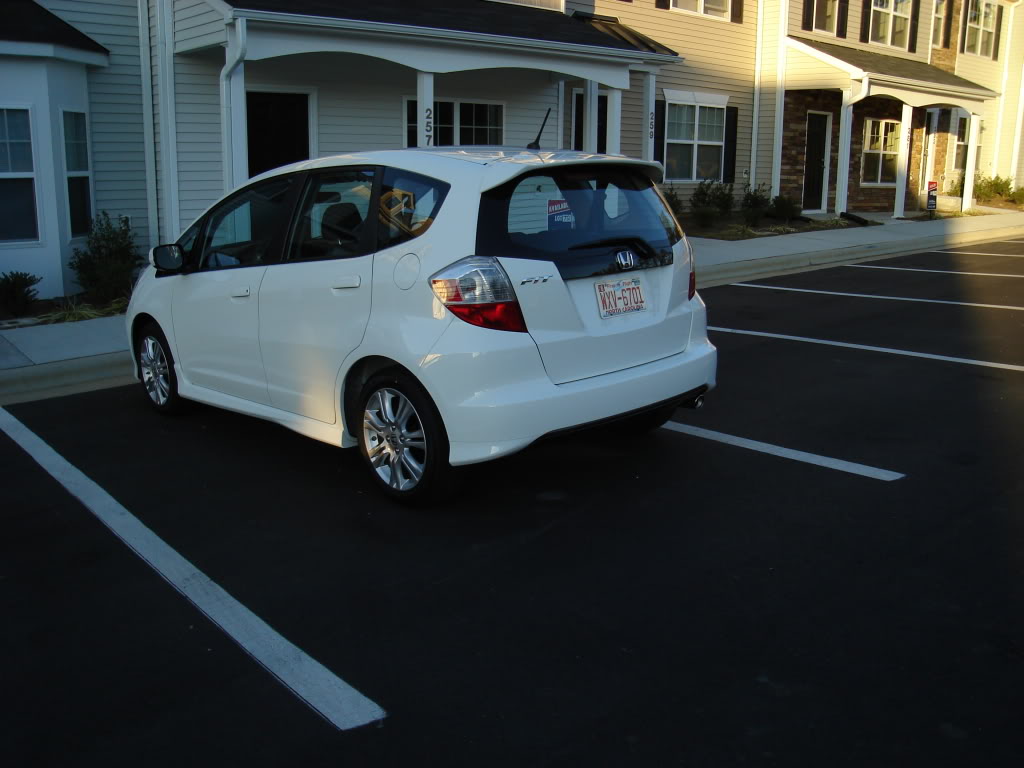
The Update is how the paint looks now, after 7 months, and also better angles to to guide someone with taping if they needed to.
2010 Fit Sport Manual
second day. already thru 120 miles on the car sinse i bought it. and i felt i was about crazy when i took sand paper to perfectly good paint.
Tools used:
Painters Tape 3/4th inch
Rustoleum Satin Black (kinda like a flat black color) I did about 3 coats, a few minutes apart from each other, just like the directions on the spray paint can.
News Paper
Sand Paper
stock:
heres what i used:
prep (taping and sanding surface to be painted):
that blue tape is painters tape.. beleive me i done it before without painters tape and alot of the paint will come off when you pull off non-painters tape after painting
spray:
remove:
results:
whole car results:
Last edited by Vash; 05-28-2010 at 04:38 PM.

#4
11-06-2009, 10:27 PM
about 2... some parts of it about 3 coats.
i done this before with no sanding and it chipped after 3 years (also did like 6 coats.. might be too many). and on the same car i done it on, i also painted the hood with sand paper with about 3 coats, and it never chipped after like 5 years (lost track of the car afterwards because i sold the car to someone else).. with the same paint as well.
so i learned my lesson, and iam posting my mistakes i did in the past too to help prevent anyone else from messing up. This time i did it perfect, but this is also like my 4th time doing something like this.
i would say low coating with sanding the surface before hand gives the best results and longevity. The more coats, the more likely it chips i beleive.. i hope someone can confirm that.
i also beleive you can replace sanding the surface down and using primer instead.... but i never used primer before, and i had many sources tell me that sandpaper also does the same job, because it creates a rough surface for the paint to really stick.
Last edited by Vash; 11-06-2009 at 10:30 PM.
#5
11-06-2009, 10:29 PM
Wow...that looks fantastic! I want to do this so bad, but I'm waaaaay too nervous to do it myself! Kudos to you!
#9
11-06-2009, 11:42 PM
idk it was just left over sand paper.. maybe 100 and a 400 for the hard the reach places? i already thru away all the sand paper today. and it was just leftover sand paper i had laying around.


#12
11-07-2009, 01:18 AM

looks great on a white car. if you want, some people buy super thin black pinstriping tape to tape over the edge for a crisp straight cut, and will most def resist chipping.
in NC they give you ur lic plates right when you buy a new car? it's been a month for me and i still got paper plates.
in NC they give you ur lic plates right when you buy a new car? it's been a month for me and i still got paper plates.
#13
11-07-2009, 01:53 AM
just saved the old plate off of the mustang, and transfered insurance and DMV info the day i bought the car. but i don't have my "official" registration papers yet
Last edited by Vash; 11-07-2009 at 01:58 AM.

#16
11-07-2009, 11:11 AM
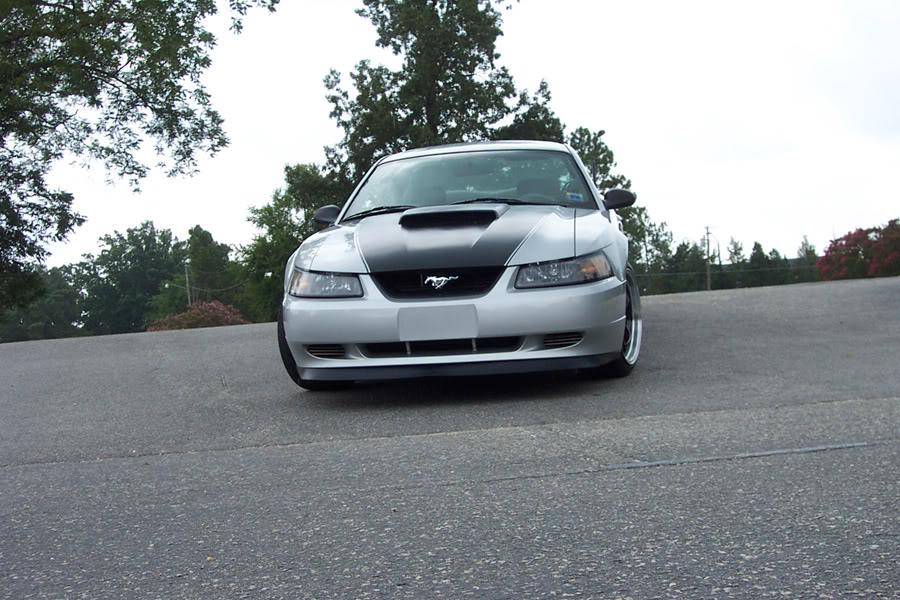
that was my first stang, heres my latest one that i sold last month:
Supercharged and Intercooled Mustang GT 02 - SVTPerformance
Supercharged and Intercooled Mustang GT 02 - SVTPerformance
#18
11-07-2009, 08:12 PM
If it doesn't move..... Paint it!!
Nice Mustangs ............... The reason for sanding is it cuts a tooth in the surface for the paint to bond into. If your spaying a color coat then the sandpaper should have a high # if your using dry paper 240-320 grit but if your wet sanding then you can go even finer 600 grit then clean the area with a paint prep to eliminate fisheying and spray away!
And you are right Vash with the thought that too many coats or to heavy a coat is better, it's Not! When sraying wether it's a rattle can or a HVLP gun you look for the moment that the coverage (paint) "just flows out" and stop!! You have to be looking at the correct angle with a good light source, and the first coat is called a tack coat this is really important, it's not meant to be a finish coat. The tack coat is lighter (less material/Paint) and is sprayed on the surface to hold the gloss/finish coats.
I know,I know it's that I've been painting stuff for years and years and I just was going to say Nice Job there Vash, Great visuals for 5 bucks and 2.5 hours. Good Work!!
Color is the cheapest way to make the biggest effect on AnyThing............. like anything the more you do it the beter it turns out.............................. Cya'll
#19
11-08-2009, 05:09 AM
that was my first stang, heres my latest one that i sold last month:
Supercharged and Intercooled Mustang GT 02 - SVTPerformance
Supercharged and Intercooled Mustang GT 02 - SVTPerformance
super nice. that thing basically paid for the fit!!

#20
11-08-2009, 08:22 PM

Nice writeup. I saw a few other people do this, and the RS looks good with that portion black which made me want to do it, but this thread finally motivated me. I spray painted that area today, used the same masking painters tape. I removed the black plastic stuff under the bumper, the muffler tip and the visible clips and wrapped everything in newspaper like you did. I sanded with what I had (800 grit) but used Rustoleum high-heat BBQ paint, its pretty much flat black. I probably spent about an hour on the masking portion, trying to get the lines perfect was a pain but the black pin-striping idea sounds great to finish it off.
Thanks for the ideas and motivaton
Thanks for the ideas and motivaton