DIY: Install Cup Holder LED's GE8


#23
 08-28-2013, 08:48 PM


Did the cupholder ambient lights today. I used a panel from a 2012 that already has the light holes and bulb holder mount. While I was at it, I also changed the cupholders to the 2012 style.
Parts List:
77290-TF0-G01ZA Replacement Panel
#74 bulb from super bright LEDs, blue
T-1 3/4 Holder
Optional: 2012-2013 Cup Holder 83403-TK6-A11ZA
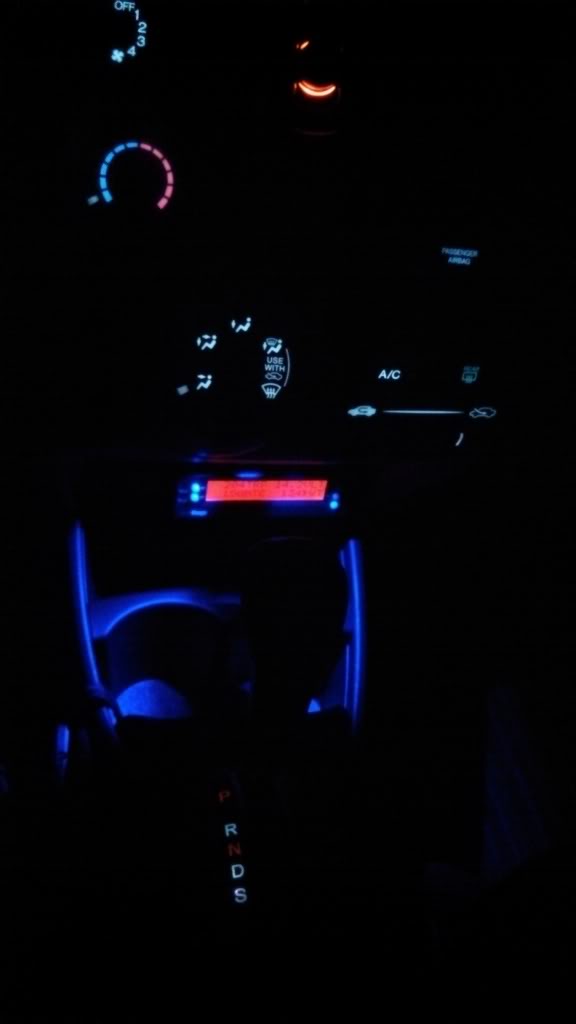
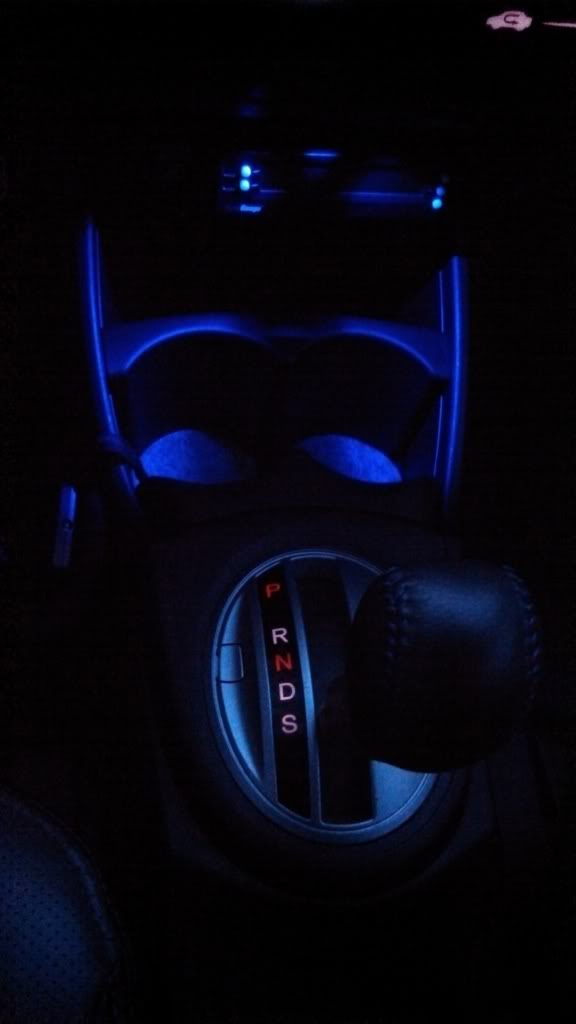
Here's a view of the 2012 cupholders installed in my 2010. The design gives more room for taller drinks, plus increases the size of the back cubby by quite a bit.

Parts List:
77290-TF0-G01ZA Replacement Panel
#74 bulb from super bright LEDs, blue
T-1 3/4 Holder
Optional: 2012-2013 Cup Holder 83403-TK6-A11ZA
Here's a view of the 2012 cupholders installed in my 2010. The design gives more room for taller drinks, plus increases the size of the back cubby by quite a bit.
Last edited by Rampo; 08-28-2013 at 09:22 PM. Reason: added part numbers

#25
11-20-2013, 01:54 AM


I just installed this retrofit using Rampo's method and part numbers tonight. The finish is very nice when using the real 2012 Honda console panel with the built-in bulb holder. The light doesn't dim with the dash lights but since I mostly do city driving this shouldn't be an issue.
I also installed the Honda armrest at the same time and used the same part number Rampo referenced to swap out the cupholder. It's really quite bizarre that Honda would use a cupholder with an integrated pocket behind it when there was already a larger pocket there. They just reduced the size for no apparent reason.
Anyway, great idea and write-up for an easy modification! I like it!

#27
01-20-2014, 09:25 PM
I'm sure it's as easy as finding another wire to tap into. You would just need the dash illumination wire. The one tapped in the instructions above seems to feed the parking lights.
#28
01-21-2014, 09:18 AM

Here you go. Tap in to the location below, and it dims with the switch.
For those pre-2012 GE8's here's the parts you'll need to make this mod work.
Needed parts
77290-TF0-G01ZA ...COVER ASSY., CENTER (2012 w/ LED cutout)
35505-SA5-003 ......SOCKET ASSY., BULB (14V 1.4W) (BASE:BLACK) (NS) (LED holder)
Optional parts
35505-692-003 (this is the white OEM bulb) I decided to swap that out for a Blue LED bulb to match the Homelink, dash, and JDM LED ashtray since they're all blue.
If you tap in to this location below, the light(s) dim with the dimmer.
Now since we don't have a direct connection for the LED holder what I did was wedge two 18-22 gauge wires ~4-6 inches long (stripped ~1/4" off the ends) to either side (positive/negative) of the terminals inside the little LED holder. After inserting the LED bulb the wires are quite secure; combine that with installing it on to the panel and it's not going anywhere. I probably could've soldered it to the terminals but then you run the risk of melting the plastic holder & the LED bulb not fitting in the holder (it's already a tight fit).
The other end of the 6" wires I attached insulated quick disconnects to about 24" of wire which then got tapped in to the Homelink wires and then to the location above.
I didn't take pics cause I can't find my crappy point & shoot camera. I could take cell phone pics if really needed but it's an easy install.
Needed parts
77290-TF0-G01ZA ...COVER ASSY., CENTER (2012 w/ LED cutout)
35505-SA5-003 ......SOCKET ASSY., BULB (14V 1.4W) (BASE:BLACK) (NS) (LED holder)
Optional parts
35505-692-003 (this is the white OEM bulb) I decided to swap that out for a Blue LED bulb to match the Homelink, dash, and JDM LED ashtray since they're all blue.
If you tap in to this location below, the light(s) dim with the dimmer.
Now since we don't have a direct connection for the LED holder what I did was wedge two 18-22 gauge wires ~4-6 inches long (stripped ~1/4" off the ends) to either side (positive/negative) of the terminals inside the little LED holder. After inserting the LED bulb the wires are quite secure; combine that with installing it on to the panel and it's not going anywhere. I probably could've soldered it to the terminals but then you run the risk of melting the plastic holder & the LED bulb not fitting in the holder (it's already a tight fit).
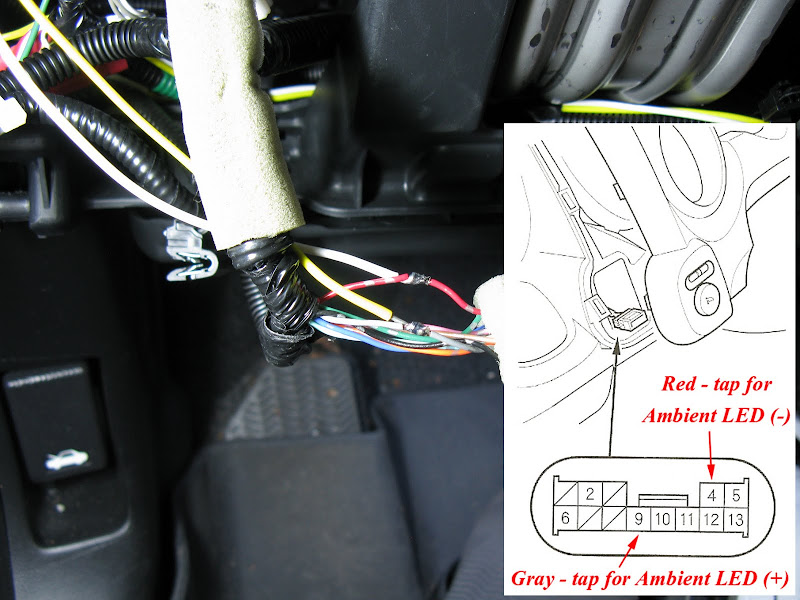
The other end of the 6" wires I attached insulated quick disconnects to about 24" of wire which then got tapped in to the Homelink wires and then to the location above.
I didn't take pics cause I can't find my crappy point & shoot camera. I could take cell phone pics if really needed but it's an easy install.
#29
01-22-2014, 12:57 AM
Excellent! I'm going to modify my wiring to match this arrangement. Only makes sense to have them dim. 
The LED that I chose to install was a white LED, I believe 3 Lumen. More than enough brightness. In fact, often too much. If the wiring modification doesn't change the amount of light I'll just put a tinted 'lens' over the hole. Be it a piece of paper or some other diffusing material. There is actually a 1 or 1.5 Lumen LED available. That may be more appropriate?
The LED that I chose to install was a white LED, I believe 3 Lumen. More than enough brightness. In fact, often too much. If the wiring modification doesn't change the amount of light I'll just put a tinted 'lens' over the hole. Be it a piece of paper or some other diffusing material. There is actually a 1 or 1.5 Lumen LED available. That may be more appropriate?
#30
01-23-2014, 09:17 AM
I tried a white LED too, when I installed the 2012 center console piece in my 2009. It's bright, but one thing I noticed is that even with that light the sides are quite dim... I went with a blue LED, but plan on adding another a few inches away from the other.
What I really want is the lighted cigarette lighter ring that some older Honda's had ... I found the yellow/amber lit one, but I'm looking for a part # for the blue one... eventually I'll do an extensive search. If I get that I probably won't need the extra LED. Thas would work great for me because I swapped out the Aux input for the JDM cig lighter, and will move the Aux power input to the middle of the console - right underneath the light from the 2012 piece, so no blind spots.
What I really want is the lighted cigarette lighter ring that some older Honda's had ... I found the yellow/amber lit one, but I'm looking for a part # for the blue one... eventually I'll do an extensive search. If I get that I probably won't need the extra LED. Thas would work great for me because I swapped out the Aux input for the JDM cig lighter, and will move the Aux power input to the middle of the console - right underneath the light from the 2012 piece, so no blind spots.


Thread
Thread Starter
Forum
Replies
Last Post
Crawly
Fit Interior & Exterior Illumination
1
11-14-2012 03:37 PM
chubbykai
Fit Interior & Exterior Illumination
2
09-06-2009 05:05 AM