DIY: progress rear sway bar install
#1
 12-06-2009, 07:47 PM


DIY: progress rear sway bar install
So I only read about the sway bar installs, but never a tutorial with pictures...
forewarning: folks with the mental thought of "bigger hammer works better" may not apply for dong this job.
time: estimating how long it should take, suiting up, setting up, with pictures 1 hr.
tools- hex key (forgot what size, but metric), 17mm wrench or socket, standard screwdriver, jack and jack stands
item list- 1 progress rear sway bar, 6 each of nuts, washers and allen bolts, instructions, and 1 sticker!!!!
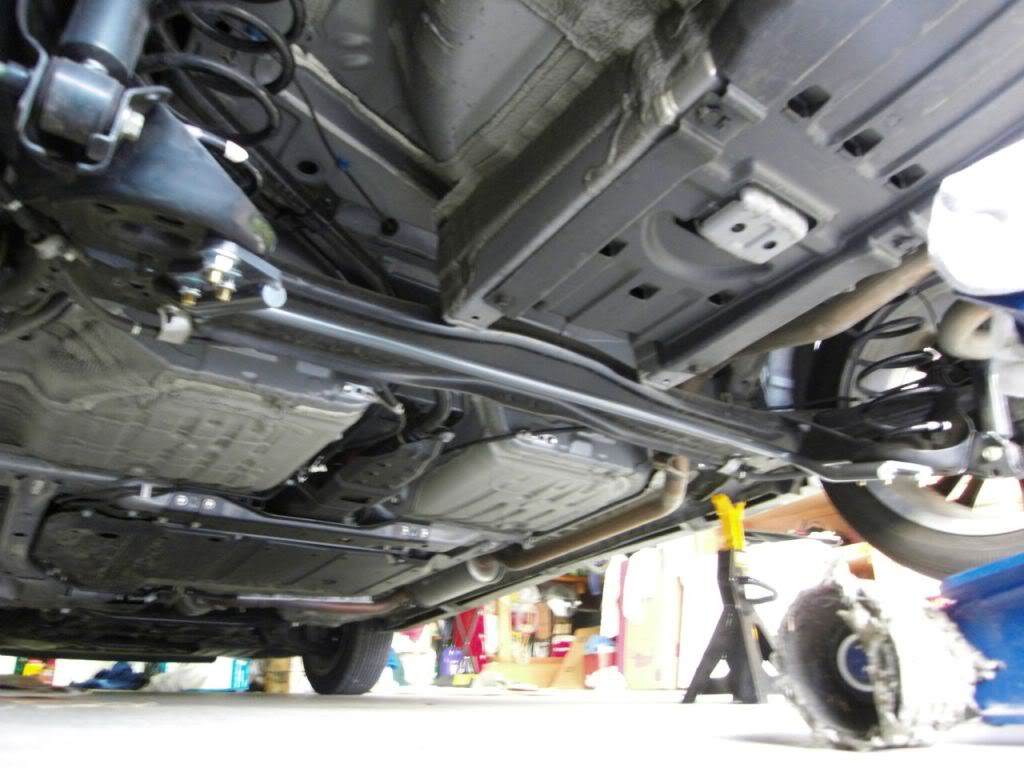
1- jack up the car where that rectangular thingy is, after the jack stands are in place, lower the jack and use it for holding the bar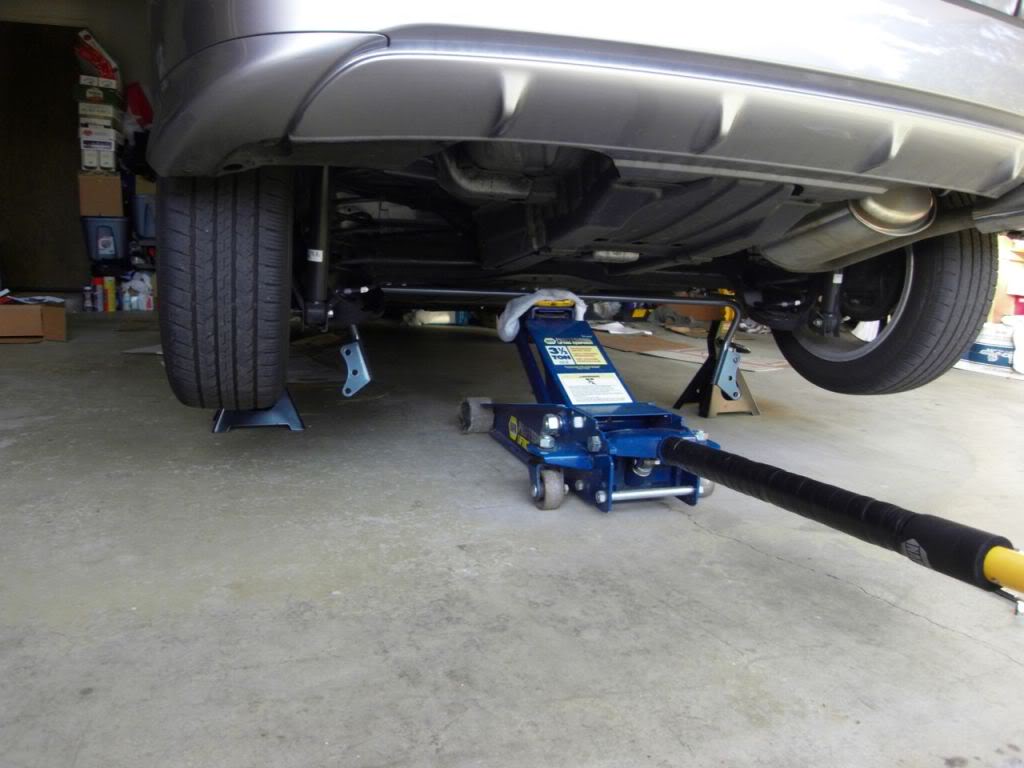
2- position the bar correctly, and estimate approx where the holes line up.
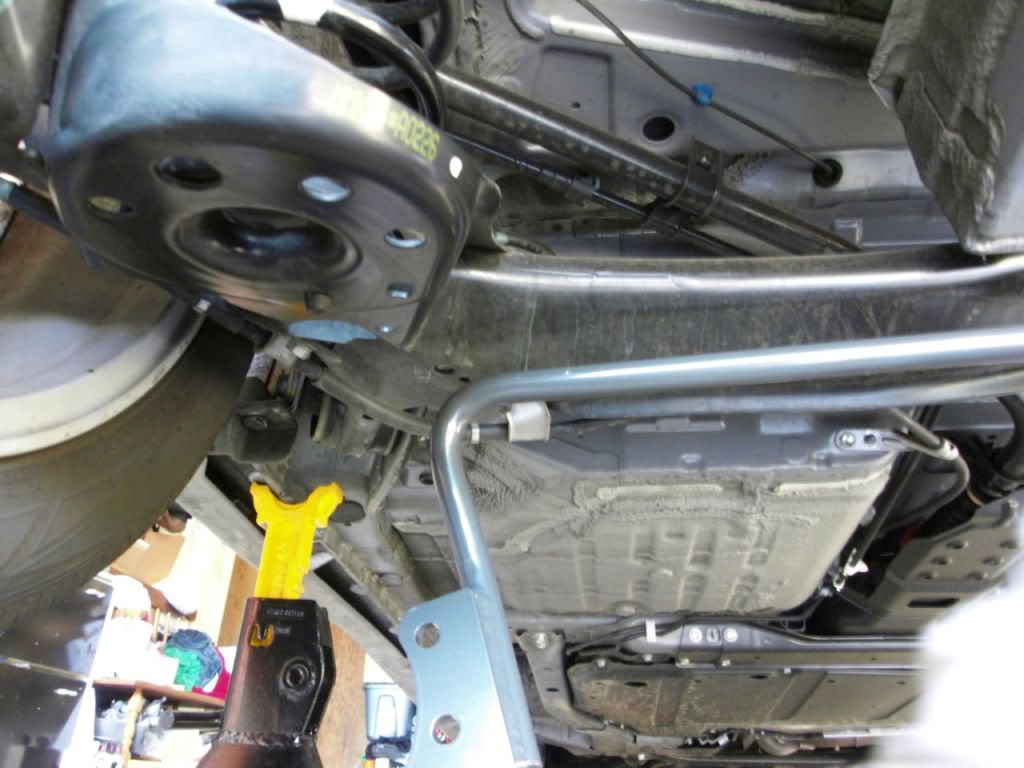
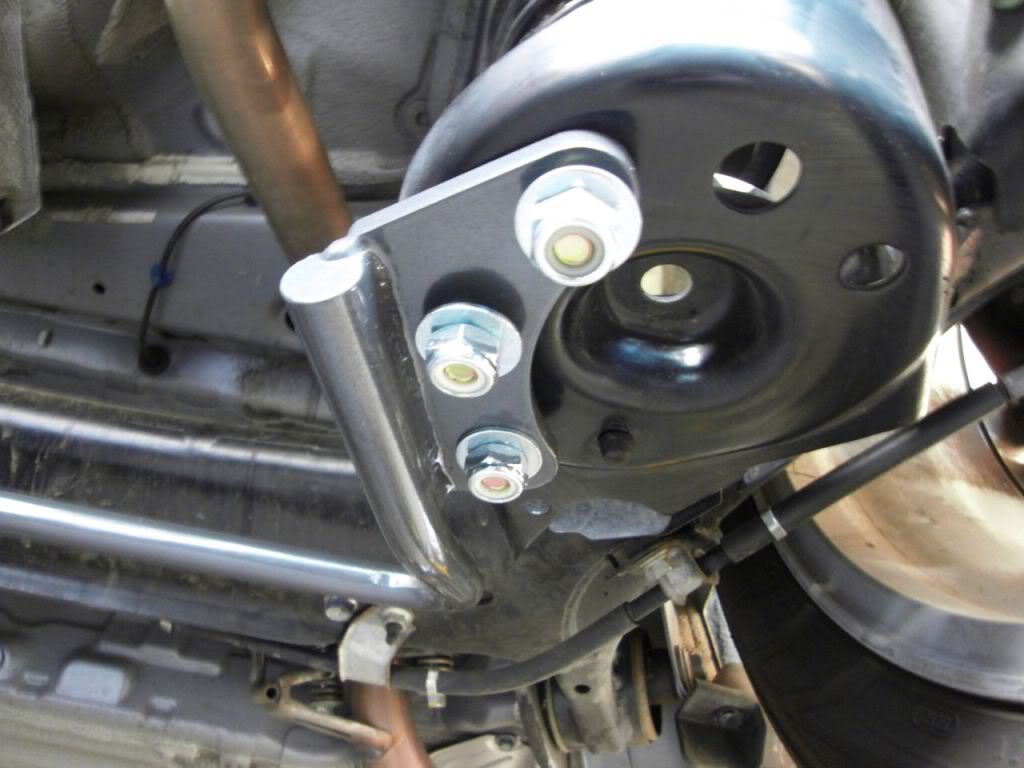
3- once the bar is aligned with the holes, drop in the allen bolt from topside.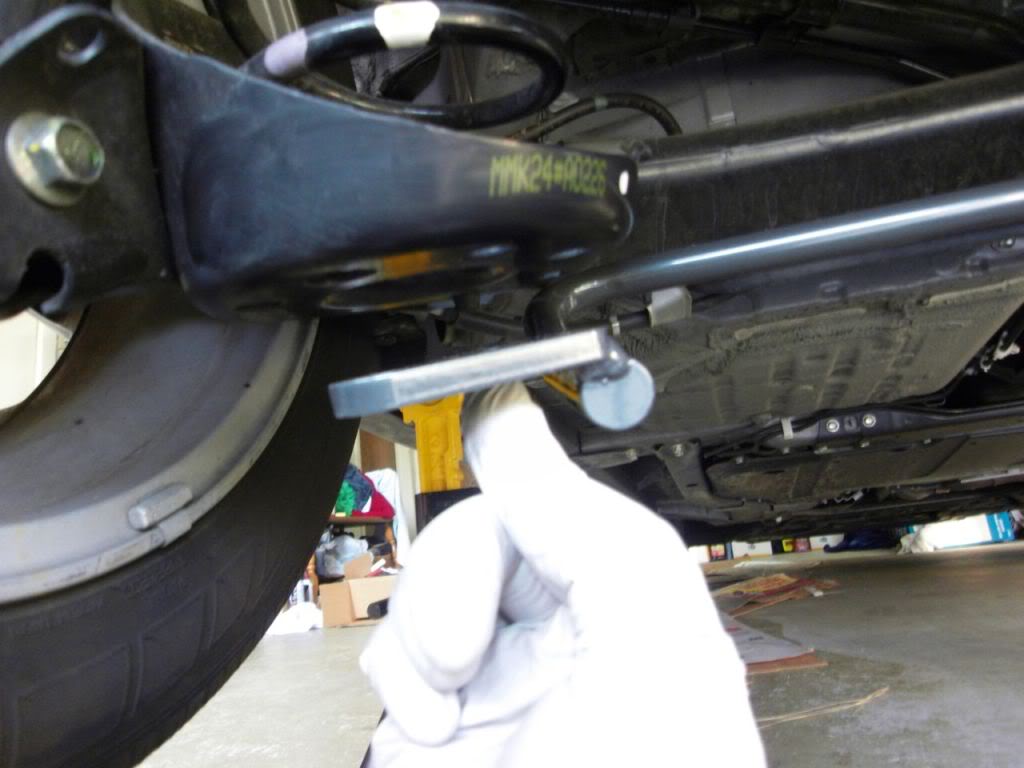
4- the 3 bolts in place on driver's side.
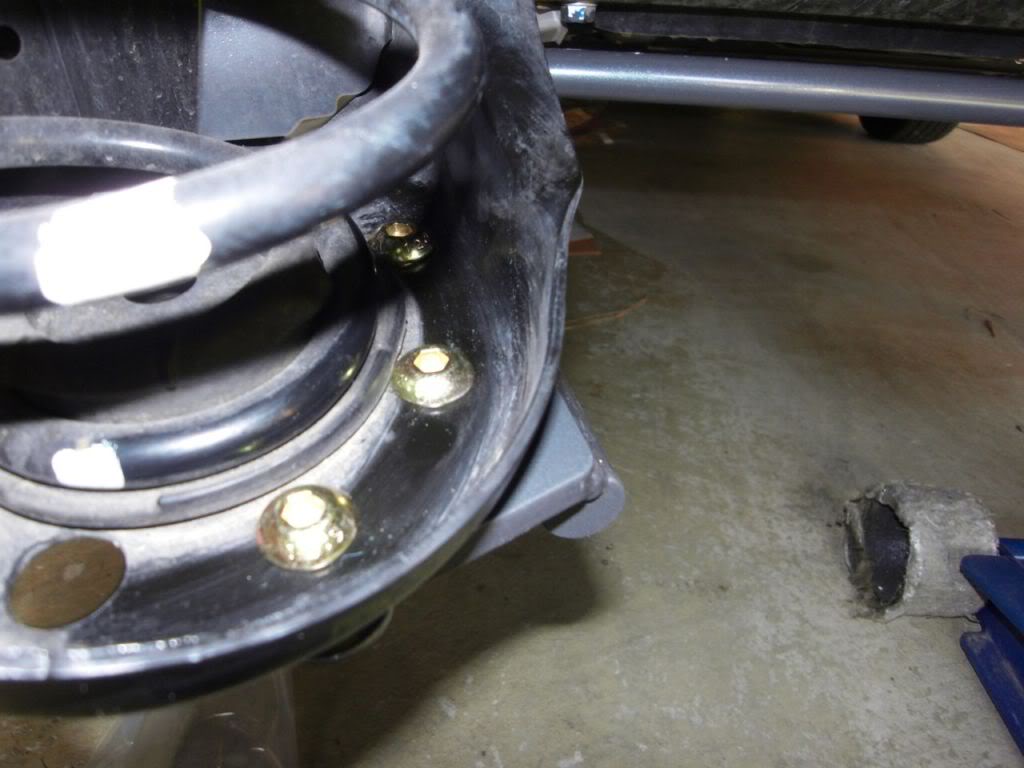
5- the 3 nuts in place on passenger's side.
6- I know I said bigger hammer metal thought shouldn't be involved, but the rubber mount holding the spring got in the way of the middle bolt, so I had to use some good ol elbow influence with a thick standard screwdriver to move the mount up enough to drop in the middle bolt on the passenger side.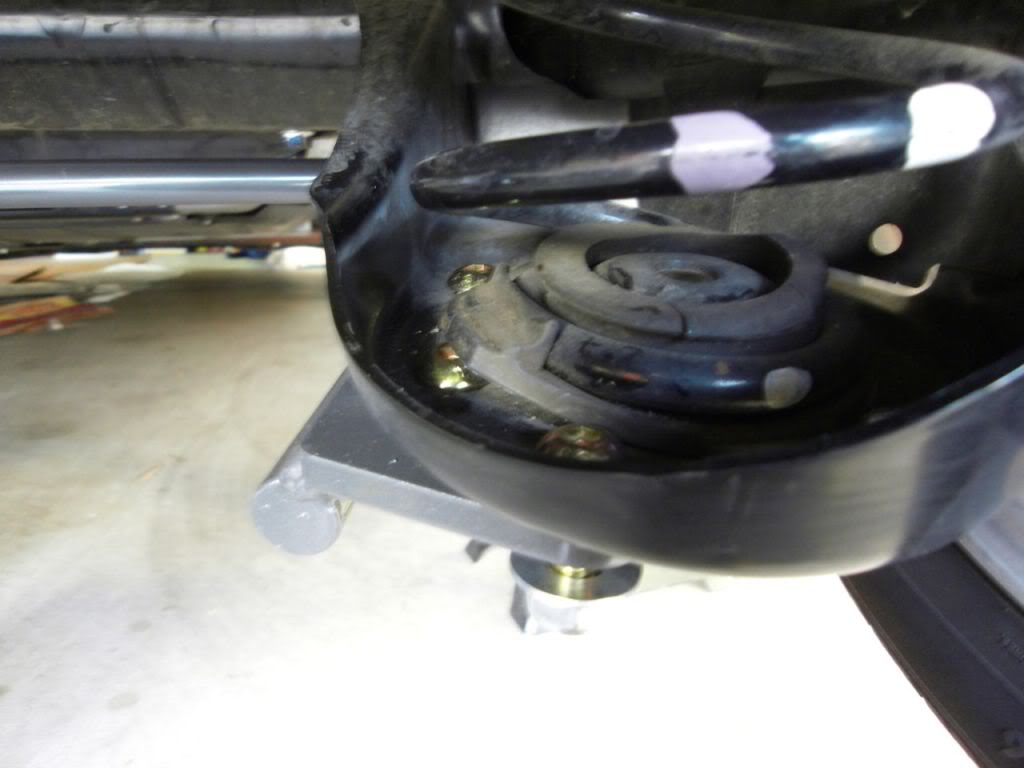
7. finished. after tightening down all 6 bolts.
8- test drive. didn't go too far, but i can tell there is a slight difference.
forewarning: folks with the mental thought of "bigger hammer works better" may not apply for dong this job.
time: estimating how long it should take, suiting up, setting up, with pictures 1 hr.
tools- hex key (forgot what size, but metric), 17mm wrench or socket, standard screwdriver, jack and jack stands
item list- 1 progress rear sway bar, 6 each of nuts, washers and allen bolts, instructions, and 1 sticker!!!!
1- jack up the car where that rectangular thingy is, after the jack stands are in place, lower the jack and use it for holding the bar
2- position the bar correctly, and estimate approx where the holes line up.
3- once the bar is aligned with the holes, drop in the allen bolt from topside.
4- the 3 bolts in place on driver's side.
5- the 3 nuts in place on passenger's side.
6- I know I said bigger hammer metal thought shouldn't be involved, but the rubber mount holding the spring got in the way of the middle bolt, so I had to use some good ol elbow influence with a thick standard screwdriver to move the mount up enough to drop in the middle bolt on the passenger side.
7. finished. after tightening down all 6 bolts.
8- test drive. didn't go too far, but i can tell there is a slight difference.
Last edited by mole177; 12-06-2009 at 07:55 PM.

#5
12-07-2009, 10:12 AM

Thanks for the DIY. I'm expecting to receive my Progress bar any day now. I read a DIY for this install (can't remember where) that included removing the lower shock bolts and removing the lower shock out of its mounting bracket. I take it this not actually necessary?

 The Progress bar supplements, not replaces, the stock bar; no need to remove it.
#11
12-09-2009, 06:44 PM
Great writeup. Impressed by the simplicity of it.
Price? Anyone in particular that sells these, others than some of the vendors on the site?
Price? Anyone in particular that sells these, others than some of the vendors on the site?
#14
12-10-2009, 06:20 AM
#15
12-11-2009, 12:50 AM
Any more anecdotal evidence to help steer me towards buying one? Is it visible once the car is off the jackstands?
I am very jealous of how clean your underbody is. It clearly has never seen snow or salt.
I am very jealous of how clean your underbody is. It clearly has never seen snow or salt.


#19
12-11-2009, 11:20 PM

Last edited by Committobefit08; 12-11-2009 at 11:27 PM.