DIY front lip

#22
 12-01-2010, 11:36 AM
a better way to do this but I need to draw up some more designs and finalize it
#23
12-01-2010, 09:35 PM
I did this today and I'm very happy with the results. Thanks for the DIY and thanks for the others who added their experiance. I see what you mean about the decision of which way to face the lip. but i think i did it the same way as you. I dont know what kind of 3m tape you guys used but i got the super heavy duty and it did not want to stick to the weather guard.
#24
12-01-2010, 10:46 PM

when i did it on my old dc2 for shits and giggles a i just 3m double side taped that bish. held up fine, did a lot of road trips and road racing courses with it and never fell off. but if you want extra security then screw it on.
#25
12-02-2010, 12:39 AM
Did mine with the heavy duty 3m red tape. Had it for about a month or so, no screws (didn't wanna put holes in the bumper...) Mine has held up well in rain and scraping and such. Great mod!
#26
12-02-2010, 02:18 AM
#27
12-02-2010, 11:21 AM
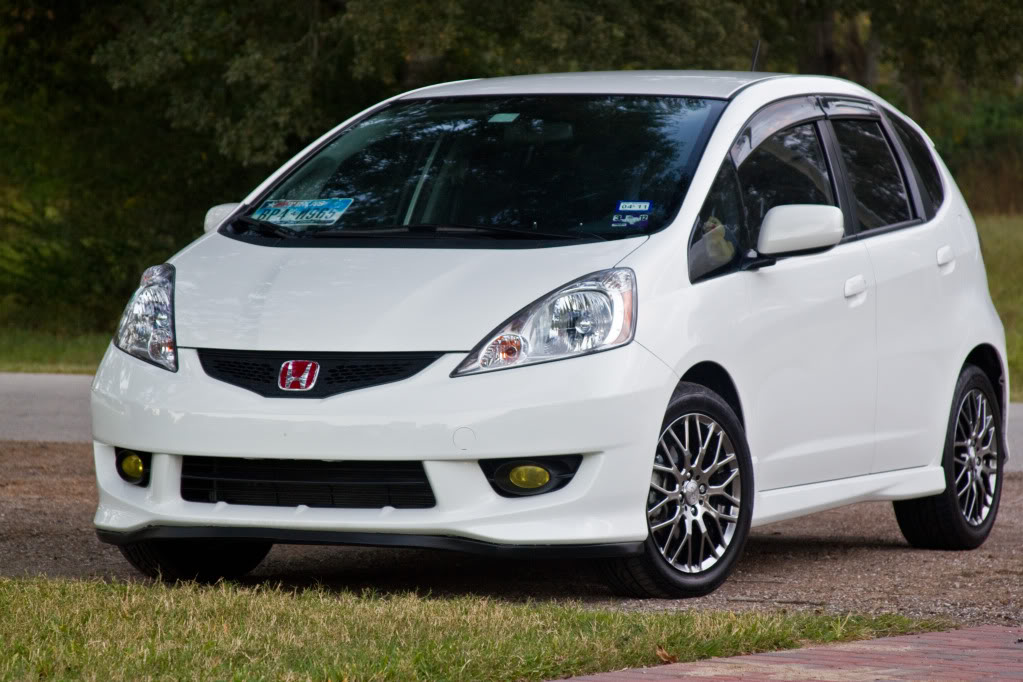
The only reason I put screws into the bumper was cause I go from Tyler to Houston and back twice a month and those Texas winds can be brutal when your doing 80 mph lol. Havent had any problems though. Here is the picture I said I would post. Sorry if it is hard to see. If you need me to get a better picture let me know. O and to make that sucker glisten, I used the tire shine spray on there and it really made it pop.

#28
12-02-2010, 11:24 AM
now that i've seen the pics. is this the better idea you had? if so please share. your lip looks better than what i did or what i could've imagined
#29
12-02-2010, 11:55 AM
ok now yours looks really good. it actually goes straight down. mine sticks almost straight out. i swear i bought the same weather guard from the picture at the top of the thread. wth? which one did you buy, or which way did you put it on and did you do anything tricky to bend it. mine was a little fussy when trying to bend it and thats what was making the tape not stick was there was so much pressure
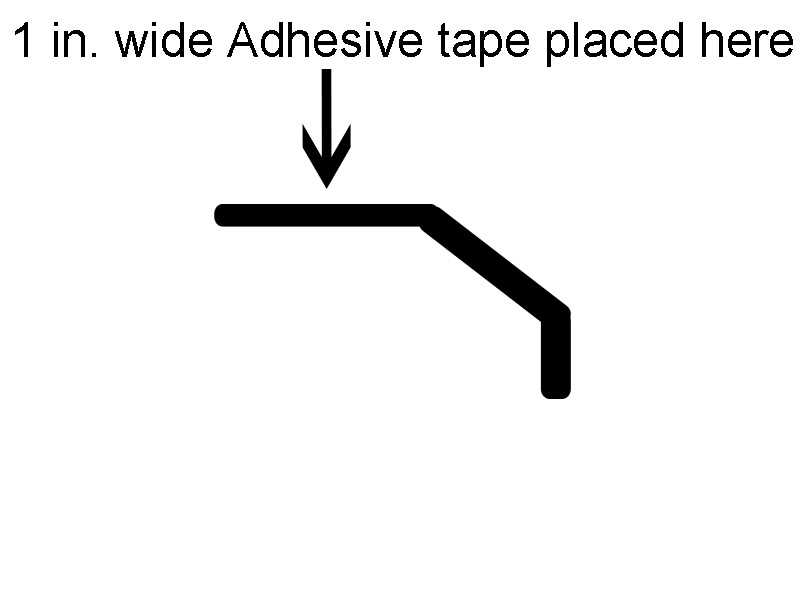
If you are looking at the rubber it has three sides to it. One side will be somewhat noticeably larger than the other. This is the side that was attached to the adhesive and bumper.
Once the adhesive was applied I put it on the bumper. But I did it slowly so that it can form around the edges of the bumper. Once I got to the middle I did find it harder to keep the lip pointing down and not out. It is not perfectly down but whatever. I do not remember if I had to work the rubber to stay pointing down or not. After doing it piece by piece (meaning I applied the adhesives in sections not all at once). I began screwing it into the bumper. I did find it difficult to get the screw both through the rubber, and the adhesive, and the bumper without twisting the rubber around. And since I did not have my car jacked up to do this I had very little room to apply upward pressure to the screwdriver. I used the palm of my hand under the screwdriver with my arm resting on my leg to push upward as I screwed it in. The rubber would twist but eventually go back to normal. I used quite a few screws, mostly in areas that needed the lip to be held closer to the bumper. Like I said I cannot remember if I did anything tricky to make it work. All I can recommend is using Isopropyl Alcohol (will help bond better with adhesive), and using 3M outdoor, wide adhesives (the roll kind). O and patience. I got inpatient since it was getting cold and starting to drizzle so I hurried on the last end a little bit.
I hope that helps. If you have anymore questions let me know.
O and my better idea was not using the screws, that was just a tip. My better idea is something I am keeping hush hush right now cause I want to make sure it can work and stuff before putting it up on here, but to give you an idea of what it is, it is a non-bendable but flexible rubber lip that is made specifically for our cars that has holes made for the screws already and is ready to install.
#30
12-02-2010, 12:57 PM

lol this is what i see as the difference. mine was facing down at about a 45 degree angle yesterday but today when i went down to my car it looked more like that. I mounted it exactly like you said but im wondering if it will bend down over time just with gravity's help. oh well it still looks decent. now it looks more like one of those downforce style lips used in real racing
 lol
lol
Last edited by ryanroland; 12-02-2010 at 01:30 PM.
#31
12-02-2010, 01:26 PM
Hahaha "real racing". Yeah give it some time. If not I am sure I can think of a way to get it to stay down.


#33
12-05-2010, 11:34 AM
Hahaha I dont know about that. Me and 4 friends were leaving the taco bell by our college late at night and I forgot it dips down before going into the street and so I hit it and it scraped BAD! I was like great....I just lost the lip. Got back to the college, it did nothing to the lip, didnt move it, didnt bend it, nothing.
#34
12-05-2010, 12:33 PM

I don't have pictures yet but i have a pretty flawless very sturdy method of this install.
1. I used a turret punch to pre punch several holes in the thick rubber.
2. Used the thick 3M between each hole
3. Mounted lip with 3M, then drilled holes to match holes already in rubber.
4. Installed 3/4" plastic push retainers in all holes.
End result looks very good, I will post pictures as soon and I find a camera.

#36
12-05-2010, 05:56 PM
i see some people are having some goodluck with this, along with some bad. lol. mine has taken a beating since i last posted. my drivers side has ripped through the screws, but is still holding in place. its torn along the bumper from my fog light to where the bumper arches up to the rad. still holding up, straight down, but it'll be gone next snow fall. oh well, i still love it.
#37
12-05-2010, 05:57 PM
The only reason I put screws into the bumper was cause I go from Tyler to Houston and back twice a month and those Texas winds can be brutal when your doing 80 mph lol. Havent had any problems though. Here is the picture I said I would post. Sorry if it is hard to see. If you need me to get a better picture let me know. O and to make that sucker glisten, I used the tire shine spray on there and it really made it pop.
lip looks wicked man! glad it worked out for you!
#38
12-05-2010, 06:09 PM
Yeah I used about 12 washers and about 25 screws so I feel mine will hold up pretty well. I only drive my car maybe once a week so that should also let it hold up longer
#40
12-07-2010, 12:38 AM
Thanks for all the compliments on the lip and the wheels lol but I gotta give alot of credit to sandblasted cause without his write-up I wouldn't have known what the hell to do