DIY front lip
#1
 10-08-2010, 03:56 PM


DIY front lip
so i seen in the "lowered ge8" thread 2 GE's with home made lips. i asked some questions, and got some replys, and well, i had to try it, and see how it works. i searched, and couldn't find any DIY's on it, so heres mine. if there is, sorry for the repost.
tools used:
phillips #2 screw driver
1/2" phillips screws(kellys screws)
3M double sided tape
garage door bottom seal(home depot)
car jack
home depot. $13 garage door bottom seal. pic is from the lowered ge thread. the packaging here in canada is different than than whats pictured.

next, put the 2 sided 3M tape on the door seal. if you notice in the pic, there is almost 3 sides to the door seal. i put the tape on the longer side, so the lip would angle under the car. i can take more pics if this part is confusing. i looked at it, sighed at what way to put it on for over a week. lol.

next, tape it to the bottom of the bumper at desired depth. under the car, or close to the edge. i like the look of the stuff, reminds me of the SI lip i had on my civic, so i wanted that look. i put it almost on the very outside edge of the bumper.
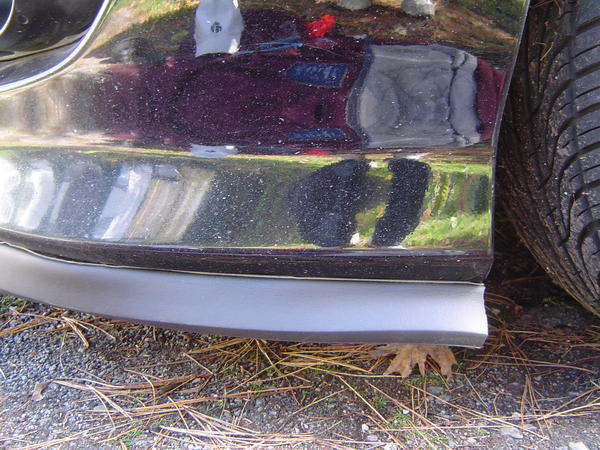
next, jack the car up(or do all this with the car jacked up) and put the screws in through the seal, the tape, and into the bumper. i found using a regular phillips screw driver worked the best. i was gonna use my drill, but i found out by just using a screw driver, it turns the seal a bit when putting them in. so make sure you push the screw through the seal, then start turning otherwise the seal will come off the bumper.(all trial and error. lol)


i spaced the screws every few inchs, and in some spots closer together. check the tape, see how its holding. if it looks like its saging, or not holding, use another screw.

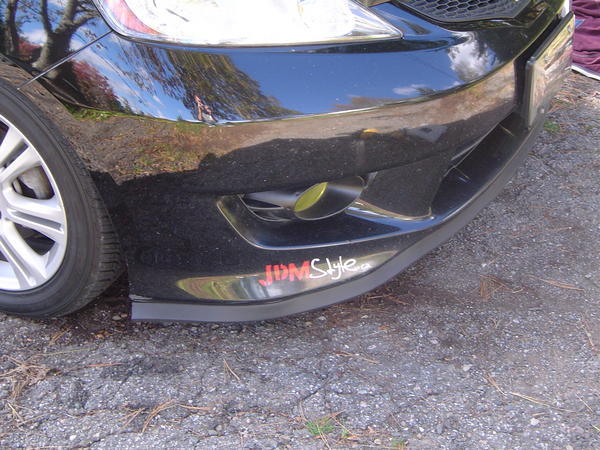
then your done. i think it looks awesome. it brings the car that much lower in the front, and with the not so much available for the GE out there, this just suited. all under 25 bucks too.


i'm going on a big cruise tomorrow with some peeps, i'll post some better pics when the car is actually clean. hope this helps. lemmie know what you think.
thanks for reading

tools used:
phillips #2 screw driver
1/2" phillips screws(kellys screws)
3M double sided tape
garage door bottom seal(home depot)
car jack
home depot. $13 garage door bottom seal. pic is from the lowered ge thread. the packaging here in canada is different than than whats pictured.
next, put the 2 sided 3M tape on the door seal. if you notice in the pic, there is almost 3 sides to the door seal. i put the tape on the longer side, so the lip would angle under the car. i can take more pics if this part is confusing. i looked at it, sighed at what way to put it on for over a week. lol.
next, tape it to the bottom of the bumper at desired depth. under the car, or close to the edge. i like the look of the stuff, reminds me of the SI lip i had on my civic, so i wanted that look. i put it almost on the very outside edge of the bumper.
next, jack the car up(or do all this with the car jacked up) and put the screws in through the seal, the tape, and into the bumper. i found using a regular phillips screw driver worked the best. i was gonna use my drill, but i found out by just using a screw driver, it turns the seal a bit when putting them in. so make sure you push the screw through the seal, then start turning otherwise the seal will come off the bumper.(all trial and error. lol)
i spaced the screws every few inchs, and in some spots closer together. check the tape, see how its holding. if it looks like its saging, or not holding, use another screw.
then your done. i think it looks awesome. it brings the car that much lower in the front, and with the not so much available for the GE out there, this just suited. all under 25 bucks too.
i'm going on a big cruise tomorrow with some peeps, i'll post some better pics when the car is actually clean. hope this helps. lemmie know what you think.
thanks for reading

#4
10-08-2010, 08:50 PM
yea...how it holds up is gonna be the big thing. winter is coming, and i doubt it will last thought it. if it does, i'll be surprised. but for 12 bucks(i had 3M tape left over from something else) i can't complain.
#6
10-09-2010, 11:21 AM
had one of these on my tib for 2 years, holds up great because it is rubberized weather stripping. this is an awesome diy, always wondered what it would look like on a fit.
#7
10-12-2010, 05:34 PM
*update*
this past saturday, i went on a wicked cruise with some peeps. over 20 cars, wicked roads. believe it or not, my car was lower than most. i was quite proud. lol.
back to the lip. i had a friend and her b/f driving infront of me, and they told me my lip was hitting on all the bumps, and rubbing on many of the turns. when they told me this, i checked the lip out, and there is no damage at all.
to make it worse, i went to my parents place yesterday to wash the car. i backed into the drive way, and didn't notice a dip on the way in. SCRAPE. i thought for sure part of the lip was gone. nope. i looked at it, still sitting there asking to be rubbed some more. overall, best 12bucks i spent, and sprayed with tire foam/spray, it even shines. LOL
#8
10-12-2010, 06:00 PM
fantastic write-up. when it's done right, this lip looks good on nearly every car, seems like it's indestructible too, lol +rep
#10
11-01-2010, 09:27 PM
*update*
while backing into my buddies garage tonight to work on the car, the lip took a beating. lol. upslope into the garage, not able to go in at an angle, it was murder on it. however, only one screw got pulled through the lip. i isn't saging, but the tape isn't holding it. its just kinda free air. so the screw is coming out tomorrow, and 2 or 3 more are going in, in its place. lol.
its also snowed here the last 2 days, so the winter tires are going on this week probably. the car will drop a bit more, so expect me to write about the lip getting ruined this week sometime. lol.
#11
11-02-2010, 07:21 PM
Wow I am so glad I found this write up. I own a 2010 TW Fit and decided to try this out. The only thing I am going to do differently is use rubbing alcohol to clean the bottom side so the adhesive will stick better and (i dont know if this is what you used exactly) use the outdoor double sided tape along with the screws to see if that works against the elements. So hopefully by this weekend I will install it and get some pictures up. Thank you for the write up!
#12
11-04-2010, 01:52 PM
Well since the rain let up yesterday I decided to go ahead and attempt this DIY front lip. I didn't have a jack handy since I was at school but I thought what the hell it only costs $25 for everything, if i screw up I will just go get more stuff. After it was all said and done I for sure learned some things.
1. It is best to apply the double sided tape in sections so that you can "bend and shape" the rubber along the curves of the bumper.
2. It is a bitch to get those screws in there because it does twist the rubber, but if you apply enough force it will just push through and screw into the bumper fine.
3. Isopropyl alcohol will help the adhesives stick better to the bumper.
4. Patience is a virtue, aka take your time
5. Using wider double sided tape may cover more space (which helps hold better), but makes it harder to get a screw through rubber, adhesive, and the bumper.
Overall it came out pretty good. The only part I am disappointed about (which is my own fault) is that when looking down one side (on the curve) it sticks out a little bit more than the other side. But o well. I think for $25 it came out good. After letting it sit and letting the rain fall for about 5 hours I decided to go ahead and drive around to make sure it wouldnt come lose or anything. So I took it for a drive around some roads. My main concern was when I head down to Houston this weekend I didnt want this thing coming off and me having to either screw it back on and stuff. I managed to get up to about 60 in a wet, semi drizzling rain, and it stayed on fine. So we will see how it holds up on my trip tomorrow. Thank you sandblasted for this awesome DIY!
PS: I will post pictures when I get a chance because these cell phone pictures didnt come out good
#14
11-04-2010, 08:45 PM
You could probably use a wide,thin washer under the screws to help keep the screws from "ripping" through the seal when you hit something. Might be worth a try.

#17
12-01-2010, 06:01 AM
im going to try this in a few days.....thanks for posting this. iv been wanting to do this for awhile now but i didnt cause didnt know how...know i do yaaay...plus rep for you.
question....is it actually screwing through the bumper 0_0 ?
question....is it actually screwing through the bumper 0_0 ?
#18
12-01-2010, 06:22 AM
I wonder if you could drill small pilot hole for screws if it would grab the foam. Also a washer on the screws should reduce the twisting when putting screws in.
Anyone have pics of this on a white Fit? It would sort of bring it all together with the black rear diffuser.
I really do need ramps. This buying them and then returning when done is a pain.
Anyone have pics of this on a white Fit? It would sort of bring it all together with the black rear diffuser.
I really do need ramps. This buying them and then returning when done is a pain.
#20
12-01-2010, 11:14 AM
I wonder if you could drill small pilot hole for screws if it would grab the foam. Also a washer on the screws should reduce the twisting when putting screws in.
Anyone have pics of this on a white Fit? It would sort of bring it all together with the black rear diffuser.
I really do need ramps. This buying them and then returning when done is a pain.
Anyone have pics of this on a white Fit? It would sort of bring it all together with the black rear diffuser.
I really do need ramps. This buying them and then returning when done is a pain.