Sound Deadening (Acoustic Foam, MLV, Closed Ceal Foam, CLD Tiles)
#1
 07-02-2013, 11:03 PM


Sound Deadening (Acoustic Foam, MLV, Closed Cell Foam, CLD Tiles)
Initially I was planning to do simple sound deadening with CLD tiles only.
CLD tiles is the generic name for Dynamat.
I apply my CLD tiles on my Front Door Panel while I was doing the JDM LED Blinker, Folding Door Mirror,
but the amazing result of the CLD tiles made me want to do much more,...
I want to do a complete sound deadening for my car and do it correctly.
Some Fit owner here had been doing a lot of sound deadening project on their car,, but so far I don't see them using acoustic foam and some times they don't do the full layer by layer.
My plan are,
Open the front door panel again and add Neoprene (Closed Cell Foam) on top of the CLD tiles then add the MLV barrier on top of the Closed Cell Foam.
I will also do the same thing for the Rear Door Panel, The Rear Hatch door, The trunk panel and of course the floor of the car.
For the headliner, I only put CLD tiles and add the Neoprene (Closed Cell Foam), but NO MLV because the weight of the MLV will be too much to be glued on upside down panel.
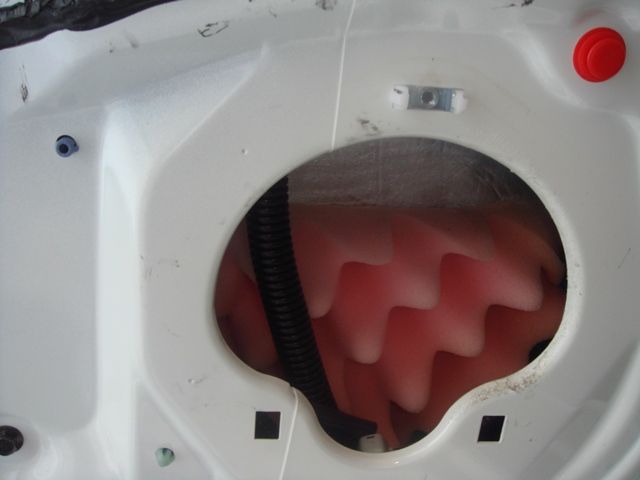
Oh, in every empty space (like under dash board and behind trunk panel),
I will also put (JAM) as much acoustic foam as possible.
some people had used the "pillow stuffing" at this area with great success,
but I think putting an acoustic foam will result in much better sound dampening plus it will be more "fire retardant" then those walmart pillow stuffing.
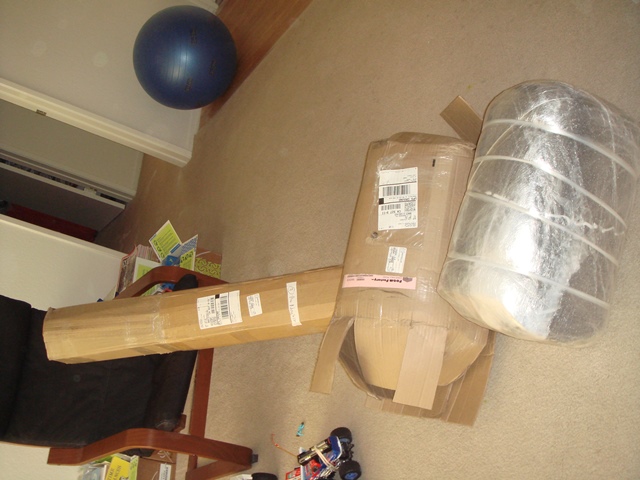
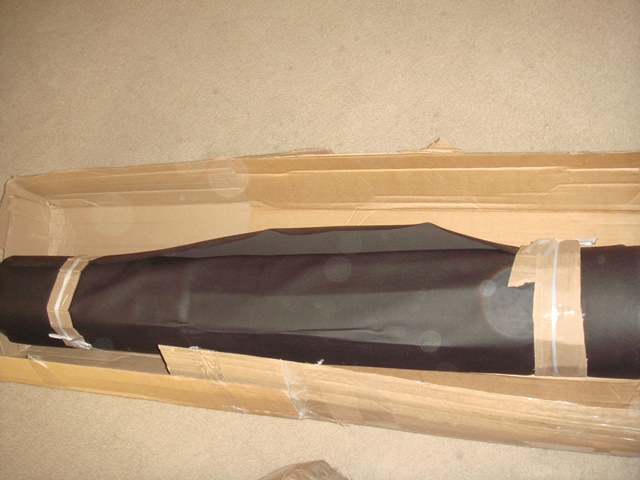
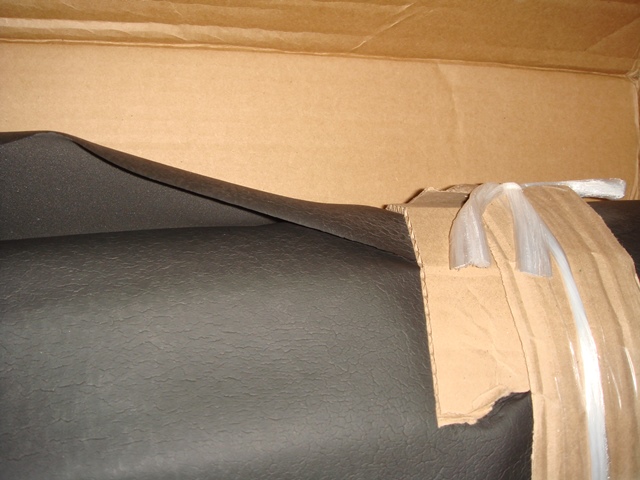
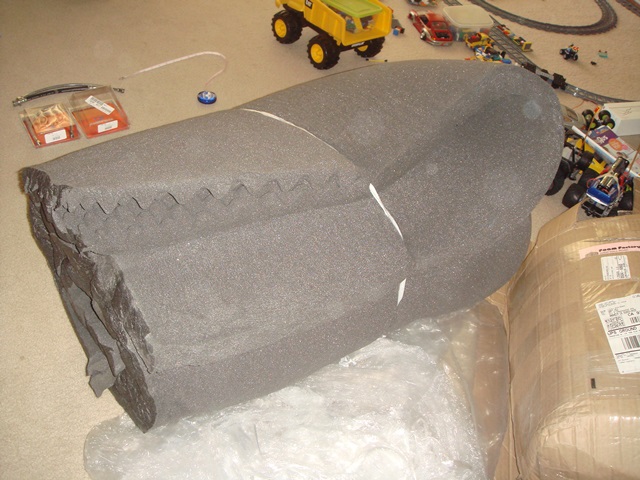
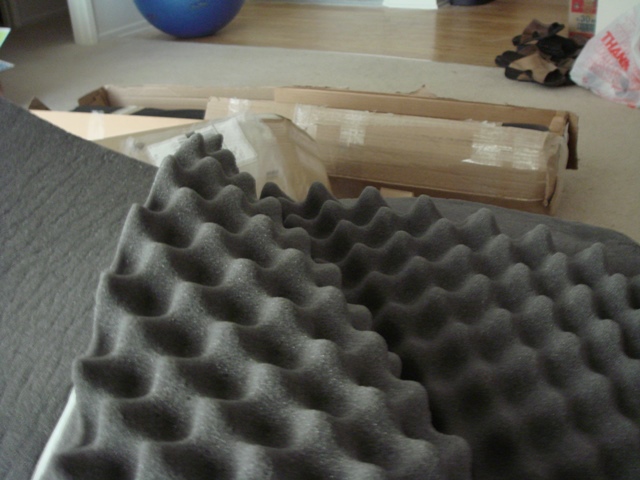
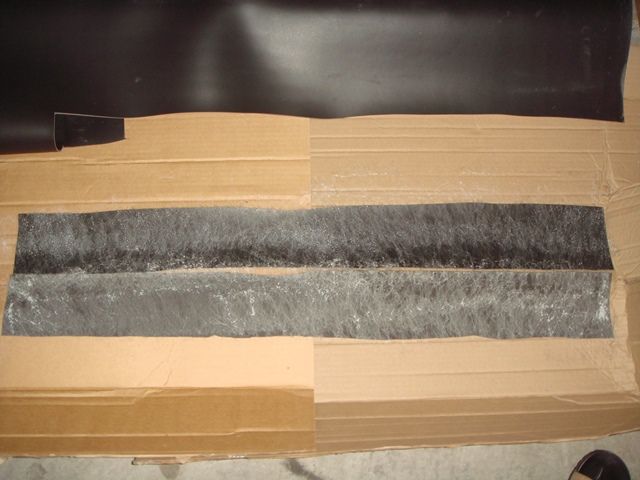
Ok, first I want to show pictures of the Neoprene Closed Cell Foam and Acoustic Foam that just arrive today:
oh, by the way, I don't know when I can finish this project though...
because this will involve taking out all the interior panel and seat too...
hopefully I have time and patient to do this asap...
the headliner, well I think I won't do that until I have long vacation...
and below is a copy and paste of what I had done to the front door panel so far that I had posted on my other thread involving the JDM Door Mirror...
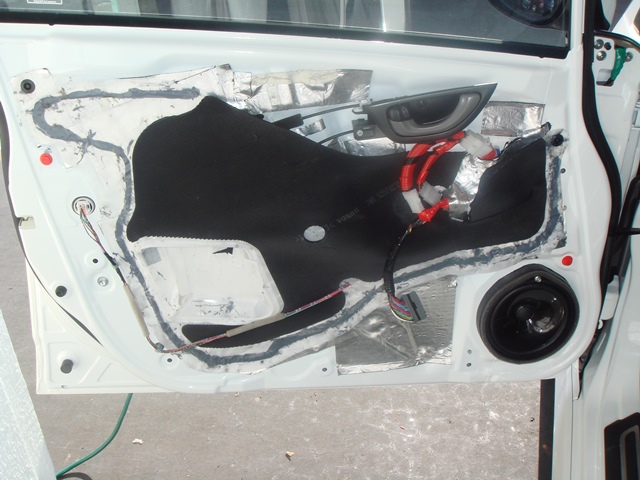
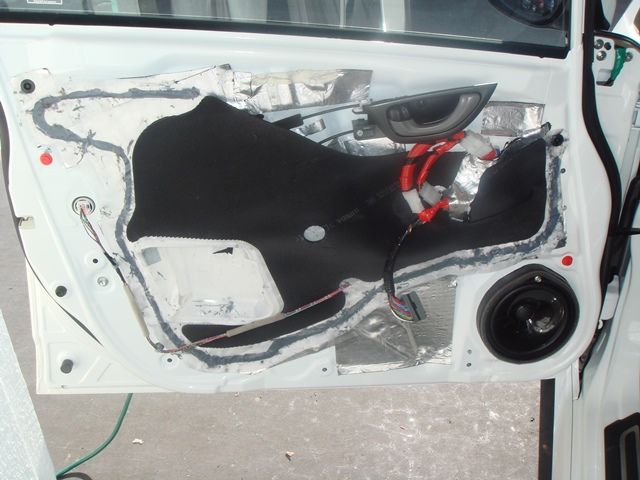
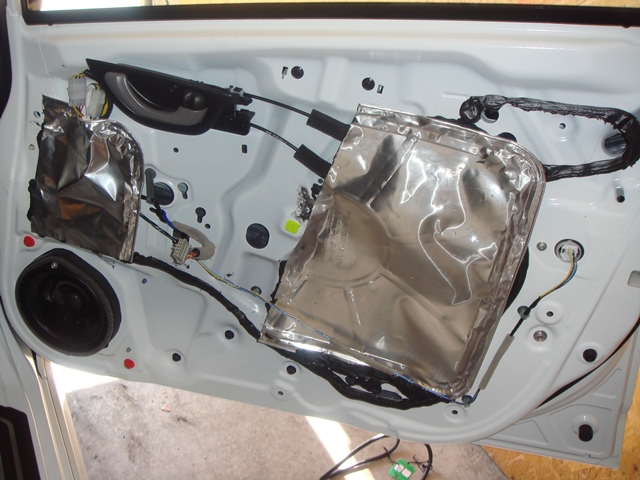
Sound deadening the Driver/Left Door with CLD Tiles,
I cover at least 90% of the area INSIDE the door !
After that I put Acoustic Foam BEHIND the Speaker Opening so to absorb unwanted resonance
I glue the foam using 3M Ultra 77 Glue,
I also make sure the foam only cover half the height of the speaker opening so it won't interfere with the window rolled down.

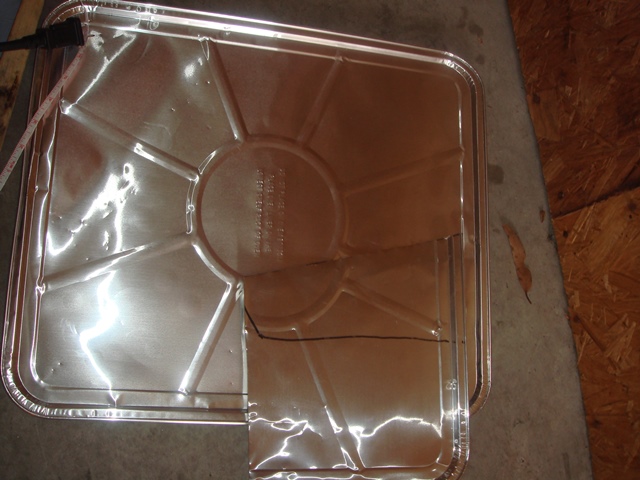
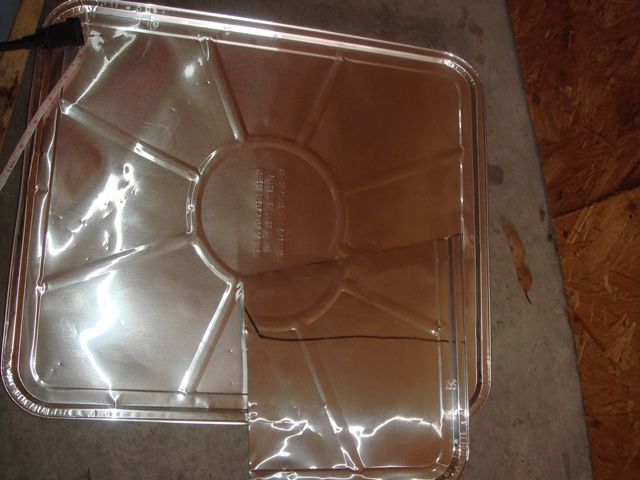
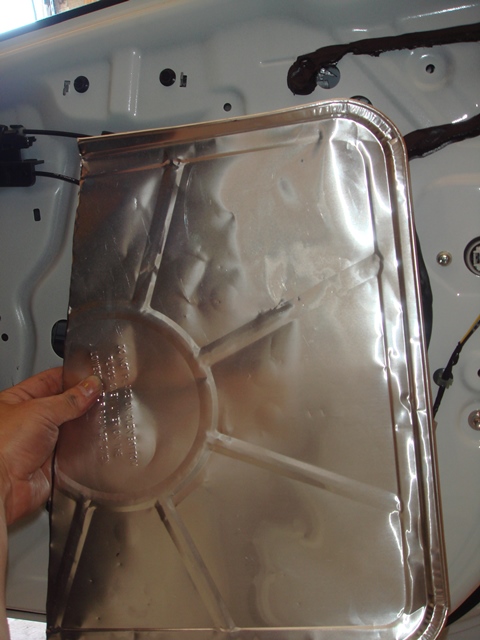
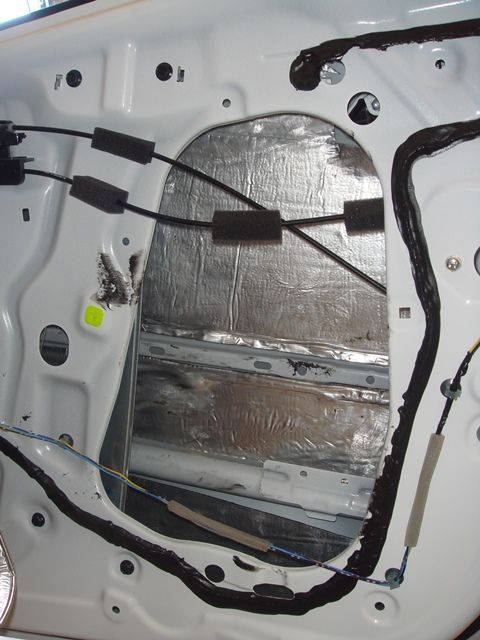
Then every large hole opening were covered with this Aluminum plate,
that I cut from a baking plate hahaha
notice one of the plate is still intact the other is what left of it
Oh, I forgot, I attached the backing plate using that 3M CALK Strip that I mention in this thread before, That 3M Calk Strip is also good to cover little gap if needed to further sealed the door !
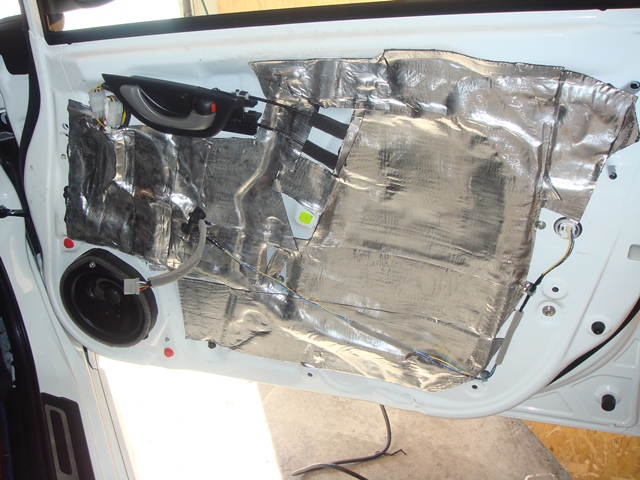
Then on top of the aluminum plate, I cover the front side/plate of the door with more CLD tiles...but this time
I only manage to cover probably around 70% of the front door plate area
because at first I worry the door panel might not goes back in easily if it is too thick,
I plan to buy MLV later, and I am pretty sure there is enough space to add MLV layer on top of the CLD tiles, but I will do this only after I bought my Mid Bass speaker, so I don't have to open and close the door panel too often... the clip's are easy to broke, I already broke 1 MOUNTING for the clip... but it still work fine...
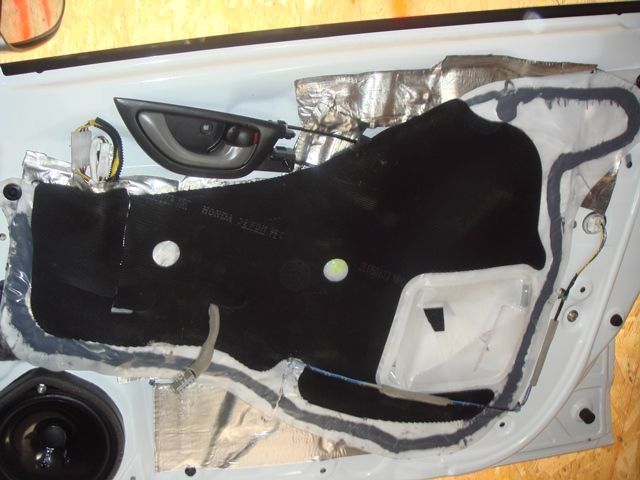
After that I recover the CLD tiles with factory original plastic covering,
but I had to cut the center square piece since it is molded as a cube...
you know what I mean when you open a brand new door later
Finally, I had to cut the foam, this foam is also cube that suppose to go on top of the plastic pieces that I am talking above...
this foam is attached to the door panel...
I cut about 1/2 the height and it's fine now


then I put the door cover panel back, and test the sound of my speaker,...
it does have a little bit more bass and the midrange is less harsh now
CLD tiles is the generic name for Dynamat.
I apply my CLD tiles on my Front Door Panel while I was doing the JDM LED Blinker, Folding Door Mirror,
but the amazing result of the CLD tiles made me want to do much more,...
I want to do a complete sound deadening for my car and do it correctly.
Some Fit owner here had been doing a lot of sound deadening project on their car,, but so far I don't see them using acoustic foam and some times they don't do the full layer by layer.
My plan are,
Open the front door panel again and add Neoprene (Closed Cell Foam) on top of the CLD tiles then add the MLV barrier on top of the Closed Cell Foam.
I will also do the same thing for the Rear Door Panel, The Rear Hatch door, The trunk panel and of course the floor of the car.
For the headliner, I only put CLD tiles and add the Neoprene (Closed Cell Foam), but NO MLV because the weight of the MLV will be too much to be glued on upside down panel.
Oh, in every empty space (like under dash board and behind trunk panel),
I will also put (JAM) as much acoustic foam as possible.
some people had used the "pillow stuffing" at this area with great success,
but I think putting an acoustic foam will result in much better sound dampening plus it will be more "fire retardant" then those walmart pillow stuffing.
Ok, first I want to show pictures of the Neoprene Closed Cell Foam and Acoustic Foam that just arrive today:
oh, by the way, I don't know when I can finish this project though...
because this will involve taking out all the interior panel and seat too...
hopefully I have time and patient to do this asap...
the headliner, well I think I won't do that until I have long vacation...
and below is a copy and paste of what I had done to the front door panel so far that I had posted on my other thread involving the JDM Door Mirror...
Sound deadening the Driver/Left Door with CLD Tiles,
I cover at least 90% of the area INSIDE the door !

After that I put Acoustic Foam BEHIND the Speaker Opening so to absorb unwanted resonance
I glue the foam using 3M Ultra 77 Glue,
I also make sure the foam only cover half the height of the speaker opening so it won't interfere with the window rolled down.
Then every large hole opening were covered with this Aluminum plate,
that I cut from a baking plate hahaha
notice one of the plate is still intact the other is what left of it
Oh, I forgot, I attached the backing plate using that 3M CALK Strip that I mention in this thread before, That 3M Calk Strip is also good to cover little gap if needed to further sealed the door !
Then on top of the aluminum plate, I cover the front side/plate of the door with more CLD tiles...but this time
I only manage to cover probably around 70% of the front door plate area
because at first I worry the door panel might not goes back in easily if it is too thick,
I plan to buy MLV later, and I am pretty sure there is enough space to add MLV layer on top of the CLD tiles, but I will do this only after I bought my Mid Bass speaker, so I don't have to open and close the door panel too often... the clip's are easy to broke, I already broke 1 MOUNTING for the clip... but it still work fine...
After that I recover the CLD tiles with factory original plastic covering,
but I had to cut the center square piece since it is molded as a cube...
you know what I mean when you open a brand new door later
Finally, I had to cut the foam, this foam is also cube that suppose to go on top of the plastic pieces that I am talking above...
this foam is attached to the door panel...
I cut about 1/2 the height and it's fine now
then I put the door cover panel back, and test the sound of my speaker,...
it does have a little bit more bass and the midrange is less harsh now
Last edited by BMW ALPINA; 07-03-2013 at 12:18 AM.
#2
07-02-2013, 11:04 PM
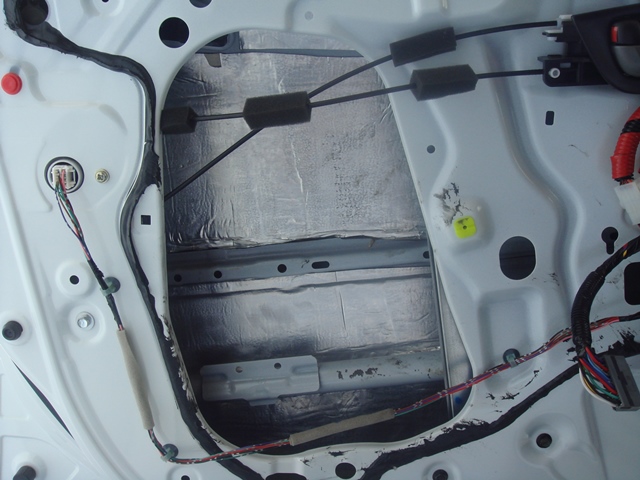
sounddampening inside RIGHT door done,
now I am going to cover this hole:

with this aluminum sheet (cut from baking foil bought at Walmart at Cooking equipment section hahaha ):
covered both holes with aluminum sheet:
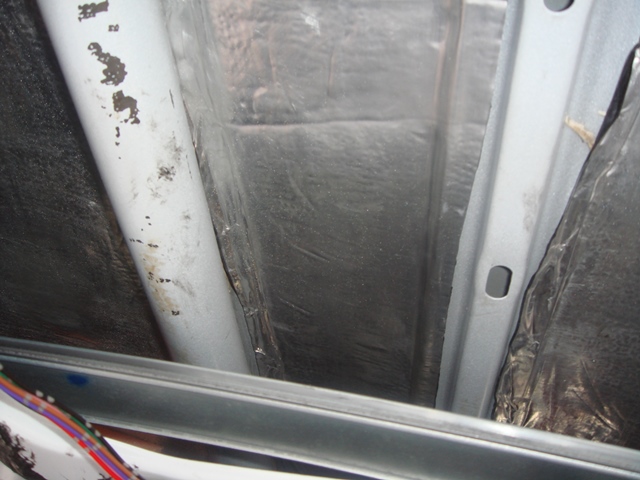
Covered with more CLD Tiles Sound dampening:
Covered back with Factory original foam:

I test my front speaker after both door covered with CLD tiles,
and now the midrange is a bit more "muffled" or not as bright as before,
but the midbass is tighter...
still, I think now I need to turn the volume knob higher for the same sound level...
so sensitivity seemed DROPPED when we add CLD tiles...
(more reason to upgrade the speaker and power amplifier, but this got to wait )
The Aluminum Foil (from the backing plate) is just for Backing Plate to cover the holes,
and on top of it, I put the actual sound deadening/CLD Tiles.
The CLD Tiles (the actual sound deadening) had sticky surface
that had to be attached to some hard surface, so the aluminum sheet is acting like the Fiber in Carbon Fiber mixture/composite,...
or like ReBar inside a Concrete mix...
The CLD Tiles it self had 2 surface,
one is the sticky one, and the other is the surface cover with aluminum sheet on it's own. but it is a very thin aluminum sheet so it is not strong enough... that is why I need the aluminum backing plate.
I bought my CLD tiles (popularly known as Dynamat) based from recommendation from another member here name "FIT4SPL".
and this is the place where I order them:
Car Auto Audio Sound Dampening Deadener 1 SQ FT GTmat Pro 80 Mil
I bought the 100 Square Feet Rolls like 3 months ago,
because they have very cheap special at that time,
It was only $139.98 already include shipping cost !!!
so it was very cheap !!!
(but now the price back to regular price of $194.99)
I think 50 Square feet rolls is enough to cover the entire car,
but they have it so cheap, I could not resist buying 100 Square feet...
hopefully I can buy another car before this CLD Tiles adhesive when bad in a few years hahaha
Here is what they looks like:

now they just came out with new CLD tiles, that is even thicker at 110mil...
now I am going to cover this hole:
with this aluminum sheet (cut from baking foil bought at Walmart at Cooking equipment section hahaha ):

covered both holes with aluminum sheet:

Covered with more CLD Tiles Sound dampening:

Covered back with Factory original foam:
I test my front speaker after both door covered with CLD tiles,
and now the midrange is a bit more "muffled" or not as bright as before,
but the midbass is tighter...
still, I think now I need to turn the volume knob higher for the same sound level...
so sensitivity seemed DROPPED when we add CLD tiles...
(more reason to upgrade the speaker and power amplifier, but this got to wait
) The Aluminum Foil (from the backing plate) is just for Backing Plate to cover the holes,
and on top of it, I put the actual sound deadening/CLD Tiles.
The CLD Tiles (the actual sound deadening) had sticky surface
that had to be attached to some hard surface, so the aluminum sheet is acting like the Fiber in Carbon Fiber mixture/composite,...
or like ReBar inside a Concrete mix...
The CLD Tiles it self had 2 surface,
one is the sticky one, and the other is the surface cover with aluminum sheet on it's own. but it is a very thin aluminum sheet so it is not strong enough... that is why I need the aluminum backing plate.
I bought my CLD tiles (popularly known as Dynamat) based from recommendation from another member here name "FIT4SPL".
and this is the place where I order them:
Car Auto Audio Sound Dampening Deadener 1 SQ FT GTmat Pro 80 Mil
I bought the 100 Square Feet Rolls like 3 months ago,
because they have very cheap special at that time,
It was only $139.98 already include shipping cost !!!
so it was very cheap !!!
(but now the price back to regular price of $194.99)
I think 50 Square feet rolls is enough to cover the entire car,
but they have it so cheap, I could not resist buying 100 Square feet...
hopefully I can buy another car before this CLD Tiles adhesive when bad in a few years hahaha
Here is what they looks like:
now they just came out with new CLD tiles, that is even thicker at 110mil...
#3
07-02-2013, 11:18 PM
I had bought the MLV sound barrier few weeks ago,
I also had bought all the glue that I am going to need,
but those stuff are at my garage and I will post picture of them later.
In the mean time,
here are the place where I got my MLV Sound Barrier and Foam:
MLV Sound Barrier:
SoundAway Barrier MLV 1#, 1/8" x 4' x 25', 100 SF, price is just $115 per roll !
SoundAway Soundproofing Mass Loaded Vinyl Noise Barrier
Black Vinyl Seam Tape Roll 2" x 108', I bought 2 roll to tape between MLV seams,
Vinyl Seam Tape
I go to their shop and pick them up myself to save shipping,
that 100 square feet of MLV were VERY HEAVY !!!
Around 100 Pounds, hopefully, I don't need to use that much to cover the entire area in my car though...
you can contact The owner directly, his name is Alex, nice guy and very knowledgeable !
Now for the foam,
I bought them here:
Neoprene Closed Cell Foam:
7 piece of 1/16" Neoprene Foam (REG) - SKIN 80" x 48" @$9.99 = $69.93
Neoprene Sheets, Rubber, Poker Table Foam, Neoprene Pads
Acoustic Foam also at the foam factory:
2 piece of 1-1/2" Charcoal Eggcrate Foam - Regular - 72" x 80" @$32.99 = $65.98
The Foam Factory, Acoustic Foam, Sound proofing Foam, Eggcrate Foam, Eggcrate, Convoluted Foam,
When you want to buy things at Foam Factory,
you can contact: jesiree@foambymail.com
Jesiree give me excellent customer service !!!
Believe me when I say excellent customer service, because I need to add some order after my order almost shipped,
and Jesiree took care all the problem that came with it, and remind super friendly all the way !!!
I had done lot of research and the 2 place above are the CHEAPEST and yet they offer many item with Great Quality,
you guys can try to find other place that might be cheaper,
but somehow I think it will not be easy
Last edited by BMW ALPINA; 07-02-2013 at 11:23 PM.
#4
07-08-2013, 01:59 PM
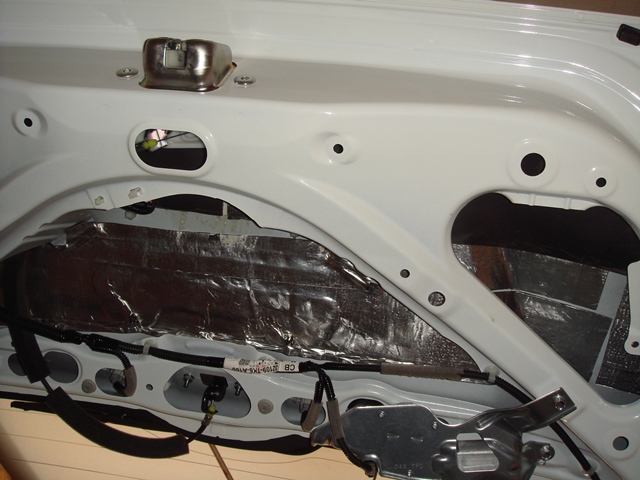
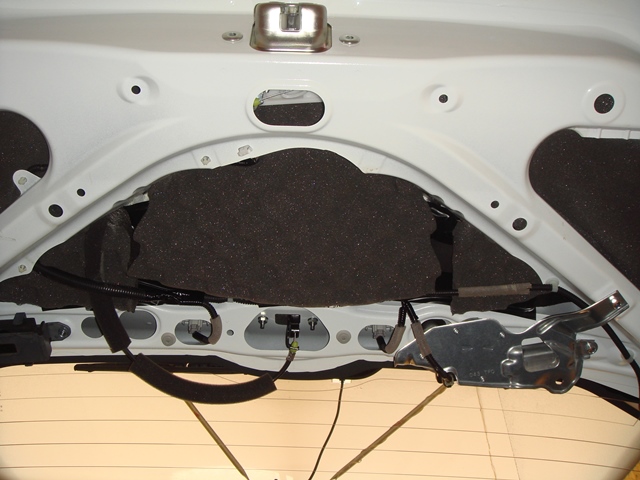
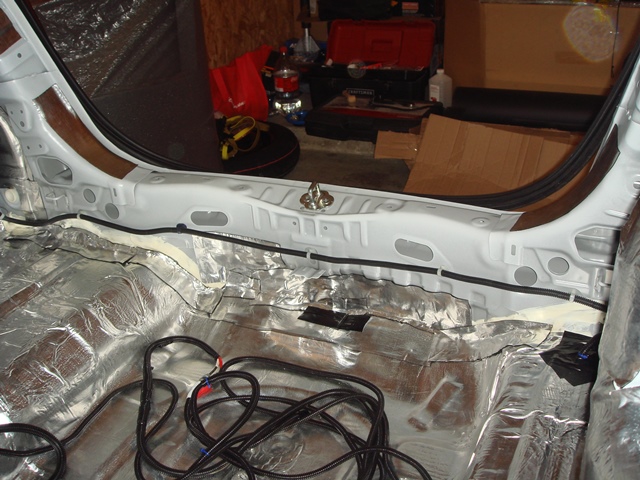
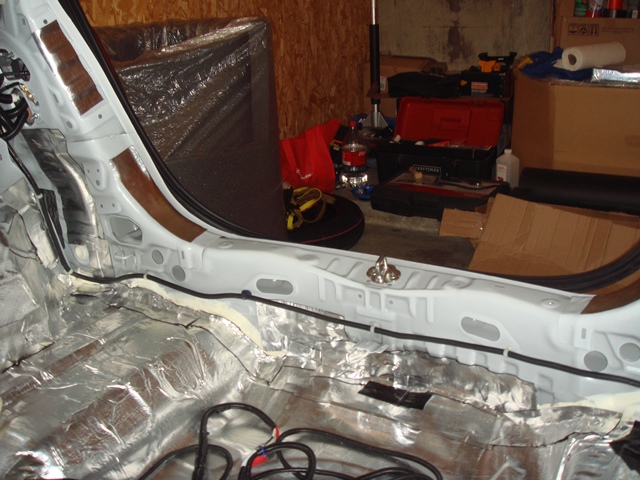
Rear Hatch Door were Sound Deadened yesterday after I install my Honda H Red Emblem:
Here are the pictures:
I glue the Closed Cell Foam and MLV together using this glue,
that I bought at Home Depot (cheaper price then even Amazon).

Below are the pictures of the Closed Cell Foam (CCF) and MLV already covered with glue:
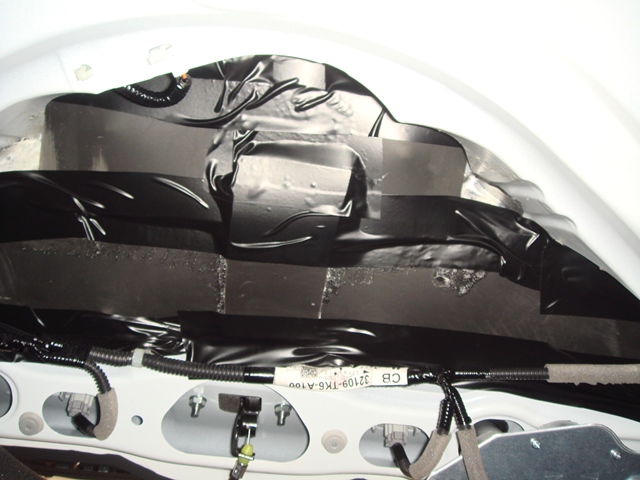
Below are the pictures of the first layer, CLD Tiles,
I then add the CCF and MLV layer on top of the CLD Tiles (again using the same glue).
Here are the CCF/MLV combo on top of the CLD Tiles:
To make sure the layer are tight, I apply Vinyl Duct Tape between the MLV seams:
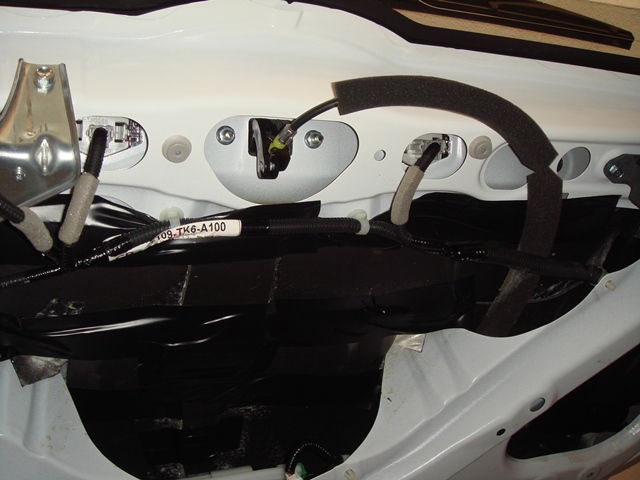
After that, I cover the entire area with Acoustic Foam,
and I use Double Layer of Acoustic Foam on the left and right compartment of the door hatch,
but on the center, I can only use single layer of Acoustic foam since
the plastic cover panel curve inward on that area:
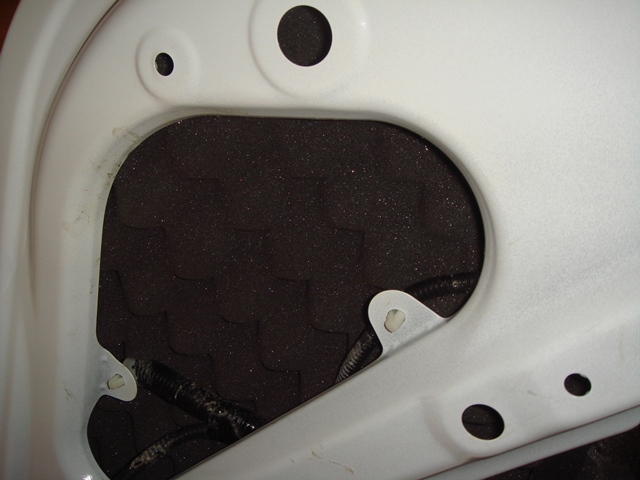
See the center part of the door hatch, that part is the one with only SINGLE layer of acoustic foam
Here are the pictures:
I glue the Closed Cell Foam and MLV together using this glue,
that I bought at Home Depot (cheaper price then even Amazon).
Below are the pictures of the Closed Cell Foam (CCF) and MLV already covered with glue:
Below are the pictures of the first layer, CLD Tiles,
I then add the CCF and MLV layer on top of the CLD Tiles (again using the same glue).
Here are the CCF/MLV combo on top of the CLD Tiles:
To make sure the layer are tight, I apply Vinyl Duct Tape between the MLV seams:
After that, I cover the entire area with Acoustic Foam,
and I use Double Layer of Acoustic Foam on the left and right compartment of the door hatch,
but on the center, I can only use single layer of Acoustic foam since
the plastic cover panel curve inward on that area:
See the center part of the door hatch, that part is the one with only SINGLE layer of acoustic foam
#5
07-09-2013, 10:36 AM
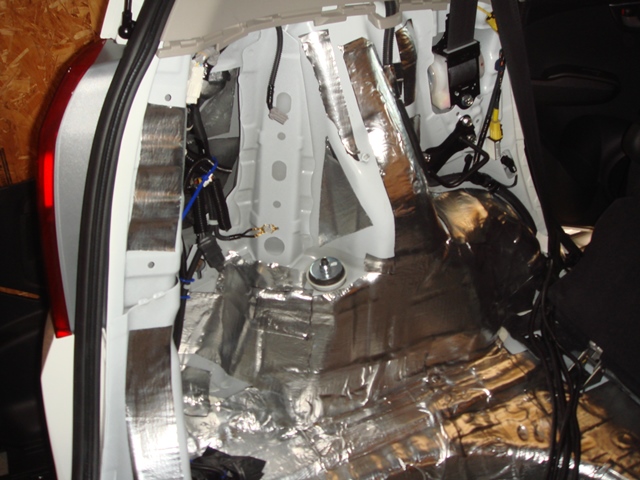
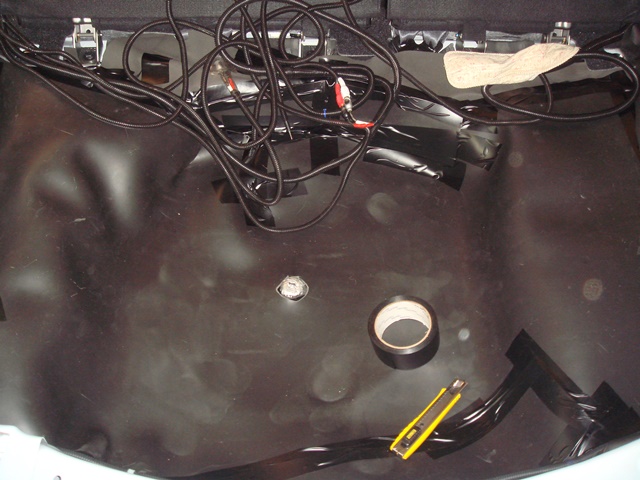
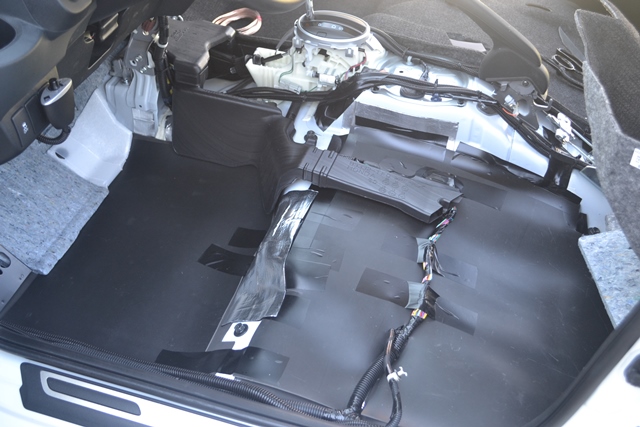
Yesterday I manage to finish sound deadening the entire trunk area,
here are the pictures:
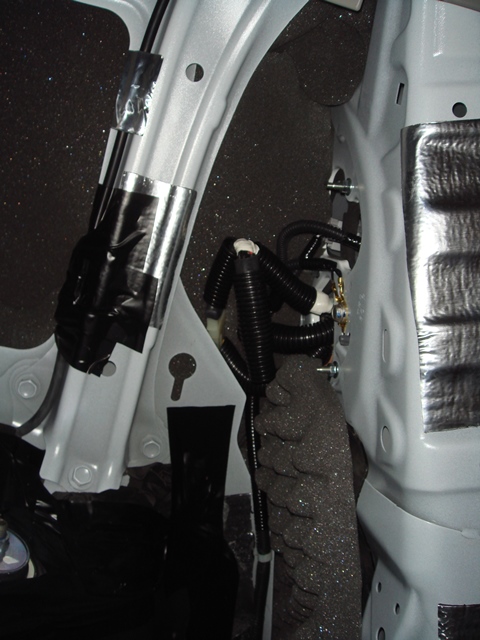
First, I need to pre run the wiring for my future plan of adding The JDM Mugen LED Fog Light as part of the JDM Mugen RS Rear Lower Spoiler Package, so I run some wire from the Left Tail Light,
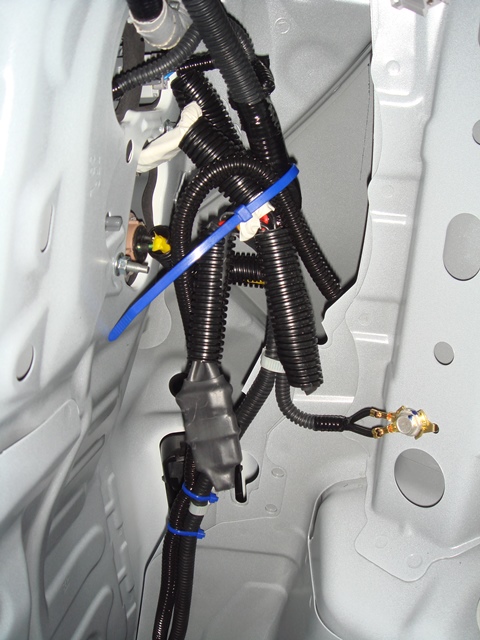
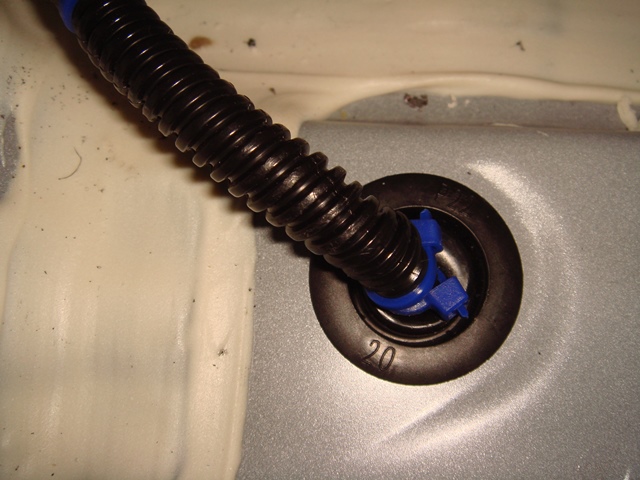
and goes down through the plastic grommet at the trunk floor.
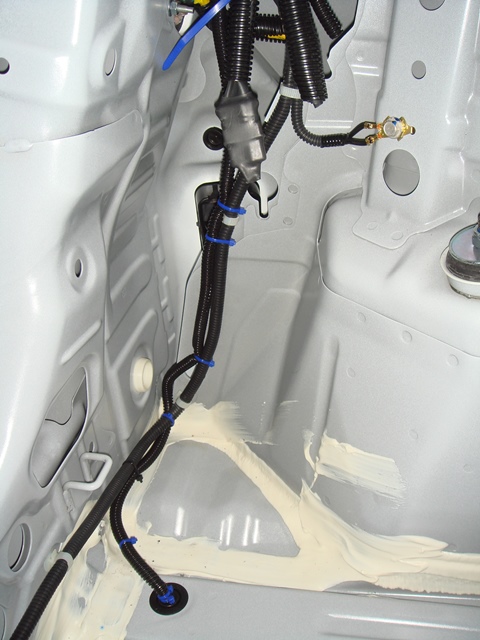
as you can see, I make a hole (using blade) so the wiring (with it's plastic black jacket) goes through that black grommet:
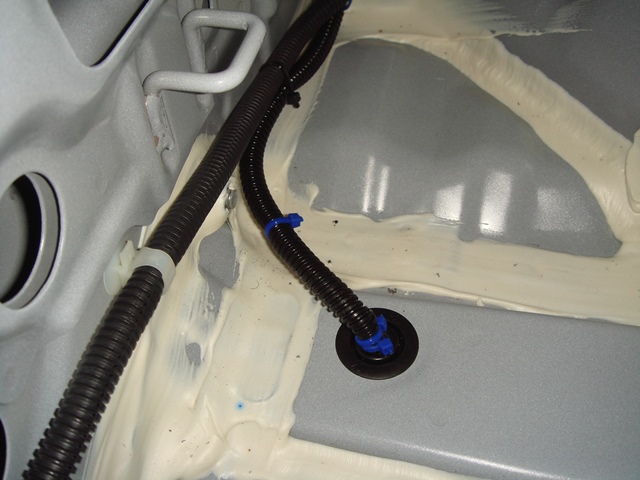
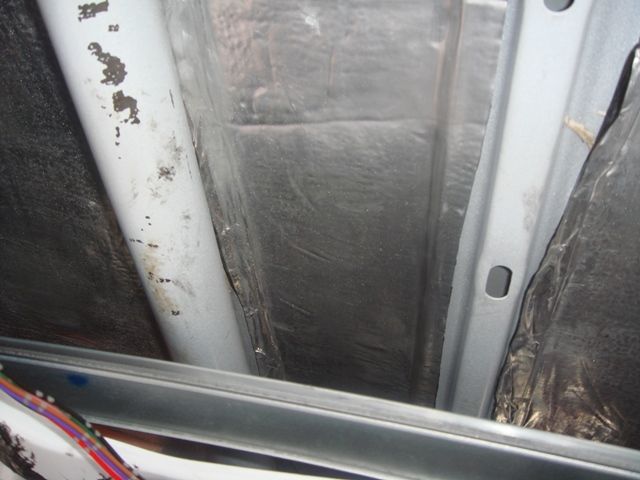
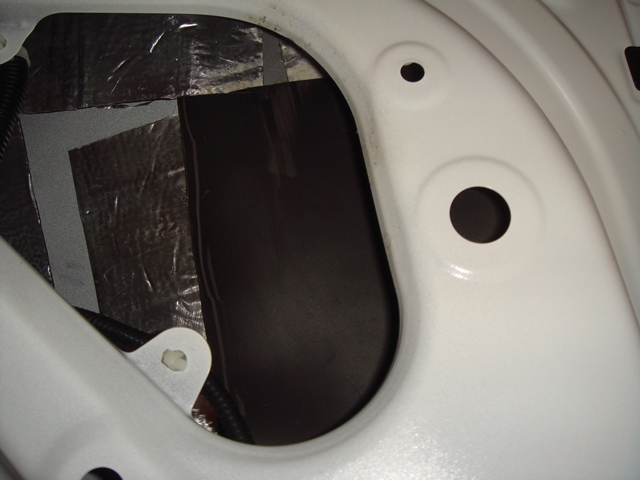
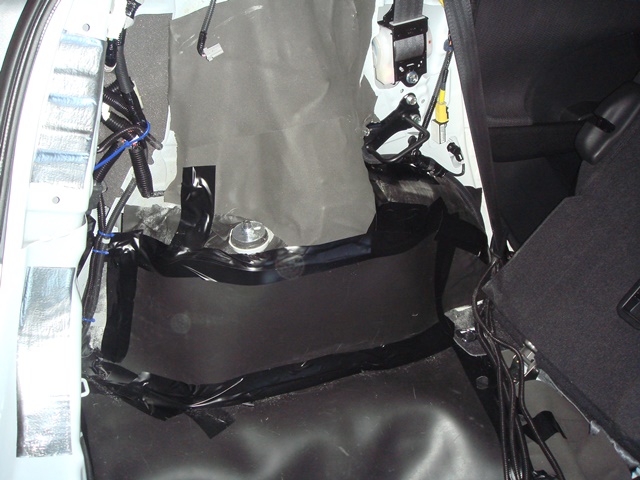
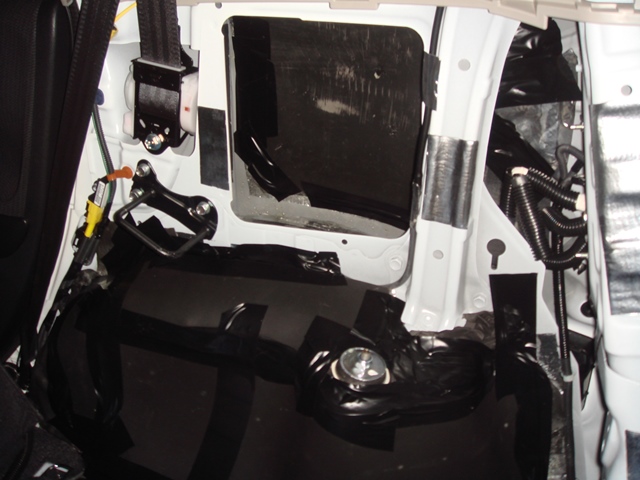
After that, I start covering as much area as possible with CLD Tiles:
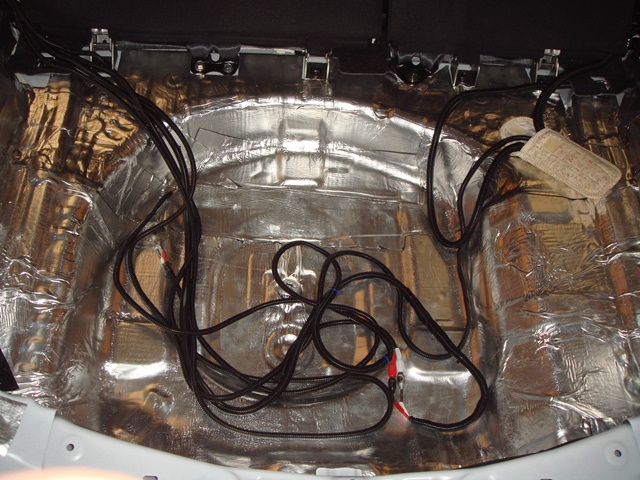
Notice I don't cover the rear ventilation holes (that 2 oval shape holes at the rear hatch door frame) near the door latch/lock,
because as much as I want my car to be quiet, I still want to keep all factory fresh air ventilation as free (not block) as possible.
Then, I try to cover as many area as possible with Closed Cell Foam (CCF),
after that I add another layer of MLV as much as possible:
Below is an example on how I spray the glue both on the CCF and the metal panel of the car (2 surface glue application):

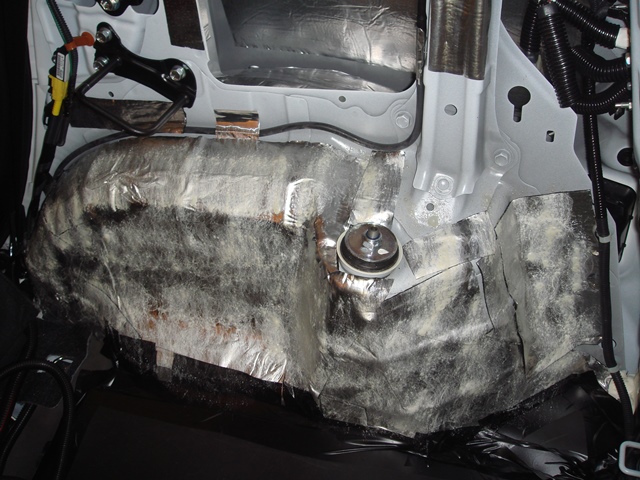
After that, I put as much vinyl duct tape as possible to make sure all the seams are tight:
On some areas where there is not too much room for added thickness,
I only applied CCF only, like on the left rear panel of the trunk:
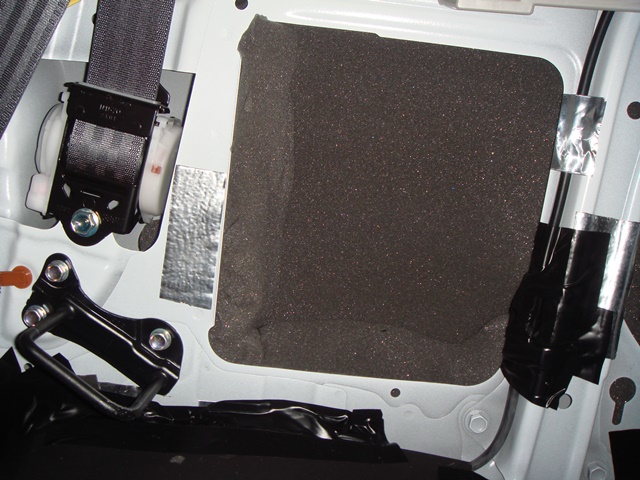
Final step is to jam in as much acoustic foam as possible on every empty space:
I then do a test drive,
what I feel right away even before I move the car was,
The Subwoofer BASS is now MORE POWERFUL and PRONOUNCED !
it even make the front tweeter sound less bright...
I think sooner or later I need to upgrade the Front Speakers (Midbass and Tweeter) !
When I test drive on freeway, the road noise from tire is much less now,
making the wind noise more noticeable,
plus the noise from the front area under the dashboard is more noticeable now...
Got to put some acoustic foam under the dashboard soon,
plus when I have time, I need to do the rear door, floor and headliner/roof panel too.
here are the pictures:
First, I need to pre run the wiring for my future plan of adding The JDM Mugen LED Fog Light as part of the JDM Mugen RS Rear Lower Spoiler Package, so I run some wire from the Left Tail Light,
and goes down through the plastic grommet at the trunk floor.
as you can see, I make a hole (using blade) so the wiring (with it's plastic black jacket) goes through that black grommet:
After that, I start covering as much area as possible with CLD Tiles:
Notice I don't cover the rear ventilation holes (that 2 oval shape holes at the rear hatch door frame) near the door latch/lock,
because as much as I want my car to be quiet, I still want to keep all factory fresh air ventilation as free (not block) as possible.
Then, I try to cover as many area as possible with Closed Cell Foam (CCF),
after that I add another layer of MLV as much as possible:
Below is an example on how I spray the glue both on the CCF and the metal panel of the car (2 surface glue application):
After that, I put as much vinyl duct tape as possible to make sure all the seams are tight:
On some areas where there is not too much room for added thickness,
I only applied CCF only, like on the left rear panel of the trunk:
Final step is to jam in as much acoustic foam as possible on every empty space:
I then do a test drive,
what I feel right away even before I move the car was,
The Subwoofer BASS is now MORE POWERFUL and PRONOUNCED !
it even make the front tweeter sound less bright...
I think sooner or later I need to upgrade the Front Speakers (Midbass and Tweeter) !
When I test drive on freeway, the road noise from tire is much less now,
making the wind noise more noticeable,
plus the noise from the front area under the dashboard is more noticeable now...
Got to put some acoustic foam under the dashboard soon,
plus when I have time, I need to do the rear door, floor and headliner/roof panel too.

#7
07-11-2013, 10:17 AM
Thanks
I still have a long way to go though...
Rear Door then Floor and Headliner will be next...
I still have a long way to go though...
Rear Door then Floor and Headliner will be next...
#10
07-31-2013, 10:04 AM
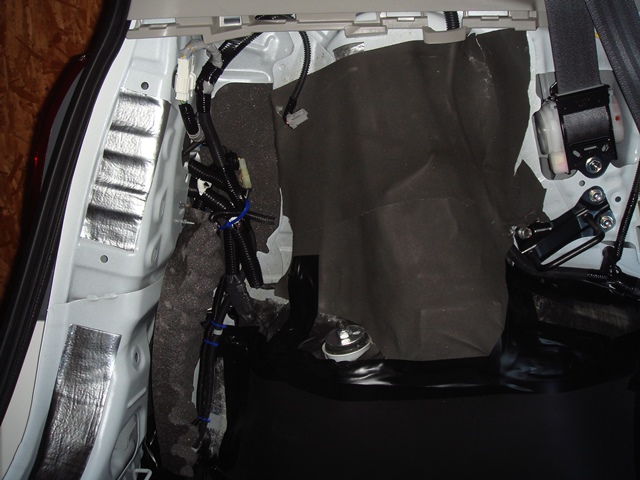
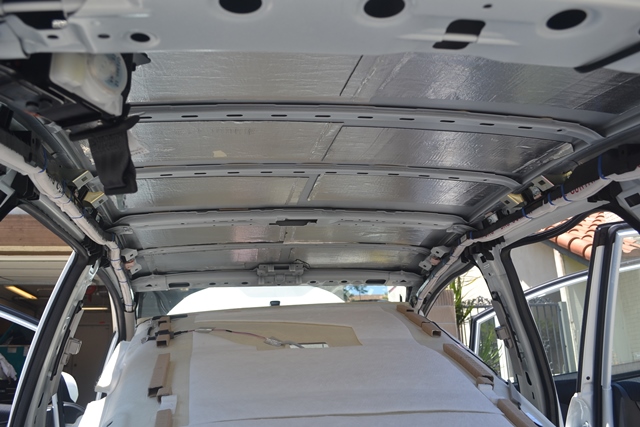
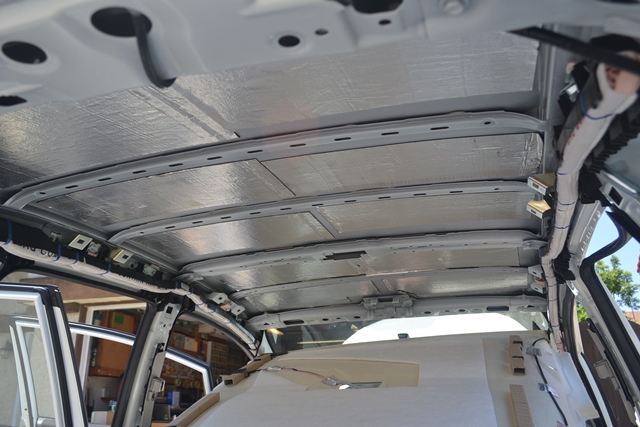
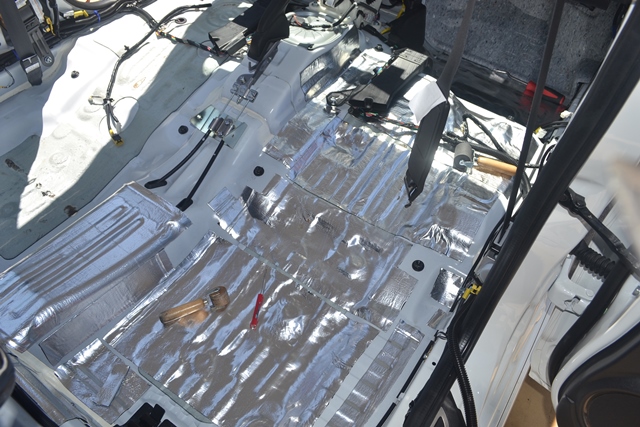
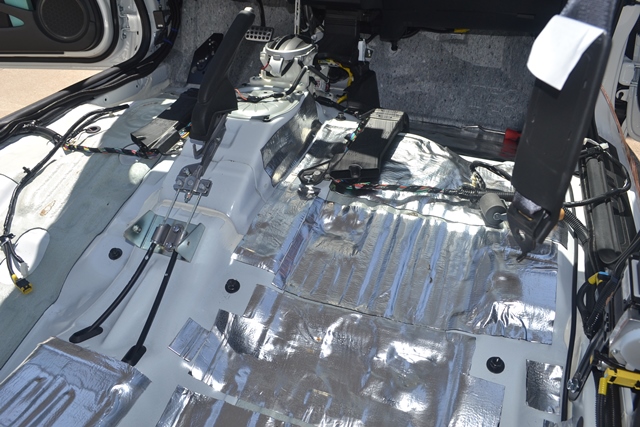
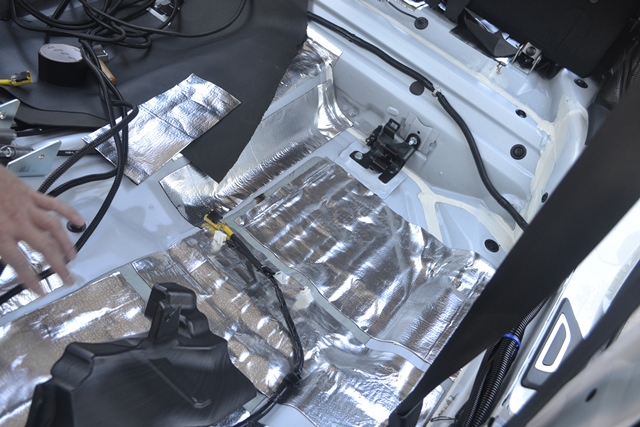
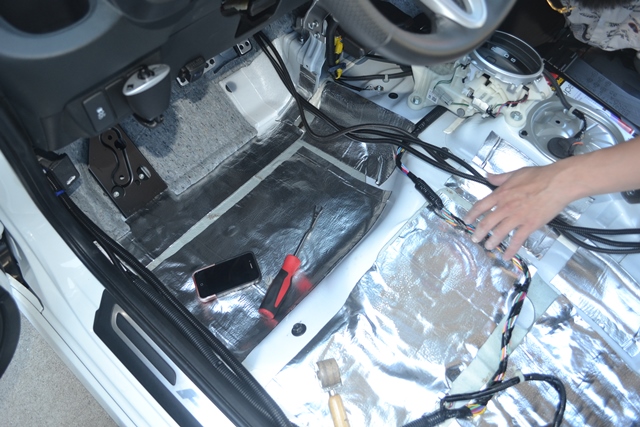
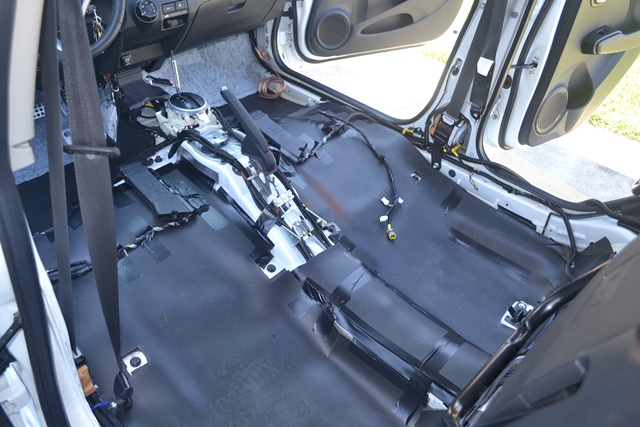
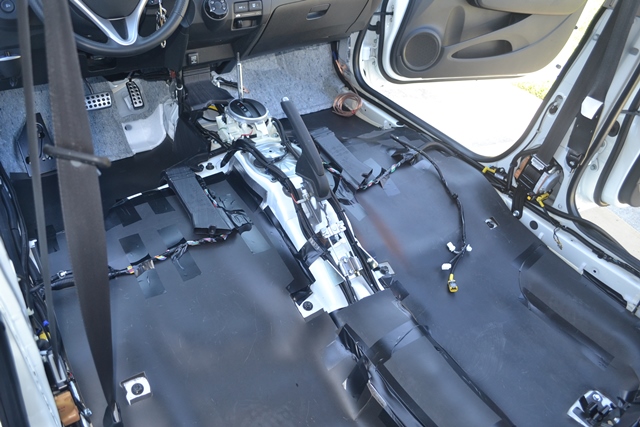
Done the sound deadening for the floor and headliner (roof) yesterday at
a car audio shop (CLD Tiles, Closed Cell Foam, and MLV Noise Barrier)
Today, I still have to go back to that shop to do my Rear Door...
My car is much quieter now,
I can hear other car's tire roar when I pass them on the freeway easily,
while before I didn't notice other's car tire roar
Here are the pictures:
Last edited by BMW ALPINA; 08-31-2013 at 09:57 PM.
#12
07-31-2013, 12:28 PM
can you please post the picture here?
I want to see how you can add more seals on the door.
Thanks
#13
07-31-2013, 12:29 PM

and Congrats on the newborn!!!!
Great job Alpina.... this is on my list too eventually...
#14
07-31-2013, 12:30 PM
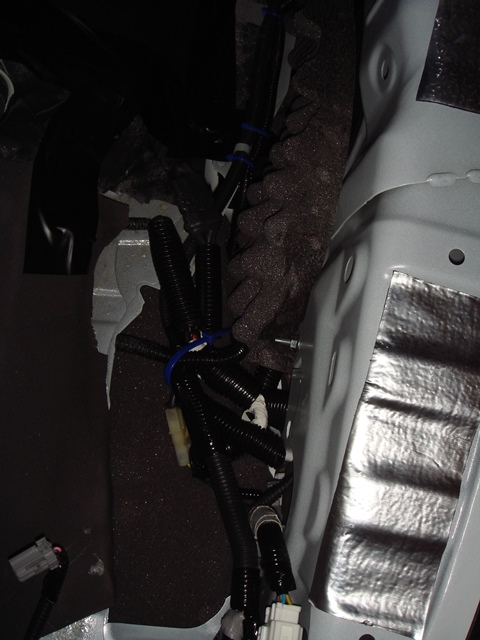
Oh, by the way,
I also had run 6 pairs of speaker wire from the trunk to the front while I am having this sound deadening installed, (that is why my hands were pictured there while running the wire hahaha)
this way, it is ready for a 3 way active front speaker system whenever I have the cash to finance it hahaha
I also had run 6 pairs of speaker wire from the trunk to the front while I am having this sound deadening installed, (that is why my hands were pictured there while running the wire hahaha)
this way, it is ready for a 3 way active front speaker system whenever I have the cash to finance it
hahaha
#15
07-31-2013, 10:47 PM
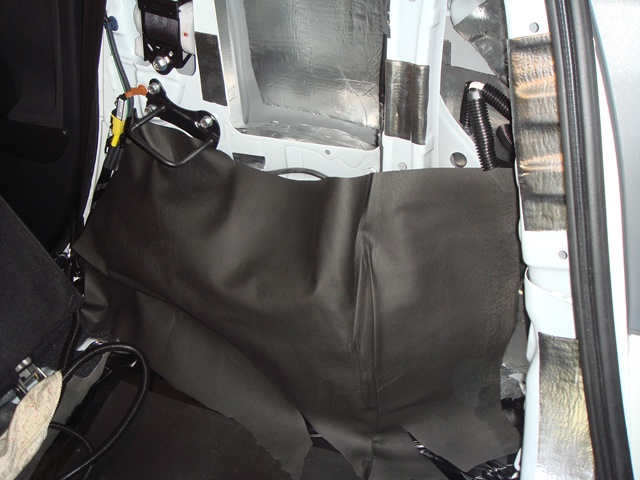
Go back to that car audio shop today to do the rear door with CLD tiles (similar to Dynamat), CCF (Closed Cell Foam) and MLV (thick heavy vinyl),
so yes, I used 3 different layer of material on all my car interior,trunk, door and hatch door too,
plus I stuff some acoustic foam in area where there are lot of empty space at the trunk and hatch...
(except headliner cause the MLV is too heavy to stick to the roof so only CLD tiles there),
I think this is the maximum that can be done to the interior of the car.
few months ago,
I had done the front door my self with CLD only
and I was not willing to open the door panel again today to add CCF and MLV, until I install the front midbass there,
I was worried, opening and closing the door panel would ruin it...
but come to think of it, if it ruin, it will only broke some clips...
so in the end,
I also added layer of CCF and MLV to my front door too TODAY...
well, I don't regret my decision because
my car was quiet this morning on my way to the car audio shop,
but after finished doing all the door, my car was even more quieter
(I test it on Freeway during my way home),...
so yes, the addition of MLV to the front door and rear door really really make the most different...
My car is very very quiet now,
oh, when my car drove over railroad, my car actually feels much more solid too...
feels like Mercedes (the bank vault feeling), I guess all that CLD tiles on the floor of the car do make the panel
more rigid and absorb more of the impact vibration...
even the door now shuts with bank vault like sound... very solid and heavy feeling to it.
next test would be when I drive in hard rain, because after the CLD tiles, now the roof of the car feels solid
and that should lessen the sound of the water drops during heavy rain... hopefully
basically all my sound dampening is done now,
well, actually there is one more thing...
all I need to do is just adding more acoustic foam under the dashboard,
but I am going to do that after I install the auto tilt and auto fold JDM wiring for my door mirror
Last edited by BMW ALPINA; 08-31-2013 at 09:59 PM.
#16
07-31-2013, 11:00 PM
Thanks for your kind words FitStir,
Last edited by BMW ALPINA; 08-31-2013 at 10:00 PM.
#18
11-04-2013, 05:44 AM
I think I add at least 80 lbs or more 
my car is definitely in needs of Supercharger now (seriously)
my car is definitely in needs of Supercharger now (seriously)

