Sprintex Supercharger Install
#1
 12-16-2013, 08:37 PM


Sprintex Supercharger Install
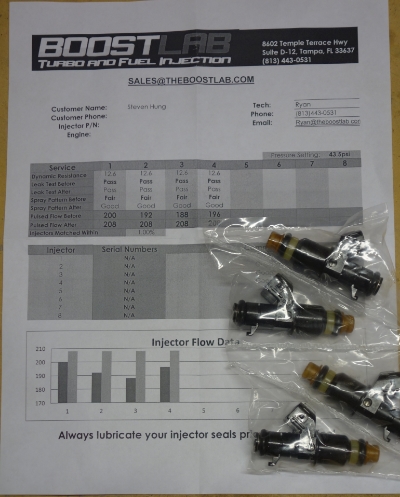
I just started my installation tonight on my 2009 Honda Fit Sport with 97K on the odometer. Spark plugs have been changed to one step colder NGK.
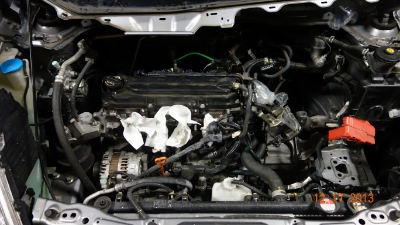
Stripped engine bay. Now is a good time to remove the fuel line between the fuel rail and the hard fuel line feed at the firewall. It will be replaced with new fuel line that supply fuel to the extra injector and the fuel rail.
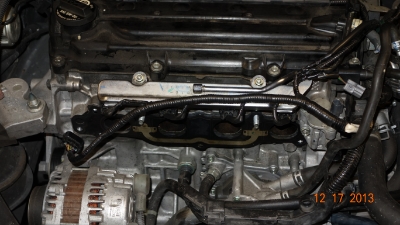
Modified injector harness with wire loom. The injector harness is tucked between the oil cover pan and the injectors not between the injector and the supercharger.
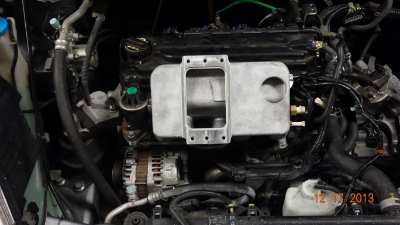
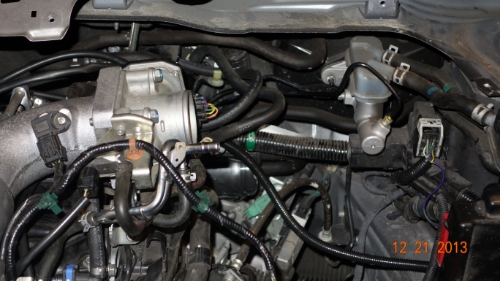
Bottom half of the supercharger. Please note the EGR is mounted almost in the same OEM location. I believe Sprintex decision to retain the EGR is the correct one. Federal law prohibit tampering with emission control devices. Eventually when the EGR valve becomes useless with age I will block it off and deal with the engine light. The EGR valve in my 20 years old 93 MR2 Turbo was rusted and clogged with no replacement to be found. I eventually used a block off plate. By the time I installed the blocked off plate I was running a standalone AEM EMS.
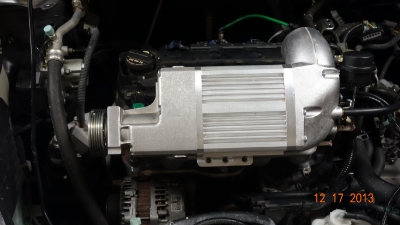
Sprintex Supercharger top half. Don't tighten the bolts until you fit the intake pipe. It is also much easier to install the supplementary injector onto the intake pipe first. You will have to be careful with the fuel line hanging loose on the intake pipe.
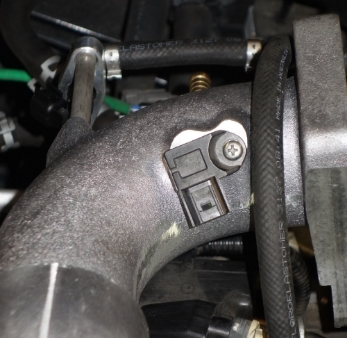
Restrictor that attaches to the inlet pipe. The supplement fuel injector mounts in the back. I apply heavy motor oil on the o-ring to make it easier to slip into the inlet pipe.
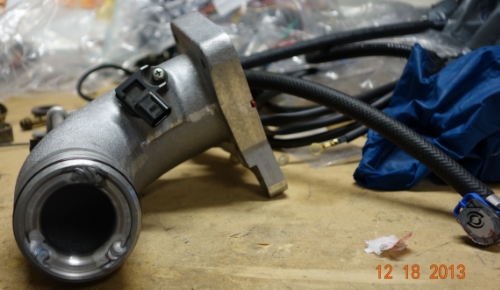
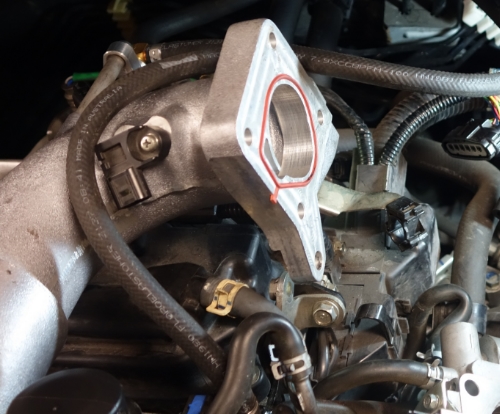
The throttle mounts at this end.
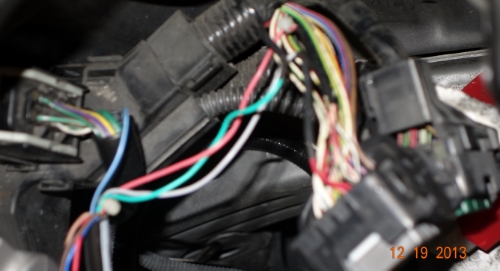
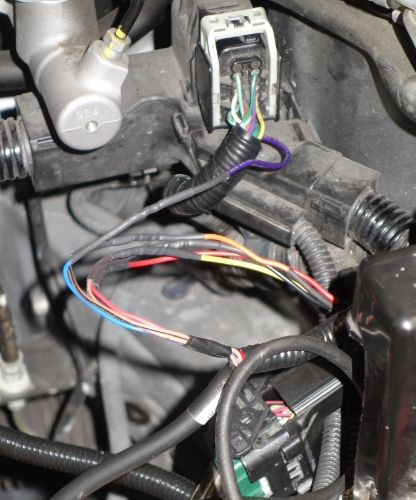
Started to work on the wiring. I had to desolder the wire on the left most connector, connect 10. The installation manual say to "T" into Light Green wire at pin 2 as viewed from the wire side of the 13 pin connector, with Blue wire (spliced to Blue/White from supp. fuel injector plug) of supplement controller. Photo has the Blue/white wire which is wrong. I had to go back and fix it. There isn't too much room to work when dealing with connector 13 and connector 14. I found it much easier to just extended wires from them. Connector 13 and connector 14 are on the lower right hand corner.
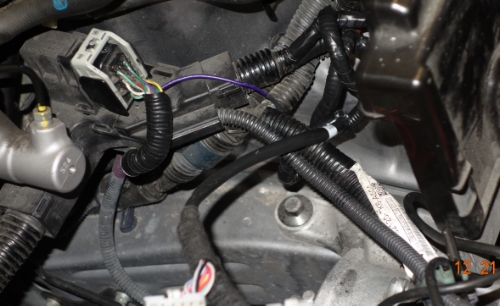
All wiring are done and loomed for a nice tidy look.
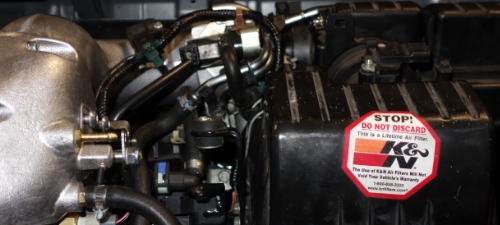
Stock air box installed and attached to throttle body. Notice how higher the air box sits by looking at the air box mount point. Two custom brackets are needed. One of each side of the air box. The hose clamp hex screw that tightens around the throttle body is 5.5 mm which is a strange size. I rarely use my 5.5 mm socket.
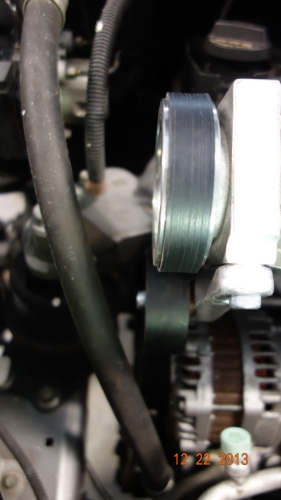
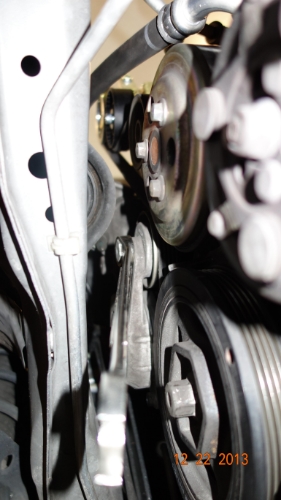
Supercharger pulley with belt. A 19 mm wrench on the belt tensioner. You can use a second wrench for leverage if you are not stronger enough pushing the 19 mm wrench toward the front of the car. Before closing everything I rotate the crank clockwise several times to check for belt alignment.
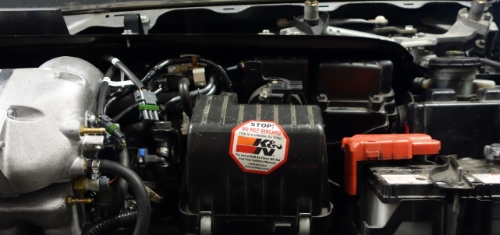
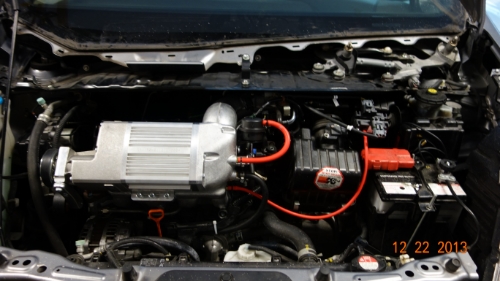
Everything is installed. I replaced the original bypass actuator that I broke with a new piece from Gary. There are two map sensor mount on the air box above the positive battery terminal. The 3 bar map sensor has a red vacuum hose connect to it. Another 1 bar map sensor is behind the 3 bar map sensor use for atmosphere pressure and doesn't require a vacuum connection. Out of habit I attached a very short vacuum hose and point the hose downward to prevent water from dipping into the sensor. The SMT is mounted with double side tape on the other side of the factory ECU. Before mounting the SMT you might want to connect an USB cable. It would be very difficult to do it later. I got a 6 feet USB cable. Hopefully it should be enough to reach the cabin.
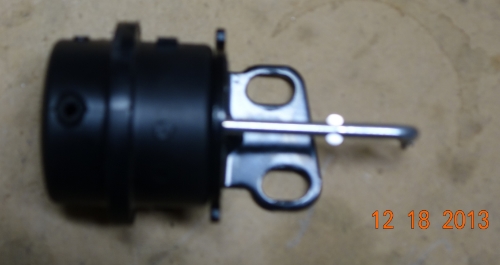
Here is the plastic bypass actuator, VA764A with the broken nipple.
Overall in my opinion the quality of the kit is good value for the money. I have two minor issues with the kit.
- NGK BRK 7EIX-11 gapped ~ 1.2 mm
- wire loom

Stripped engine bay. Now is a good time to remove the fuel line between the fuel rail and the hard fuel line feed at the firewall. It will be replaced with new fuel line that supply fuel to the extra injector and the fuel rail.

Modified injector harness with wire loom. The injector harness is tucked between the oil cover pan and the injectors not between the injector and the supercharger.

Bottom half of the supercharger. Please note the EGR is mounted almost in the same OEM location. I believe Sprintex decision to retain the EGR is the correct one. Federal law prohibit tampering with emission control devices. Eventually when the EGR valve becomes useless with age I will block it off and deal with the engine light. The EGR valve in my 20 years old 93 MR2 Turbo was rusted and clogged with no replacement to be found. I eventually used a block off plate. By the time I installed the blocked off plate I was running a standalone AEM EMS.

Sprintex Supercharger top half. Don't tighten the bolts until you fit the intake pipe. It is also much easier to install the supplementary injector onto the intake pipe first. You will have to be careful with the fuel line hanging loose on the intake pipe.

Restrictor that attaches to the inlet pipe. The supplement fuel injector mounts in the back. I apply heavy motor oil on the o-ring to make it easier to slip into the inlet pipe.


The throttle mounts at this end.


Started to work on the wiring. I had to desolder the wire on the left most connector, connect 10. The installation manual say to "T" into Light Green wire at pin 2 as viewed from the wire side of the 13 pin connector, with Blue wire (spliced to Blue/White from supp. fuel injector plug) of supplement controller. Photo has the Blue/white wire which is wrong. I had to go back and fix it. There isn't too much room to work when dealing with connector 13 and connector 14. I found it much easier to just extended wires from them. Connector 13 and connector 14 are on the lower right hand corner.


All wiring are done and loomed for a nice tidy look.

Stock air box installed and attached to throttle body. Notice how higher the air box sits by looking at the air box mount point. Two custom brackets are needed. One of each side of the air box. The hose clamp hex screw that tightens around the throttle body is 5.5 mm which is a strange size. I rarely use my 5.5 mm socket.


Supercharger pulley with belt. A 19 mm wrench on the belt tensioner. You can use a second wrench for leverage if you are not stronger enough pushing the 19 mm wrench toward the front of the car. Before closing everything I rotate the crank clockwise several times to check for belt alignment.


Everything is installed. I replaced the original bypass actuator that I broke with a new piece from Gary. There are two map sensor mount on the air box above the positive battery terminal. The 3 bar map sensor has a red vacuum hose connect to it. Another 1 bar map sensor is behind the 3 bar map sensor use for atmosphere pressure and doesn't require a vacuum connection. Out of habit I attached a very short vacuum hose and point the hose downward to prevent water from dipping into the sensor. The SMT is mounted with double side tape on the other side of the factory ECU. Before mounting the SMT you might want to connect an USB cable. It would be very difficult to do it later. I got a 6 feet USB cable. Hopefully it should be enough to reach the cabin.

Here is the plastic bypass actuator, VA764A with the broken nipple.

Overall in my opinion the quality of the kit is good value for the money. I have two minor issues with the kit.
- Honda OEM air box sit too high requiring new brackets to be made
- Give me an excuse to chuck it for a new intake - Wiring harness to the right of the dip stick cannot be mount using the original bracket
- zip tie is the simplest solution
Last edited by Steven Hung; 01-05-2014 at 08:03 PM.

#3
12-16-2013, 08:52 PM
More pics and vids once it's installed!!!
I got tired of waiting so pulled out and went on to finish other projects. Keep us posted on how it goes.
I got tired of waiting so pulled out and went on to finish other projects. Keep us posted on how it goes.
Last edited by 1SickVeilsideZ; 12-16-2013 at 09:02 PM.

#5
12-16-2013, 09:20 PM
Glad to see someone got one, do a review once you have completed installation, congrats. Up here if I got one it would be sitting in the garage until May 2014.
Last edited by cjecpa; 12-16-2013 at 09:42 PM.

#8
12-17-2013, 02:17 PM
How long were you on the wait list?
I just email them last week and they told me the batch of 12 were spoken for. Two days later they told another guy on the forum they were available!?! IOdd.... I really cant wait to put one on my car.
I just email them last week and they told me the batch of 12 were spoken for. Two days later they told another guy on the forum they were available!?! IOdd.... I really cant wait to put one on my car.

#11
12-17-2013, 03:14 PM
Hi, Doug.
Our Honda kit is becoming available, now. It produces 5psi of boost and makes about 180hp at the crank. We’ve got a cleaned up tune that is running well on 91 octane gas. No dyno report on it yet, though.
Retail price is $2,995 with the SMT8L PerfectPower tuner included.
These first 12 are spoken for. Contact us again after the first of the year and the second batch should be on the way.
Kind Regards,
Gary Turner
USA Coordinator
#12
12-17-2013, 03:54 PM

Steven, Thanks for posting this up. I should be getting my kit the end of this week and attempting installation next week. Any knowledge you care to share about your install would be greatly appreciated!

#16
12-17-2013, 10:04 PM
Funny enough, I was wondering how exactly the belt would be ran for this kit due to the location that the supercharger is at. Tagging thread for interest... still kinda curious if the intake and supercharger would work on a GD. >: D

#18
12-17-2013, 11:18 PM
I did a bit more work tonight and managed to break the nipple off the plastic bypass valve actuator. You cannot be too rough with it. Yeah now I have to spend $$ on a replacement. I believe Eaton, Whipple and Sprintex use this bypass actuator on some of their supercharger kit. More pictures will be uploaded tomorrow. I also started to sort out the wiring and soldered a couple of the wire splices.
jibberjabbs PM me when you are ready to do your installation we can chat. You will probably need to think about gas octane. I normally fill up with 87 regular gasoline and according to the installation manual the recommended minimum grade is 93 octane. My car still has about 1/2 tank full of 87 regular. Sprintex suggestion is octane booster in their manual. Almost all off the shelf octane booster is good for a tenth of a point not a full octane point. I might end up pouring a couple of gallon of toluene to mix with the � tank full to boost octane to 94. Toluene is hard to find and expensive.
jibberjabbs PM me when you are ready to do your installation we can chat. You will probably need to think about gas octane. I normally fill up with 87 regular gasoline and according to the installation manual the recommended minimum grade is 93 octane. My car still has about 1/2 tank full of 87 regular. Sprintex suggestion is octane booster in their manual. Almost all off the shelf octane booster is good for a tenth of a point not a full octane point. I might end up pouring a couple of gallon of toluene to mix with the � tank full to boost octane to 94. Toluene is hard to find and expensive.
#19
12-17-2013, 11:43 PM
I did a bit more work tonight and managed to break the nipple off the plastic bypass valve actuator. You cannot be too rough with it. Yeah now I have to spend $$ on a replacement. I believe Eaton, Whipple and Sprintex use this bypass actuator on some of their supercharger kit. More pictures will be uploaded tomorrow. I also started to sort out the wiring and soldered a couple of the wire splices.
jibberjabbs PM me when you are ready to do your installation we can chat. You will probably need to think about gas octane. I normally fill up with 87 regular gasoline and according to the installation manual the recommended minimum grade is 93 octane. My car still has about 1/2 tank full of 87 regular. Sprintex suggestion is octane booster in their manual. Almost all off the shelf octane booster is good for a tenth of a point not a full octane point. I might end up pouring a couple of gallon of toluene to mix with the � tank full to boost octane to 94. Toluene is hard to find and expensive.
jibberjabbs PM me when you are ready to do your installation we can chat. You will probably need to think about gas octane. I normally fill up with 87 regular gasoline and according to the installation manual the recommended minimum grade is 93 octane. My car still has about 1/2 tank full of 87 regular. Sprintex suggestion is octane booster in their manual. Almost all off the shelf octane booster is good for a tenth of a point not a full octane point. I might end up pouring a couple of gallon of toluene to mix with the � tank full to boost octane to 94. Toluene is hard to find and expensive.

