My JDM DISK BRAKE RS Rear Axle conversion
#301
 10-15-2015, 02:25 PM


Hello Kenny,
I got those rear axle from Japan, my friend who used to do business there
imported it for me. but I don't think he is doing that business in Japan anymore.
You can always buy the CR-Z rear axle here but you have to change to 5 bolt wheel pattern...
or you can buy this parts from JapanParts.com as brand new OEM Honda Parts but it will be quite expensive including shipping
#302
10-21-2015, 03:46 AM

Install the Modified Splash Guard and tightening the bolt using Loctite
and Torque Wrench:
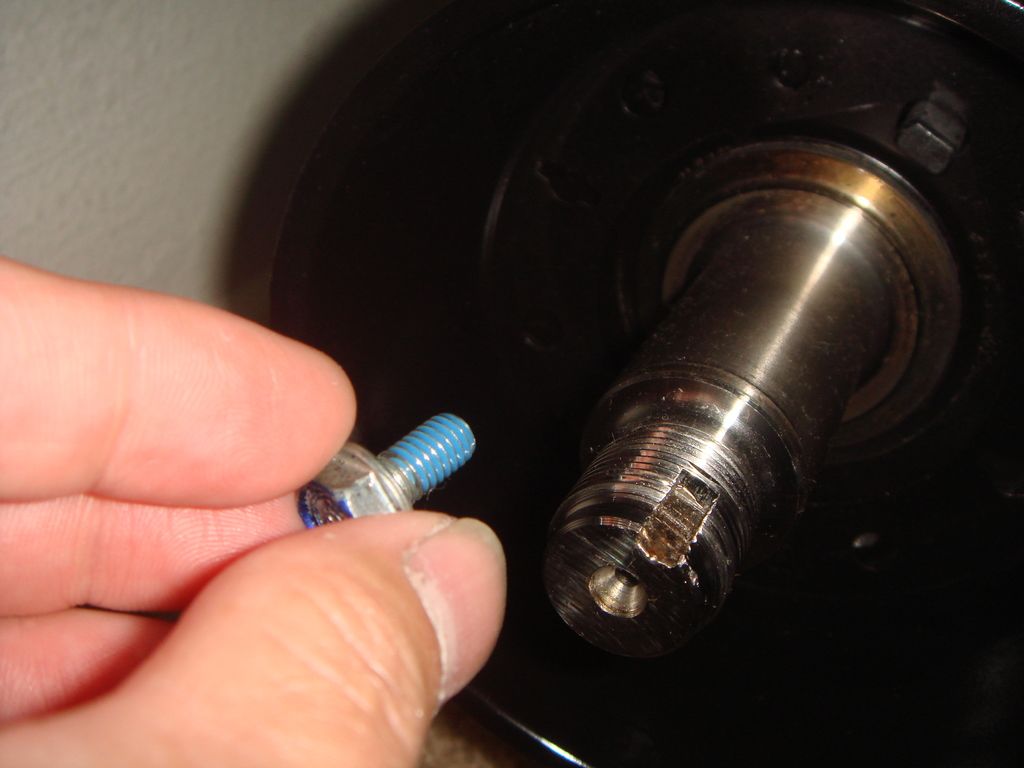
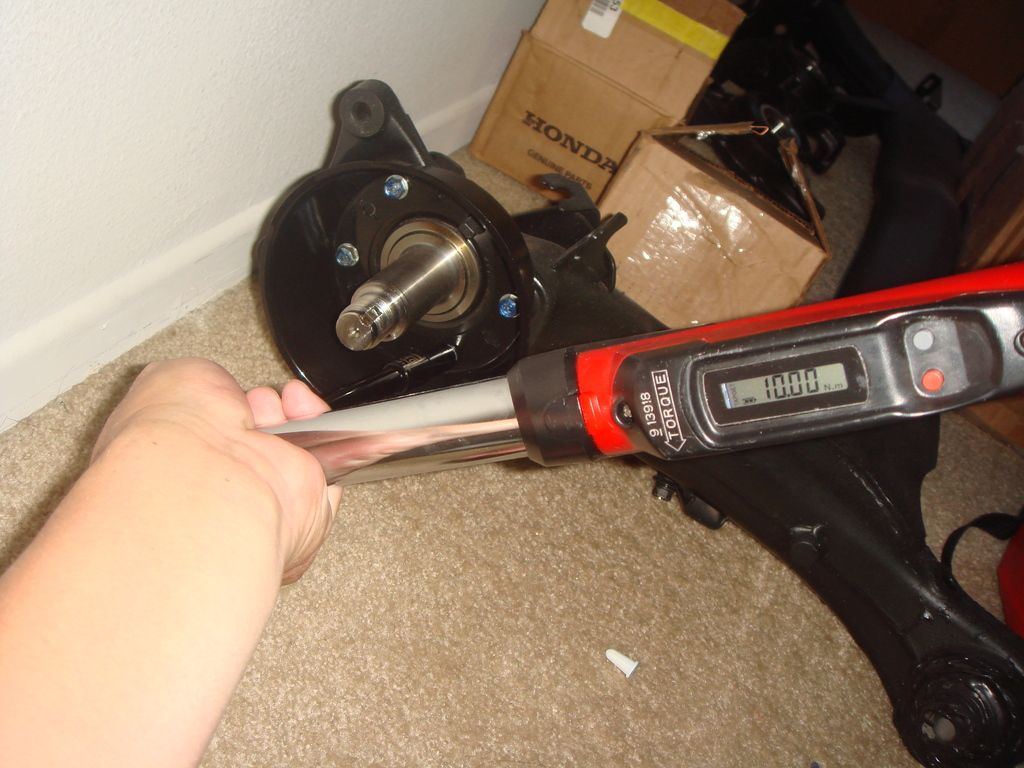
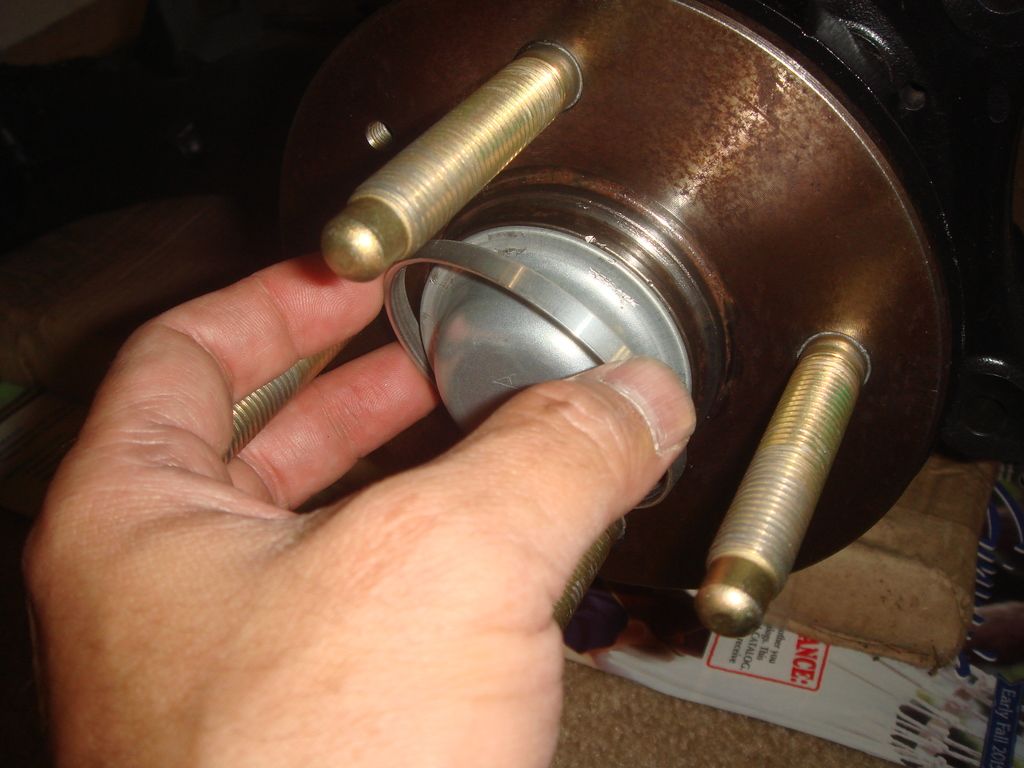
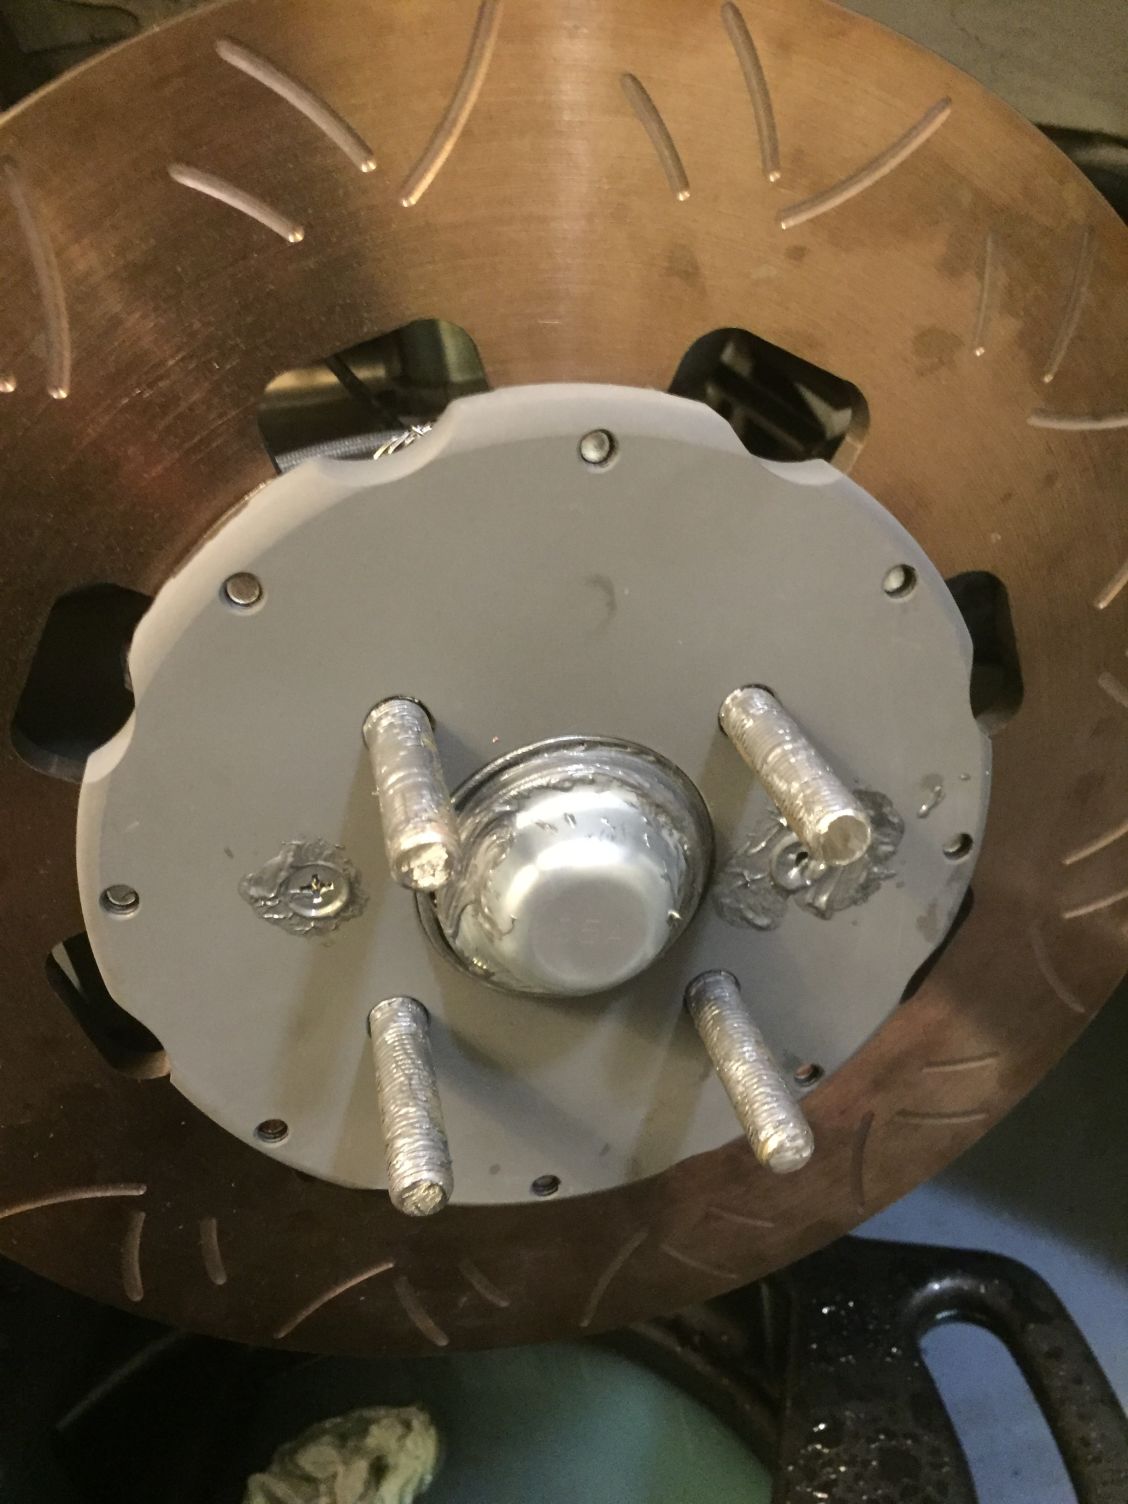
Insert the hub with the longer ARP stud (and stronger too ),
and tightening with Torque Wrench, after that lock it by
hammering with chisel and hammer:
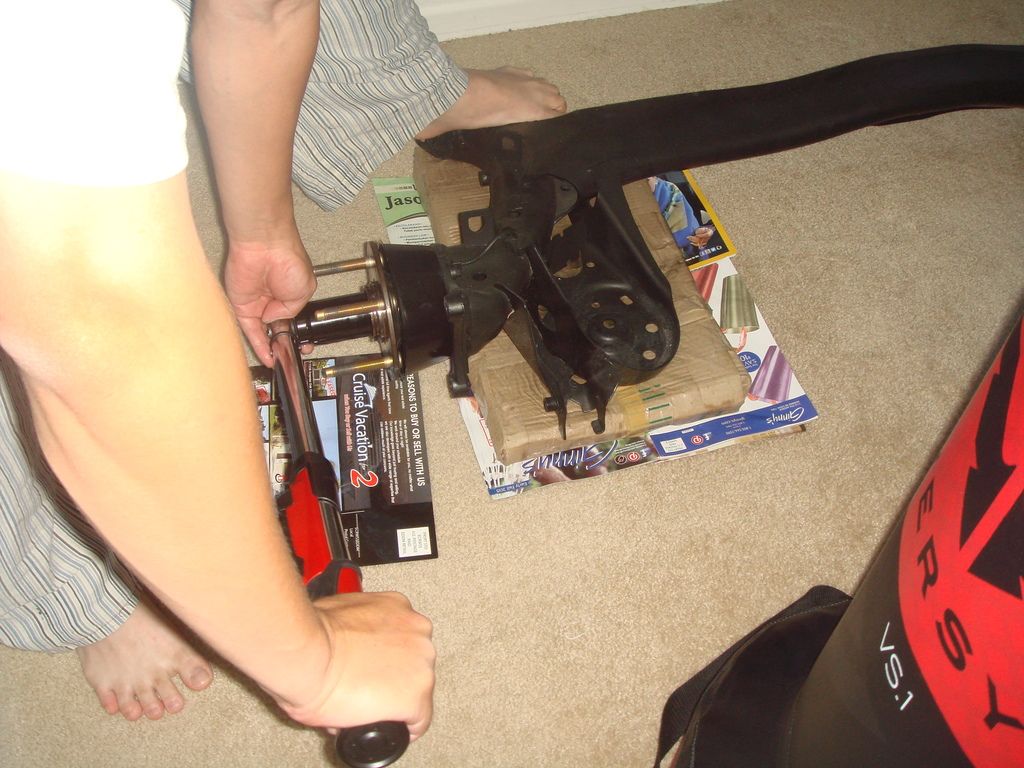
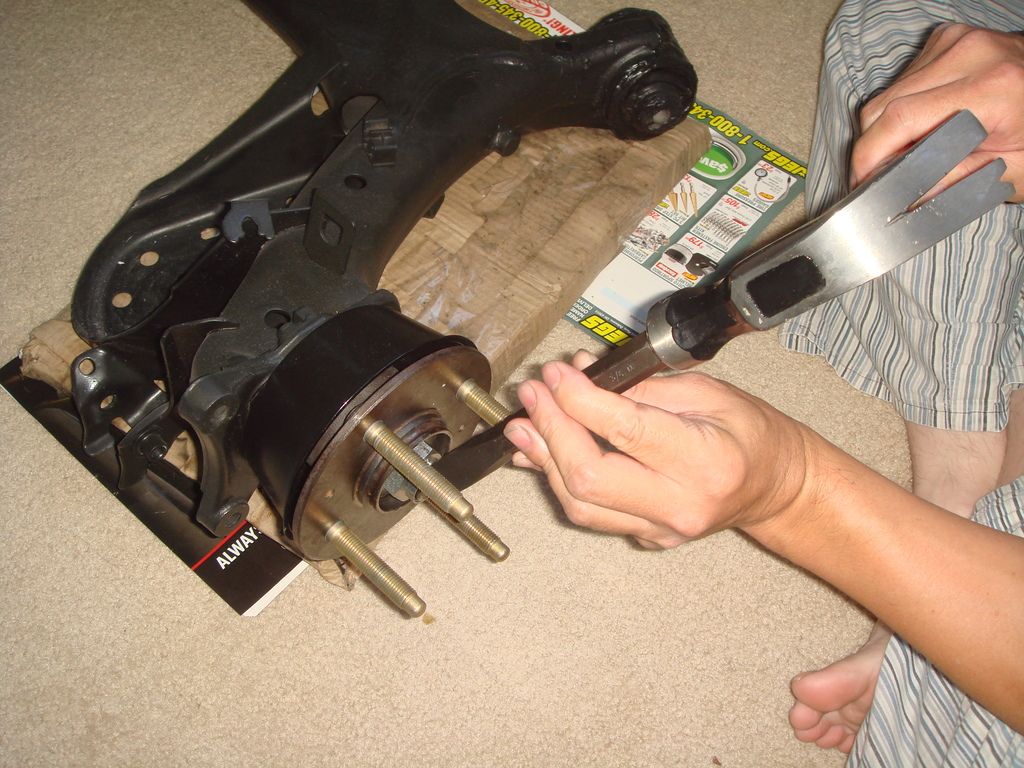
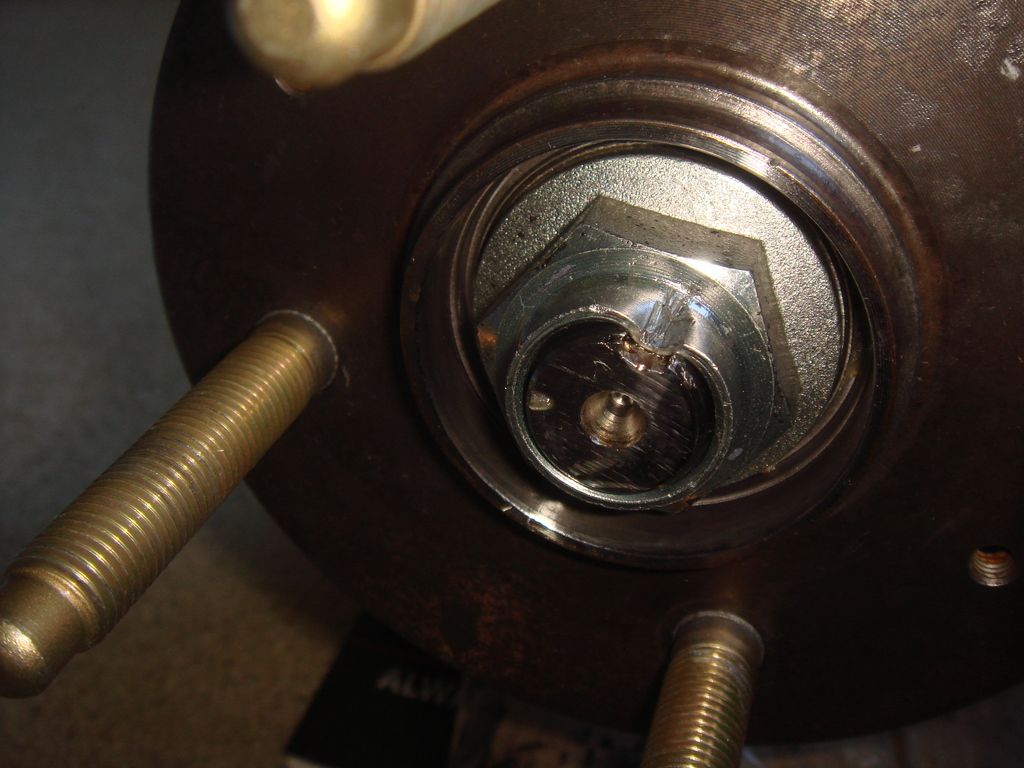
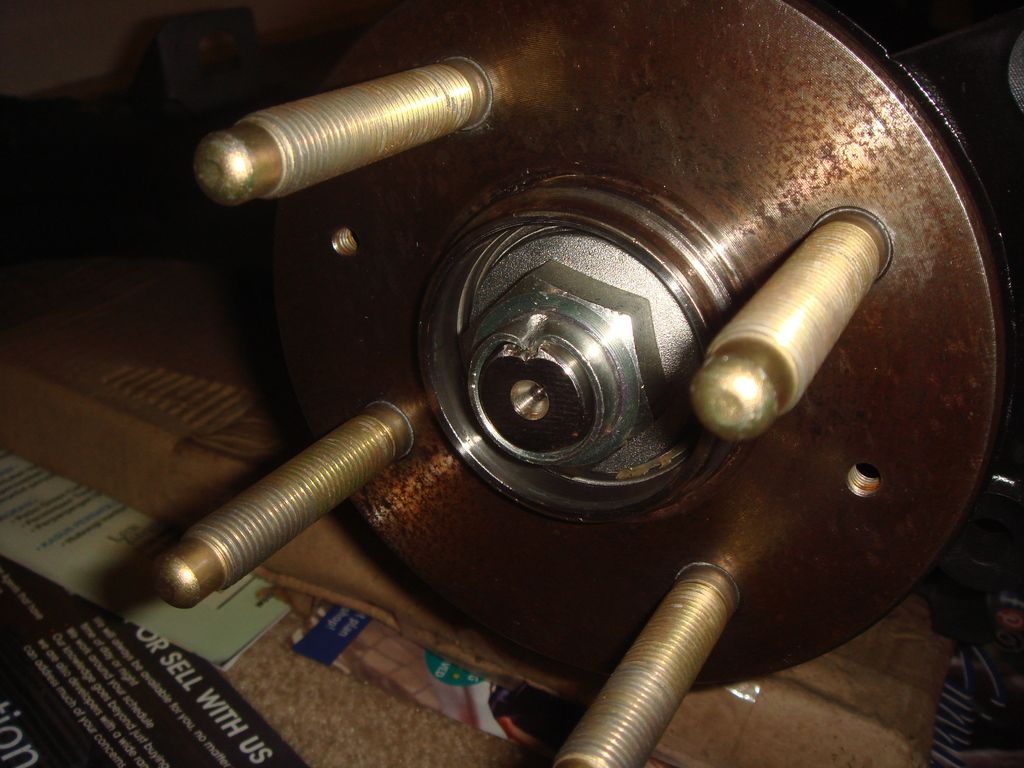
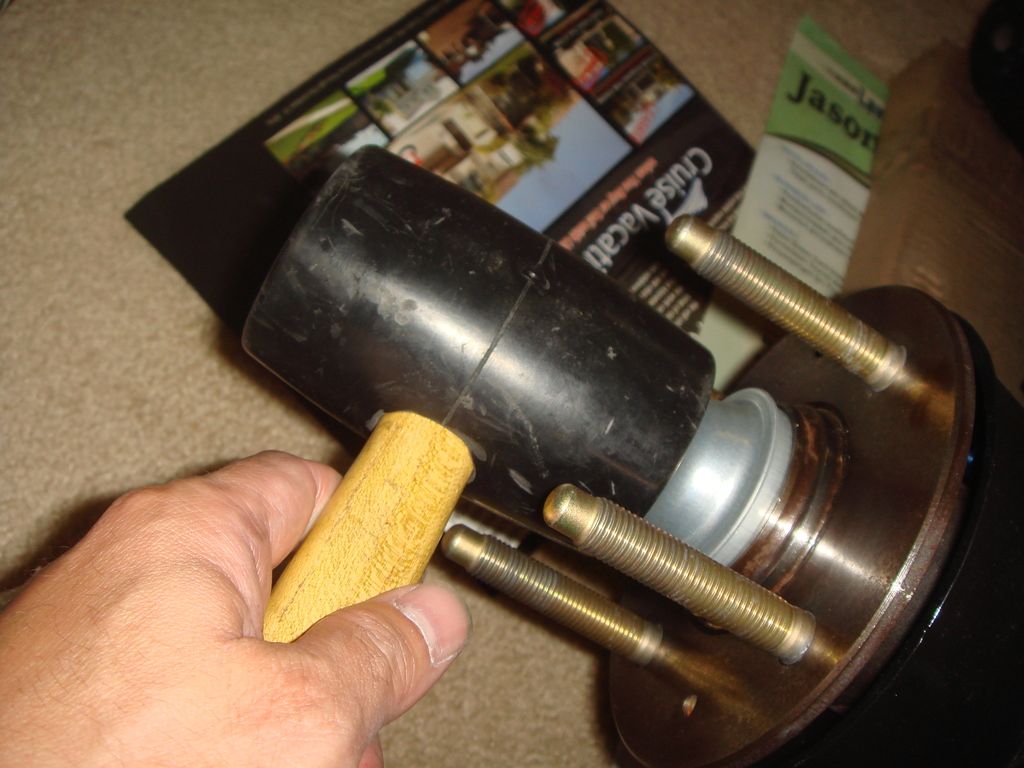
Hammer in the Hub Caps:
and Torque Wrench:
Insert the hub with the longer ARP stud (and stronger too
),and tightening with Torque Wrench, after that lock it by
hammering with chisel and hammer:
Hammer in the Hub Caps:
#303
10-21-2015, 03:50 AM
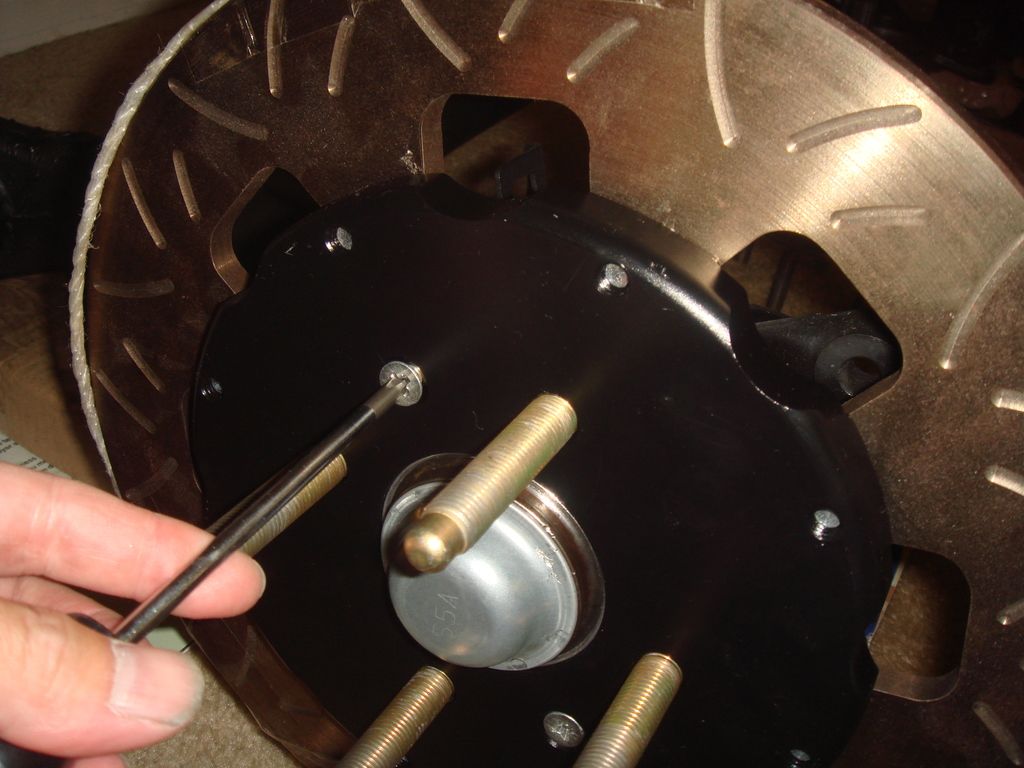
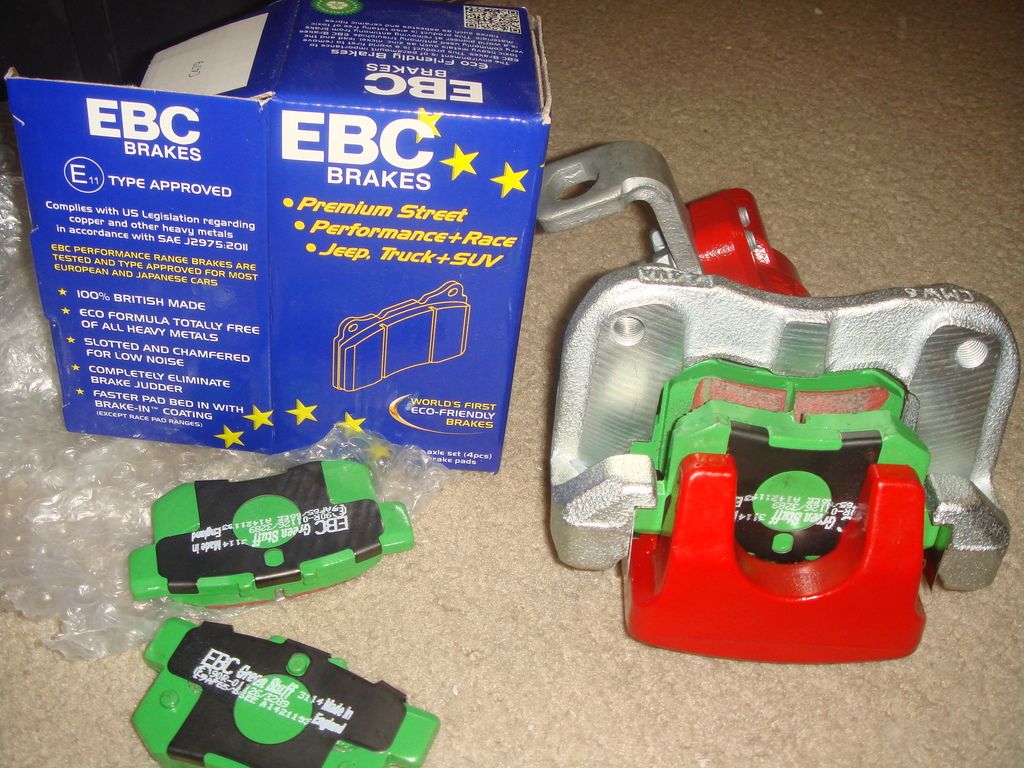
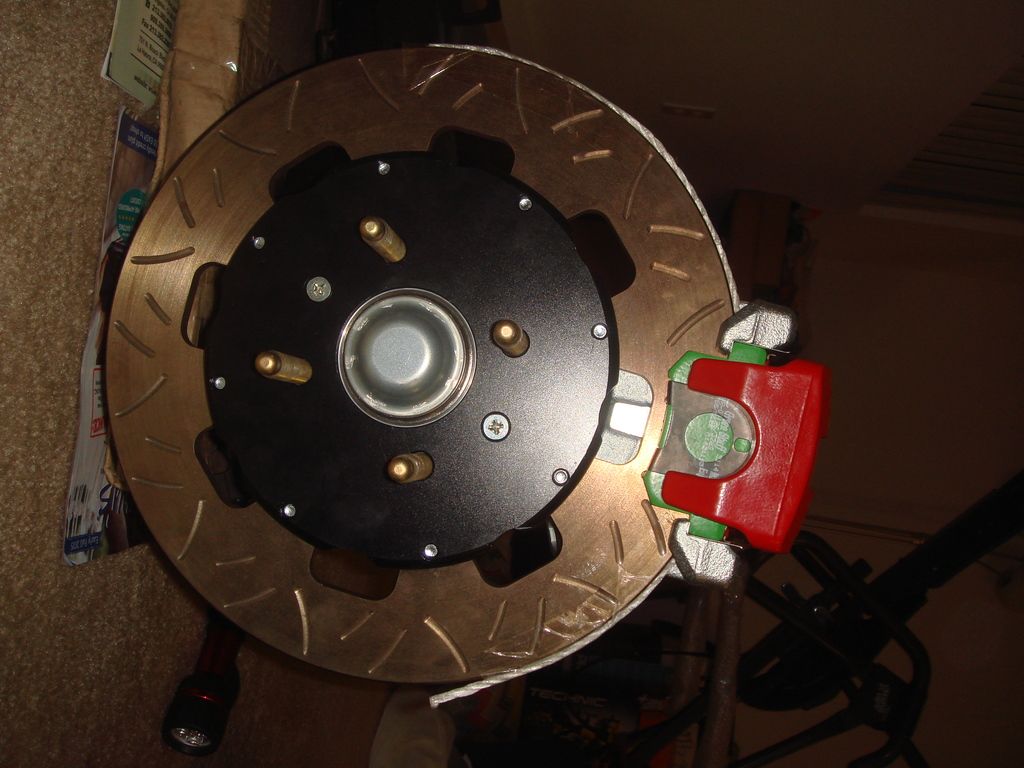
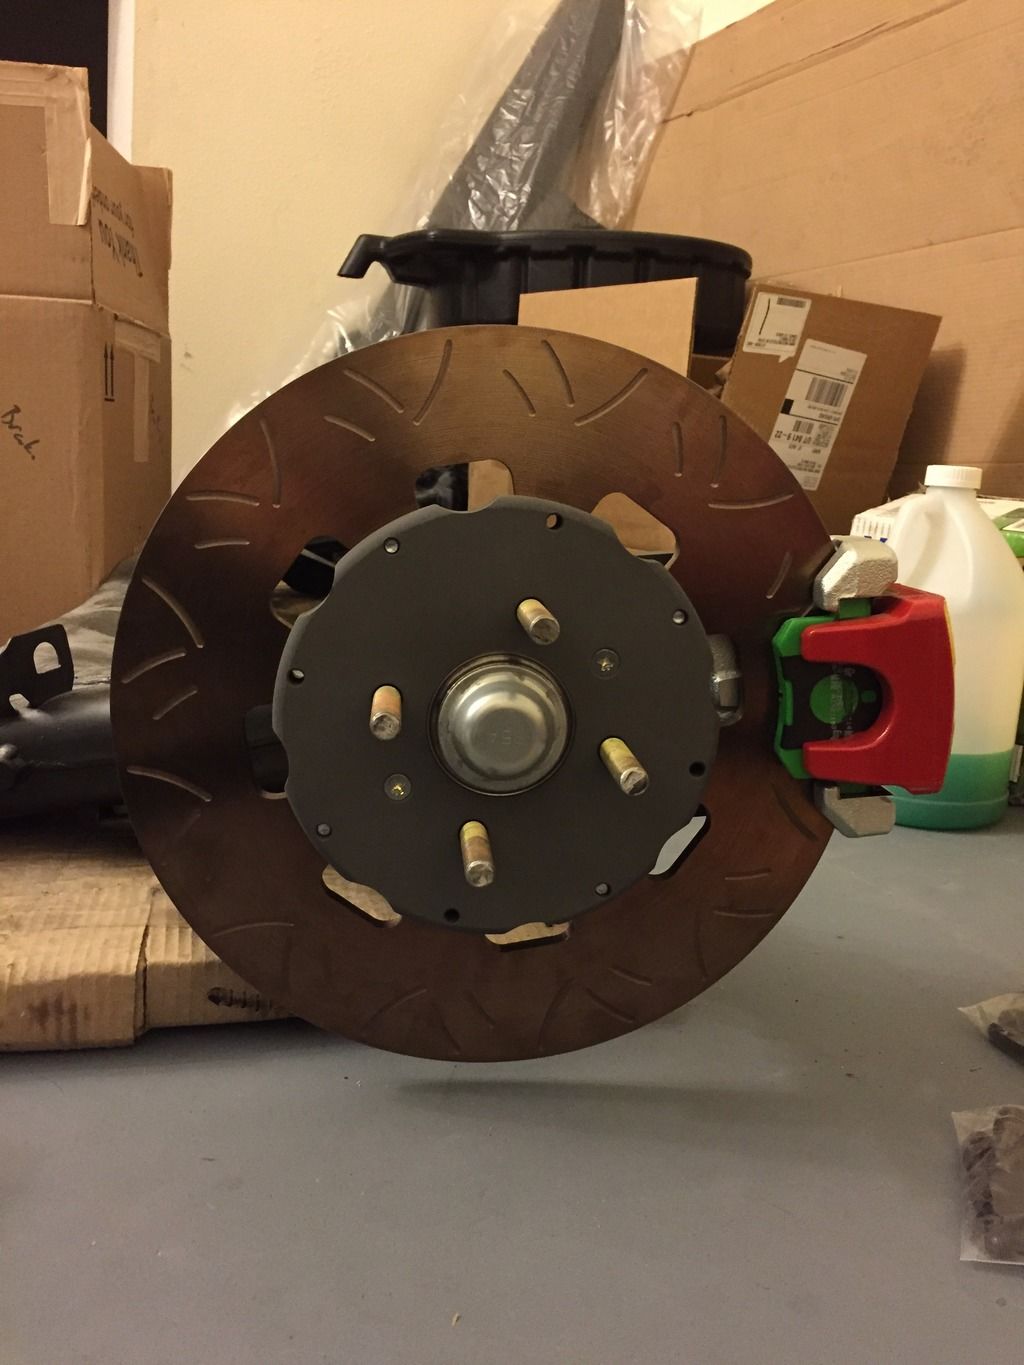
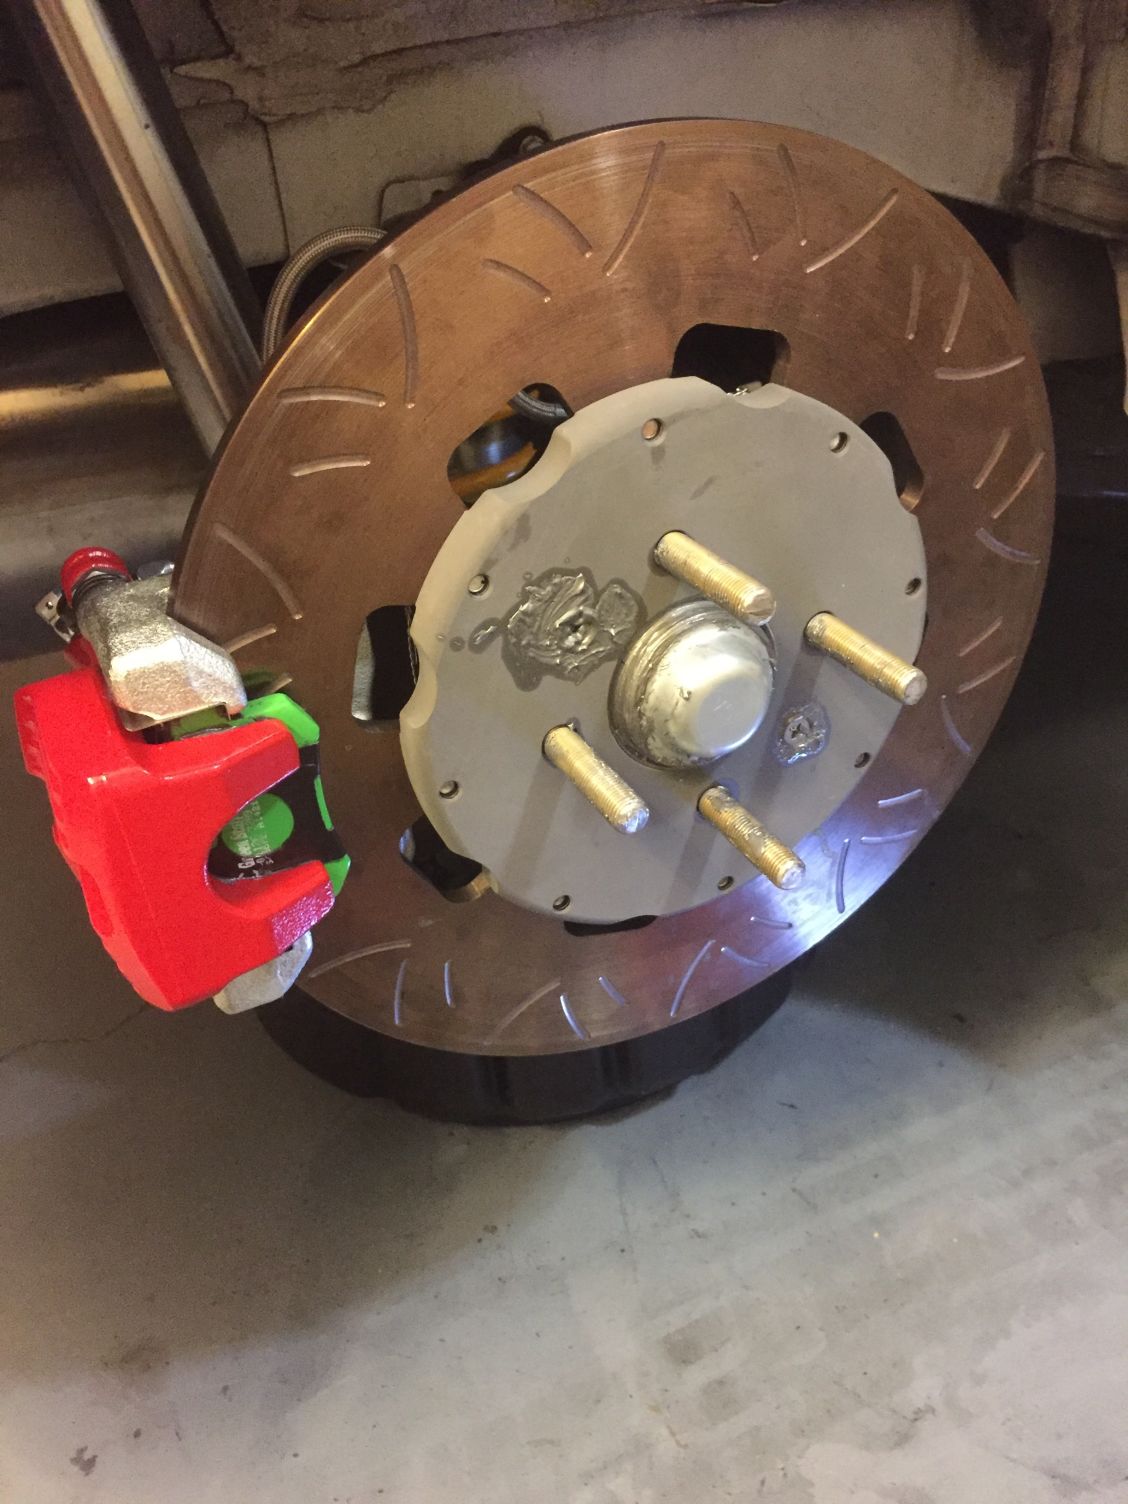
Assemble the rotor onto the Wilwood Hat for test fit of the
new JDM Integra DC5 Type R rear caliper:
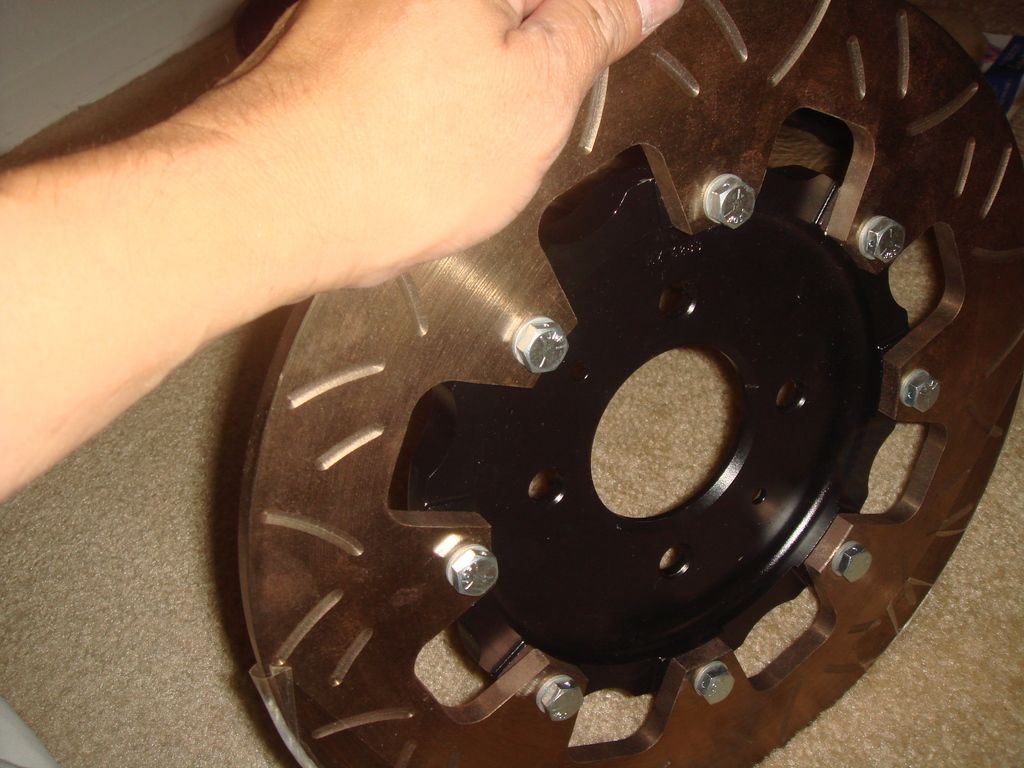
Install the centering ring and the rotor/hat assembly to the hub:
Tighten the rotor screw:
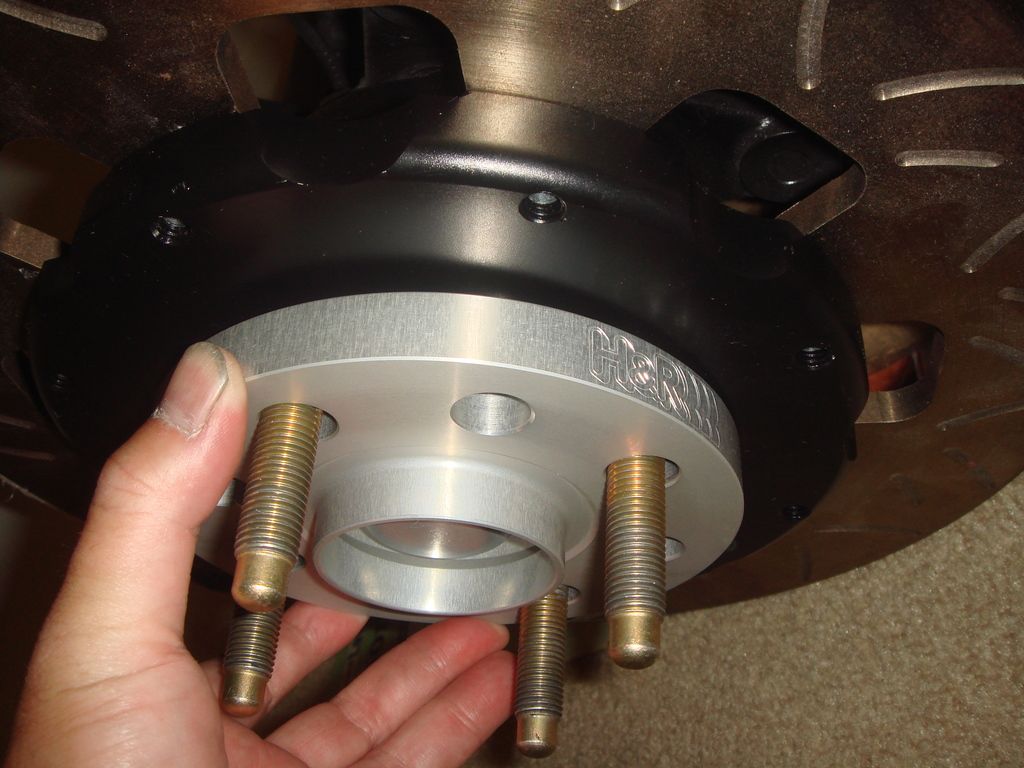
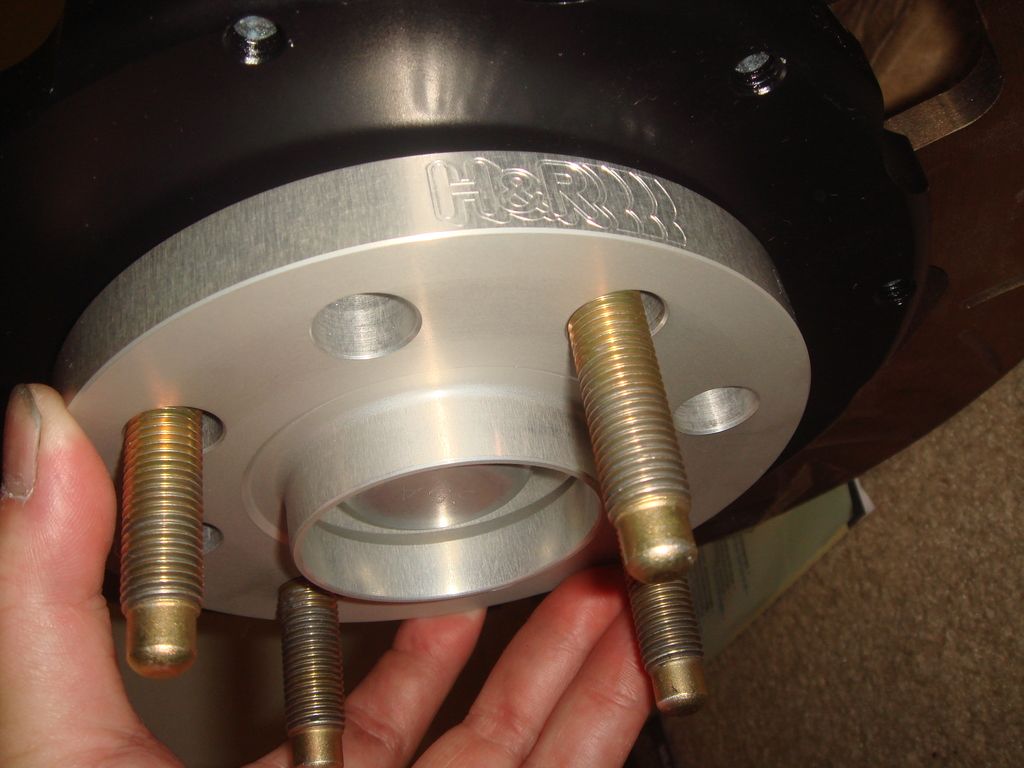
Test Fit the 15mm H&R Spacer that just arrived
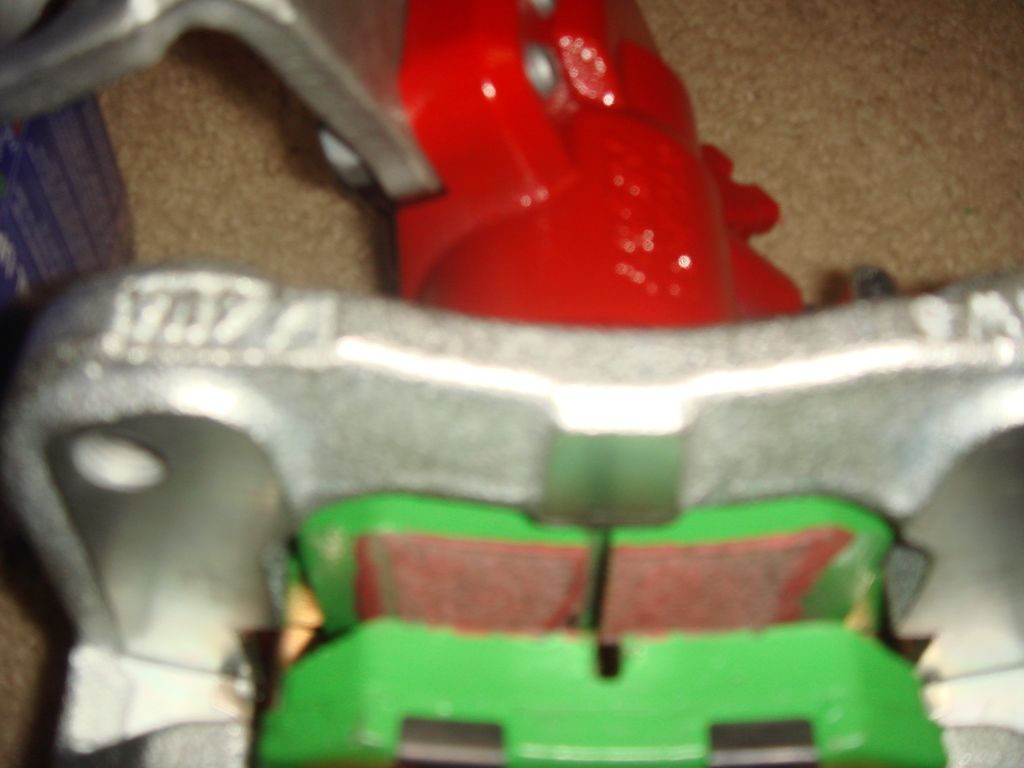
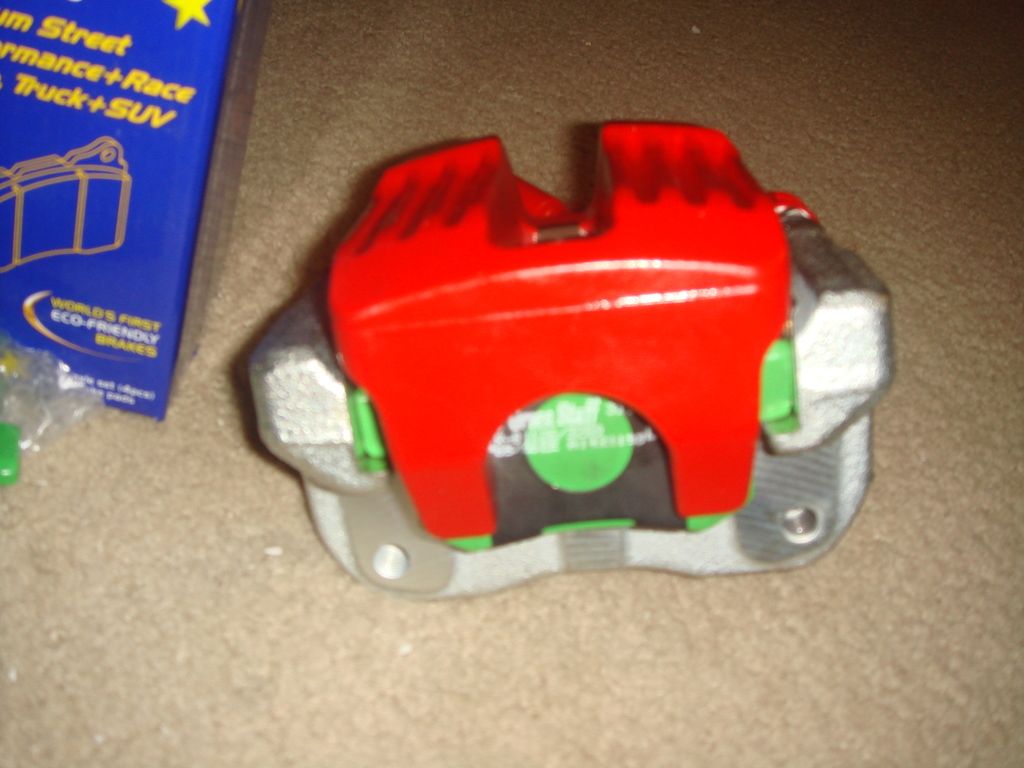
Install the EBC brake pads into the caliper:
new JDM Integra DC5 Type R rear caliper:
Install the centering ring and the rotor/hat assembly to the hub:
Tighten the rotor screw:
Test Fit the 15mm H&R Spacer that just arrived
Install the EBC brake pads into the caliper:
#304
10-21-2015, 03:51 AM
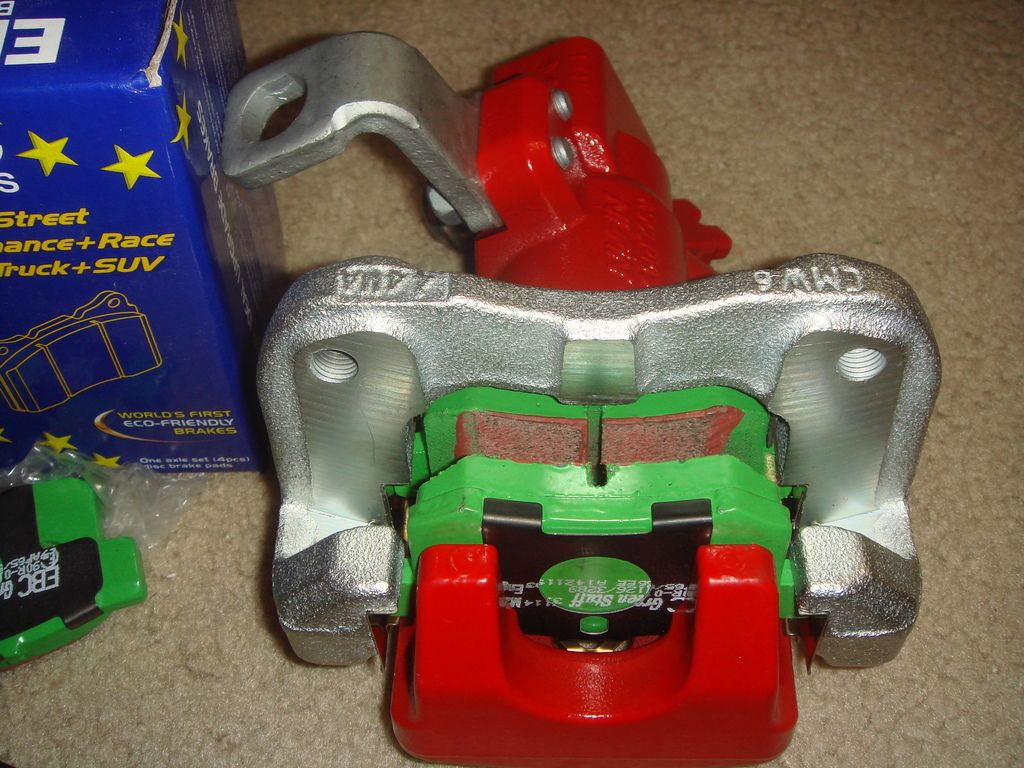
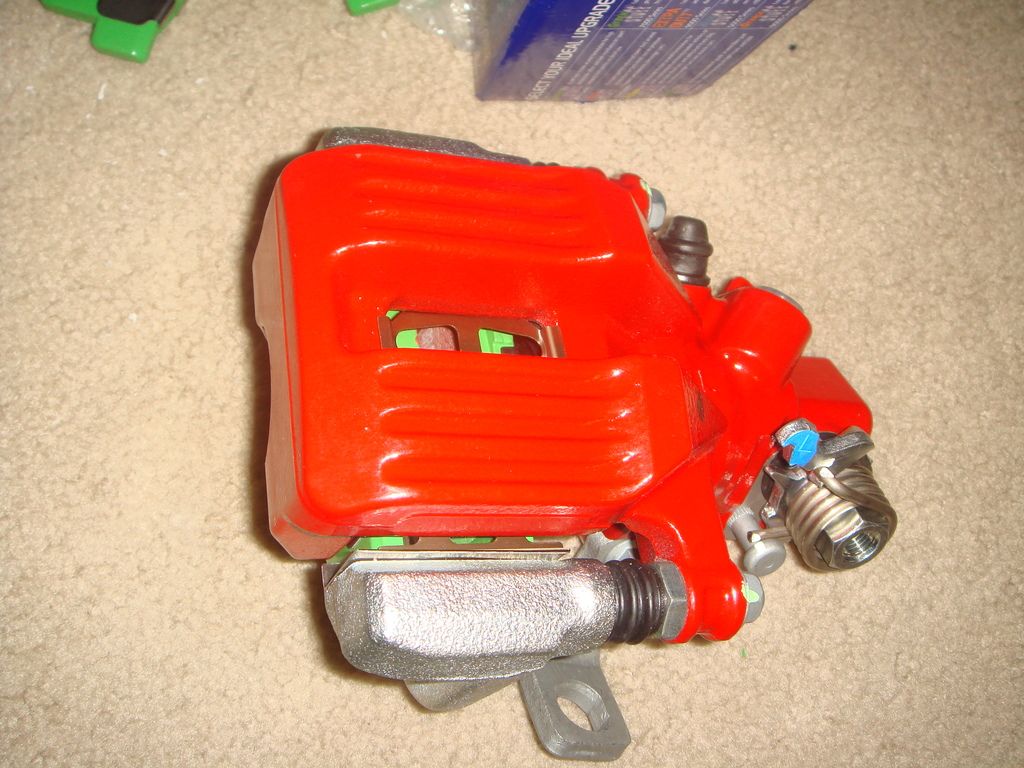
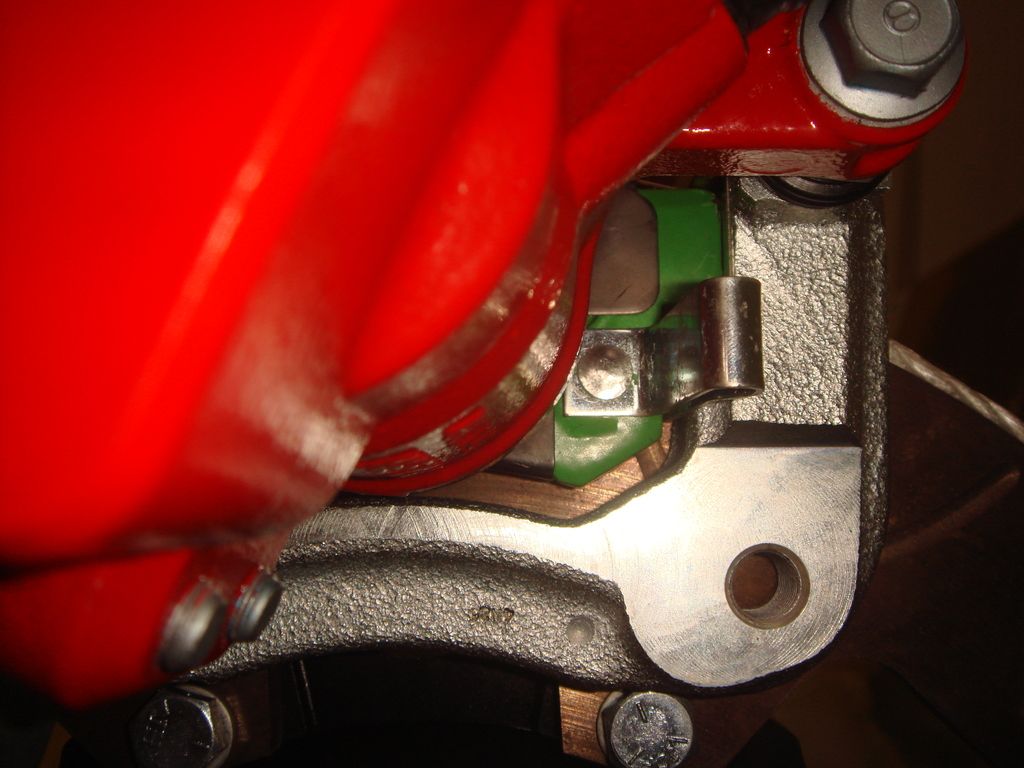
Test fit the whole caliper assembly onto the rotor
and found problem with fitting...
the Caliper Bracket is too long so
the pads do not properly cover all the rotor,
and the bracket hit the rotor/hat bolt.......
Looks like I need to get Integra GSR Rotor and New Brake Pads too...
oh well... more stuff to buy ...
and found problem with fitting...
the Caliper Bracket is too long so
the pads do not properly cover all the rotor,
and the bracket hit the rotor/hat bolt.......
Looks like I need to get Integra GSR Rotor and New Brake Pads too...
oh well... more stuff to buy ...
#305
11-09-2015, 07:11 PM
The Integra GSR Caliper Bracket do NOT fit at all with this JDM Brake Caliper,...
perhaps because this JDM Brake Integra Type R caliper is bigger in housing size compare to the USDM Integra Type R caliper, so I return the Integra GSR caliper bracket and brake pad to Amazon...
I figure the solution for this is to force fit the current JDM Brake Caliper/Bracket
which mean only about 70% of the pads will touch the brake disk rotor,
and as soon as this custom brake disk rotor run out,
I will order an even larger custom brake disk rotor that will then fit perfectly...
and I think will look even better since it will be a bigger rotor too...
well, I just finished with measuring the custom brake caliper "extra" bracket
and ordering it,
if somehow after I install I feel the brake is not working properly,then
I can just throw away this current custom rotor and upgrade to the larger custom
rotor by then...
#306
02-03-2016, 11:01 PM
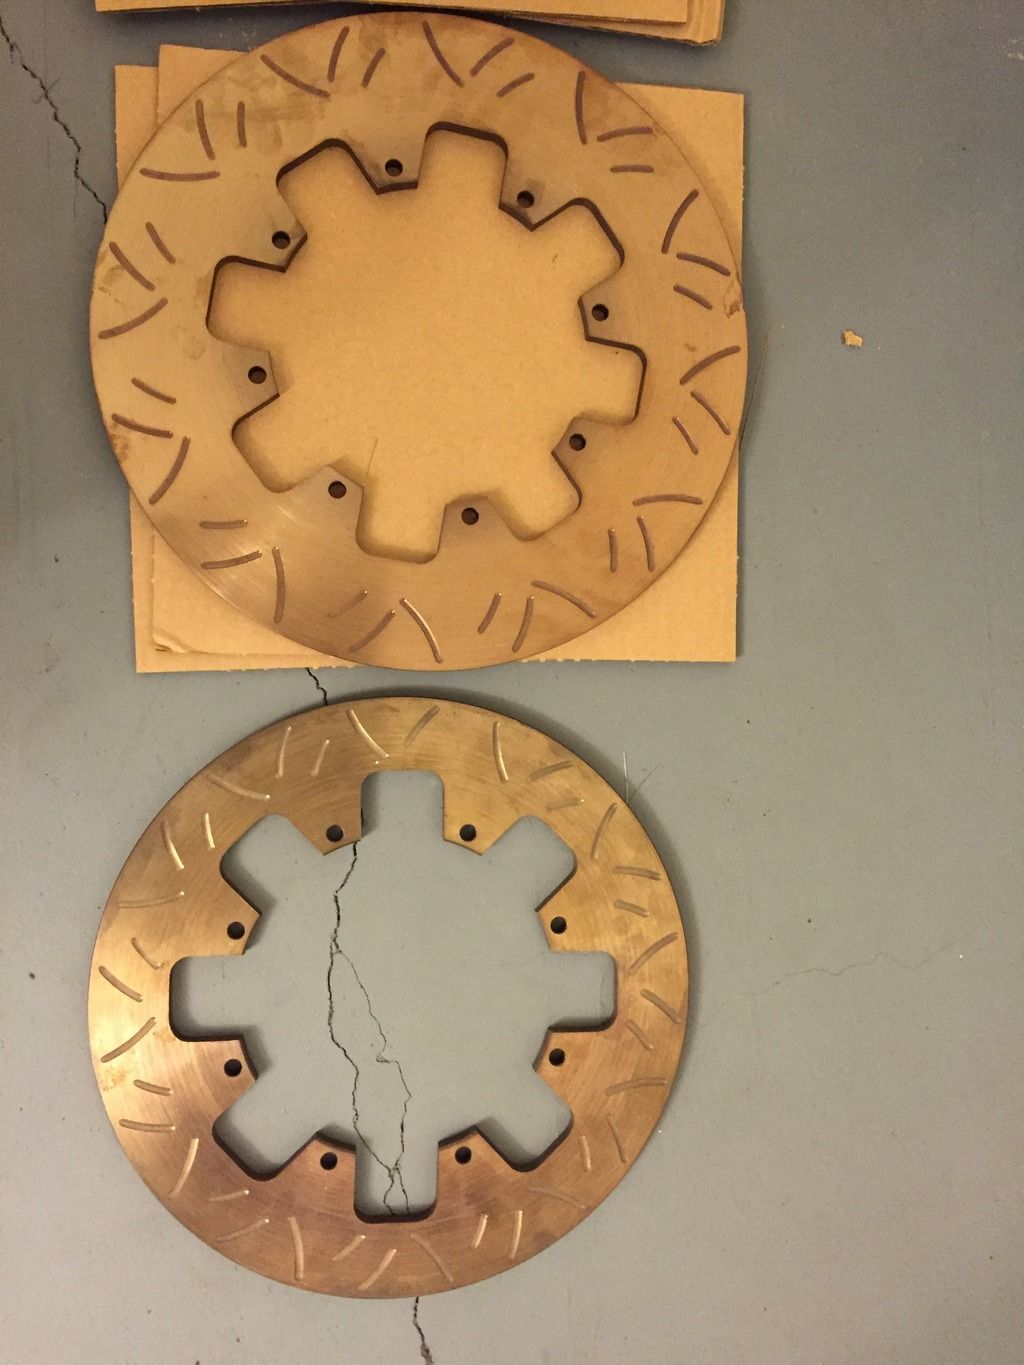
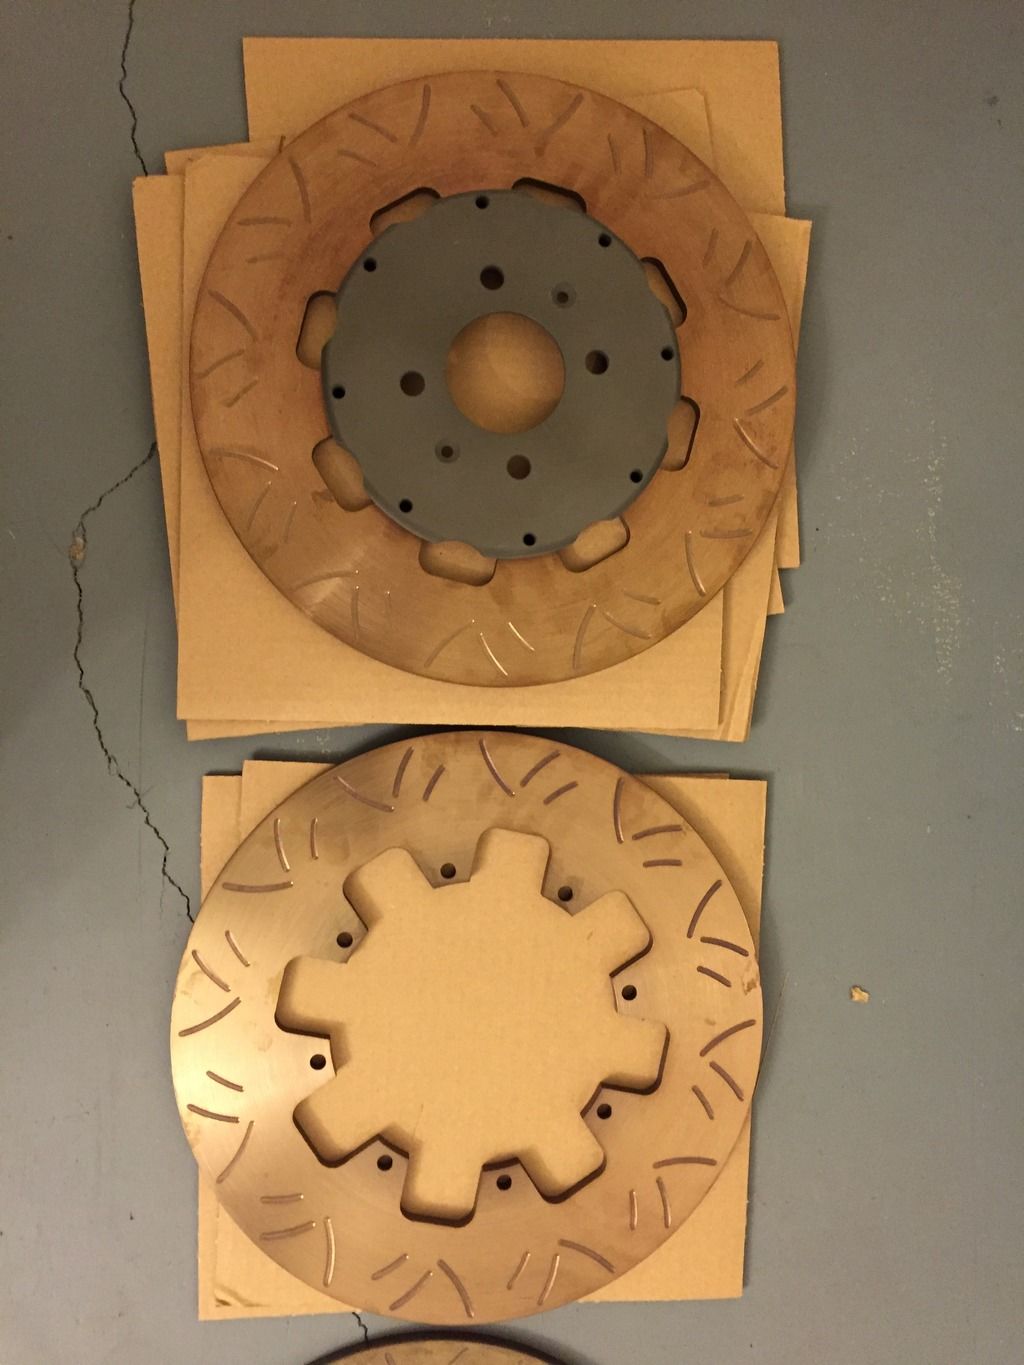
My New LARGER Custom Rear Disc Brake Rotor by Coleman Racing finally arrived today.
It is now 13in in diameter, so not only the brake pads will have full swept area,
it will also look more balance with my 355mm Brembo Front rotor.
This is the last part that I need to install my JDM RS Rear Axle conversion,
Hopefully I can finish the conversion this weekend
The pictures below will show the comparison between my older smaller rotor to this new larger one:
#307
02-10-2016, 10:51 PM
I haven't had time to install everything,
but I manage to make progress:
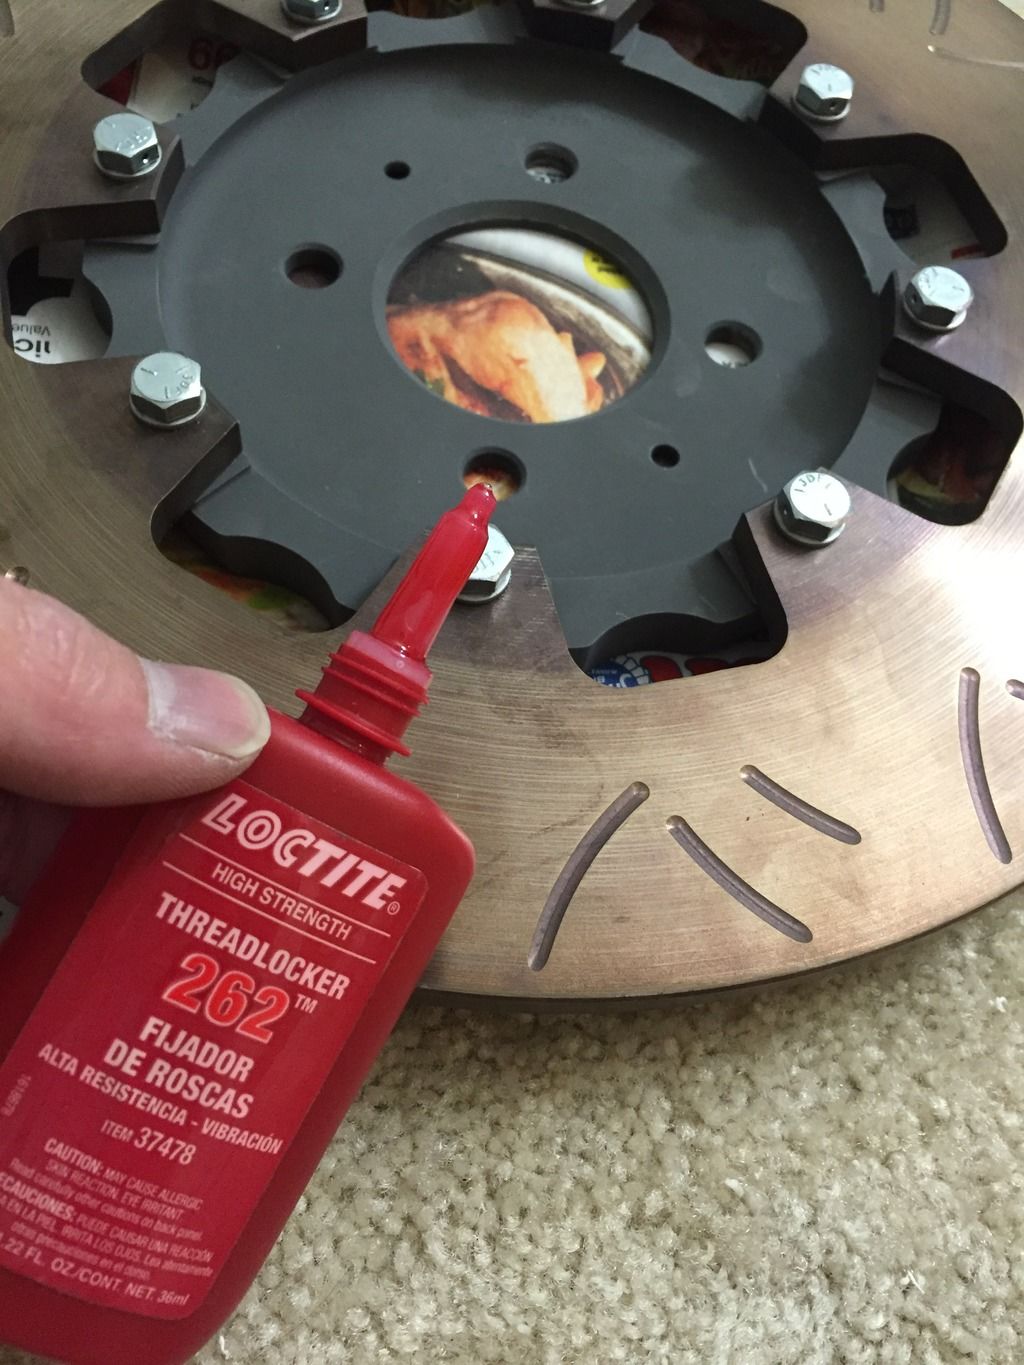
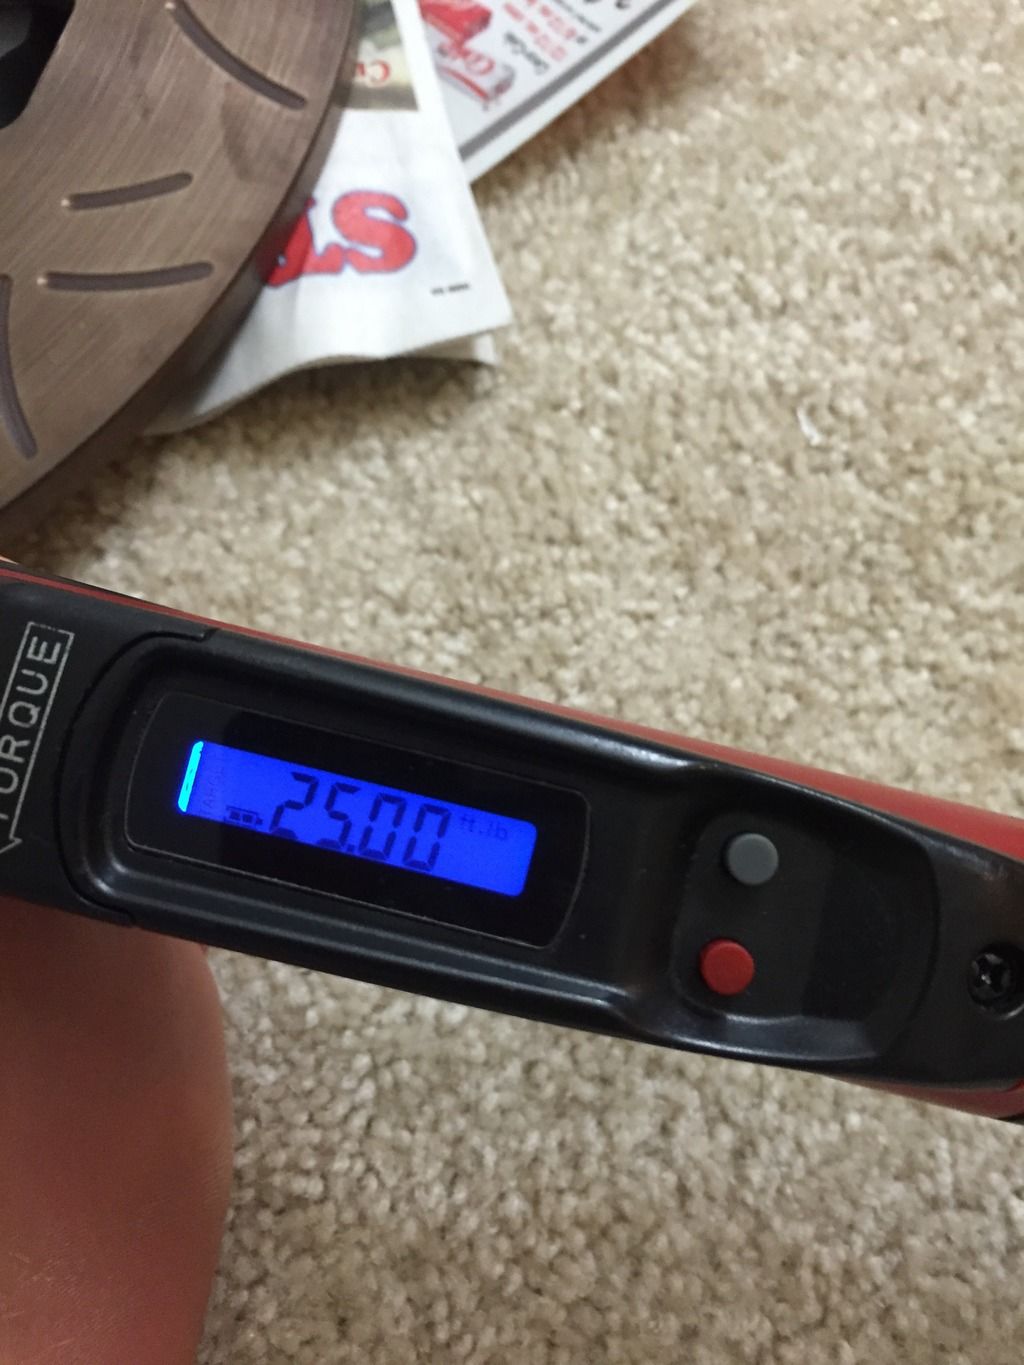
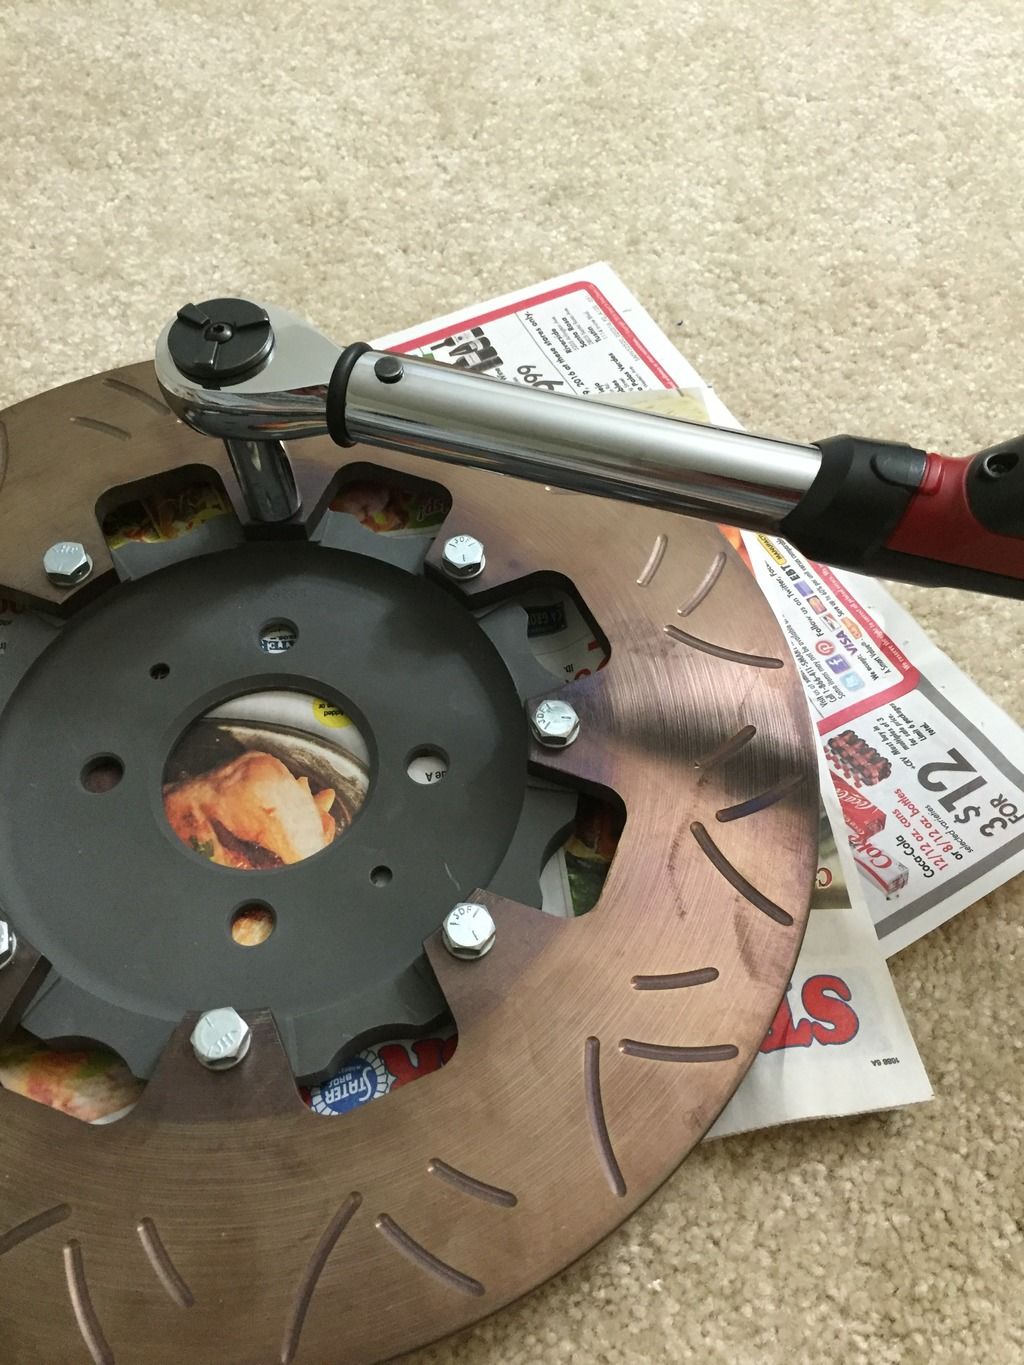
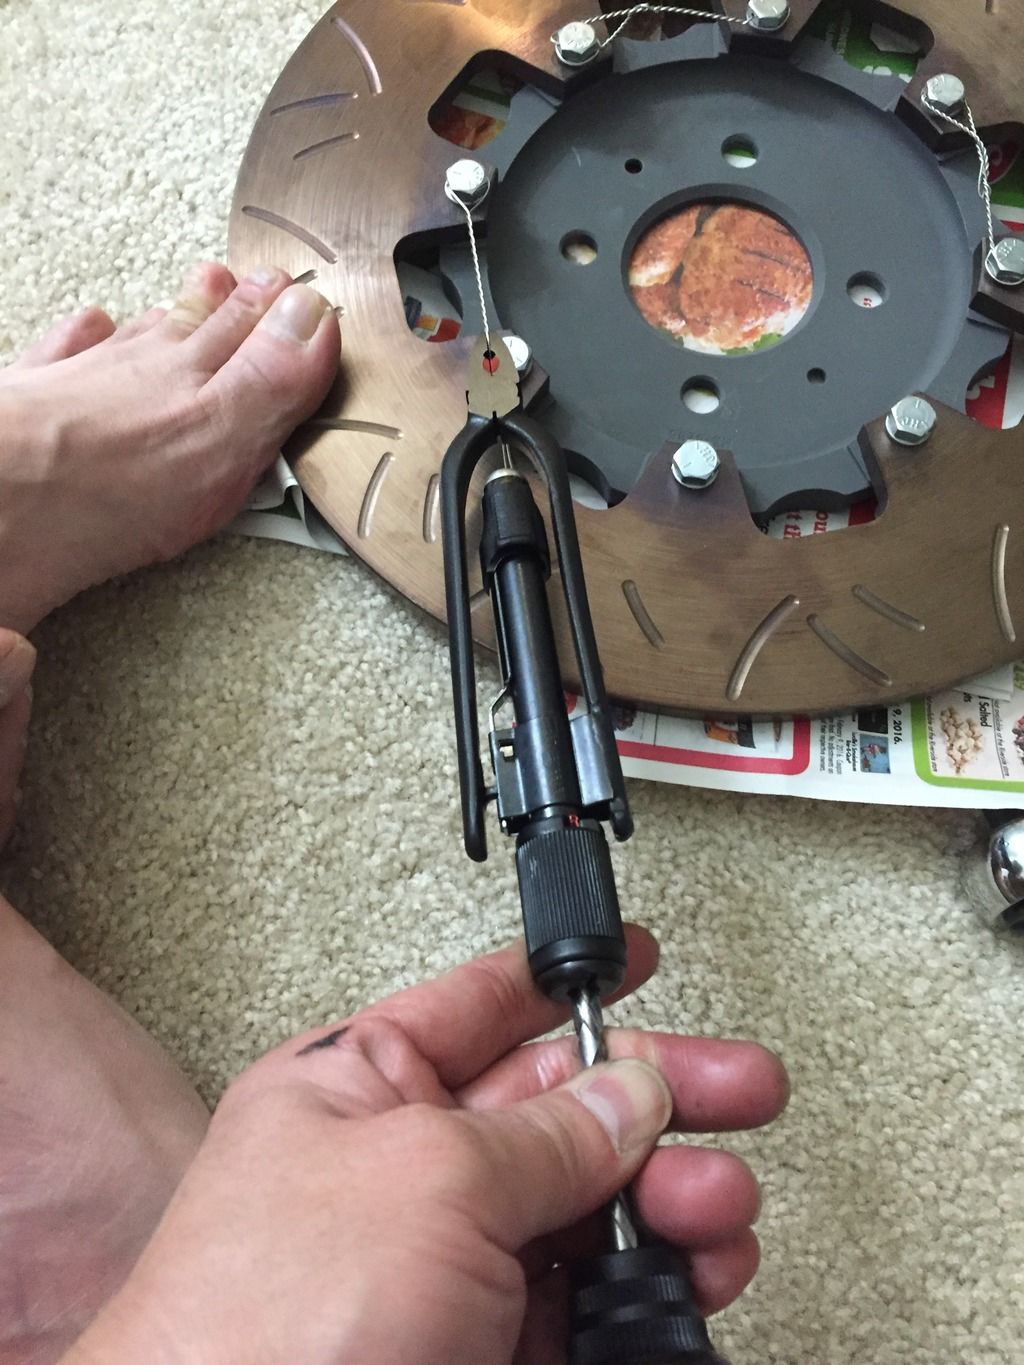
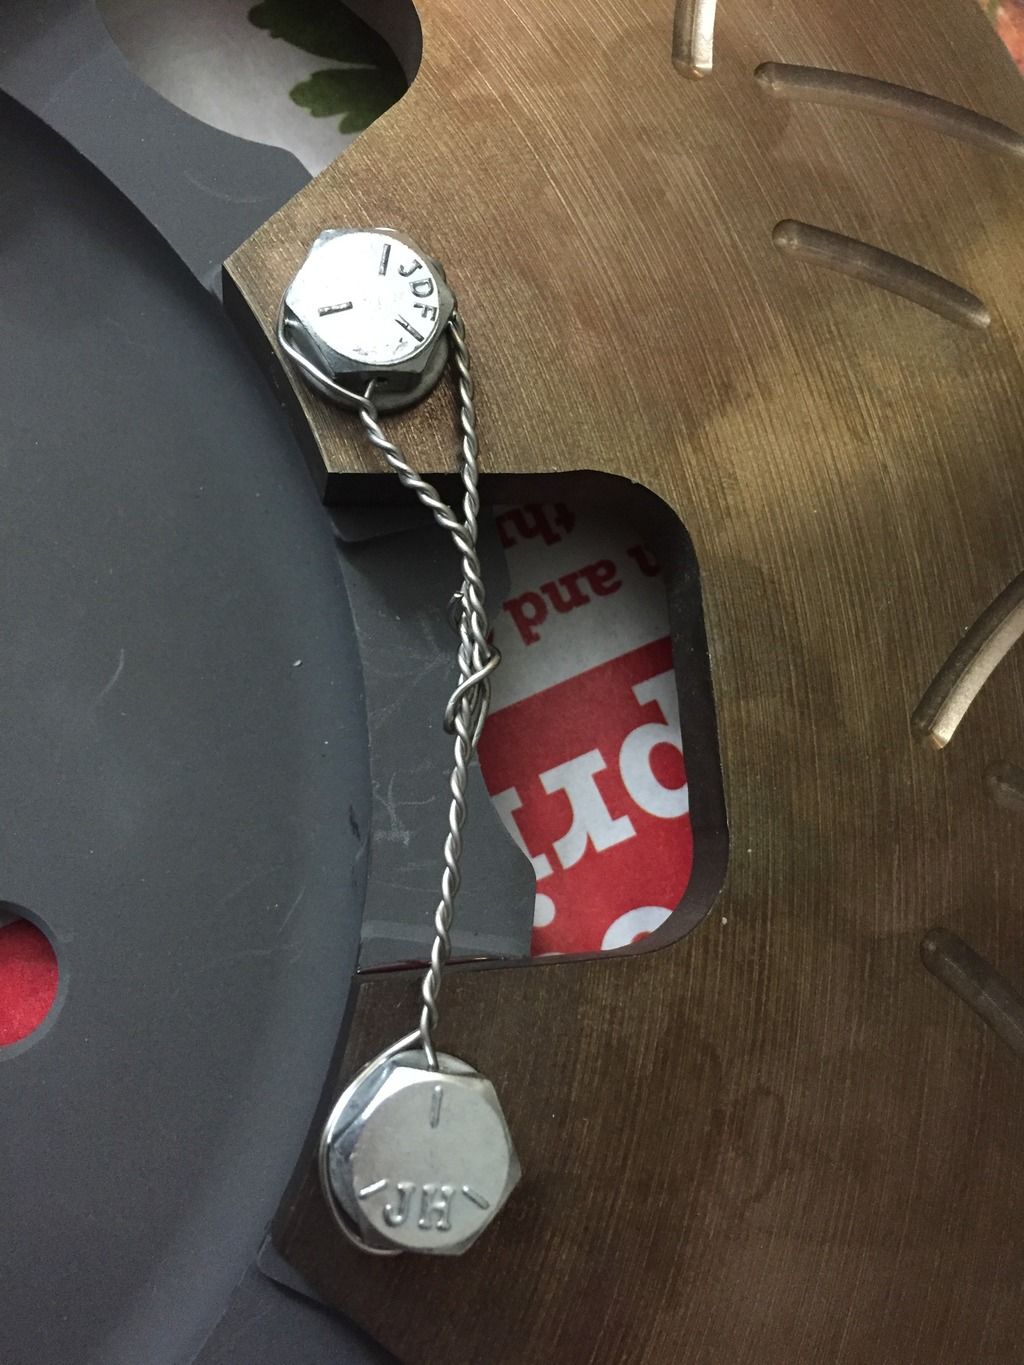
I install the new larger disc rotor to the Wilwood hat.
I use torque wrench at 25lb-ft as advise by Wilwood,
Use high strength RED Loctite,
and then use the safety wire with the tools to spin the wire.
here are the pictures:

but I manage to make progress:
I install the new larger disc rotor to the Wilwood hat.
I use torque wrench at 25lb-ft as advise by Wilwood,
Use high strength RED Loctite,
and then use the safety wire with the tools to spin the wire.
here are the pictures:
Last edited by BMW ALPINA; 02-10-2016 at 10:53 PM.
#309
02-13-2016, 07:08 PM
Test fit the whole caliper assembly onto the rotor
and found problem with fitting...
the Caliper Bracket is too long so
the pads do not properly cover all the rotor,
and the bracket hit the rotor/hat bolt.......
Looks like I need to get Integra GSR Rotor and New Brake Pads too...
oh well... more stuff to buy ...
and found problem with fitting...
the Caliper Bracket is too long so
the pads do not properly cover all the rotor,
and the bracket hit the rotor/hat bolt.......
Looks like I need to get Integra GSR Rotor and New Brake Pads too...
oh well... more stuff to buy ...
Much respect due for your awesome work. I just have a quick question for you in regards to rotors. I have a ge8 and would like to confirm with you if possible if the crx rear rotors and civic fronts will fit the stock JDM model?
Appreciate your help.

Last edited by 345ge8RS5mt; 02-13-2016 at 09:51 PM.
#310
02-14-2016, 02:07 AM
Hello BMW Alpina,
Much respect due for your awesome work. I just have a quick question for you in regards to rotors. I have a ge8 and would like to confirm with you if possible if the crx rear rotors and civic fronts will fit the stock JDM model?
Appreciate your help.
Much respect due for your awesome work. I just have a quick question for you in regards to rotors. I have a ge8 and would like to confirm with you if possible if the crx rear rotors and civic fronts will fit the stock JDM model?
Appreciate your help.
I don't really know much about the Civic Fronts and CRX rear rotors.
because I have never do any research about larger front brake using Civic fronts,
plus I no longer have the stock rear JDM Honda Fit rotor so I don't know
the measurement of the stork rear JDM Honda fit anymore...
but as long as those rotor have 4x100 PCD bolt hole pattern,
they should fit, all you have to do is adjust the brake caliper bracket
or make a custom brake caliper bracket
#311
02-14-2016, 05:27 PM
Hello,
I don't really know much about the Civic Fronts and CRX rear rotors.
because I have never do any research about larger front brake using Civic fronts,
plus I no longer have the stock rear JDM Honda Fit rotor so I don't know
the measurement of the stork rear JDM Honda fit anymore...
but as long as those rotor have 4x100 PCD bolt hole pattern,
they should fit, all you have to do is adjust the brake caliper bracket
or make a custom brake caliper bracket
I'll try..thanks again!
#312
02-17-2016, 02:29 AM
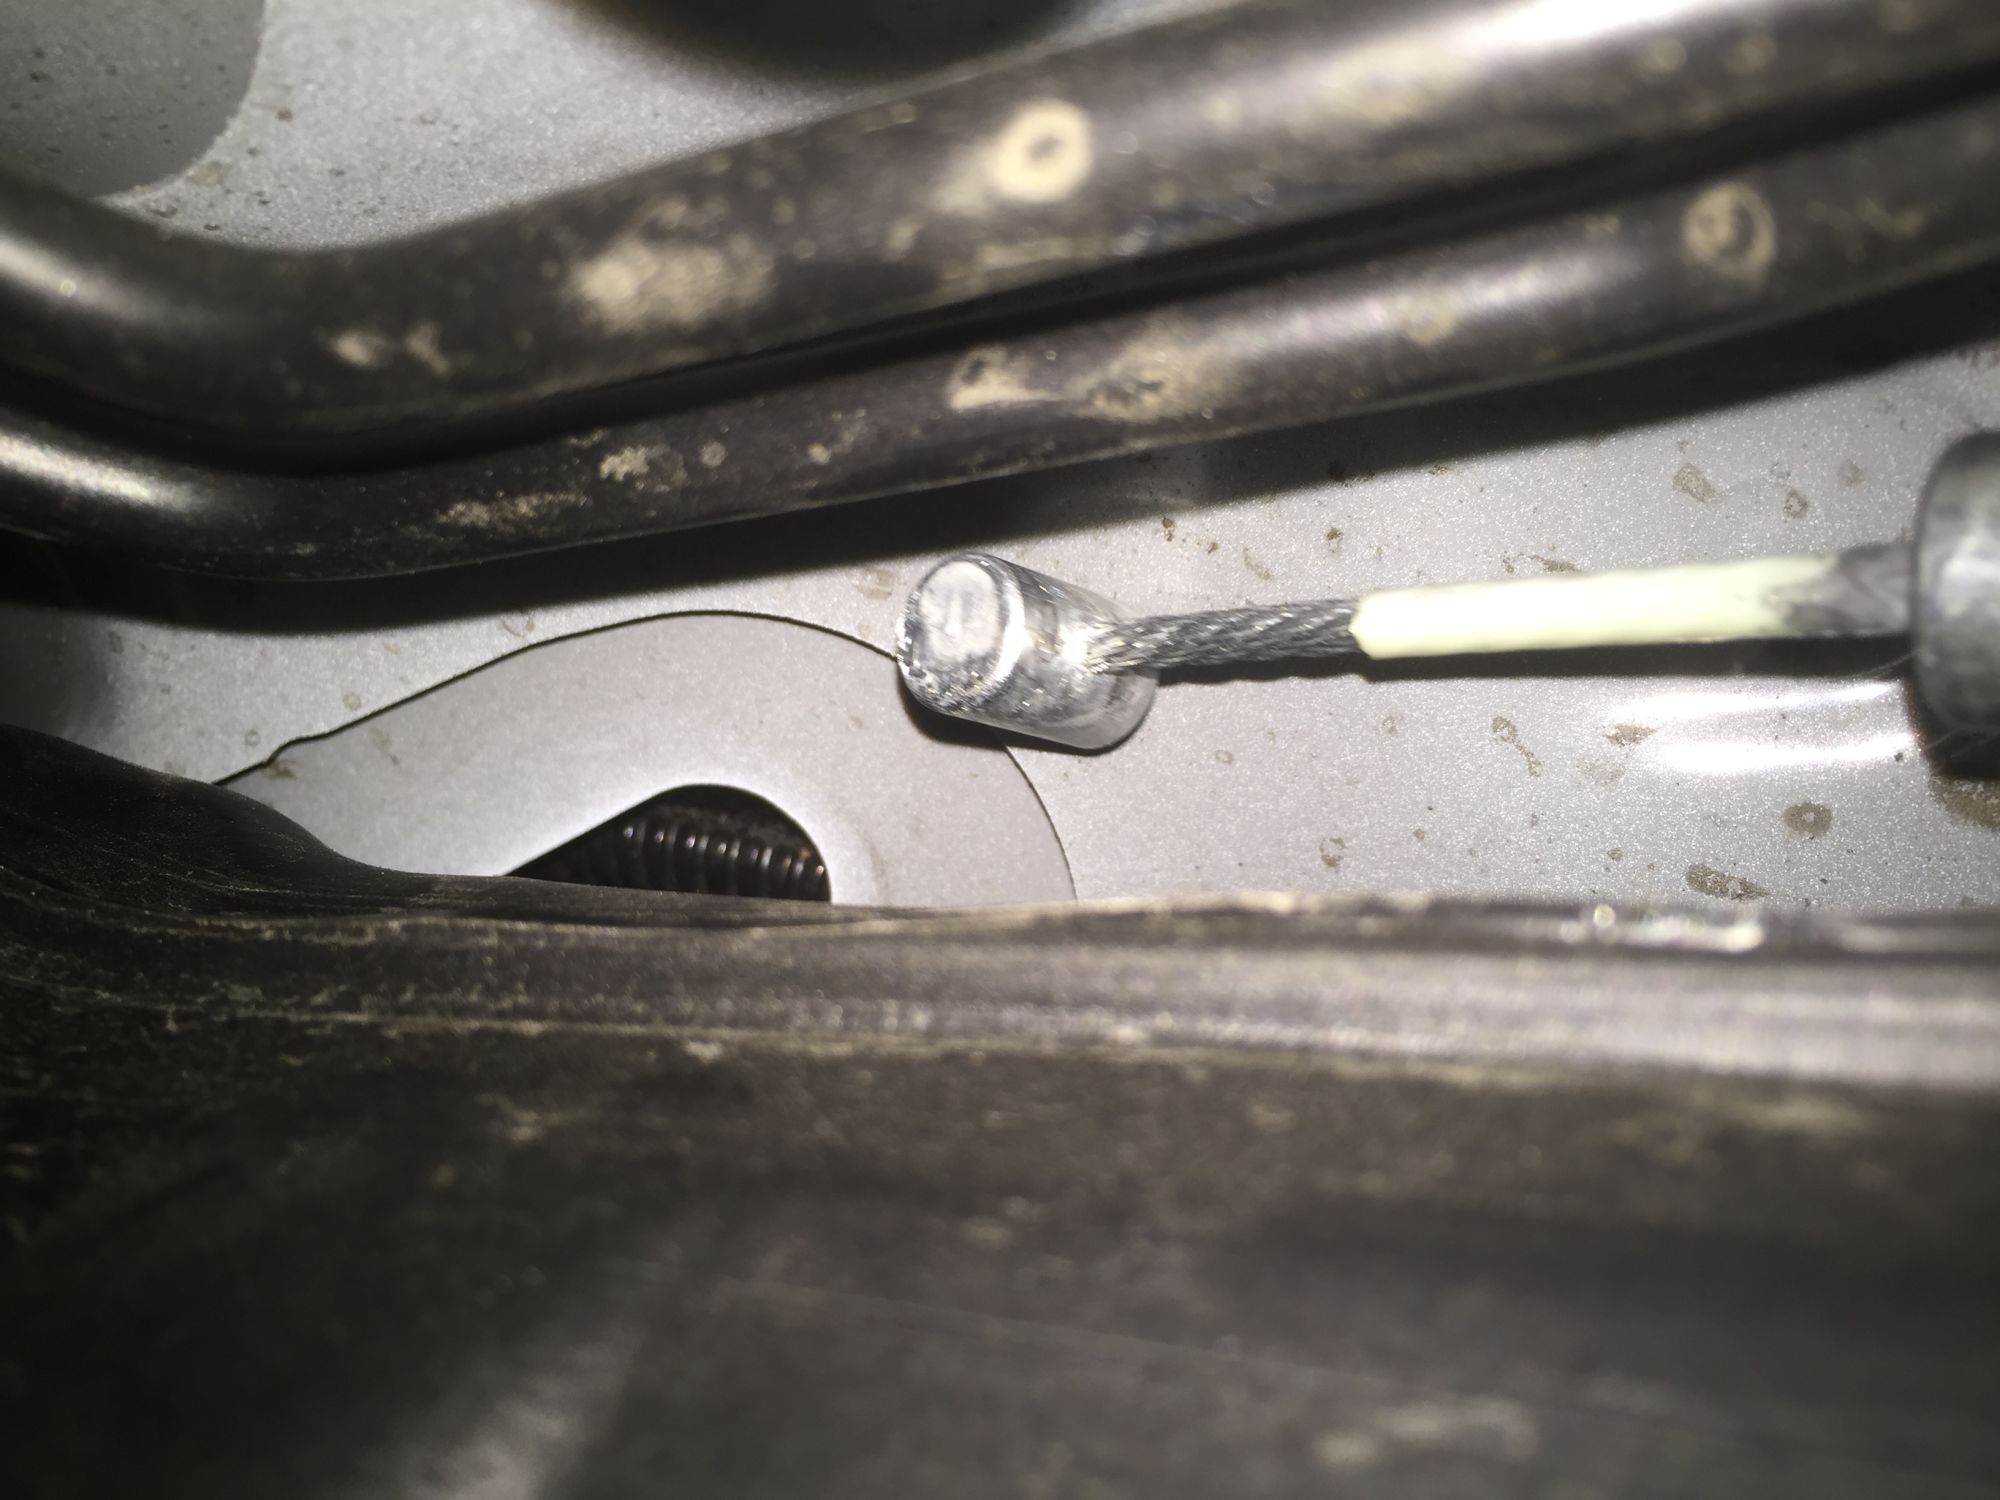
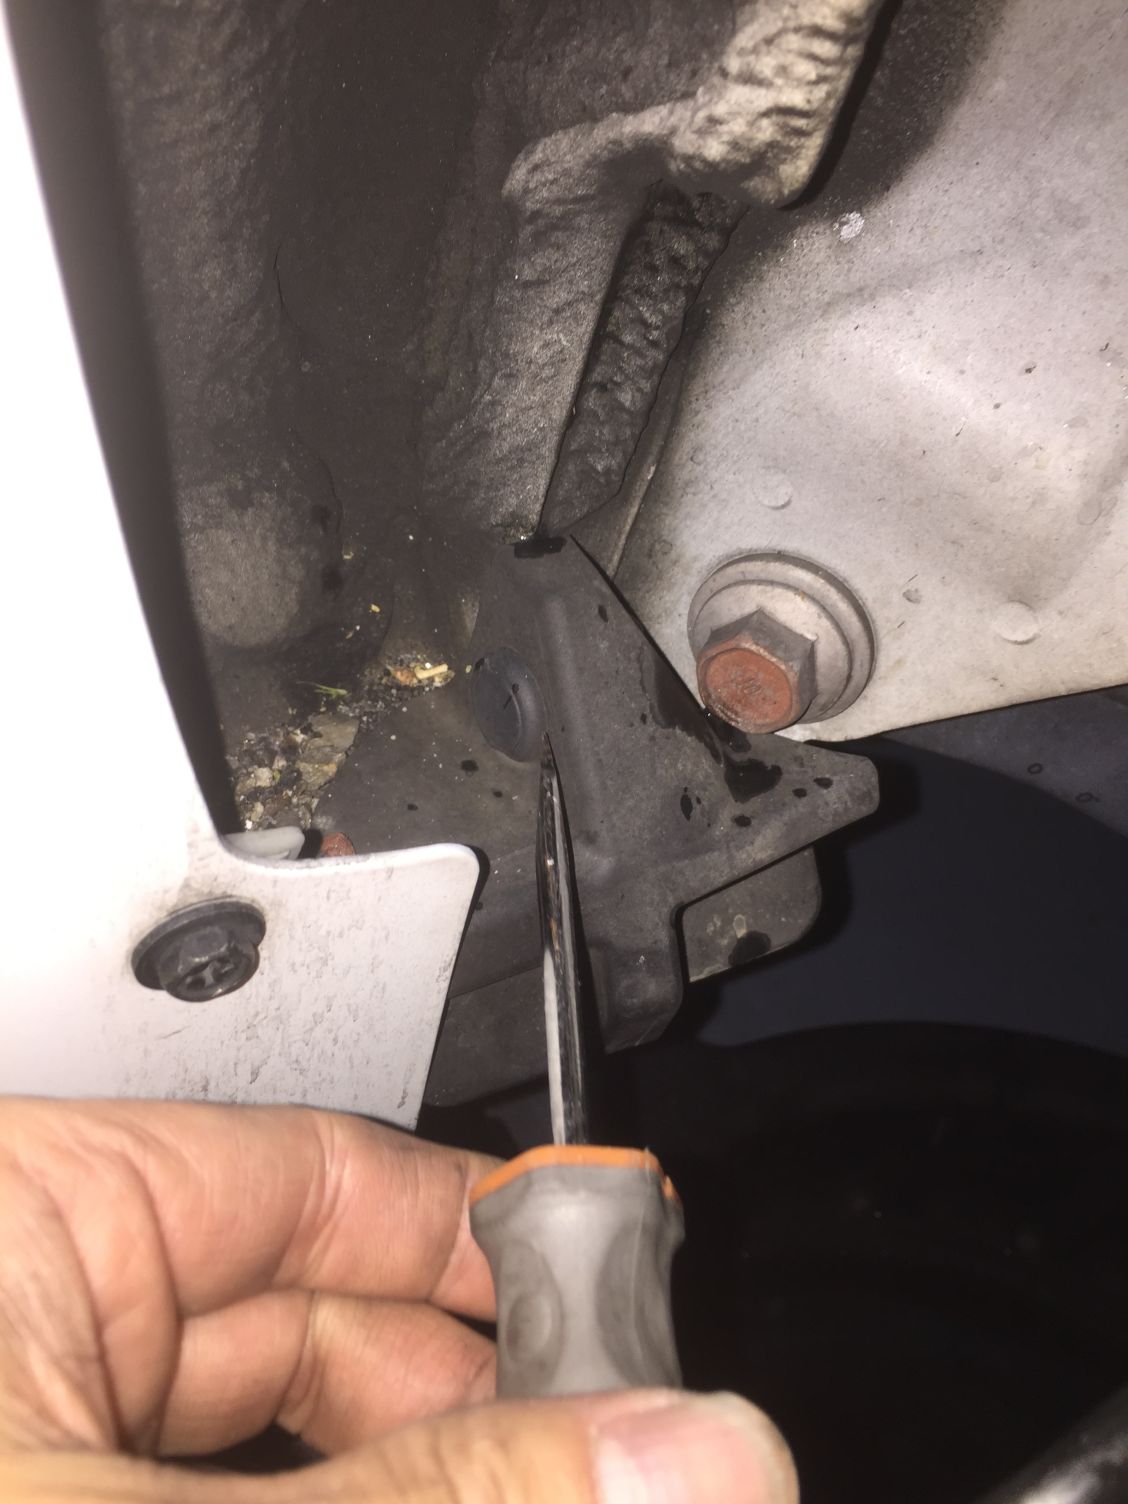
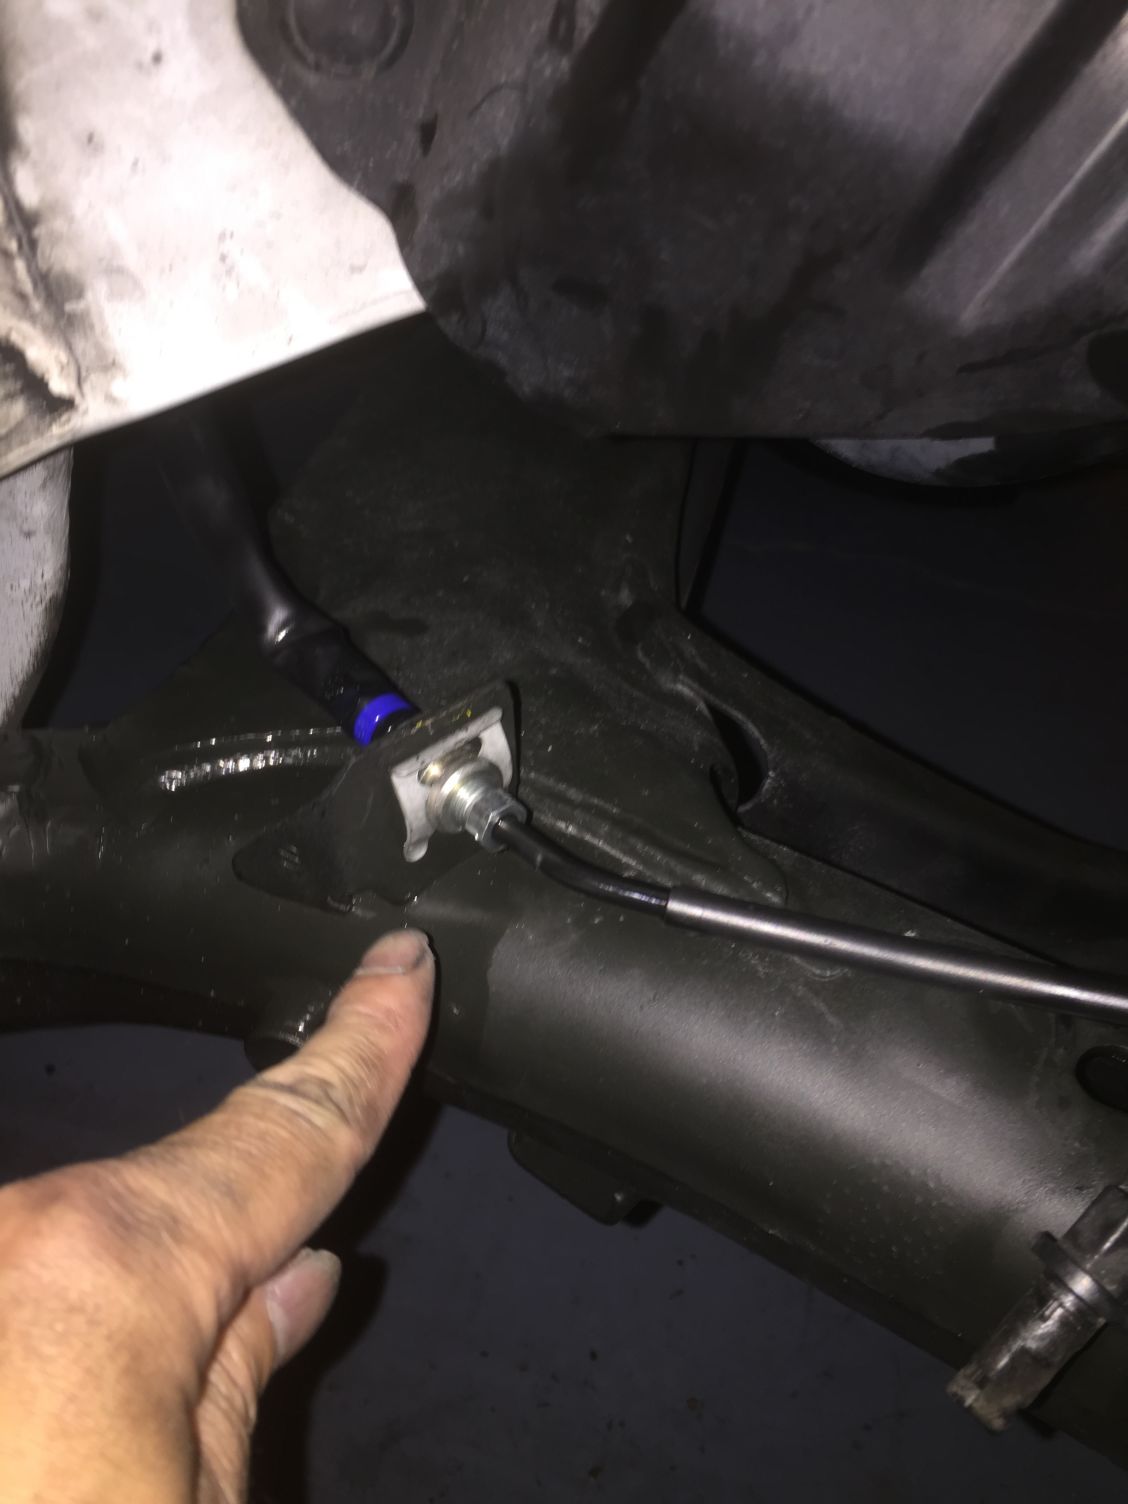
Take out the center console and remove the bolt holding the parking brake cable and
release the parking brake cable from the puller mechanism, then pull it from under the car
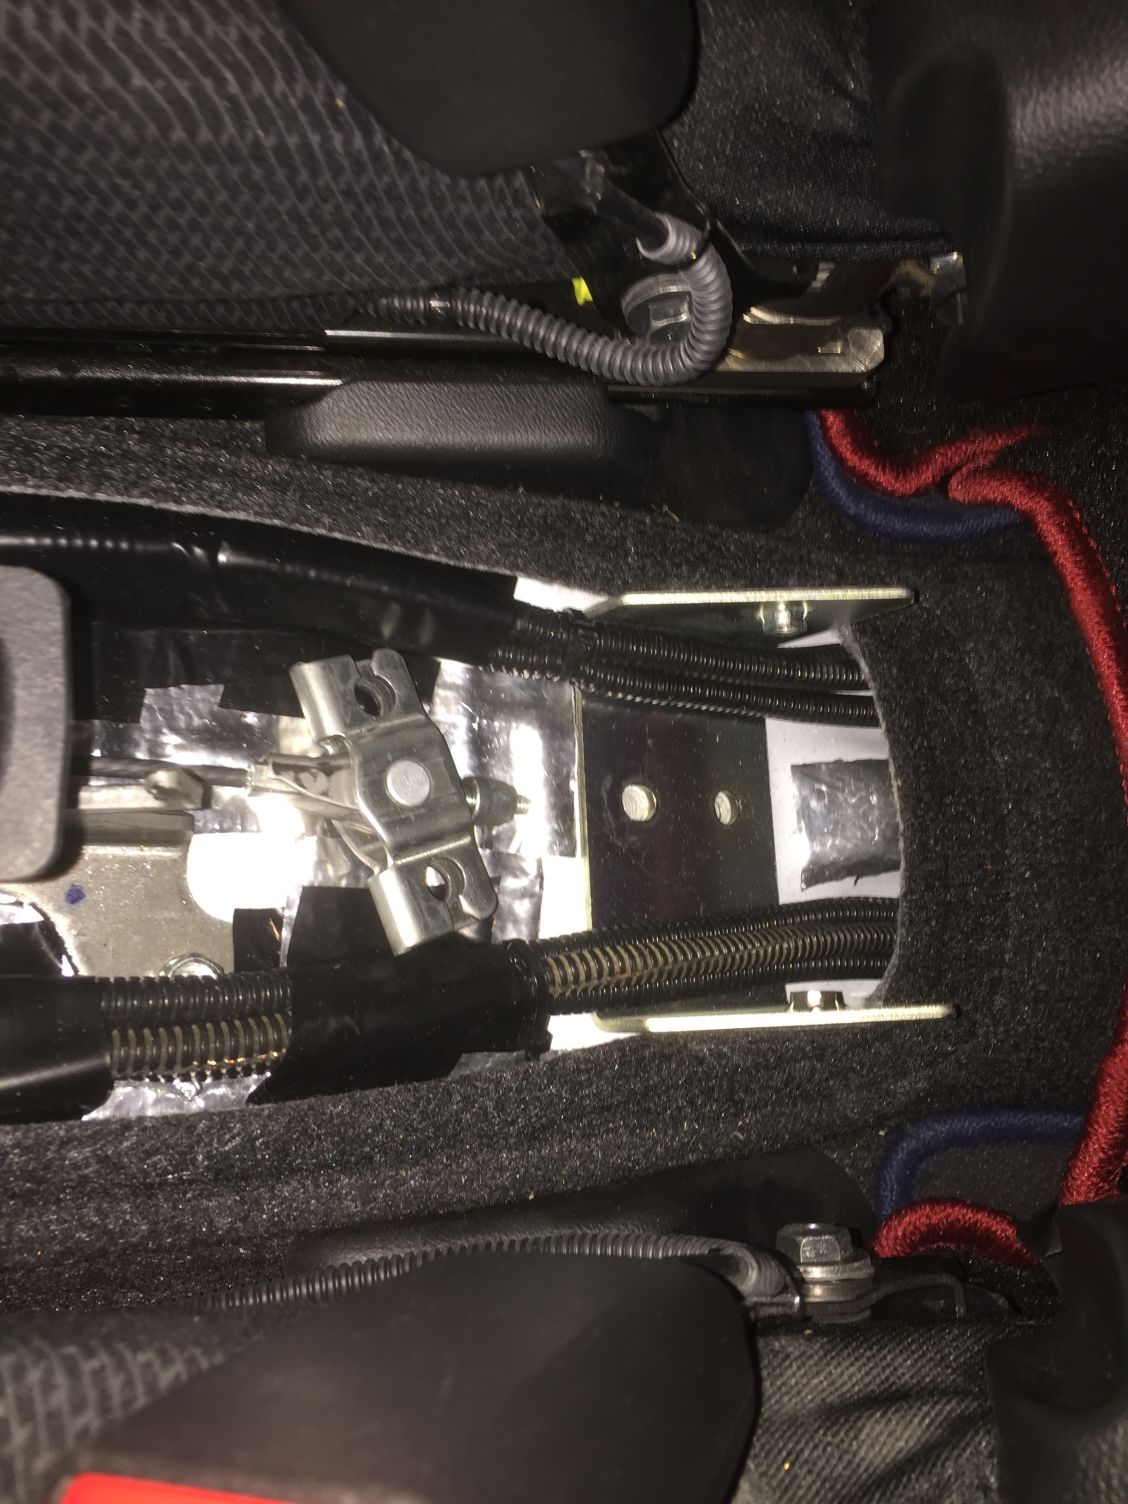
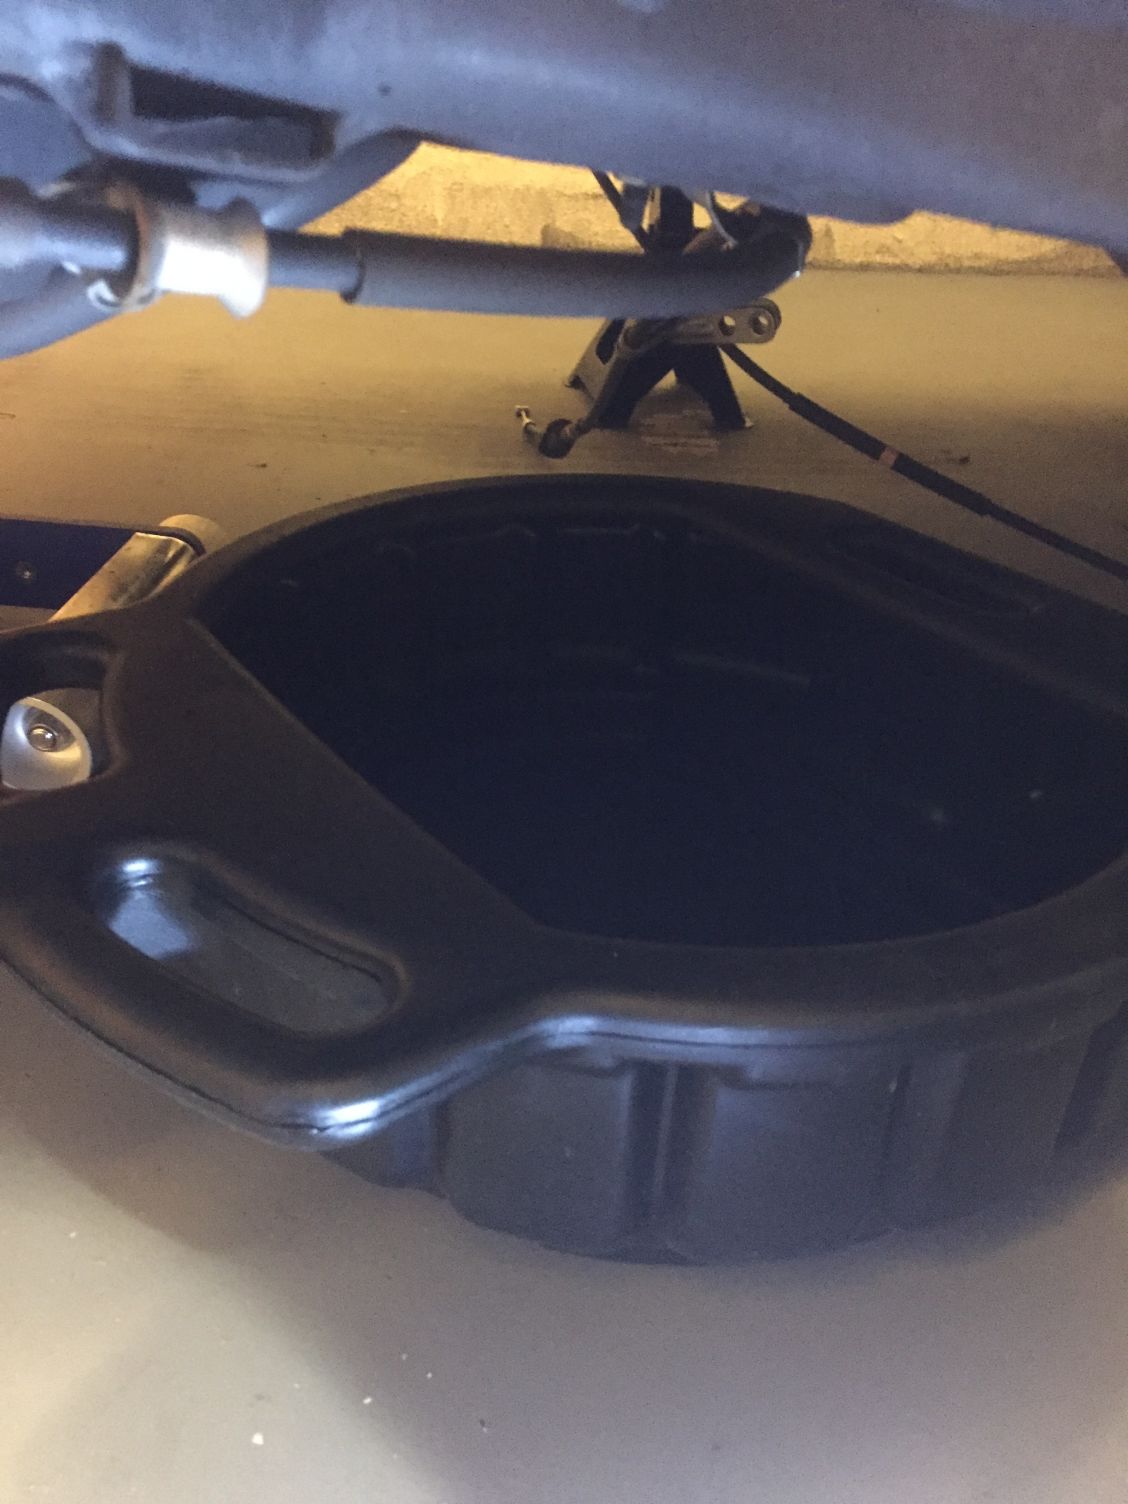
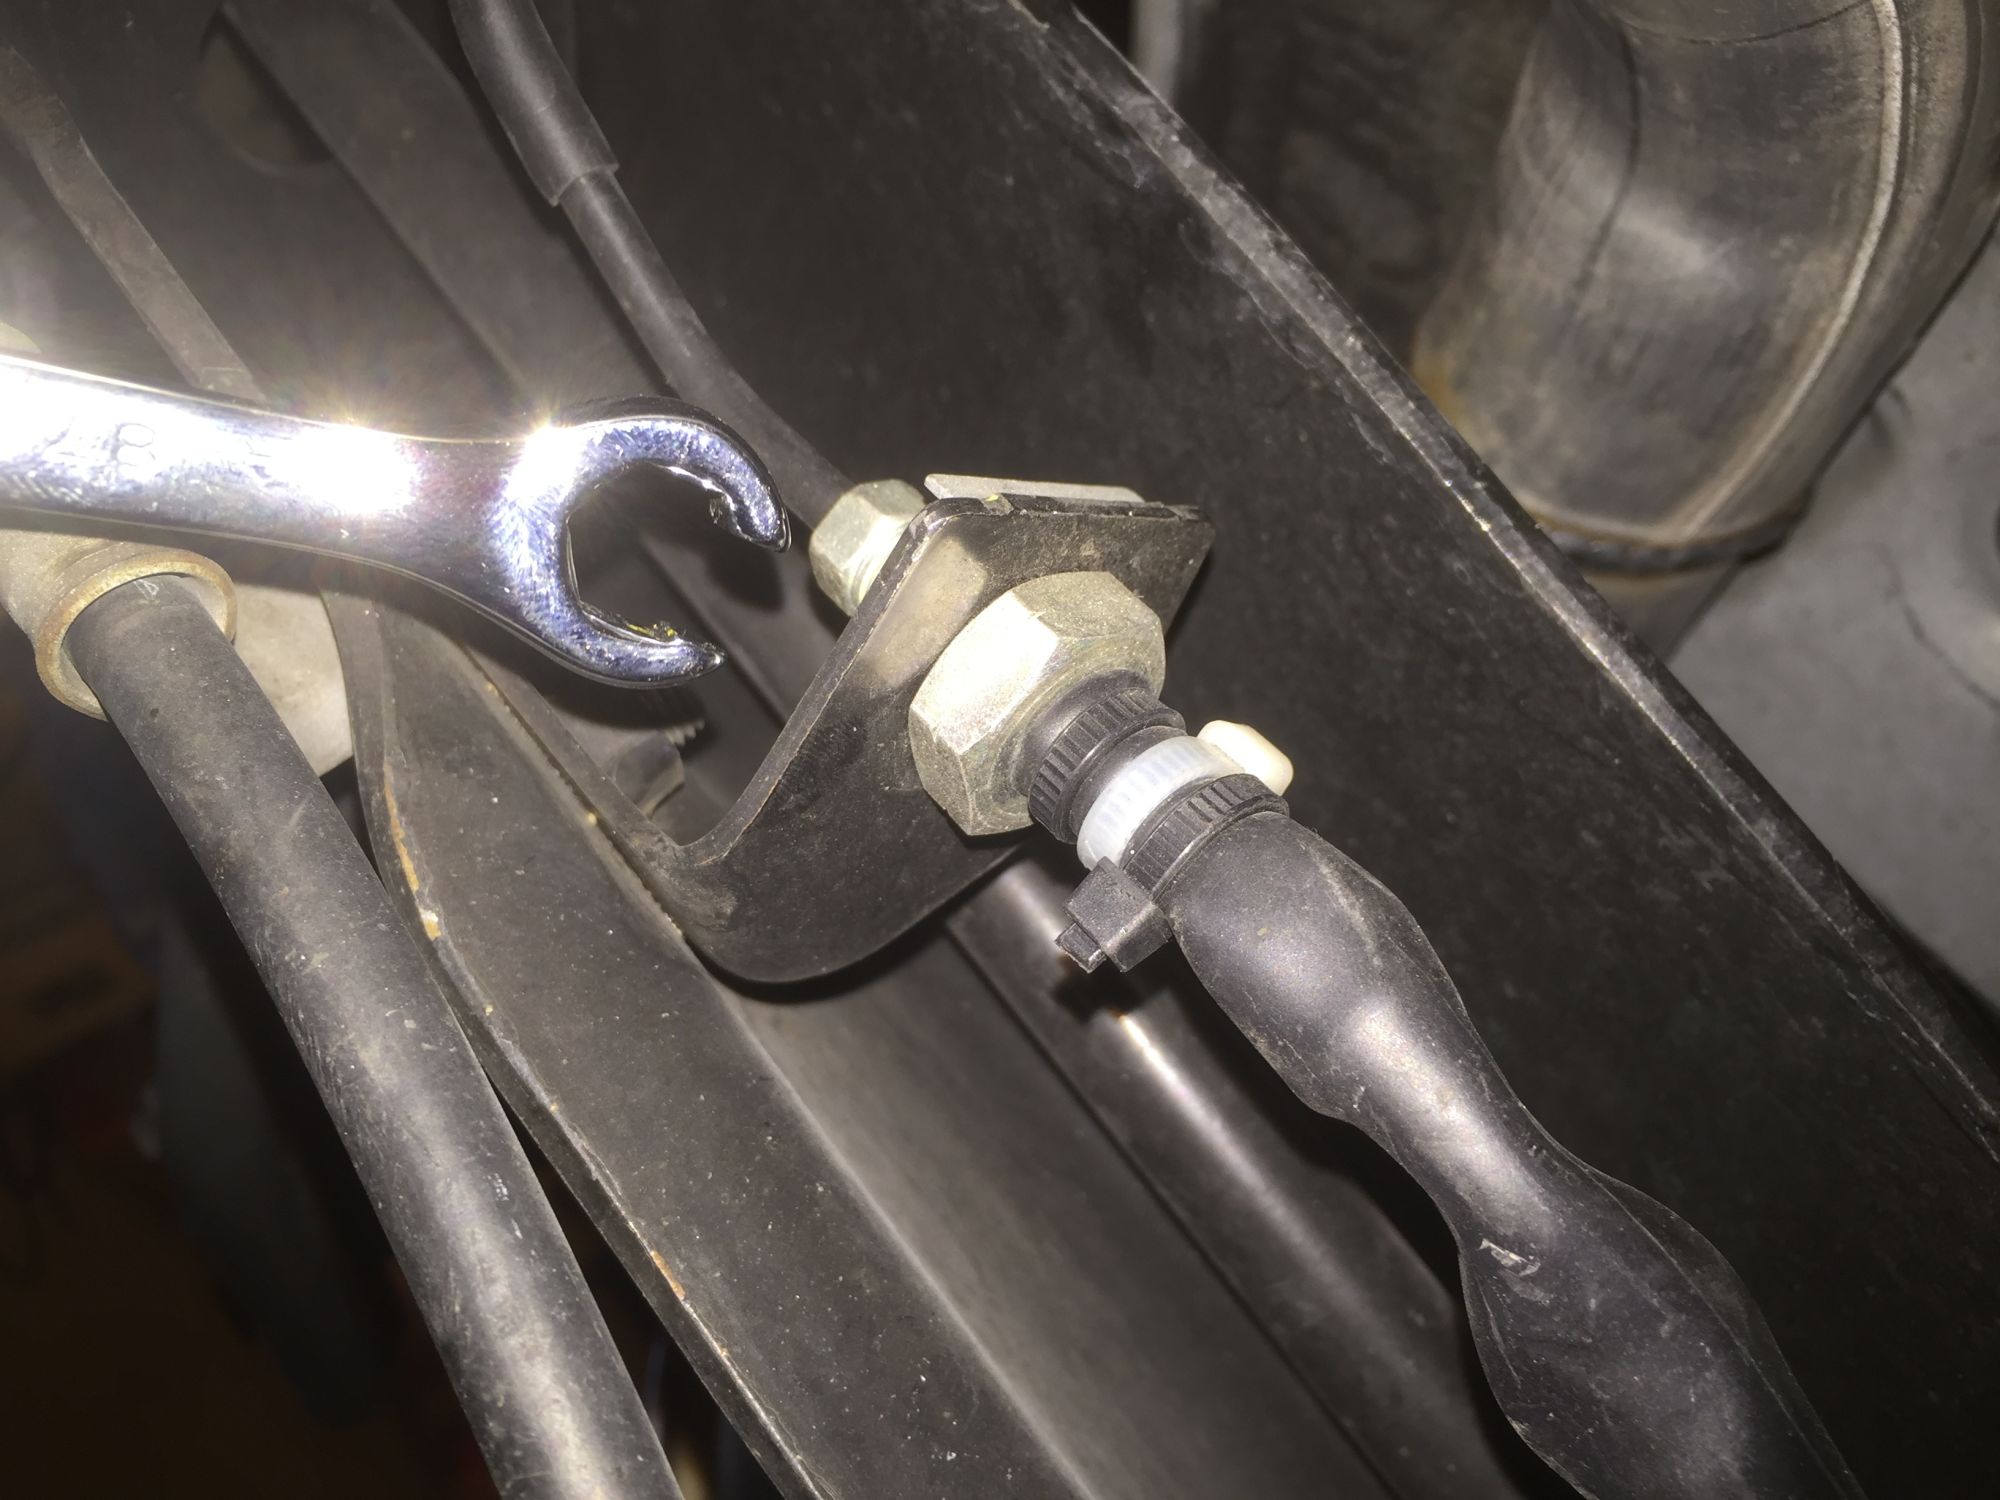
Prepare a pan to catch the dripping brake fluid then remove the brake pipe from the brake hose:
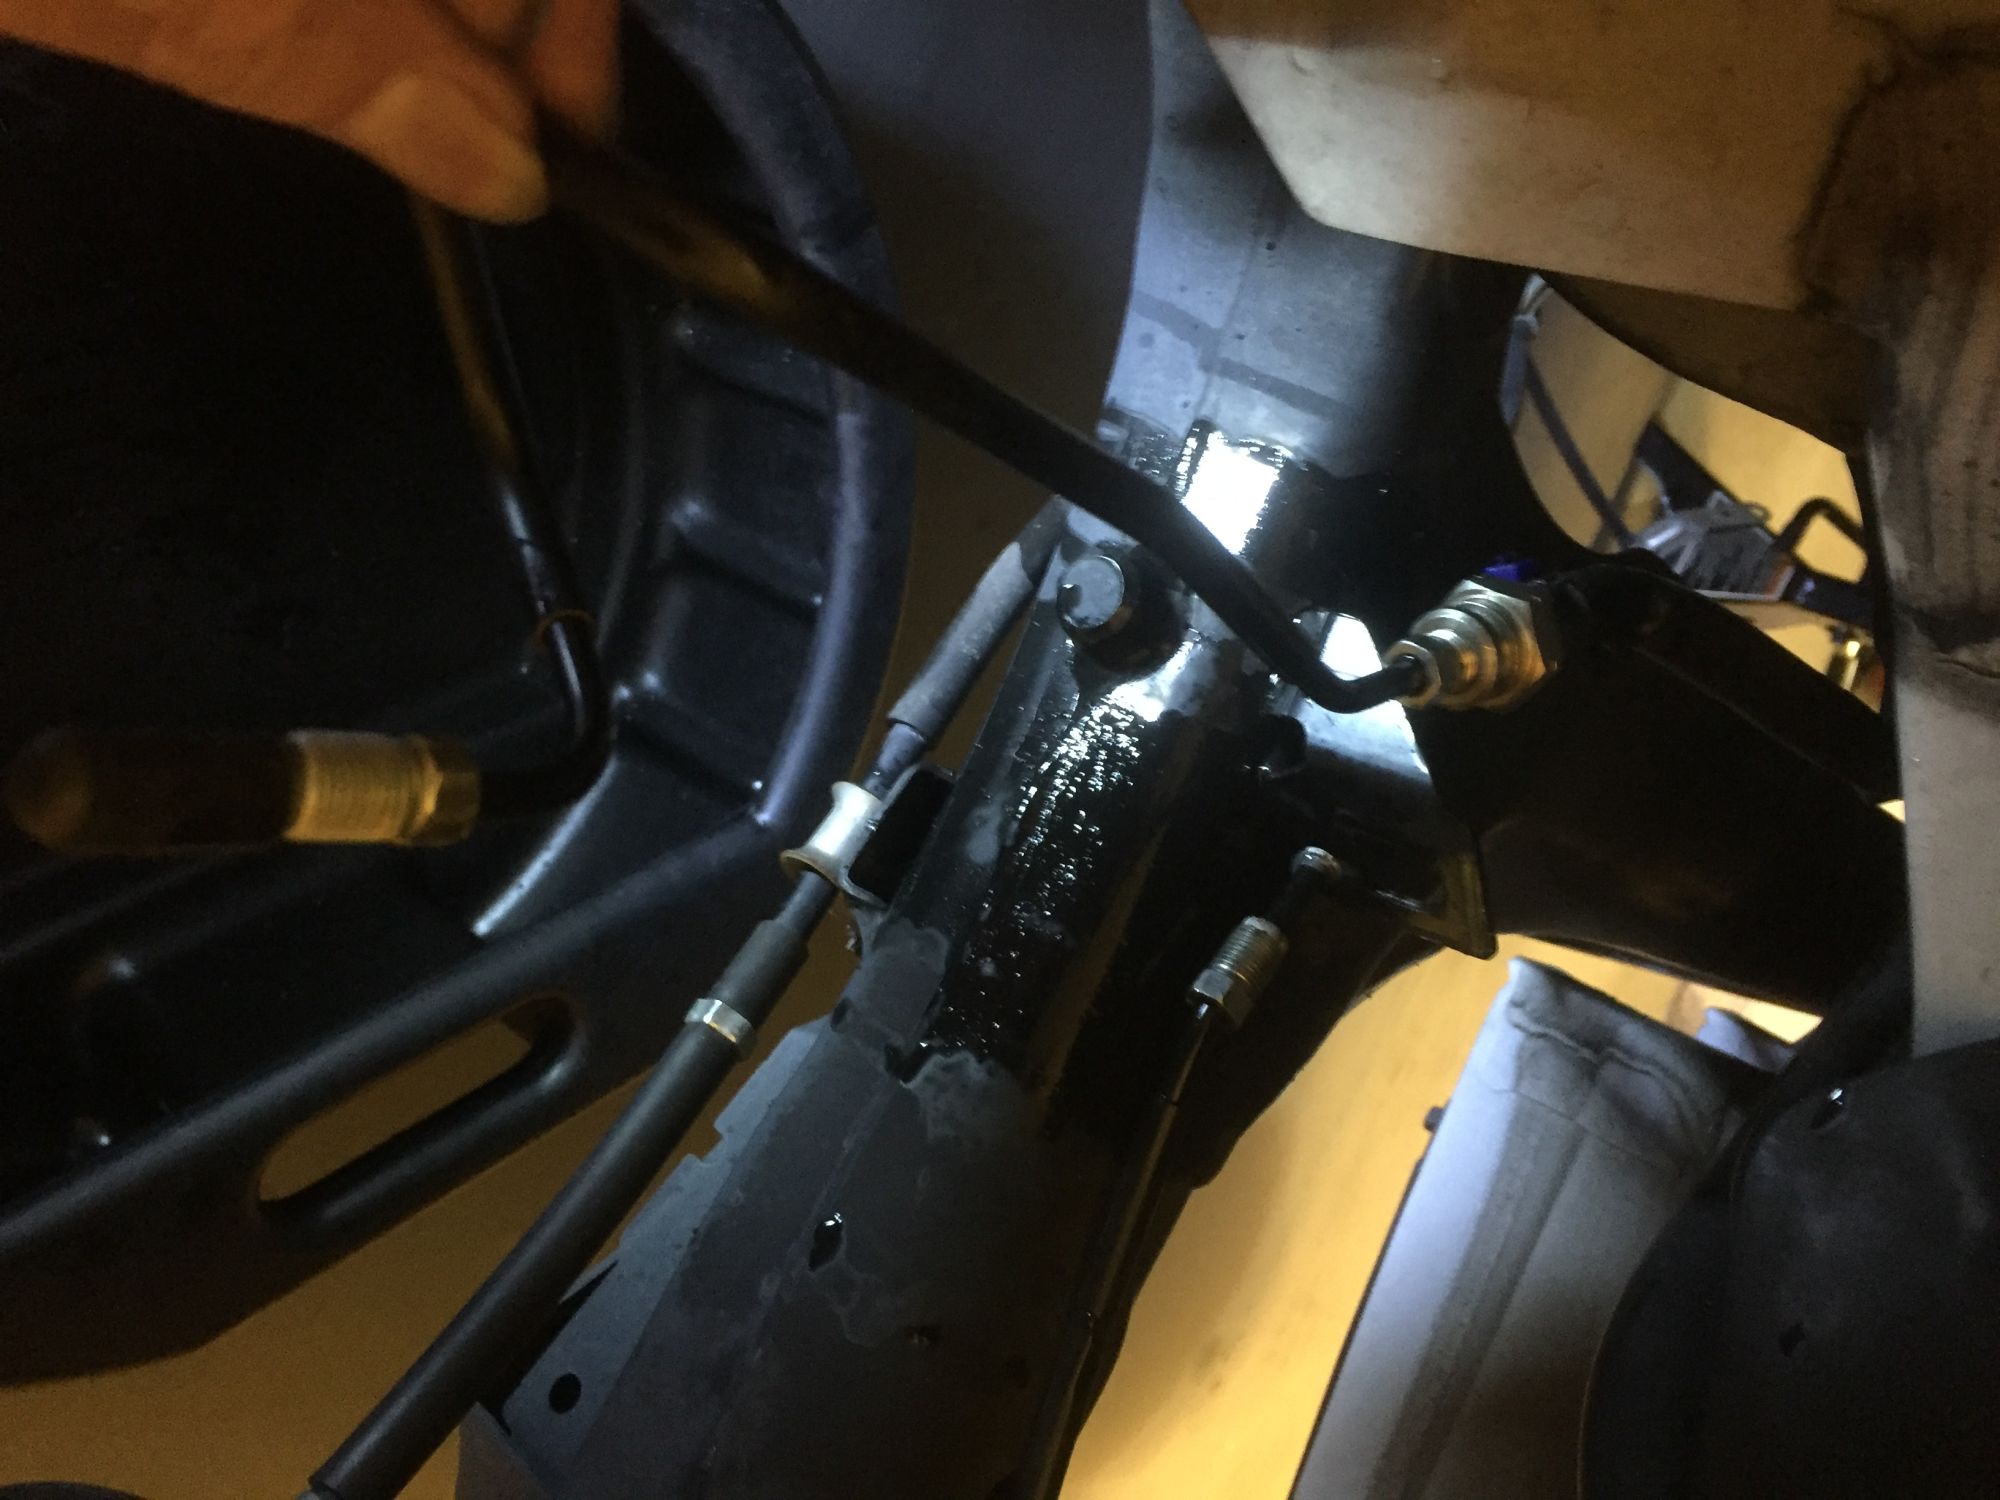
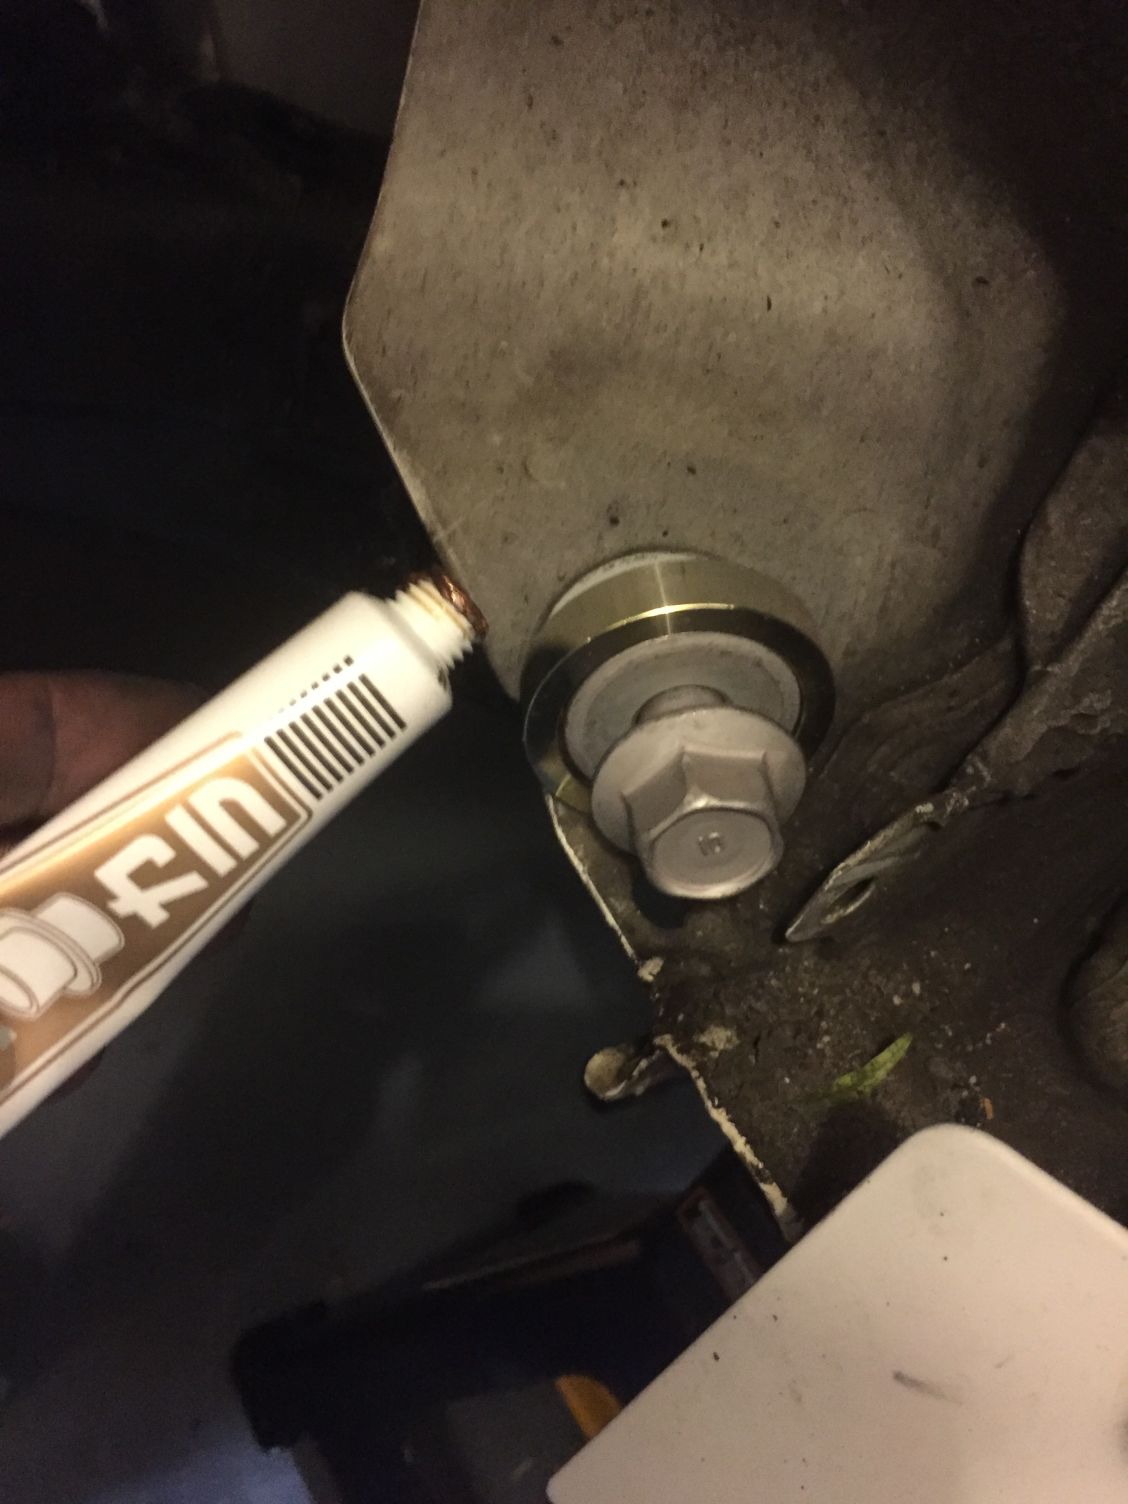
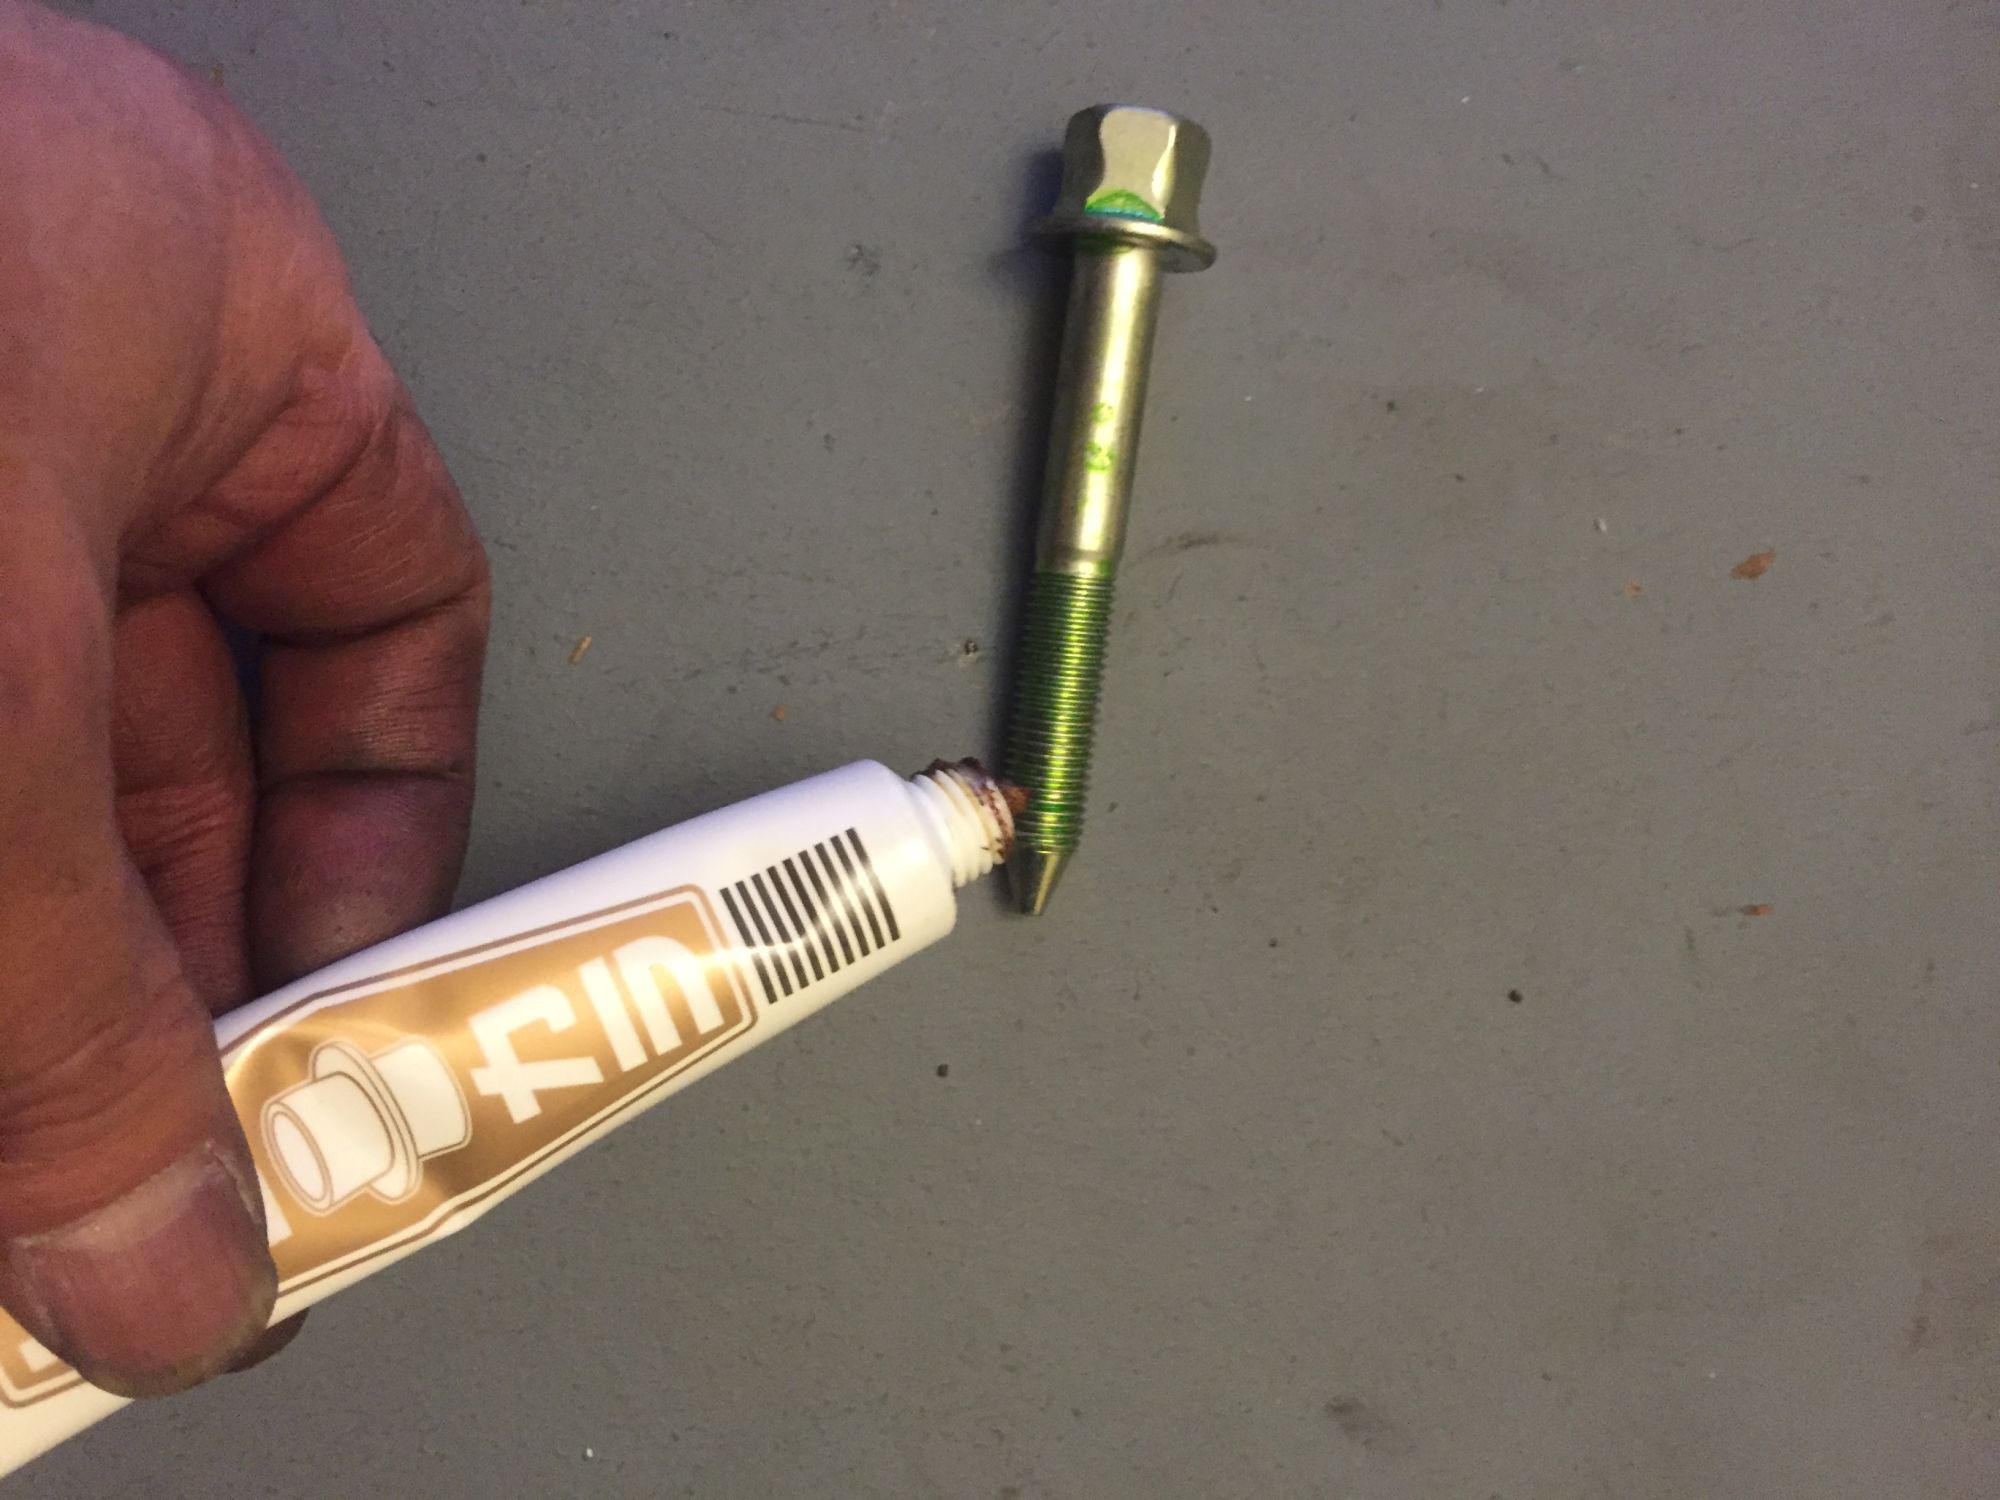
Remove the plastic clip and then remove the main bolt holding the rear axle,
then lower the rear axle, after that then remove the two bolt connecting the rear axle to the rear shocks and the rear axle is now free.
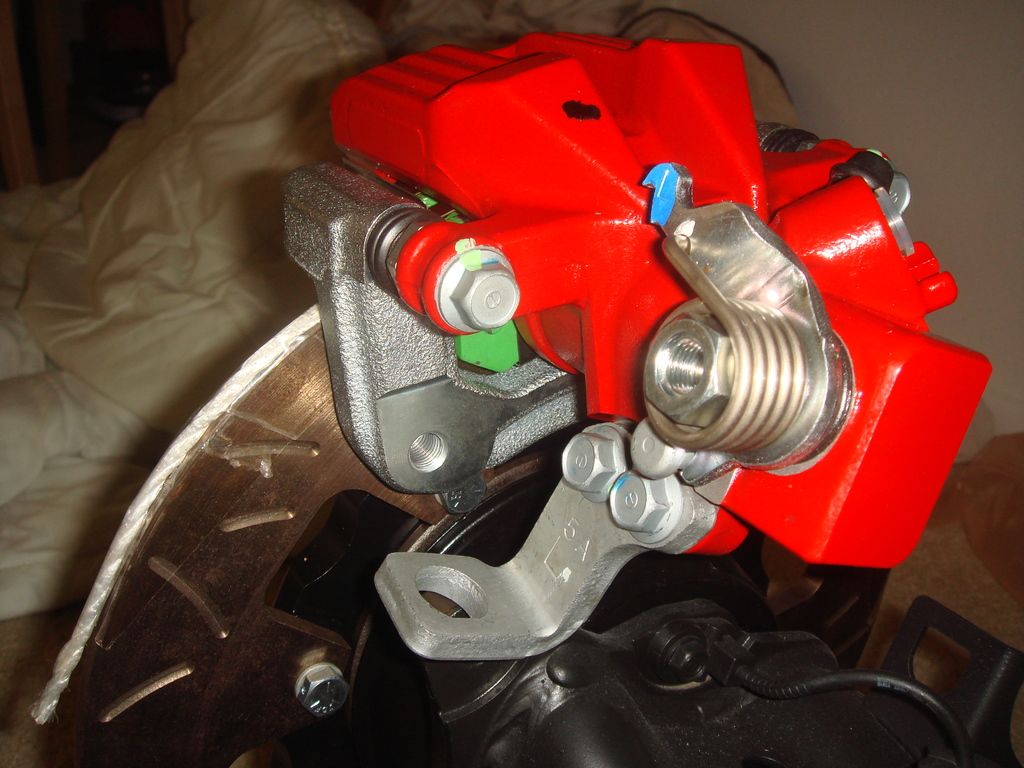
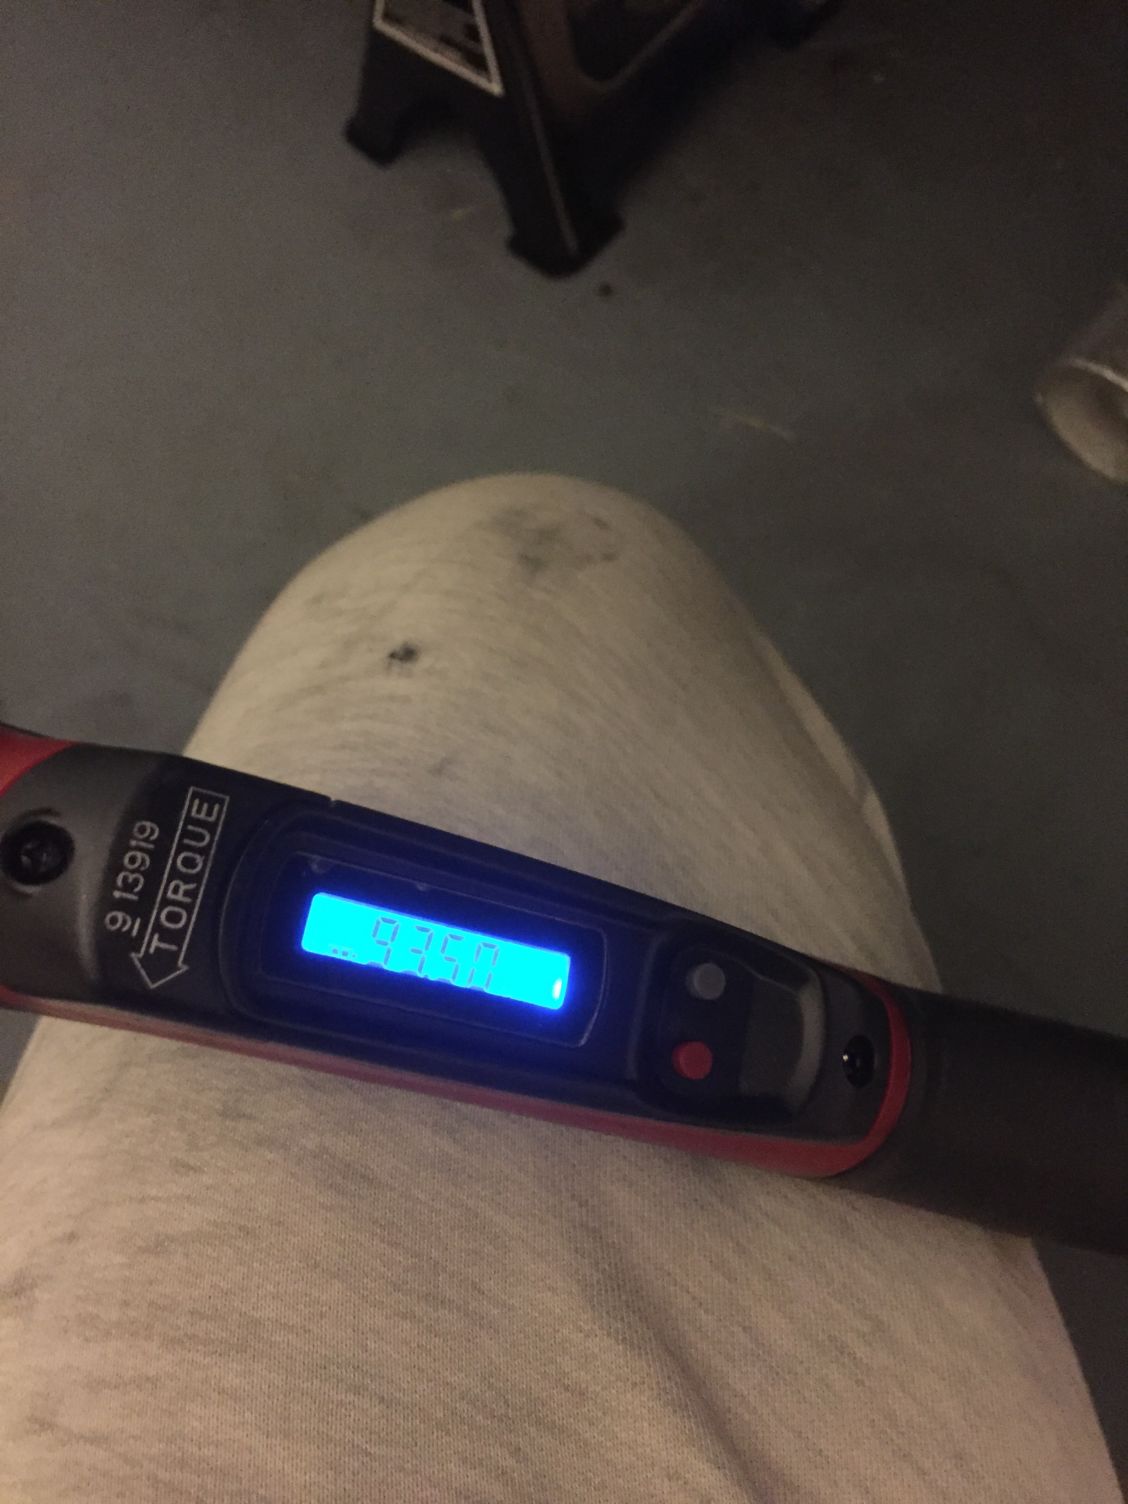
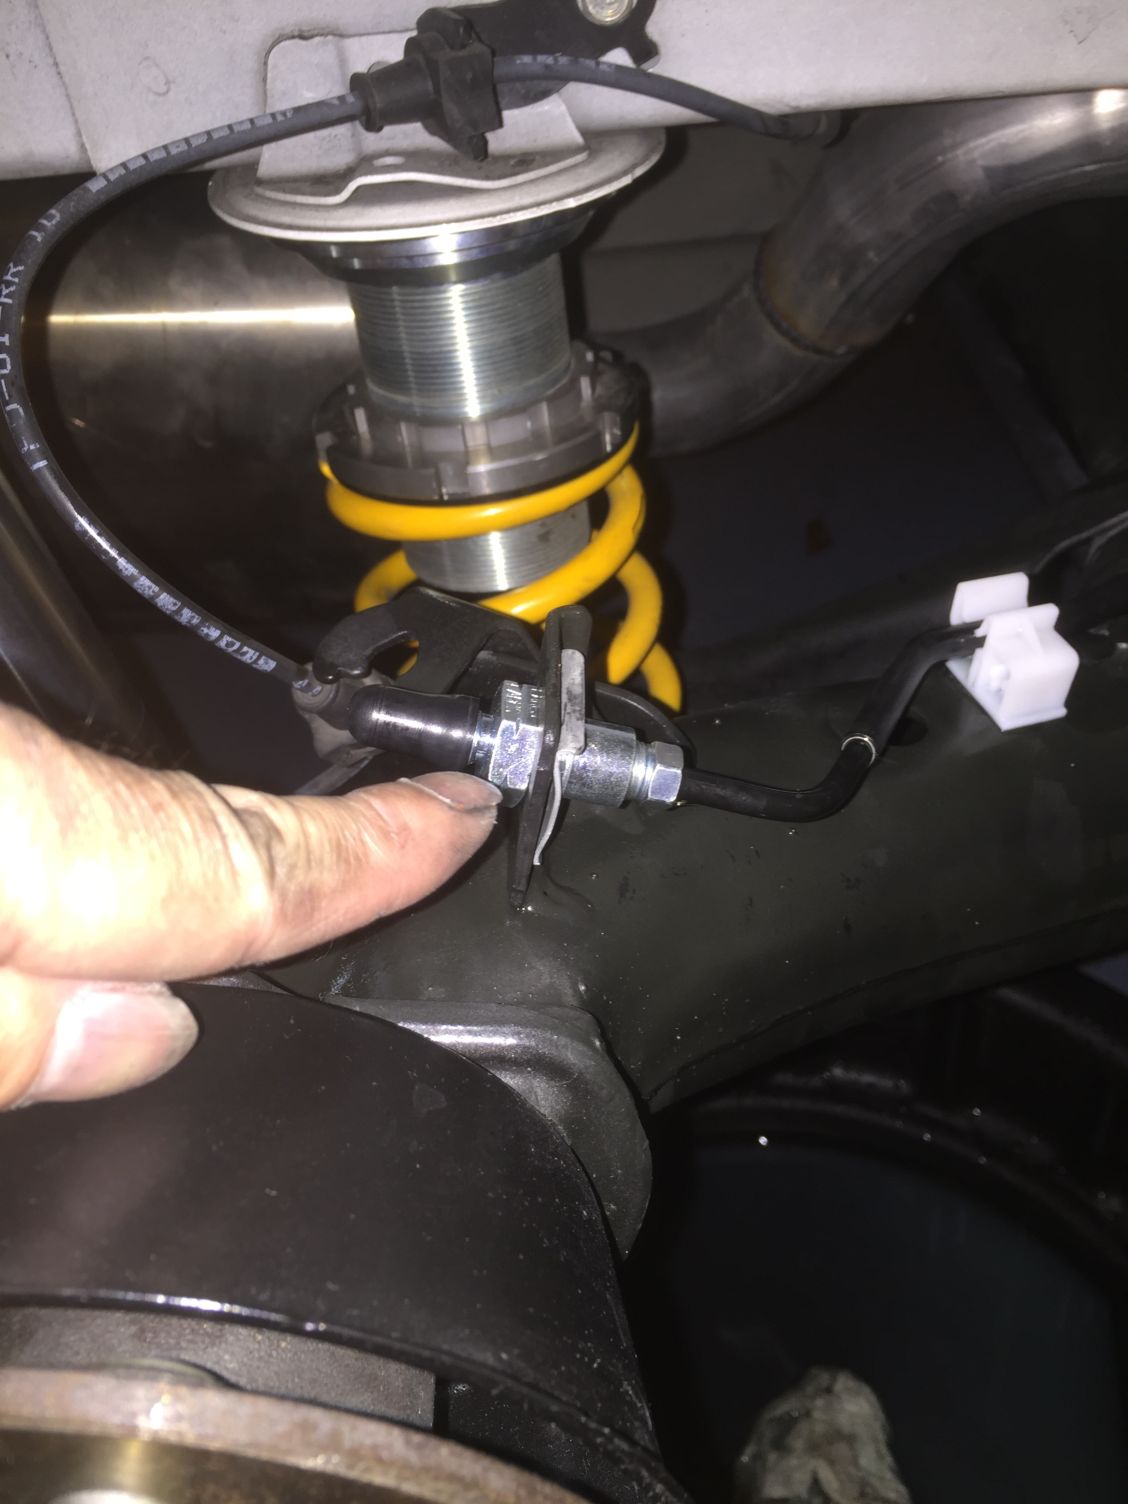
install the new axle back and put some grease on the bolt then attached the spoon rigid collar and tighten it to 93nm:

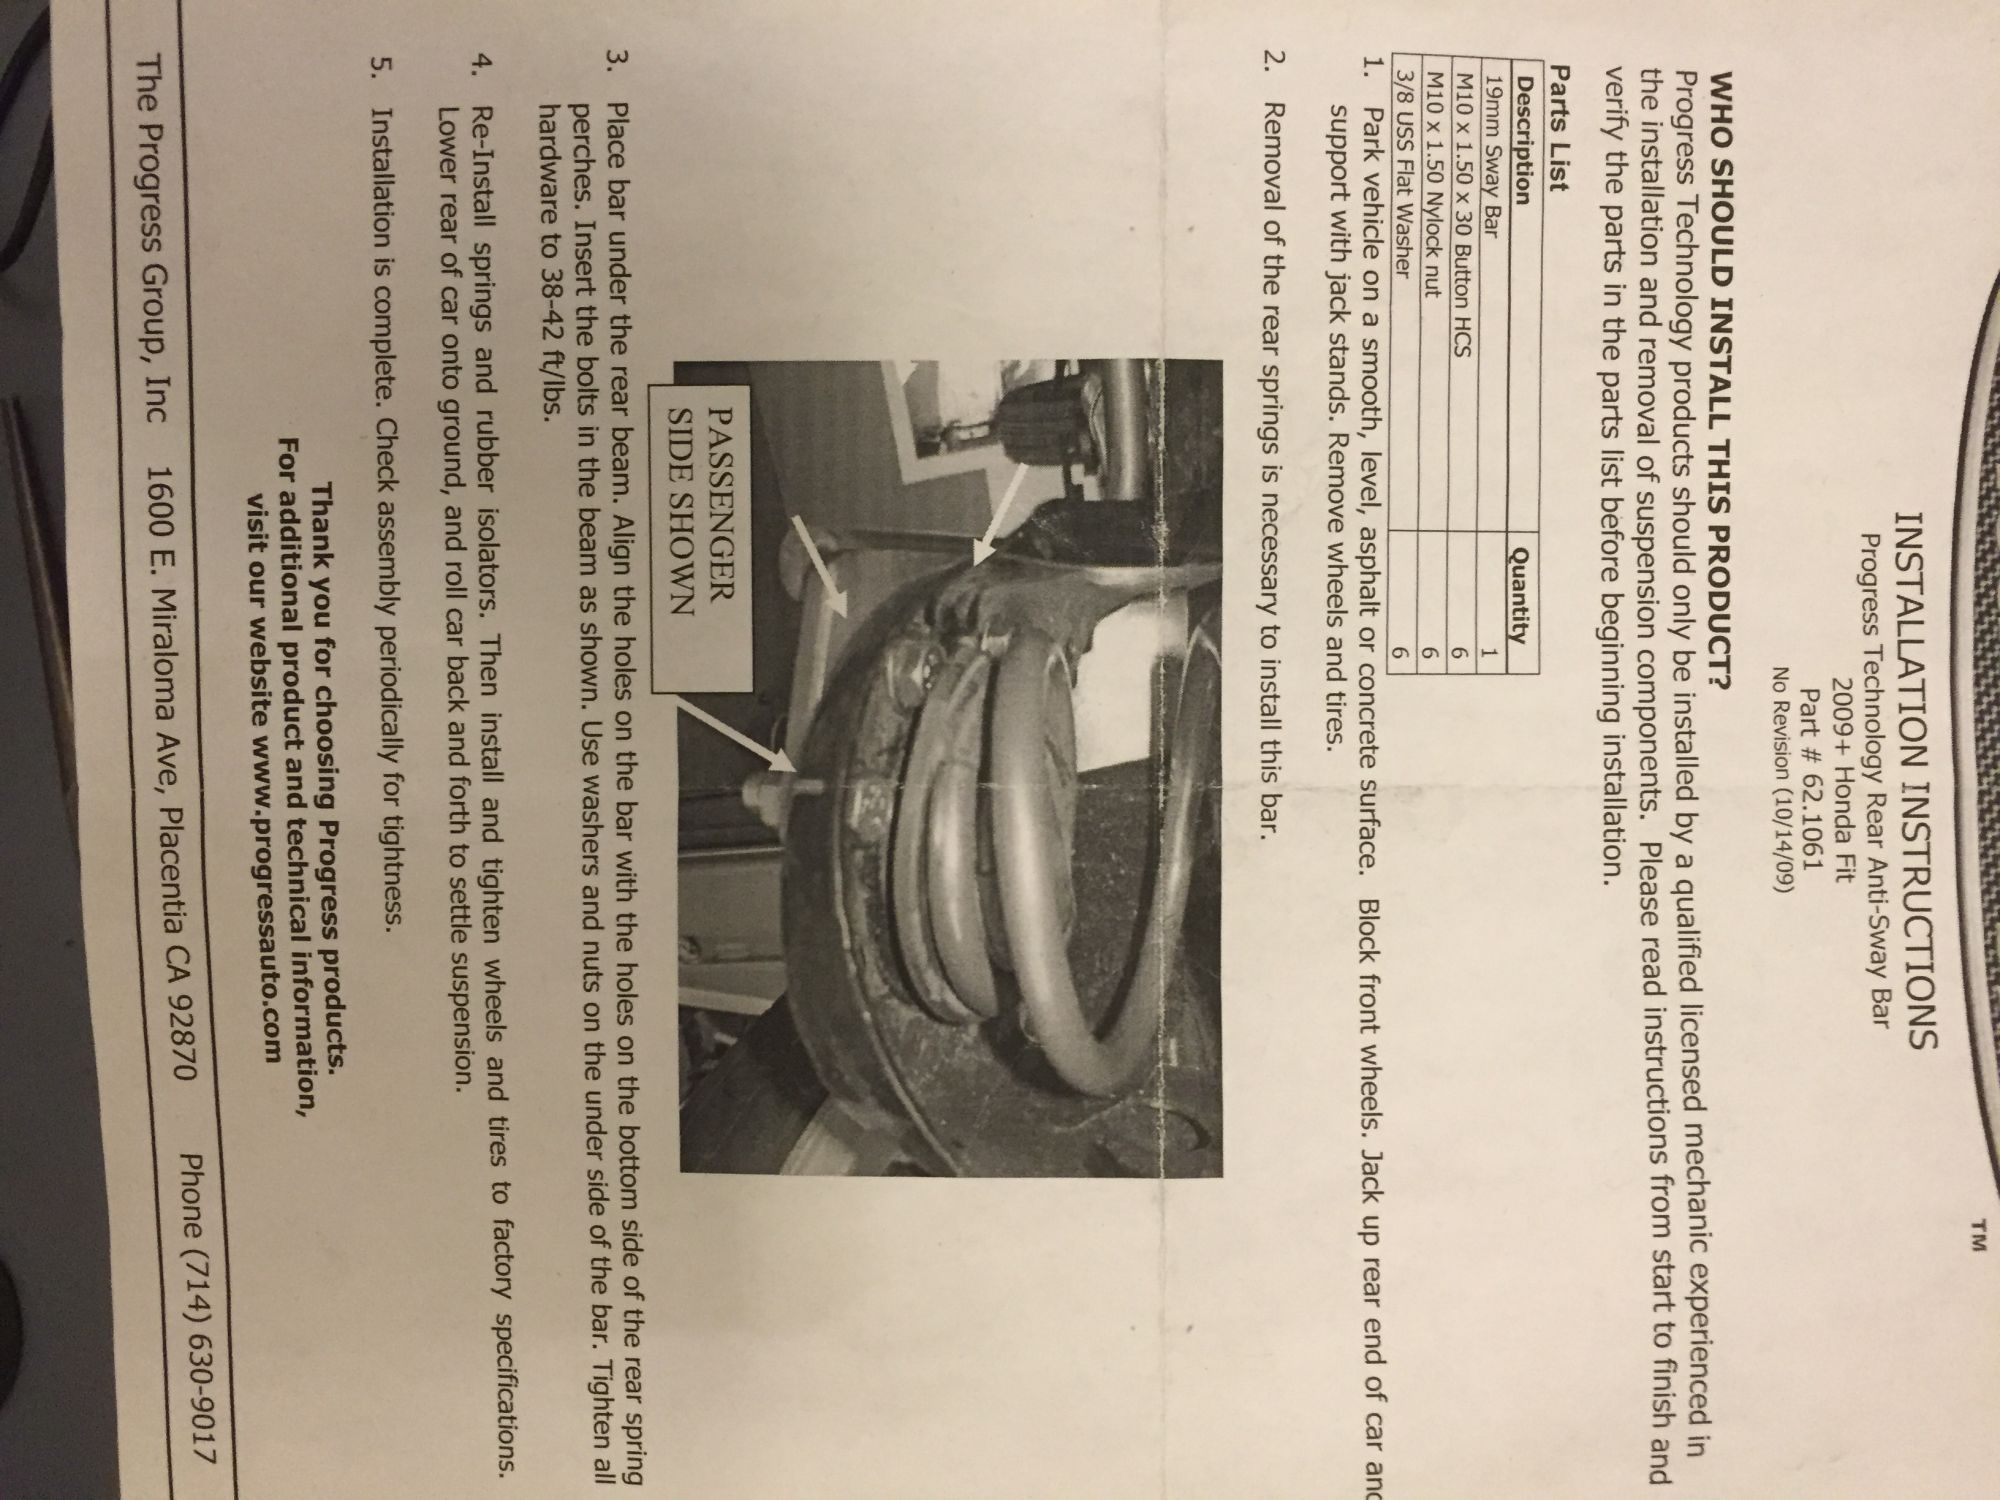
Install back the Progress rear sway bar and tighten it according to Progress manual:
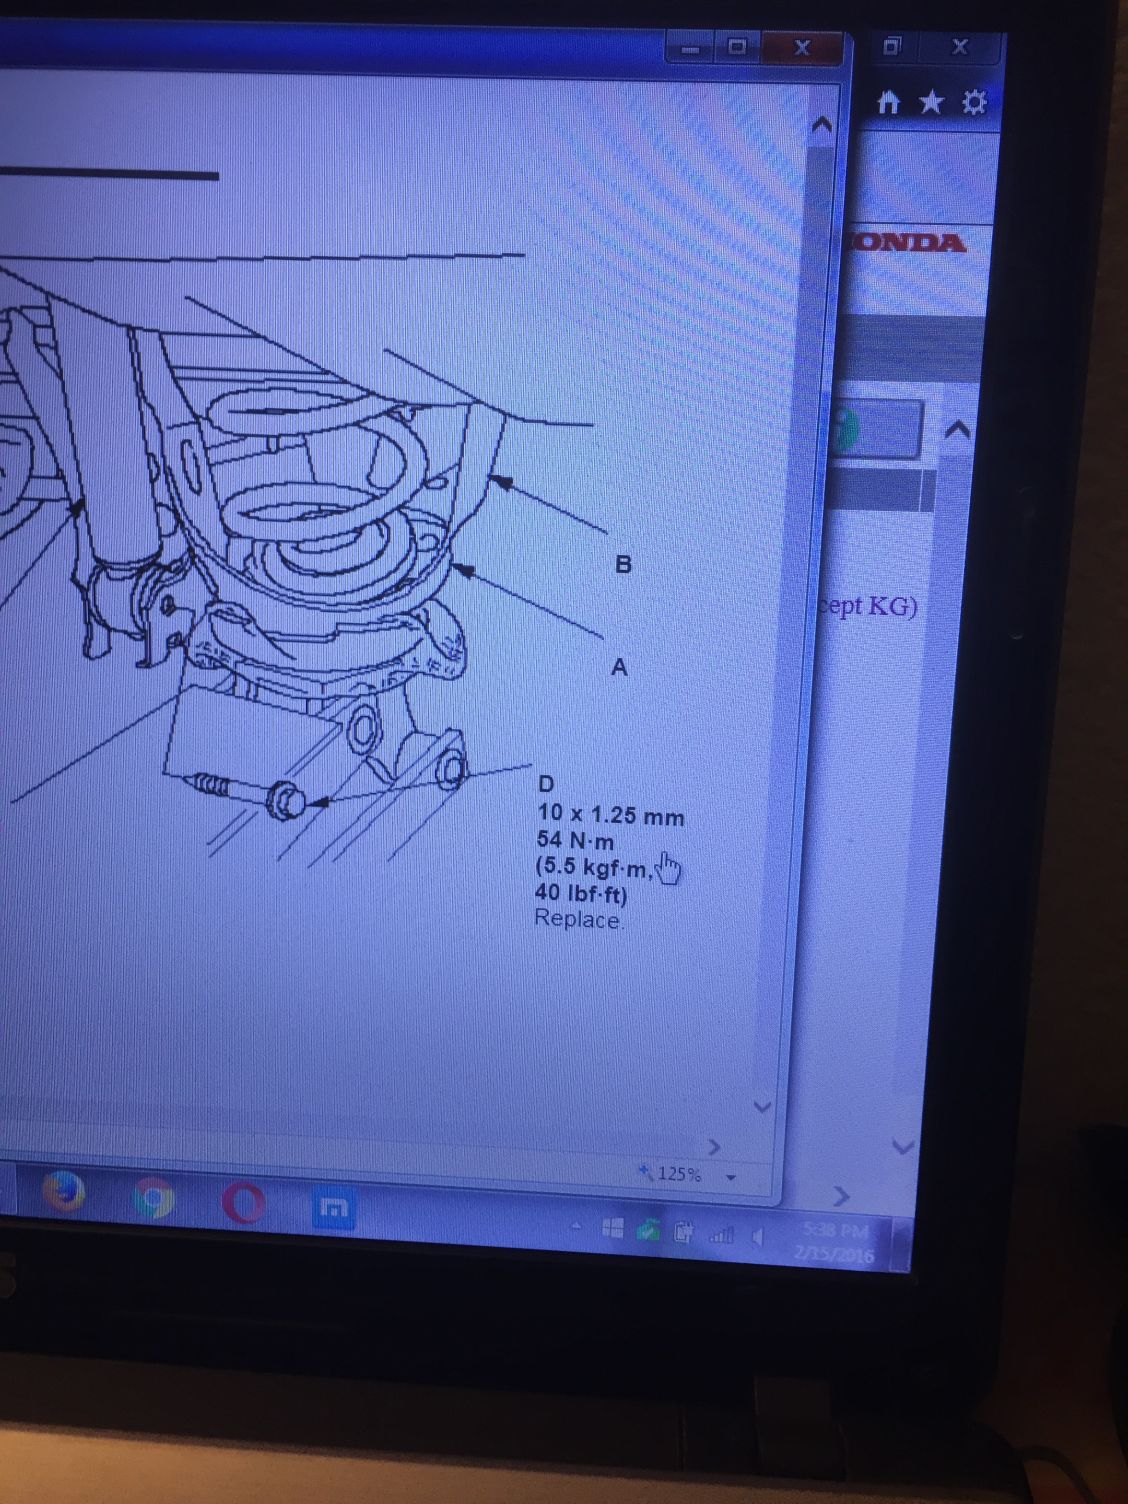
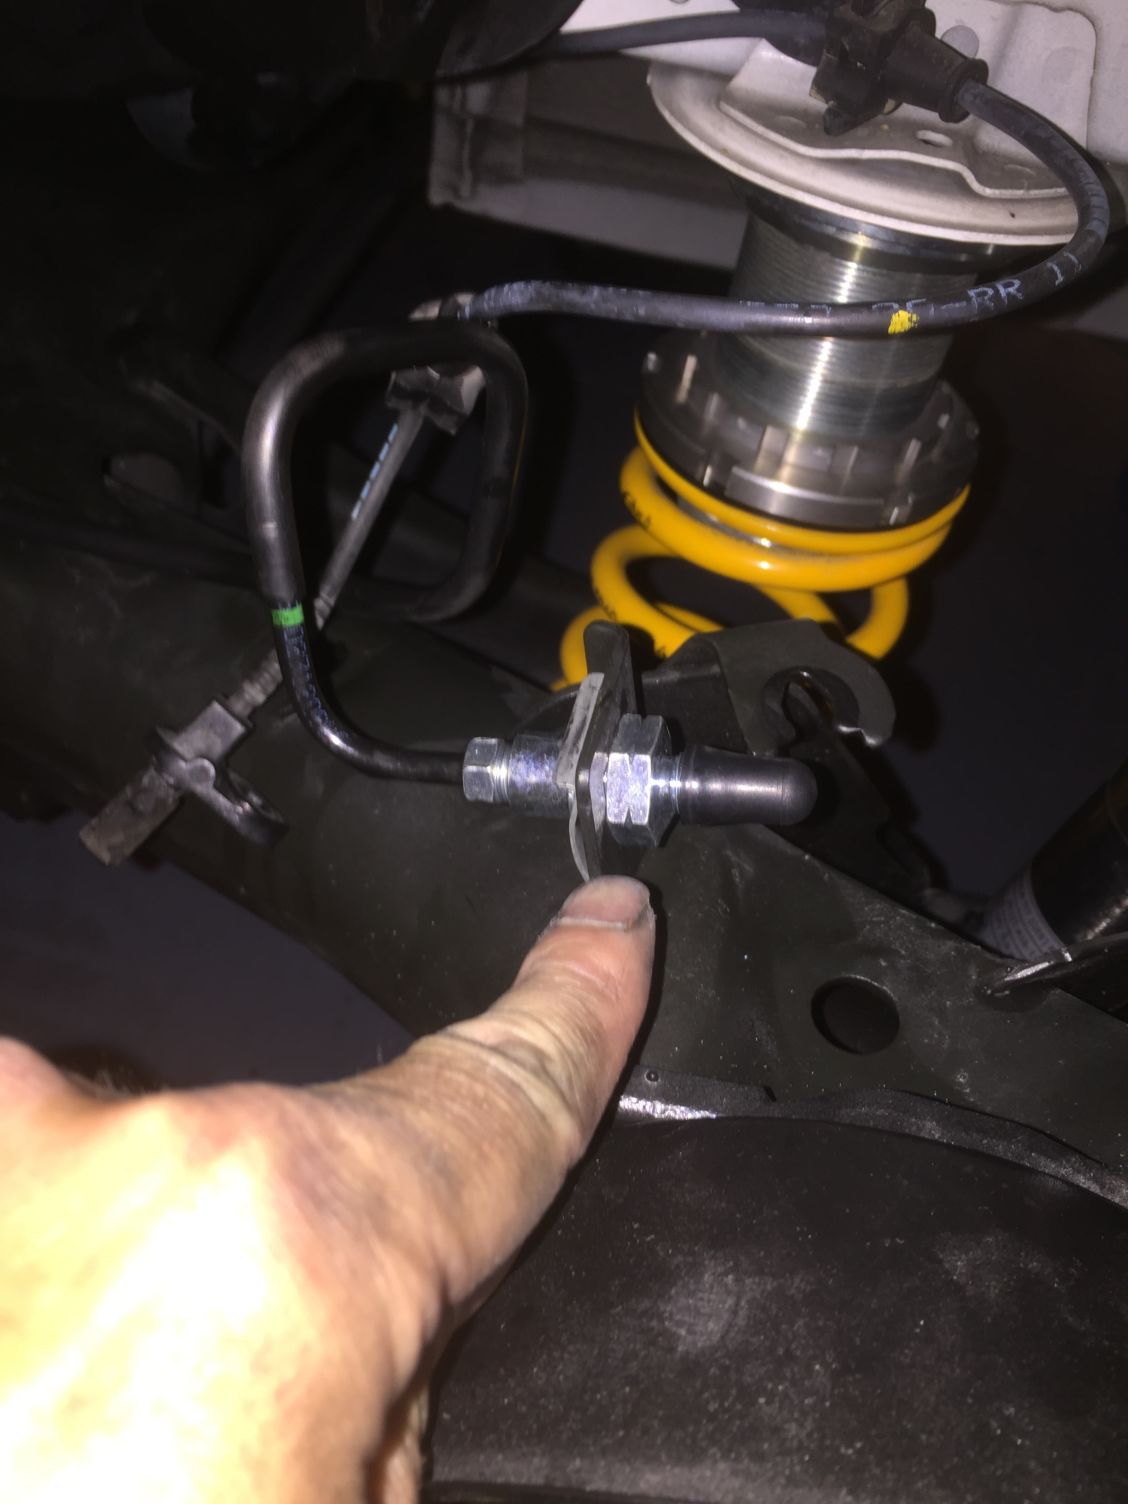
Tighten the bolt to the shock absorber:
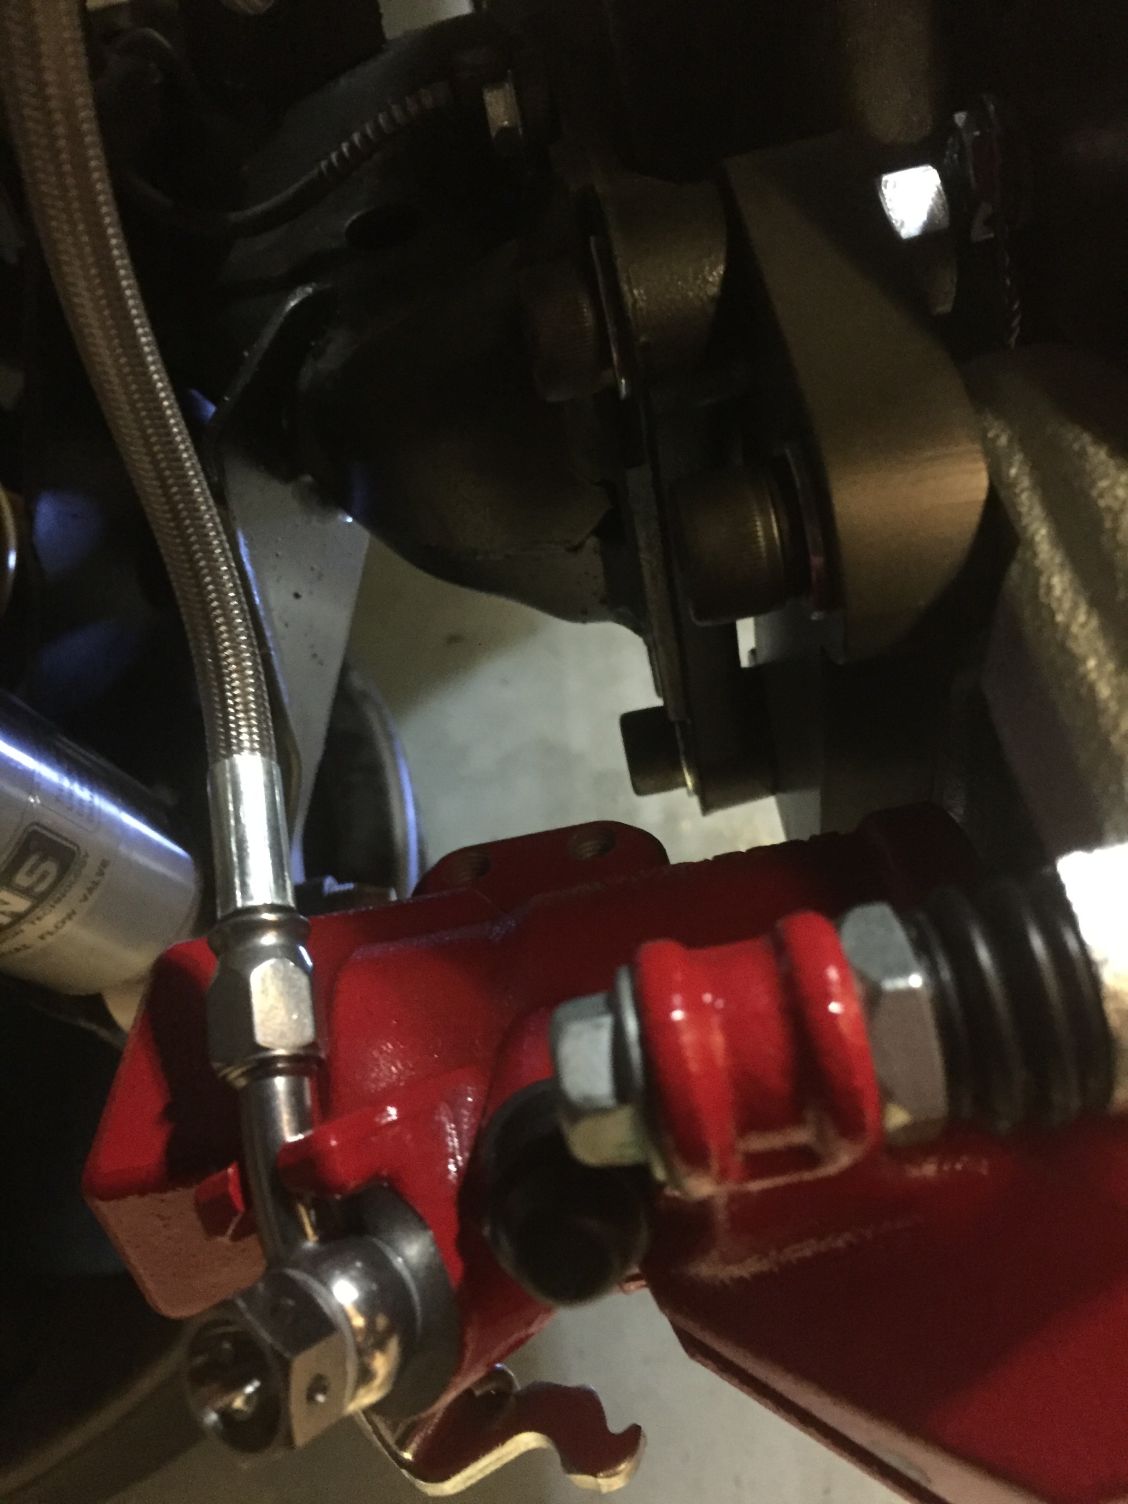
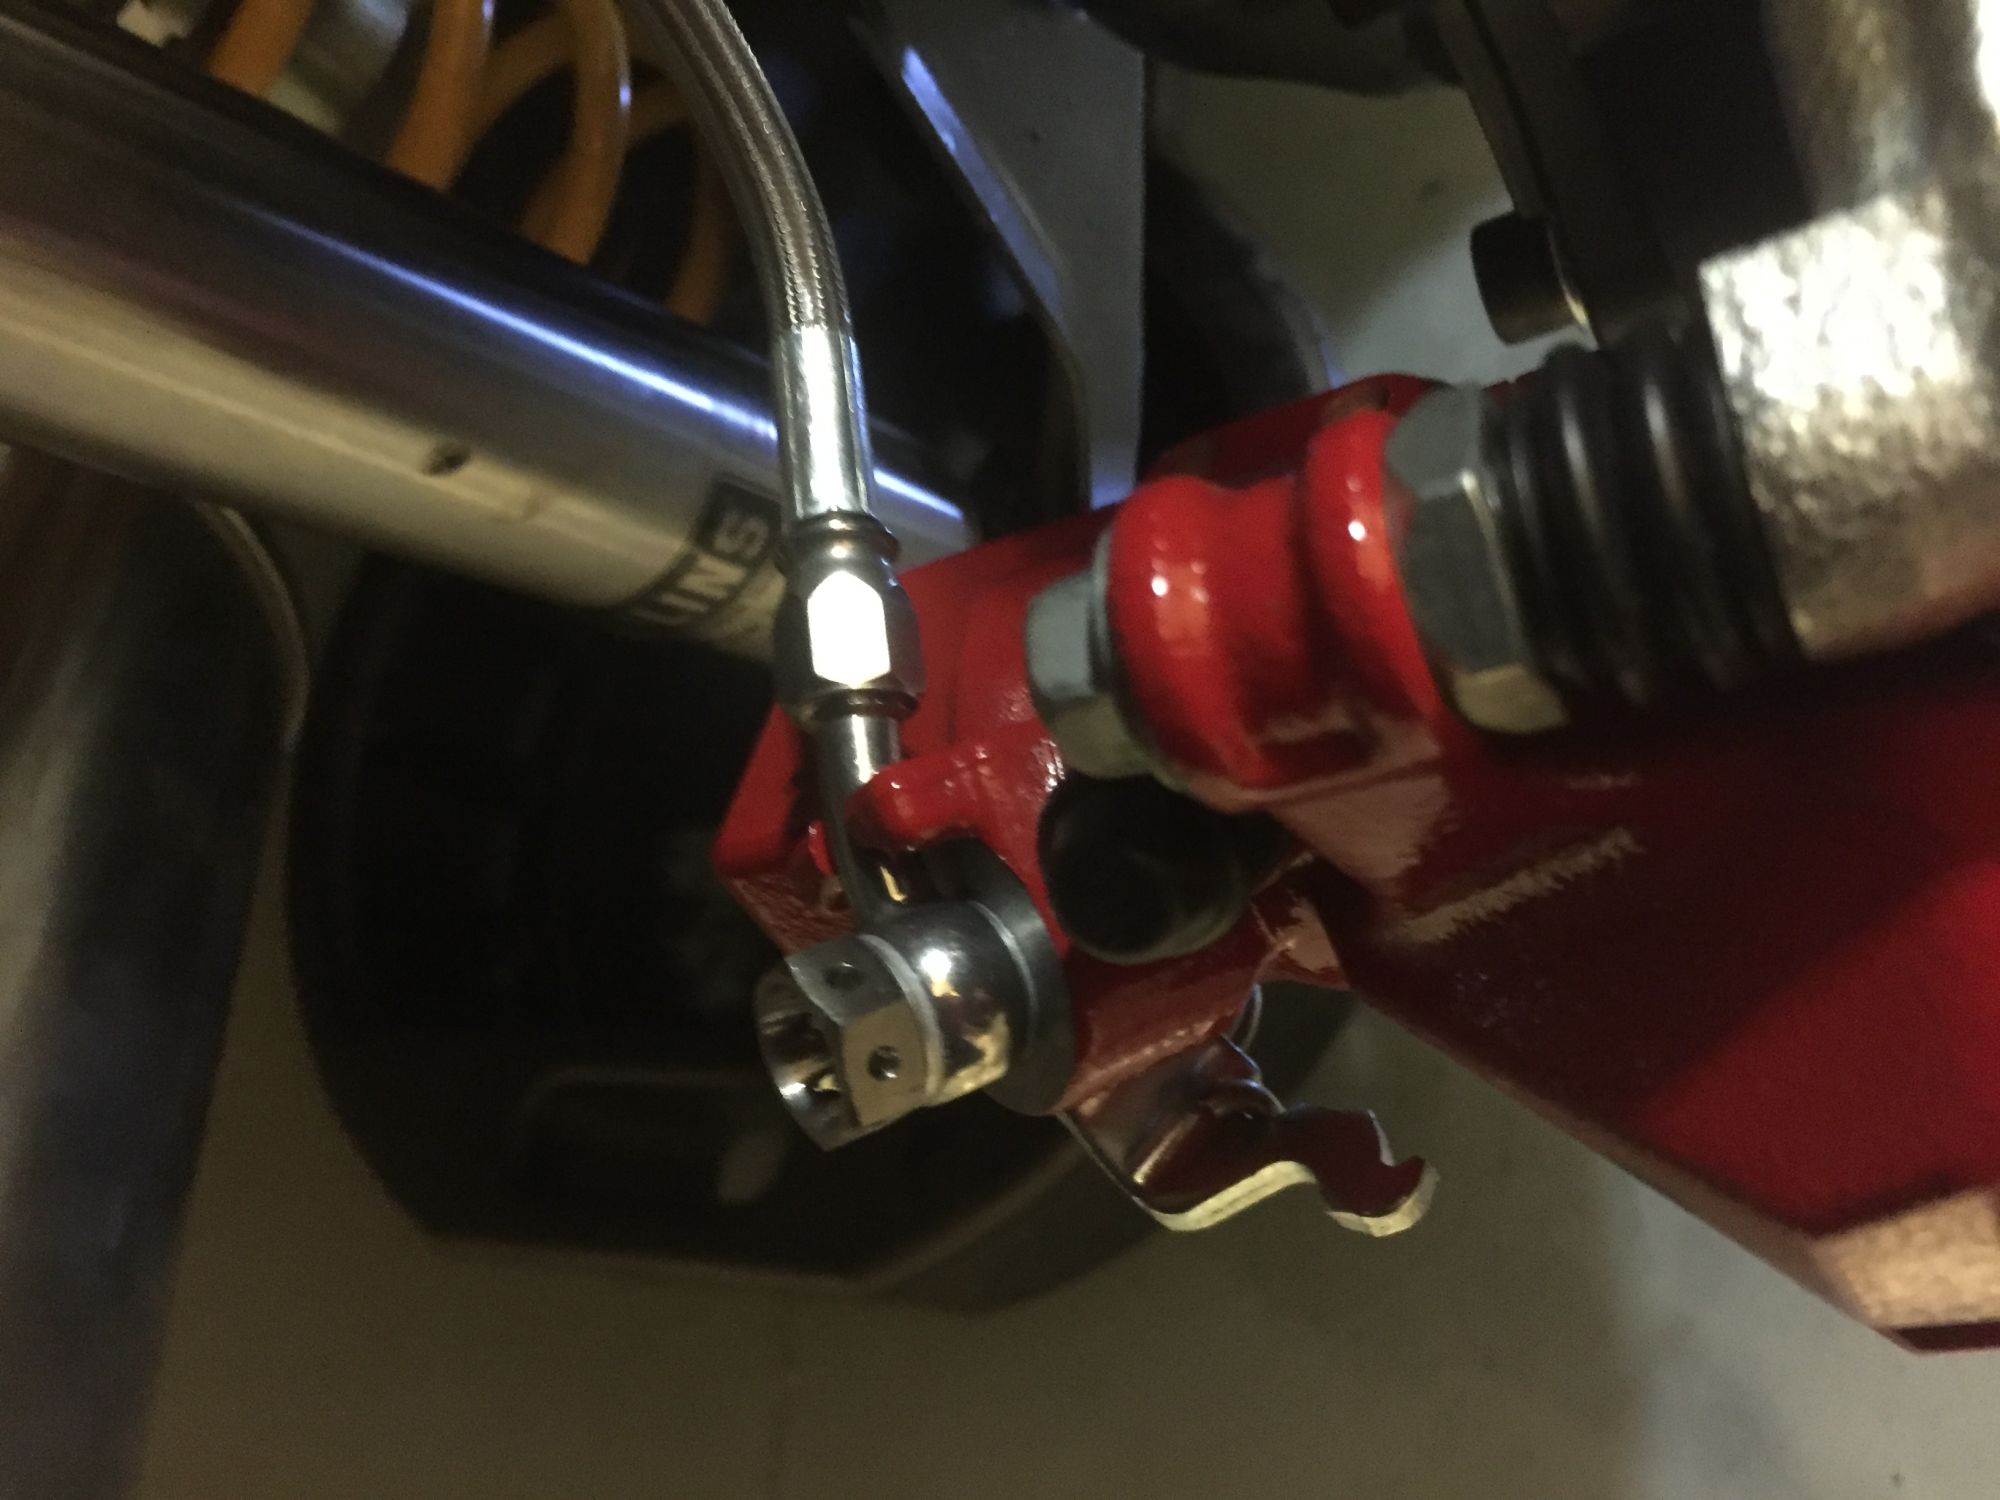
Connect all the brake pipe and hoses:
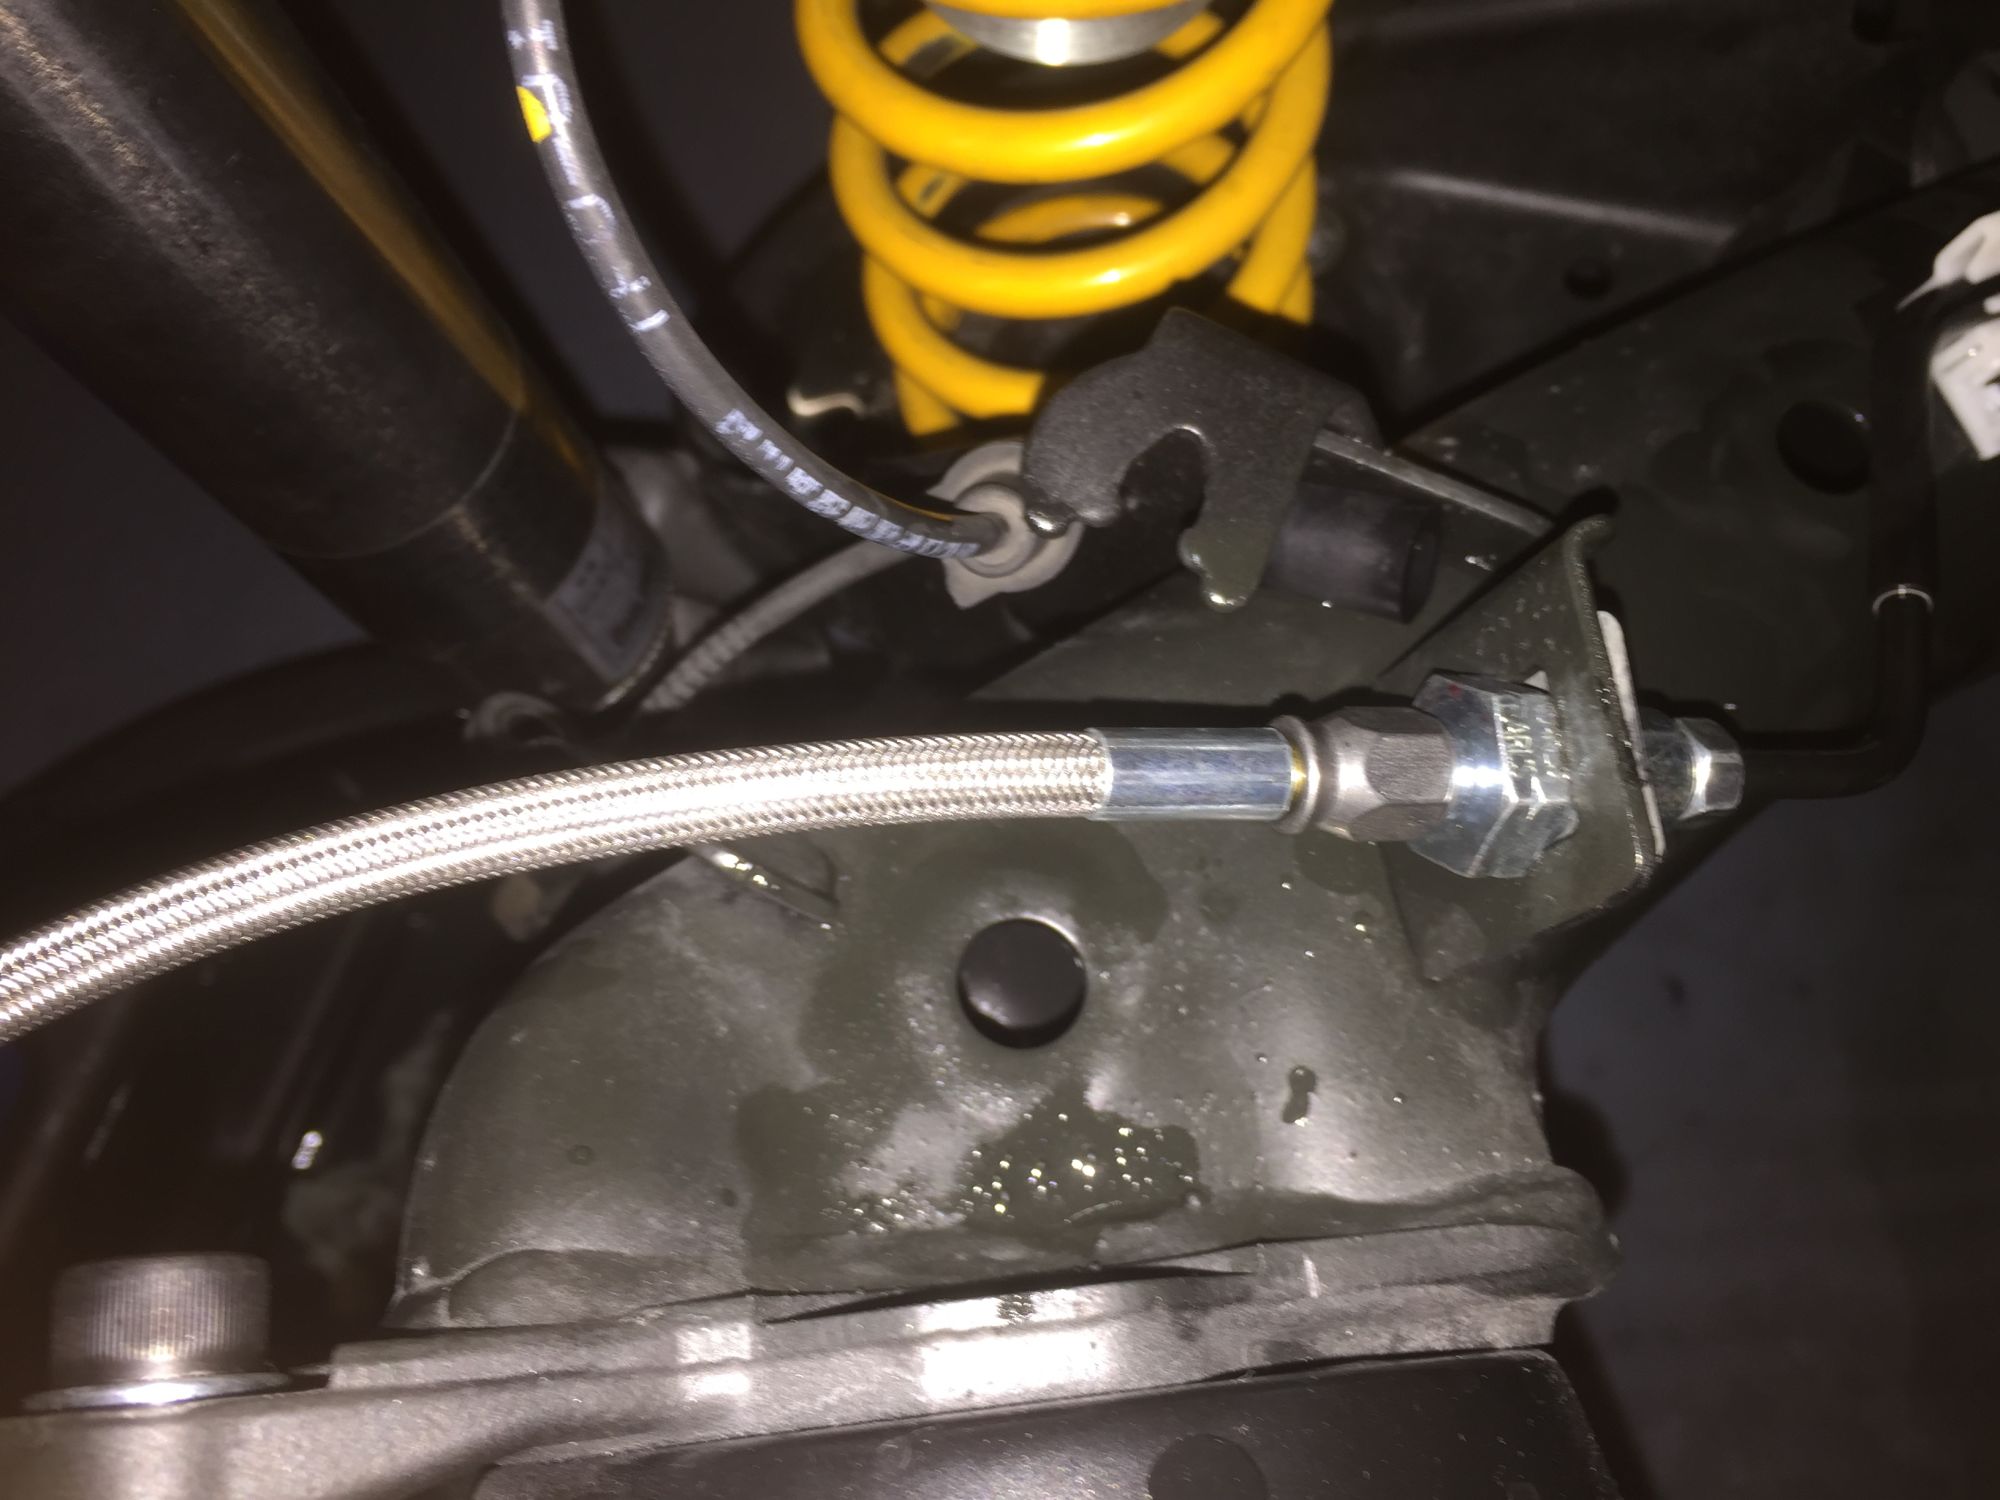
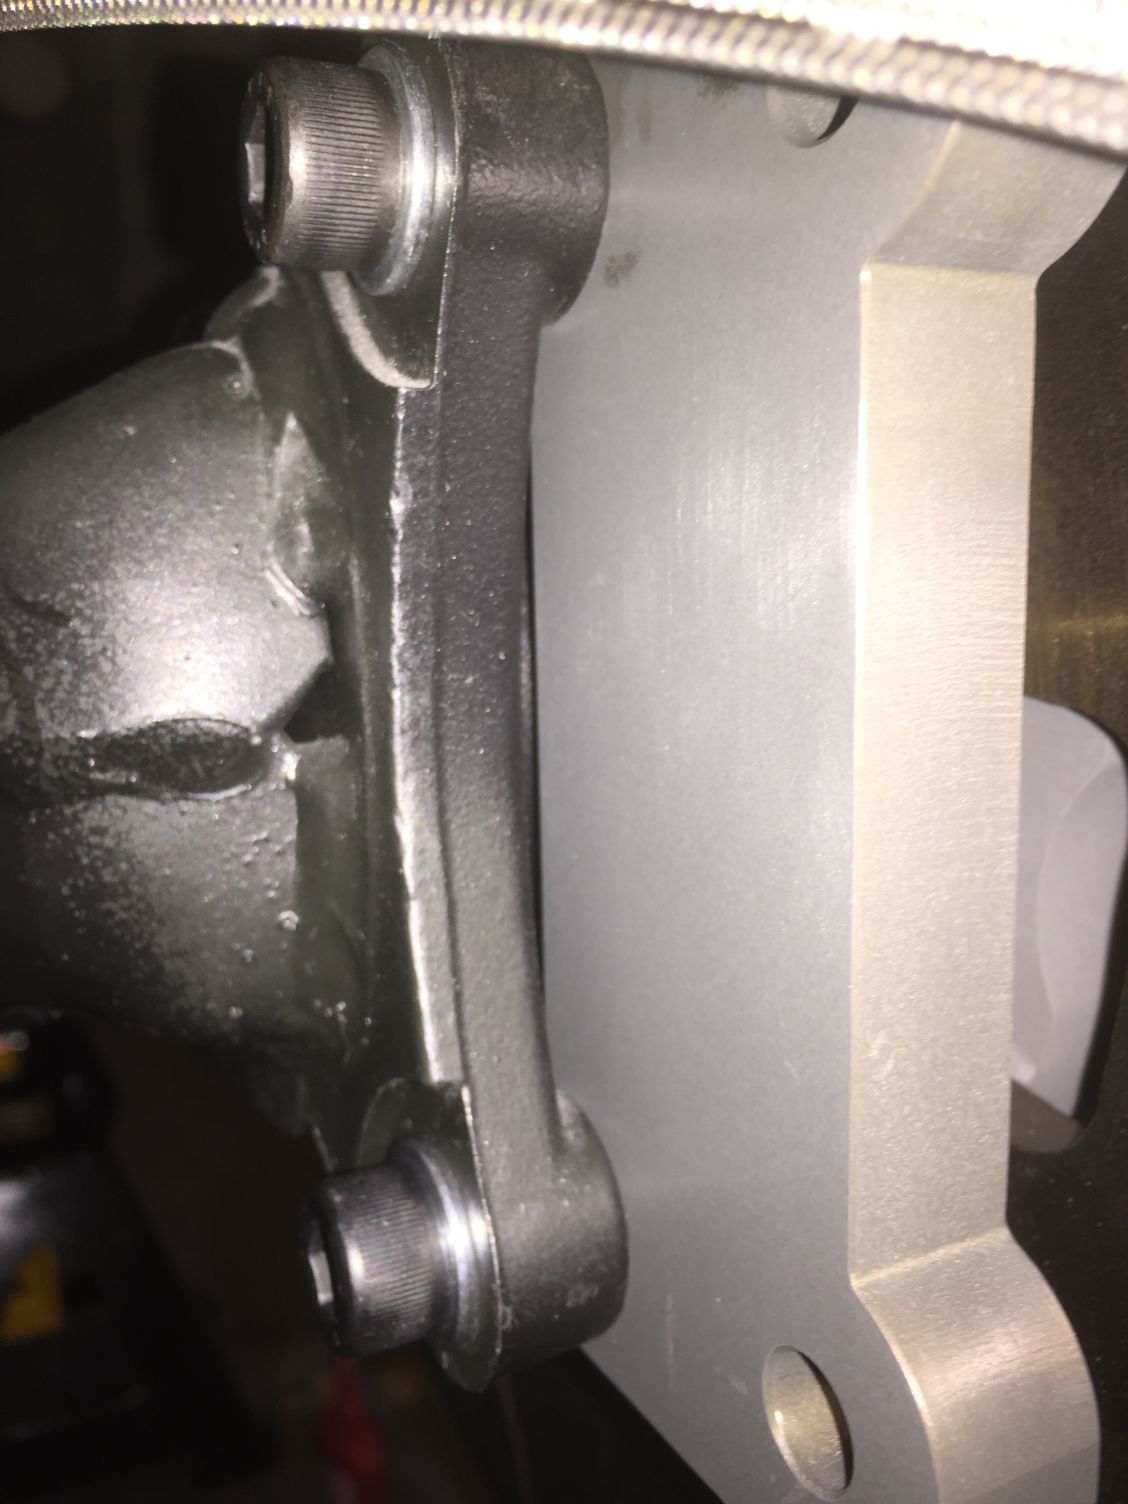
Install the bracket, tighten the bolt that hold the bracket to the axle to 68nm
and tighten the bolt that hold the caliper to the bracket 58nm,
install the rotor and hat assy:
Install the 15mm spacer and the wheel,...
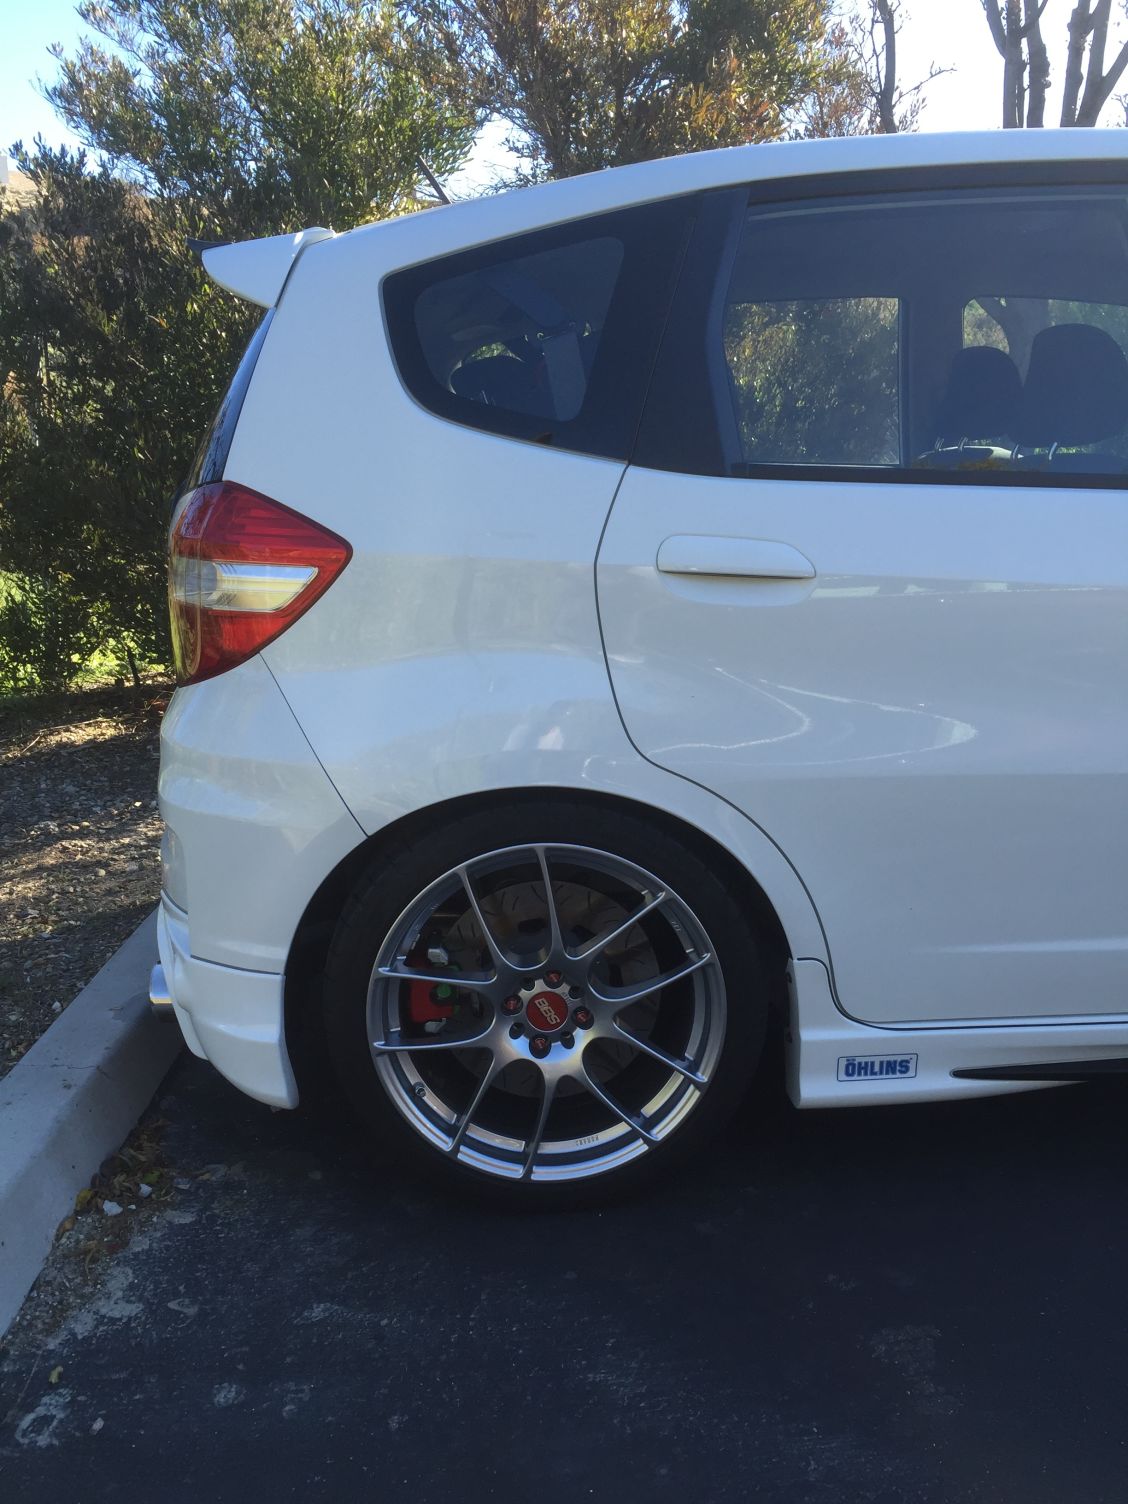
and the pictures after it is finished:
release the parking brake cable from the puller mechanism, then pull it from under the car
Prepare a pan to catch the dripping brake fluid then remove the brake pipe from the brake hose:
Remove the plastic clip and then remove the main bolt holding the rear axle,
then lower the rear axle, after that then remove the two bolt connecting the rear axle to the rear shocks and the rear axle is now free.
install the new axle back and put some grease on the bolt then attached the spoon rigid collar and tighten it to 93nm:
Install back the Progress rear sway bar and tighten it according to Progress manual:
Tighten the bolt to the shock absorber:
Connect all the brake pipe and hoses:
Install the bracket, tighten the bolt that hold the bracket to the axle to 68nm
and tighten the bolt that hold the caliper to the bracket 58nm,
install the rotor and hat assy:
Install the 15mm spacer and the wheel,...
and the pictures after it is finished:
Last edited by BMW ALPINA; 02-17-2016 at 02:50 AM.
#313
02-17-2016, 02:55 AM
#314
02-17-2016, 03:00 AM
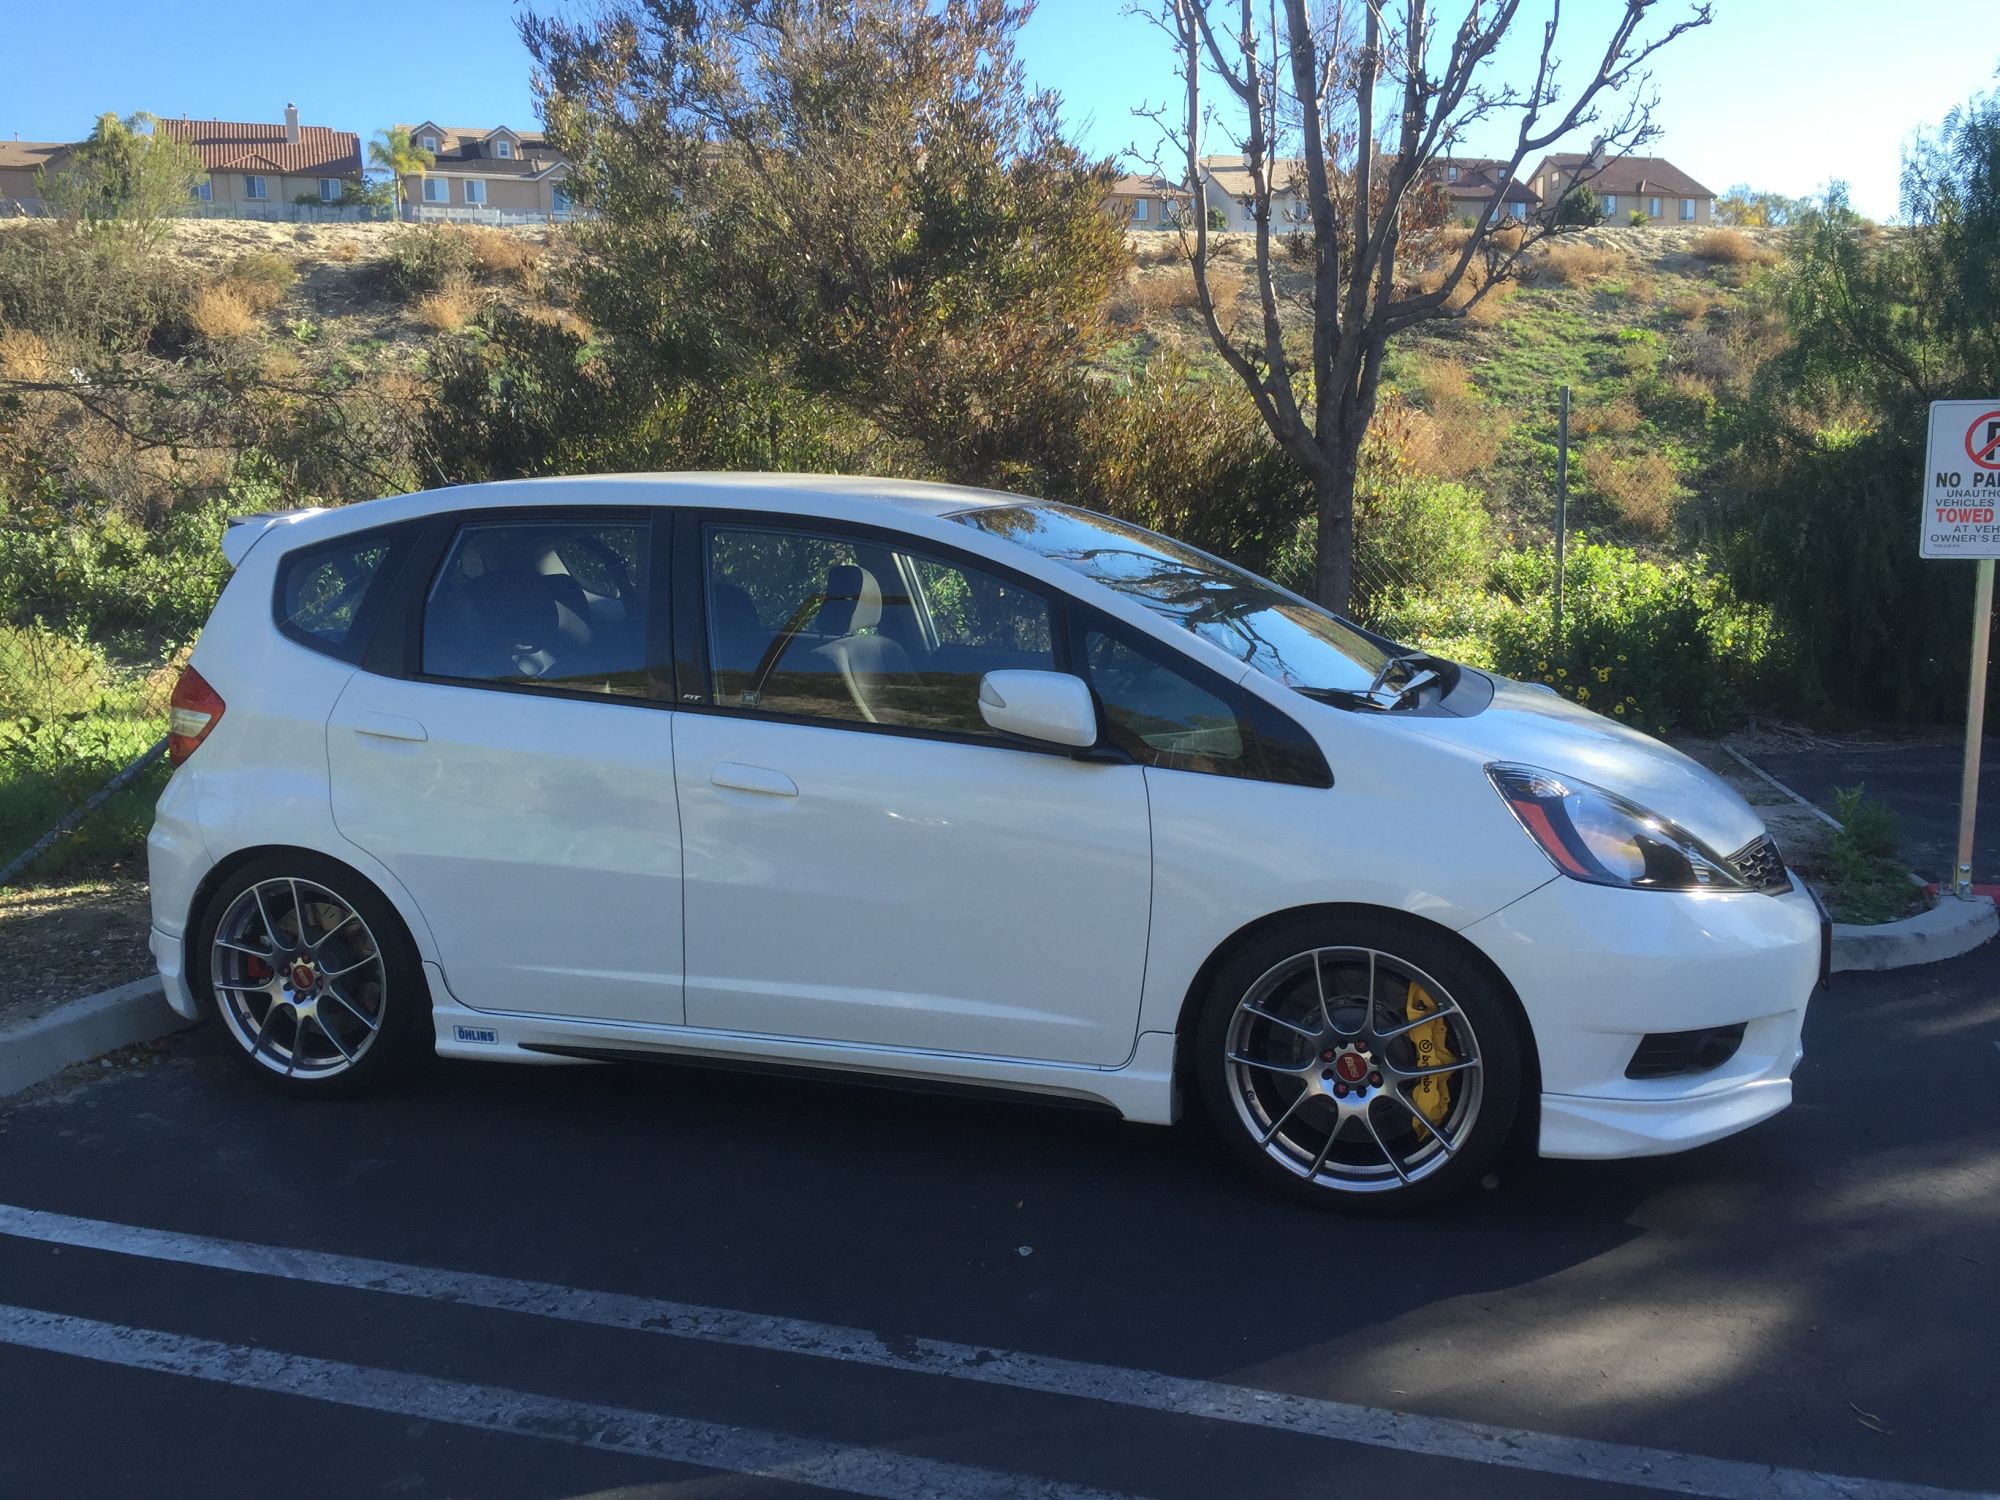
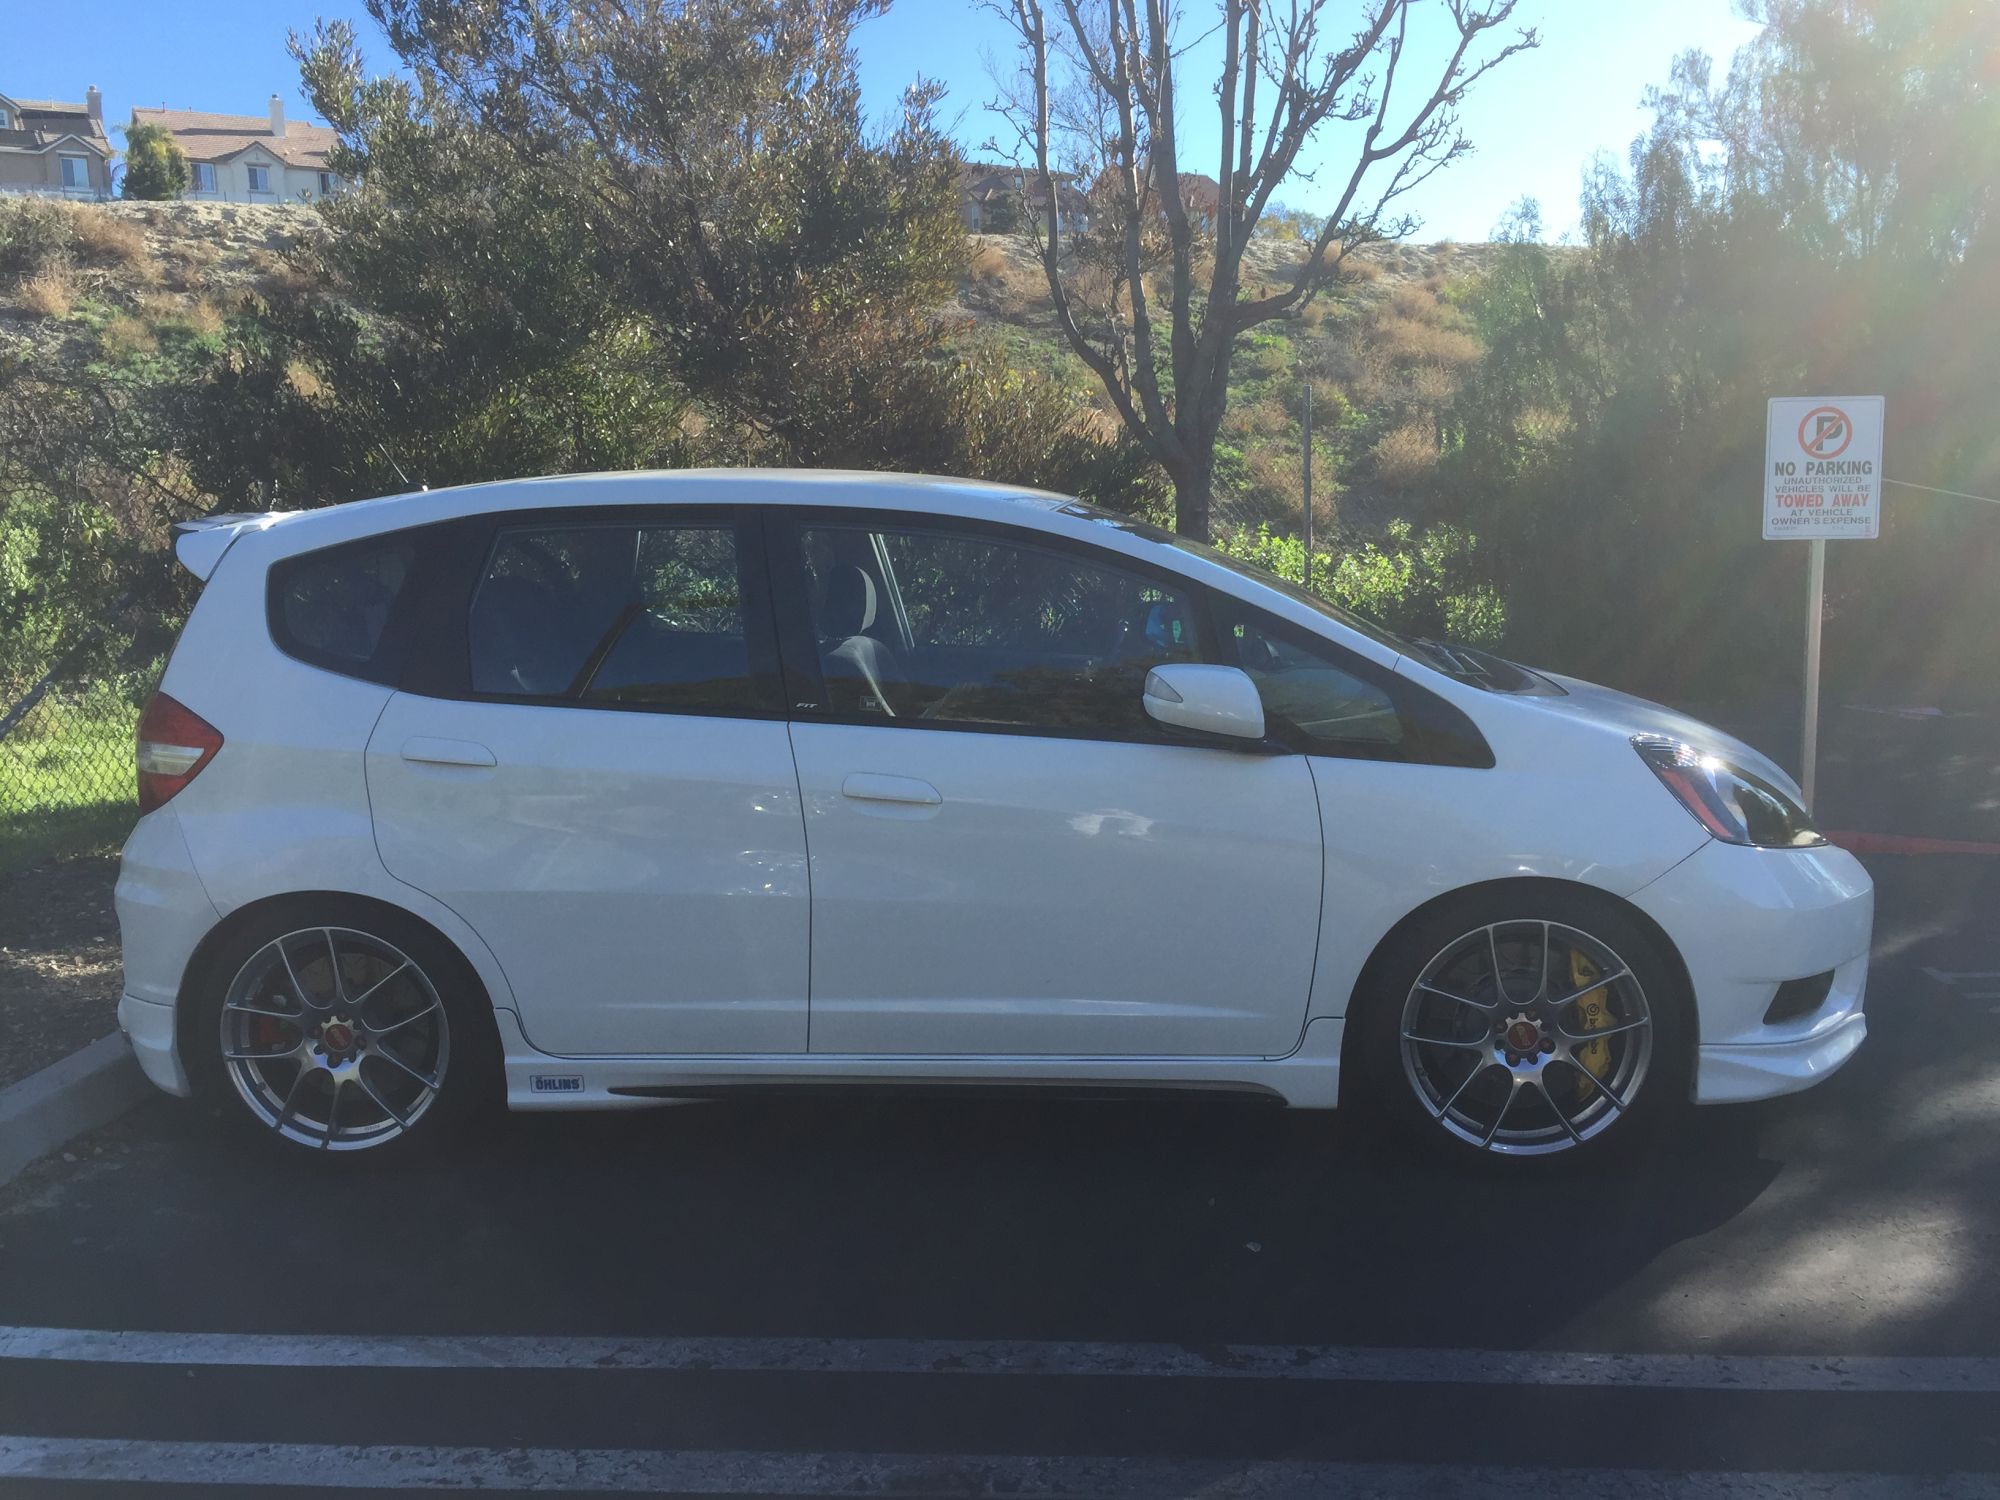
So with the pictures above,
I finally closed my journey from April 2013
The car now more stable,
due to wider stance from the spacer (15mm spacer),
The Spoon Rigid Collar and the filled bushing reduce the bushing side to side flex,
so the rear axle tracked more true...
The brake are easier to modulate
LESS NOSE DIVE under braking due to better rear brake bias,
which make the car stop faster because the ABS do not activate too early,
and the rear also do more braking than with the drum brakes,
Pedal feel also much improved...
and I think My JDM RS Rear Axle with aluminum caliper from DC5 Integra type R
with 2 piece rotor (wilwood aluminum hat combo) are actually lighter than the USDM drum brakes one...
I am happy to finally close the chapter on this modification with good result
Last edited by BMW ALPINA; 02-17-2016 at 11:09 AM.

#316
05-09-2016, 01:26 PM
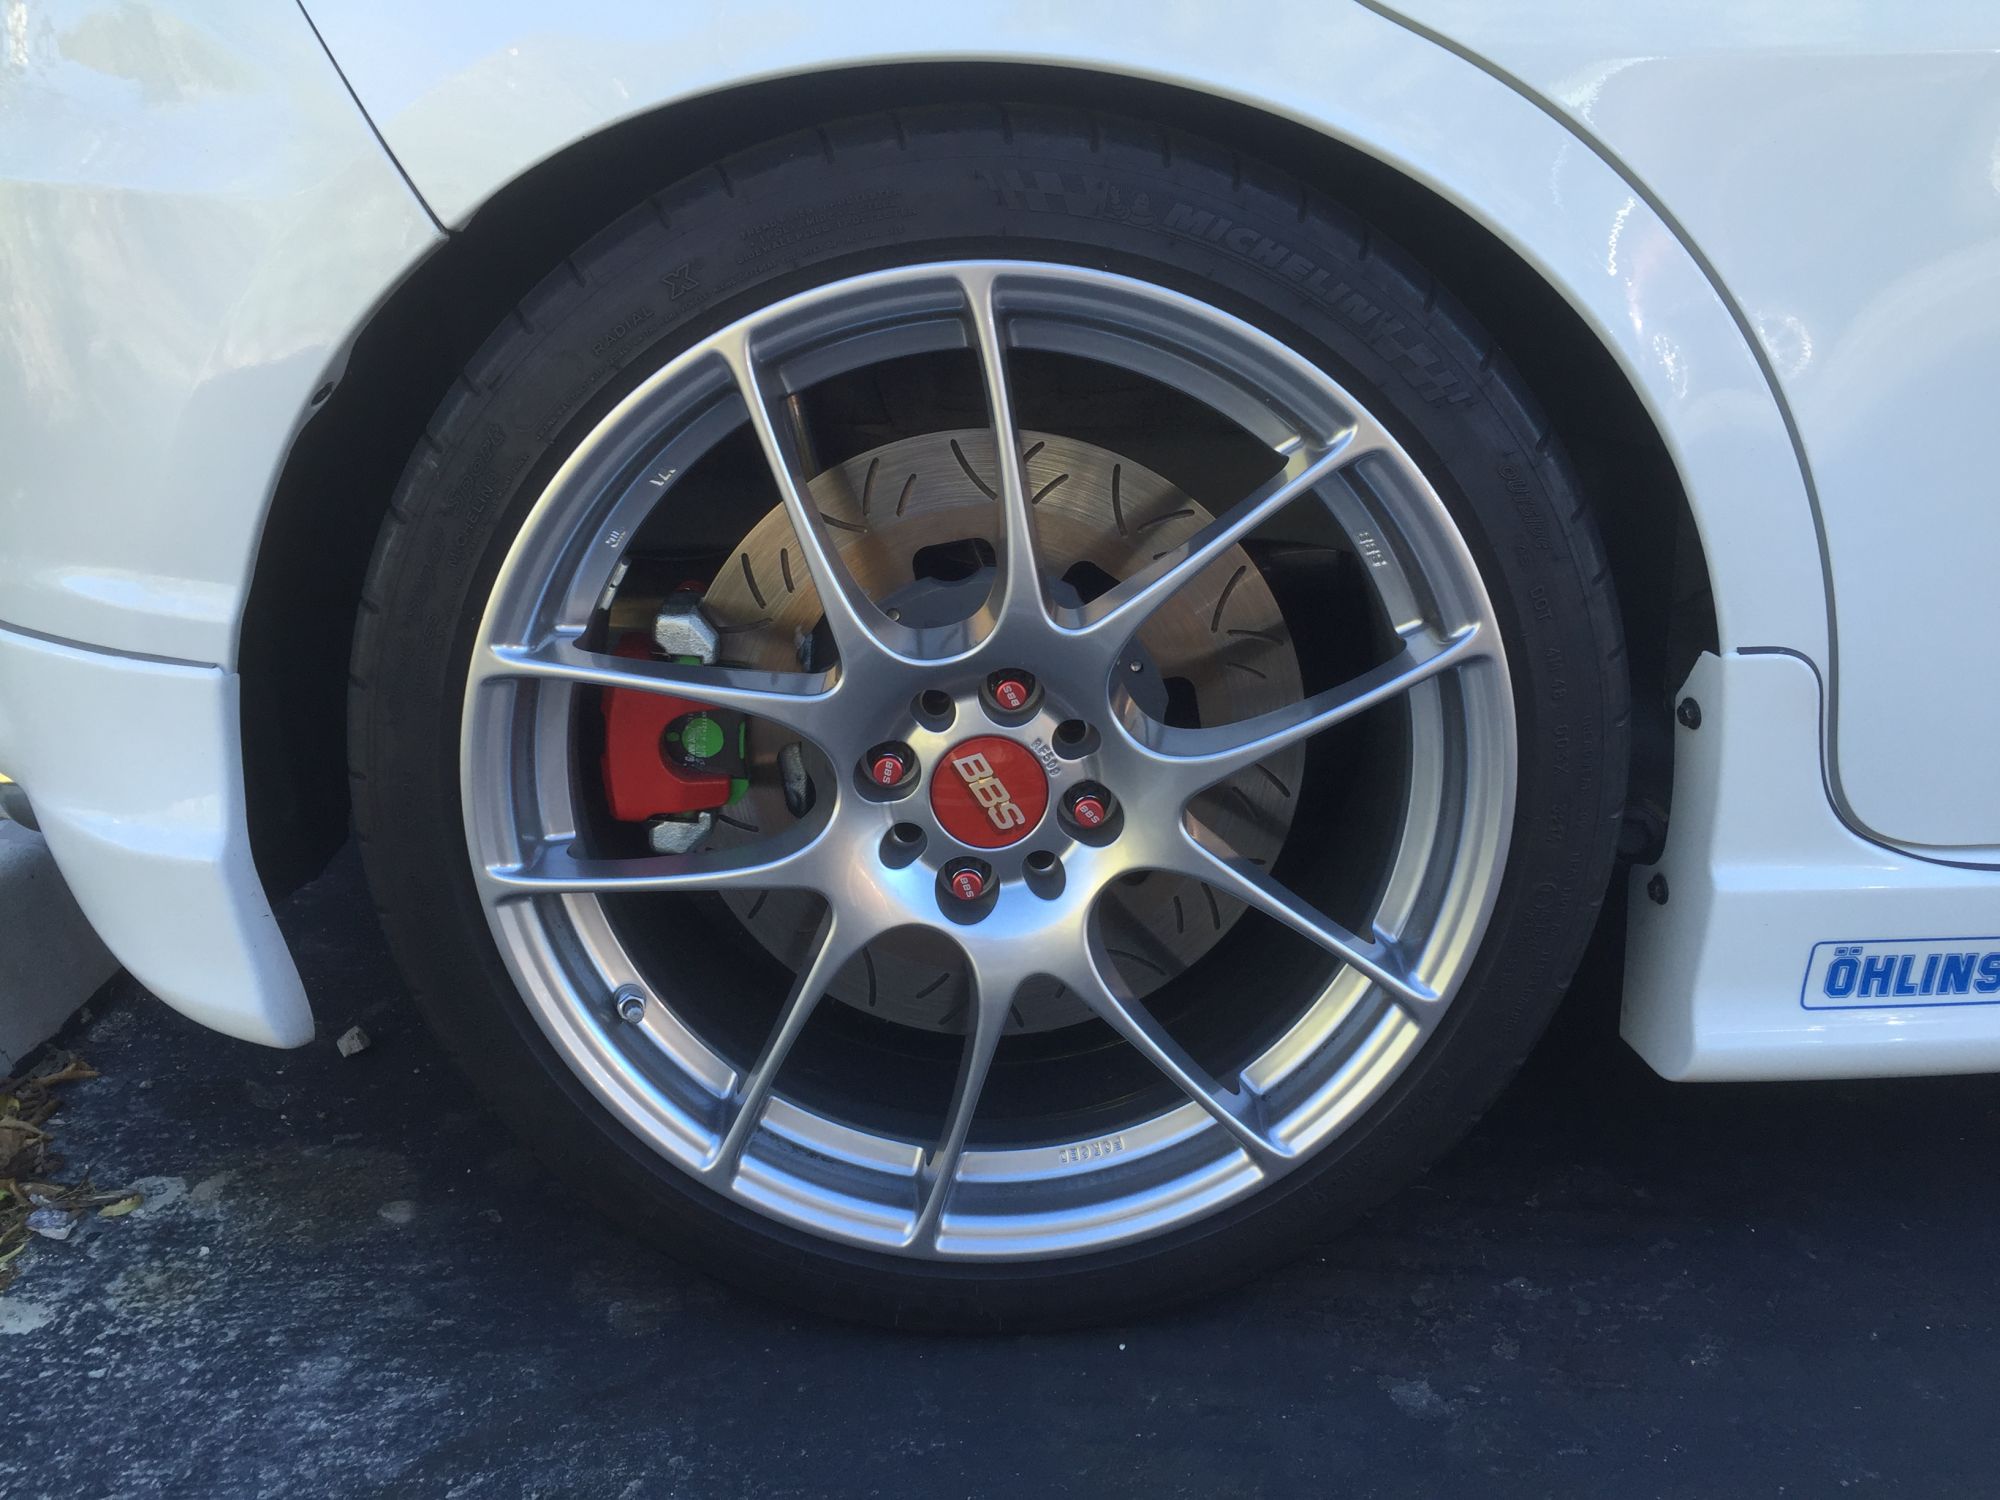
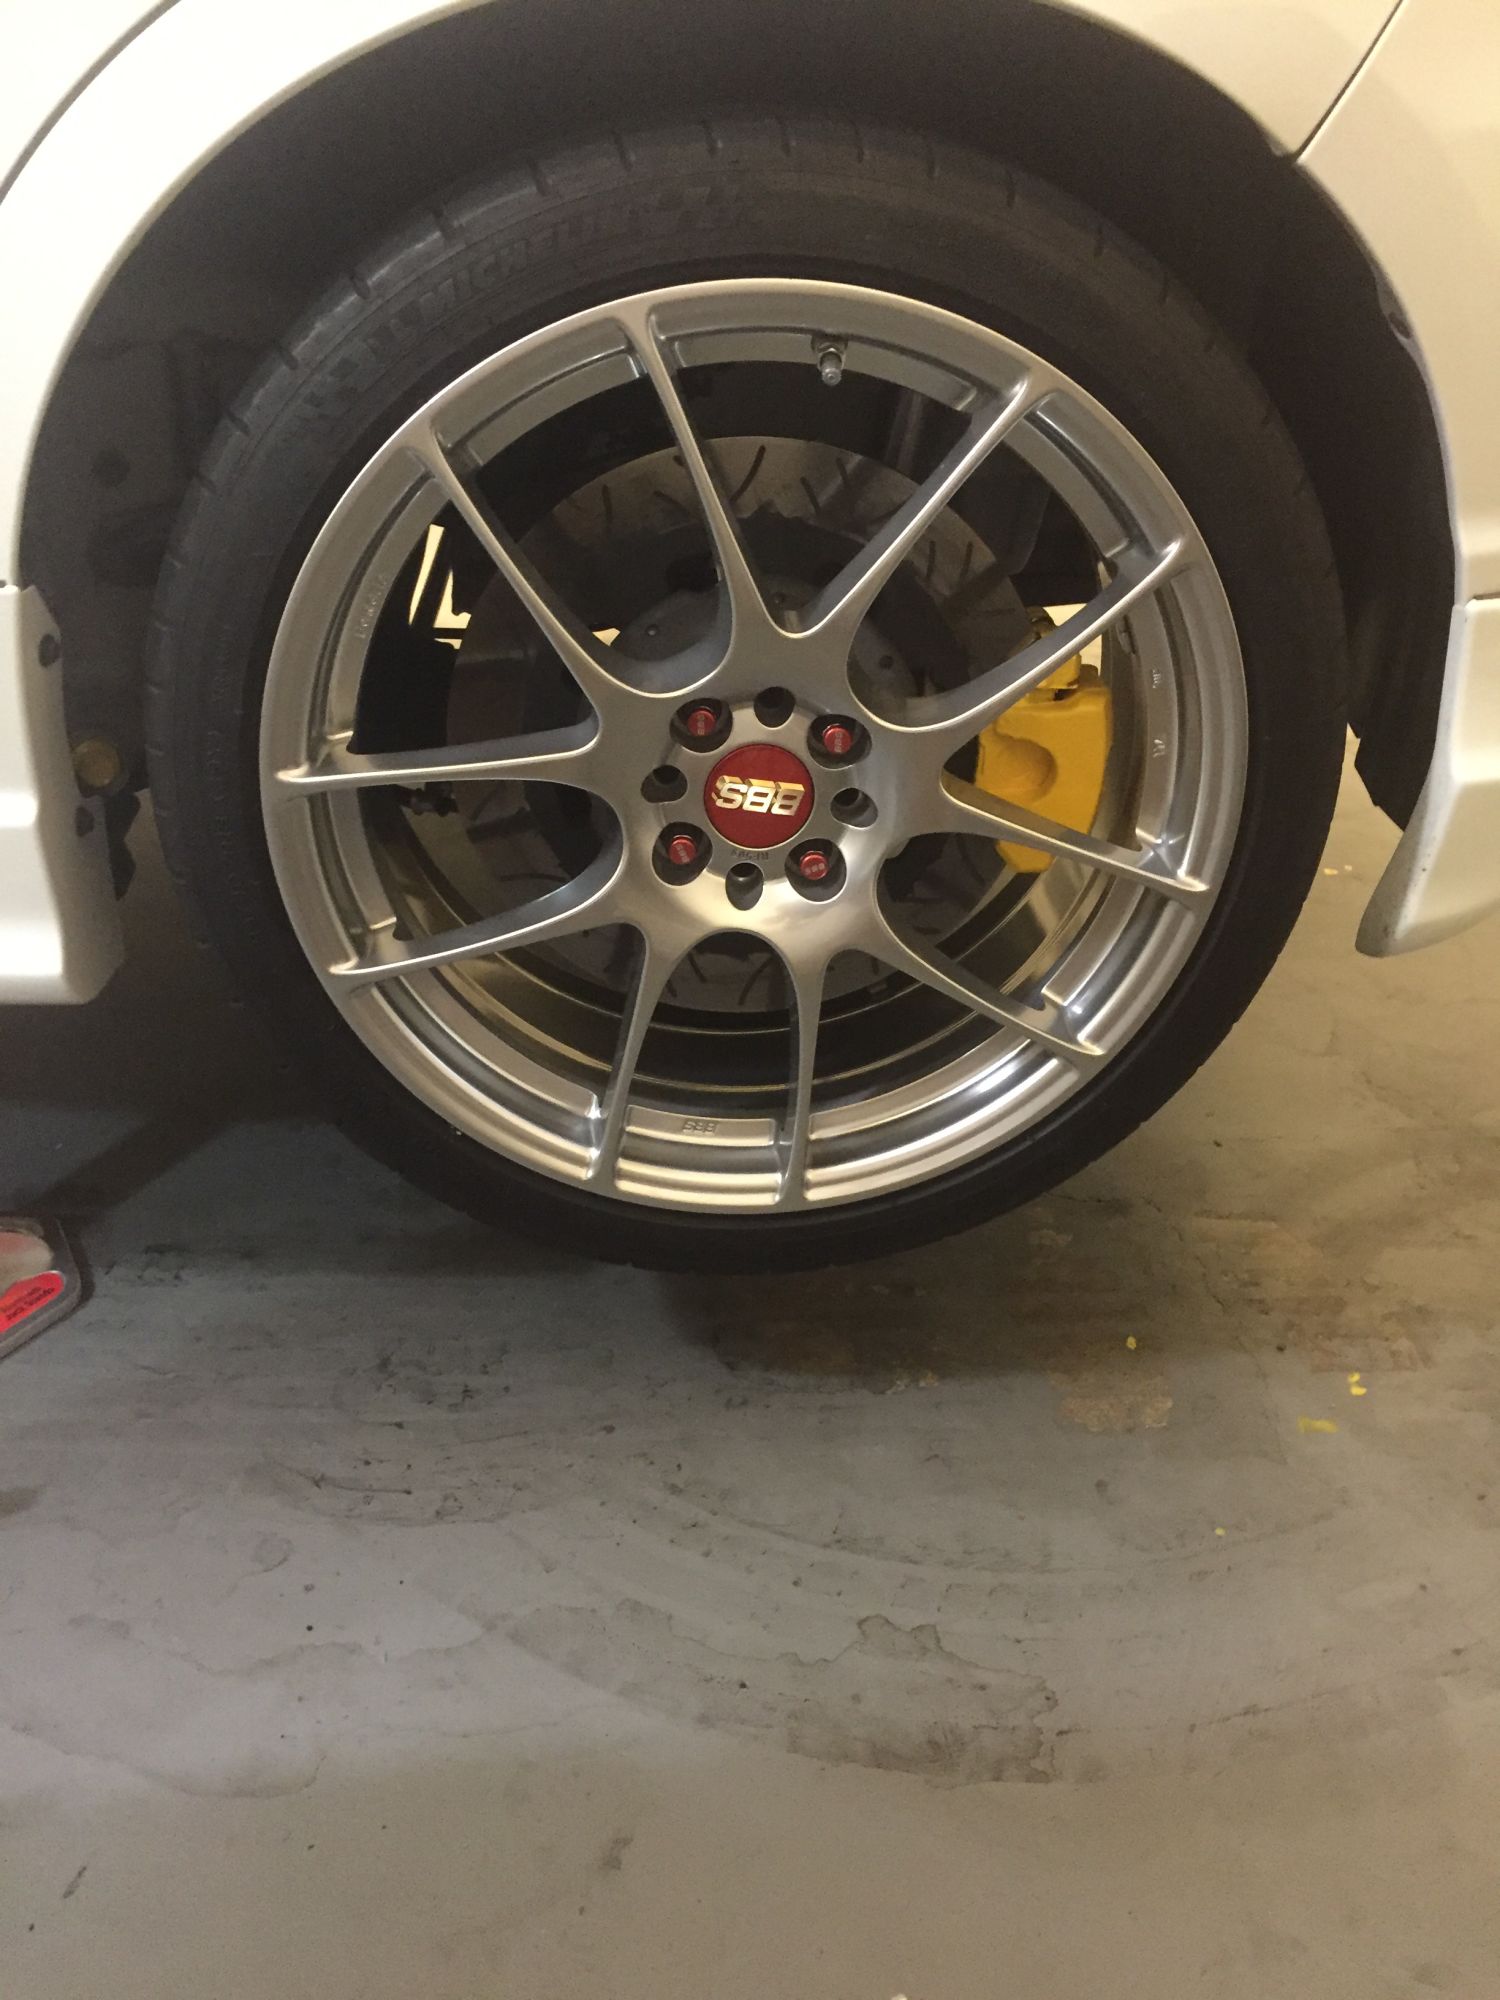
I decide to paint the JDM Integra Type R Caliper to yellow from it's original red to match the front caliper. I also paint the caliper bracket that was silver to yellow so the caliper would look larger from a distance 
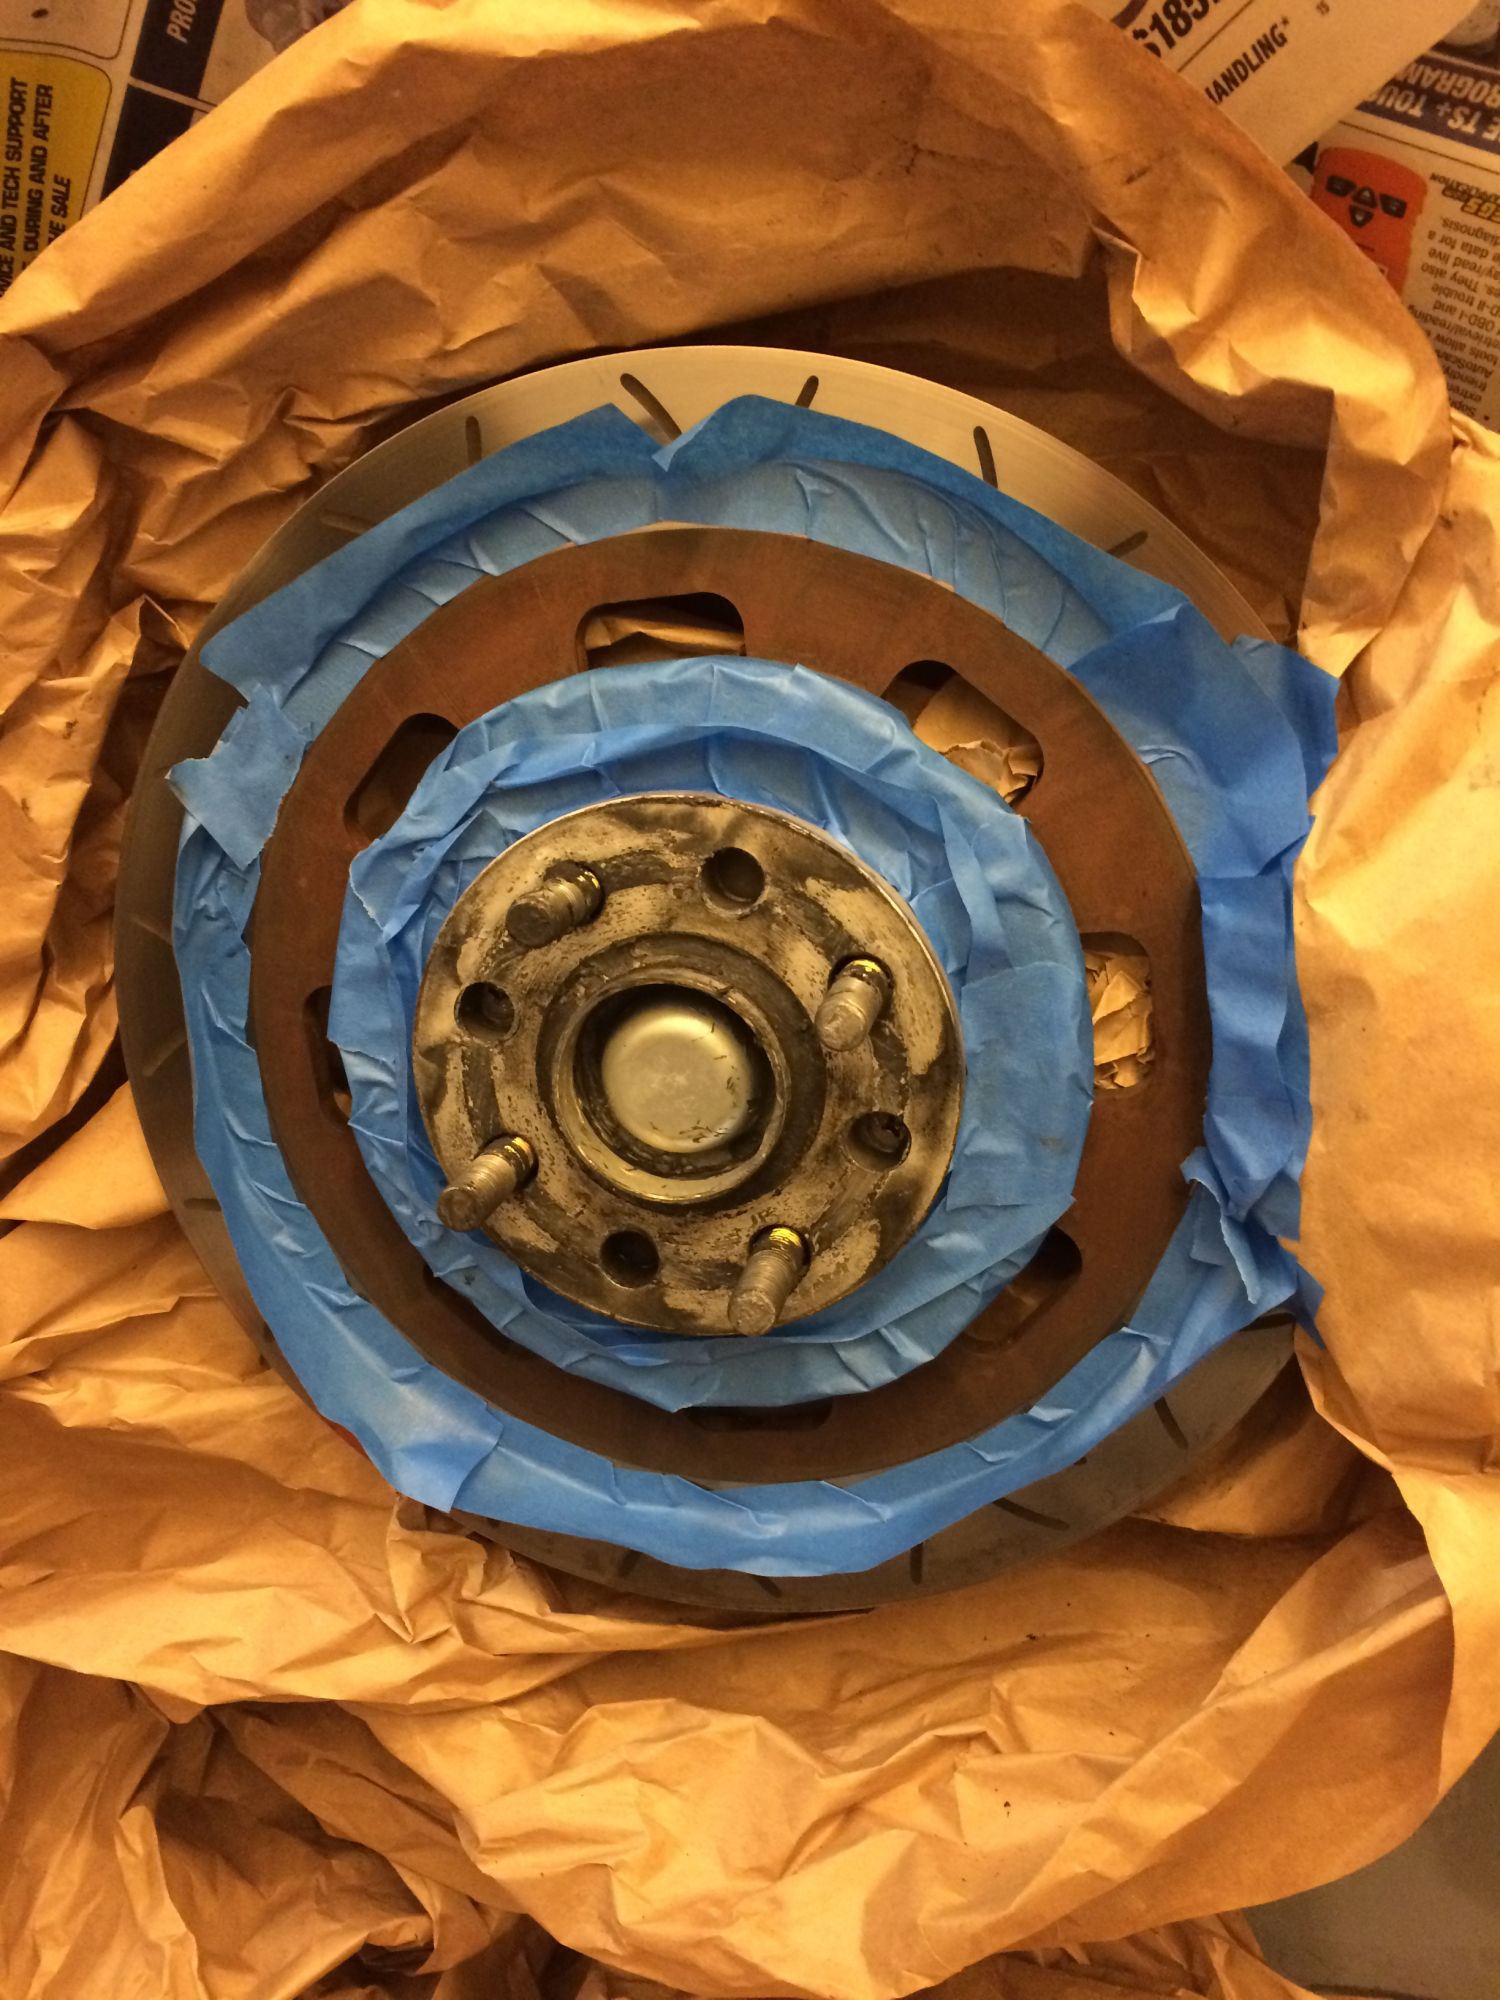
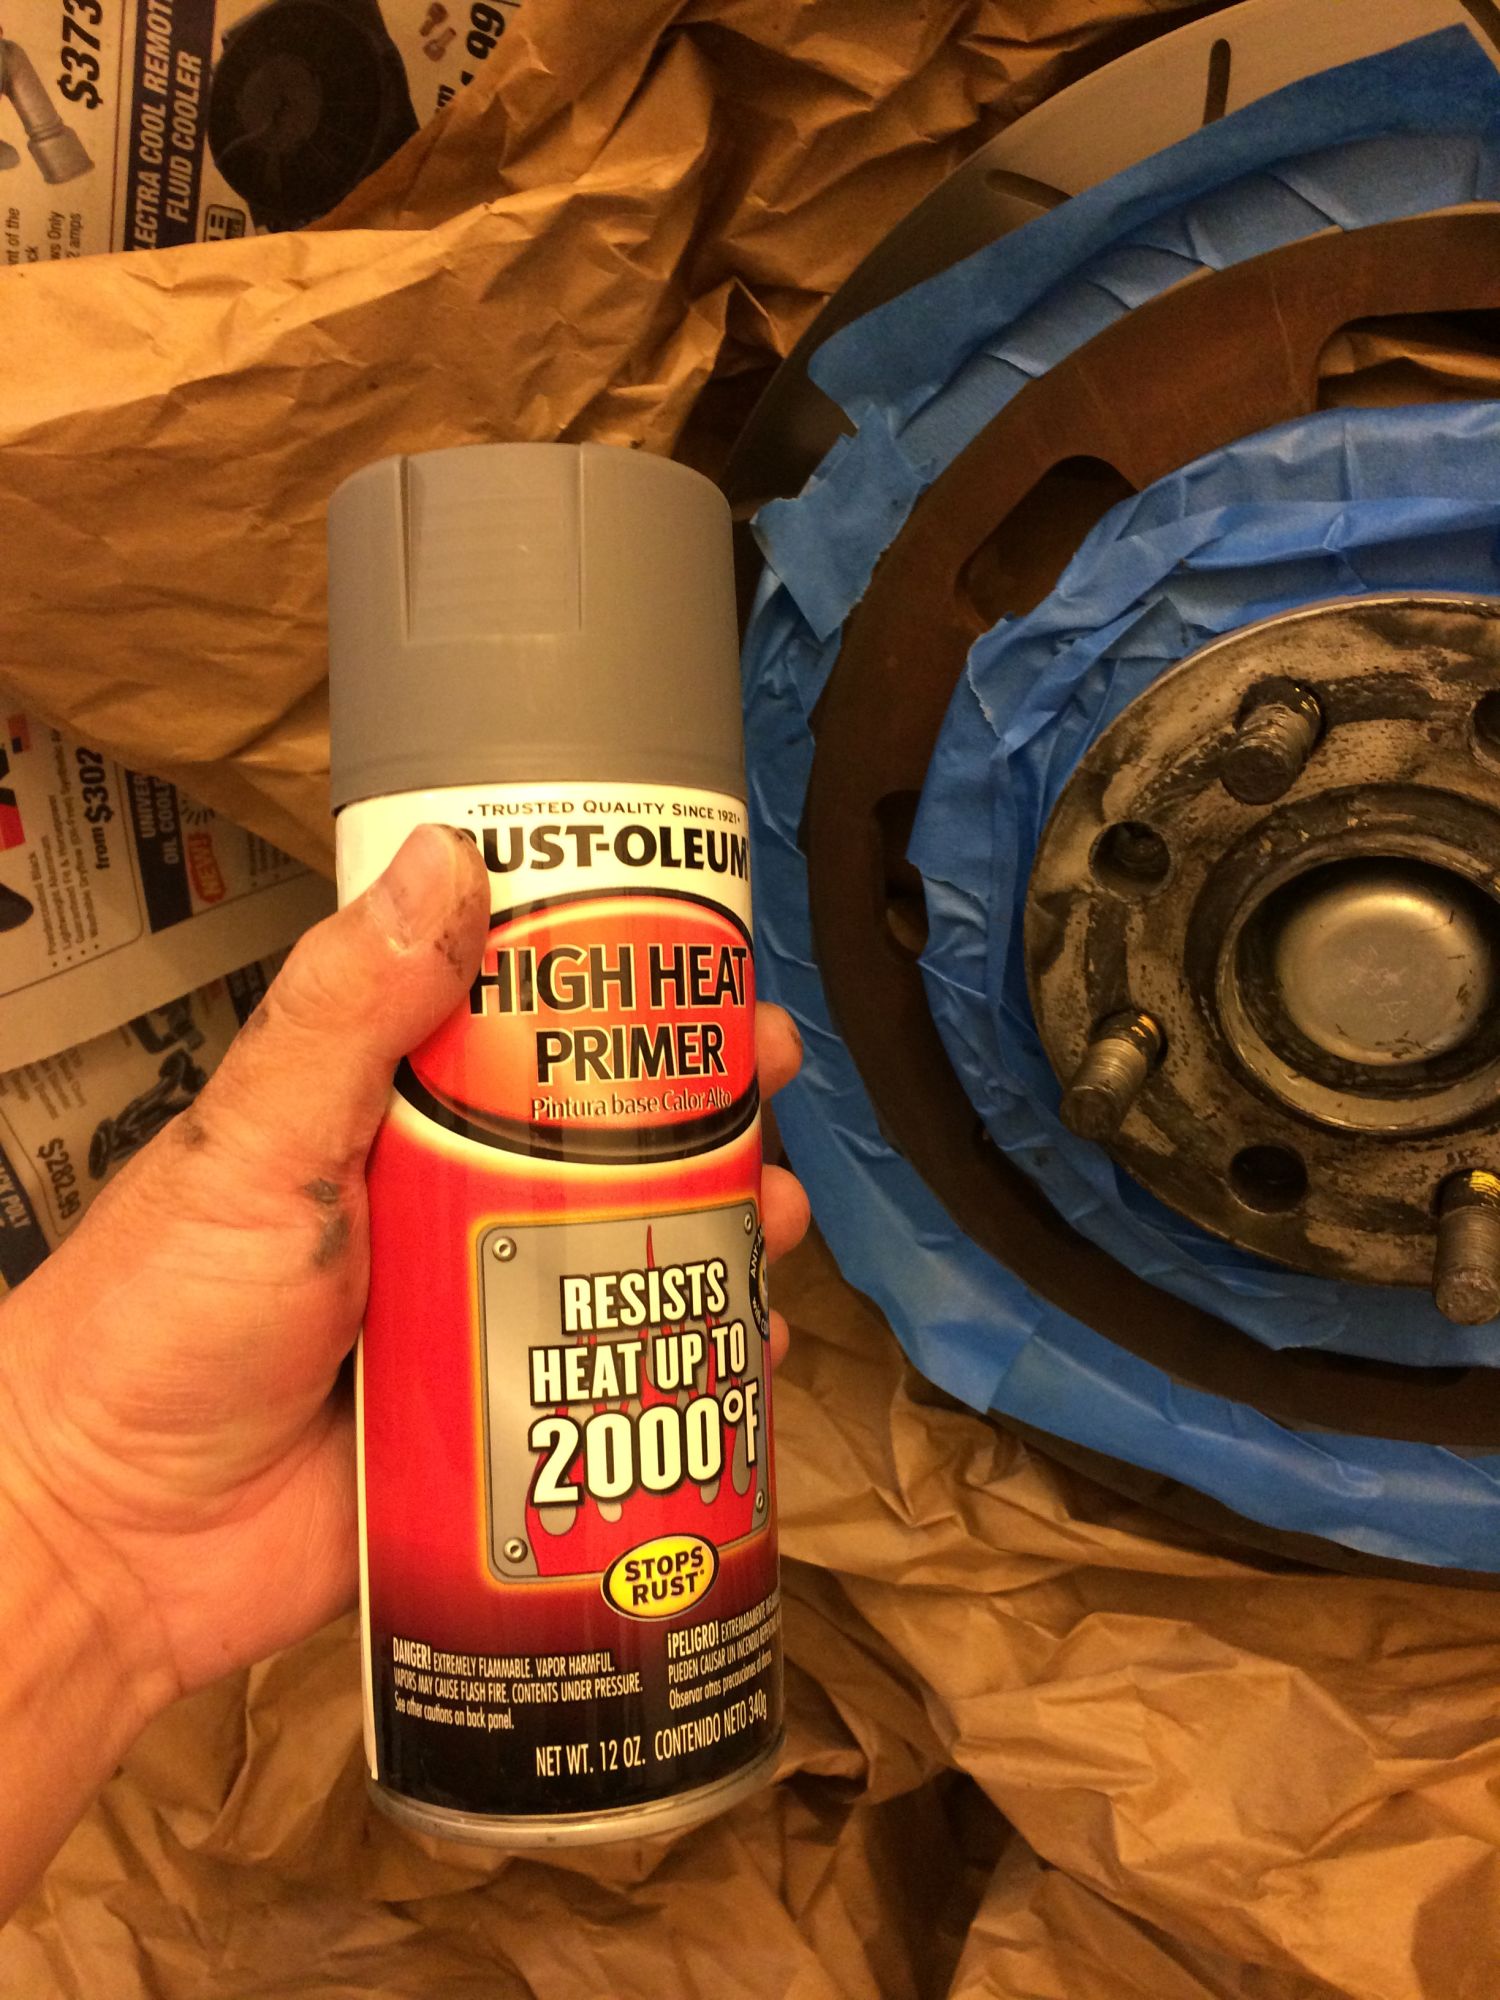
I also paint parts of the disk brake (rotors) that do not come in touch with the pads and rusting with black high temp paint.
The original color of Red Caliper with Silver Bracket, green EBC pads and rusting braking rotors/disk brake:

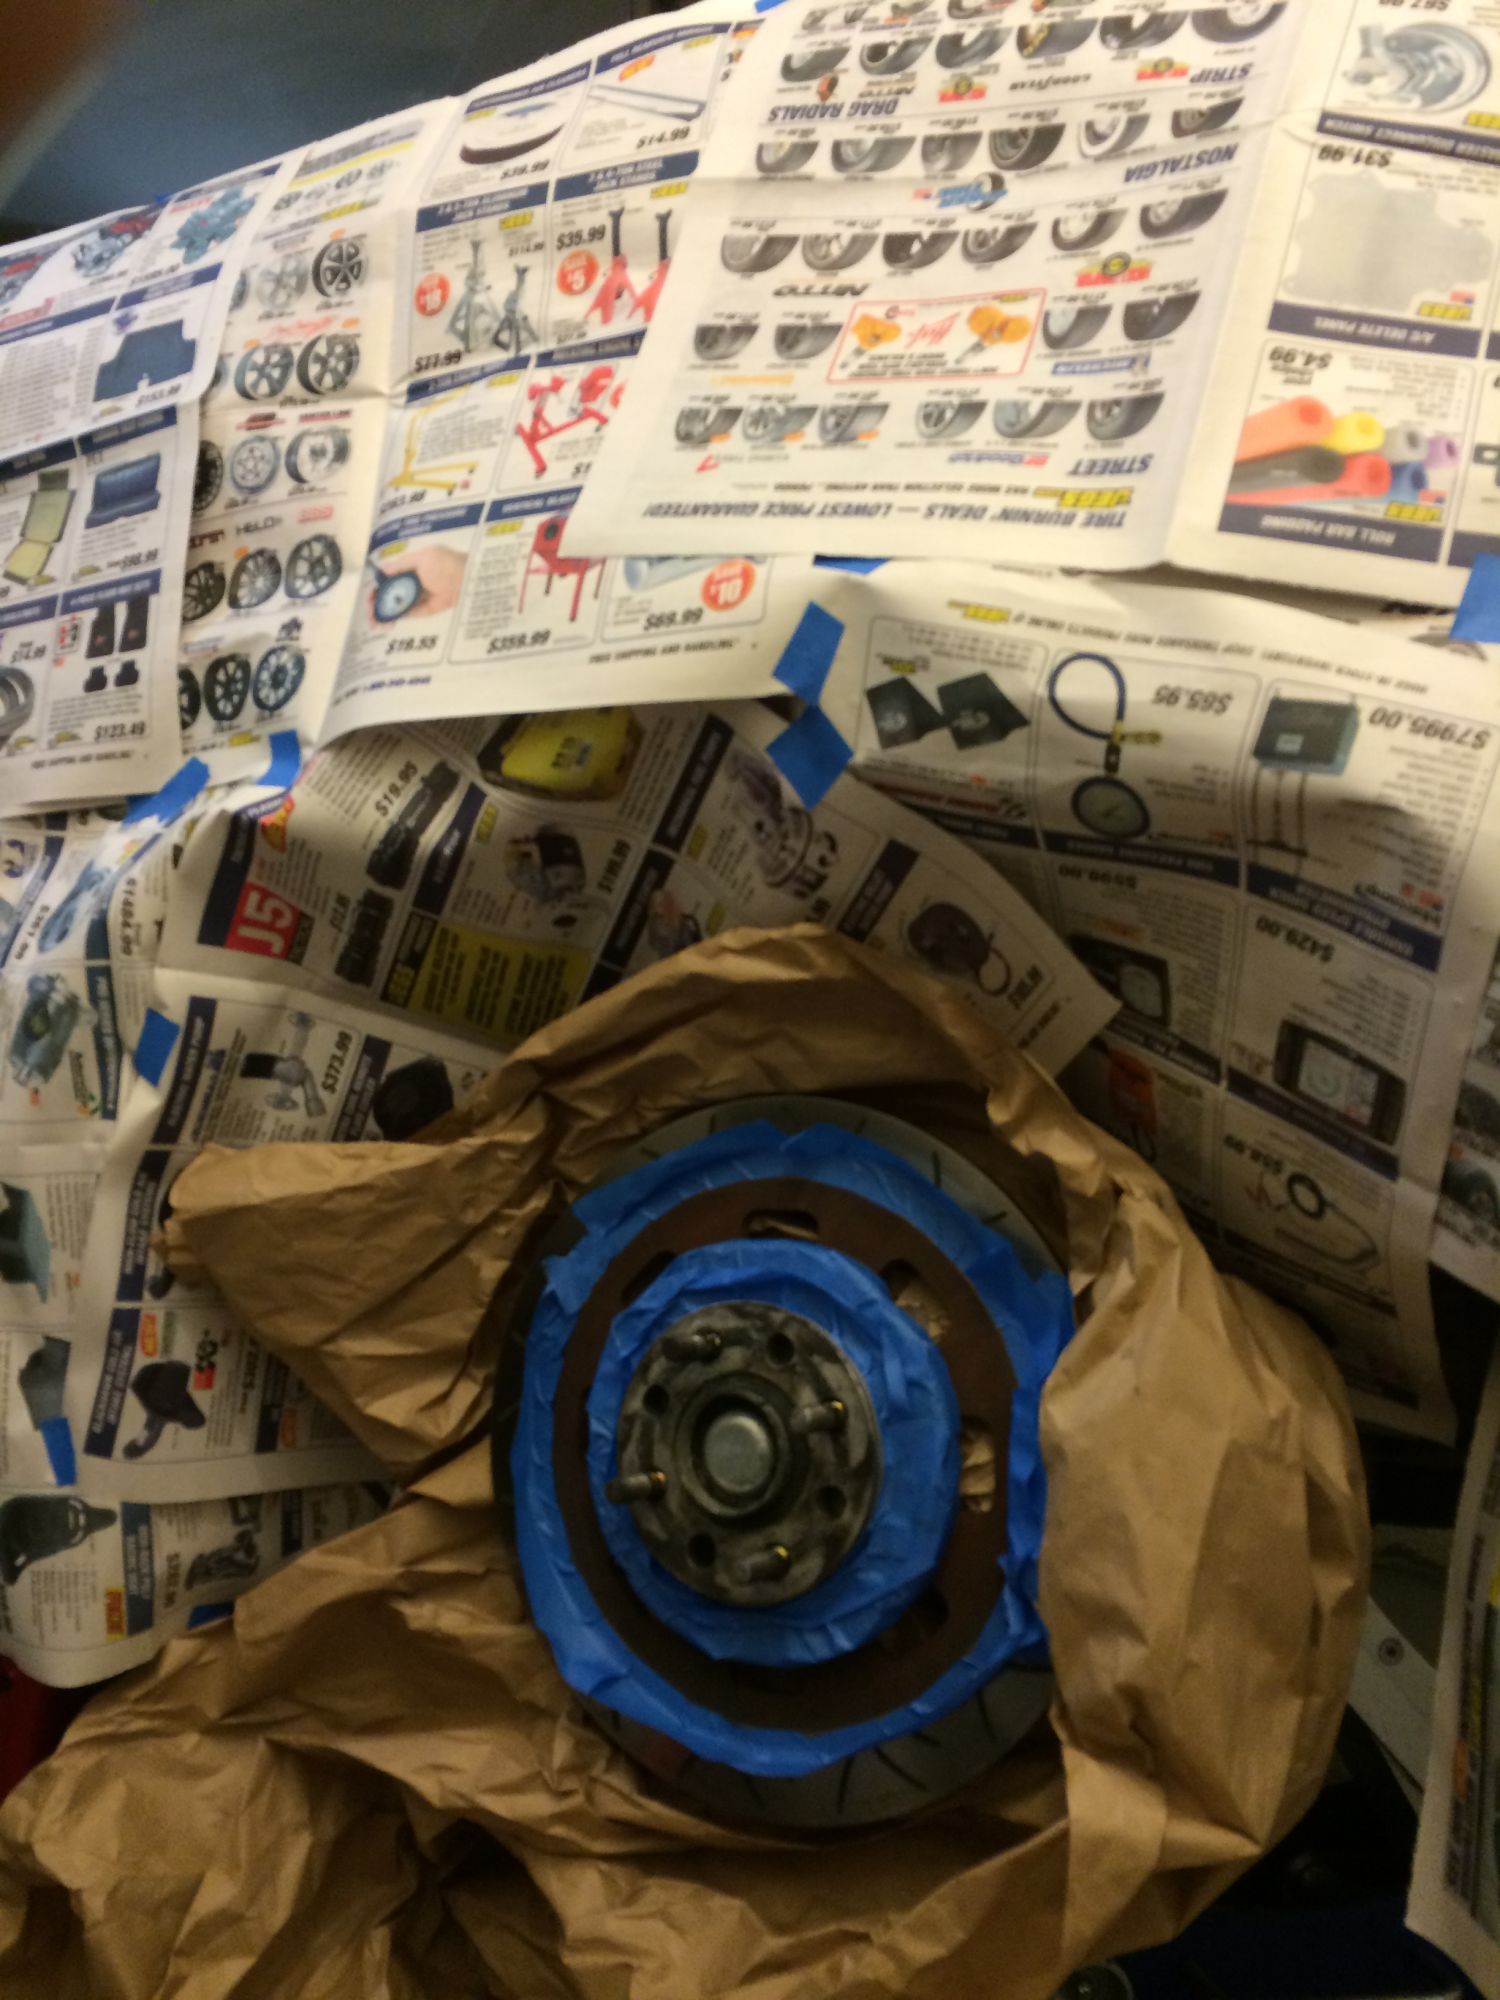
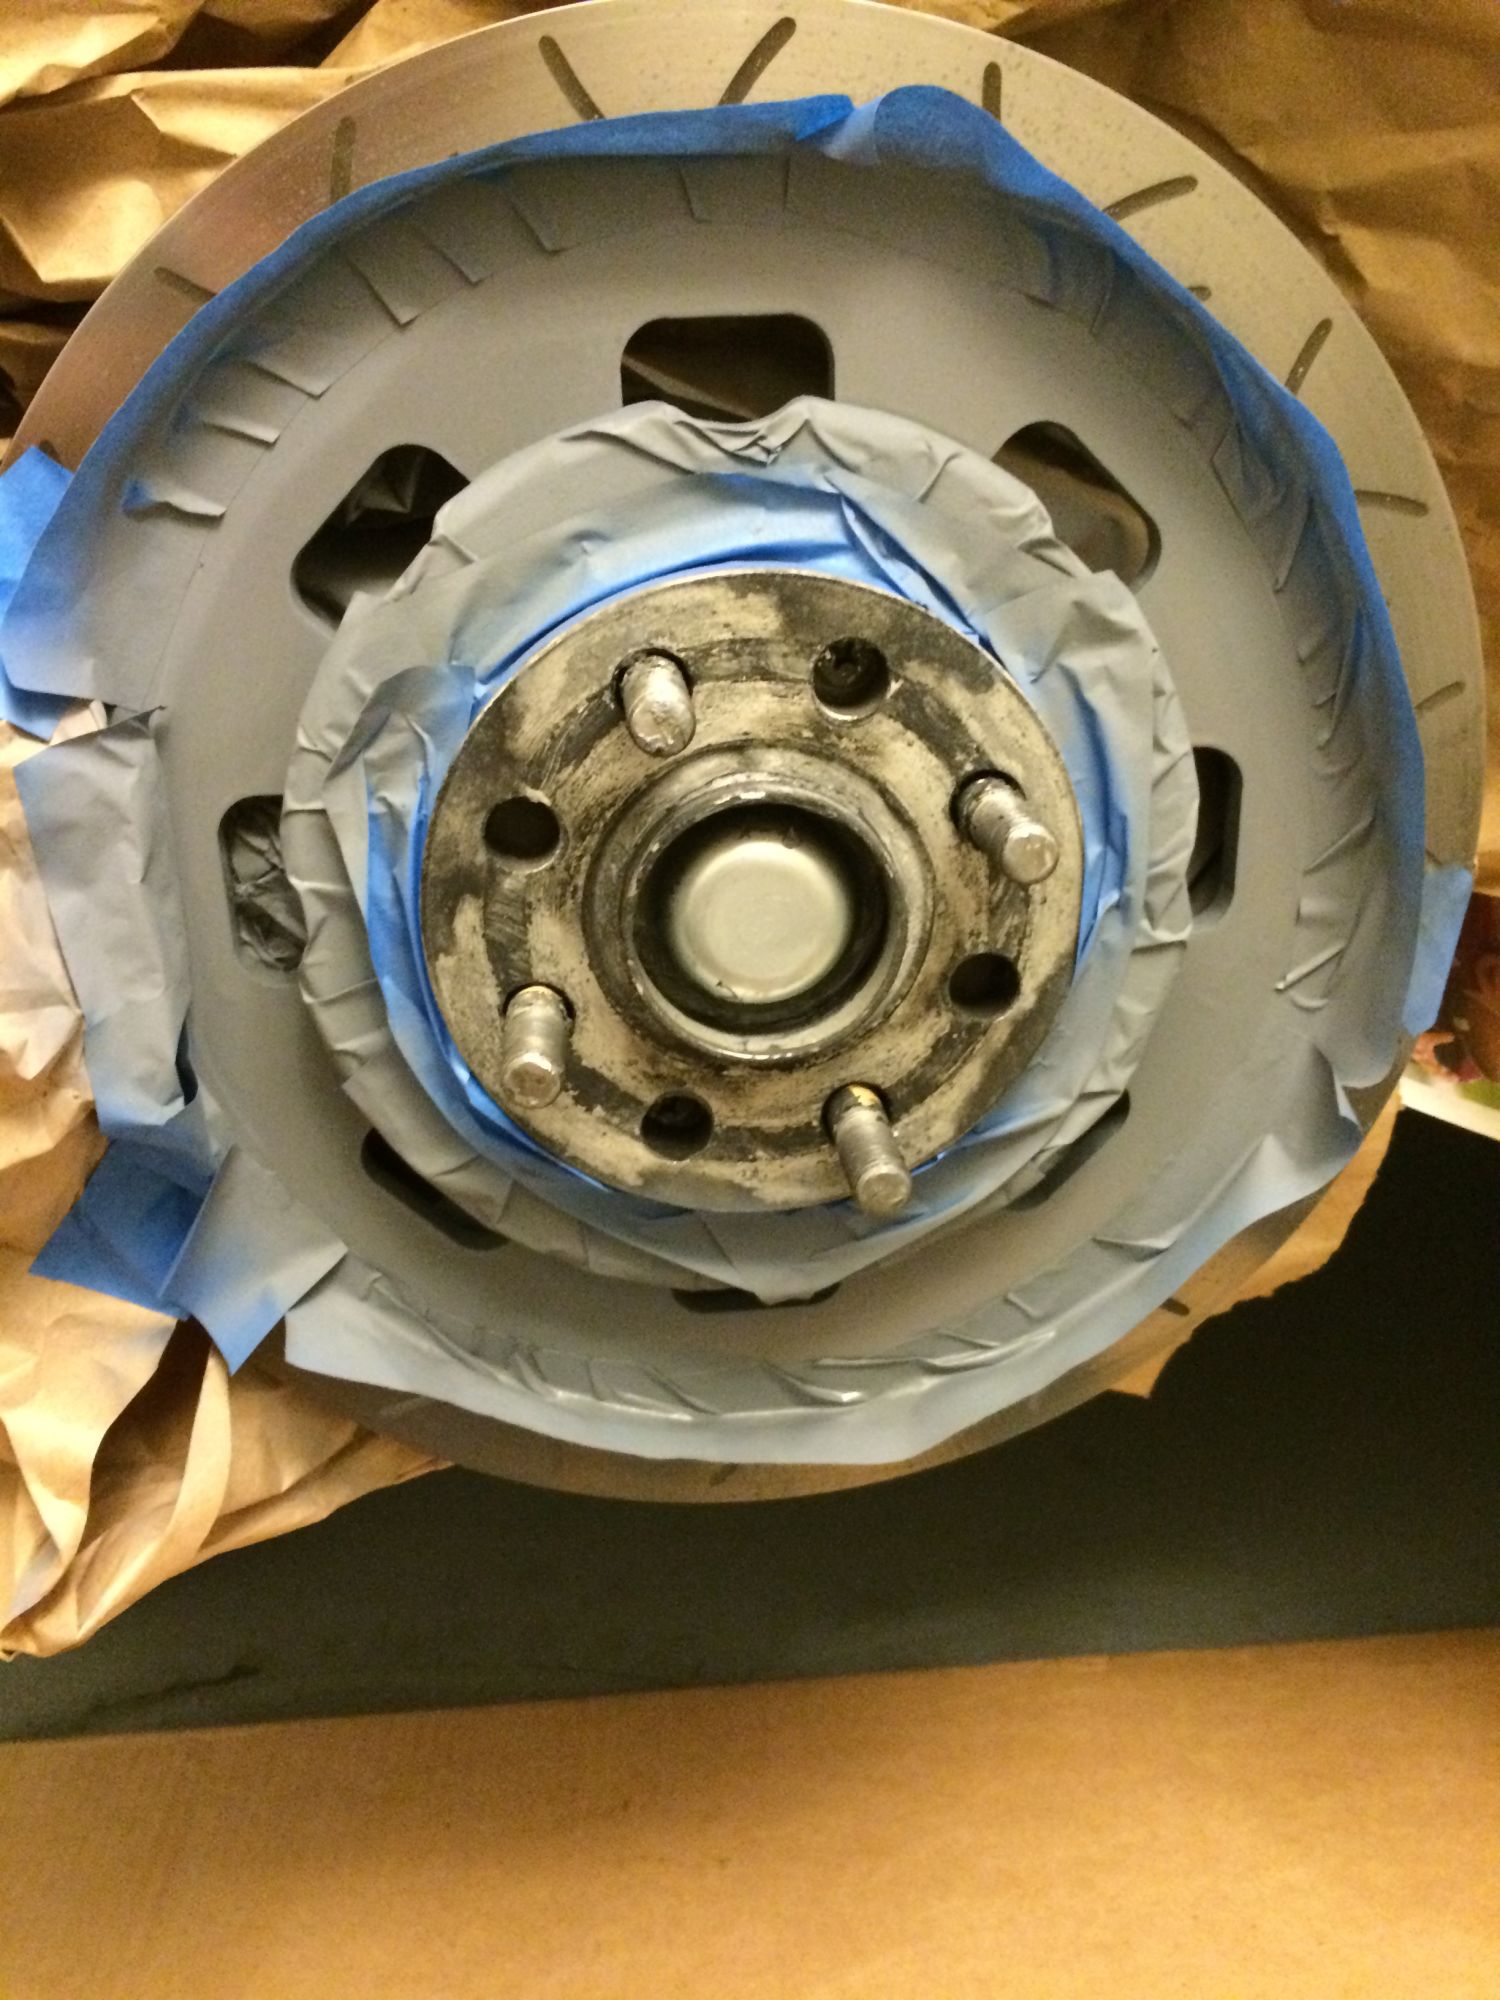
Protect the Car Paint with newspaper and also masked the area to paint the rusting disk brake/rotors:
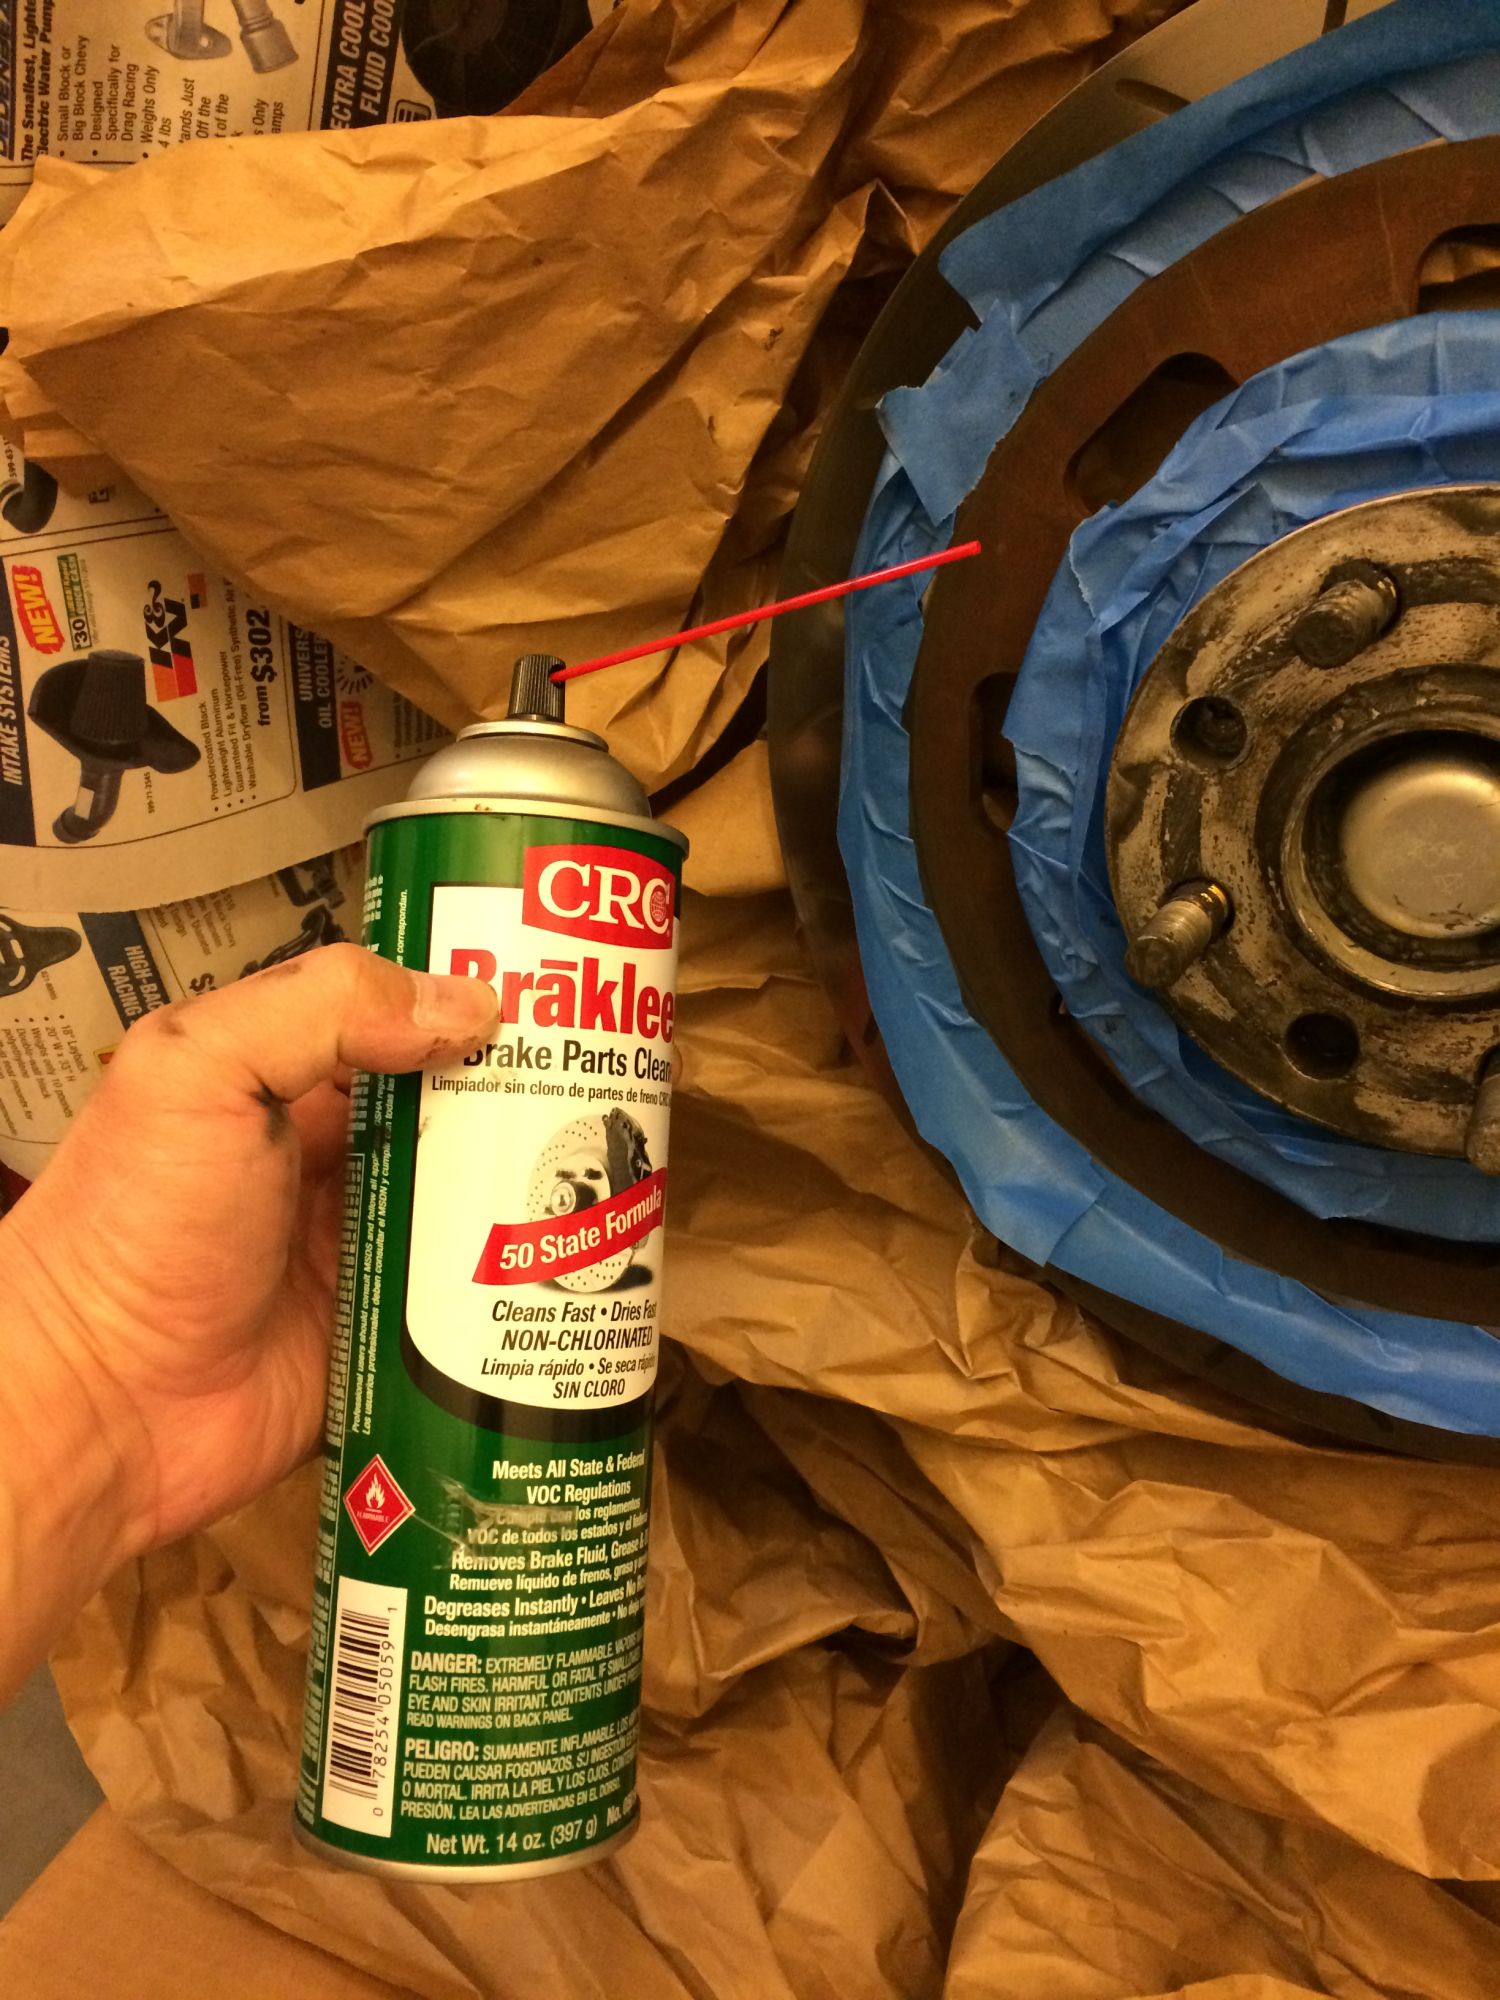
Clean the area I am going to paint with Brake Cleaner (Acetone):
Primer High Temp Paint for the rusting disk brake/rotor:
Painted with Primer:
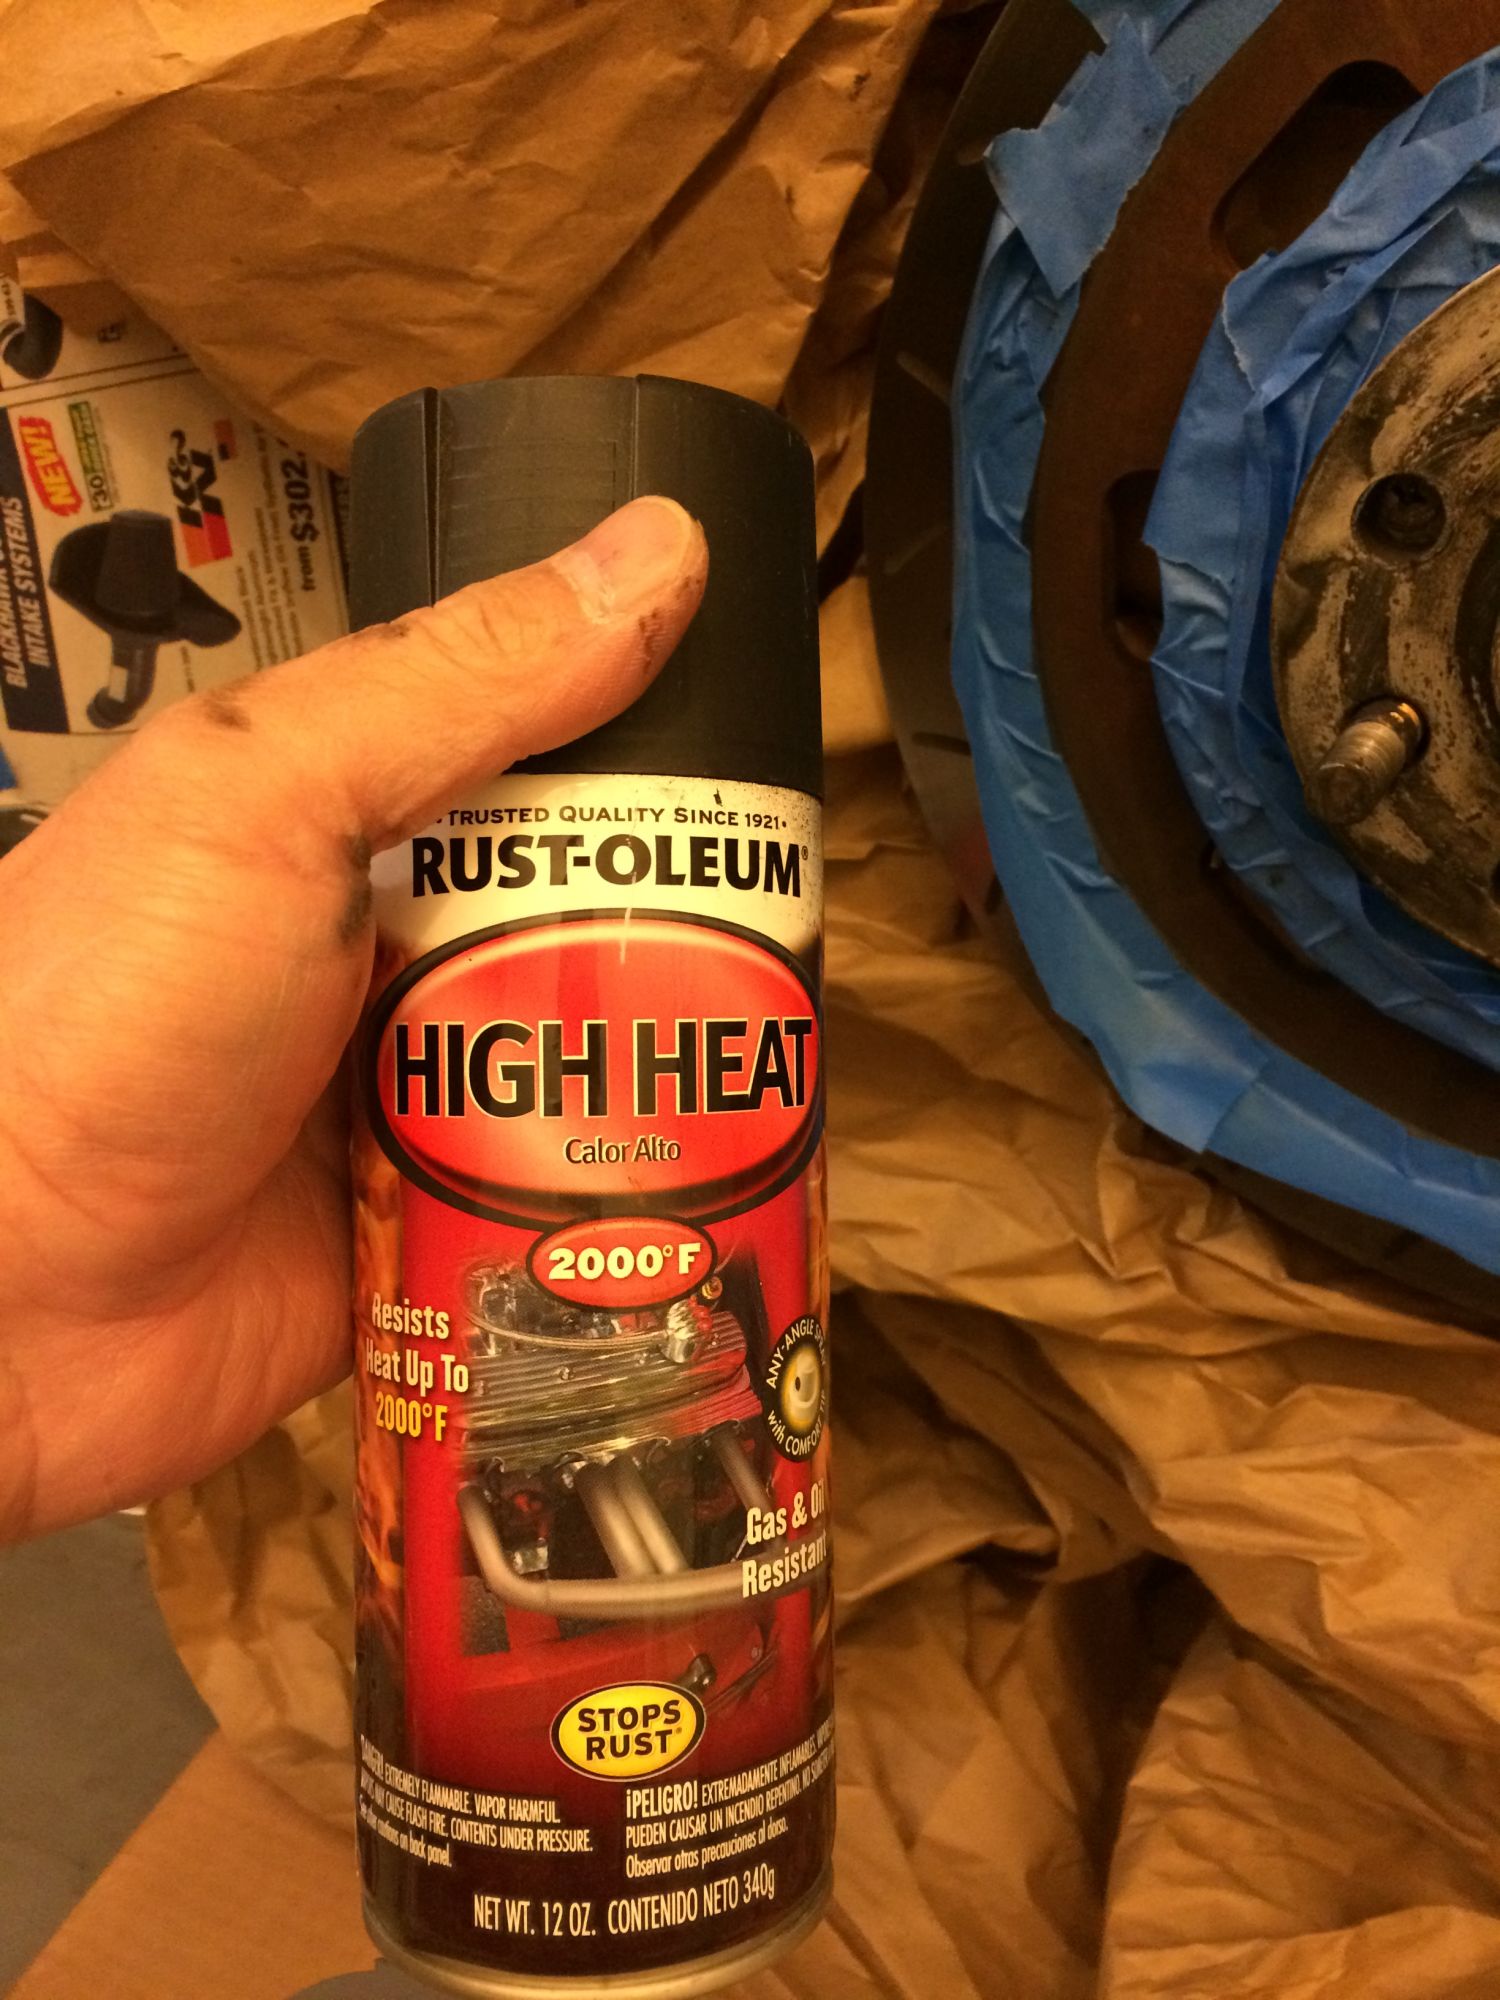
Black High Temp ready to be applied about 1 hour after the primer:
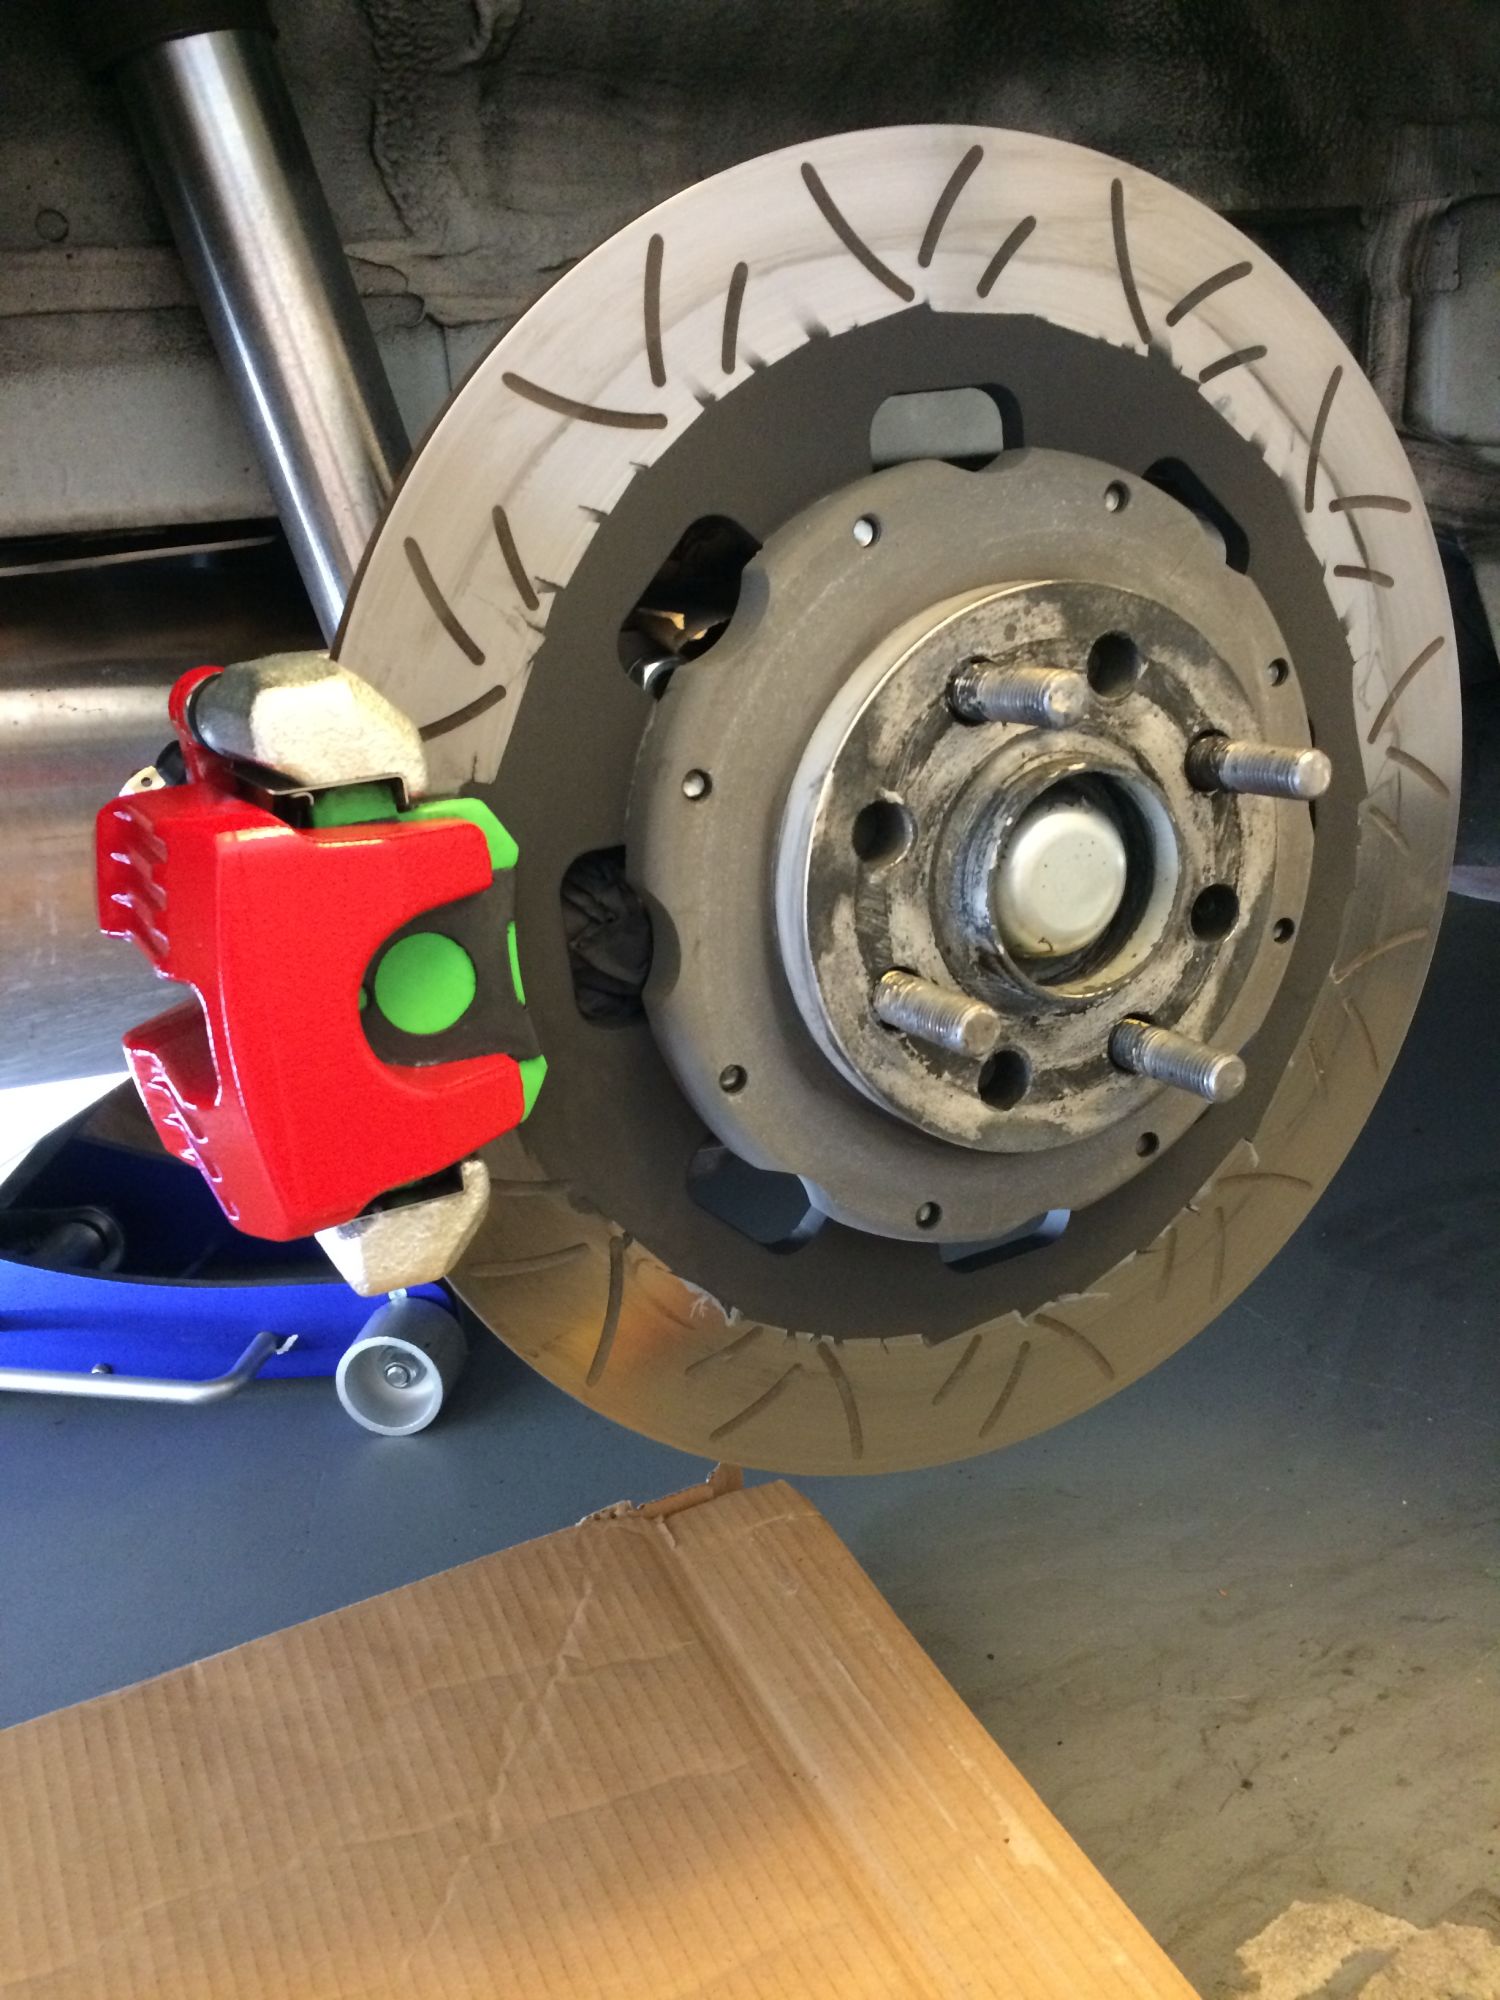
Rotor/Disk Brake painted so no longer show any rusting parts,
I know the black paint is not really round/perfect circle, but it will become perfect circle as soon as I use this brake
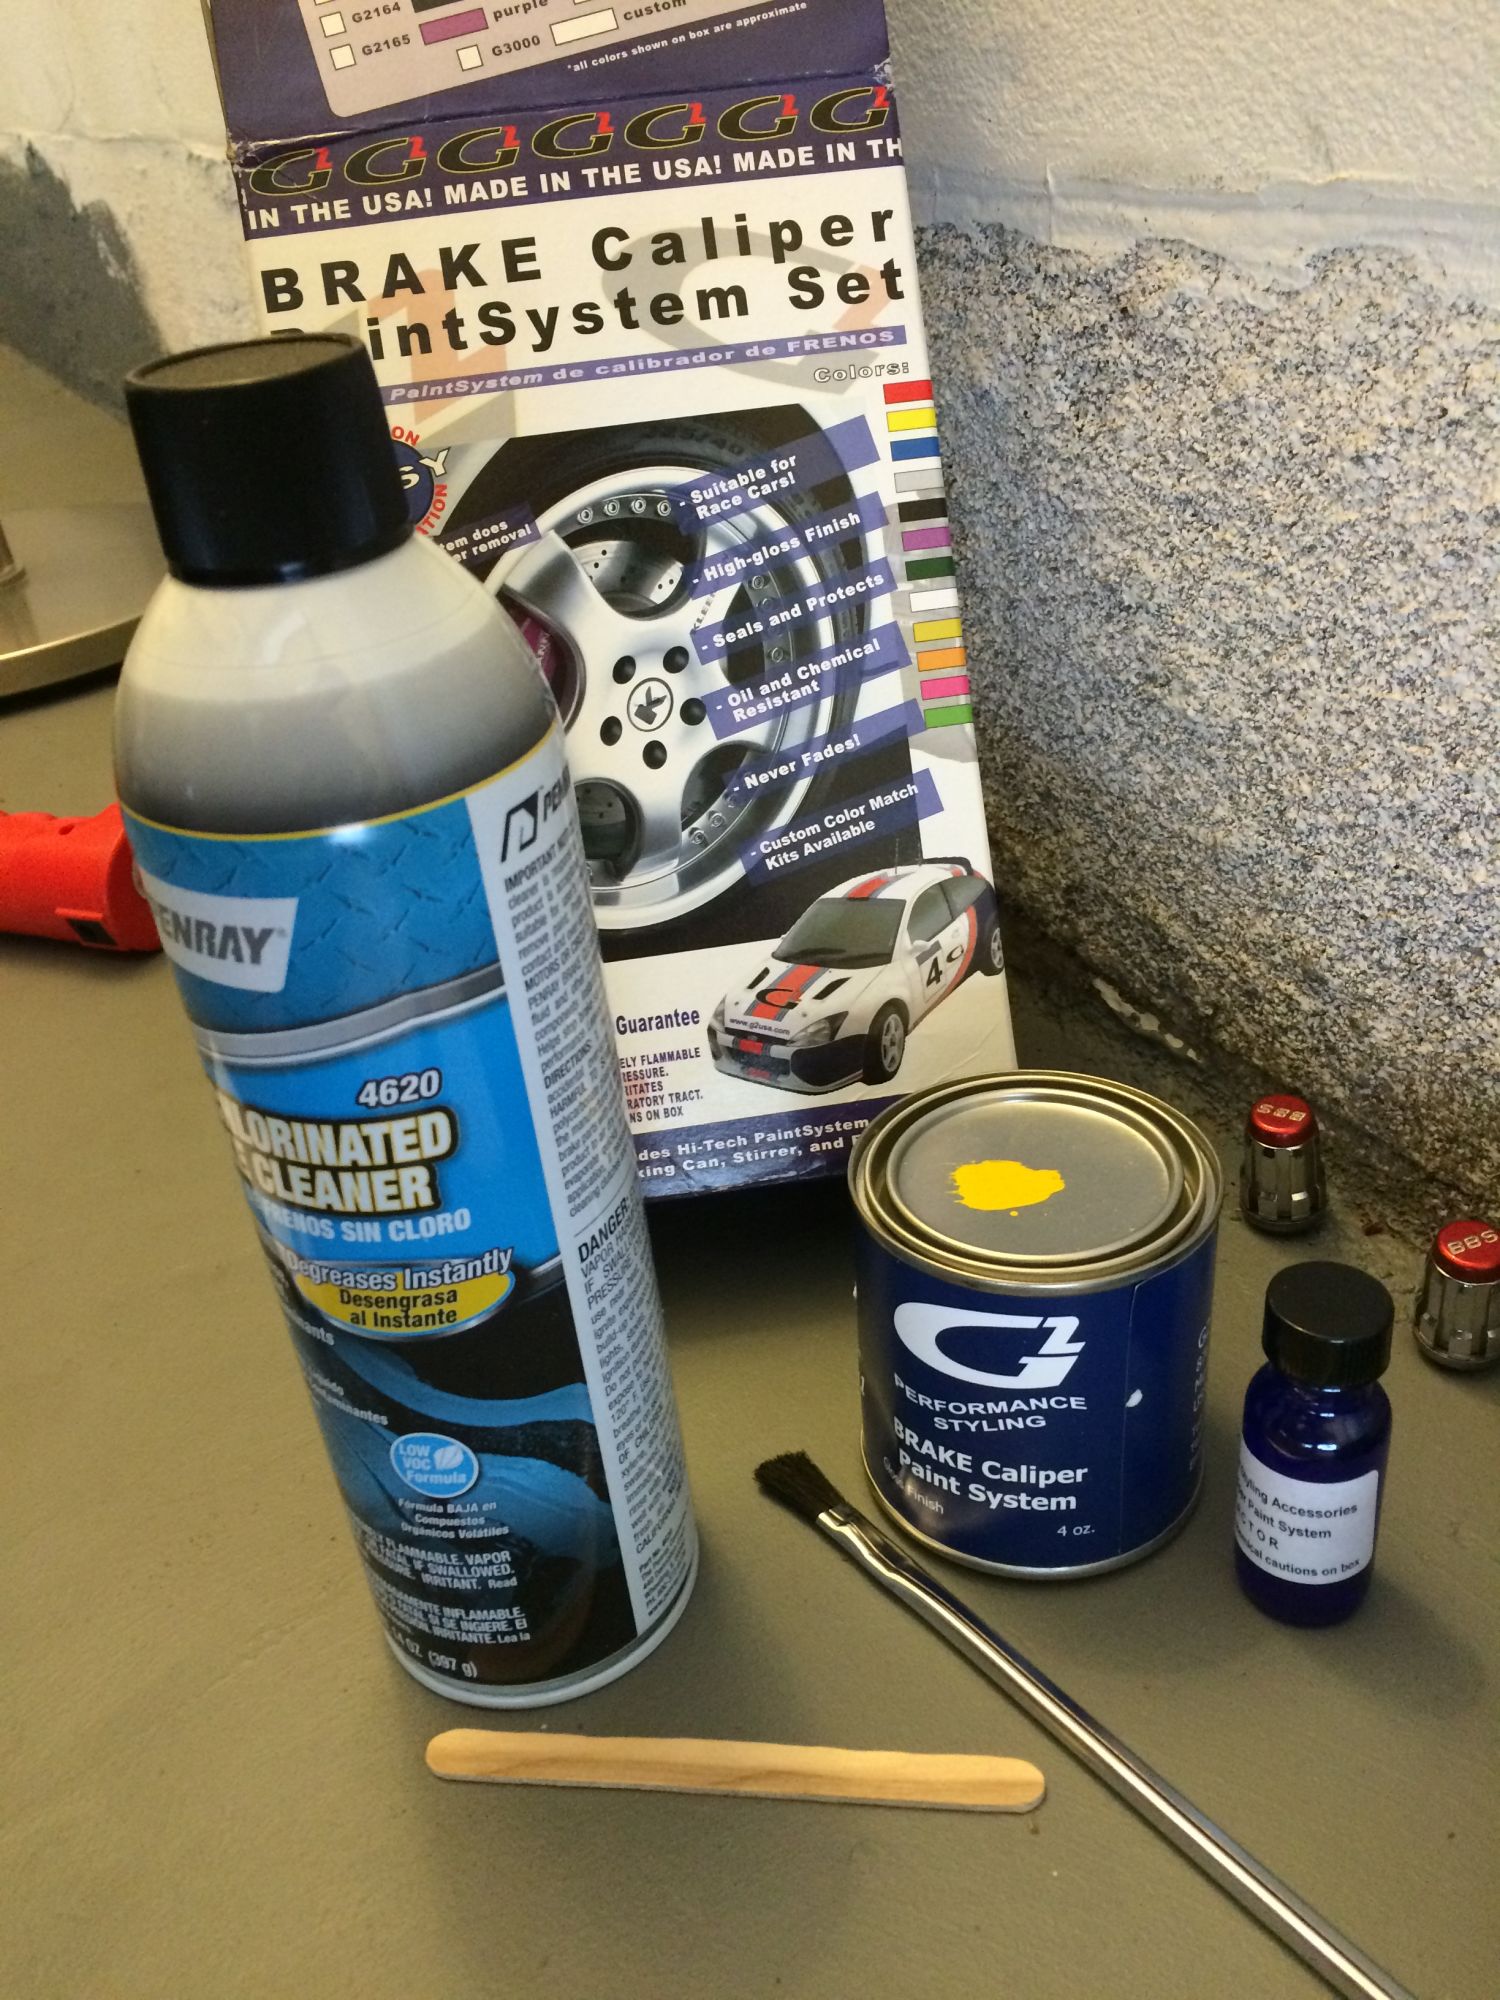
Time to paint the Caliper:
Here are the paints kit, it came with Paint, another can of brake cleaner/acetone, hardener/catalyst for paint, brush and plenty of instruction:
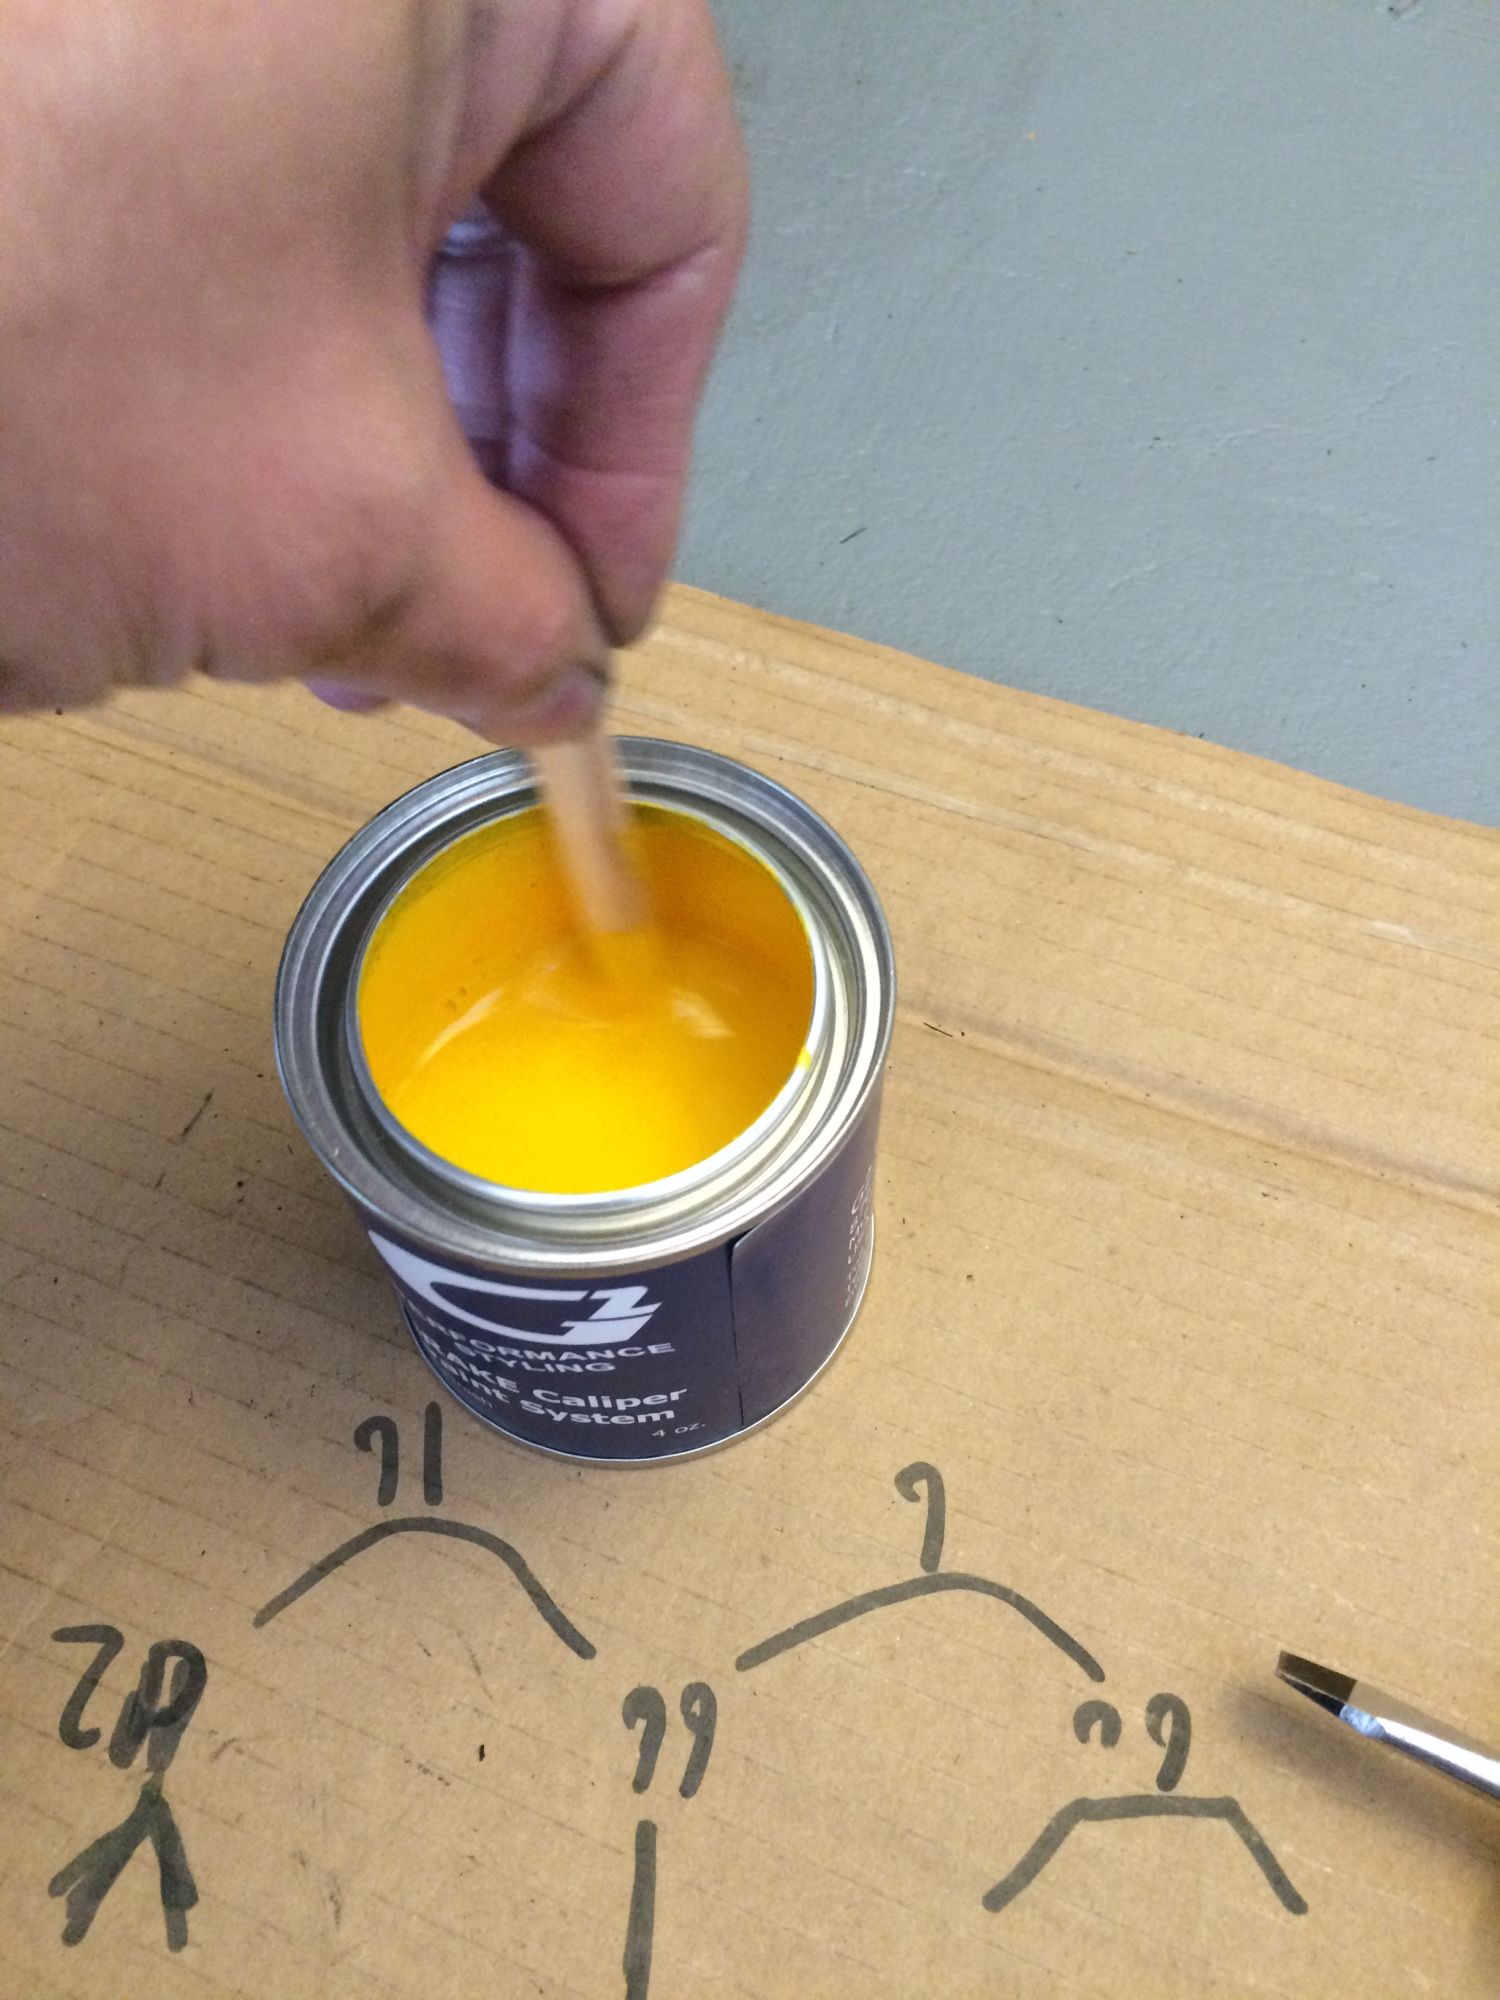
Pour the catalyst/hardener to the paint:
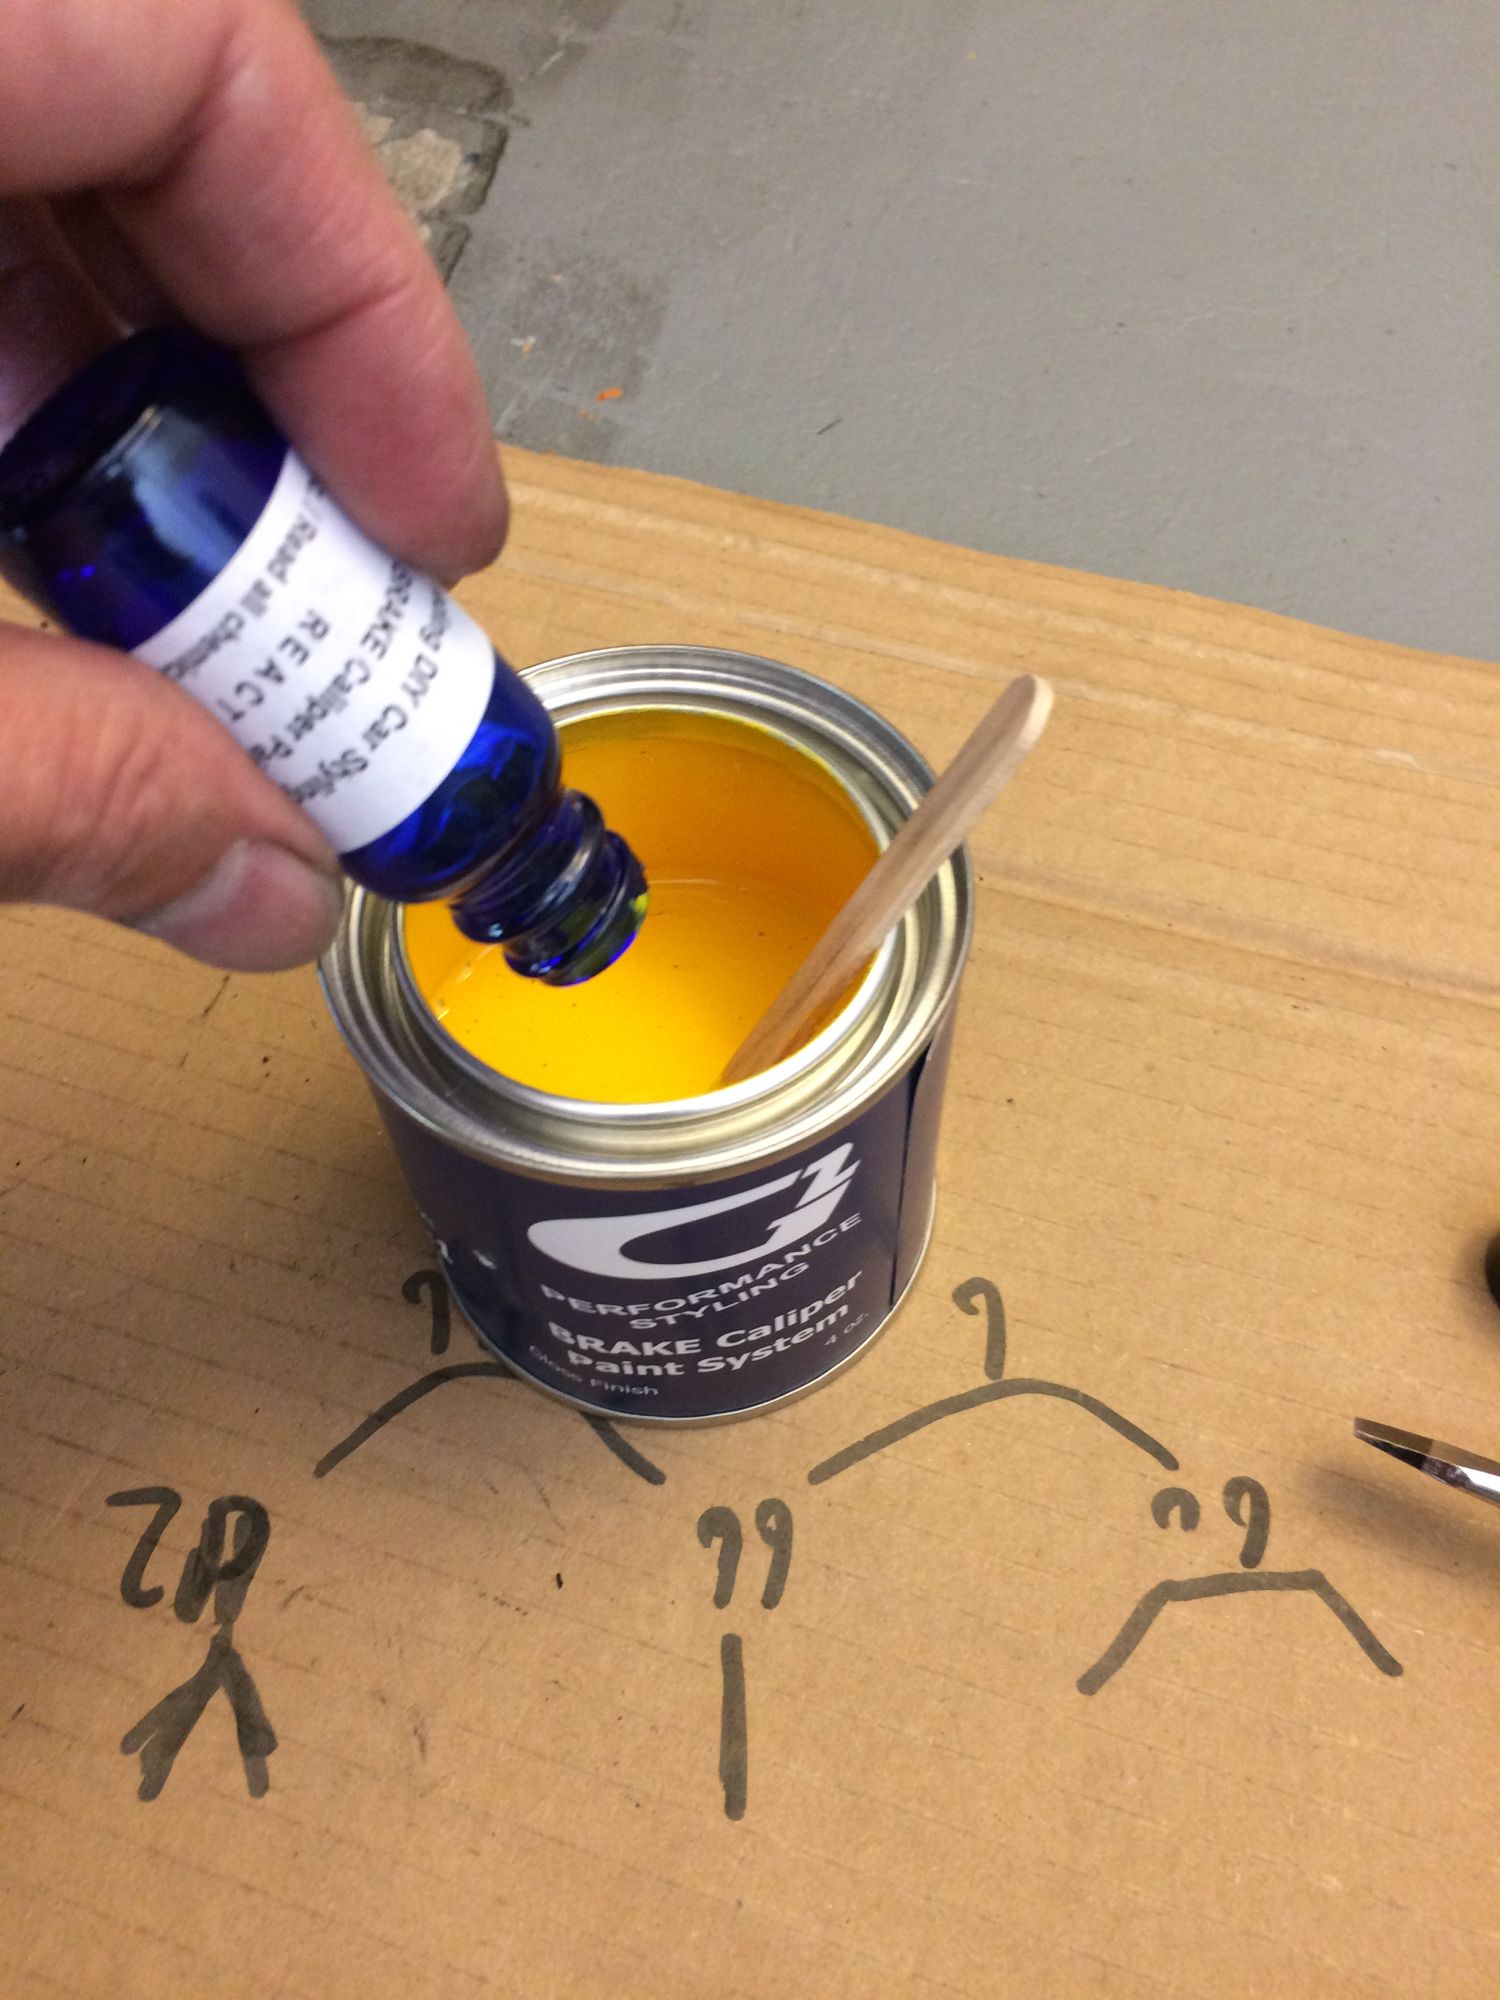
Mixed for 2 minutes, let it react for 5 minutes and mixed it again:
I am not very perfect with brush hahaha ,
,
but amazingly this paint have some kind of self elastic features
that after a while it become even by it self:
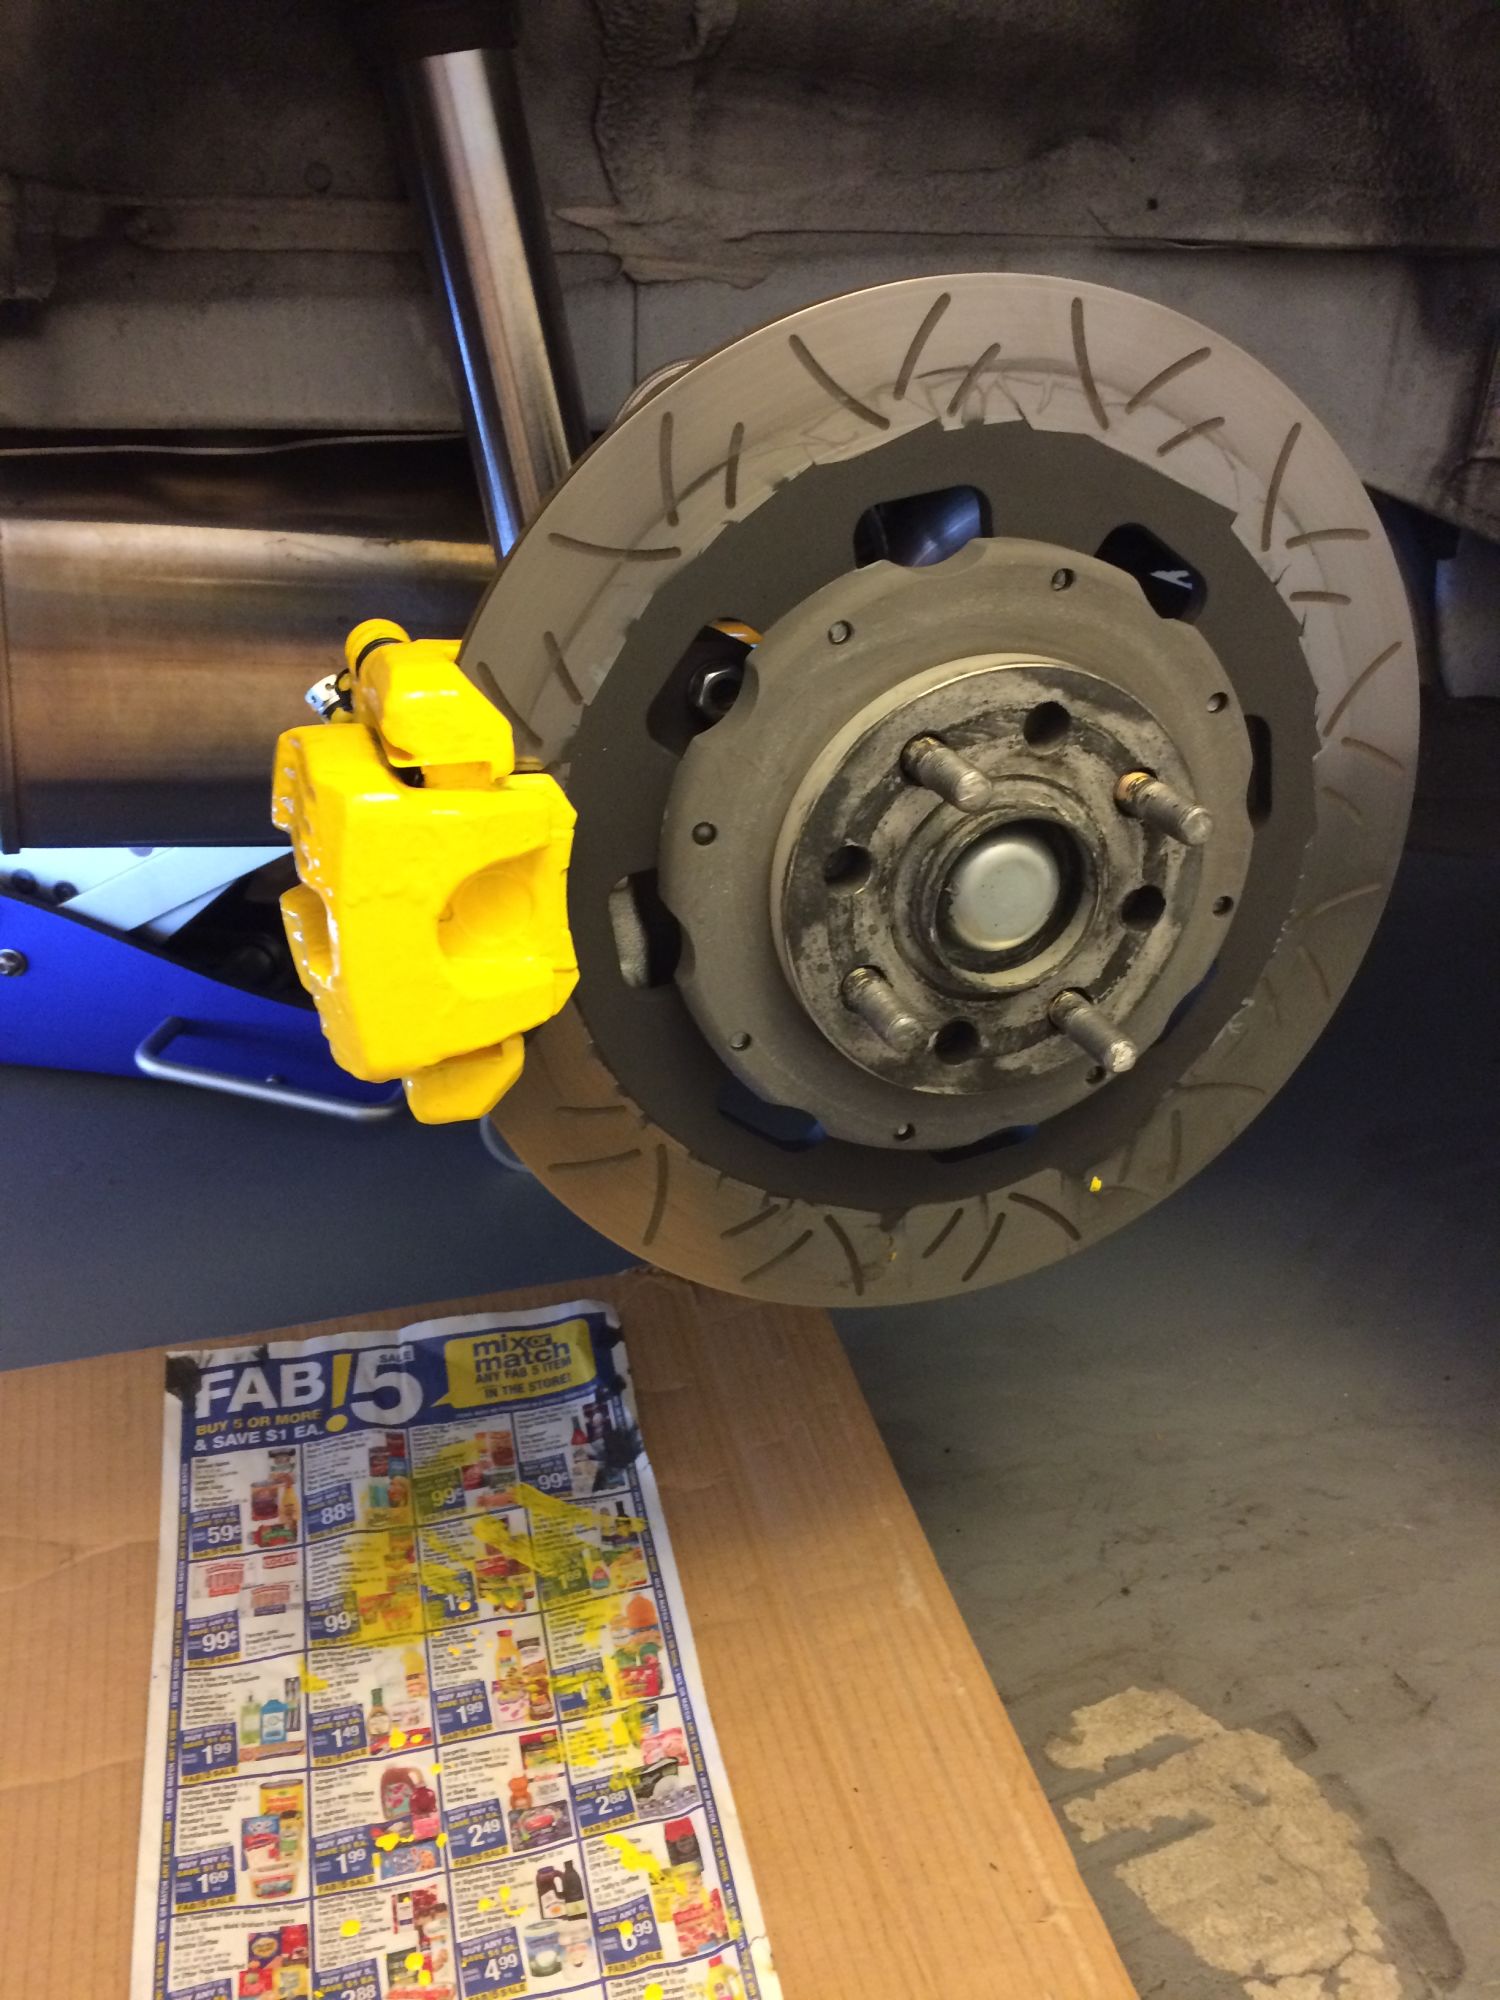
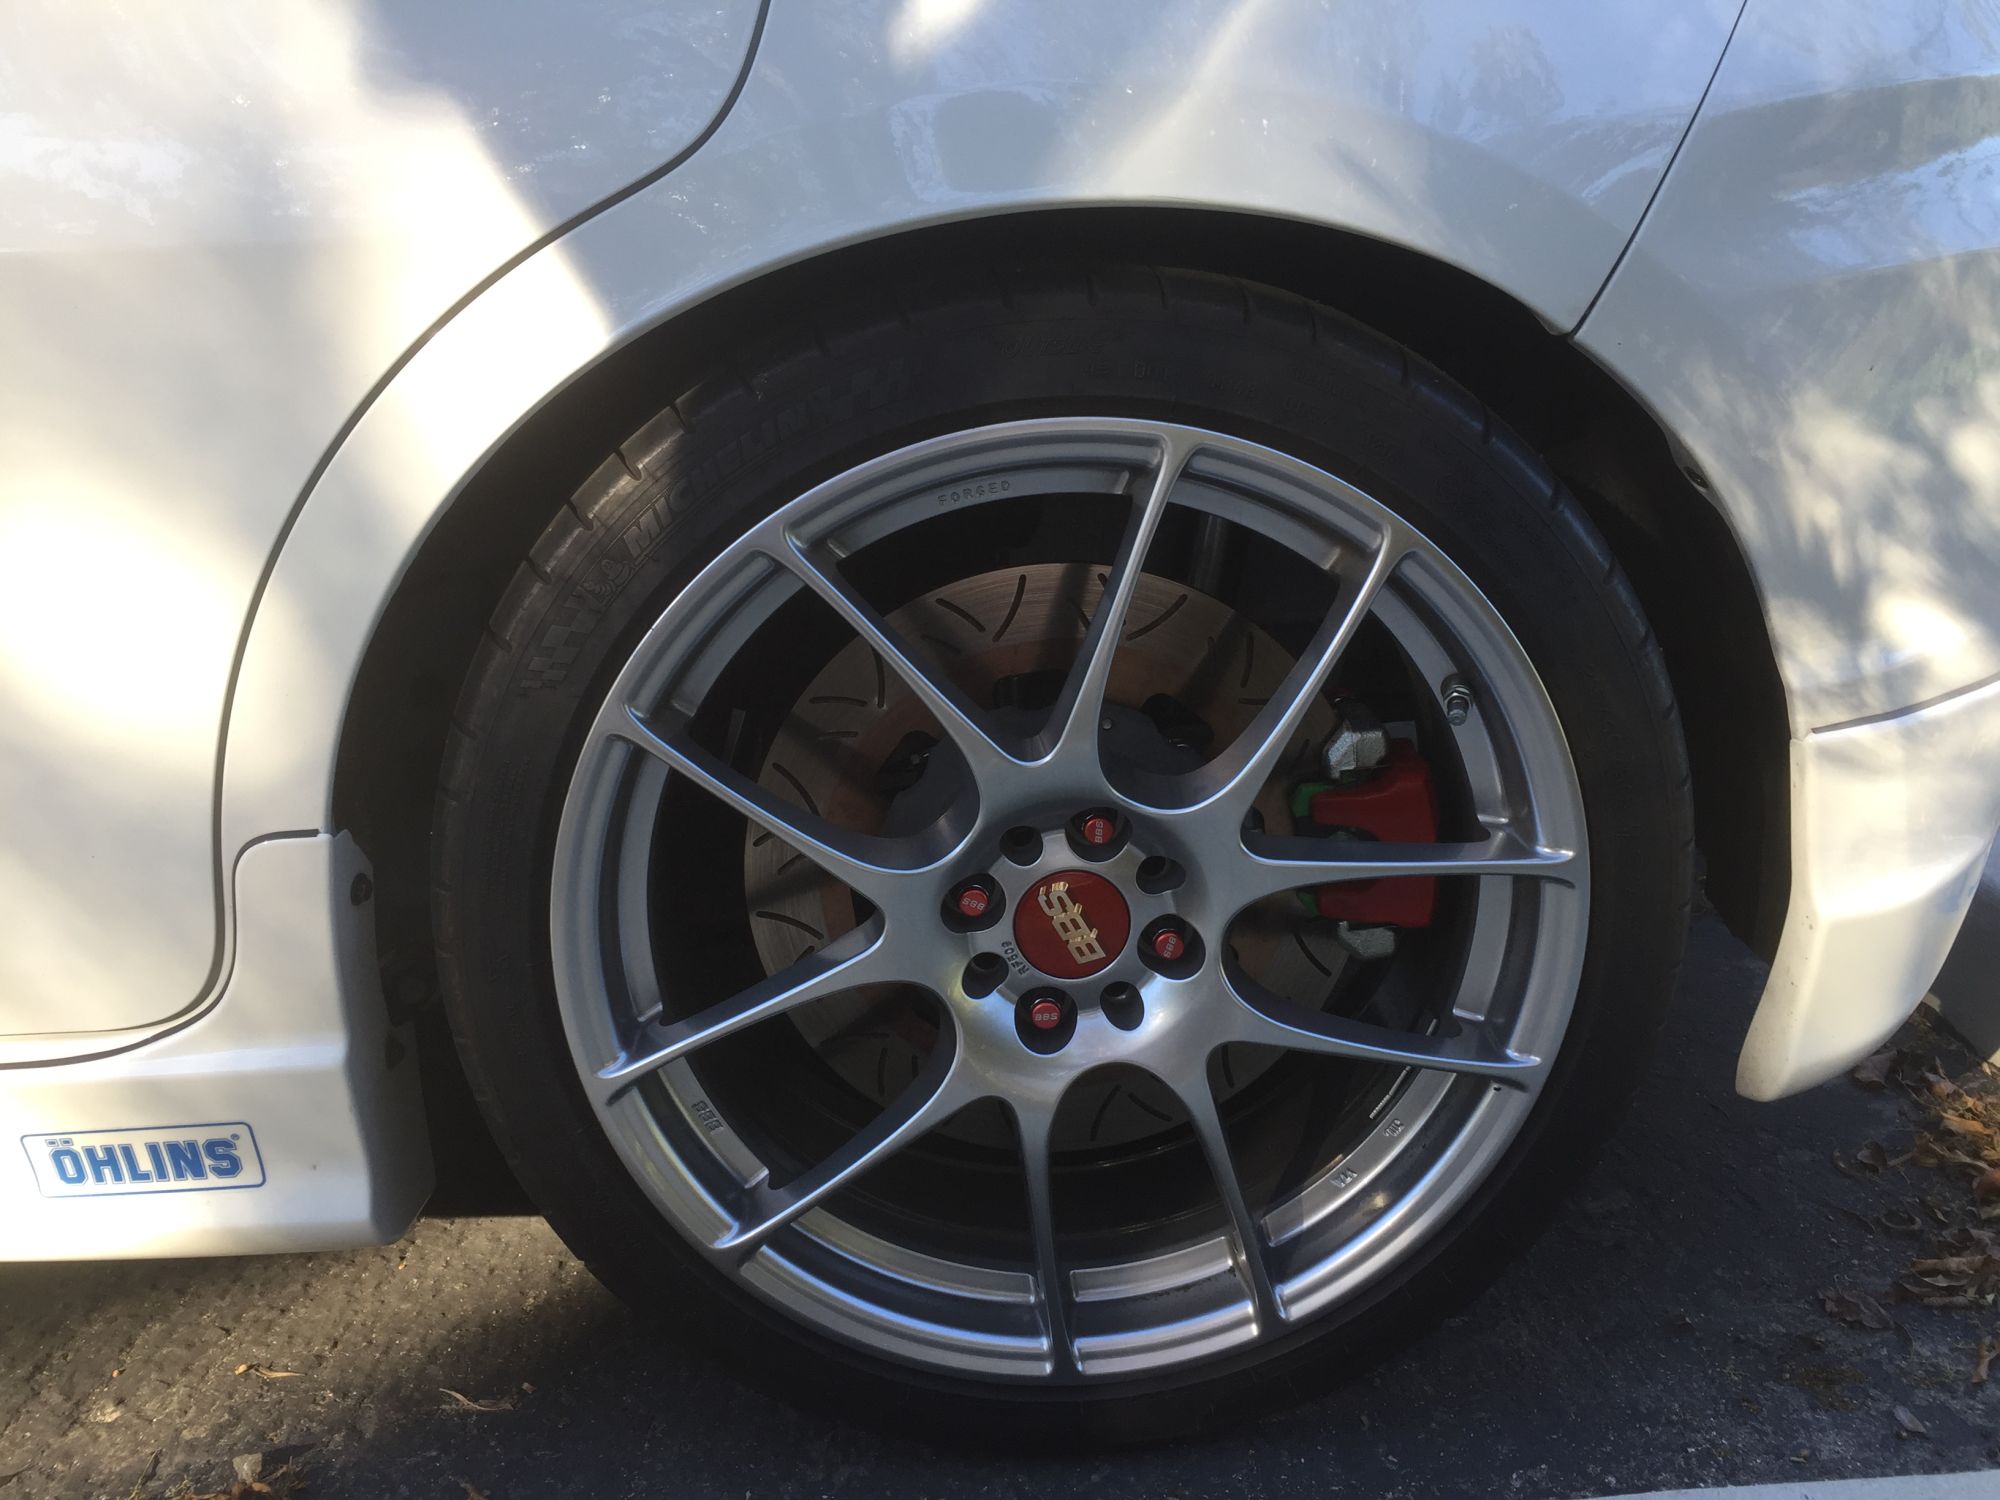
Wait for 2 hours after painting before install the wheel according to the instruction... well I decide to wait longer and just install the wheel back,
I like the looks because now I have both yellow on all four corners
I also paint parts of the disk brake (rotors) that do not come in touch with the pads and rusting with black high temp paint.
The original color of Red Caliper with Silver Bracket, green EBC pads and rusting braking rotors/disk brake:
Protect the Car Paint with newspaper and also masked the area to paint the rusting disk brake/rotors:
Clean the area I am going to paint with Brake Cleaner (Acetone):
Primer High Temp Paint for the rusting disk brake/rotor:
Painted with Primer:
Black High Temp ready to be applied about 1 hour after the primer:
Rotor/Disk Brake painted so no longer show any rusting parts,
I know the black paint is not really round/perfect circle, but it will become perfect circle as soon as I use this brake
Time to paint the Caliper:
Here are the paints kit, it came with Paint, another can of brake cleaner/acetone, hardener/catalyst for paint, brush and plenty of instruction:
Pour the catalyst/hardener to the paint:
Mixed for 2 minutes, let it react for 5 minutes and mixed it again:
I am not very perfect with brush hahaha
,but amazingly this paint have some kind of self elastic features
that after a while it become even by it self:
Wait for 2 hours after painting before install the wheel according to the instruction... well I decide to wait longer and just install the wheel back
,I like the looks because now I have both yellow on all four corners
#317
05-09-2016, 08:03 PM

looks good!
That G2 caliper paint is the best. Its expensive ($40?) but, it is very hard chemical resistant and color won't fade. Can still chip if you hit it with the wheel good, but still not as bad as any 1 part paint.
Does that wire tool cost much? I need to wire up my wilwoods in the front and the new discs I got from you to the wilwood hats.
#318
05-09-2016, 08:22 PM
looks good!
That G2 caliper paint is the best. Its expensive ($40?) but, it is very hard chemical resistant and color won't fade. Can still chip if you hit it with the wheel good, but still not as bad as any 1 part paint.
Does that wire tool cost much? I need to wire up my wilwoods in the front and the new discs I got from you to the wilwood hats.
That G2 caliper paint is the best. Its expensive ($40?) but, it is very hard chemical resistant and color won't fade. Can still chip if you hit it with the wheel good, but still not as bad as any 1 part paint.
Does that wire tool cost much? I need to wire up my wilwoods in the front and the new discs I got from you to the wilwood hats.
I bought the tools from eBay:
Blue Point Safety Wire Twister #WTRW6A
The seller was selling an overstock but it is a brand new condition.
I bought it for just $76, so I am lucky...
I saw 2 seller on eBay now trying to sell it for around $127 to $140 (or best offer).
#319
05-10-2016, 09:19 AM
wow! May have to do by hand.
Next time I take a lesuirly drive through the neighborhood maybe I can borrow it. Your only about 3000 miles away after all, we're practically nieghbors!
How was the rigid colar instal? I have to do start looking at my bushings and all the stock rubber suspension bits. Feeling a bit to much slop for my liking.
#320
05-10-2016, 11:39 AM
 Lot of work there! Lots of detail.. Great writeup.
 More tips,,,
FYI in general you only need about 1 gram of anti seize on a lug, its not recommended at all on the street on lugs, for your center hub just a haze will do it.
Another option,,, POR-15 has a paint product thats wicked tough for painting calipers and other hard parts that get hot.. its also a self leveling product so it turns smooth as it cures.
On your top - hat bolts from the outer side opposite the heads, there is a product sold by electric suppliers and some aircraft suppliers that is to let you know if a bolt goes loose, you can fill the hole with it and it will dry in about 15 minutes, it cracks if the bolt turns at all and you'll be able to see from the outside if the bolts have moved at all.. Its like a brittle paint, and it will help keep moisture out of the threads, but it does not retain the bolt at all.