When you click on links to various merchants on this site and make a purchase, this can result in this site earning a commission. Affiliate programs and affiliations include, but are not limited to, the eBay Partner Network.
These interior footwell lights go on and off with the dome light and do not stay on after the dome light goes off so these are not considered 'ambient' lights that are on while driving.
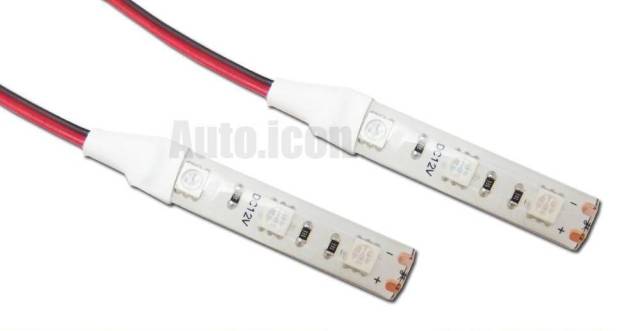
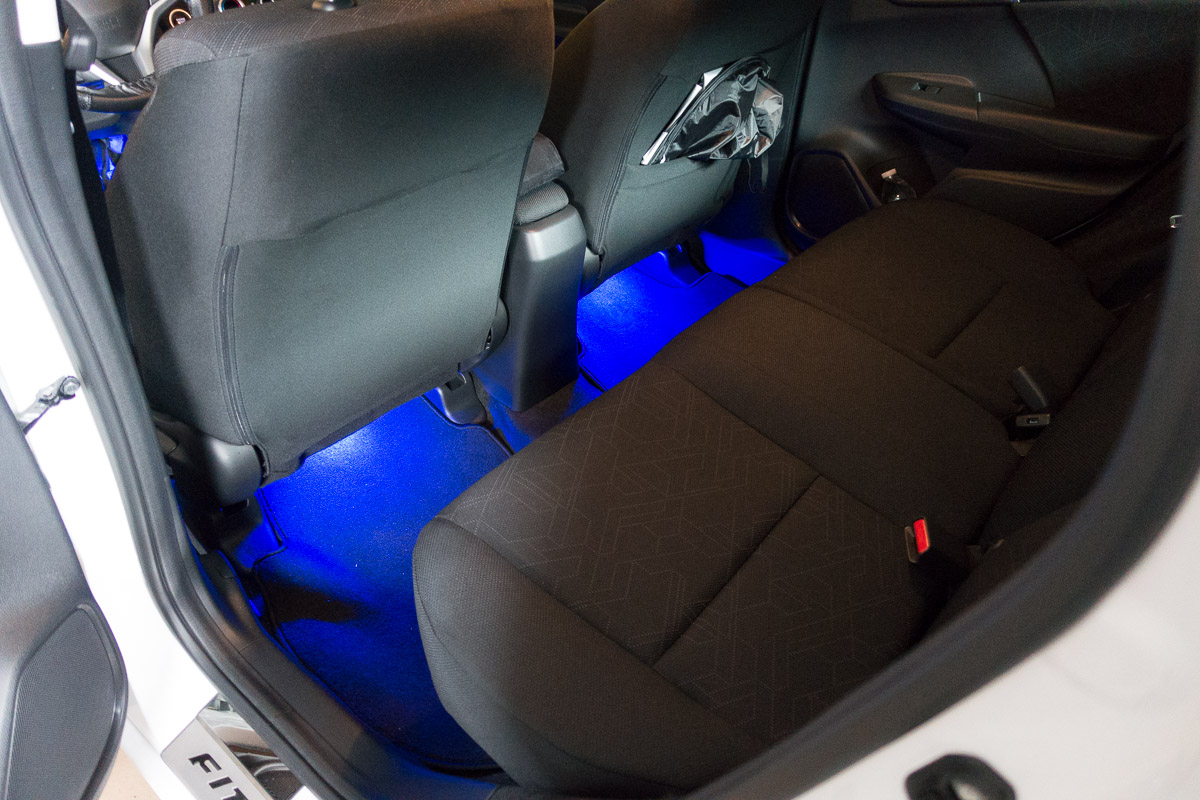
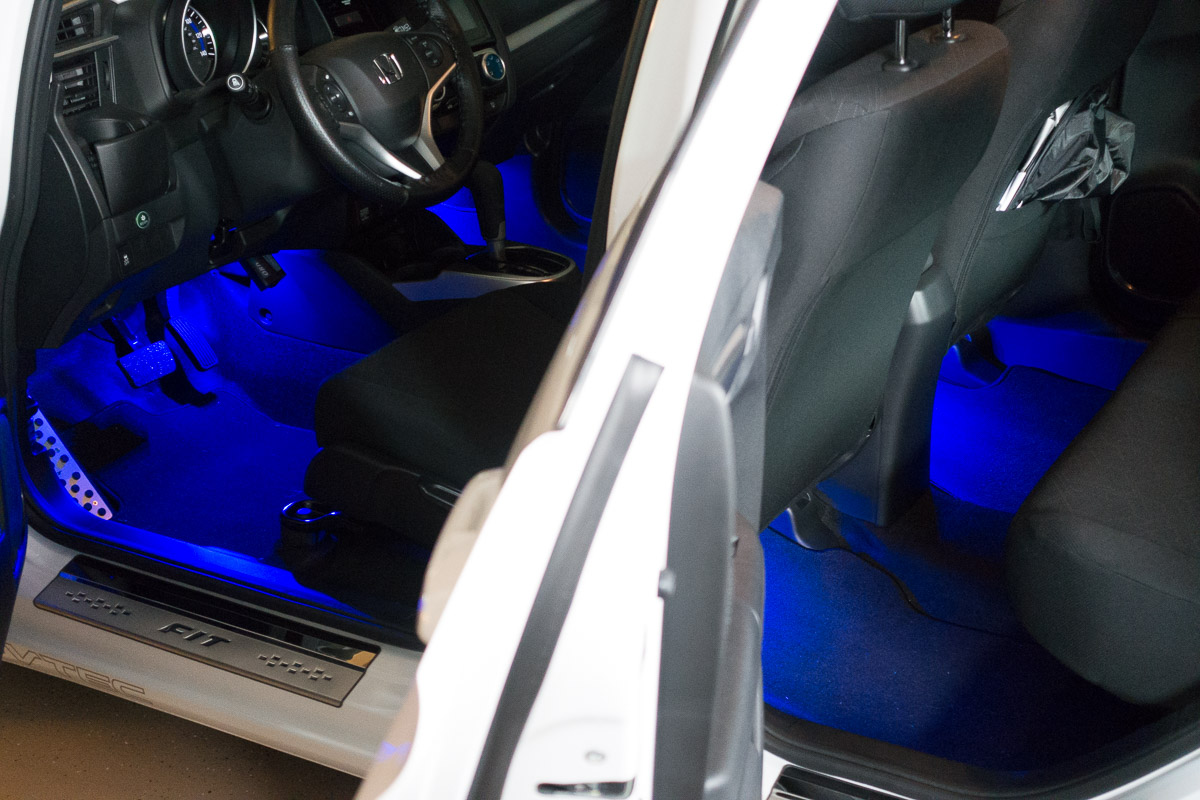
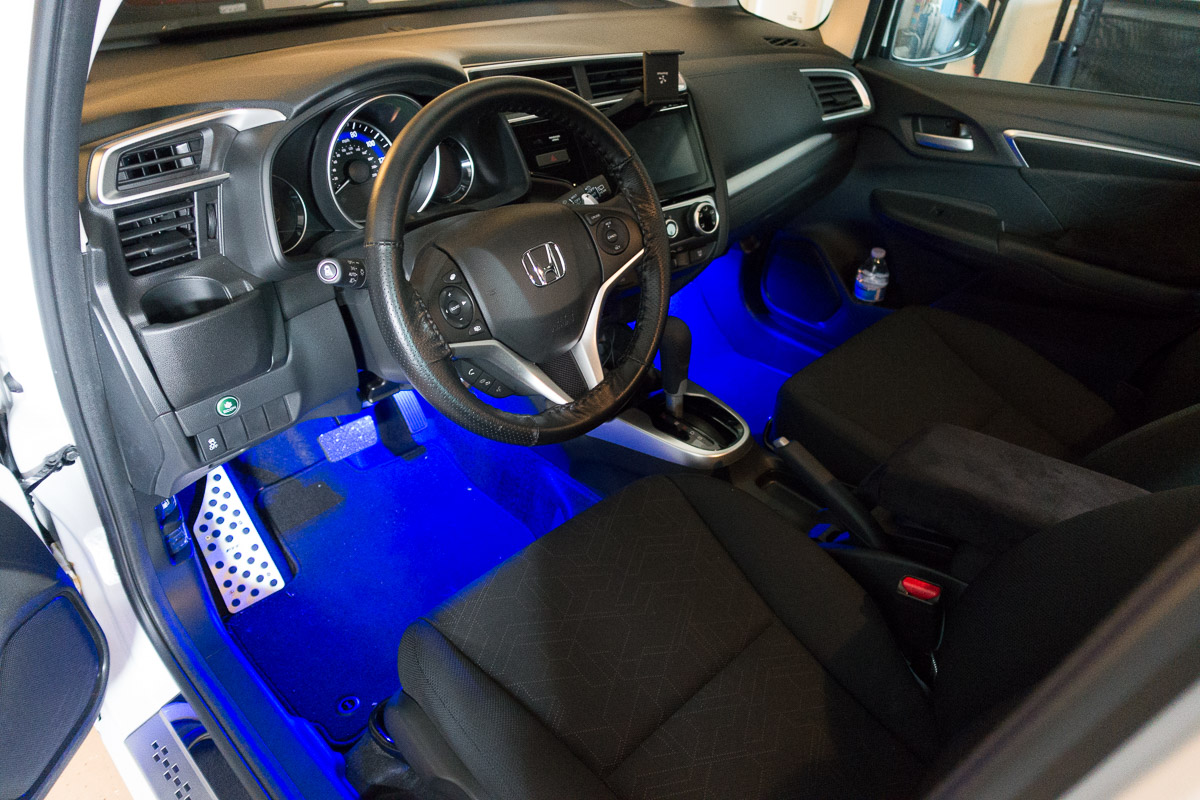
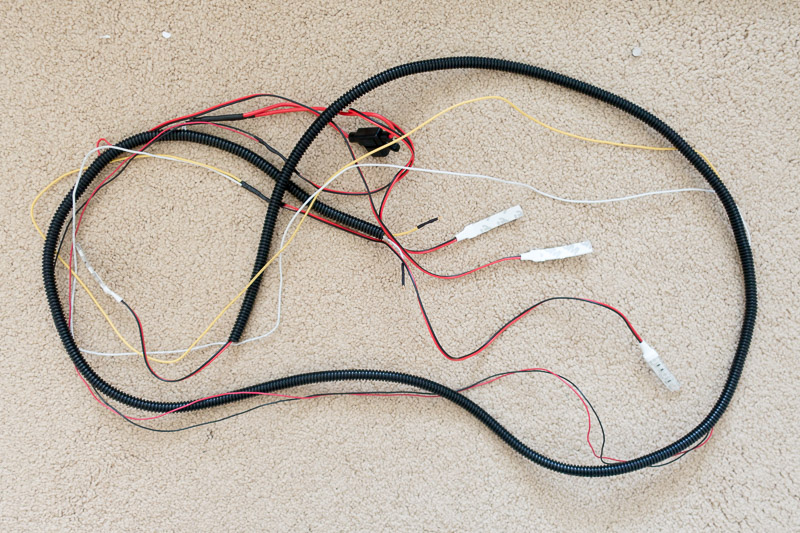
The camera really brings out the blue color, they are not actually quite that bright. Took several hours to make the harness using shrink wrap and several more to install and route along the central console.
I used more of the flex tubing under the front seats (not shown) during final installation.
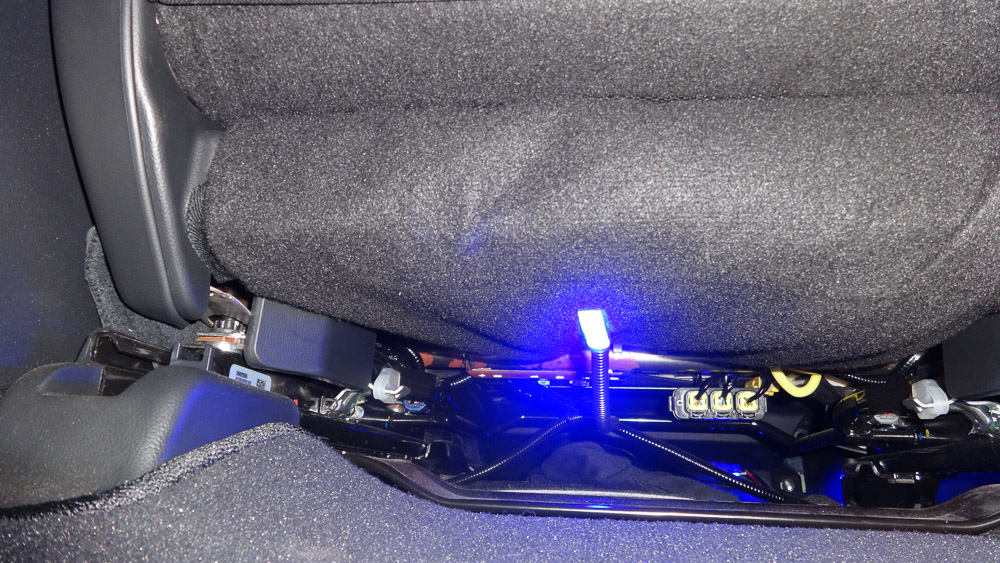
Well, I figured out the wiring on the dome light so that I could hook up my after-market illuminated door sills. If you look at the instructions for the OEM door sill garnish you will see that they show where to install the OEM Wire Harness connector into the fuse panel. It is an 8 pin connector. The following are the pins of importance within the fuse panel:
FUSE PANEL PINS
1 2 3 4
5 6 7 8
Pin 1 and 4 represent the two pins that link to the Dome light and activate upon opening the door(s) (Pin 4 is the HOT lead - and Pin 1 is the circuit completion lead). I have not been able to locate a suitable connector to use with the fuse panel but I was able to fashion a small quick connect spade connector by taking a standard small spade connector and removing all but one side of the connector and then flattening it a bit with a pair of pliers. This allowed me to create a small enough connector to slip over the small flat pin within the Fuse Panel area without touching any of the other pins. Hopefully at some point I can purchase a harness or just the connector to make it a more professional installation but for now this works fine and is totally removable if needed.
Also, one thing to note, To gain better access to the fuse panel I would refer you to the Instructions for installing the OEM Under Dash Illumination Kit for the front foot rest areas... These instructions show you how to remove the panel under the steering wheel. To access it you need to pop off the side panel on the driver's side of the car. (On the side of the car where the driver's cup holder is located) Once this is removed you will see a screw at the bottom - remove this screw and then the panel under the steering wheel can be removed by pulling down and out - similarly to removing the panel under the glove box. This will give you much better access to the fuse panel area.
I'm very pleased with the final result and this should make it easier to locate items on the floor in the dark when getting in and out of the vehicle. And of course there is the 'cool' factor.
MODS: Feel free to move this to the 3rd gen interior forum where I thought I had posted this...
I was recently in an Audi A1 and it had an ambient light. I have never seen it before and looks cool. Also the feature that I like is that when you open the doors it illuminate the floor.
Looks pretty cool your set up. To bad I am not a tech savy guy. What other things you have done? Or any future plans?
Any suggestions for how to mount the ones under the front seat, I felt around and it feels like a large cloth cover... Curious how yours are attached? Thanks!
Any suggestions for how to mount the ones under the front seat, I felt around and it feels like a large cloth cover... Curious how yours are attached? Thanks!
Simple, Velcro. The under seat fabric material is the 'Vel', and I put the 'Cro' on the light assembly where the 3M sticky tape was.
I used zip ties to hold the LED wire up to the existing wires in the front of the seat to keep it steady when the seat moves back and forth. The wires are all inside 1/4" convoluted tubing so it looks or at least matches the OEM wiring harnesses.
These interior footwell lights go on and off with the dome light and do not stay on after the dome light goes off so these are not considered 'ambient' lights that are on while driving.
I'm very pleased with the final result and this should make it easier to locate items on the floor in the dark when getting in and out of the vehicle. And of course there is the 'cool' factor.
MODS: Feel free to move this to the 3rd gen interior forum where I thought I had posted this...
tbFit, very interested in doing this project but not very electrically savy. Did you splice all the LED leads together before the fuse and then the fuse to the box? Did you use a terminal fork for the connection to the box? Any help would be greatly appreciated!
tbFit, very interested in doing this project but not very electrically savy. Did you splice all the LED leads together before the fuse and then the fuse to the box? Did you use a terminal fork for the connection to the box? Any help would be greatly appreciated!
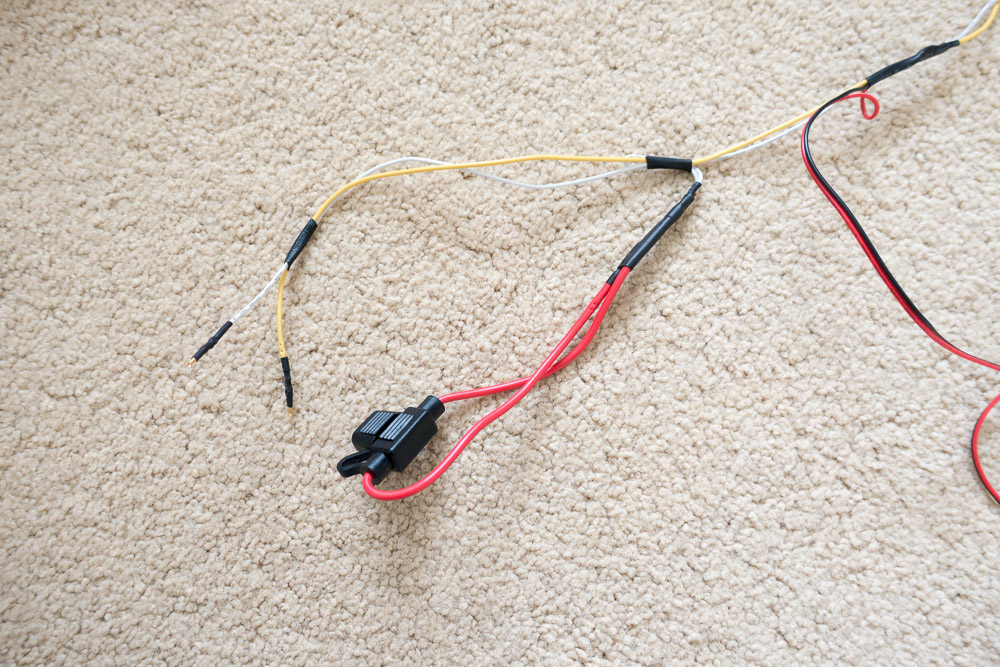
Yes, LED leads all spliced, soldered and shrink wrapped. Inline fuse between the lights and the fuse box.
I used 2 RS232 female serial cable crimp pins on the 2 leads and pushed them on to the terminals in the fuse box.
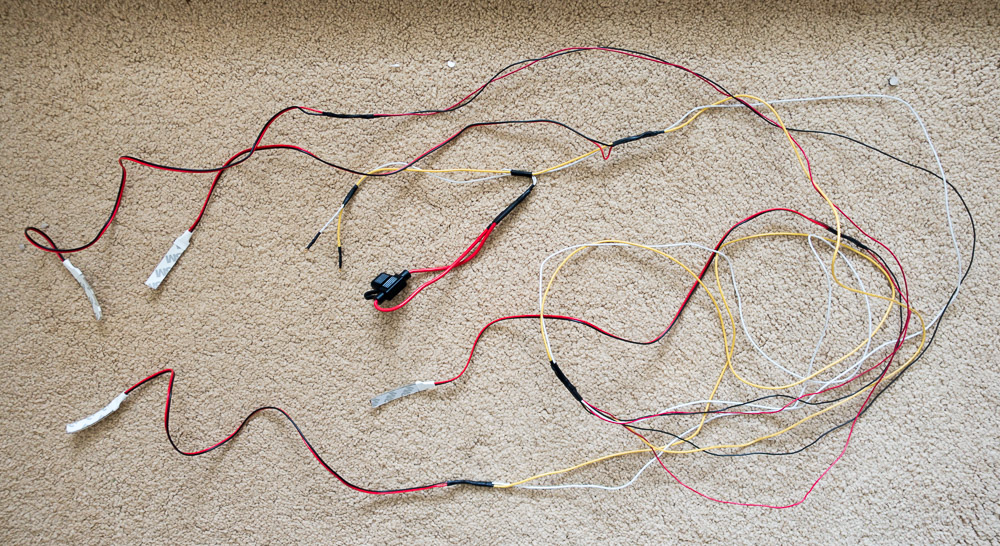
Couple more images of the harness I took back in February:
could you take a picture of the rear foot well? I'm curious to see how you mounted them. I wont be putting it in min as I got under seat subs going in. Yours look great btw! i also got the sills connected to the lights the same way!
Added foot well lighting. These are brighter than the OEM illumination kit and are operated by the Dome light circuit. The door sills are connected to the dome light circuit as well.<br/><br/>I do have the OEM light kit as well which is operated when the headlights are turned on.
Overall picture of the door sill and foot well lighting.
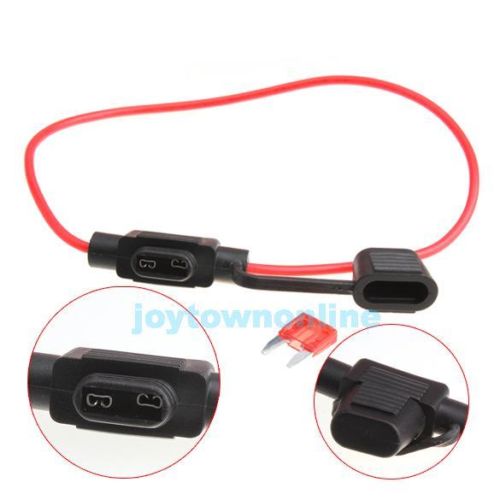
Connector for adding auxiliary lights to the dome light circuit.
could you take a picture of the rear foot well? I'm curious to see how you mounted them.
Thanks... Older pic here:
They are velcro'd to the bottom of the seat as mentioned in an ealier post. The bottom of the seat is acting as one half the velcro, so it just sticks there. The cable leading to that is zip tied to the bottom of the front of the seat and enclosed in tubing.
Fresh pic here:
I love these lights as you can see pretty well even with the dome lights off at night.
Awesome thank you for the pic! If i can fit the rear lights after the sub install ill def follow your lead!
They are velcro'd to the bottom of the seat as mentioned in an ealier post. The bottom of the seat is acting as one half the velcro, so it just sticks there. The cable leading to that is zip tied to the bottom of the front of the seat and enclosed in tubing.
Fresh pic here:
I love these lights as you can see pretty well even with the dome lights off at night.
Awesome! Thanks for the help! Looks like the fuse is only through the negative? Correct?
Awesome! Thanks for the help! Looks like the fuse is only through the negative? Correct?
Based on the photo posted earlier with the terminals designated positive and negative, I hooked the white wire to positive and that is wire I have the fuse on. Although I'm not sure it matters.
Based on the photo posted earlier with the terminals designated positive and negative, I hooked the white wire to positive and that is wire I have the fuse on. Although I'm not sure it matters.
It does matter. Being a negative ground system its established practice to fuse the anode positive. If you only fused the negative, all that positive wire needs to do is touch the chassis to complete the circuit and potentially short out. Fusing the positive prevents murphys law and elimates any path back to the battery that could short to the frame.
It does matter. Being a negative ground system its established practice to fuse the anode positive. If you only fused the negative, all that positive wire needs to do is touch the chassis to complete the circuit and potentially short out. Fusing the positive prevents murphys law and elimates any path back to the battery that could short to the frame.
Just finished mine up with the red LEDs. Took quite a bit of work and time, but looks MAAAAD at a price OEM can't even get close to. Props to tbFit. Pics to come.
Neat, looking forward to the pics. I love how this mod is not just cool to view, but very functional, lighting up the floor area where you tend to lose small items at night.
I installed a switch that allows me to turn on my footwell lights while driving or toggle them to come on with the dome lights. Details in this thread:
 02-22-2015, 01:21 PM


 Big thumbs up credit to Jupiter Joe for the connection point for the dome light circuit.