Installing 12 Volt Always-On Fuse Block
#1
 08-24-2014, 12:13 PM


Installing 12 Volt Always-On Fuse Block
Adding a Fuse Panel
Having a 12v outlet can come in handy if you want to power something when the car is turned off. I'm talking about something like a GPS or a cell phone charger, not a cooler or a TV.
I like to add various electrical accessories to my cars, but I don't like splicing into wires to power them. I came up with the idea of installing a separate fuse block, connected directly to the battery with an inline fuse holder. This protects the whole circuit against shorting out. One fuse panel can power up to six accessories, and you add fuses based on the power requirements of the device.
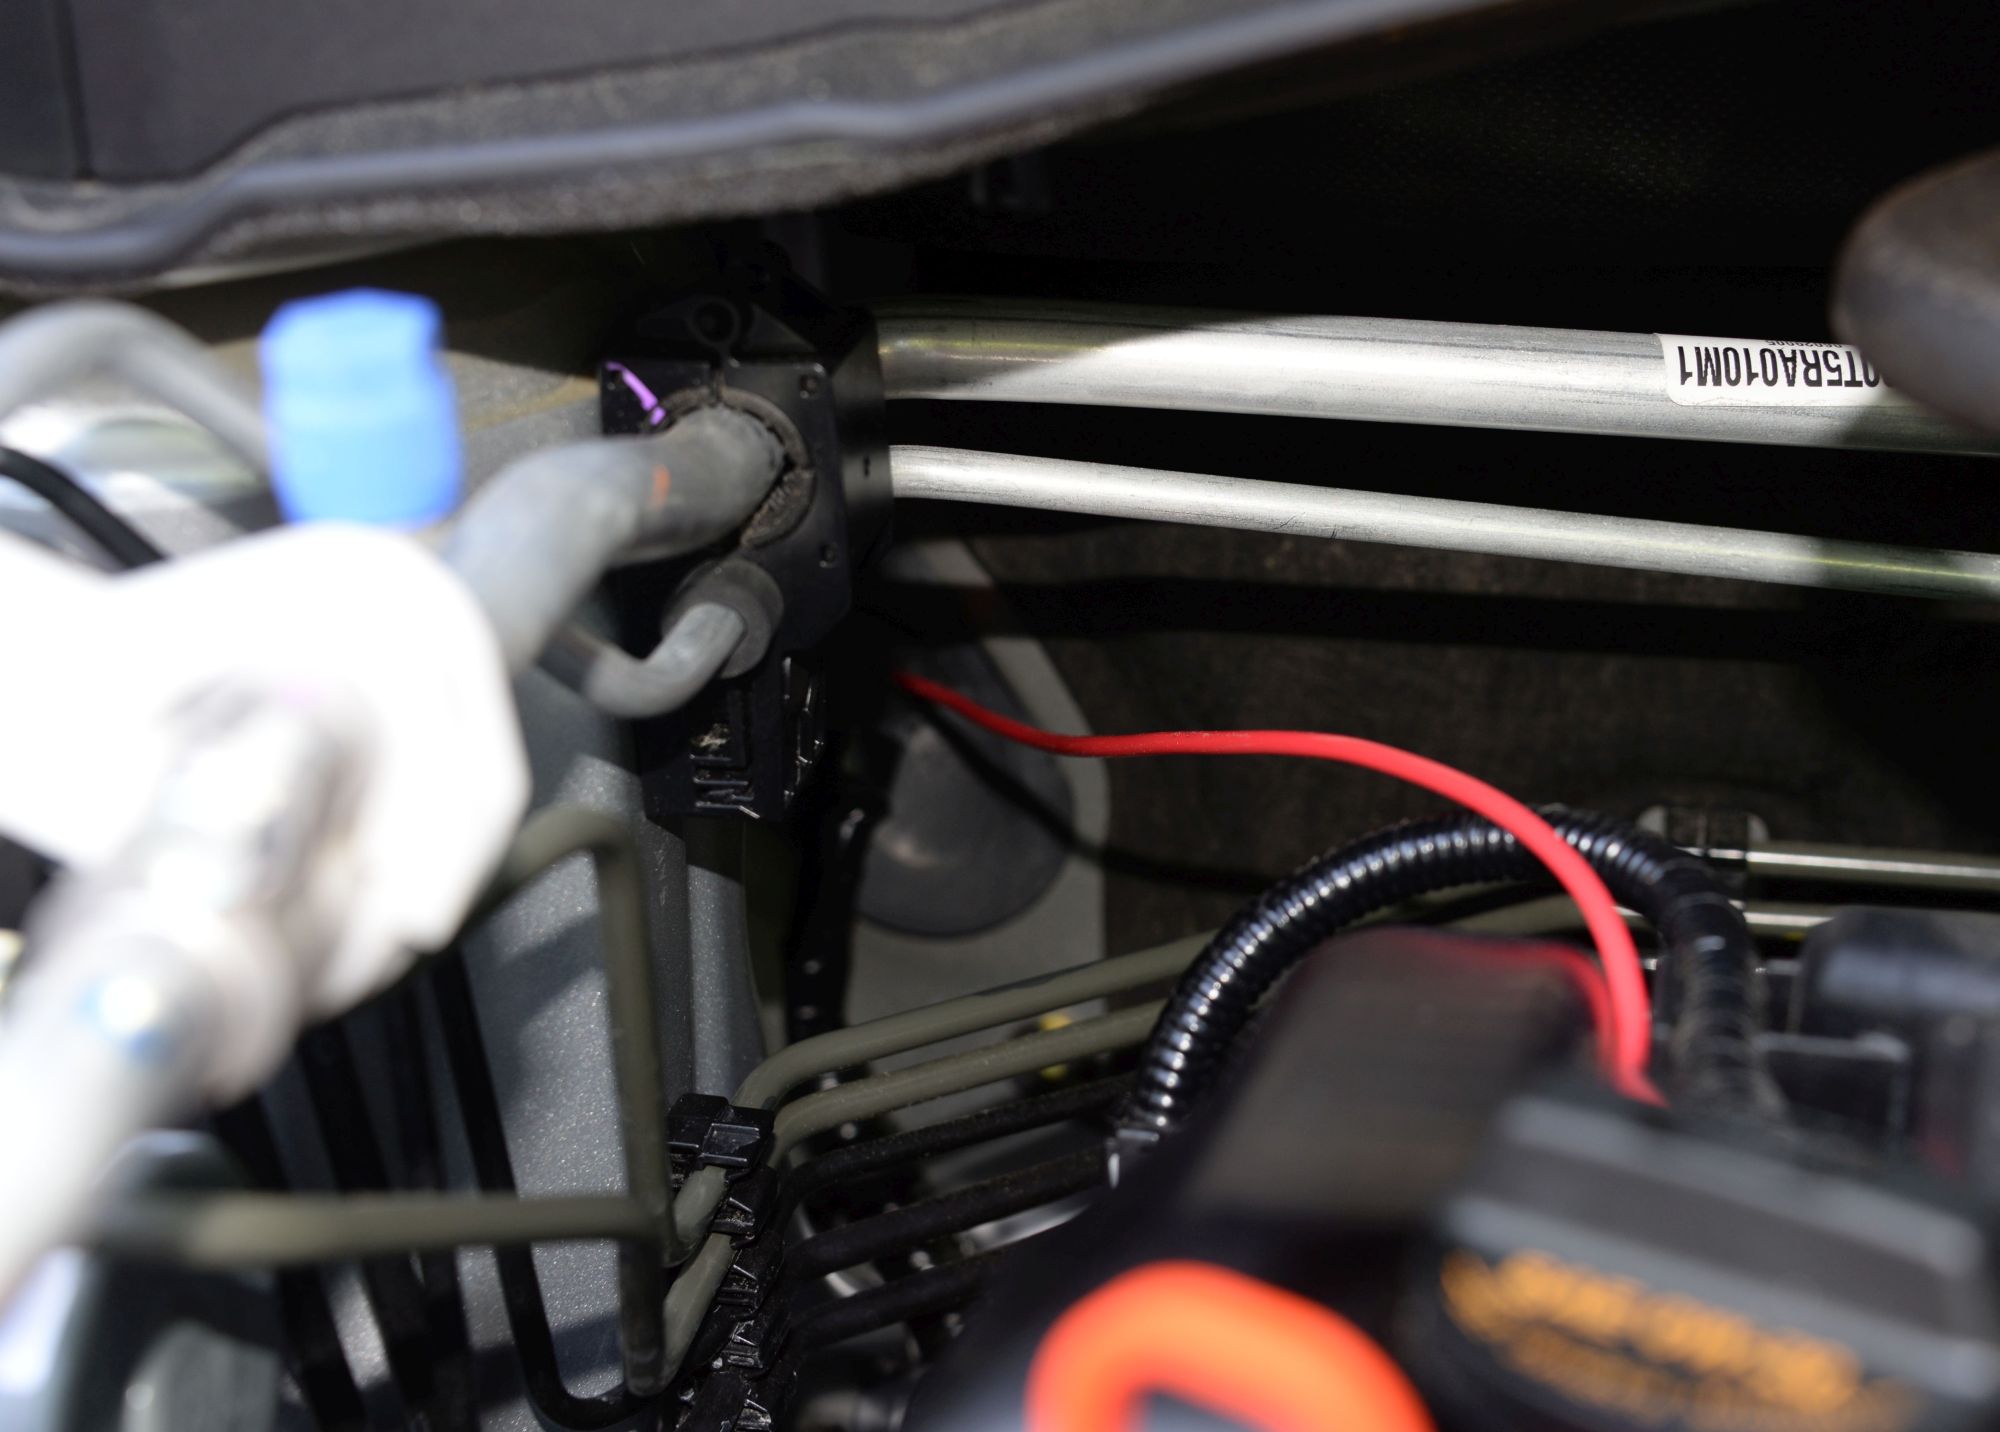
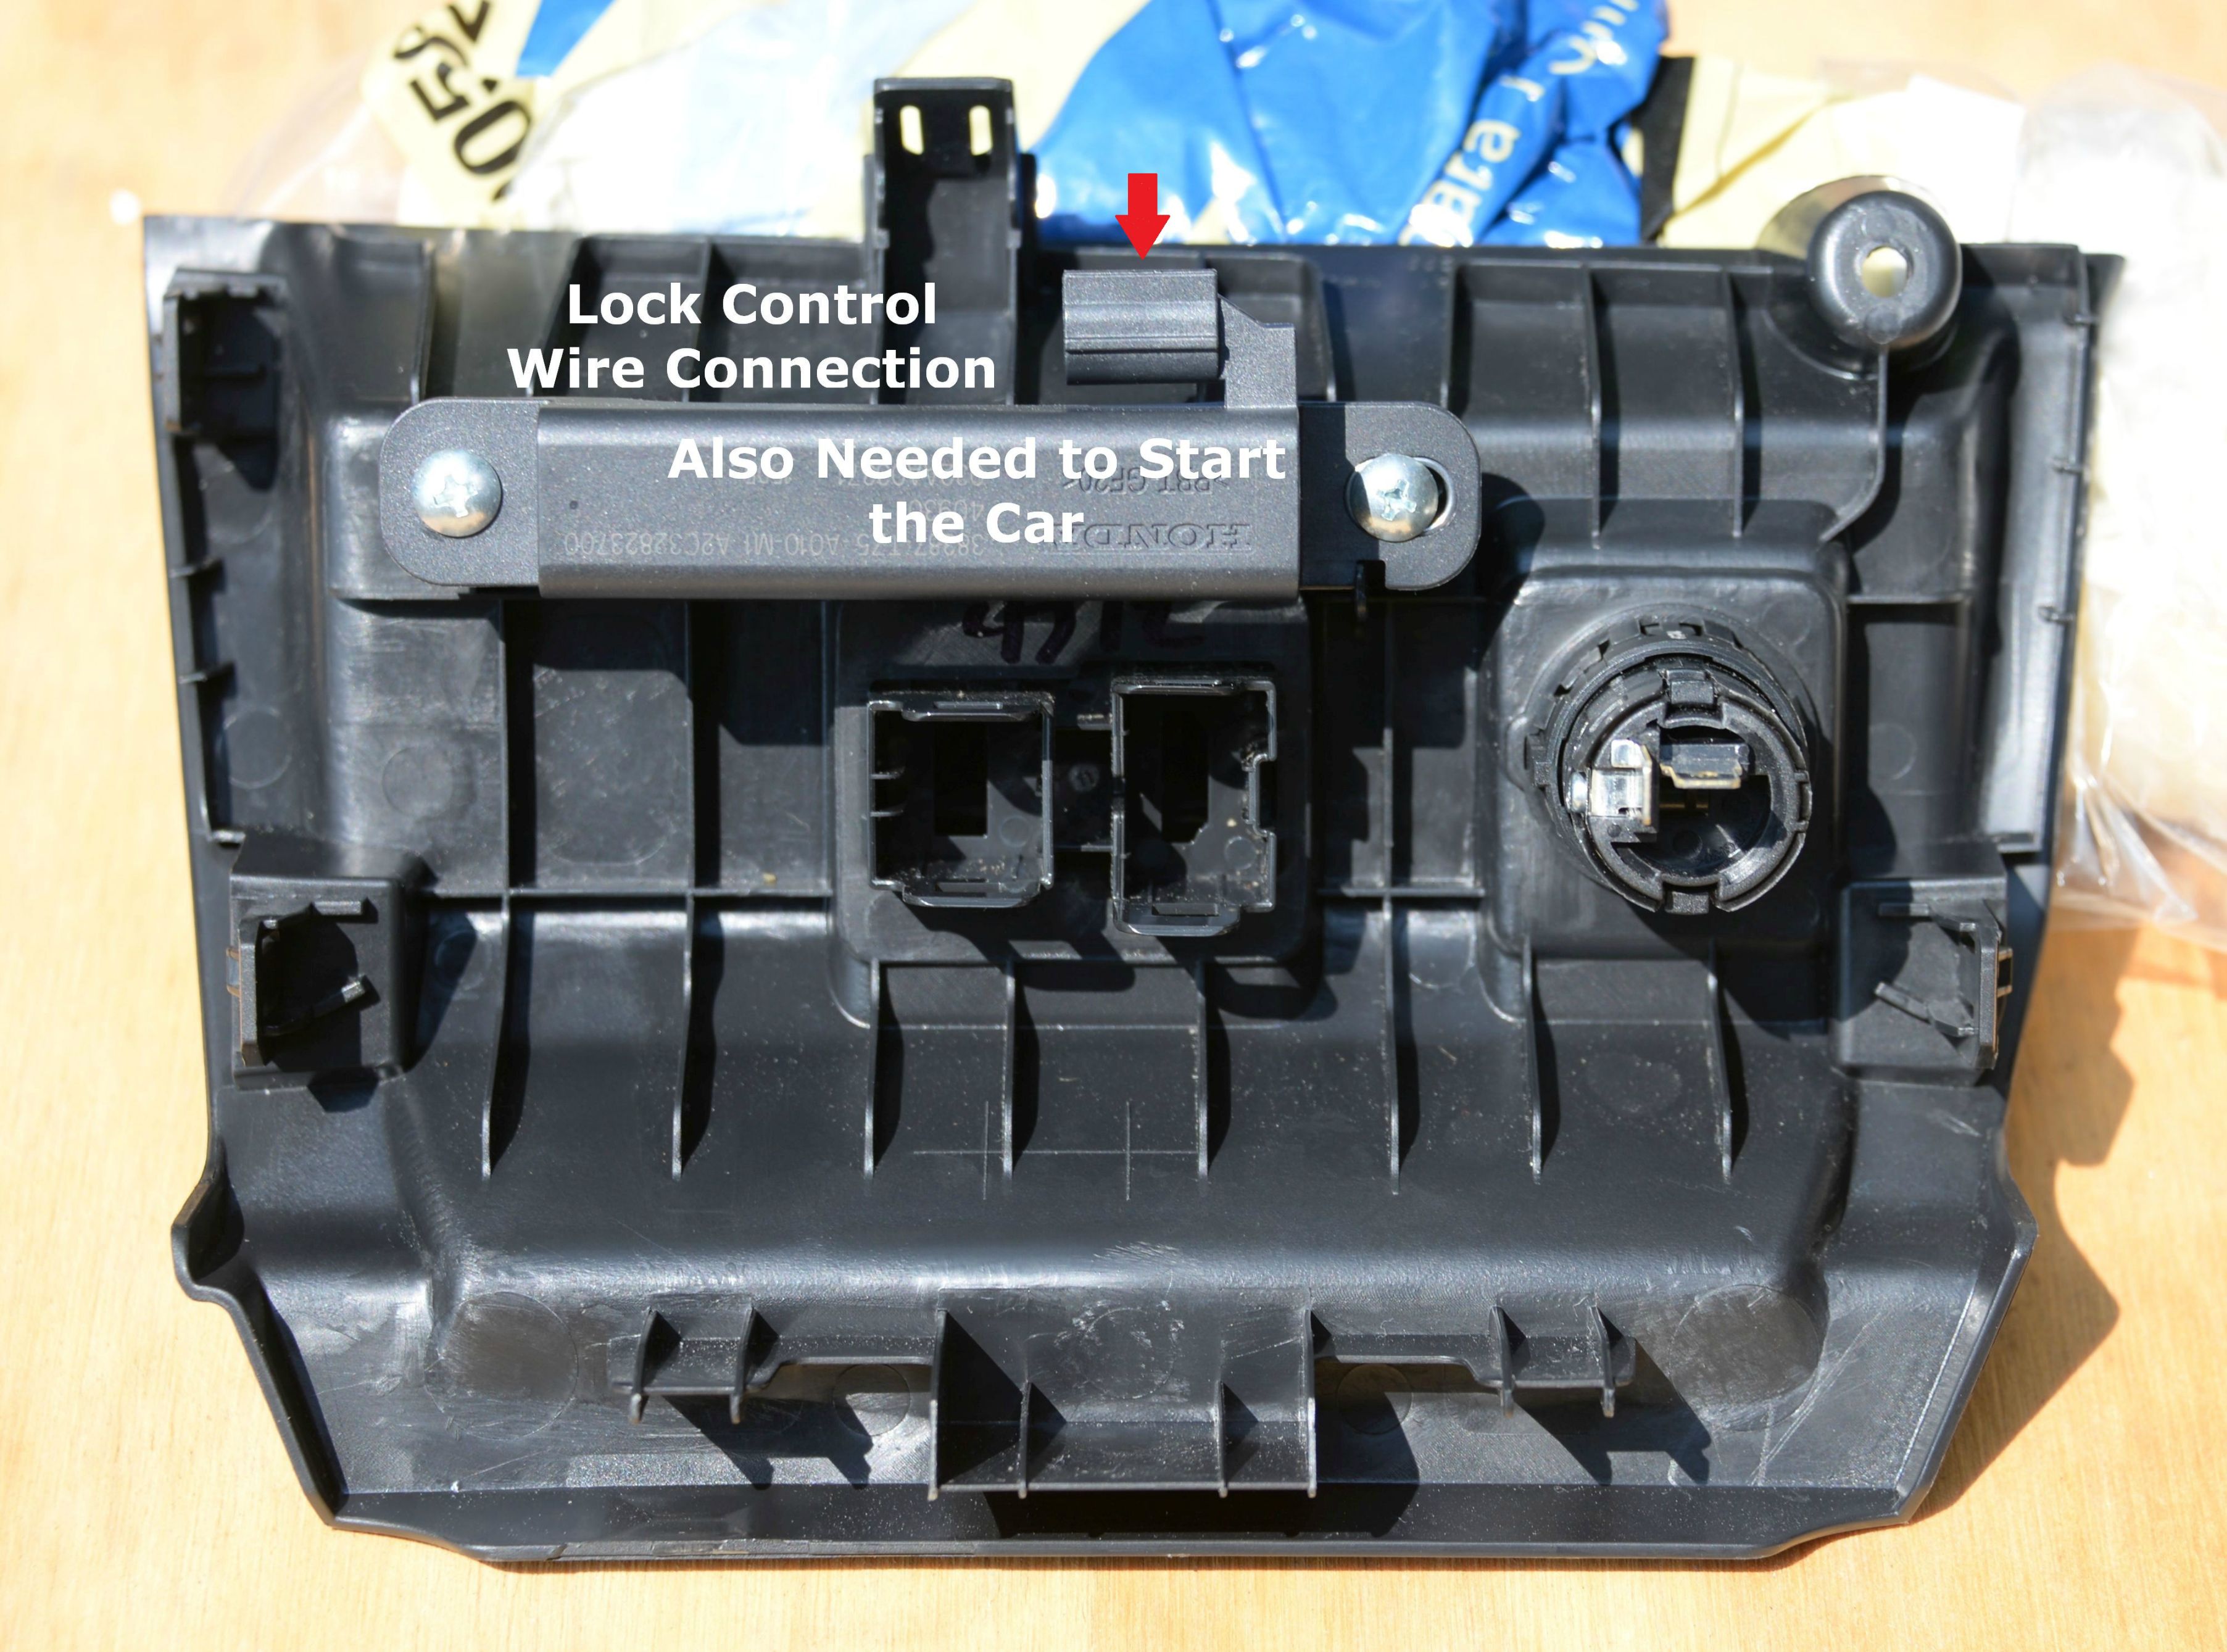
Just for your information, the wire that attaches to the bracket on the back of the Fit’s outlet panel - red arrow in photo - must be connected for the car to start and the door locks to work from the outside.
For consistency, you might want to use all ATM fuses - the smaller ones. I couldn't find a panel that used the small ATM fuses, so I have to stock both ATM and the larger ATC fuses. No big deal.
The large panel below the glove box is easy to remove. Grab it at the top and pull down. There is a snap clip on either side. Then pull back to release the two pegs on the bottom, left and right.
Honda recommends putting tape next to the outlet panel you are going to remove to prevent scratches.
What you’ll need -
Chopstick - or similar
Electrical tape
Fuse holder
Assorted fuses
Fuse block
Cable ties
Wire
Electrical connectors
Tools
1. Disconnect the negative battery terminal.
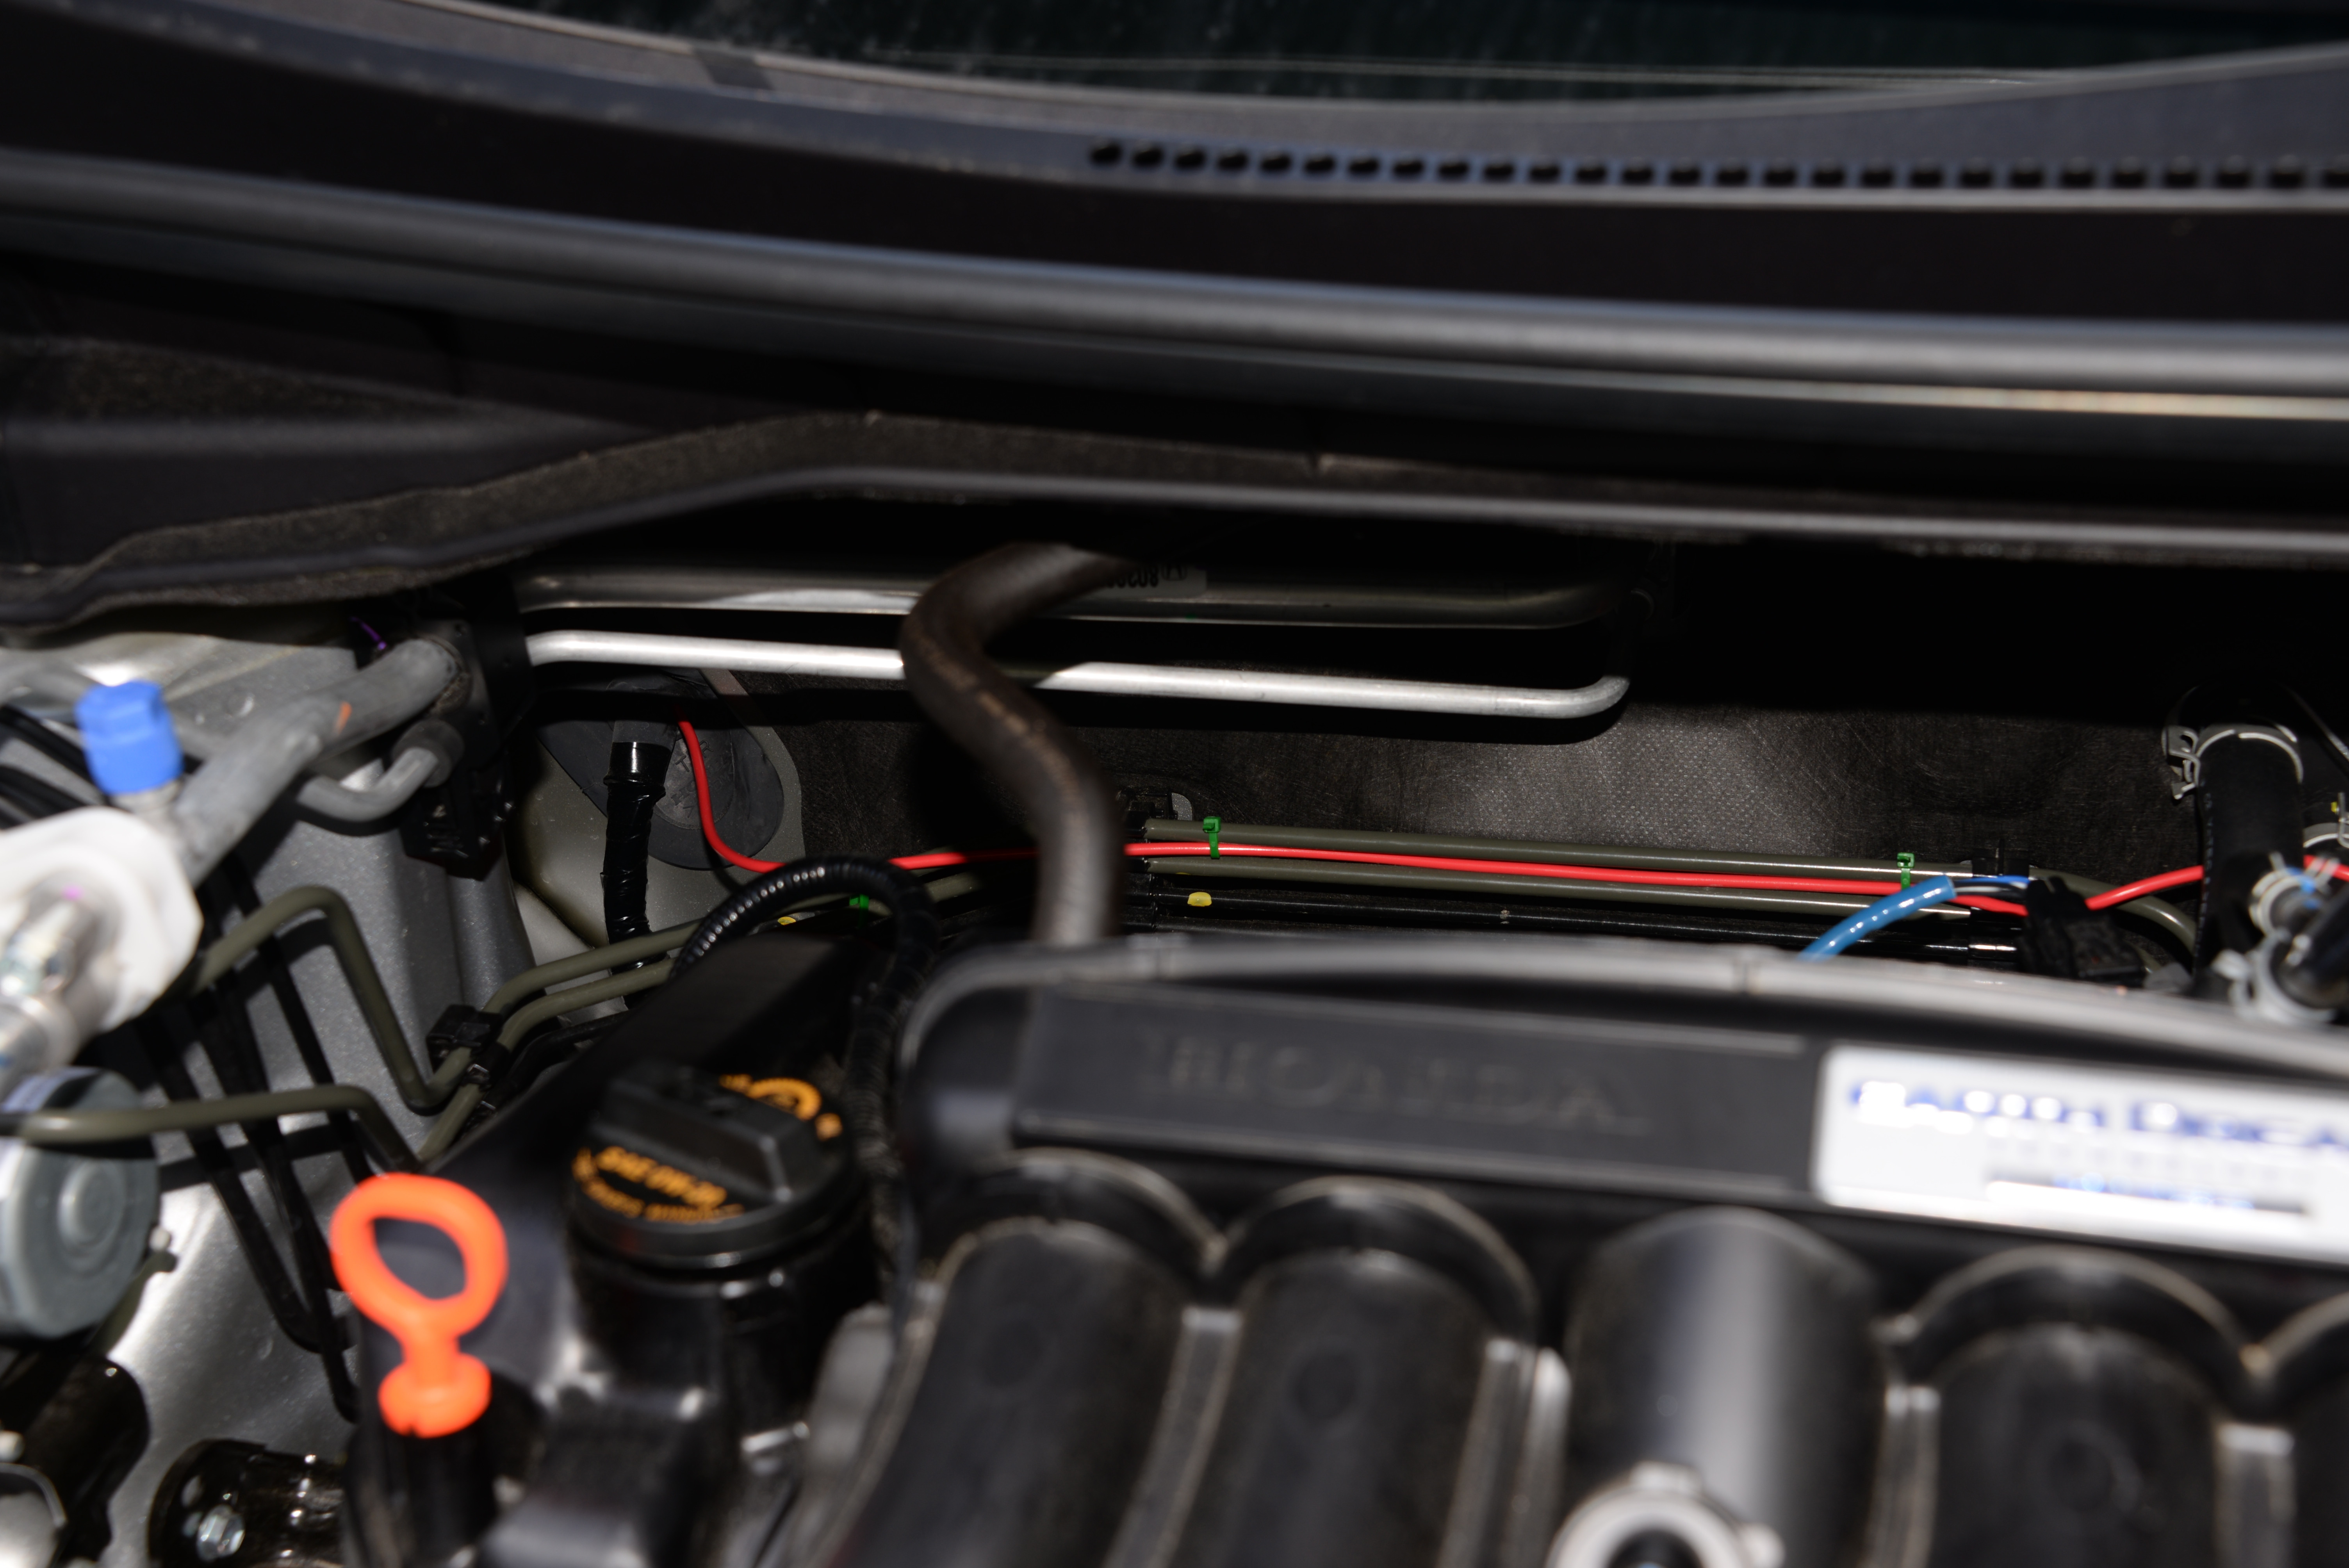
2. On the firewall on the passenger’s side is a thick bunch of wires going through a grommet. Tape the end of your power wire to a stick of some kind - not a pointy piece of metal - and push it gently through one side of the grommet. It seems like the grommet has double walls, so you’ll have to poke through twice. Having someone watch from inside/outside the car will make it easier. I found it easier poking through from the inside of the car.
3. Route the wire back and across the engine compartment and into the passenger’s footwell, allowing enough wire to work on the fuse panel.
4. Once the wire is inside the car, go back to the engine compartment and very carefully plan a neat route for the power wire. Use cable ties along the way, making sure the wire is not near anything that will get hot or anything that moves. Be sure to allow enough wire to mount it neatly on the positive battery terminal, with access to the fuse holder.
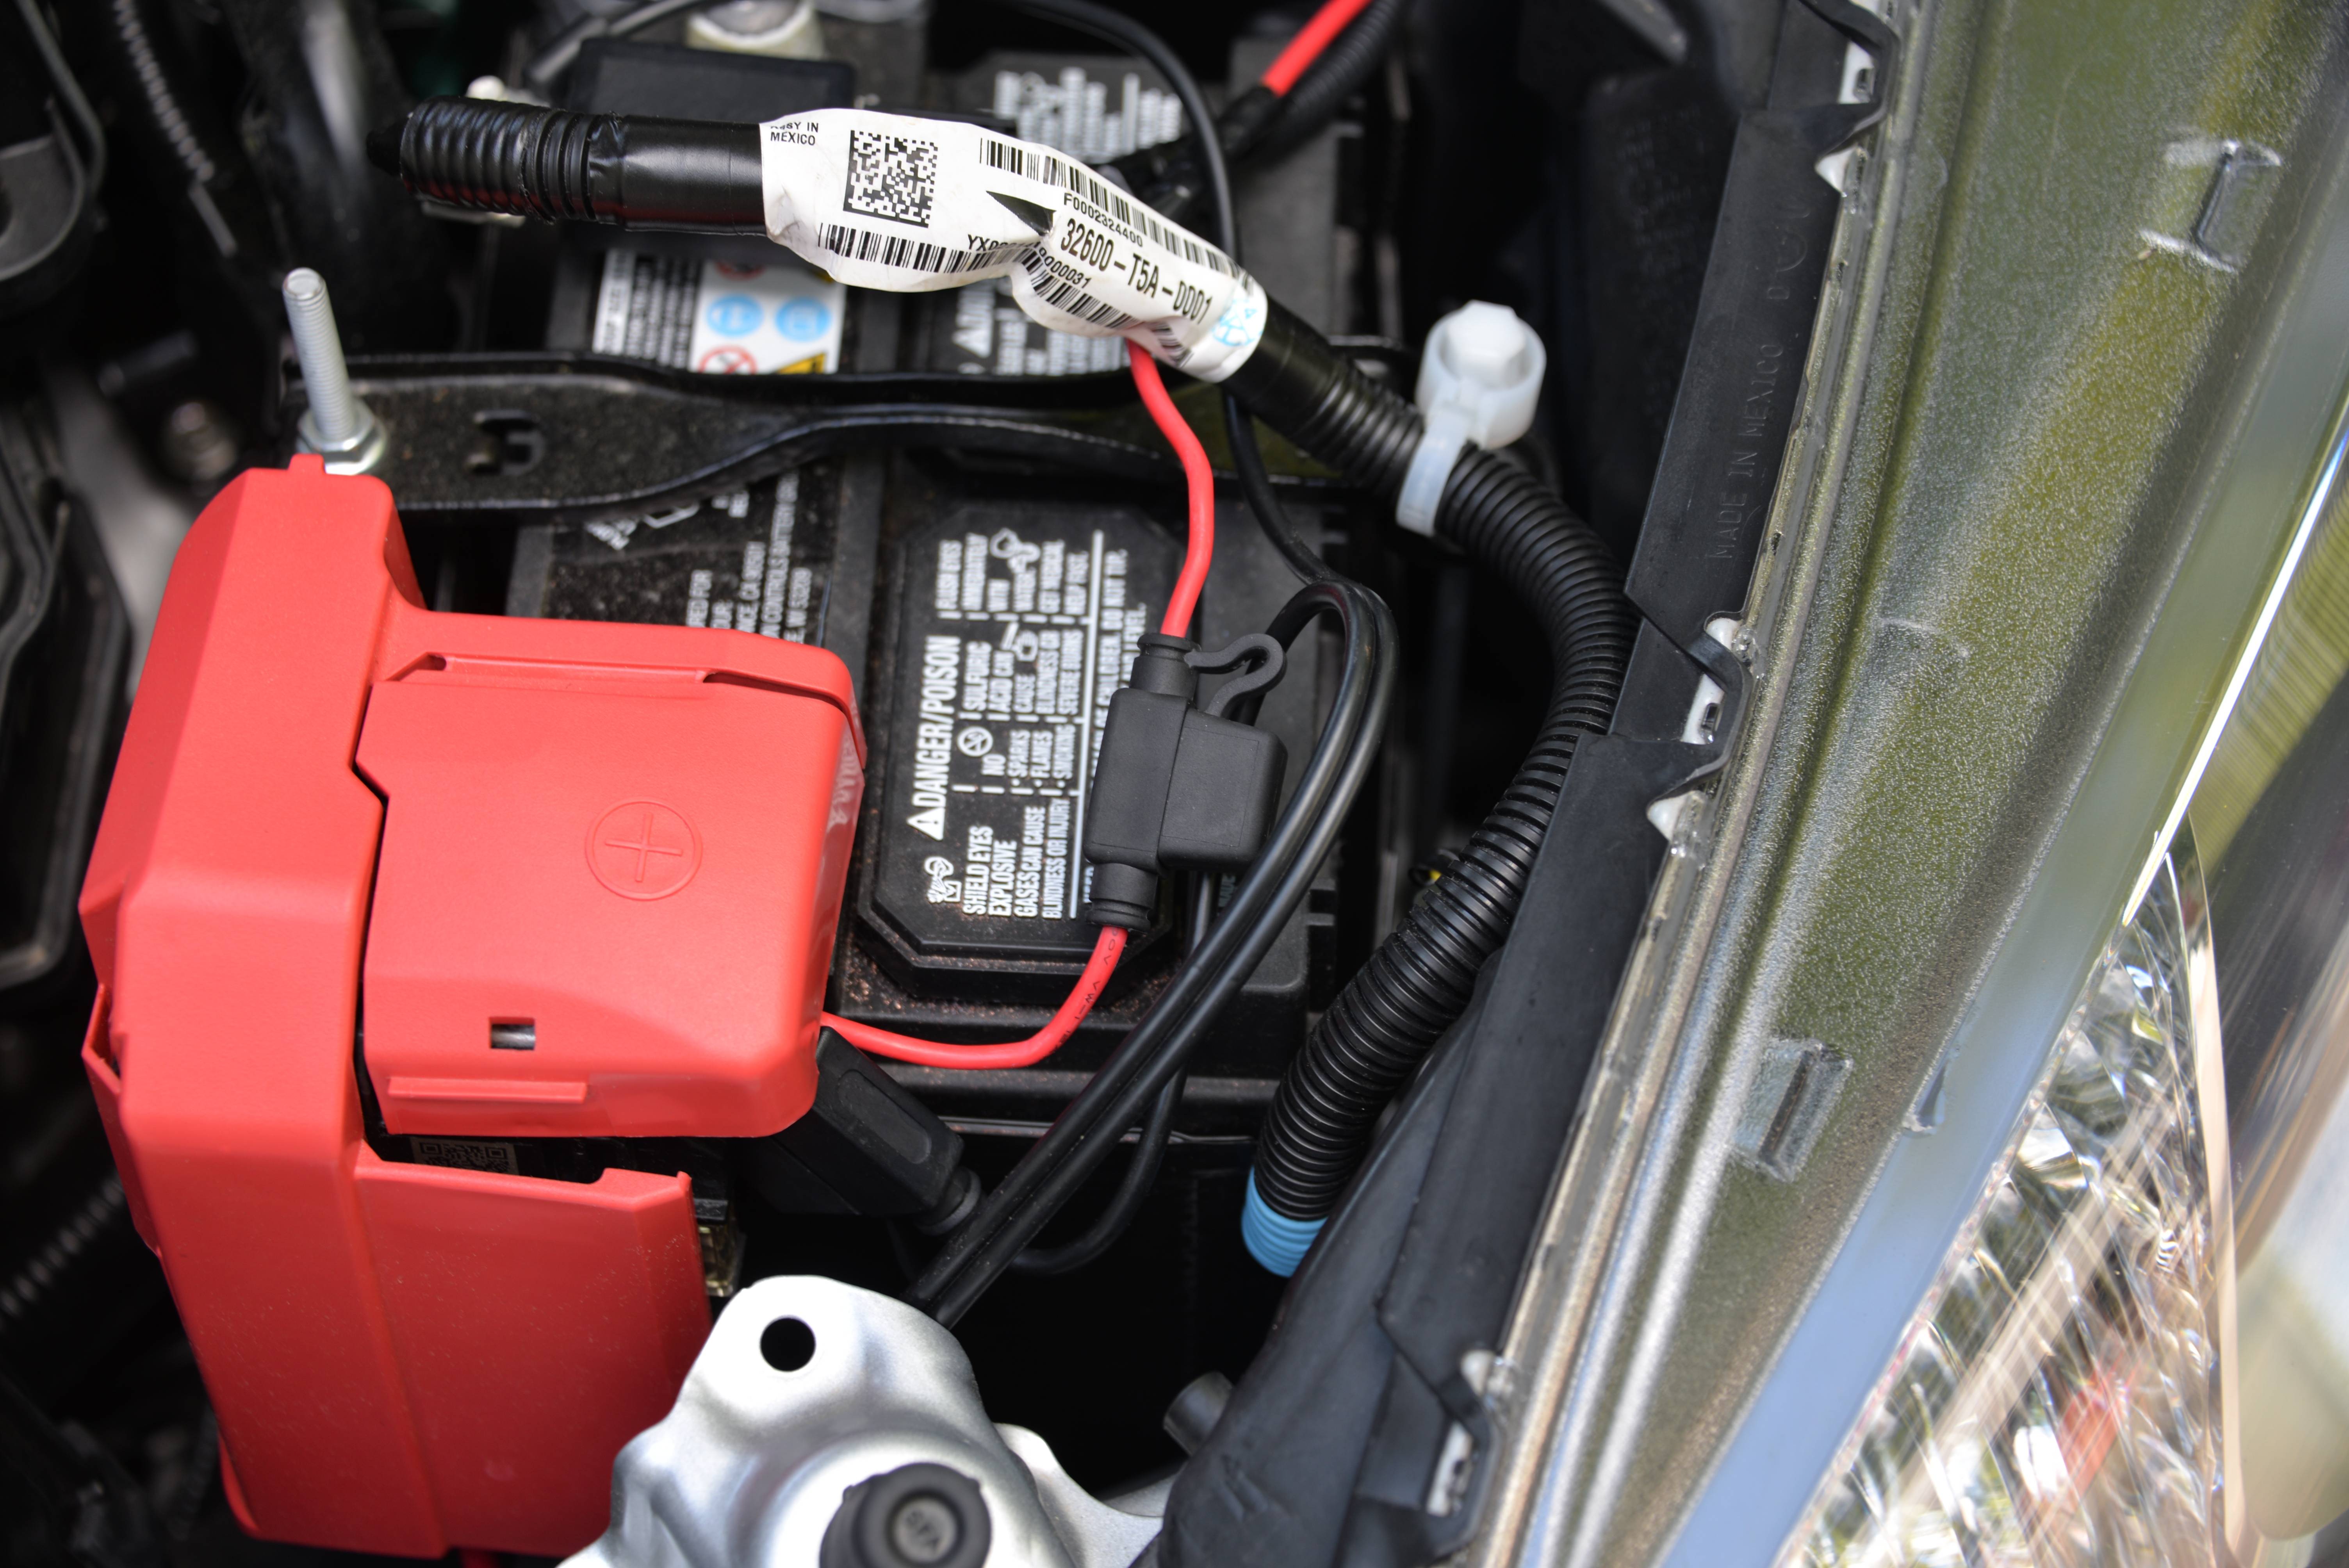
5. Splice the fuse connector into your wire and place it near the positive battery.
6. Attach a round connector (or whatever kind your fuse panel needs) and connect it to the panel.
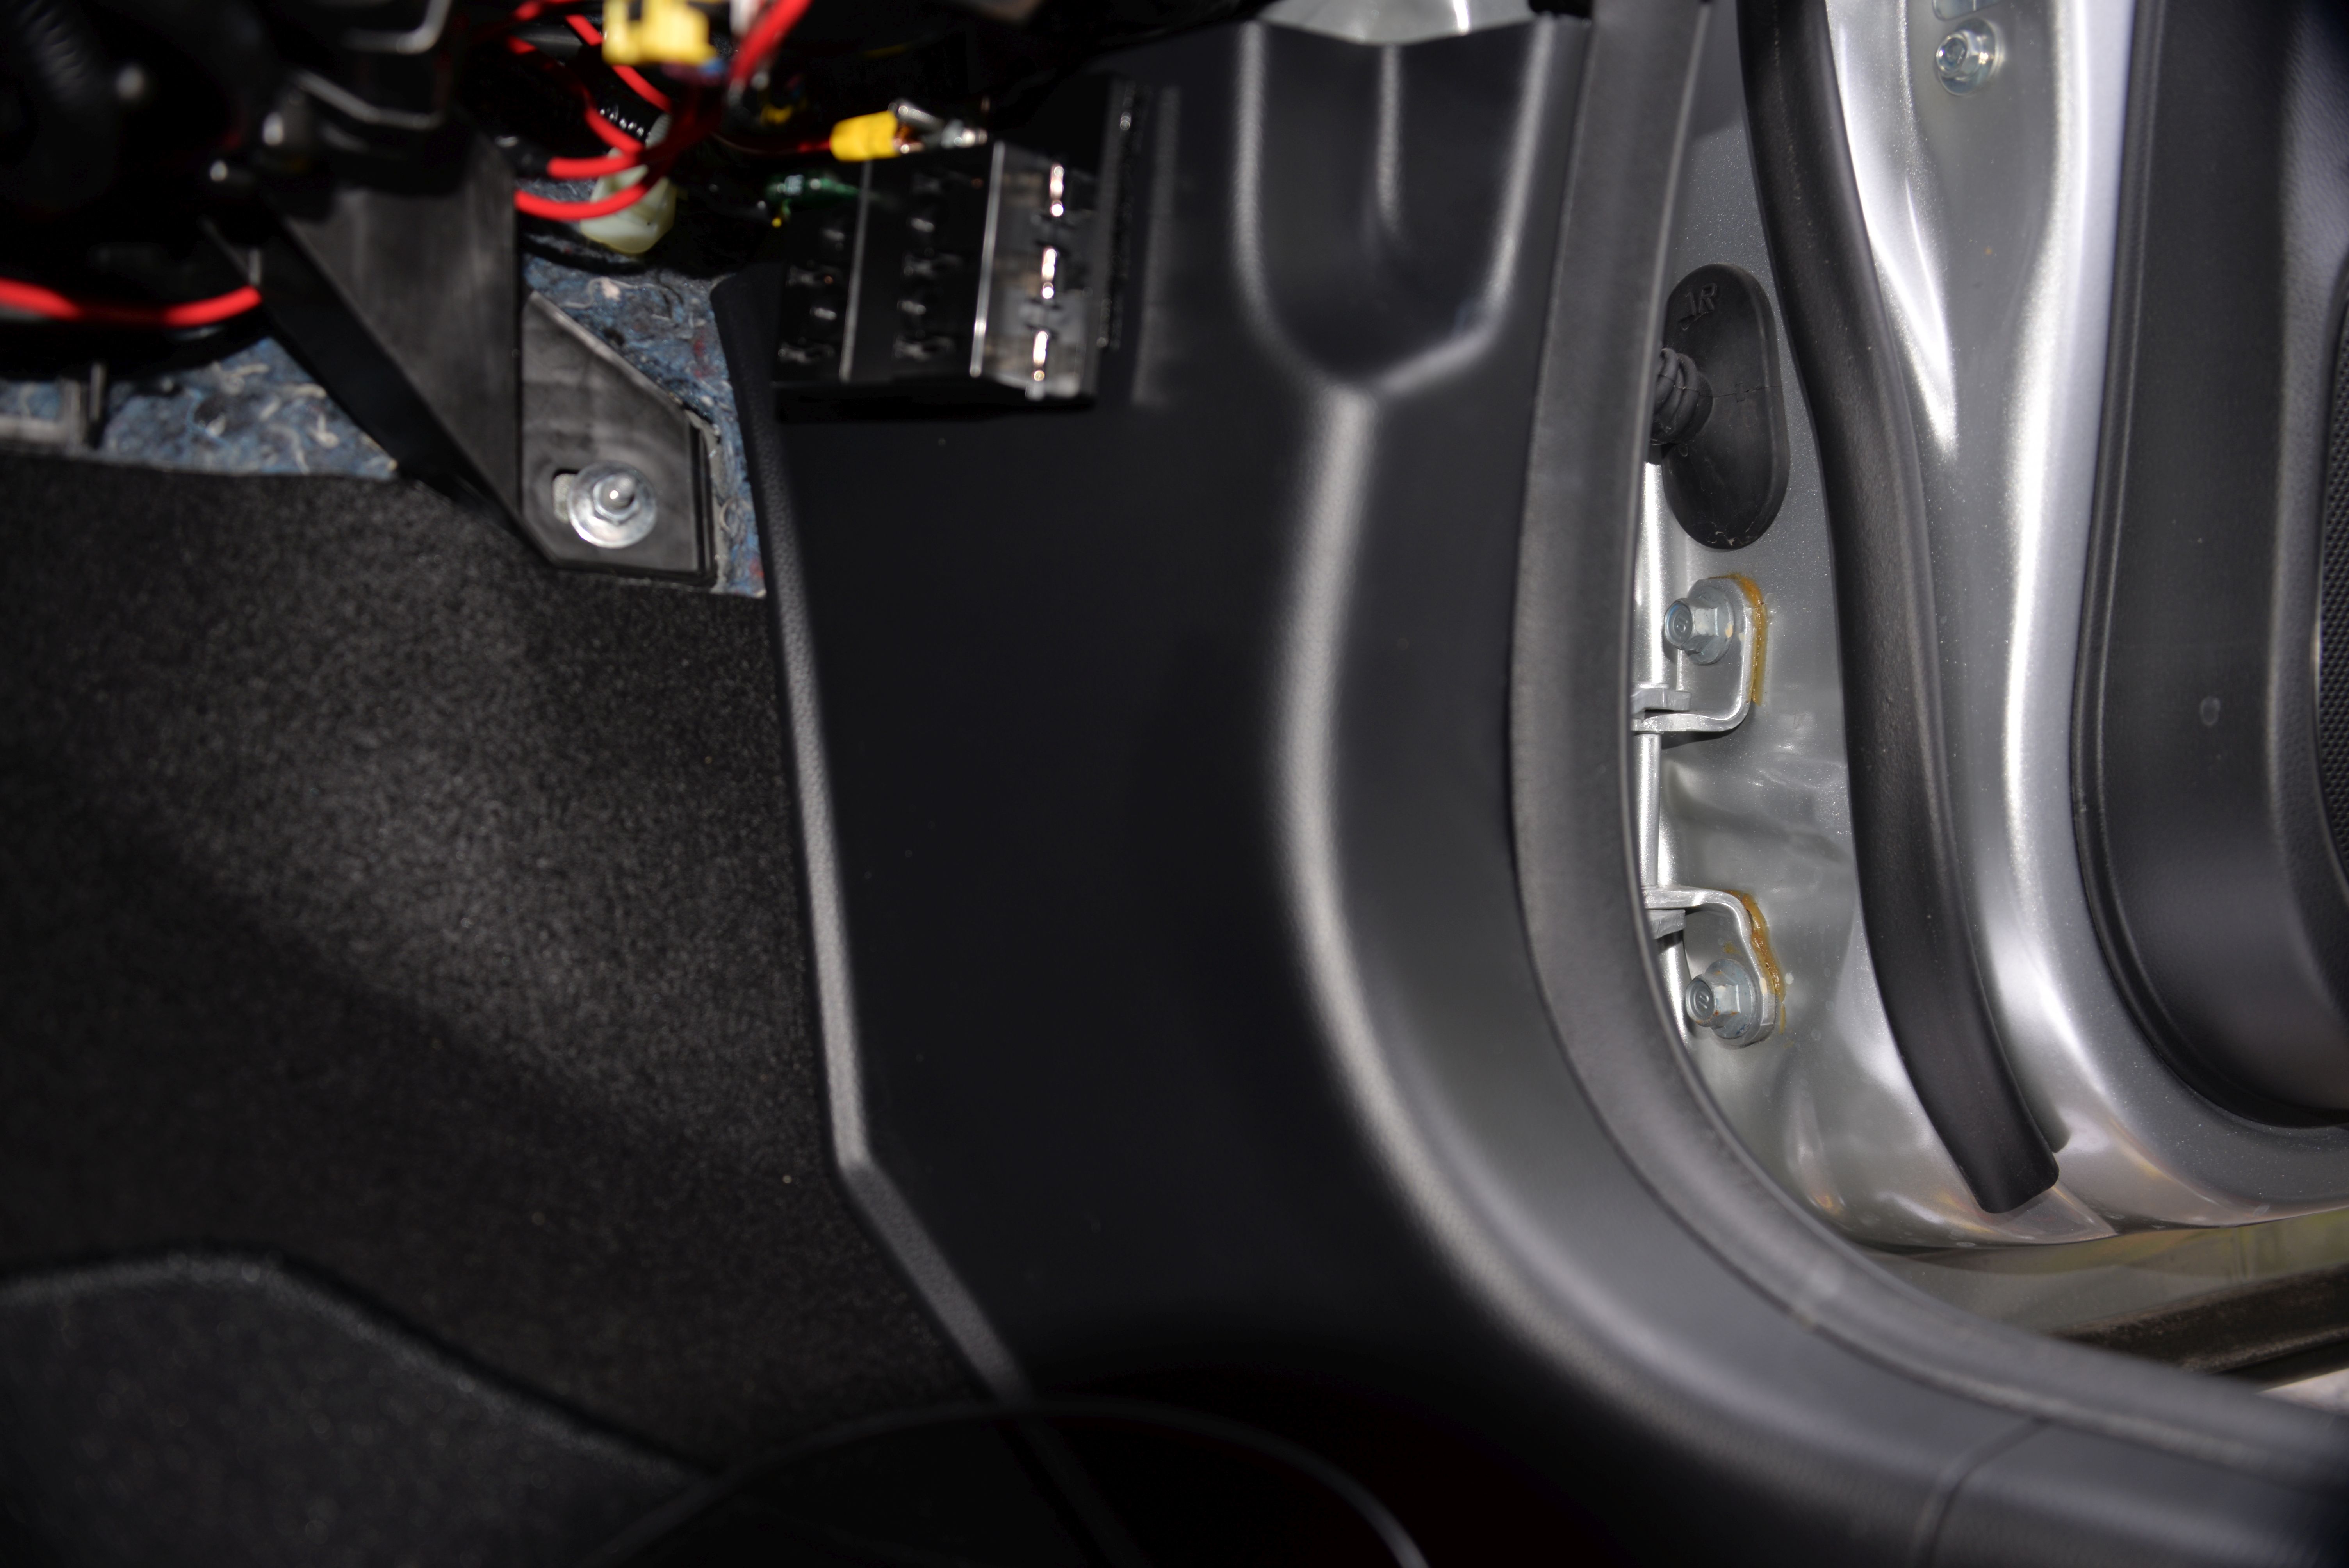
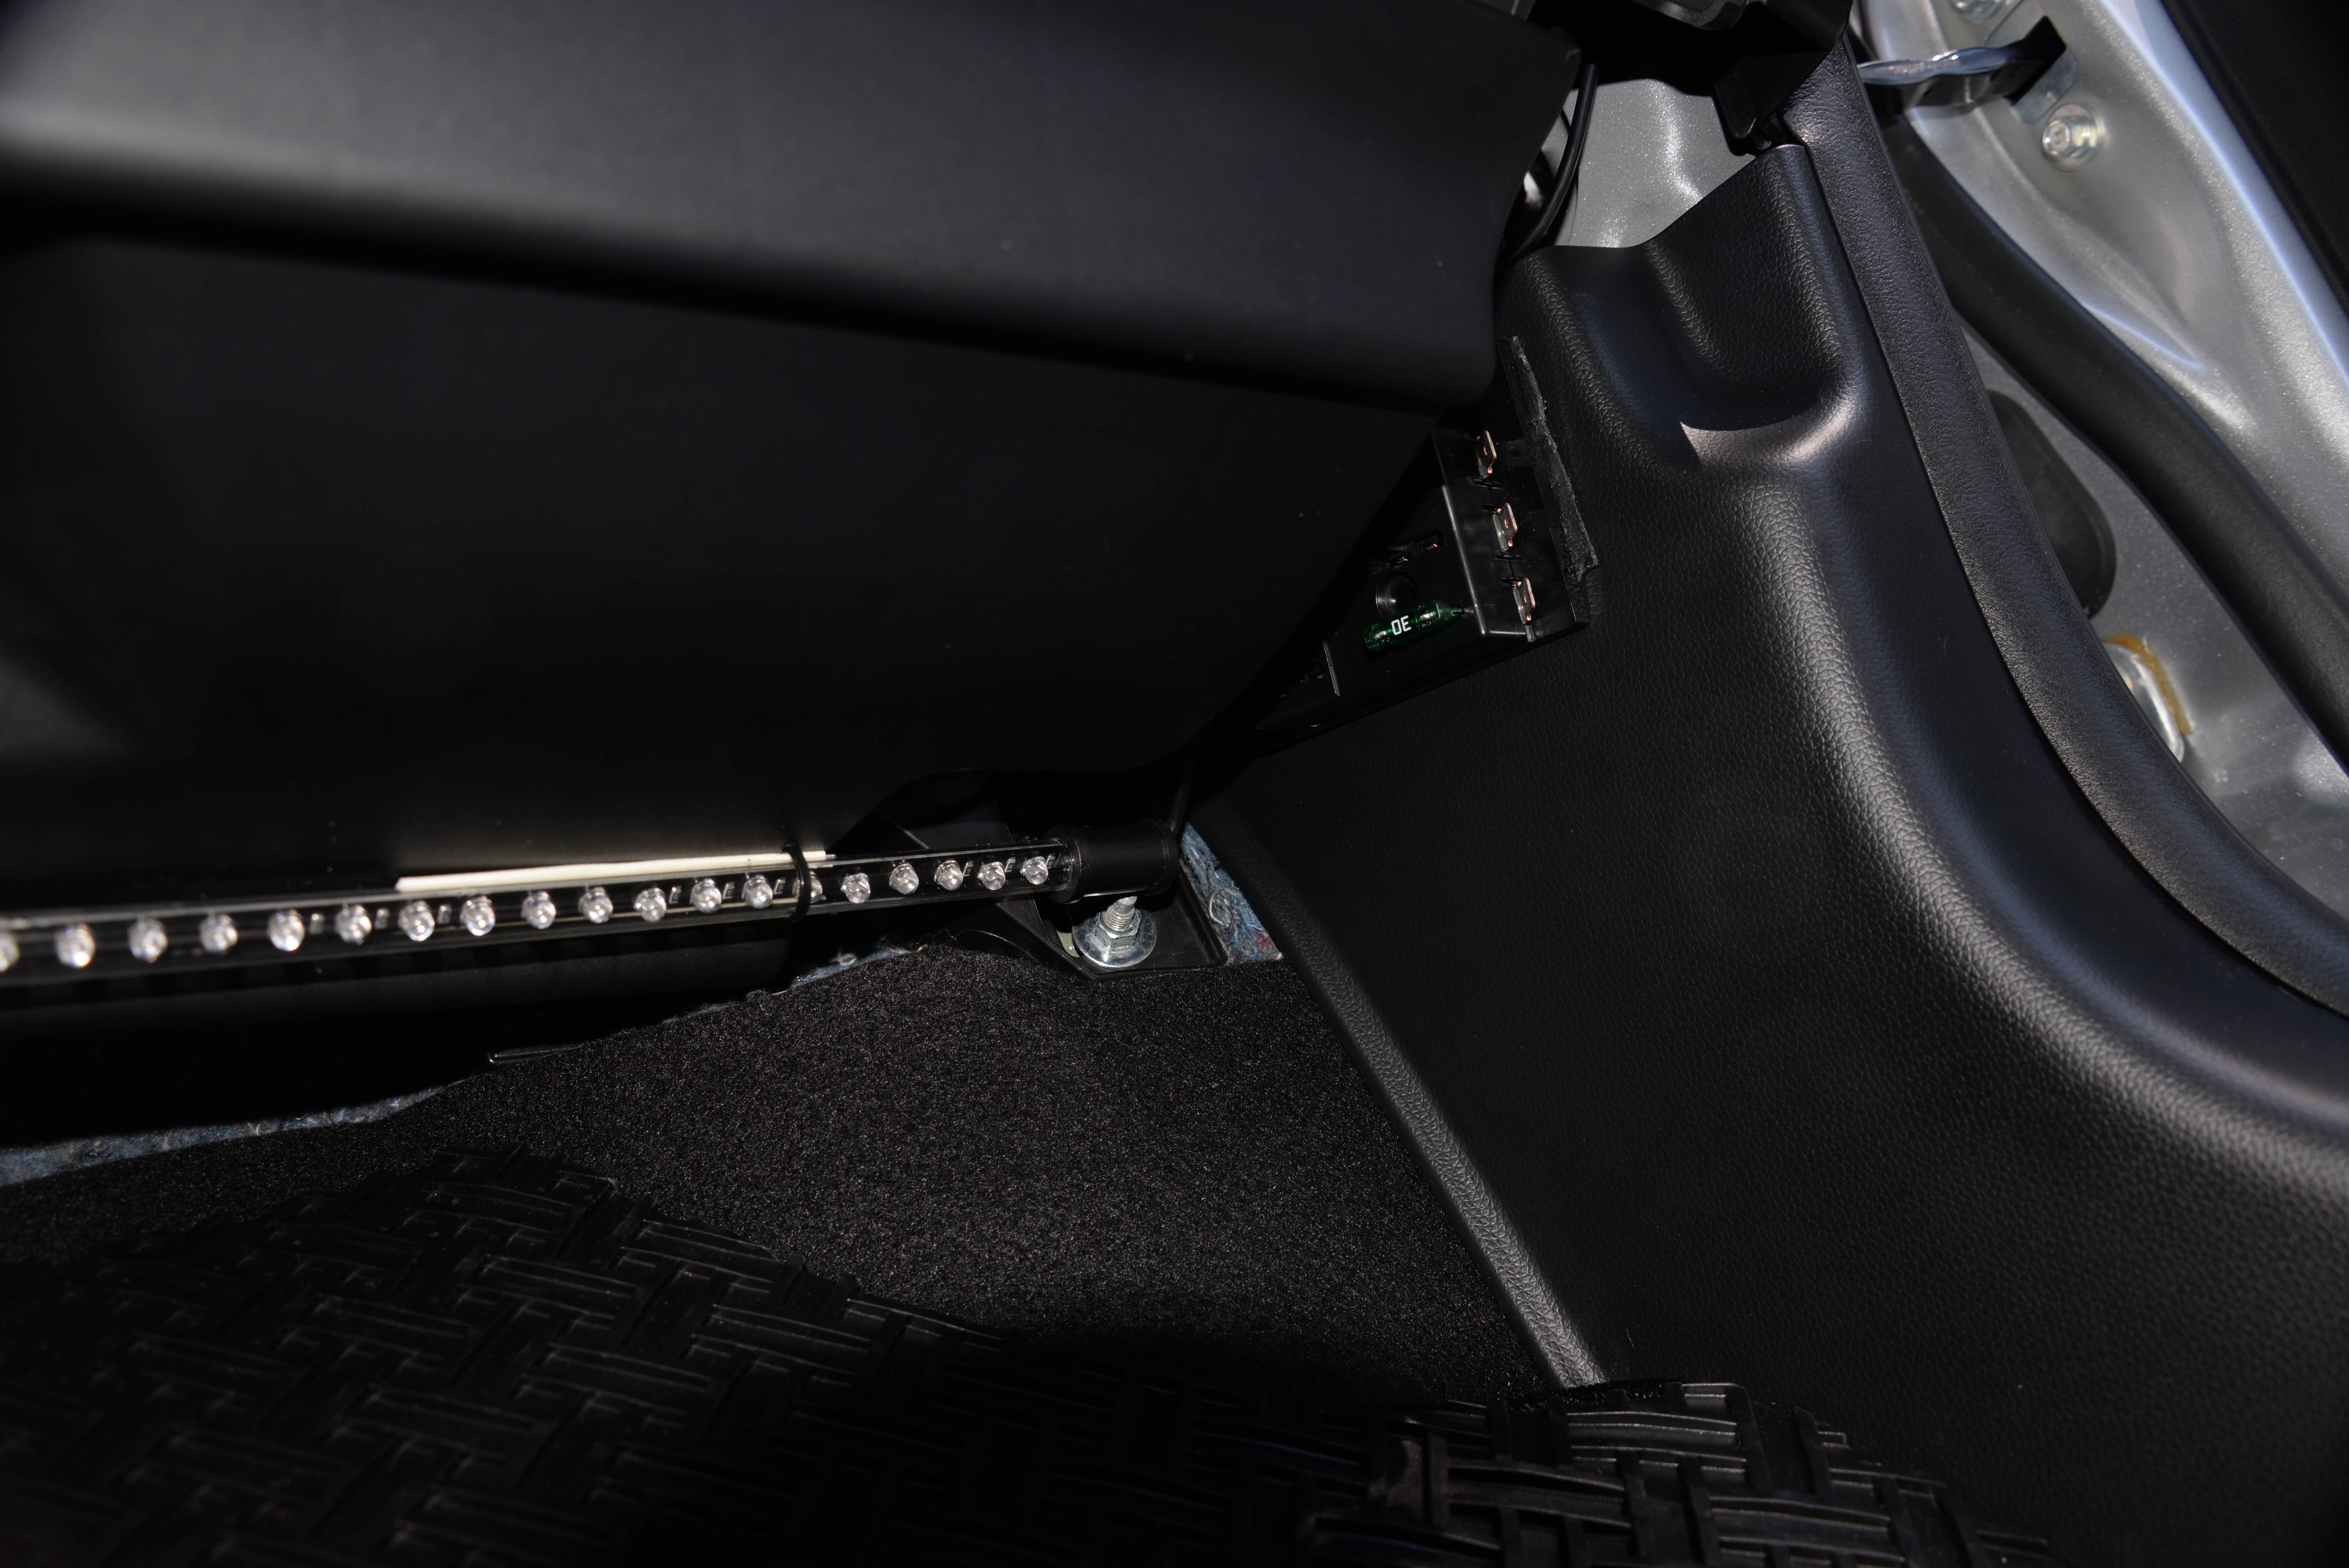
7. I used Velcro to attach the fuse panel to the upper part of the panel to the right of the passenger’s leg. Two things are important here: have the panel out of the way of the passenger’s feet; have it accessible enough that you can add circuits and change fuses.
8. Very important: make sure the all wires are out of the way of feet, especially the driver’s feet. Cable ties are perfect for this.
Just because I had those three blanks on the left side of the dash, I added a switch to control power to the fuse panel. That required running the wire from the battery directly to the switch and then running another wire from the switch to the panel. It’s your choice.
If you do this, be careful about keeping wires tucked well out of the way of the driver’s feet. It’s not easy, but the best way to get wires routed above the driver’s feet is to run them over the steering column mount on the firewall. Again, use enough cable ties.
After reconnecting the battery, make sure your foot is off the brake, and tap the Start/Stop button once. That will power on the radio. Hold the On/Off button for two seconds to reinitialize the radio. I think this re-pairs the radio to the car.


Having a 12v outlet can come in handy if you want to power something when the car is turned off. I'm talking about something like a GPS or a cell phone charger, not a cooler or a TV.
I like to add various electrical accessories to my cars, but I don't like splicing into wires to power them. I came up with the idea of installing a separate fuse block, connected directly to the battery with an inline fuse holder. This protects the whole circuit against shorting out. One fuse panel can power up to six accessories, and you add fuses based on the power requirements of the device.
Just for your information, the wire that attaches to the bracket on the back of the Fit’s outlet panel - red arrow in photo - must be connected for the car to start and the door locks to work from the outside.
For consistency, you might want to use all ATM fuses - the smaller ones. I couldn't find a panel that used the small ATM fuses, so I have to stock both ATM and the larger ATC fuses. No big deal.
The large panel below the glove box is easy to remove. Grab it at the top and pull down. There is a snap clip on either side. Then pull back to release the two pegs on the bottom, left and right.
Honda recommends putting tape next to the outlet panel you are going to remove to prevent scratches.
What you’ll need -
Chopstick - or similar
Electrical tape
Fuse holder
Assorted fuses
Fuse block
Cable ties
Wire
Electrical connectors
Tools
1. Disconnect the negative battery terminal.
2. On the firewall on the passenger’s side is a thick bunch of wires going through a grommet. Tape the end of your power wire to a stick of some kind - not a pointy piece of metal - and push it gently through one side of the grommet. It seems like the grommet has double walls, so you’ll have to poke through twice. Having someone watch from inside/outside the car will make it easier. I found it easier poking through from the inside of the car.
3. Route the wire back and across the engine compartment and into the passenger’s footwell, allowing enough wire to work on the fuse panel.
4. Once the wire is inside the car, go back to the engine compartment and very carefully plan a neat route for the power wire. Use cable ties along the way, making sure the wire is not near anything that will get hot or anything that moves. Be sure to allow enough wire to mount it neatly on the positive battery terminal, with access to the fuse holder.
5. Splice the fuse connector into your wire and place it near the positive battery.
6. Attach a round connector (or whatever kind your fuse panel needs) and connect it to the panel.
7. I used Velcro to attach the fuse panel to the upper part of the panel to the right of the passenger’s leg. Two things are important here: have the panel out of the way of the passenger’s feet; have it accessible enough that you can add circuits and change fuses.
8. Very important: make sure the all wires are out of the way of feet, especially the driver’s feet. Cable ties are perfect for this.
Just because I had those three blanks on the left side of the dash, I added a switch to control power to the fuse panel. That required running the wire from the battery directly to the switch and then running another wire from the switch to the panel. It’s your choice.
If you do this, be careful about keeping wires tucked well out of the way of the driver’s feet. It’s not easy, but the best way to get wires routed above the driver’s feet is to run them over the steering column mount on the firewall. Again, use enough cable ties.
After reconnecting the battery, make sure your foot is off the brake, and tap the Start/Stop button once. That will power on the radio. Hold the On/Off button for two seconds to reinitialize the radio. I think this re-pairs the radio to the car.
Last edited by SilverEX15; 08-24-2014 at 12:37 PM.

#3
08-24-2014, 09:36 PM
Another one on Monday about putting switches into the slots to the left of the steering wheel.
Wait a minute. I think I already did that. I'll check tomorrow.
Wait a minute. I think I already did that. I'll check tomorrow.
#4
08-25-2014, 12:42 AM

Nice article!
A few questions as I'm contemplating something similar.
-How are you physically connecting the wire to the battery terminal? Could you show a pic with the cover open?
-What gauge wire are you using?
-What are you grounding to? Is there some kind of grounding post on the chassis near the box?
Thanks!
#5
08-25-2014, 08:29 AM
Nice article!
A few questions as I'm contemplating something similar.
-How are you physically connecting the wire to the battery terminal? Could you show a pic with the cover open?
-What gauge wire are you using?
-What are you grounding to? Is there some kind of grounding post on the chassis near the box?
Thanks!
A few questions as I'm contemplating something similar.
-How are you physically connecting the wire to the battery terminal? Could you show a pic with the cover open?
-What gauge wire are you using?
-What are you grounding to? Is there some kind of grounding post on the chassis near the box?
Thanks!
As for connecting to the battery, I'll post a picture of that, too. I have a large collection of electrical connectors, and I use them whenever I can - like connecting to the battery and ground.
When I have to ground several wires, I twist them together and use a wire nut to connect them.
For wire, I got a large spool of red 12 ga that I use for power and another spool of black 12 ga. I think it's overkill because the wires on the car are much thinner.
I love those little fuse-holder wires because they give excellent protection. If there is a short, the fuse will blow. When I was a kid, I ran an unprotected wire for something. It shorted out while I was driving, and the whole thing went up in smoke. No fire, just a lot of smoke.
There isn't a lot of free space under the dash, and feeding wires over the steering column bracket was frustrating.
When I take more pictures, I'll put them in a separate post.

Thread
Thread Starter
Forum
Replies
Last Post