Action Jackson's tinkering
#1
 12-03-2015, 10:50 AM


Action Jackson's tinkering
Modulu Sport grill and OEM rear splashguards
Sun strip (Oracal 651 Matte Black and Vvivid Vinyl carbon fibre) 3M Pro paint protection on hood, headlights, inner door handles, rear bumper, front tow hook area, fender side next to hood, and 4 roof points for roof rack.
Generic yellow fog light film.
Vvivid "Carbon Fibre" vinyl on roof, front cowl, side pillar pieces and front grill
Tint - Llumar Formula 1 Pinnacle 15% sides, 5% rear
Weather Tech in channel door window visors
Lloyd Rubbertite floor mats for front and back (Burgundy)
Maxpider Aries 3D Beige floor mats (spring - fall)
Lloyd Rubbertite (red) rear cargo mat
Krownrust sprayed
Debadged "Fit"
custom trunk storage "improvement"
Yakima Baseline roof rack with Jetstream bars
Yakima Jaylow Kayak carrier
Yakima Loadwarrior roof basket
Nokian WRG4 195/55/16 V
Powerstop blank rotors
Powerstop Stainless Steel braided brake lines.
Powerstop Evolution Z17 Ceramic pads
Ford DOT3 Brake Fluid
Gas hood struts
JDM Hazard Button
Brushed aluminum A/C knob rings
COB interior LED
Fake CF shifter plate trim
Black perforated leather steering wheel wrap, red stitching and red marker
Leather CVT shift knob wrap with red stitching
Leather handbrake wrap with red stitching
Fake leather center console cover - black with red stitching
CG Seatbelt Lock
Savanini paddle shifter extension
Razo RP121A pedals
Razo RP124A dead pedal
Generic heel plate
Savanini throttle body spacer
K&N VF2033 cabin air filter
K&N 33-5027 air filter
Tanabe Sustec Front Strut Tower Bar
Progress rear sway bar
Mishimoto compact 2 port baffled oil catch can
Kenwood Excelon DNX995S
idatalink maestro rr radio interface
idatalink maestro HO2 steering wheel harness
Kenwood CA-C3AV AV Cable for Video AV Input & RadioShack HDMI-to-Composite Converter to retain OEM HDMI port
Kenwood CA-U1EX USB Extension cable to retain OEM USB ports
Kicker KQ5 parametric equalizer
AudioControl D-4.800 amp
Sony XS-GS1621 coax
Morel Hybrid 63 in custom A pillar pods
Sony XM-GS100 mono amp
Kicker L7 QB8 sub
Road noise reduction (floor, doors, roof, sunroof cover, hatch, A/B and C pillars and trunk using Noico CLD, MLV, asphalt undercoat front fenderwells, dashboard and firewall inside towards cabin using technofloor rubber, climaloc insulation and recycled denim blanket.
Denali Sound Bomb Compact Horn
Philips X-treme Ultinon 12953BWX2 H4 150% LED bulbs
GK Fog Lights Anytime On mod with lights on indicator
Front corner turn signal mod
Philips X-treme Ultinon LED Golden Yellow 2700K 12793UNIX2
OEM cargo light wired to 2nd cargo light with switch [HR-V] (Part number 34265-SFE-003) and COB LED's
Colorized various interior buttons/switches
Red tach and speed needles
Additional cigarette lighter outlet in OEM start button location
Mini voltage display
Viofo A129 Pro Duo dash cam (formerly FineVu CR2000 Omega GPS Dashcam)
Generic Rear Pillar Lights with brake and turn function
Diode Dynamics turn as tail module
EX-L mirror signals
Rear red led turn signal bulbs with hyperflash fix
Orange LED front corner bulbs with built in hyperflash fix
Gentex 50-GENK5AM auto dimming mirror with compass
Optima Yellow Top 51R battery
21" antenna
4E Hud
Lighted Ignition
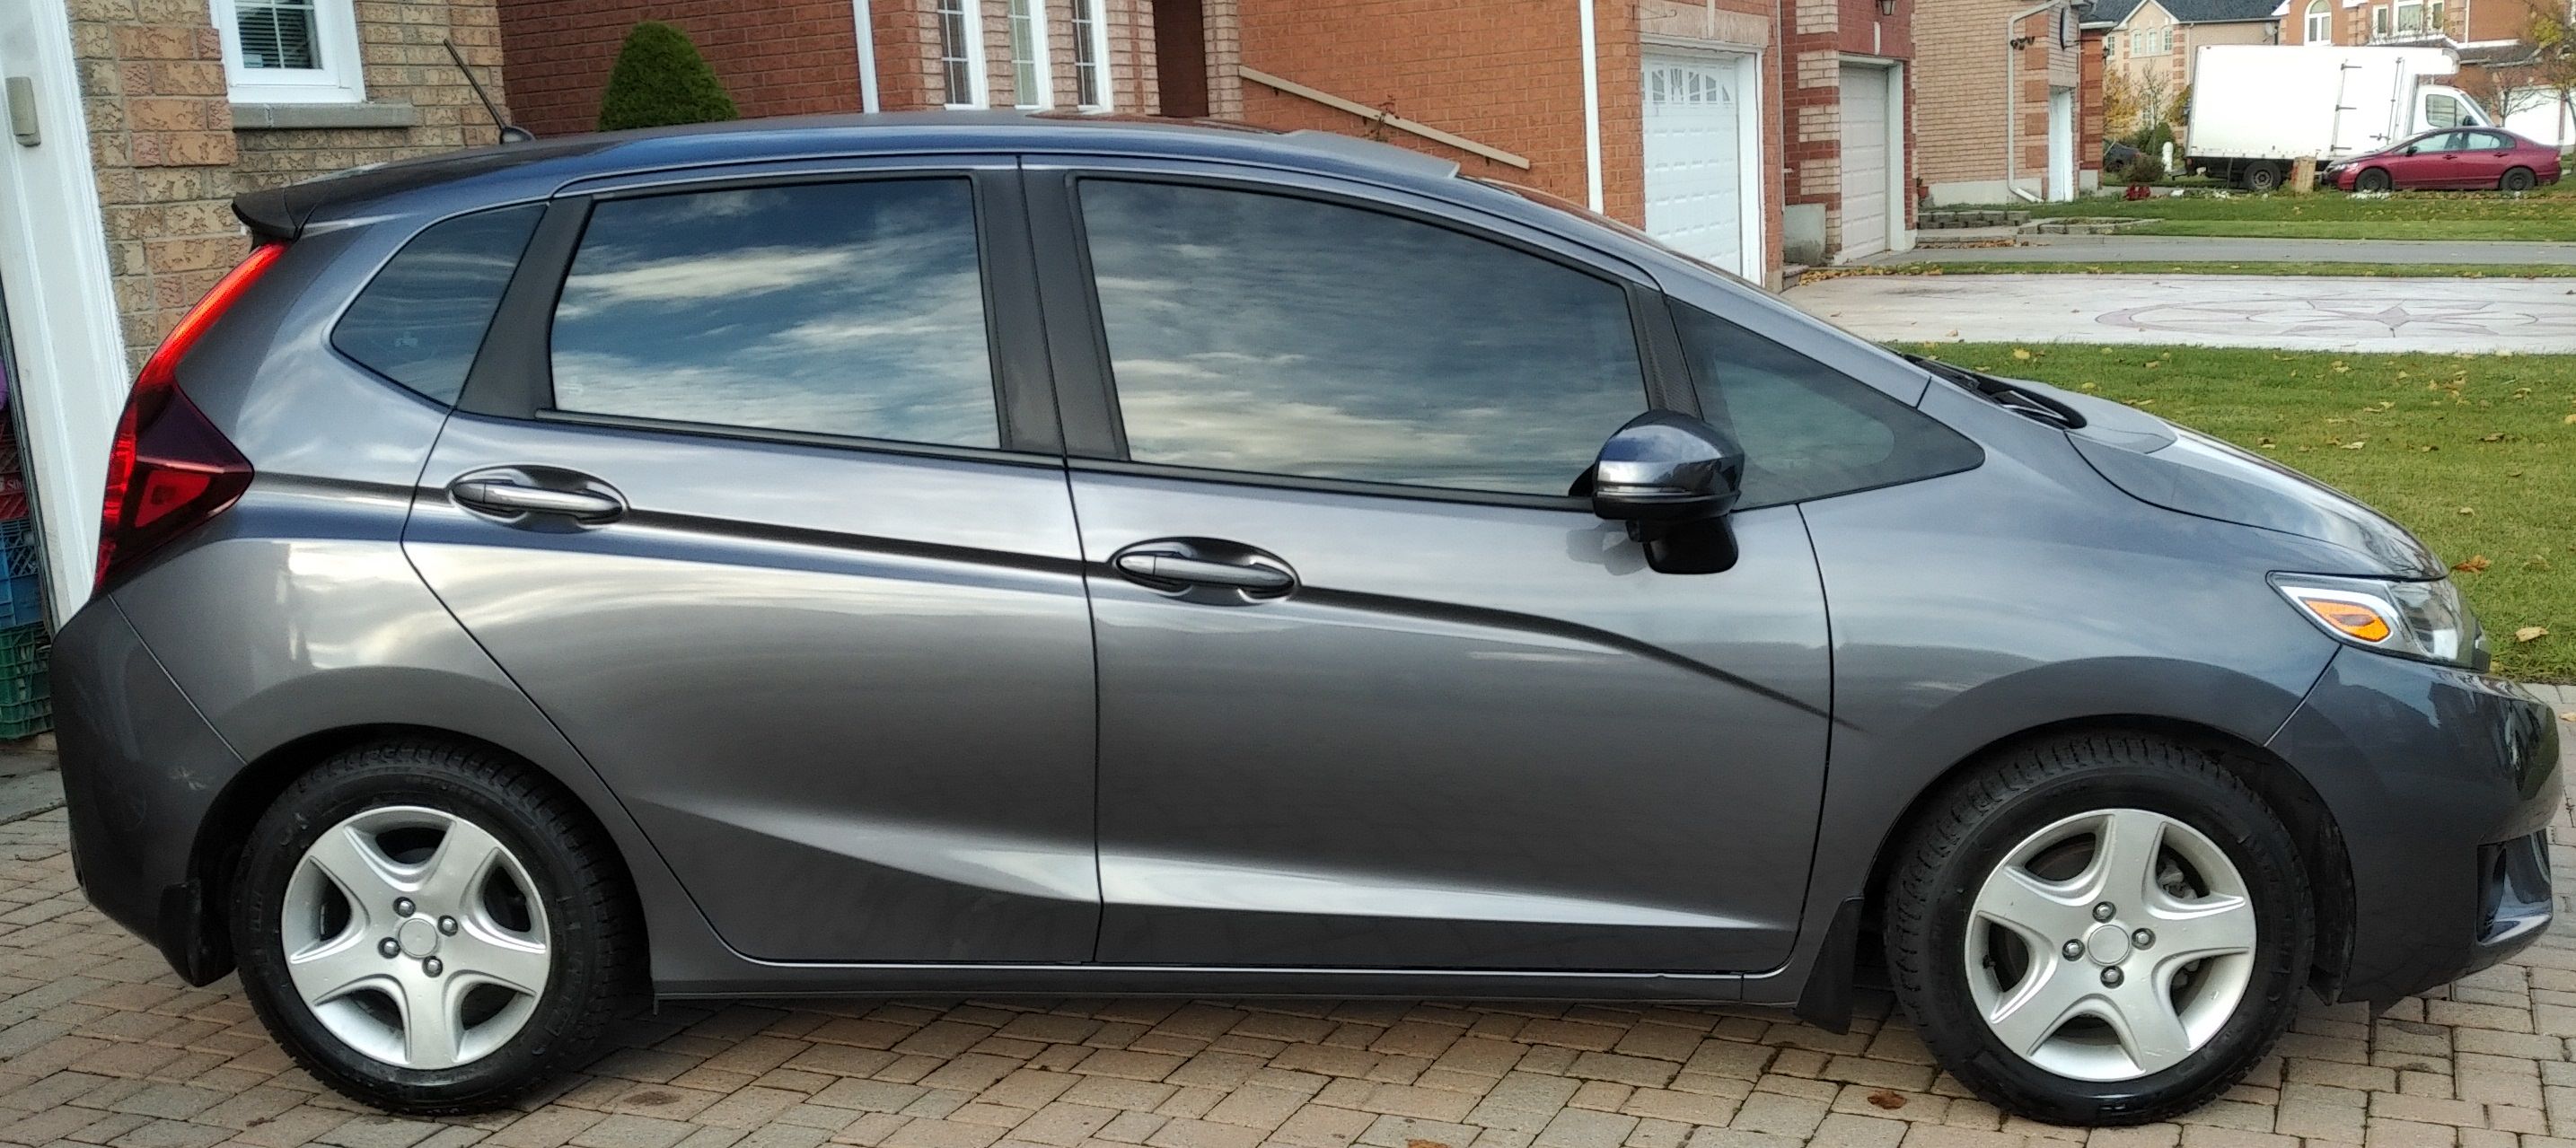
I should've painted the wheels metallic silver, bronze, gold or gunmetal. But for winters, at least they'll be easy to clear the snow out of.

Sun strip (Oracal 651 Matte Black and Vvivid Vinyl carbon fibre) 3M Pro paint protection on hood, headlights, inner door handles, rear bumper, front tow hook area, fender side next to hood, and 4 roof points for roof rack.
Generic yellow fog light film.
Vvivid "Carbon Fibre" vinyl on roof, front cowl, side pillar pieces and front grill
Tint - Llumar Formula 1 Pinnacle 15% sides, 5% rear
Weather Tech in channel door window visors
Lloyd Rubbertite floor mats for front and back (Burgundy)
Maxpider Aries 3D Beige floor mats (spring - fall)
Lloyd Rubbertite (red) rear cargo mat
Krownrust sprayed
Debadged "Fit"
custom trunk storage "improvement"
Yakima Baseline roof rack with Jetstream bars
Yakima Jaylow Kayak carrier
Yakima Loadwarrior roof basket
Nokian WRG4 195/55/16 V
Powerstop blank rotors
Powerstop Stainless Steel braided brake lines.
Powerstop Evolution Z17 Ceramic pads
Ford DOT3 Brake Fluid
Gas hood struts
JDM Hazard Button
Brushed aluminum A/C knob rings
COB interior LED
Fake CF shifter plate trim
Black perforated leather steering wheel wrap, red stitching and red marker
Leather CVT shift knob wrap with red stitching
Leather handbrake wrap with red stitching
Fake leather center console cover - black with red stitching
CG Seatbelt Lock
Savanini paddle shifter extension
Razo RP121A pedals
Razo RP124A dead pedal
Generic heel plate
Savanini throttle body spacer
K&N VF2033 cabin air filter
K&N 33-5027 air filter
Tanabe Sustec Front Strut Tower Bar
Progress rear sway bar
Mishimoto compact 2 port baffled oil catch can
Kenwood Excelon DNX995S
idatalink maestro rr radio interface
idatalink maestro HO2 steering wheel harness
Kenwood CA-C3AV AV Cable for Video AV Input & RadioShack HDMI-to-Composite Converter to retain OEM HDMI port
Kenwood CA-U1EX USB Extension cable to retain OEM USB ports
Kicker KQ5 parametric equalizer
AudioControl D-4.800 amp
Sony XS-GS1621 coax
Morel Hybrid 63 in custom A pillar pods
Sony XM-GS100 mono amp
Kicker L7 QB8 sub
Road noise reduction (floor, doors, roof, sunroof cover, hatch, A/B and C pillars and trunk using Noico CLD, MLV, asphalt undercoat front fenderwells, dashboard and firewall inside towards cabin using technofloor rubber, climaloc insulation and recycled denim blanket.
Denali Sound Bomb Compact Horn
Philips X-treme Ultinon 12953BWX2 H4 150% LED bulbs
GK Fog Lights Anytime On mod with lights on indicator
Front corner turn signal mod
Philips X-treme Ultinon LED Golden Yellow 2700K 12793UNIX2
OEM cargo light wired to 2nd cargo light with switch [HR-V] (Part number 34265-SFE-003) and COB LED's
Colorized various interior buttons/switches
Red tach and speed needles
Additional cigarette lighter outlet in OEM start button location
Mini voltage display
Viofo A129 Pro Duo dash cam (formerly FineVu CR2000 Omega GPS Dashcam)
Generic Rear Pillar Lights with brake and turn function
Diode Dynamics turn as tail module
EX-L mirror signals
Rear red led turn signal bulbs with hyperflash fix
Orange LED front corner bulbs with built in hyperflash fix
Gentex 50-GENK5AM auto dimming mirror with compass
Optima Yellow Top 51R battery
21" antenna
4E Hud
Lighted Ignition
I should've painted the wheels metallic silver, bronze, gold or gunmetal. But for winters, at least they'll be easy to clear the snow out of.
Last edited by Action Jackson; 08-14-2022 at 09:06 AM.
#2
12-07-2015, 09:02 AM

 really like the si wheels.
 As for the krown rustproofing, I was going to do it as well but I've heard so many arguments suggesting it is better to simply spray wash the underbody once in a while in the winter. I guess since you and I are both in Ontario with the same car, we can both watch for rust in the future and compare.
#3
12-07-2015, 09:13 AM

Nice. Was going to order the same thing but waiting on some warranty repair to get done to make sure they don't try to weasel out of it.

#4
12-08-2015, 05:26 AM
really like the si wheels. As for the krown rustproofing, I was going to do it as well but I've heard so many arguments suggesting it is better to simply spray wash the underbody once in a while in the winter. I guess since you and I are both in Ontario with the same car, we can both watch for rust in the future and compare.
My Protege5 was probably the only rust free Mazda in existence, until it was totalled. Taking apart the suspension was a breeze after 5 years. Rustproofing will also protect the engine bay, and electrical, etc...
#5
12-08-2015, 01:25 PM
I'll install this tmmw and post back. Hope your warranty work gets resolved.
#6
12-08-2015, 01:32 PM

From eBay. Contrary to the listing, this i not specific to the Fit
 . It seems a bit too wide. I'll trace out a cardboard mock up and give it a try.
http://www.fitfreak.net/forums/3rd-gen-gk-specific-fit-exterior-modifications-jdm-styling-sub-forum/91913-would-you-install-rear-bumper-guard.html#post1328995
Last edited by Action Jackson; 12-10-2015 at 10:12 AM. Reason: fixed links
#7
12-09-2015, 05:00 PM
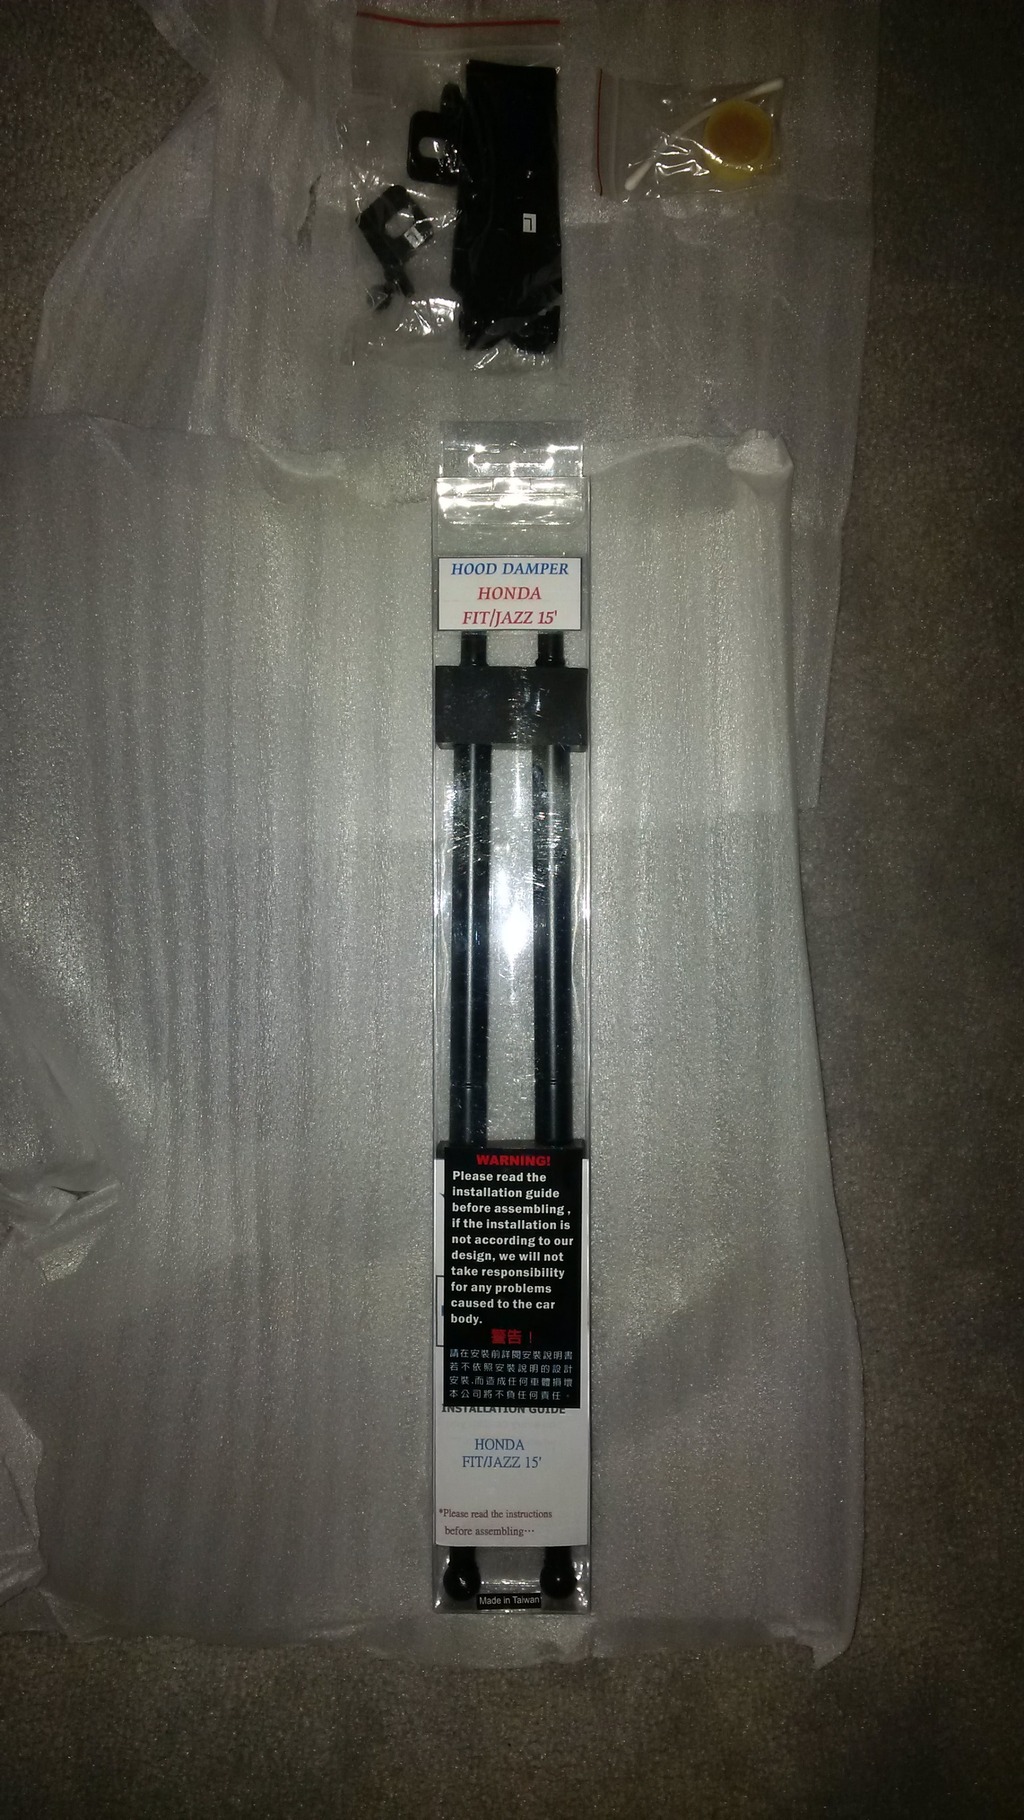
MIT (Made in Taiwan?) Gas hood struts from eBay
http://www.ebay.com/itm/111710347204?_trksid=p2057872.m2749.l2649&ssPageName=STRK%3AMEBIDX%3AITseller : mitaccessories1
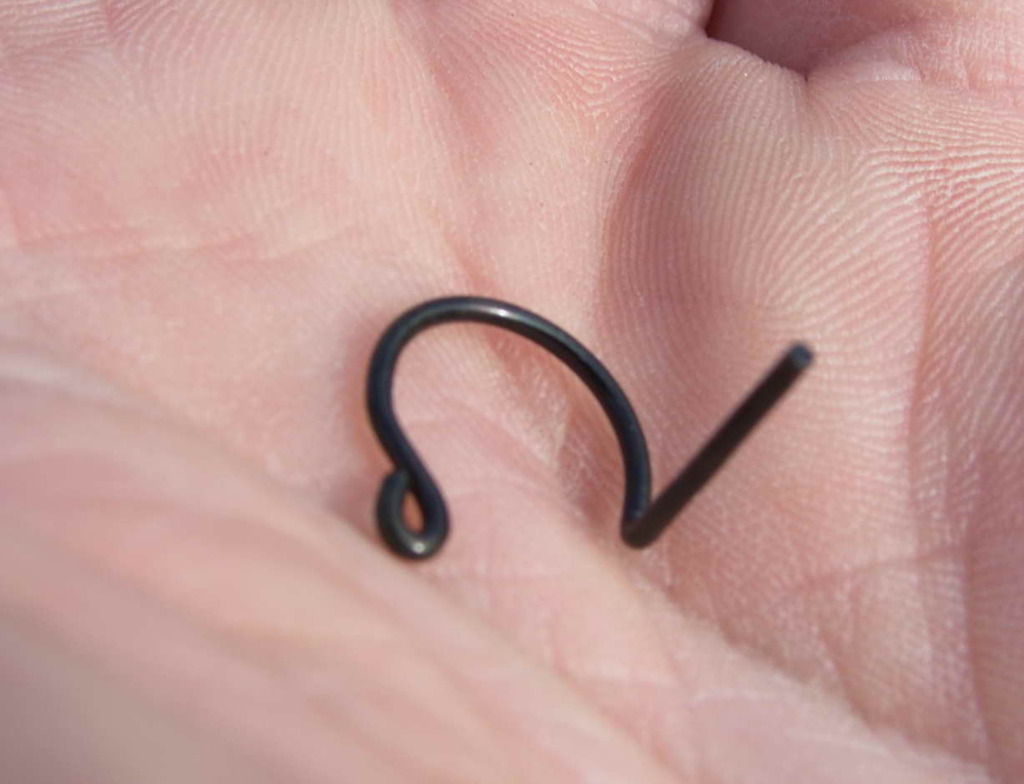
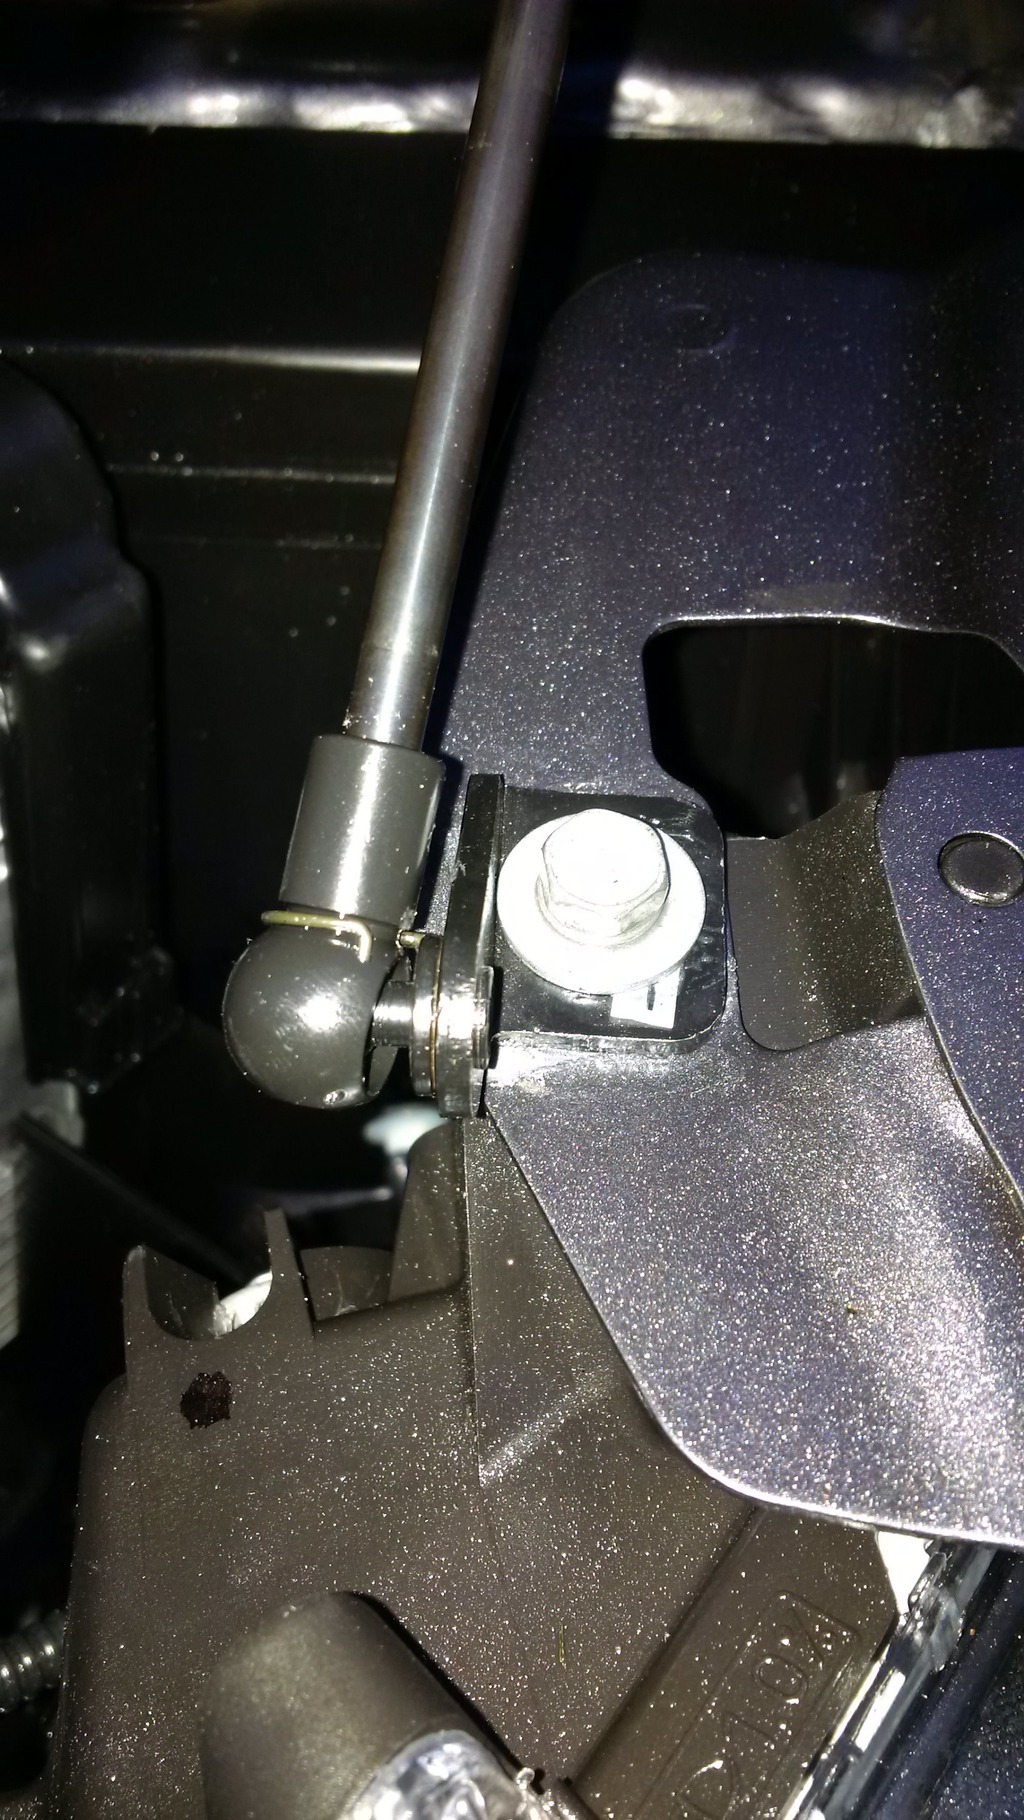
Don't lose this pin!
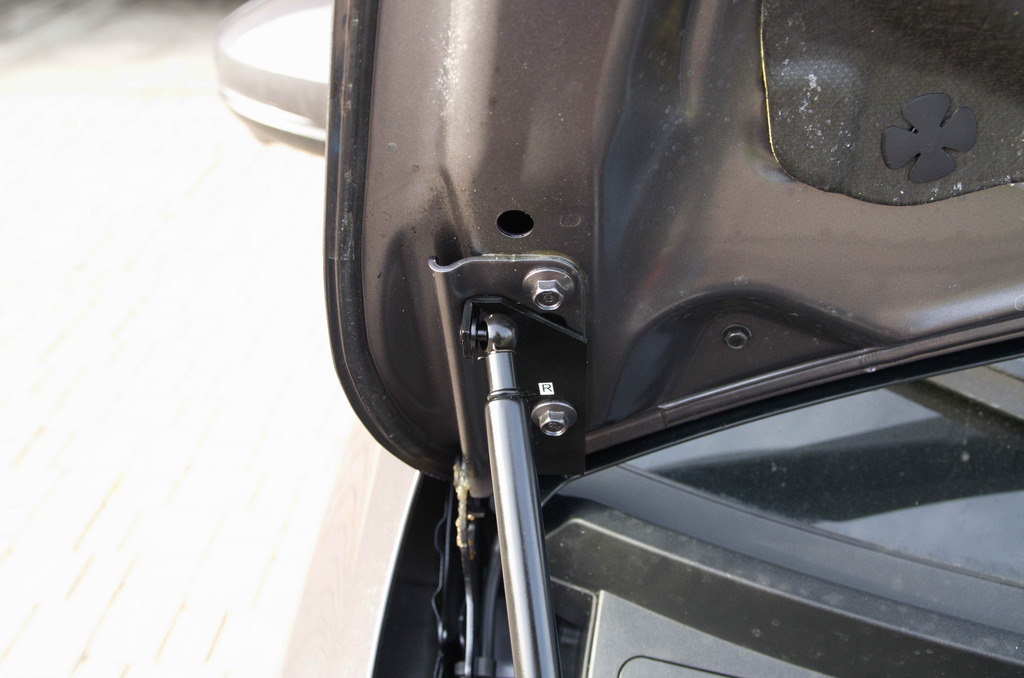
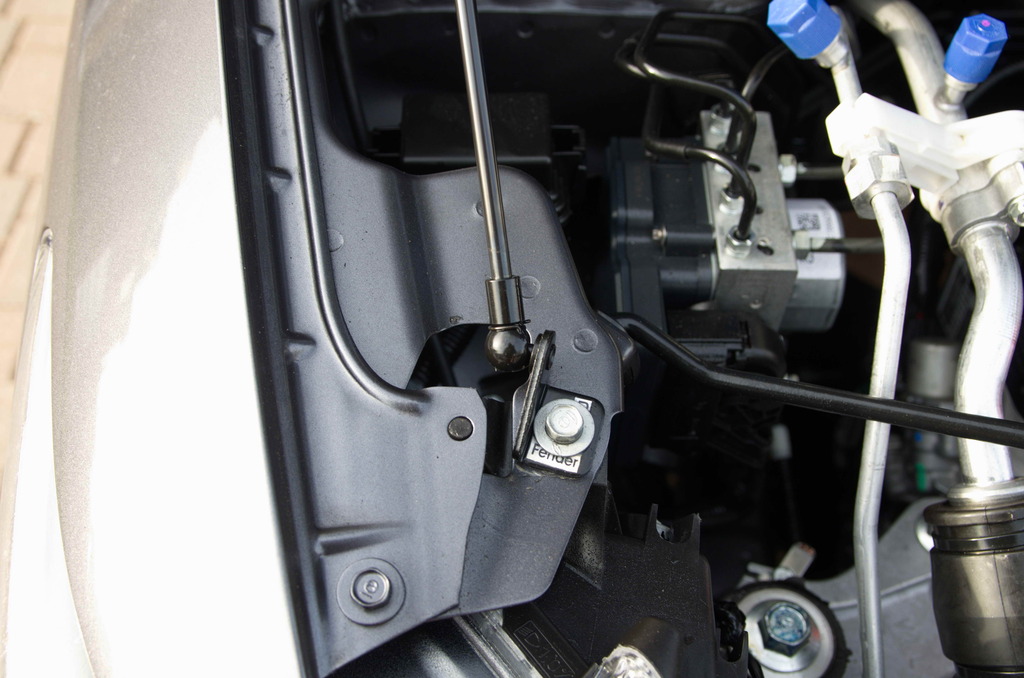
I didn't like the suggested angle for this bracket as it kept rotating loosely. I'm hoping this angle fairs better. BTW, this bolt screws into the plastic headlight housing, so simply tightening this isn't an option.
Paint got scratched up a bit.
Smaller front brace will not mount 180 facing forwards (as recommended) b/c it will just rotate.
You cannot over tighten forward bolt as the "nut" is the plastic housing of the headlights.
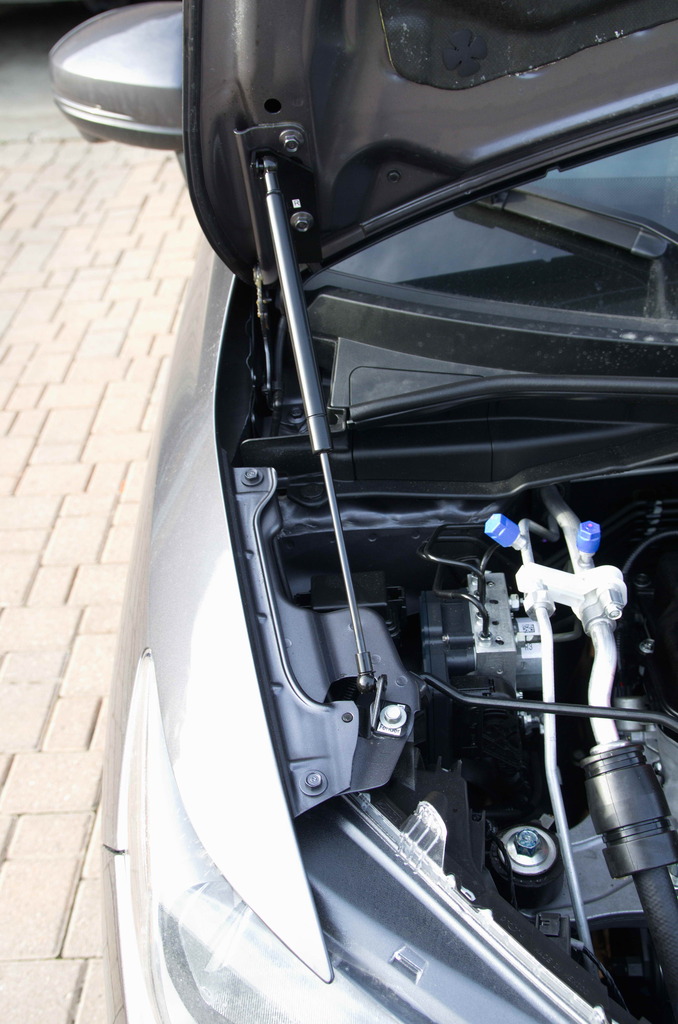
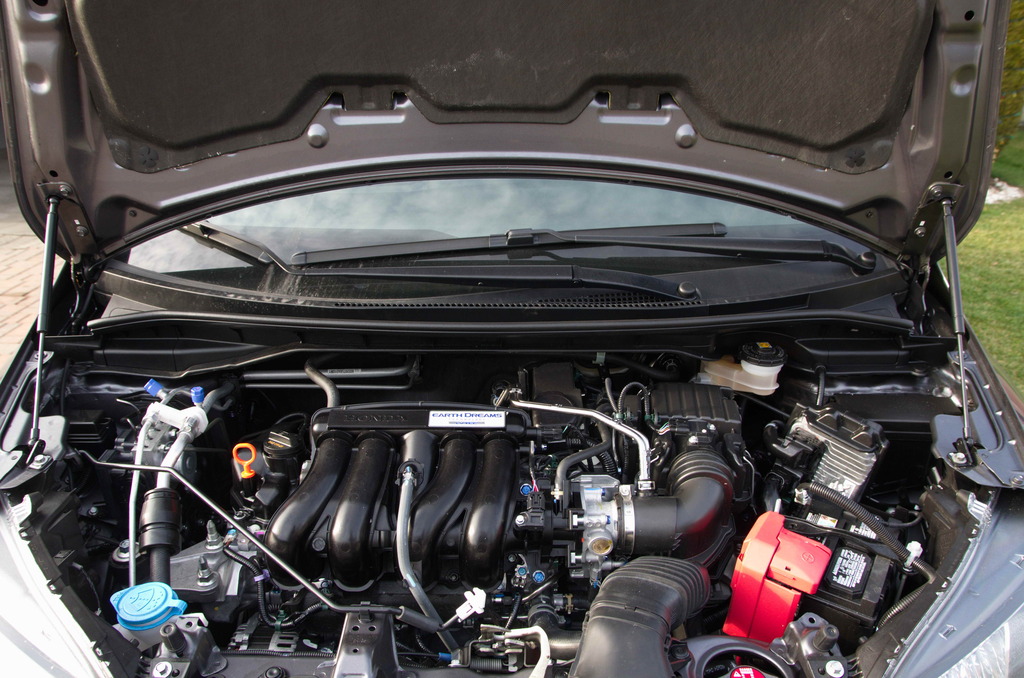
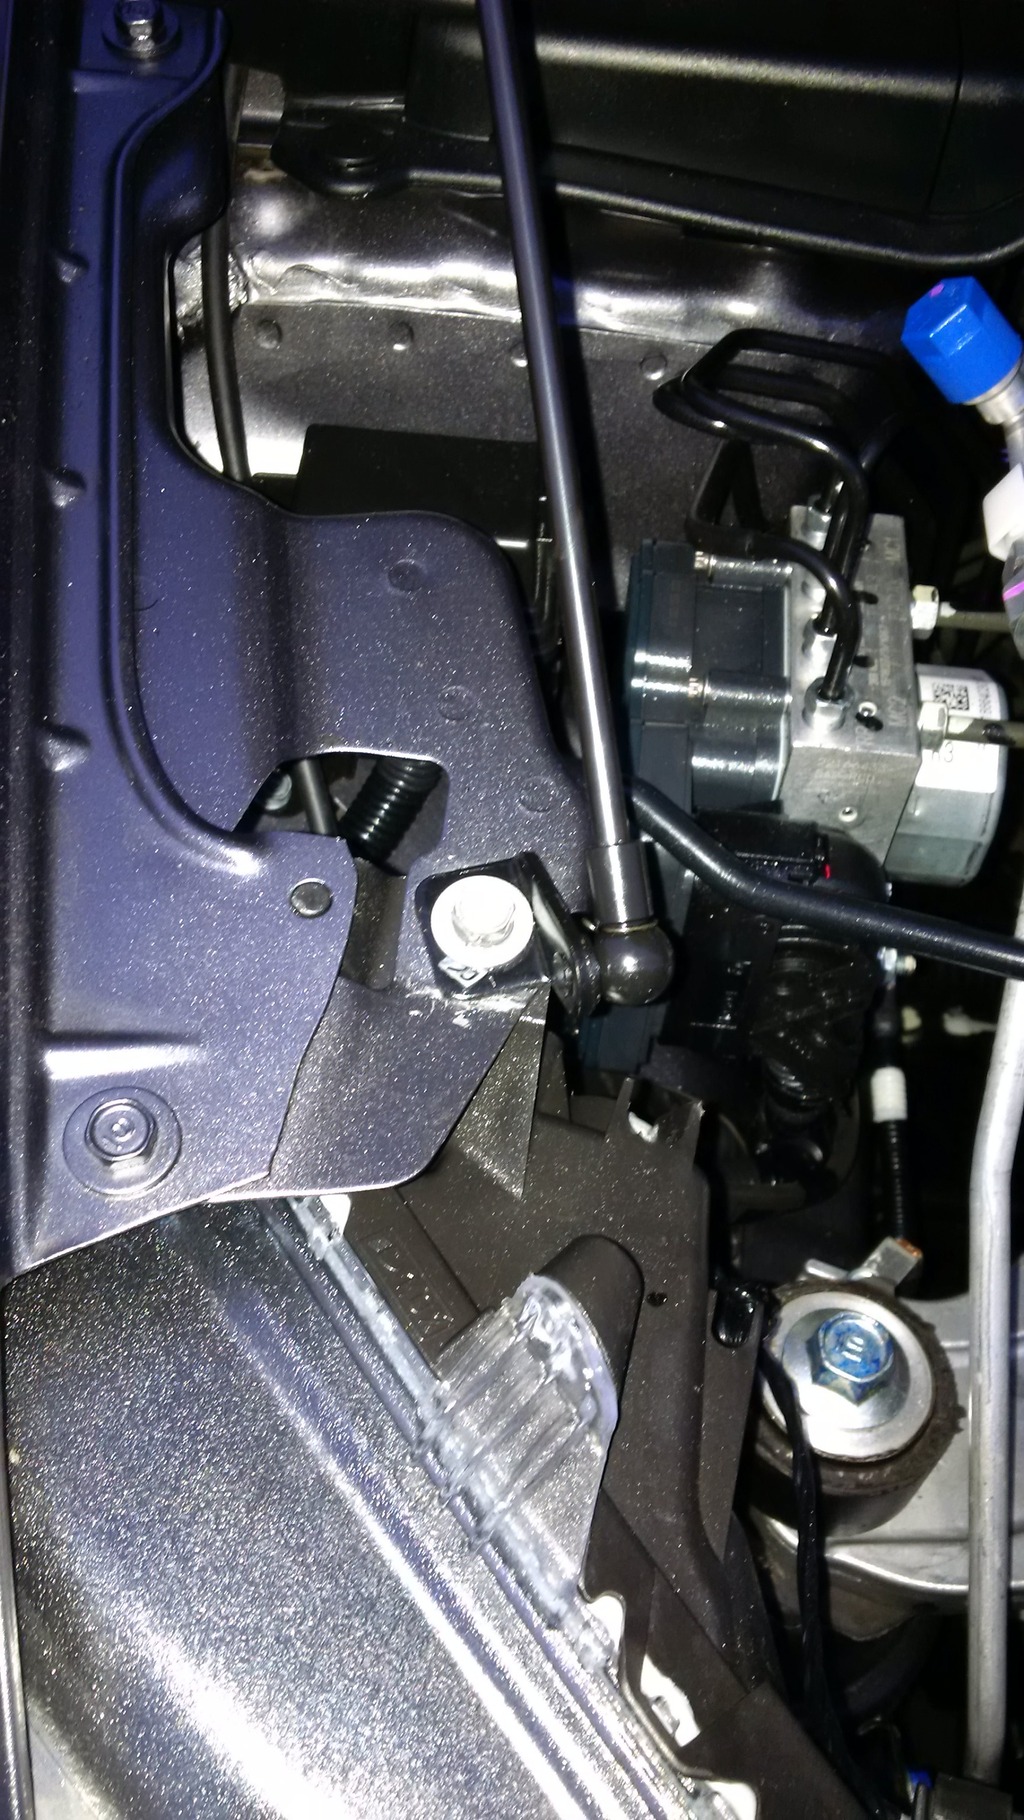
Hood opens up farther back.
When you open or close the hood, you can see the front bodywork and headlight housing flex (only a bit) just under the front brace.
Attach the strut to the front brace first b/c if you have to compress it, it's easier to compress it forwards, rather than pushing the hood away from the hood prop if you did the longer brace first.
Don't lose that pin!
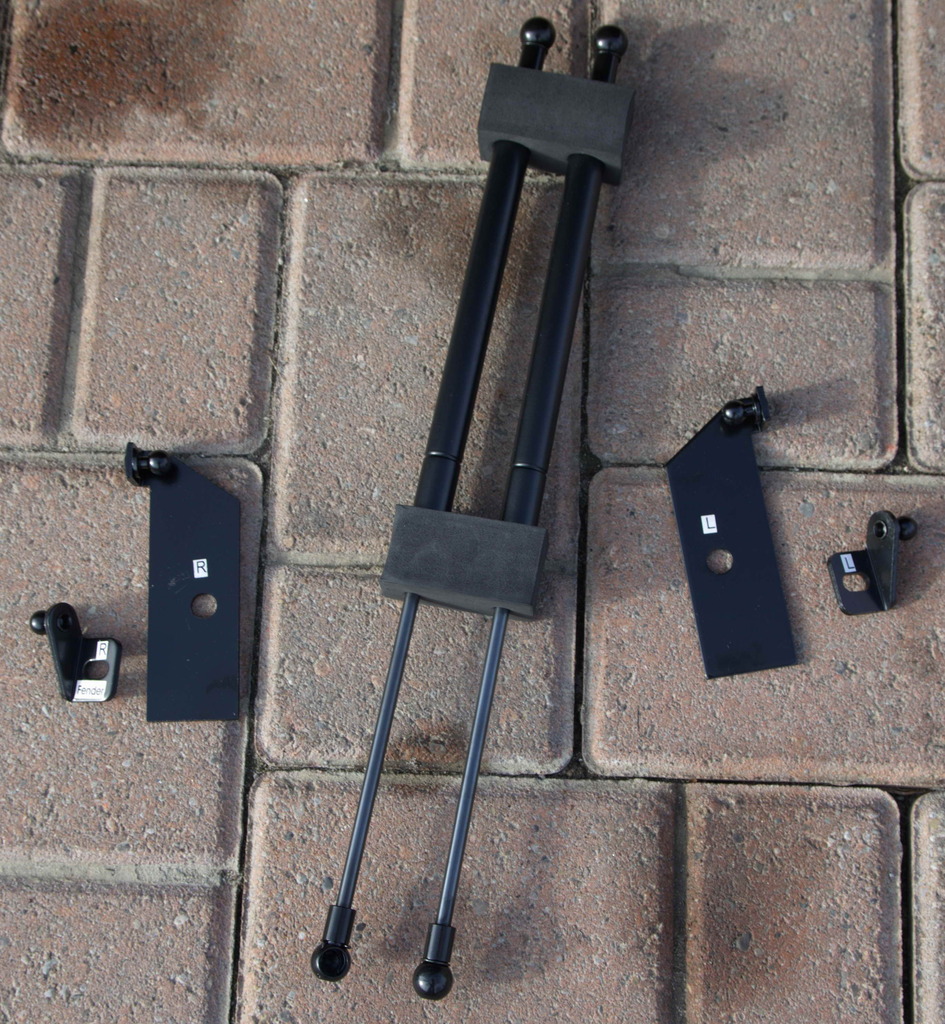
You'll need a 10mm socket. I used high pressure grease and sprayed it into the pivot points of the struts.
The pivot points are all plastic - on the struts and on the brackets. The brackets themselves are metal.
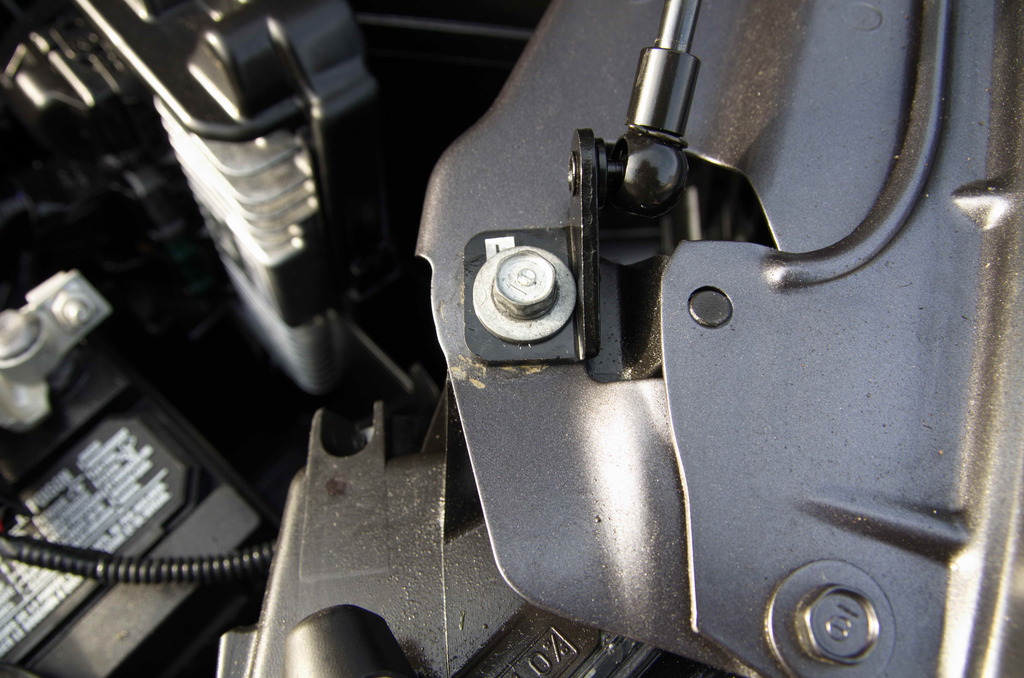
Update:
My angle for the front brace didn't work. It rotated.
So now I'll try this angle, which is what is originally suggested by the manufacturer:
http://www.ebay.com/itm/111710347204?_trksid=p2057872.m2749.l2649&ssPageName=STRK%3AMEBIDX%3AITseller : mitaccessories1


Don't lose this pin!


I didn't like the suggested angle for this bracket as it kept rotating loosely. I'm hoping this angle fairs better. BTW, this bolt screws into the plastic headlight housing, so simply tightening this isn't an option.


Paint got scratched up a bit.
Smaller front brace will not mount 180 facing forwards (as recommended) b/c it will just rotate.
You cannot over tighten forward bolt as the "nut" is the plastic housing of the headlights.
Hood opens up farther back.
When you open or close the hood, you can see the front bodywork and headlight housing flex (only a bit) just under the front brace.
Attach the strut to the front brace first b/c if you have to compress it, it's easier to compress it forwards, rather than pushing the hood away from the hood prop if you did the longer brace first.
Don't lose that pin!
You'll need a 10mm socket. I used high pressure grease and sprayed it into the pivot points of the struts.
The pivot points are all plastic - on the struts and on the brackets. The brackets themselves are metal.
Update:
My angle for the front brace didn't work. It rotated.
So now I'll try this angle, which is what is originally suggested by the manufacturer:


Last edited by Action Jackson; 01-07-2016 at 04:36 PM.
#8
12-10-2015, 08:27 AM
Is this a one person job if you do one side at a time?
I'm holding off installing because I'm trying to get Honda to fix my sagging front bumper. I'm just waiting to get it to their body shop. I don't want them saying that because I have the gas struts installed, that it is causing the bumper to sag. At this point, I wouldn't put it past them to try that...
#9
12-10-2015, 10:38 AM
Thanks for posting the pictures of the install and the final product. It looks good. Any gotchas during the install? When I do mine, I'll put some masking tape down to minimize scratches.
Is this a one person job if you do one side at a time?
I'm holding off installing because I'm trying to get Honda to fix my sagging front bumper. I'm just waiting to get it to their body shop. I don't want them saying that because I have the gas struts installed, that it is causing the bumper to sag. At this point, I wouldn't put it past them to try that...
Hope you get your bumper fixed. I tried to take off my front bumper to do my fog overlays, just like in the video for the sport horn install by College Hills (https://www.youtube.com/watch?v=HDkb...ature=youtu.be 2 min mark) and I snapped one of the "clips" of the bumper. It was the top one on the passenger side.
Needless to say, I stopped right there. So only a small portion of the bumper sticks out a bit. I've removed the front bumpers from all of my cars, and it's sad how flimsy the one on the FIT is. I suppose to give us this level of equipment, costs are saved elsewhere.
Last edited by Action Jackson; 01-09-2016 at 08:58 PM.
#10
01-04-2016, 05:35 PM
With my previous Saturn Astra, I didn't like the thin, vinyl steering wheel, so I wrapped it in a Wheelskins cover:
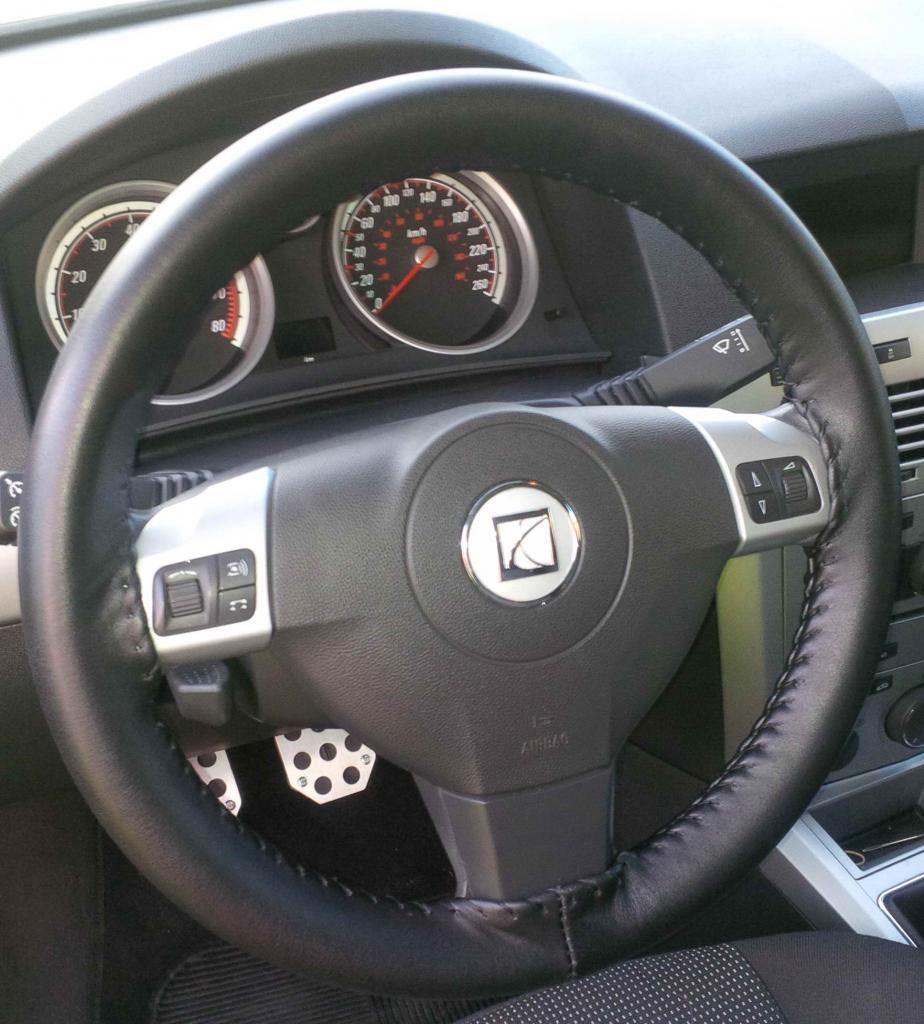
I later learned to tuck in the sides under the steering wheel controls.
So I find the Fit's steering wheel just a bit too thin for my tastes.
I ordered this from Ali Express: http://www.aliexpress.com/snapshot/7127896415.html?orderId=71169890551127
This kits comes with the cover, a plastic shimming tool, a tacky thimble I never used, a sharp needle, good quality thread and some amazingly thin double sided tape, plus good instructions. I also have a metal pry tool for car panels that I used.
Big thank you to Stembridge for his pics on the steering wheel garnish. It helped big time.
https://www.fitfreak.net/forums/3rd-...ml#post1330251
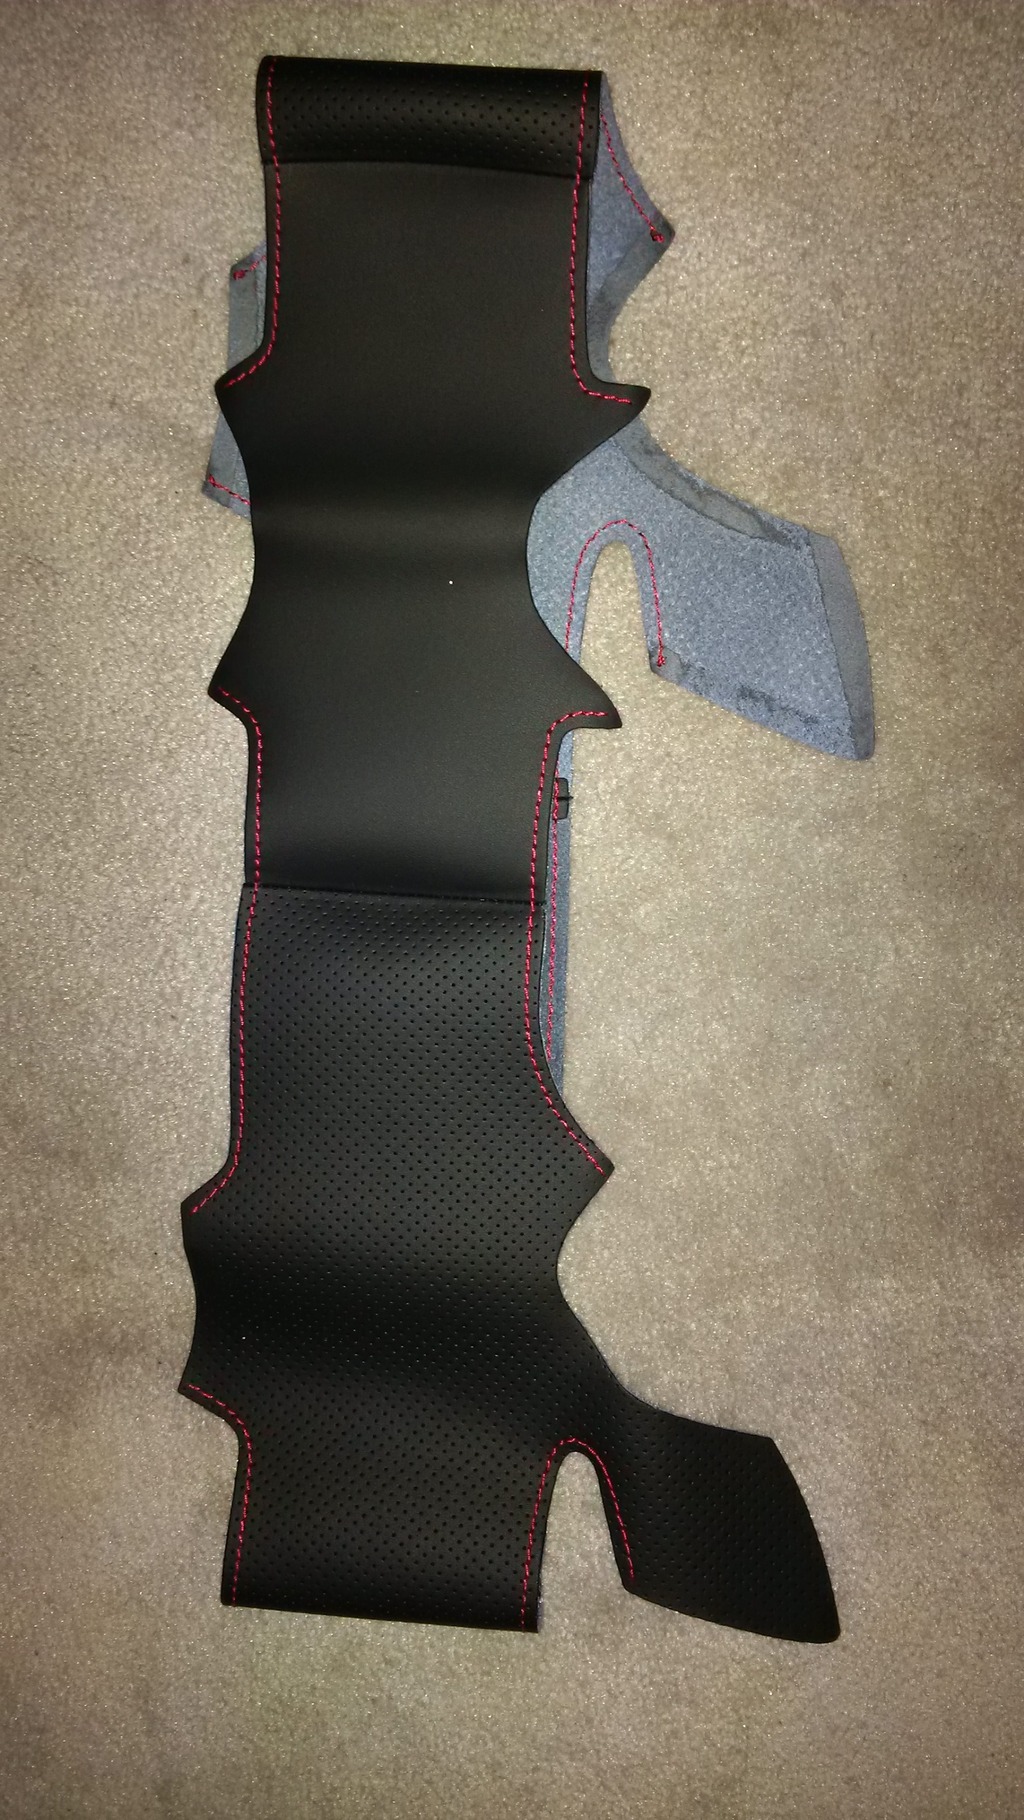
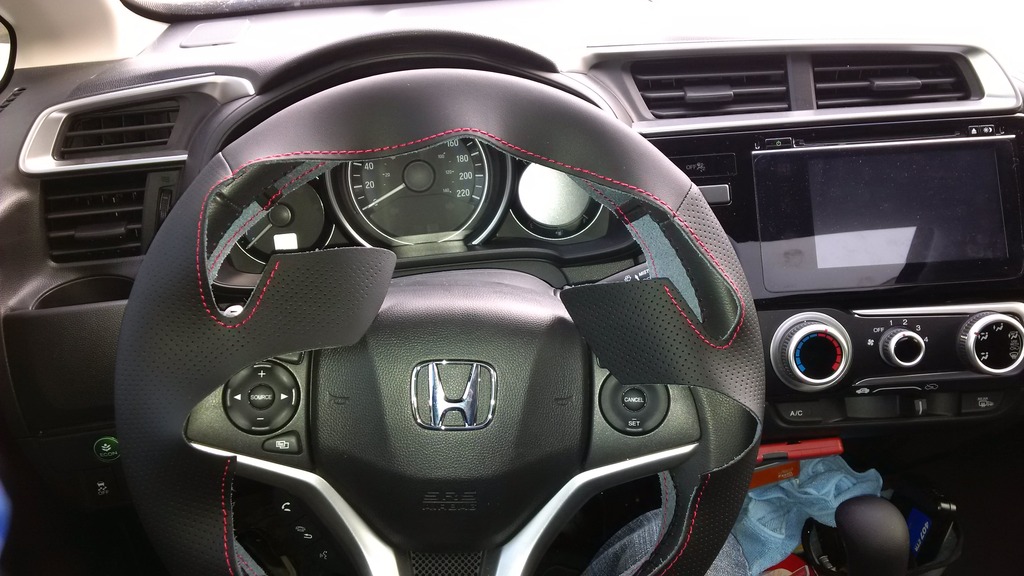
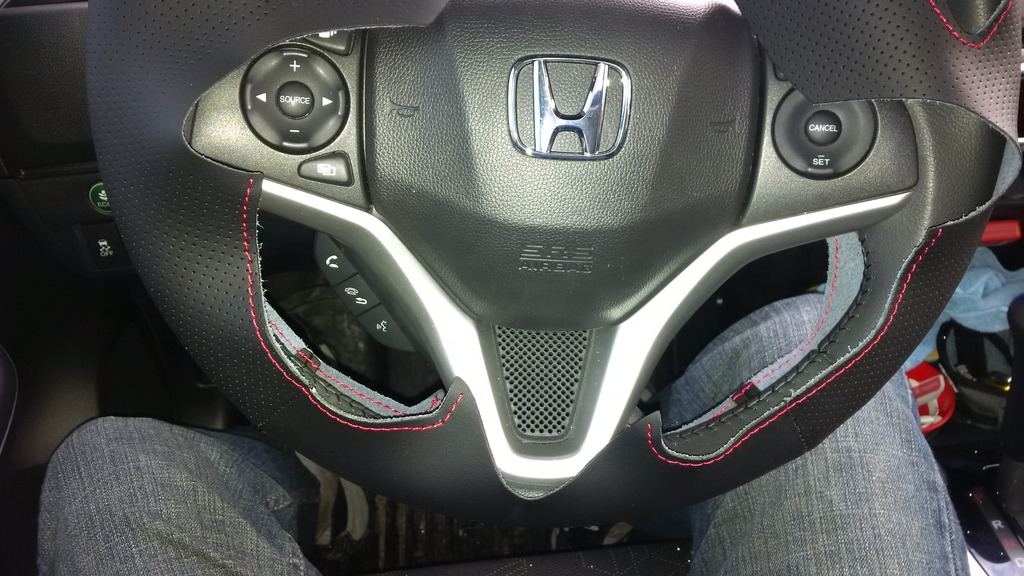
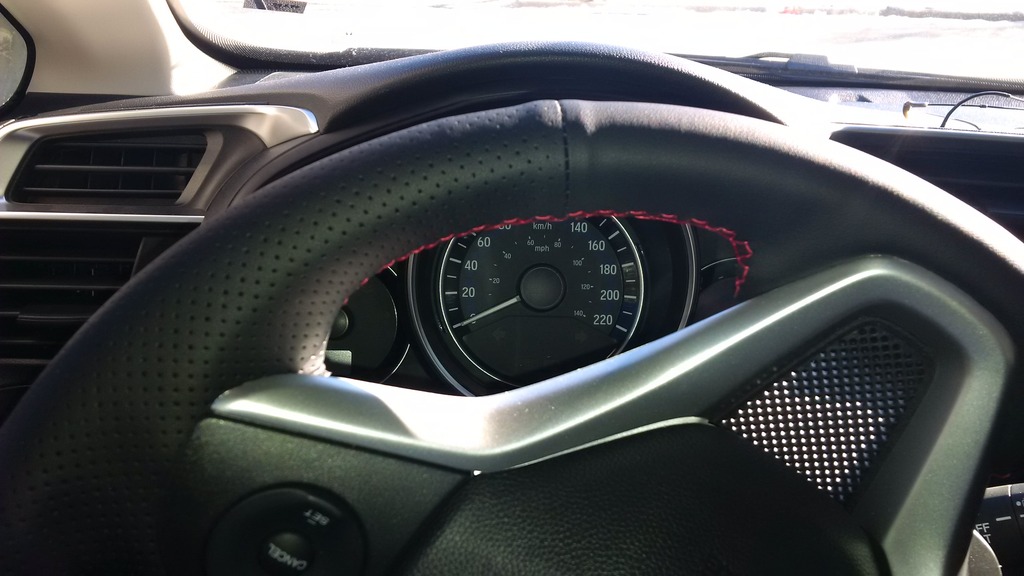
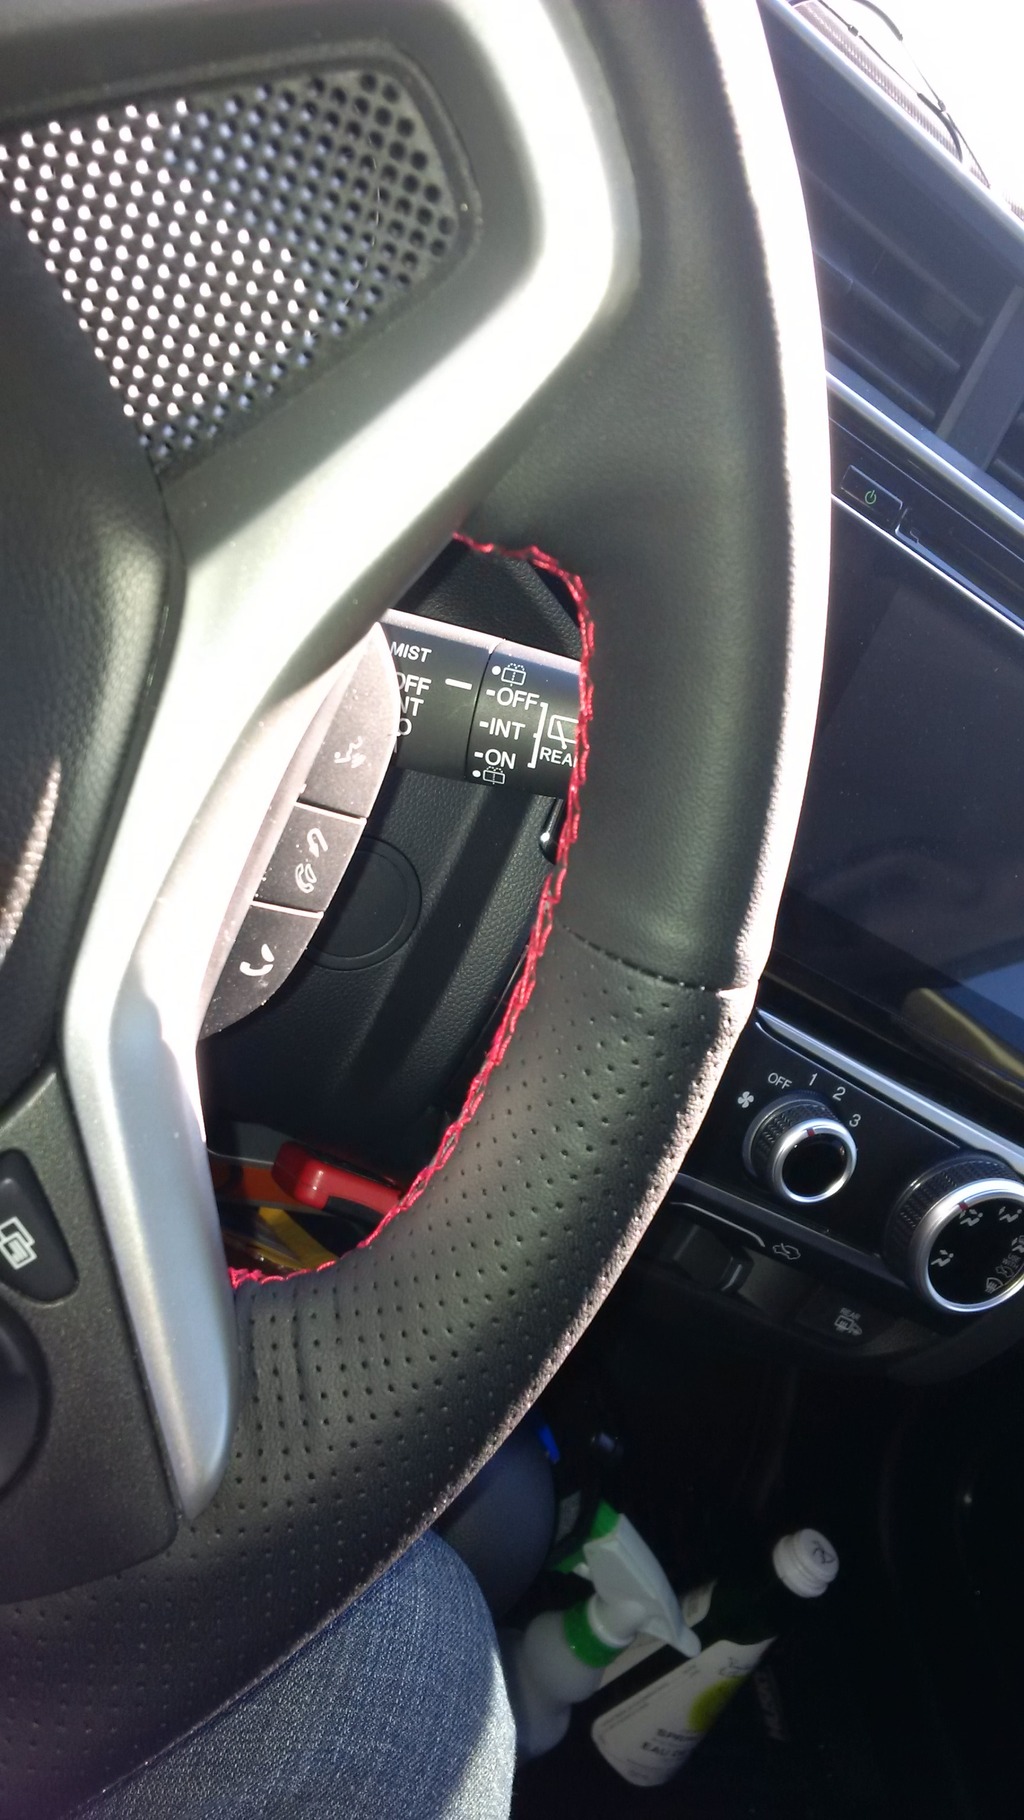
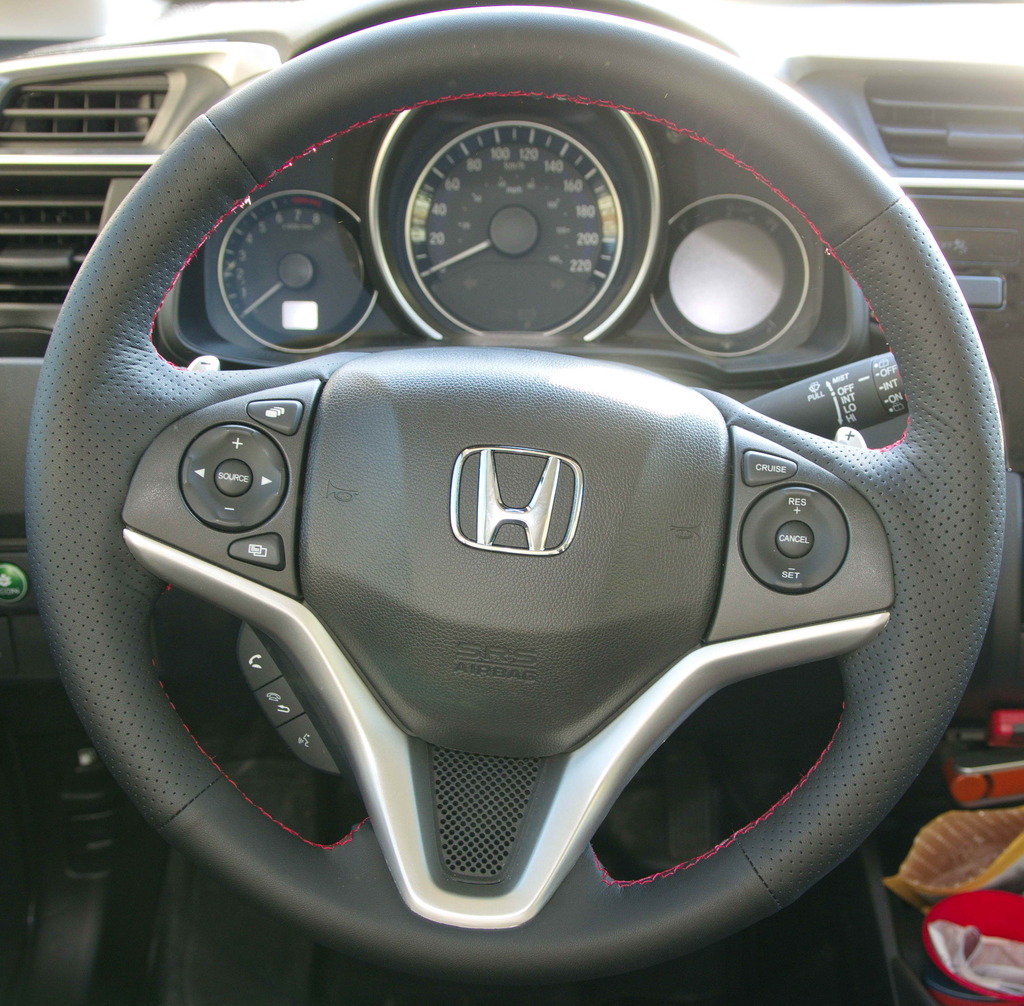
There you have it. Nice fitting, and nice and thick, real leather. The red stitching was a nice touch (I know, Type R). You can get other color threading.
I would highly recommend this. If you do this, double back on the threading occasionally as it helps to anchor what you're doing. I would've been able to close the slight gap a bit.
When I did the Saturn, I've snapped that really thick thread a few times, and that project took 5 hours. This one took maybe the same amount of time, but less frustrating. The thread in this kit never broke. It did cut into my finger a bit though, drawing a tiny bit of blood.
I've finally finished the wrap, the 2nd part is here:
https://www.fitfreak.net/forums/3rd-...ml#post1343658

I later learned to tuck in the sides under the steering wheel controls.
So I find the Fit's steering wheel just a bit too thin for my tastes.
I ordered this from Ali Express: http://www.aliexpress.com/snapshot/7127896415.html?orderId=71169890551127
This kits comes with the cover, a plastic shimming tool, a tacky thimble I never used, a sharp needle, good quality thread and some amazingly thin double sided tape, plus good instructions. I also have a metal pry tool for car panels that I used.
Big thank you to Stembridge for his pics on the steering wheel garnish. It helped big time.
https://www.fitfreak.net/forums/3rd-...ml#post1330251


There you have it. Nice fitting, and nice and thick, real leather. The red stitching was a nice touch (I know, Type R). You can get other color threading.
I would highly recommend this. If you do this, double back on the threading occasionally as it helps to anchor what you're doing. I would've been able to close the slight gap a bit.
When I did the Saturn, I've snapped that really thick thread a few times, and that project took 5 hours. This one took maybe the same amount of time, but less frustrating. The thread in this kit never broke. It did cut into my finger a bit though, drawing a tiny bit of blood.
I've finally finished the wrap, the 2nd part is here:
https://www.fitfreak.net/forums/3rd-...ml#post1343658
Last edited by Action Jackson; 05-03-2016 at 08:26 PM.


#15
01-07-2016, 01:55 PM
Wow, this is a nice touch! From the photos, it looks like a real OEM Steering wheel!
I would really be interested in this when i get my Jazz!
I would really be interested in this when i get my Jazz!

#17
01-08-2016, 09:51 AM
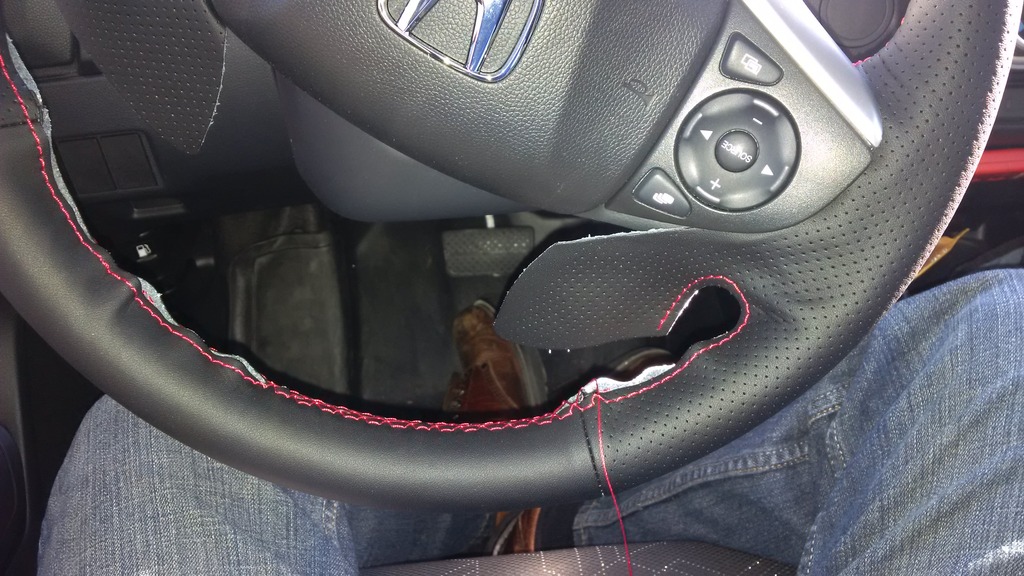
Thanks all. I redid the bottom 2 sides again. I couldn't close the gap anymore than 1mm. I needed to redo it anyways to realign one side, and to apply more of the double sided tape to finish it off.
#18
01-08-2016, 09:52 AM
I ended up doing that, as recommended by the manufacturer. So far, no issues.
#19
04-09-2016, 03:08 AM
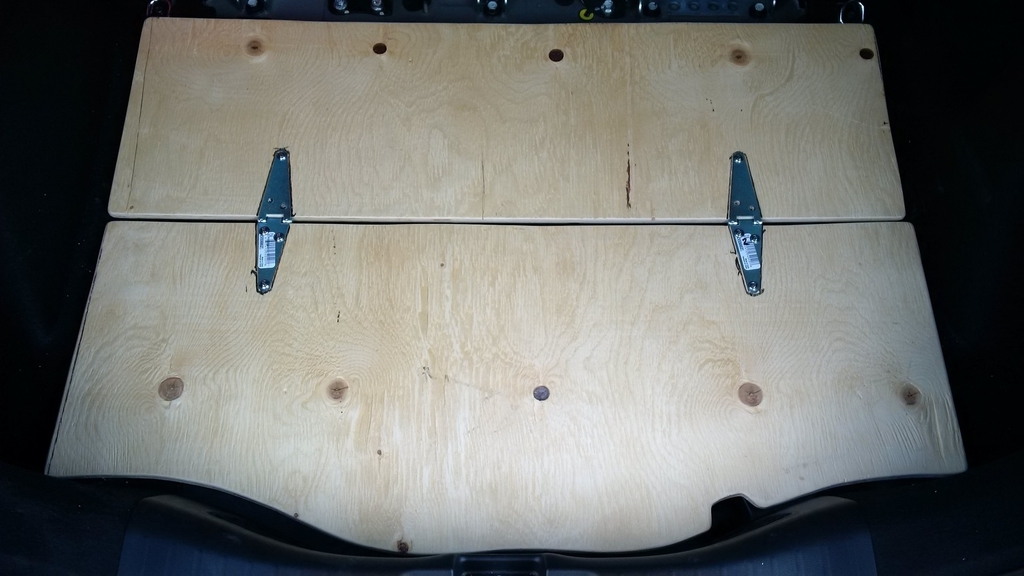
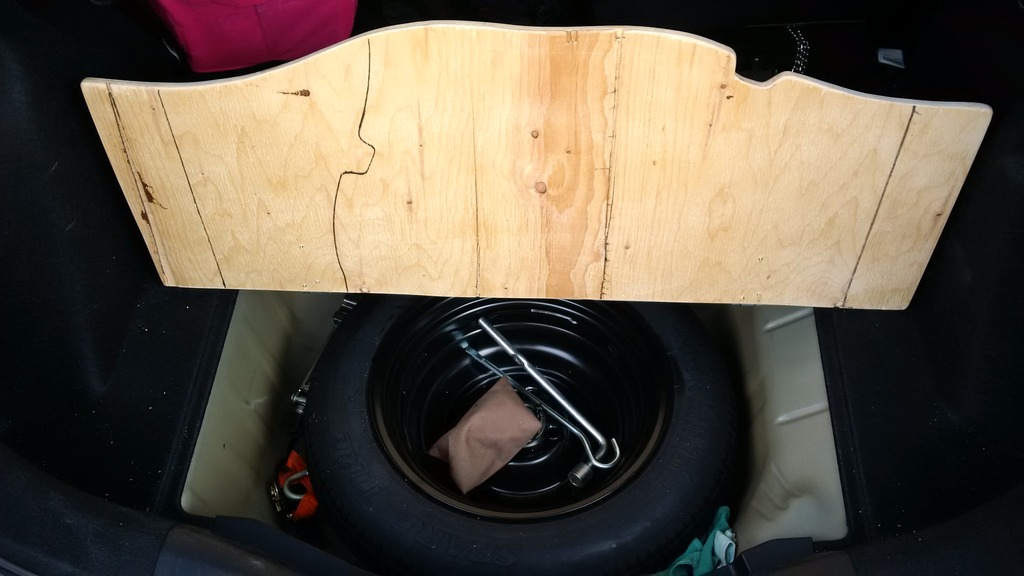
Got around to improving the storage of the trunk. Hated the foam. This is version 1, just to see how long it lasts. Diamond Plate is something for the near future. Now I can properly store my stuff.


Last edited by Action Jackson; 04-09-2016 at 03:12 AM.
#20
04-09-2016, 05:27 AM
Nice! I've thought about doing the same thing. I'm always concerned with putting anything of real weight back there.
What thickness plywood did you use? Hopefully it won't bend after a while.
What thickness plywood did you use? Hopefully it won't bend after a while.