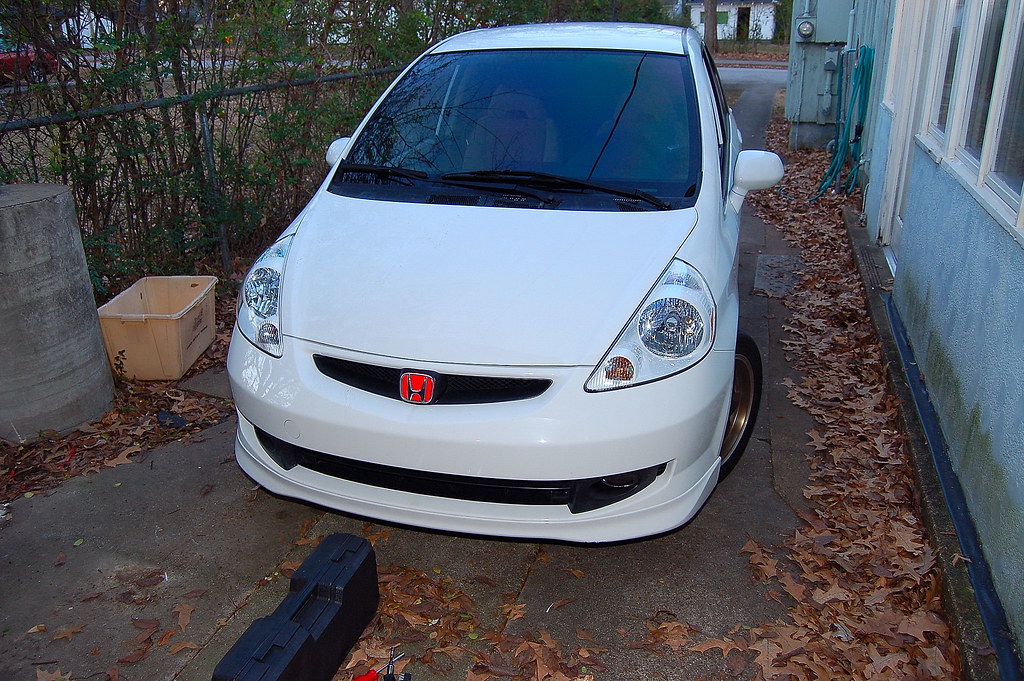
DIY: Changing Headlight Bulbs
#1
 12-31-2008, 12:35 AM


DIY: Changing Headlight Bulbs
Since there actually is not a real DIY for changing headlights/parking lights at all, I figured I would go ahead and make one today.
Disclaimer: The following is provided as a GUIDE ONLY, and neither myself, nor FITFREAK.NET endorse, recommend, encourage, nor take any responsibility for the possible outcomes of performing this DIY. You follow these steps at your own risk.
Step 1: Get a jack, set the parking brake, and chock the rear tires for safety reasons.
Step 2: Jack up one side of the vehicle. Check the owners manual to see where to actually place the jack before jacking it up
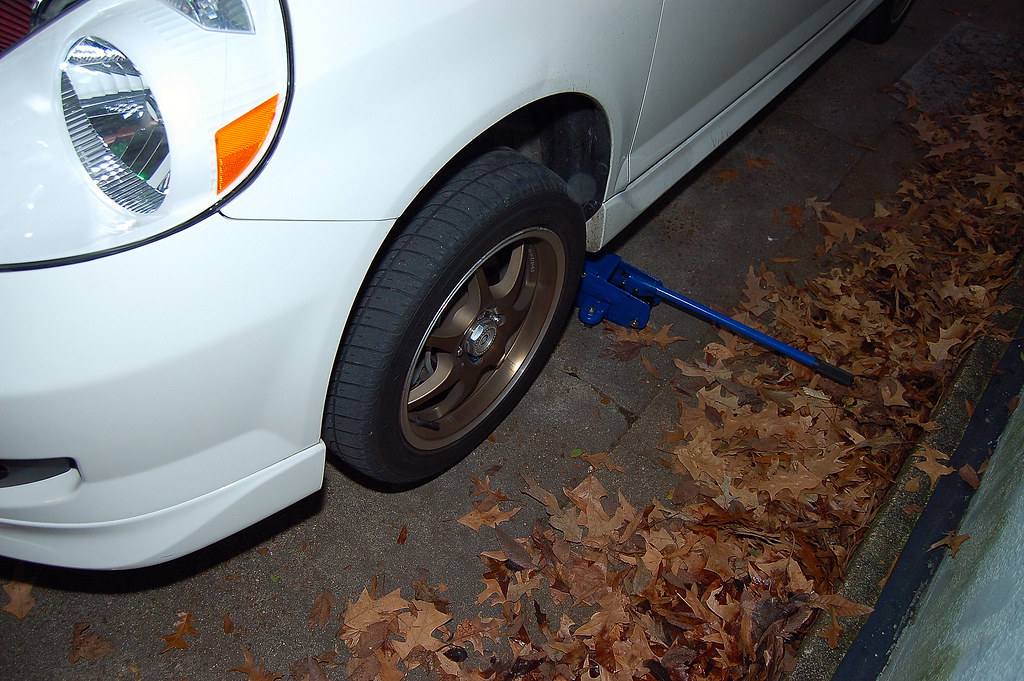
Step 3: Remove the front wheel from the car.
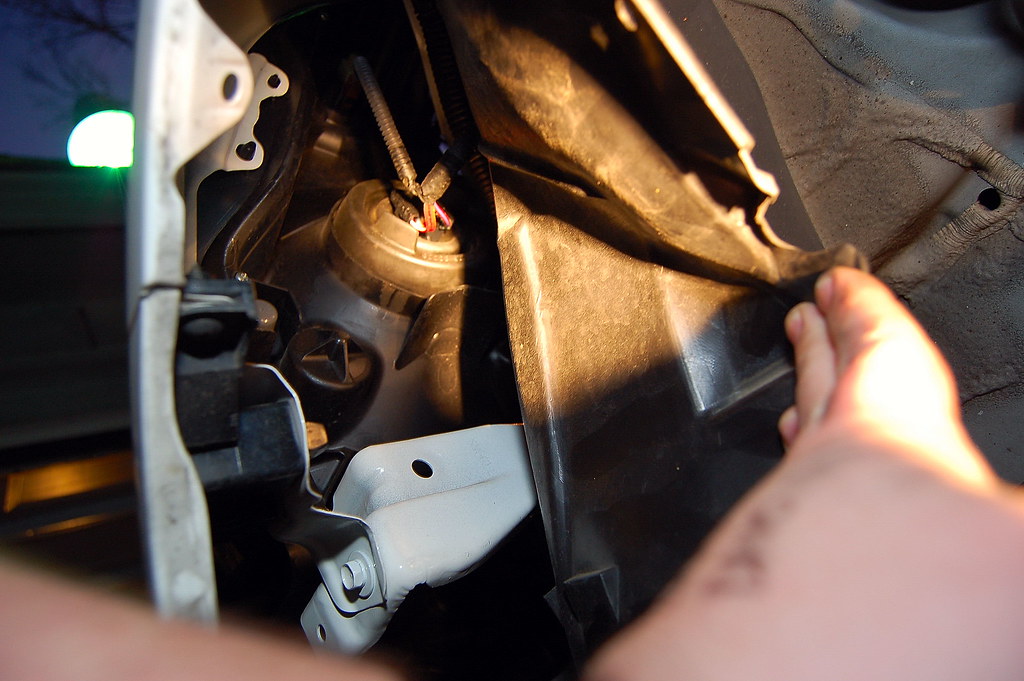
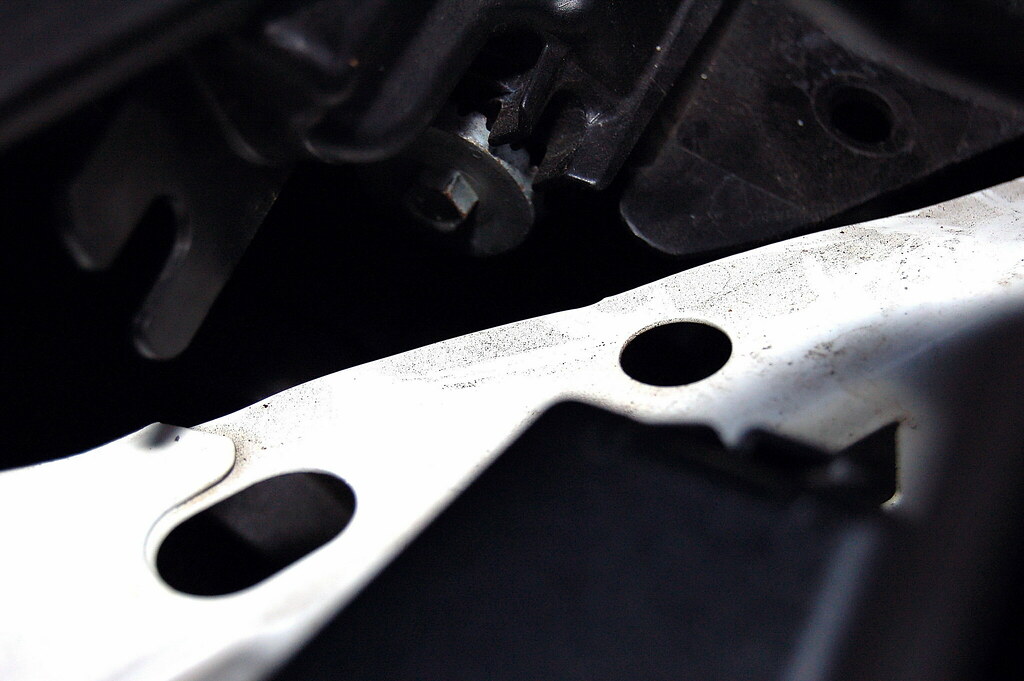
Step 4: Take notice of the retaining clip the connects the inner fender liner to the fender that is right next to the bright light spot to the left. It is really the only retaining clip you have to remove. The liner will move enough to reach the bulb without removing any other clips.

Step 5: When you pull back the fender liner you can see the headlight bulb wiring harness and seal.
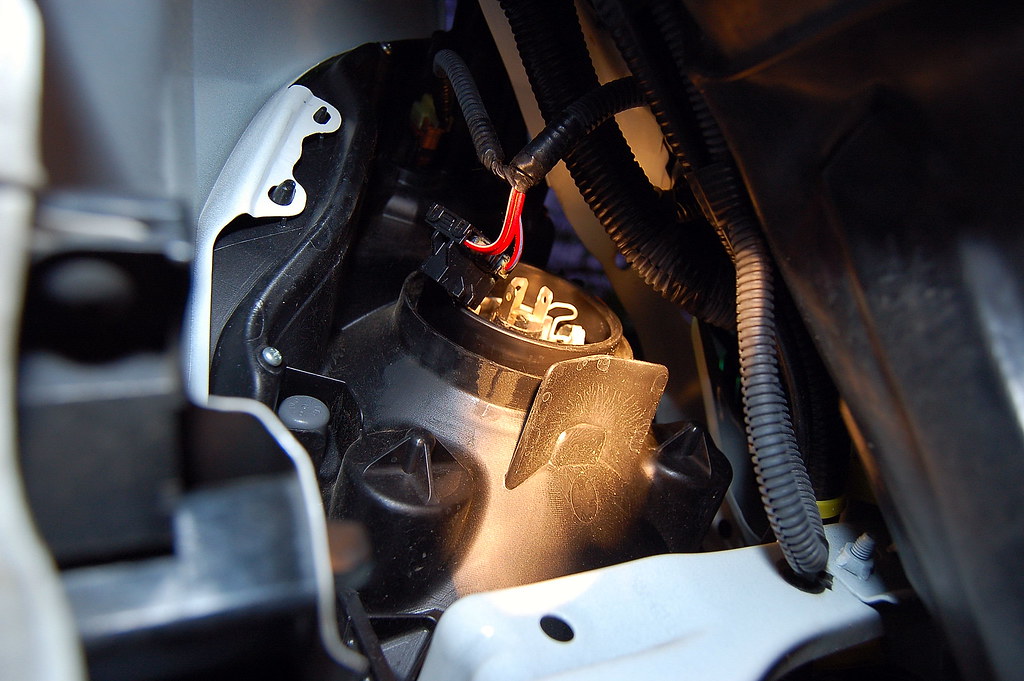
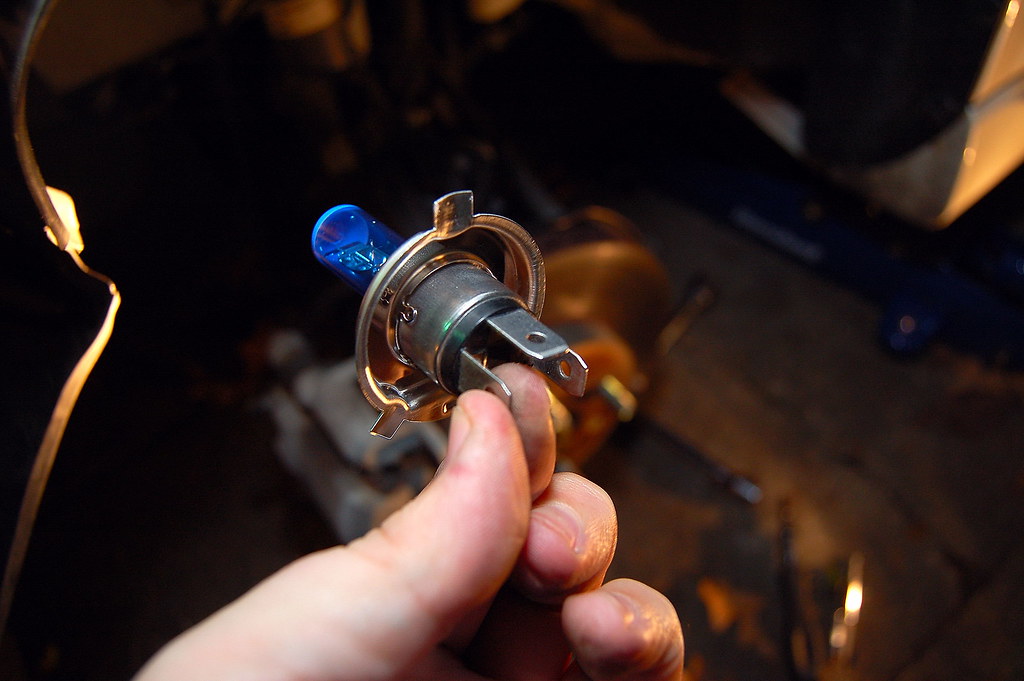
Step 6: Remove the harness clip from the bulb terminal and remove the rubber seal. Here you can see the retaining clip that holds the bulb in. You will need to push it in and toward the top to release the bulb. Take notice the pattern of the 3 light bulb rear terminals. The middle horizontal terminal is located on the top with the vertical terminals on either side.
Here is the new bulb I am installing. It is a bulb I got from a motorcycle shop. It's an H4 bulb with 90w low and 100w high beam. They are super bright and look awesome. Notice again the middle terminal is on the top.
Step 7: Place the new bulb in and push in the retaining clip in and down.

Step 8: Then you want to replace the rubber seal making sure all three terminals poke through the center. Then replace the harness clip.
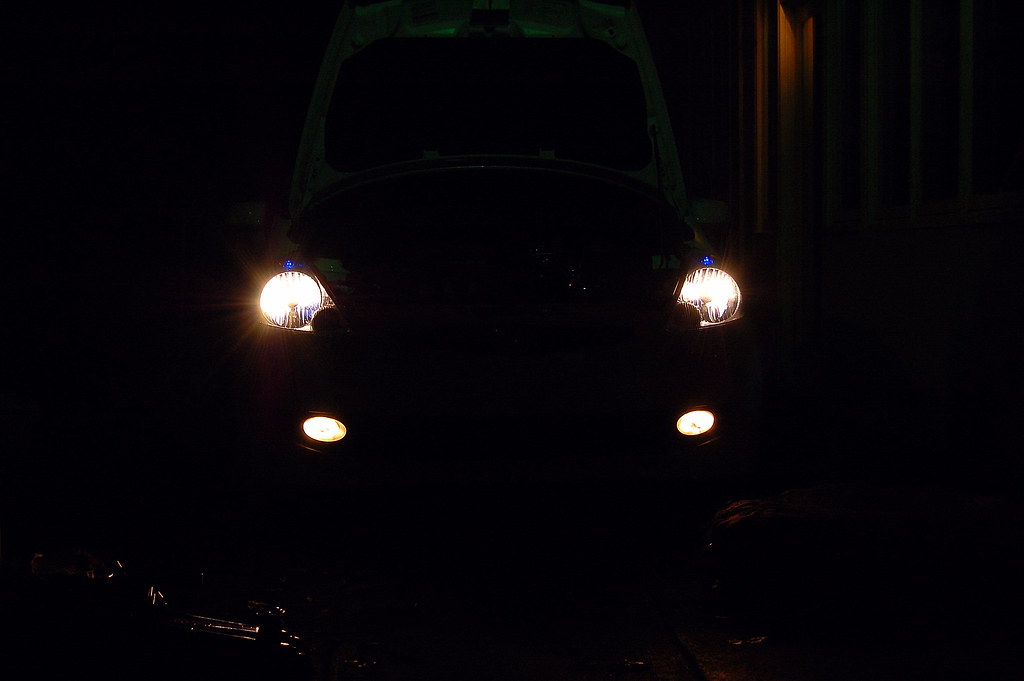
Here you can see a SilverStar Ultra H4 on the left and the new 90/100w H4 on the right. It is considerably brighter. I did not have the camera on a tripod and there seems to be some glare or blooming, but it's only showing that way in the picture. I thought the SilverStar Ultras looked good and bright, but man they pale in comparison to these new 90/100w H4s.

Step 9+: Repeat the proceeding steps for the passenger side. Then replace the wheels and make sure the lugnuts are torqued properly.
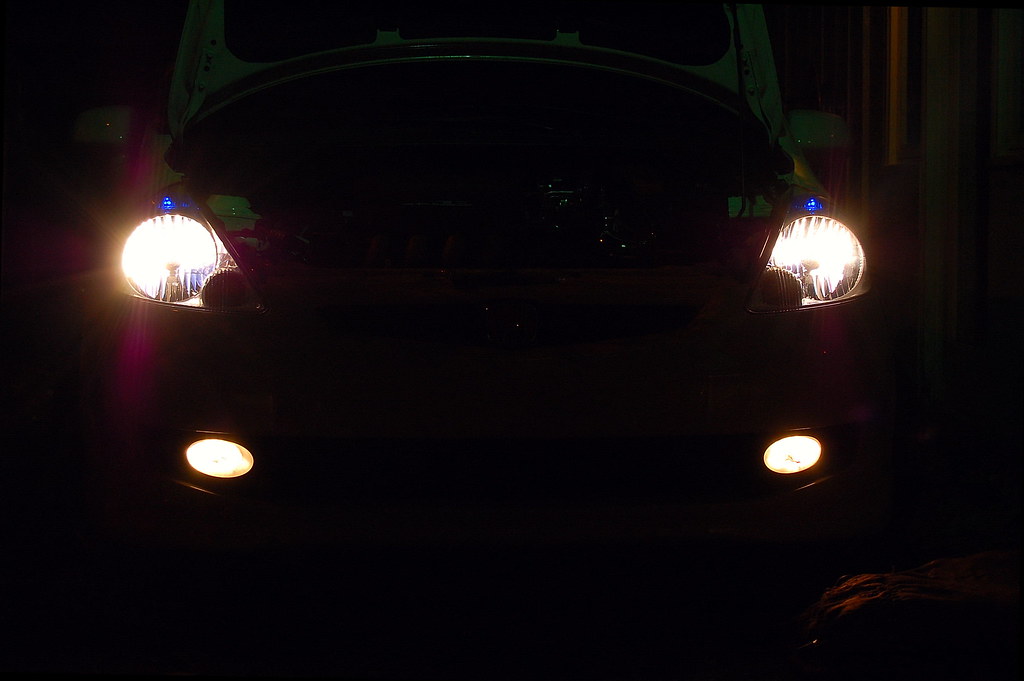
Here are what both new H4 bulbs look like.
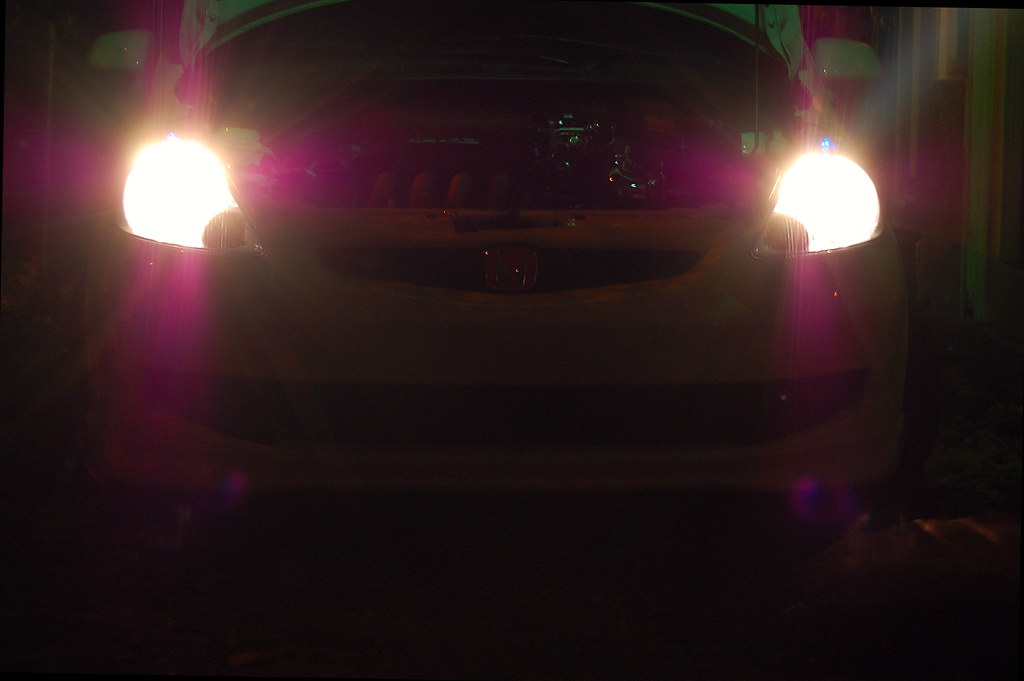
And here are the brights.

For adjustment:
And to adjust the vertical position of the headlights you want to turn the following silver colored gears clockwise to raise and counter-clockwise to lower them. You can use an 8mm wrench or a Phillips screwdriver to adjust the gear. There are other threads that address the adjustment of the headlights.
Passenger Side gear:

Driver side gear:
Disclaimer: The following is provided as a GUIDE ONLY, and neither myself, nor FITFREAK.NET endorse, recommend, encourage, nor take any responsibility for the possible outcomes of performing this DIY. You follow these steps at your own risk.
Step 1: Get a jack, set the parking brake, and chock the rear tires for safety reasons.
Step 2: Jack up one side of the vehicle. Check the owners manual to see where to actually place the jack before jacking it up
Step 3: Remove the front wheel from the car.
Step 4: Take notice of the retaining clip the connects the inner fender liner to the fender that is right next to the bright light spot to the left. It is really the only retaining clip you have to remove. The liner will move enough to reach the bulb without removing any other clips.
Step 5: When you pull back the fender liner you can see the headlight bulb wiring harness and seal.
Step 6: Remove the harness clip from the bulb terminal and remove the rubber seal. Here you can see the retaining clip that holds the bulb in. You will need to push it in and toward the top to release the bulb. Take notice the pattern of the 3 light bulb rear terminals. The middle horizontal terminal is located on the top with the vertical terminals on either side.
Here is the new bulb I am installing. It is a bulb I got from a motorcycle shop. It's an H4 bulb with 90w low and 100w high beam. They are super bright and look awesome. Notice again the middle terminal is on the top.
Step 7: Place the new bulb in and push in the retaining clip in and down.
Step 8: Then you want to replace the rubber seal making sure all three terminals poke through the center. Then replace the harness clip.
Here you can see a SilverStar Ultra H4 on the left and the new 90/100w H4 on the right. It is considerably brighter. I did not have the camera on a tripod and there seems to be some glare or blooming, but it's only showing that way in the picture. I thought the SilverStar Ultras looked good and bright, but man they pale in comparison to these new 90/100w H4s.
Step 9+: Repeat the proceeding steps for the passenger side. Then replace the wheels and make sure the lugnuts are torqued properly.
Here are what both new H4 bulbs look like.
And here are the brights.
For adjustment:
And to adjust the vertical position of the headlights you want to turn the following silver colored gears clockwise to raise and counter-clockwise to lower them. You can use an 8mm wrench or a Phillips screwdriver to adjust the gear. There are other threads that address the adjustment of the headlights.
Passenger Side gear:
Driver side gear:


#5
12-31-2008, 11:52 AM
It is true that if you have thin arms and small hands that you may be able to squeeze inside the fender when you turn the wheel toward the opposite side that you are working on. But, you will mostly only be able to reach up blindly into the fender, you won't really be able to see up in there.
But a lot of us are not so thin or small. Removing the wheels, while adding a little time to the entire process, definitely makes it a lot easier to see and reach the bulb.
But a lot of us are not so thin or small. Removing the wheels, while adding a little time to the entire process, definitely makes it a lot easier to see and reach the bulb.
#6
02-05-2009, 03:59 PM
I just changed a driver's side bulb in 15 degree weather, with the underside of the car covered in ice and road grunge, and it was a beyotch because of those things -- but easy otherwise. I took your advice and jacked the car up etc. Thank you, +rep.
I'll be interested to hear how well those high wattage bulbs hold up. They're not known for their longevity. Hopefully you will not find yourself in a situation similar to mine!
I'll be interested to hear how well those high wattage bulbs hold up. They're not known for their longevity. Hopefully you will not find yourself in a situation similar to mine!


#14
01-07-2011, 04:52 AM
Im about to change more details on my 07 Fit Sport and this comes very handy. I will be updating my bulbs in the spring to PIAA's Super Plasma's. Thanks again and like the previous reply indicated - will you be posting one for the Fog Lights? I am currently looking for an option to switch those as well. 
#15
01-09-2011, 06:12 AM

Thanks a million for this guide! I'm not much for car maintenance so I found it quite difficult even with this guide, especially the retainer clip for the bulb. Regardless, without this forum, I would've been up a certain creek with no paddle. Thanks guys!
#16
01-22-2011, 03:33 PM

Just replaced both lights thanks to this thread. I didn't jack the Fit and though things were tight, I could manage with a minimal amount of cursing and scratches. The passenger side area behind the light has much more room to maneuver around.
Thank you for the photos and guidance.
Thank you for the photos and guidance.

#18
01-25-2012, 08:27 AM

"retaining clips"
Gently push the tip of a small screwdriver into the groove toward the center of the pin and carefully pry up the central portion of the head. You should be able to lift it about 1/4" (6 mm) before the entire pushpin starts lifting out of the hole. At that point, it should be easy to remove the pin with your fingers by pulling on the raised central head of the pin.
Reinstallation is done by squeezing the pushpin's retaining legs together while keeping the head in the extended position. Insert the pushpin through both the wheelhouse liner and the fender. Then push the raised central part of the head back into the seated position and you are done.
#19
01-25-2012, 10:08 AM
This is how they change the bulb in a GD?
The GE, pop open the hood, take off wire take off rubber boot, flip clip, remove...reverse for install...
The GE, pop open the hood, take off wire take off rubber boot, flip clip, remove...reverse for install...
#20
01-25-2012, 01:28 PM
Yup, that's how you do it... although tight you can also get away with just cranking the wheel all the way out... a bit tight but can be done. Just replaced mine yesterday. Man those Silverstar Ultras didn't last very long.
Good DIY post Sid!
Good DIY post Sid!

