T1R rear disc conversion package!
#1
 07-11-2008, 10:03 PM


T1R rear disc conversion package!
Disclaimer: Do at your own risk! etc.............
The installation guide from T1R is a great. Just adding something else that you might want to know!
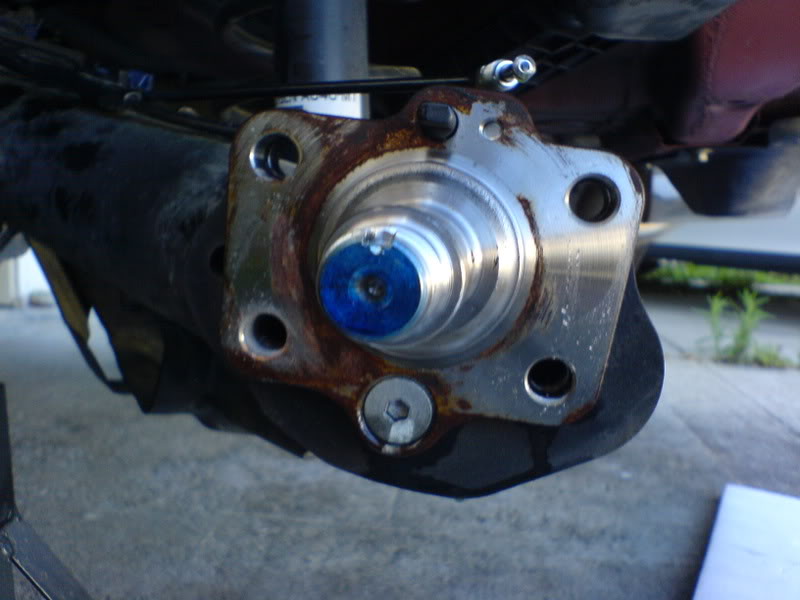
1) Jack up the car, make sure it's stable, take out the wheel and the drum.
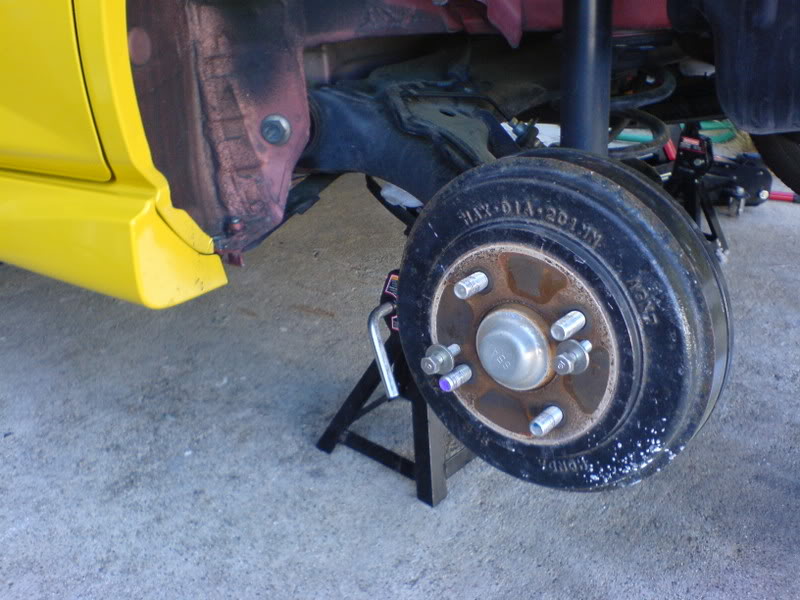
2) I used a flathead screwdriver and hammered the hub cap out.
3) Then I found out I don't have a tool for this and went to buy a 32mm impact socket.
4) Take out those four bolts and take out the rest of the drum kit.
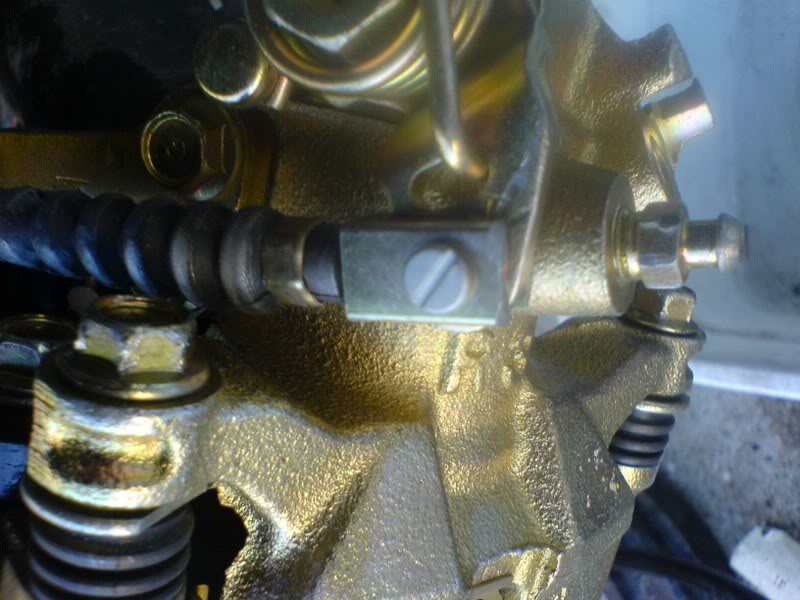
5) Also remove the brake hose and the sensor. BE VERY CAREFUL OF THE ALLEN BOLT, it's very tight and I stripped one side.
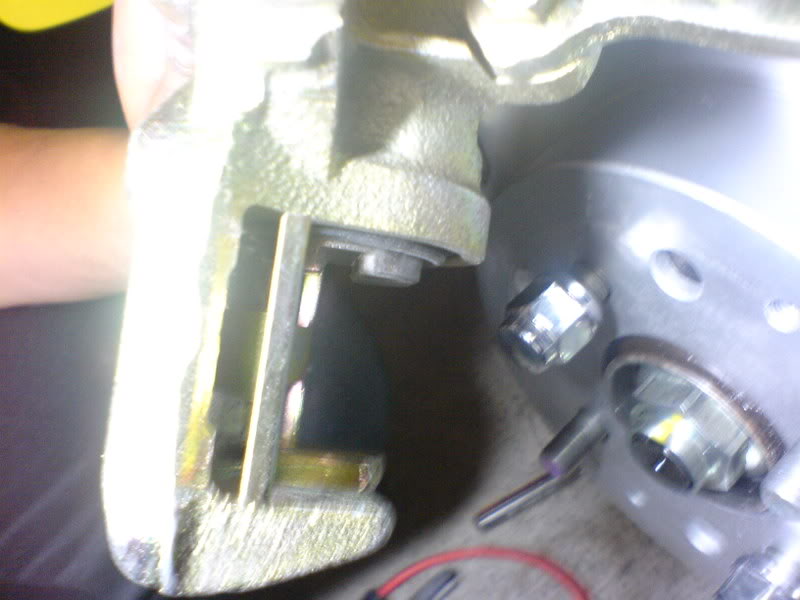
6) Install new caliper bracket, put those four bolts and the allen bolt back.
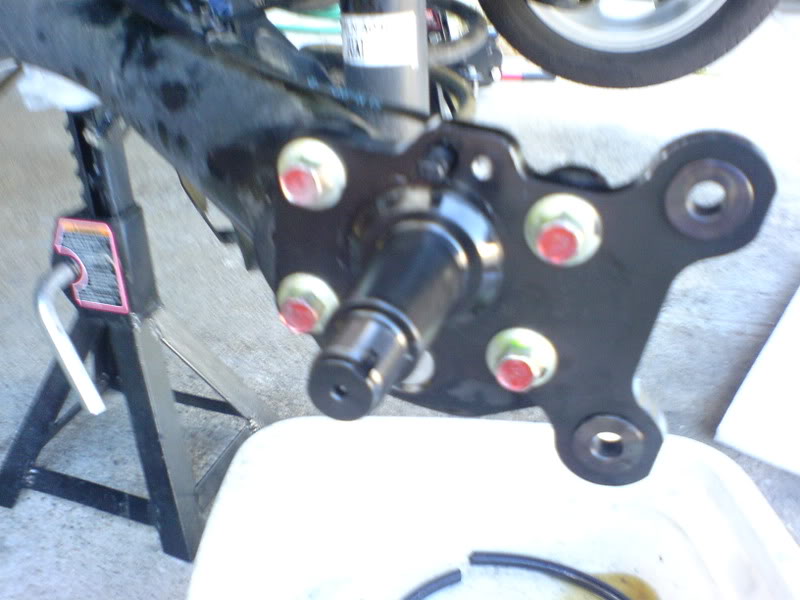
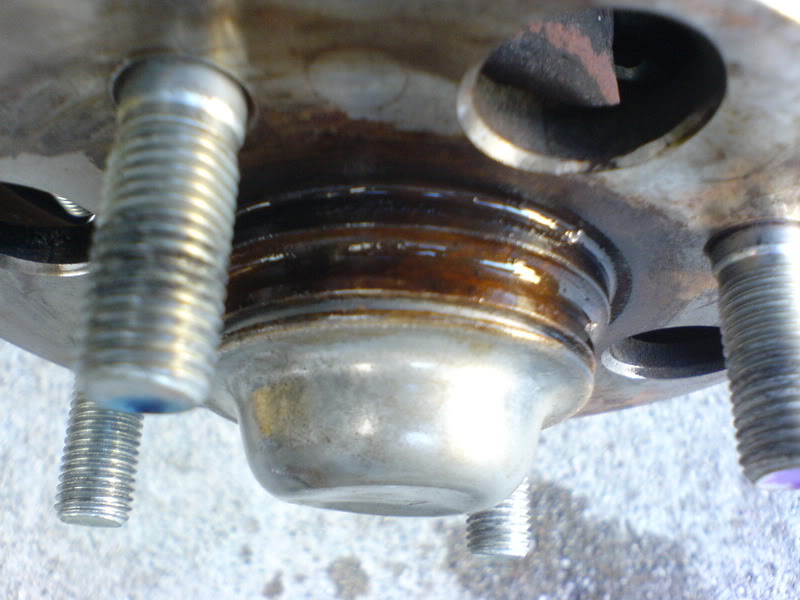
7) Put the T1R ring into the hub and install the hub on the new bracket and disc.
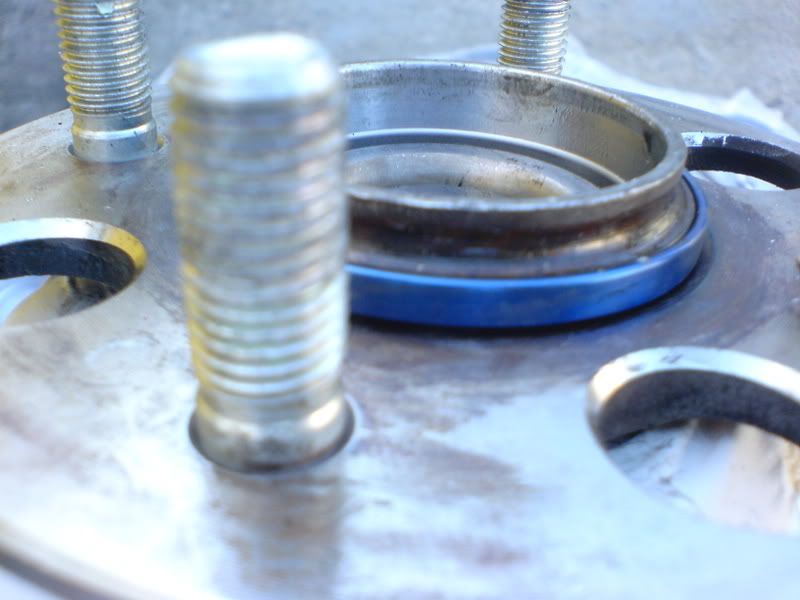
8) Take the brake pad holder out from the caliper and install it first, use 2 of the wheel nut to hold down the disc
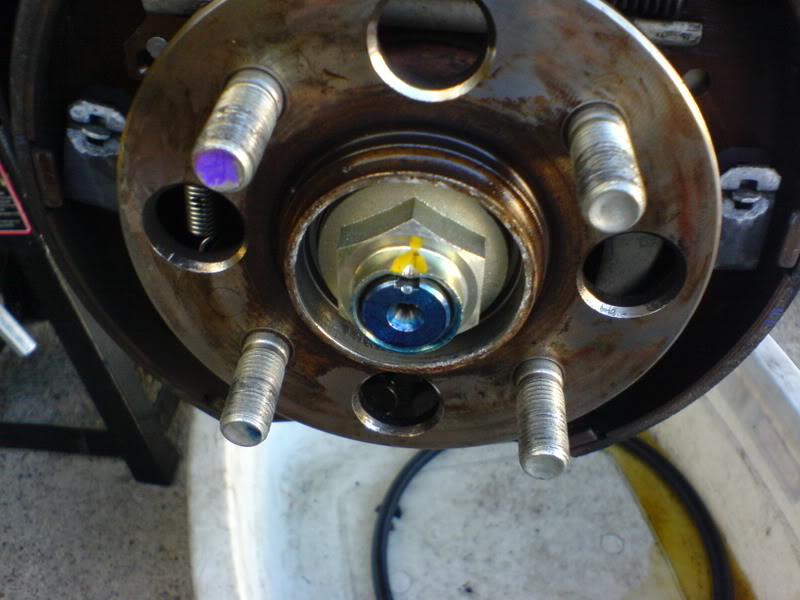
9) The caliper piston of mine stick out a little, makes it hard to install, you can push it back by turning the piston clockwise.
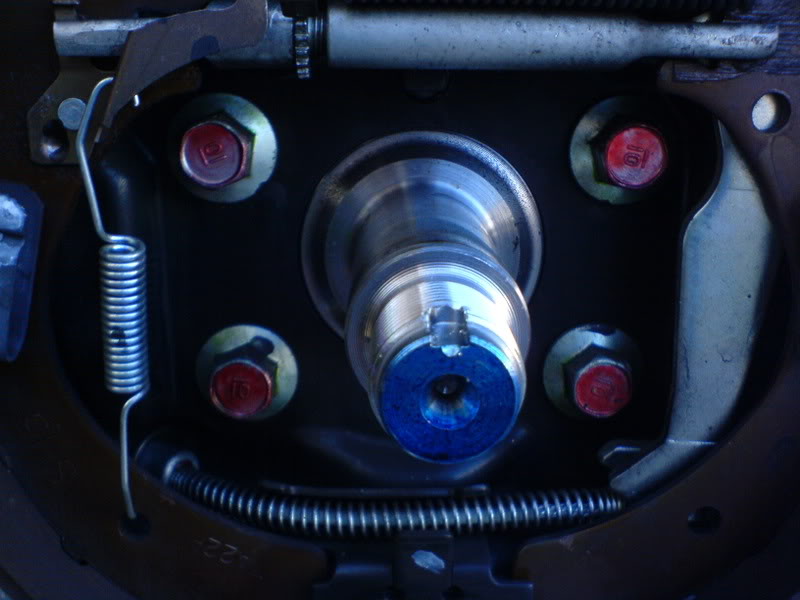
10) Remove center consle, and the old E brake component.
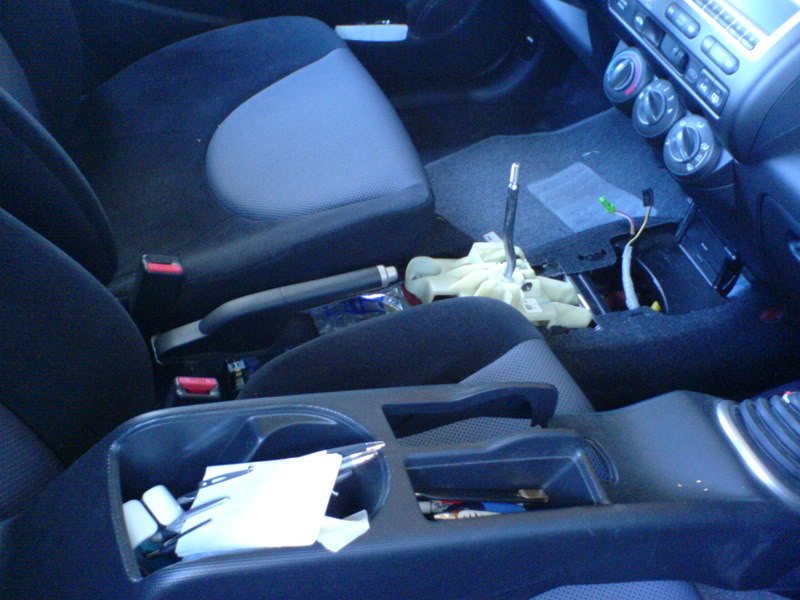
11) Install new E brake cable, this is very time consuming, and the rubber seal is very big. I cut it out first to make the installation easier and then make it smaller, so it will fit better.
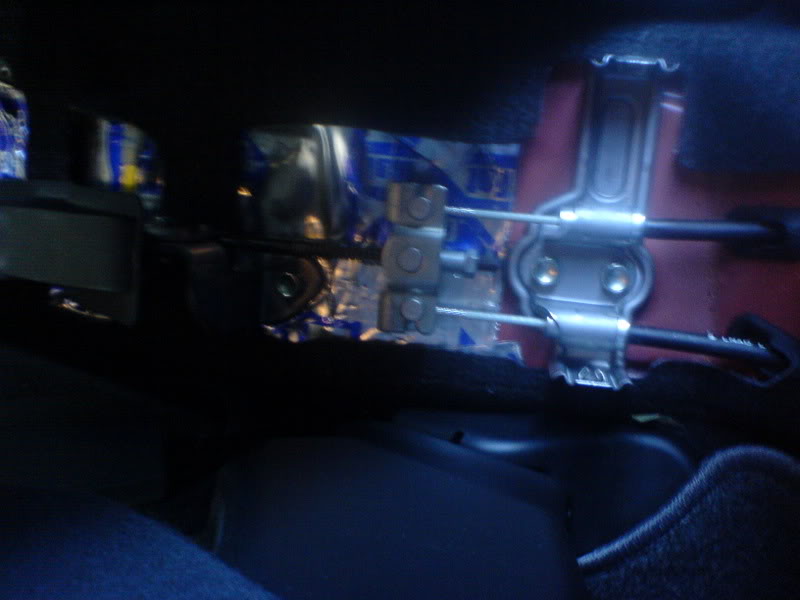
12) I took out all of the new E brake cable brackets because I don't see how they fit on the original spot. I just zip tie the cable together.
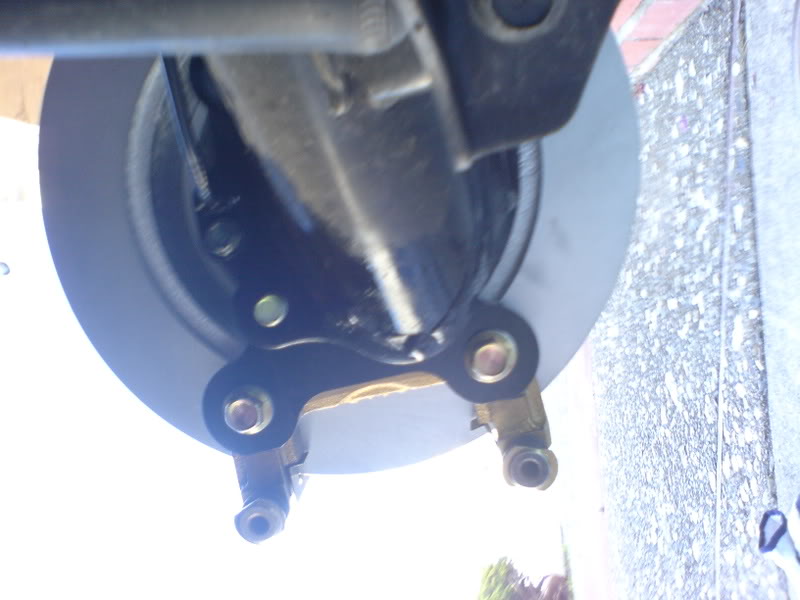
13) Install new cable on the caliper and install the new brake hoses.
14) And after 8hrs, including buying tools and taking care of the stripped bolt. I STILL NEED SOMEONE TO HELP ME PUMP THE BRAKE WHILE I BLEED ><;
The installation guide from T1R is a great. Just adding something else that you might want to know!
1) Jack up the car, make sure it's stable, take out the wheel and the drum.
2) I used a flathead screwdriver and hammered the hub cap out.
3) Then I found out I don't have a tool for this and went to buy a 32mm impact socket.
4) Take out those four bolts and take out the rest of the drum kit.
5) Also remove the brake hose and the sensor. BE VERY CAREFUL OF THE ALLEN BOLT, it's very tight and I stripped one side.
6) Install new caliper bracket, put those four bolts and the allen bolt back.
7) Put the T1R ring into the hub and install the hub on the new bracket and disc.
8) Take the brake pad holder out from the caliper and install it first, use 2 of the wheel nut to hold down the disc
9) The caliper piston of mine stick out a little, makes it hard to install, you can push it back by turning the piston clockwise.
10) Remove center consle, and the old E brake component.
11) Install new E brake cable, this is very time consuming, and the rubber seal is very big. I cut it out first to make the installation easier and then make it smaller, so it will fit better.
12) I took out all of the new E brake cable brackets because I don't see how they fit on the original spot. I just zip tie the cable together.
13) Install new cable on the caliper and install the new brake hoses.
14) And after 8hrs, including buying tools and taking care of the stripped bolt. I STILL NEED SOMEONE TO HELP ME PUMP THE BRAKE WHILE I BLEED ><;
Last edited by RubyQQ1211; 08-28-2008 at 07:11 AM.

#7
08-28-2008, 11:13 AM
Bleeding the breaks!
Try this:
Get a old soda bottle, Clear if possible, put about 1 in of break fluid in the bottle, get a piece of tubing (about 12-24 in, clear if possible) that will fit tight on the bleeder screw and put the other end in the bottom of the bottle submerged in the brake fluid.
Fill the master cylinder, open the bleeder and pump the breaks. You will be able to see the bubbles in the BF. As long as the tube stays submerged in the BF you will not get any air back into the system.
Watch the MC so it does not go dry. Do this to all four wheels and you should be OK.
Hope this helps
AC


#14
09-06-2008, 10:58 PM
hey gotta question about this rear disk conversion..i did a brake upgrade on me civic hatch and also install rear disk on this app. you have to change out the MC and the proportion valve because drum brakes work at a higher pressure because on the line and bends,etc. also in this app i can cuase the pads to wear funny and/or drag...so is this the same case with the fits and if so is there a different MC and PV to use?
#15
09-07-2008, 12:20 PM
hey gotta question about this rear disk conversion..i did a brake upgrade on me civic hatch and also install rear disk on this app. you have to change out the MC and the proportion valve because drum brakes work at a higher pressure because on the line and bends,etc. also in this app i can cuase the pads to wear funny and/or drag...so is this the same case with the fits and if so is there a different MC and PV to use?
oooh! x2
i would like to know this as well.
and, you dont happen to have part numbers off of each part in the conversion kit, do you?
#16
09-08-2008, 01:07 PM
I have some issue with my brake also, still trying to fix them.
First is the right ebrake is stronger than left, I tried to pull ebrak on a small slope and can see that happen. The disc and brake pad also touch more on the right side, I can tell by the difference of rotating the wheels. I am assuming that the ebrake cable need to be adjust.
The other problem is on the left side. It makes noise sometimes when I hit the brake. It makes the noise in about 1 out of 10 braking. I think it's the pad retainer and the disc having contact.
Anyone got other ideas about it?
#17
09-08-2008, 01:19 PM
I have some issue with my brake also, still trying to fix them.
First is the right ebrake is stronger than left, I tried to pull ebrak on a small slope and can see that happen. The disc and brake pad also touch more on the right side, I can tell by the difference of rotating the wheels. I am assuming that the ebrake cable need to be adjust.
The other problem is on the left side. It makes noise sometimes when I hit the brake. It makes the noise in about 1 out of 10 braking. I think it's the pad retainer and the disc having contact.
Anyone got other ideas about it?
First is the right ebrake is stronger than left, I tried to pull ebrak on a small slope and can see that happen. The disc and brake pad also touch more on the right side, I can tell by the difference of rotating the wheels. I am assuming that the ebrake cable need to be adjust.
The other problem is on the left side. It makes noise sometimes when I hit the brake. It makes the noise in about 1 out of 10 braking. I think it's the pad retainer and the disc having contact.
Anyone got other ideas about it?
this would be one reason for me not doing the t1r conversion on my fit.

Thread
Thread Starter
Forum
Replies
Last Post
avocado123
For Sale / Want To Buy / Classified Ads for USED Fit Items
22
11-28-2011 06:32 PM