DIY: Installation of lowering springs on 07-08 GD3
#141
 06-06-2011, 04:28 PM


I followed this guide and it was extremely helpful. Bit of advice, as the guide is all happy go lucky, and sometimes that is just not how installs go 
1) the swaybar end links did not come off as easily as I read. It could be the NJ winters, but when I spun the nut, the swaybar bushing on the other side spun. I tried to use an allen key and a wrench, but i ended up stripping out the allen key. I ended up with vice grips on the endlink to get it off.
2) I did not have any issue with the axles, but I also did not pay too much attention to them. I did leave the jack holding up the axle. When I was reading peoples responses about axles popping out i was terrified. I have done numerous spring installs on other Hondas and never thought twice about them. From what I saw; As long as you aren't yanking at the axles, you shouldn't be to concerned with them.
And my favorite number:
3) the nut that holds the strut to the spring perch was seized. I also ended up stripping it pretty damn good. I resorted to dropping the strut from inside the cabin. This gives you enough clearance to remove the spring without taking the bolt off. Also took about 4-5 minutes for each side with this method. No rusty bolts to worry about either.
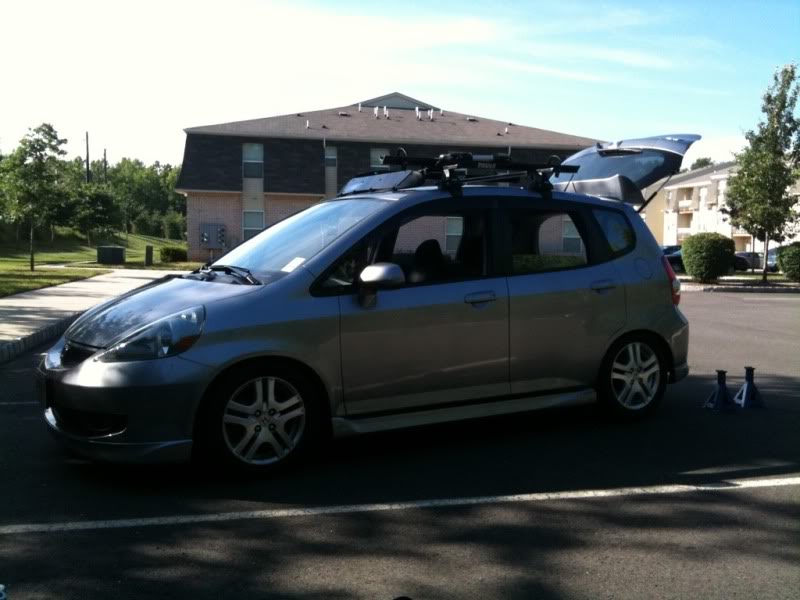
Great write up, very informative and left no surprises on my end when I jacked my car up.
Here is my finished product:
1) the swaybar end links did not come off as easily as I read. It could be the NJ winters, but when I spun the nut, the swaybar bushing on the other side spun. I tried to use an allen key and a wrench, but i ended up stripping out the allen key. I ended up with vice grips on the endlink to get it off.
2) I did not have any issue with the axles, but I also did not pay too much attention to them. I did leave the jack holding up the axle. When I was reading peoples responses about axles popping out i was terrified. I have done numerous spring installs on other Hondas and never thought twice about them. From what I saw; As long as you aren't yanking at the axles, you shouldn't be to concerned with them.
And my favorite number:
3) the nut that holds the strut to the spring perch was seized. I also ended up stripping it pretty damn good. I resorted to dropping the strut from inside the cabin. This gives you enough clearance to remove the spring without taking the bolt off. Also took about 4-5 minutes for each side with this method. No rusty bolts to worry about either.
Great write up, very informative and left no surprises on my end when I jacked my car up.
Here is my finished product:

#143
07-12-2011, 05:33 PM

And my favorite number:
3) the nut that holds the strut to the spring perch was seized. I also ended up stripping it pretty damn good. I resorted to dropping the strut from inside the cabin. This gives you enough clearance to remove the spring without taking the bolt off. Also took about 4-5 minutes for each side with this method. No rusty bolts to worry about either.
3) the nut that holds the strut to the spring perch was seized. I also ended up stripping it pretty damn good. I resorted to dropping the strut from inside the cabin. This gives you enough clearance to remove the spring without taking the bolt off. Also took about 4-5 minutes for each side with this method. No rusty bolts to worry about either.

#144
08-21-2011, 12:25 AM

Has anyone had issues installing the strut back in? I can get only the bottom bolt of the two for the front strut back in...? I cant seem to manuever the brake assembly straight enough to get the top bolt in.
#145
08-21-2011, 10:51 AM
Nevermind guys. Figured it out. My axle came out and I cut the clip so I can see it and guide it in. I already took the axle nut off because I suspected my axle popped out. So it made it soooo easy. After fighting with it all night and no sleep for the last 26 hours...I feel great. Awesome write up btw sir.
#147
09-07-2011, 03:29 AM
did mine today while reading this write up step by step! thanks so much! +1 rep! took about 2 hrs. mostly cause of the fronts and was kinda just hanging around chillin with my buddy who was helping me. ill post pics tomorrow
#148
01-20-2012, 09:50 PM

Does anyone know if I am just changing my struts and reusing the original springs if I should be able to reassemble everything relatively easy with the original springs being longer than the ones used to do the lowering operation? It looks like I should be able to compress the spring enough by hand to get the nut on but wanted to make sure.
Thanks
Dan
Thanks
Dan
#149
01-21-2012, 12:27 AM
Does anyone know if I am just changing my struts and reusing the original springs if I should be able to reassemble everything relatively easy with the original springs being longer than the ones used to do the lowering operation? It looks like I should be able to compress the spring enough by hand to get the nut on but wanted to make sure.
Thanks
Dan
Thanks
Dan
makes life MUCH easier.
#150
02-11-2012, 08:28 PM
I used this DIY today to replace the struts on my 08 Fit. I reused the stock springs. The first strut took about 1 1/2 hours and the second 20 minutes. I did have to use a spring compressor from AutoZone. It does not cost anything to use their tools, just put down a deposit. The nut came off of the first spring easily but on the second spring it shot off with some force so make sure you do not have the top of the strut pointing at your face when you remove the top nut. This post saved me about $700 from NTB replacing the struts. I appreciate it greatly.
Dan
Dan
#151
02-11-2012, 11:39 PM
Um... did you use the spring compressor to hold the spring? I mean, use the compressor during the removal of the old spring and install of the new one.
#152
02-12-2012, 05:16 AM

Silly question. I've reassembled the strut back in to the fronts and the plastic cup which sits on top is raised. Have i assembled it wrong some how or not pushed something tight enough. I'm sure the top cup sat in to the hole of the strut or am i mistaken? Just want to check. Cheers

#154
02-24-2012, 05:35 AM
Top cap seating
Strut tops have a space? - Honda Fit Forums
Same issue as above forum. Apologies, think I should start a new topic. Moderators please move my posts as required.
They not supplied a suggestion to the problem. Cannot see how the rubber support can deteriorate over night. I'm now thinking the support below the rubber was turned too low. Is screw not supposed to be turned to the end of the thread.
#156
03-24-2012, 07:22 PM
Strut tops have a space? - Honda Fit Forums
Same issue as above forum. Apologies, think I should start a new topic. Moderators please move my posts as required.
They not supplied a suggestion to the problem. Cannot see how the rubber support can deteriorate over night. I'm now thinking the support below the rubber was turned too low. Is screw not supposed to be turned to the end of the thread.
Same issue as above forum. Apologies, think I should start a new topic. Moderators please move my posts as required.
They not supplied a suggestion to the problem. Cannot see how the rubber support can deteriorate over night. I'm now thinking the support below the rubber was turned too low. Is screw not supposed to be turned to the end of the thread.
Namely, the parts under the car's sheet metal. The big rubber grommet goes on top of the bearing.
#157
03-29-2014, 11:56 PM

This thread helped when I installed Progress springs and Tokico shocks last year. The front axle thankfully didn't pop out and the rears were easy as cake in comparison to the fronts. It took me a really long time because I was doing the install by myself and in the Arizona heat. I think in all it was about 6 hours or so, but I was going really slow. I think I also installed Tanabe front and rear uoper strut tower bars and a Progress rear sway bar at the same time. I also installed the front driver side spring upside down, but didn't realize it until I had lowered it and put everything back together. So, off everything came again and I started all over agan. Very good write-up. Does anyone happen to know to torque specifications for the rear upper strut bolts?
#158
08-05-2016, 05:47 PM

Hey guys,
Just wondering, for the people who has done this, how did you torque the top nut for the struts to spec (33ft/lb) without taking off the windshield cowl? There's not enough room to fit a long socket and torque wrench without removing the cowl.
Just wondering, for the people who has done this, how did you torque the top nut for the struts to spec (33ft/lb) without taking off the windshield cowl? There's not enough room to fit a long socket and torque wrench without removing the cowl.


Thread
Thread Starter
Forum
Replies
Last Post
jdmekh22
For Sale / Want To Buy / Classified Ads for USED Fit Items
1
06-09-2015 08:34 PM
Paulo107
For Sale / Want To Buy / Classified Ads for USED Fit Items
2
06-11-2014 07:37 PM
Raymond87
Fit Suspension & Brake Modifications
20
12-19-2007 02:44 PM