***The Official SSR Intake DIY Thread (Sid Short Ram Intake)***


#22
 05-07-2008, 03:00 PM
Not to far I just loosened up the bracket on top and moved it over as far as it goes without touching the other side that way I could move the intake more and I could fit my hand in there.
I didn't really have to move the battery but it definitely helped to move it over.
I didn't really have to move the battery but it definitely helped to move it over.
#25
05-09-2008, 12:25 AM
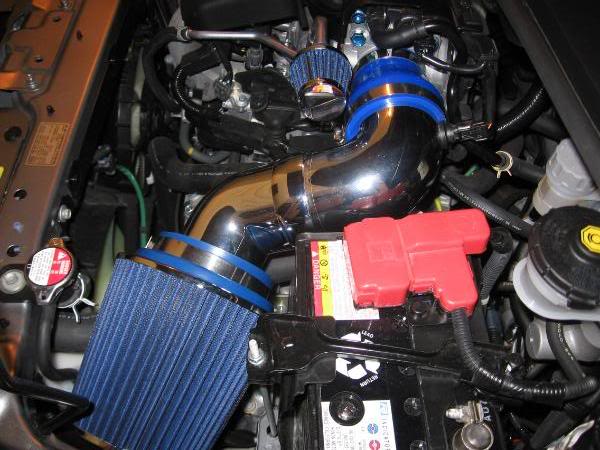
Really loving this intake  it is really cheap and mpg has been better throttle response has been better and pick up is better at higher rpms.
Only draw back is when you play you pay more in mpg but I think that would be expected....
it is really cheap and mpg has been better throttle response has been better and pick up is better at higher rpms.Only draw back is when you play you pay more in mpg but I think that would be expected....
#26
05-09-2008, 02:14 PM
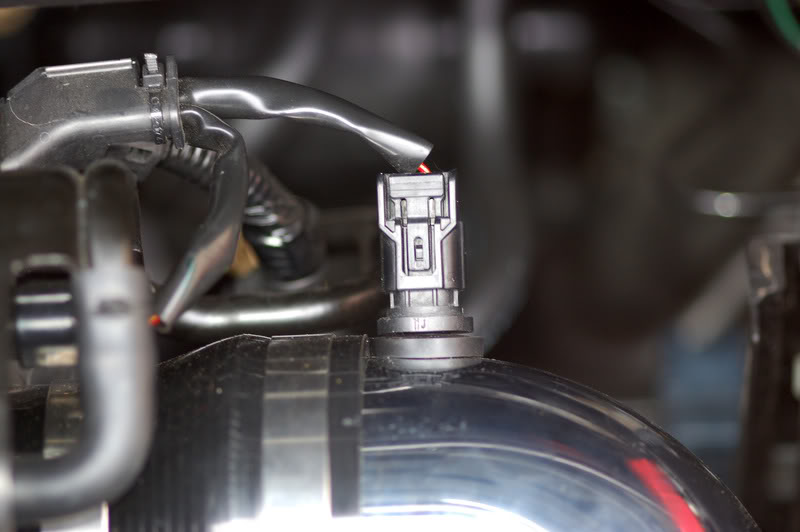
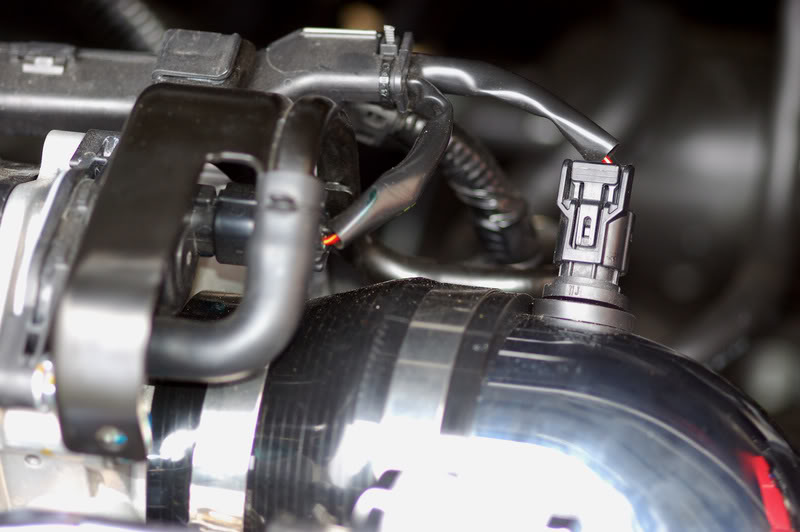
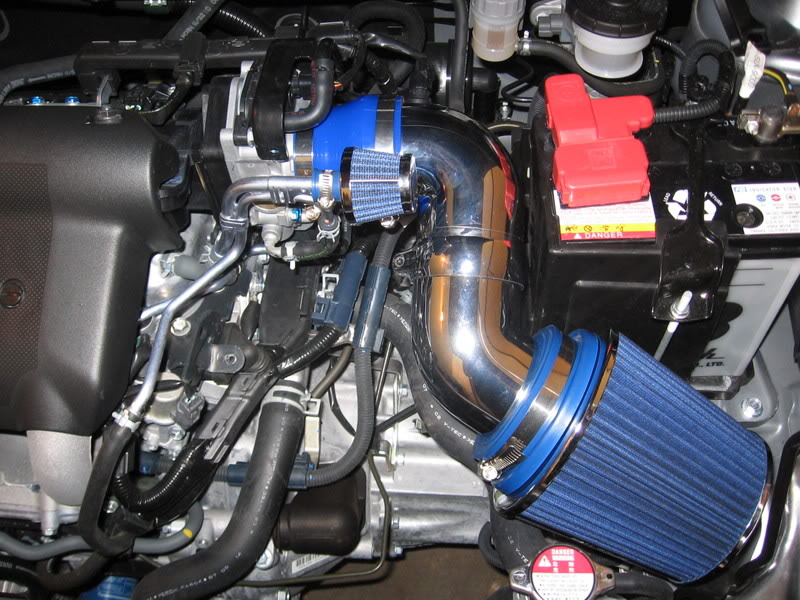
Sid or Fitcapo... do either of you have a closer pic of how far away from the silcone boot the AIT sensor hole... i dont have any slack in my wiring and it looks like i will have to drill the hole right next to the boot that connects to the throttle body...
#27
05-09-2008, 03:14 PM
i got it installed... had to put the sensor rubber boot right up against the silicone boot that mounts to the TB. I am going to have to try and get some slack in the wires as the sensor is sitting at an angle slightly because the wires just arent long enough.


#30
05-09-2008, 09:49 PM
Thats one way to do it i guess.
I'm going to go get a 45 degree bend tomorrow to help the 90 bend tube sit straighter on the TB. The filter is up against the battery and that is making the whole thing sit a little crooked. I'm pretty sure that will help me get the slack on the sensor wires that i need.
I'm going to go get a 45 degree bend tomorrow to help the 90 bend tube sit straighter on the TB. The filter is up against the battery and that is making the whole thing sit a little crooked. I'm pretty sure that will help me get the slack on the sensor wires that i need.
#32
05-10-2008, 01:17 AM
You might not have the boot pushed as far as it will go on the TB. There is a small tab on the TB that the boot should sit flush with.
All it takes is just pushing the boot on a little farther to create enough slack to eliminate that angle on the sensor.
ez
#33
05-10-2008, 10:36 AM
Oh its all the way on there, believe me... one of the perks of my job, working on environmental systems of aircraft. Some ducts are connected together with rubber or silicone boots... guess i'm just one of the lucky ones that doesnt have any slack in the wiring. Going to get that other duct today to see if it gives me a little more slack.
#34
05-11-2008, 01:15 AM
#35
05-11-2008, 05:31 AM
Oh its all the way on there, believe me... one of the perks of my job, working on environmental systems of aircraft. Some ducts are connected together with rubber or silicone boots... guess i'm just one of the lucky ones that doesnt have any slack in the wiring. Going to get that other duct today to see if it gives me a little more slack.
Sounds good.
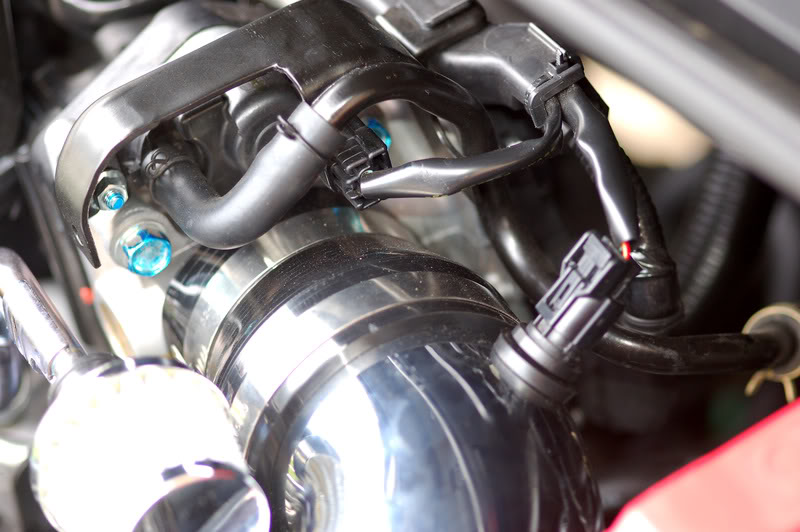
I also saw one installation where the guy cut a semi-circle out at the edge of the boot to allow the sensor to be mounted without any tension. If you put the hose clamp inboard just a bit, it will give you enough room to do that.
BTW, my son is a C-5 crewchief at Travis AFB.
Ex-Navy here, but he doesn't hold it against me
.ez
#36
05-11-2008, 11:25 AM
Auto zone didnt have any more 90 degree bends and i knew a 45 wasnt going to have enough angle so i got the 60 degree bend. Tension is off the wires now. I've only driven it once and that was to go back to auto zone to get the 60 degree bend... sounds alot different now... Thanks for the closer pics Fitcapo... puts me at ease knowing my sensor is pretty much in the same place as yours.
#38
05-11-2008, 02:01 PM
The clamp in the middle to hold the two pipe sections worked well for me when I had that system installed.
I had a lot of trouble trying to get those screwy o-rings to stay put, however, until I used a little vaseline in the grooves. I don't think the o-rings really do anything anyway.
ez
#39
05-11-2008, 03:56 PM
i'm not so sure it is the best thing to have on there really. I to had issues with the oring staying in place but like ez said, i'm not so sure it is doing any good. Both of the elbow pieces need to be pushed together and that plastic clamp cranked down to ensure it isnt leaking. I do have another of the silicone boots but decided to try hooking it up like this first. I will probably swap it out soon with the silicone boot, just for piece of mind.
#40
05-13-2008, 11:06 AM

Oh that looks SO easy. If it rates an increase in fuel economy, even by just a couple MPG, it would be worth it to me. The Fit is my DD, and gets about 45 miles every day. Bumping my 33-34mpg average up a few would be nice!
I'm going to make a list of the parts. I'll probably go with a K&N filter element, so I can clean it easily.
I'm going to make a list of the parts. I'll probably go with a K&N filter element, so I can clean it easily.

