Honda Fit GD3 DIY PRM Ram Air for base/DX/LX models
#1
 06-25-2015, 11:36 PM


Honda Fit GD3 DIY PRM Ram Air for base/DX/LX models
I've been slowly and eagerly collecting parts for this project after reading about Myxalplyx's PRM ram air setup in his GK here: https://www.fitfreak.net/forums/3rd-...take-test.html
There is also a thread for ram air for the GD3 IF you have the sport model here: https://www.fitfreak.net/forums/fit-...t-opening.html
Since I have the Canadian LX model, I do not have fog lights so I didn't have a port available when a foglight is removed. I also wanted something a little more durable than dryer duct and less noticeable (something black, not silver). I had an eBay CAI which worked great but noticed the IATs were still not ambient and would creep up while idling. I bought a PRM intake and in stock configuration the temperature of the air coming in was even higher....so this is what bought and how I did it:
Things To Consider
1)You will be cutting a 4 inch hole in your bumper using a hole saw. It`s commitment time son.
2)You will need 24 hours with your bumper removed to set glue for the internal hose attachment. Or it CAN be duct taped but since we just drilled a 4 inch hole, why not try and make it look the least ghetto possible.
3) Have your car stereo code handy, it`s in your owner`s manual.
Parts
1) PRM Intake GD3 (PRM Jet Stream? Intake Systems)
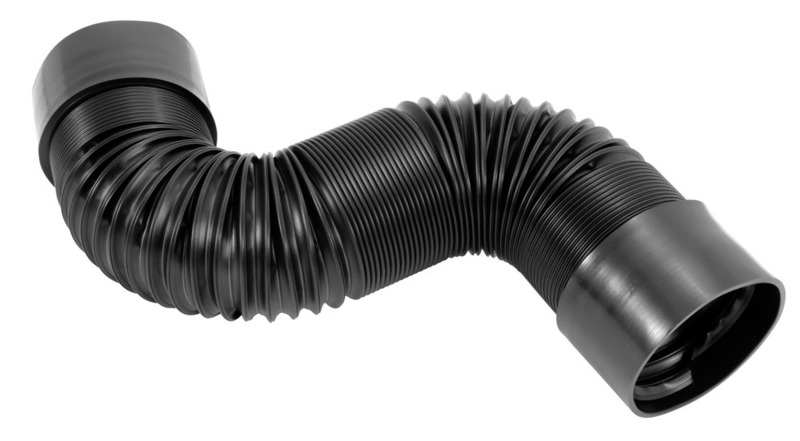
2) Spectre Performance 4 inch air duct w/ couplers (Amazon.com: Online Shopping for Electronics, Apparel, Computers, Books, DVDs & more)
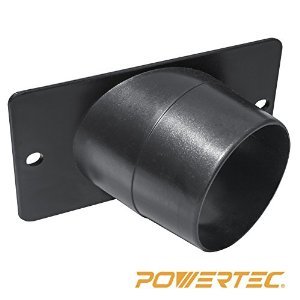
3) Powertec 4 inch angled dust port (70153) (Amazon.com: Online Shopping for Electronics, Apparel, Computers, Books, DVDs & more)
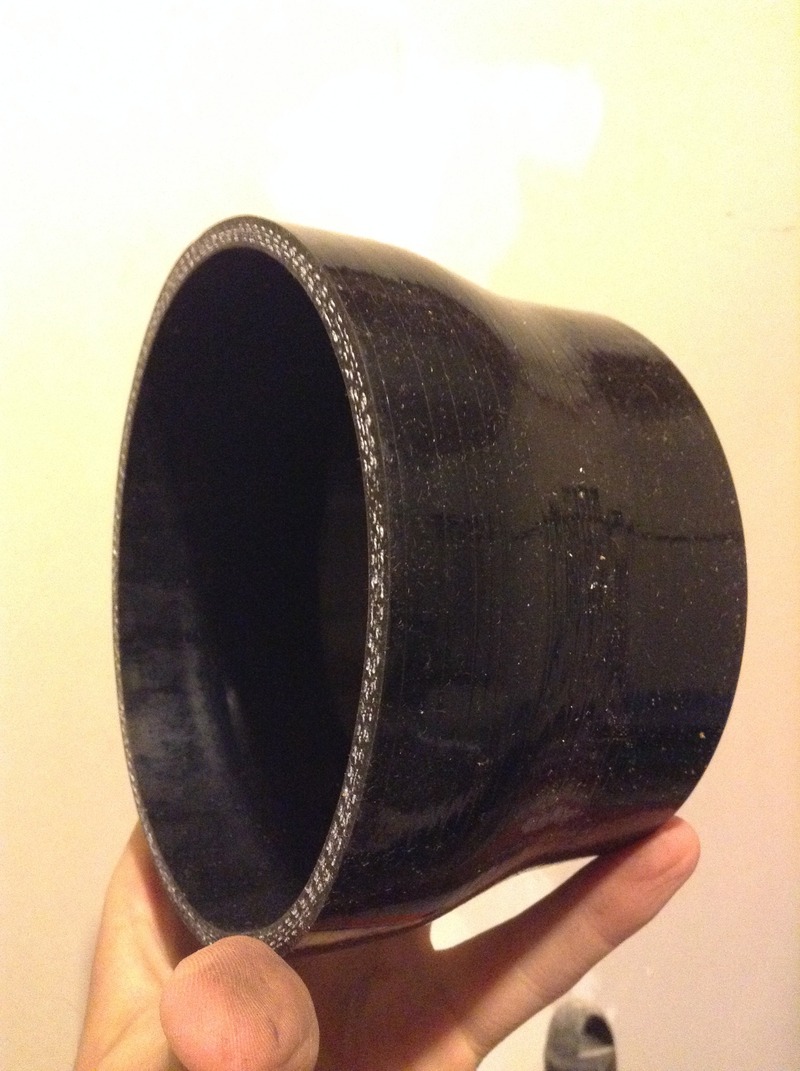
3) 4.5 to 4" Black Silicone Reducer (SIL000370)...I could only find these here: www.SiliconeIntakes.com Pipe Reducer
4) 4 inch duct extension (any hardware store)
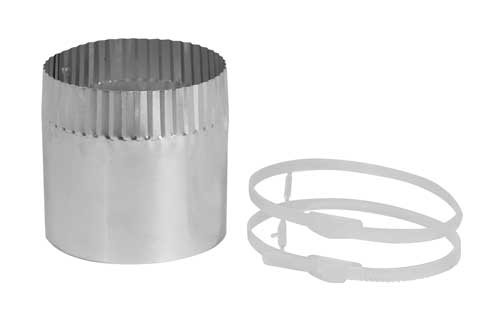
5) two 4 inch hose clamps (any hardware store)
6) one 4-1/8-Inch to 5-Inch Adjustable Stainless Steel Hose Clamp (LDR 610 6372) (Amazon.com: Online Shopping for Electronics, Apparel, Computers, Books, DVDs & more)
Special Tools
1) 4 inch hole saw with pilot bit and arbor (borrow if possible, otherwise it`ll be about $40)
2) Gorilla Glue Epoxy resin
3) Rotary Tool with cut-off wheel
Procedure
1) You will need to remove your front bumper. Do it first so you won`t scratch it in the process of working under the hood. Also, unplug the negative terminal of your battery to reset your ecu and to avoid setting off airbag sensors in the fender well.
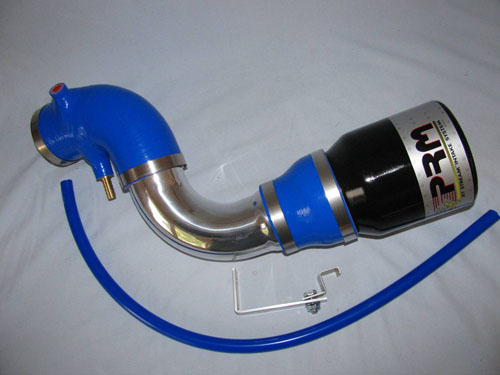
2)If the PRM isn`t already installed, remove your stock airbox. Other wise, remove all PRM components except for the 90 degree silicone coupler. You will probably need to loosen these components for rearranging however. This is what you want to do:
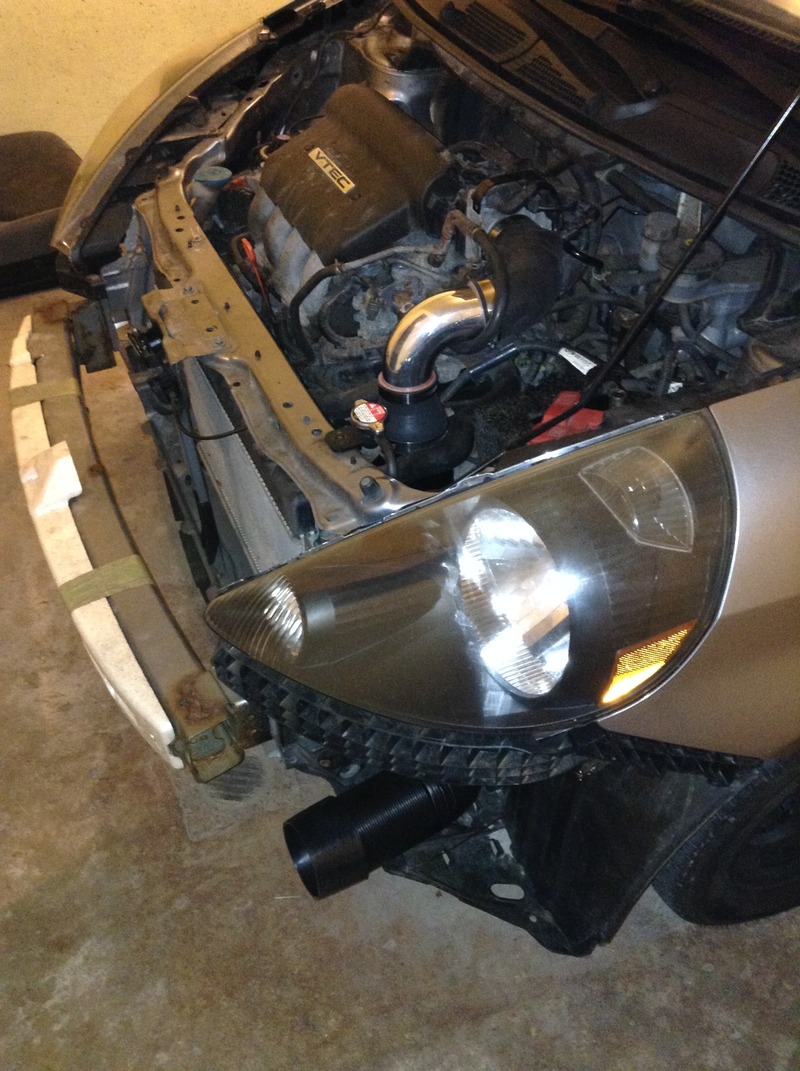
Pretty basic, just turning the aluminum elbow pipe 90 degrees so it points downward.
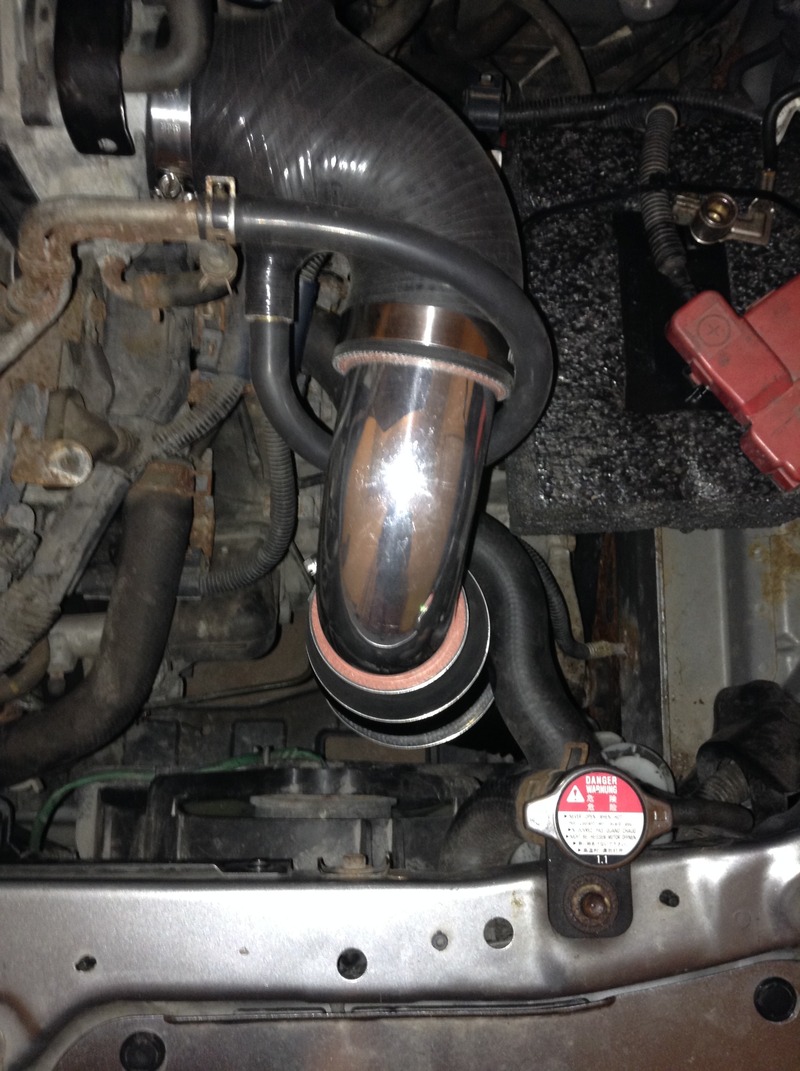
3) You will need to remove the stock airbox bracket AND the radiator hose bracket. The rad hose bracket is a bitch to remove without removing the wheel and fender liner first. I opted for the hard way and spent a good hour removing it from within the engine bay. Be sure and save these parts. Surprisingly, the rad hose curves ever so perfectly around the top half of the PRM filter!
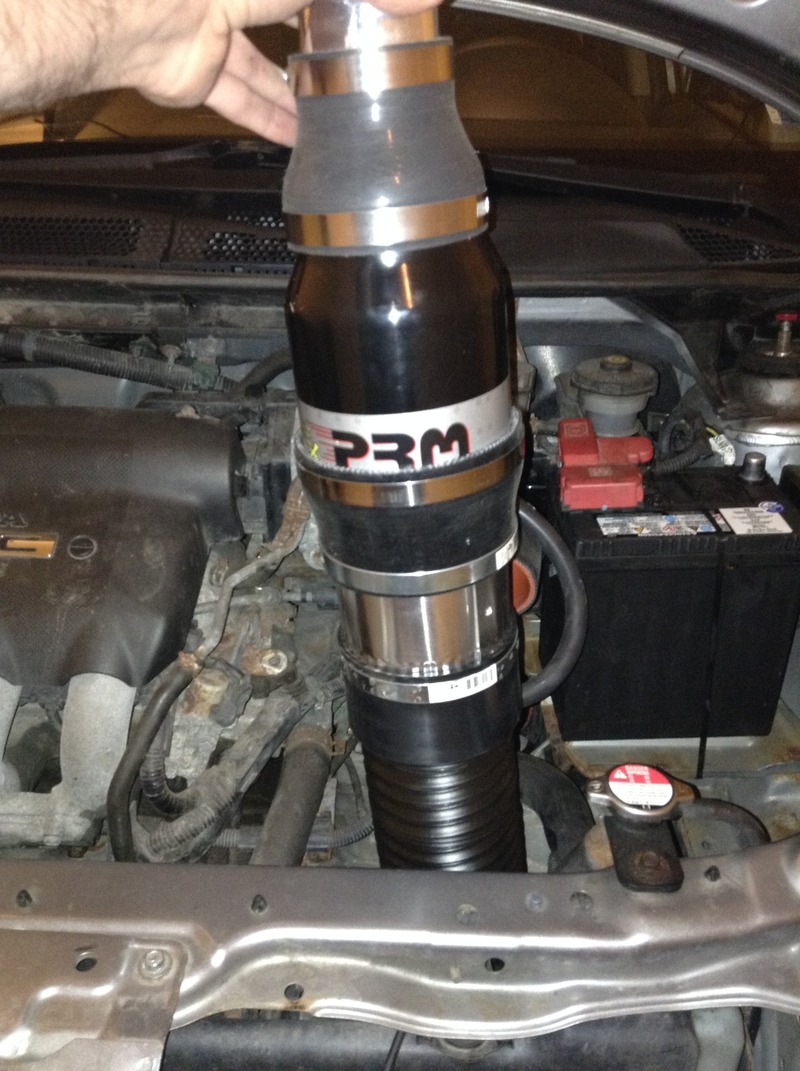
4) Now it`s time to connect the 4.5 inch-4 inch silicone coupler to the mouth of the PRM filter. Use the single larger hose clamp for that. Next insert the 4 inch duct extension into the 4 inch side of the silicone coupler. Use a 4 inch hose clamp on that. Then, attach the rubber hose coupler to the other end of the duct extension, secure with a 4 inch hose clamp. Not too tightly, these duct extensions are flimsy, haven`t found a better replacement yet. It should look like this:
5) Now feed the black duct work down and into the fender well, avoid contact with the airbag sensor (has a yellow wire going to it). Have the pipe come around that and point to the front with room for extending it forward.
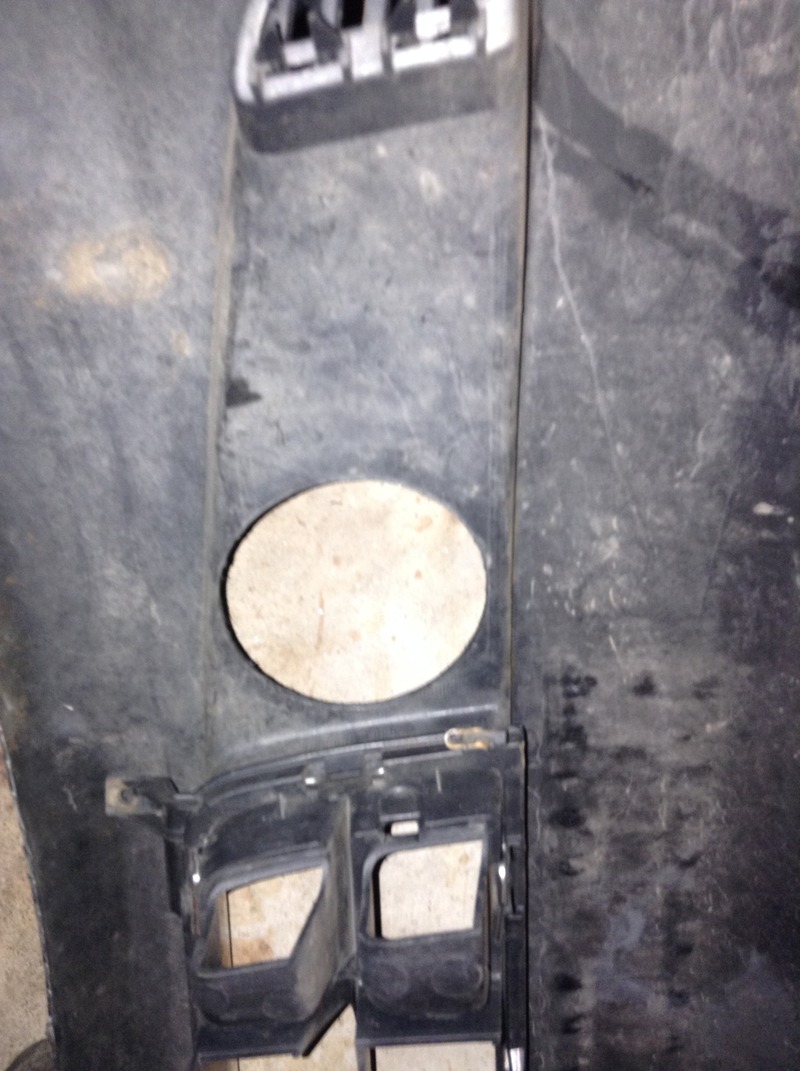
6) Now it`s time to drill a hole in the bumper, take a deep breath and drill slowly at first to avoid slipping the pilot bit somewhere off center (like I did...haha) I recommend your gaping hole to be a little bit more towards the driver side of the car (to the Right when looking at the front of the car) as the pipe needs a little room to move around the airbag sensor.
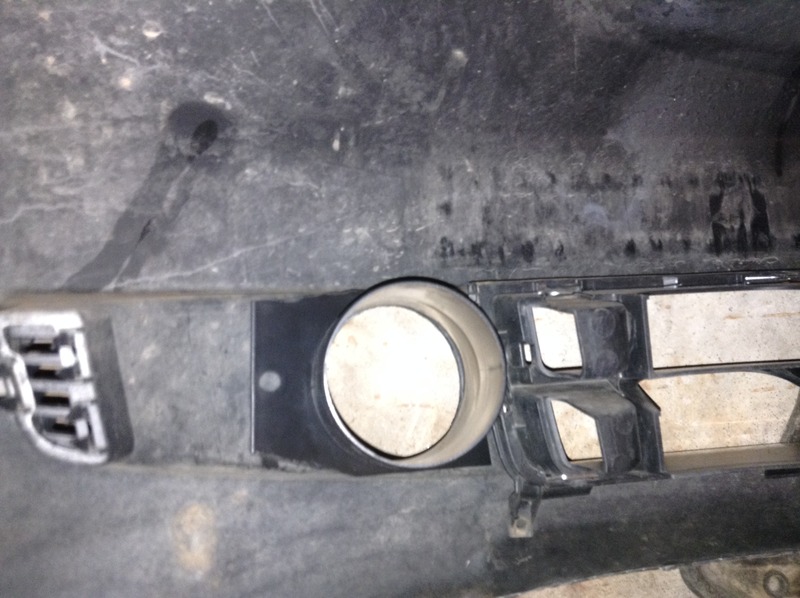
7) Now we need to cut the angled dust port so it fits on the rear face of the front bumper and lines up with the hole. The rotary and cut-off tool work well for this. Measure twice, cut once.
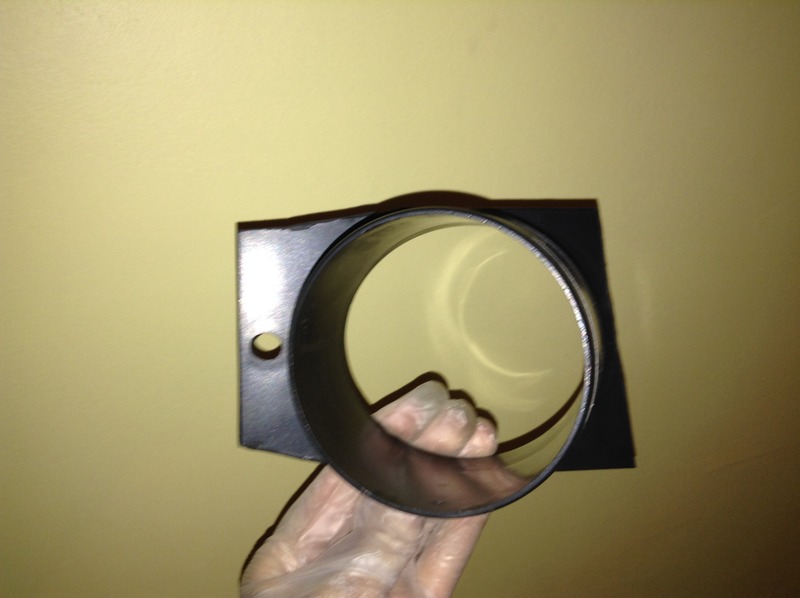
8) Now you have the option of duct taping it on there redneck style OR use the Gorilla Glue epoxy and permanently adhere that thing like so (and NO, you DO NOT see left over duct tape glue on the dust port)
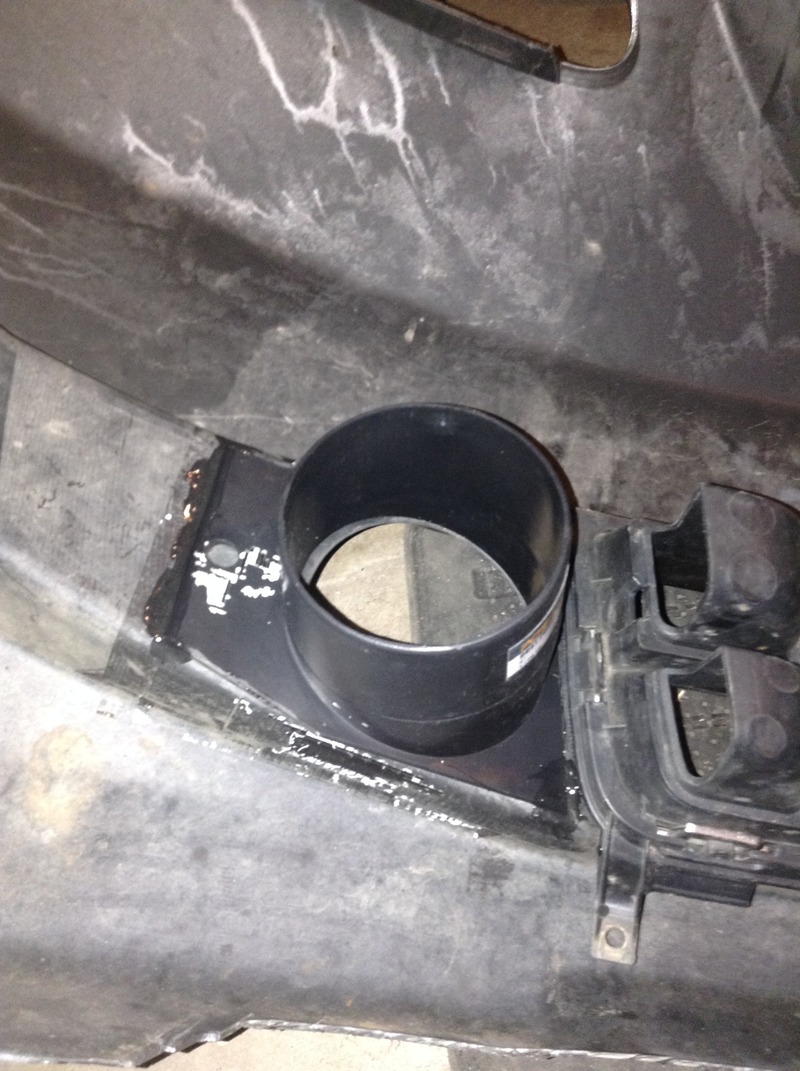
You can only epoxy the left and right edges of the port as there is a bit of a gap on the top and bottom. This can be filled in later on with some other type of adhesive or if you are really fancy you can take the pieces of plastic you just cut and shape it to fit the gap...seal with epoxy.
**LET THIS DRY FOR 24 HOURS** Feel free to drive around with no front bumper, just because.
9) Once the port is sealed to the bumper, we can now reattach everything. Pull the black hose forward enough to insert the angled port into the rubber hose coupling. Then you can push the front bumper on and this hose will shrink back somewhat easily. I don`t think a hose clamp is needed here, the hose has no room to disconnect. Firmly secure your front bumper

10) Plug your battery back in, close the hood and start `r up! (Not in the garage with the door closed)
Even though the radiator hose touchs the PRM filter, the IATs do not creep up like they would if there was no duct leading to the outside. I noticed a drop in IATs of 10 degrees celcius while driving and 15+ degrees while idling comparing to the short ram style set up. The ram air effect happens at 40 MPH and above, haven`t had the chance to test it at the quarter mile yet.
To Do
1) Find a plug for the bumper hole in the winter time and put the PRM back to original setup.
2) Fill in the top and bottom edges of the angled port to remove the gap
Don`t Do
1) Drive in deep puddles or snow...
2) Roll your eyes at my questionable taste.
There is also a thread for ram air for the GD3 IF you have the sport model here: https://www.fitfreak.net/forums/fit-...t-opening.html
Since I have the Canadian LX model, I do not have fog lights so I didn't have a port available when a foglight is removed. I also wanted something a little more durable than dryer duct and less noticeable (something black, not silver). I had an eBay CAI which worked great but noticed the IATs were still not ambient and would creep up while idling. I bought a PRM intake and in stock configuration the temperature of the air coming in was even higher....so this is what bought and how I did it:
Things To Consider
1)You will be cutting a 4 inch hole in your bumper using a hole saw.
It`s commitment time son.2)You will need 24 hours with your bumper removed to set glue for the internal hose attachment. Or it CAN be duct taped but since we just drilled a 4 inch hole, why not try and make it look the least ghetto possible.
3) Have your car stereo code handy, it`s in your owner`s manual.
Parts
1) PRM Intake GD3 (PRM Jet Stream? Intake Systems)

2) Spectre Performance 4 inch air duct w/ couplers (Amazon.com: Online Shopping for Electronics, Apparel, Computers, Books, DVDs & more)

3) Powertec 4 inch angled dust port (70153) (Amazon.com: Online Shopping for Electronics, Apparel, Computers, Books, DVDs & more)

3) 4.5 to 4" Black Silicone Reducer (SIL000370)...I could only find these here: www.SiliconeIntakes.com Pipe Reducer

4) 4 inch duct extension (any hardware store)

5) two 4 inch hose clamps (any hardware store)
6) one 4-1/8-Inch to 5-Inch Adjustable Stainless Steel Hose Clamp (LDR 610 6372) (Amazon.com: Online Shopping for Electronics, Apparel, Computers, Books, DVDs & more)
Special Tools
1) 4 inch hole saw with pilot bit and arbor (borrow if possible, otherwise it`ll be about $40)
2) Gorilla Glue Epoxy resin
3) Rotary Tool with cut-off wheel
Procedure
1) You will need to remove your front bumper. Do it first so you won`t scratch it in the process of working under the hood. Also, unplug the negative terminal of your battery to reset your ecu and to avoid setting off airbag sensors in the fender well.
2)If the PRM isn`t already installed, remove your stock airbox. Other wise, remove all PRM components except for the 90 degree silicone coupler. You will probably need to loosen these components for rearranging however. This is what you want to do:

Pretty basic, just turning the aluminum elbow pipe 90 degrees so it points downward.
3) You will need to remove the stock airbox bracket AND the radiator hose bracket. The rad hose bracket is a bitch to remove without removing the wheel and fender liner first. I opted for the hard way and spent a good hour removing it from within the engine bay.
Be sure and save these parts. Surprisingly, the rad hose curves ever so perfectly around the top half of the PRM filter! 
4) Now it`s time to connect the 4.5 inch-4 inch silicone coupler to the mouth of the PRM filter. Use the single larger hose clamp for that. Next insert the 4 inch duct extension into the 4 inch side of the silicone coupler. Use a 4 inch hose clamp on that. Then, attach the rubber hose coupler to the other end of the duct extension, secure with a 4 inch hose clamp. Not too tightly, these duct extensions are flimsy, haven`t found a better replacement yet. It should look like this:

5) Now feed the black duct work down and into the fender well, avoid contact with the airbag sensor (has a yellow wire going to it). Have the pipe come around that and point to the front with room for extending it forward.
6) Now it`s time to drill a hole in the bumper, take a deep breath and drill slowly at first to avoid slipping the pilot bit somewhere off center (like I did...haha) I recommend your gaping hole to be a little bit more towards the driver side of the car (to the Right when looking at the front of the car) as the pipe needs a little room to move around the airbag sensor.

7) Now we need to cut the angled dust port so it fits on the rear face of the front bumper and lines up with the hole. The rotary and cut-off tool work well for this. Measure twice, cut once.


8) Now you have the option of duct taping it on there redneck style OR use the Gorilla Glue epoxy and permanently adhere that thing like so (and NO, you DO NOT see left over duct tape glue on the dust port
)
You can only epoxy the left and right edges of the port as there is a bit of a gap on the top and bottom. This can be filled in later on with some other type of adhesive or if you are really fancy you can take the pieces of plastic you just cut and shape it to fit the gap...seal with epoxy.
**LET THIS DRY FOR 24 HOURS** Feel free to drive around with no front bumper, just because.
9) Once the port is sealed to the bumper, we can now reattach everything. Pull the black hose forward enough to insert the angled port into the rubber hose coupling. Then you can push the front bumper on and this hose will shrink back somewhat easily. I don`t think a hose clamp is needed here, the hose has no room to disconnect. Firmly secure your front bumper

10) Plug your battery back in, close the hood and start `r up! (Not in the garage with the door closed)
Even though the radiator hose touchs the PRM filter, the IATs do not creep up like they would if there was no duct leading to the outside. I noticed a drop in IATs of 10 degrees celcius while driving and 15+ degrees while idling comparing to the short ram style set up. The ram air effect happens at 40 MPH and above, haven`t had the chance to test it at the quarter mile yet.
To Do
1) Find a plug for the bumper hole in the winter time and put the PRM back to original setup.
2) Fill in the top and bottom edges of the angled port to remove the gap
Don`t Do
1) Drive in deep puddles or snow...
2) Roll your eyes at my questionable taste.
Last edited by devmail; 10-31-2015 at 11:04 AM.
#4
06-26-2015, 11:40 PM
That is a great setup. LOVE it! Had to look at the pics on my phone since my job don't won't show the pics.
I can not imagine that setup not making extra horsepower. The pipe being angled to take in air being forced in is great. Flooring it on the highway or cruising between 50-75mph vs same roads stock is where you will notice a difference. Car should be less reluctant to downshift now since more air is available. If some knocking is detected with the extra airflow, you could always bump the octane up a notch or two.
Either way....thanks for posting up all the pics. Yeah, hydrolocking...water...etc, etc could be an issue but that's not what this is about. Now for a tune to take advantage of this setup (if air/fuel ratios ain't optimal). Oh baby!


#9
05-27-2016, 09:14 PM

Can't afford at the pay they pay us versus cost of vehicles (I do feel they are grossly overpriced discount included) However since I have had a ram 1500 hemi for the last 3 weeks while waiting for airbags I am going to afford a ram. Within the next 2 years I am breaking up with the fit and getting a ram crew cab 

Thread
Thread Starter
Forum
Replies
Last Post