GE8 Honda Fit with Mori Mini D2S


#22
 03-20-2011, 07:19 PM
Nice job. Another fellow Fit owner who converted to projectors. I did a write up for the GD3. It should be the same for the most part installing the projectors. No cutting necessary unless its the shroud. Other wise everything fits perfectly and you just need to aim the lights up. I added some slim washers which gave me a little more color at the cut off. Best easy upgrade you can do to your headlights without getting the projectors which fall short in output. I do have to let everyone know that the projectors are skewed a little bit. I didn't notice it until I put everything on my car and closed up everything. But its only 1-2 degrees off. If your anal about it you can grind a sliver off the H4 adaptor to rotate it correctly.
My cut off
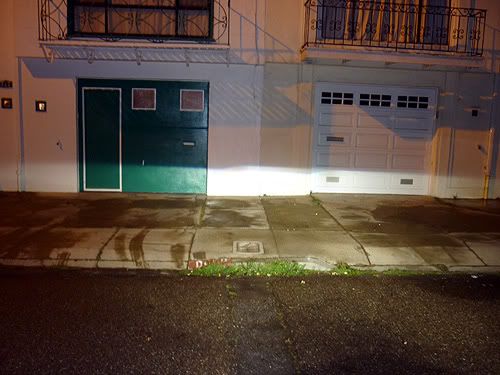

My cut off
#23
03-20-2011, 11:34 PM

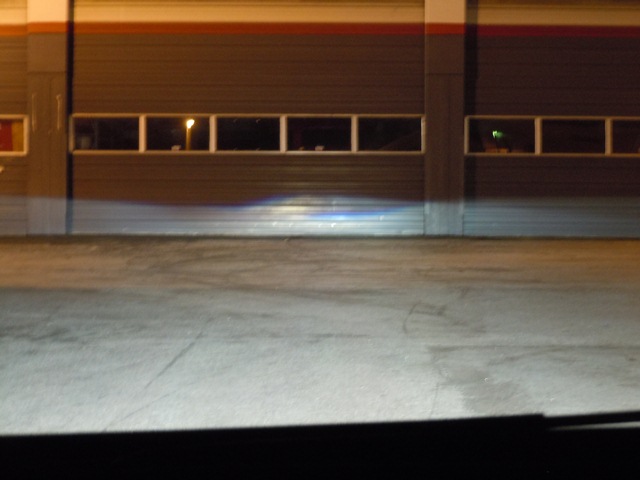
Wow! I just installed the Osram 66240's and what huge difference! Now there is so much more light. The DDM Tuning bulb was obviously not set correctly to have the best hot spot position. One can see in the underexposed shot where the hot spot of the DDM tuning bulb is no where near the optimum position in the middle and around the cutoff. Left - Osram 66240, Right - DDM Tuning (Both bulbs have less that 24 hours of burn time)


Big difference in the bulbs. I'm running 85122+ but I don't think I'm getting the output I'm supposed to.
I just finished by DS2 setup this morning but it's either my aiming or something else but the steps are not coming together at a distance. At about 20 feet, you'll see both of them separately and I think I'll have play with the shield or the projector's rotation but one side is sloped a bit more than the other.
Definitely some more tweaking with something to get it the way I was expecting it to be. I'll try to get some night shots tomorrow.
#24
03-21-2011, 03:54 AM

Big difference in the bulbs. I'm running 85122+ but I don't think I'm getting the output I'm supposed to.
I just finished by DS2 setup this morning but it's either my aiming or something else but the steps are not coming together at a distance. At about 20 feet, you'll see both of them separately and I think I'll have play with the shield or the projector's rotation but one side is sloped a bit more than the other.
Definitely some more tweaking with something to get it the way I was expecting it to be. I'll try to get some night shots tomorrow.
#25
03-21-2011, 10:49 AM

No, the slope is not caused by the bulb, rather the whole projector assembly. The fix is easy, but does require me to remove my bumper and I am too lazy for that since I don't notice it when driving. Just remove the adapter, grind, then reinstall. The only times a person can tell is when I am close against a wall, which only happens backing out of the garage.
The bulbs did give me much better output from my setup though.
The bulbs did give me much better output from my setup though.
#26
03-21-2011, 12:15 PM
How was your horizontal aiming? I'll wait till it's dark again and I need to go to a bigger area to get the output shots but I think my horizontal aiming is off. The steps aren't converging like they're supposed to be. Vertical aiming is ok and the rotation I think I can live with since there isn't much that can be done once everything is installed. I'm too lazy, too to take everything back out again.
#27
03-21-2011, 12:22 PM
How was your horizontal aiming? I'll wait till it's dark again and I need to go to a bigger area to get the output shots but I think my horizontal aiming is off. The steps aren't converging like they're supposed to be. Vertical aiming is ok and the rotation I think I can live with since there isn't much that can be done once everything is installed. I'm too lazy, too to take everything back out again.

#28
03-21-2011, 12:42 PM

like i have said, i had to open up my headlights twice after the initial install of the projectors to perfect the rotation and aim.
if you see cars that come from the factory with projector HID headlights its obvious how to aim your new setup.
you have to angle your driver's side projector a couple degrees towards the center and the passenger's side projector dead on straight.
in the distance your cutoff will come close together in the 75ft-100ft range but will not converge, just the step cutoff will come close together.
it willl look like this in about 20-30ft distance ____/---------/-----------
at about 75-100ft distance should look like this, _________/--/-----------
whereas the left driver's side step has moved closer to the passenger's side step and the passenger's side step did not move horizontally.
this is achieved by angling the driver's side projector a few degrees inwards towards the center.
also morimoto projectors are not precision built like oem projectors so youll have to tweak and play with the cutoff shields to have a perfect cutoff and equal color at the cutoff line.
#29
03-21-2011, 01:13 PM
Thanks guys. Sorry I'm wrong, it doesn't converge but gets closer at distance like JJINN mentioned above.
I'm going to try to mod the H4 adapter a bit to get the driver's side rotation fixed. It's off a little bit. For the possible cross eye look, I'll give the aiming of the headlight of driver side angled and passenger side straight ahead.
I'm going to try to mod the H4 adapter a bit to get the driver's side rotation fixed. It's off a little bit. For the possible cross eye look, I'll give the aiming of the headlight of driver side angled and passenger side straight ahead.
#30
03-21-2011, 11:29 PM
Me too brother... Such a crappy process of aiming. I'm in the same situation. I had it aimed correctly before I resealed the lenses, and after I resealed the left side is rotated upwards counterclockwise, so everything looks jacked up. I'm going out of town this week so I can't get back to it until next week... Ugh!


#31
04-14-2011, 05:59 AM

I have the same exact problem on my retrofit - did them awhile back, but never set aside time to fix the rotation on the driver's side.
Here's the pictures from my setup:
https://www.fitfreak.net/forums/fit-...etrofit-5.html
can't really tell in those pics, but the rotation is slightly off as well - wonder if it's the way the headlight housings are made
Here's the pictures from my setup:
https://www.fitfreak.net/forums/fit-...etrofit-5.html
can't really tell in those pics, but the rotation is slightly off as well - wonder if it's the way the headlight housings are made
#32
04-14-2011, 11:44 AM
I have the same exact problem on my retrofit - did them awhile back, but never set aside time to fix the rotation on the driver's side.
Here's the pictures from my setup:
https://www.fitfreak.net/forums/fit-...etrofit-5.html
can't really tell in those pics, but the rotation is slightly off as well - wonder if it's the way the headlight housings are made
Here's the pictures from my setup:
https://www.fitfreak.net/forums/fit-...etrofit-5.html
can't really tell in those pics, but the rotation is slightly off as well - wonder if it's the way the headlight housings are made
#33
04-14-2011, 03:47 PM
ah ok - that's good that they straightened out. Maybe I have the same problem. Any tips on getting them tight? I noticed that it was a bit difficult to get them really tight.
As for the horizontal aiming - one thing you could look into is perhaps just using zipties to sort of force the whole projector to point a bit to the right. I know this sounds really ghetto, but actually that's how my driver's side projector is currently being held up, and it's been there for awhile - I tried to take off the H4 ring without taking off the headlights and that didn't pan out well - so the temporary fix was to force the projector into place using zipties.
As for the horizontal aiming - one thing you could look into is perhaps just using zipties to sort of force the whole projector to point a bit to the right. I know this sounds really ghetto, but actually that's how my driver's side projector is currently being held up, and it's been there for awhile - I tried to take off the H4 ring without taking off the headlights and that didn't pan out well - so the temporary fix was to force the projector into place using zipties.
#34
04-15-2011, 01:47 AM
I just took off my headlamps and used large needle nose pliers. Grip the nuts on the grooves and carefully tightened it snugged. Because on not overdoing it as the nuts can snap from what I've read.
I'll give the zip ties a try.
I'll give the zip ties a try.
#35
04-17-2011, 02:11 PM

I know you stated that there was no hacking, but just to clarify...did you use the center post to mount the projector into the existing bulb hole or did you mount using the four corner bolts? your setup looks great and this is probably my next project. TIA!
#36
04-17-2011, 11:03 PM
never mind. got my answer and I ordered my kit with Osram 66240 D2S bulbs. hope to be joining you guys soon. thanks for the inspiration. 
#37
04-29-2011, 02:06 AM
I've been doing a lot of reading on HIDplanet to prepare for my retrofit and many users have reported that the minis produce too much foreground lighting and the effect it has on distance vision. have you guys noticed this as well or does the GE's headlight shape and bumper offer enough of a block to hinder this phenomenon? it would be nice to know just in case I need to make a foreground limiter on the shield. TIA!
#38
04-29-2011, 02:15 AM
hmmmm yeh - I have noticed that a bit when there's a lot of ambient lighting (in which case you probably woudln't need distance lighting anyways...) - but when it's pitch dark out distance lighting is fine - I'm satisfied with mine just because I can see much better compared to the halogens - I just wish I got it with 5000k bulbs instead of 4300k, and I still need to fix the rotation a bit.
maybe the H1 morimoto projector will work better for you then - i hear it has better output, although you won't be able to use the OEM D2S bulbs with these.
maybe the H1 morimoto projector will work better for you then - i hear it has better output, although you won't be able to use the OEM D2S bulbs with these.
#39
04-29-2011, 02:26 AM
thanks for the response. I suppose I can play around with the adjustments and try to perfect it before they're mounted on the car. I just need to have my replacement headlights before I do. then I can take my sweet time.
oh, too late...I already have the D2S kit in my hands. I have been reading mixed reviews about some folks preferring the output of the h1 and some others preferring the OEM bulb selection and color of the D2S. I think I'd be happy with either one. I'm just trying to soak up as much information as I can before I dive into this project.
I suppose I can play around with the adjustments and try to perfect it before they're mounted on the car. I just need to have my replacement headlights before I do. then I can take my sweet time.oh, too late...I already have the D2S kit in my hands. I have been reading mixed reviews about some folks preferring the output of the h1 and some others preferring the OEM bulb selection and color of the D2S. I think I'd be happy with either one. I'm just trying to soak up as much information as I can before I dive into this project.