DIY Lightweight & Cheap bucket seat and brackets for racing
#1
 03-27-2015, 02:54 PM


DIY Lightweight & Cheap bucket seat and brackets for racing
I've been looking for a lightweight seat for the GD and found this: http://www.summitracing.com/int/parts/sum-g2100
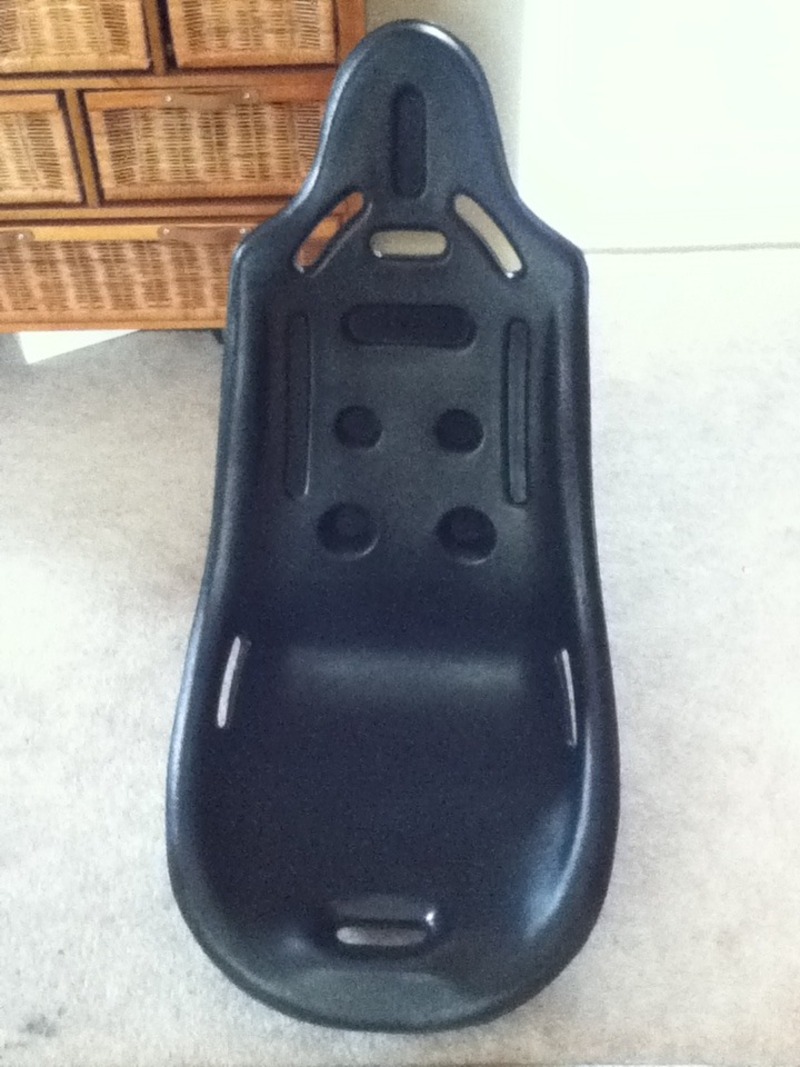
The Summit Racing G2100 seat is 12.2 lbs without brackets or cover. I ordered this along with the vinyl cover and universal aluminum brackets. To my door in Canada it cost me $225. Now this seat might not be for everyone as it is not going to be as comfortable as most aftermarket seats but the price can't be beat. I was going to order a buddy club seat that weighed 11 lbs but it would have cost me $1000 CAD for a $400 seat...and that's before duty. This might be a race only seat for me but so far it's doing the trick as my daily seat.
This DIY will not cover the addition of the sliding brackets that are also available for sale at Summit. I don't move my seat and therefore didn't need it or want the extra weight.
The stock driver's seat weighs 42.6 lbs. This seat with it's universal brackets attached to the brackets I made comes in at 19.0lbs, that's a savings of 23.6 lbs! I considered reusing the stock sliders but they are very heavy and it would not have been worth it. I did remove the stock seat brackets however, the part that curves and connects with a bolt into the frame.
So here is what you will need:
Seat:
Stock driver's seat
G2100 Seat from Summit Racing
Aluminum Universal Seat brackets w/ bolts from Summit Racing
(optional) Black Vinyl Seat cover (provides minimal cushion)
Tools: adjustable wrench, socket set, drill with 7/16" and 3/8" steel bit, rubber mallet, tape measure, marker, rotary tool with 8-10 cut off wheels (Dremel, comes in packs of 5)
Materials:
aluminum square tube, 1/8" thick x 1" square x 4' long(seat position can be lowered with a smaller tube)
aluminum angle 1/8" x 1" x 3'
bolts: (4) 3/8" x 16 in 3/4" length, (8) 3/8" x 16" in 1 1/2" length
nuts: (12) 3/8" locking nuts
*the pictures show washers which I later realized I didn't need plus it also gives more threads
for the locking nuts to grip
Step 1
Remove the stock driver's seat. There are 4 bolts to remove underneath some tricky-to-remove plastic coverings. Before removing the seat be sure to tilt it back and remove the 3 wiring harness clips for the airbags, seatbelt light etc. Carefully remove the seat.
Step 2
Remove the stock seat attachment brackets. These are held on by a large silver rivet, spot welding on the edges and a small spot weld on the underside: 1) Using the drill and 7/16" bit, drill through the silver rivet.
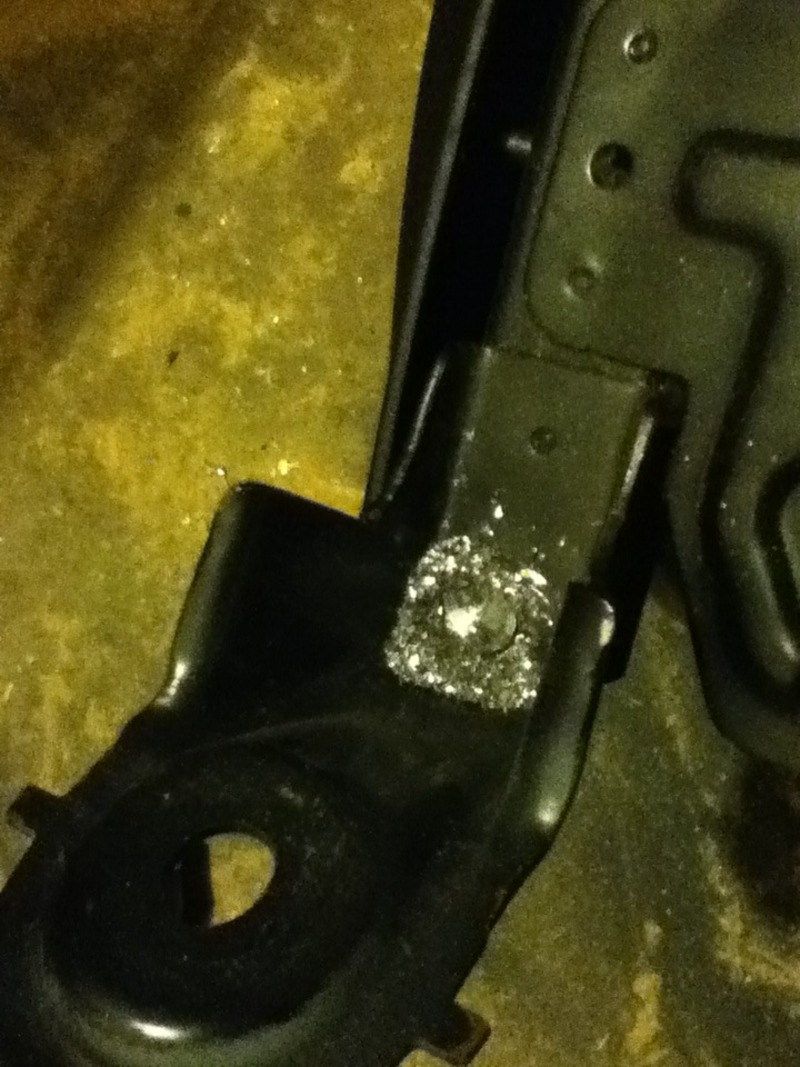
2) Using the rotary tool and cut off wheel, cut through the welds in between the bracket attachment and slider. There are 2 areas on each attachment. Some need to be cut in a vertical direction, others horizontal.
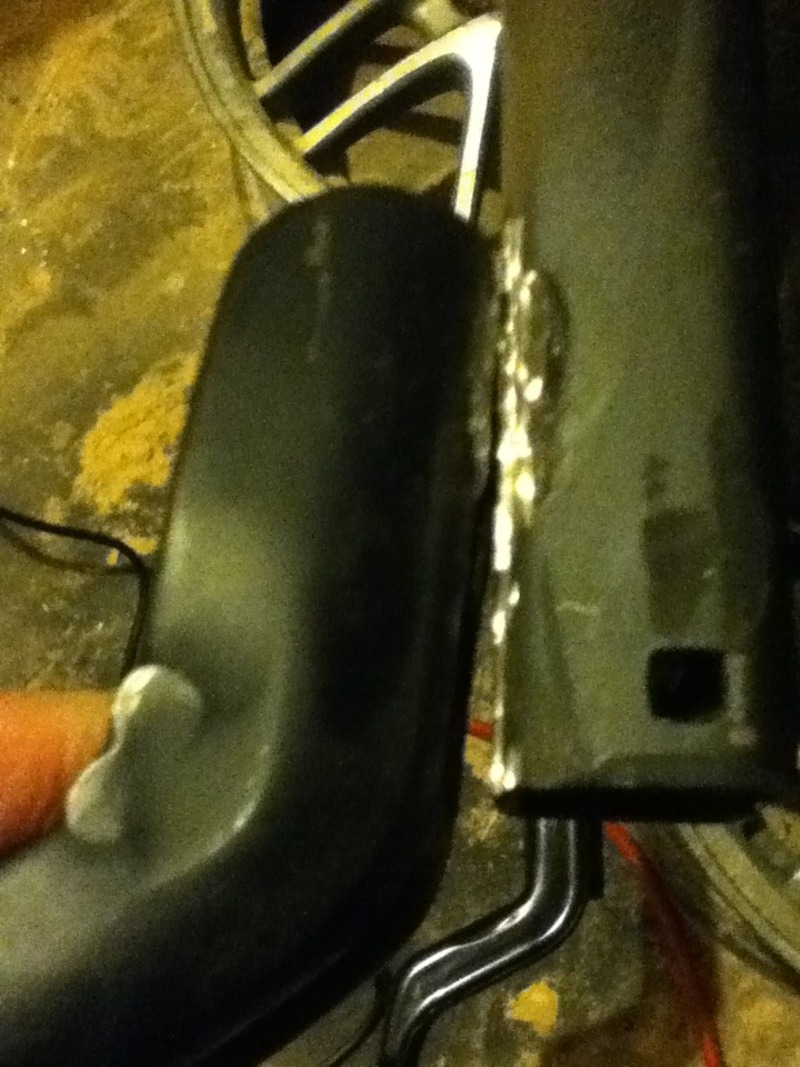
3) Using the rubber mallet, beat the attachment in a downward direction until the last spot welding on the underside lets go. Then you will have the bracket free.
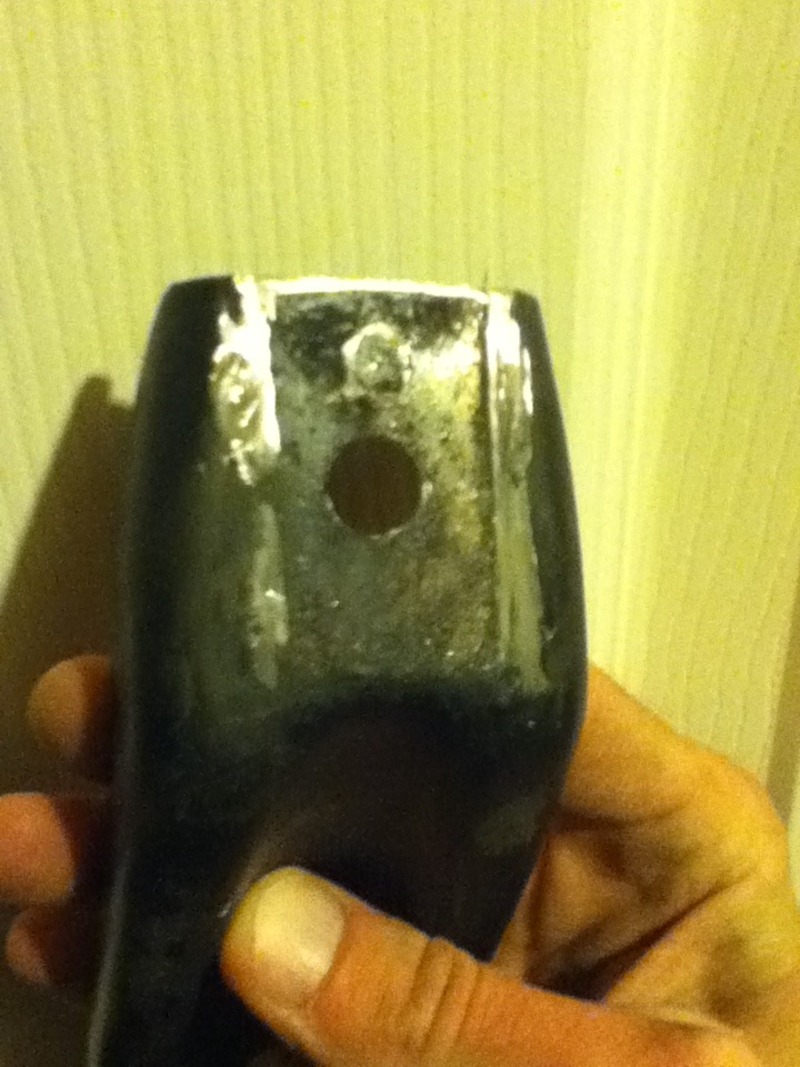
Step 3
Install stock seat bracket attachments, measure and cut the aluminum square tubing and angle to be bolted on. IMPORTANT: Allow extra length on the back end of this tubing as the seat and universal bracket will rest further back than where the actual stock bracket attachments connect. I'm 5'10" and needed about 3" extra at the back. Cut the aluminum square tube into the 2 needed lengths. Drill the 4 holes with 7/16" bit for the stock brackets to attach to and bolt them up with the 1 1/2" bolts. Now you will need to cut the aluminum angle into 2 pieces, as these will run perpendicular to the square tube and will hold the front and back portions of the universal bracket.
Step 4
Attach the universal brackets to the G1200 seat after drilling the proper holes with 7/16" bit. Do this one hole at a time as the bottom of the seat is not perfectly flat. Use the included bolts.
Step 5
Find the correct seat position for yourself. Place the seat on top of the aluminum angle which is resting perpendicular on the aluminum square tube. you will need to find the correct forward/backward position AND side to side position. Mark these on the aluminum angle with the marker after finding just the right spot.
Step 6
Drill the holes with 7/16" bit and attach the aluminum angle to the square tubing (1 1/2" bolts) and the universal brackets/seat to the aluminum angle (3/4" length bolts).
Step 7
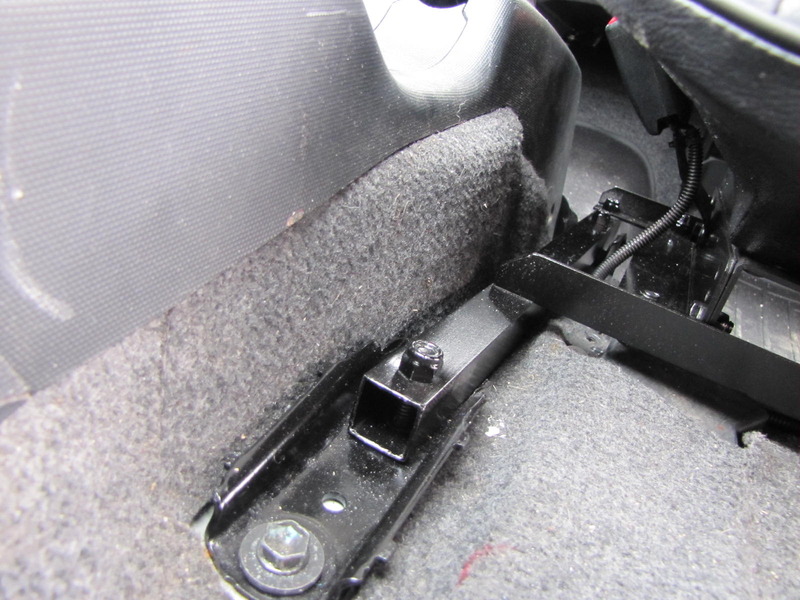
Sit in the seat, adjust the tilt on the universal brackets and drill holes for the seat belt connector. I had to tilt the seat back up and the front down for a near stock feel. Also keep in mind this position will be a little on the high side, this can be remedied by using a small square tubing. For now I like this position better as I can see more of the road and other cars. Once you find the right tilt position of the seat on the universal brackets, only then drill the 2 holes for the seat belt attachment, the larger one for the bolt and the smaller 3/8" bit size for the piece of steel that keeps the belt piece from rotating.

Step 8
Sand/grind, paint if needed. Remove excess metal, round off corners.
Step 9
Install, don't forget about the seat belt light connector.
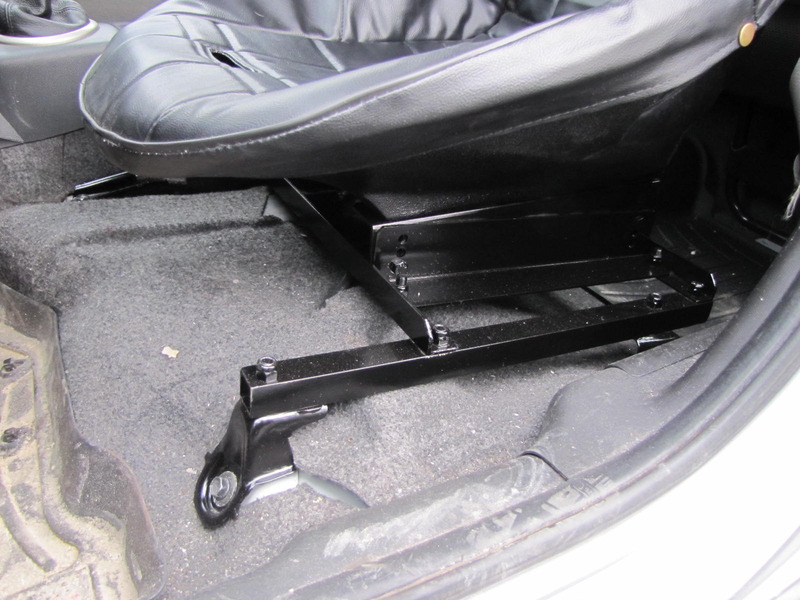
Here is a pic of the seat removed with brackets.
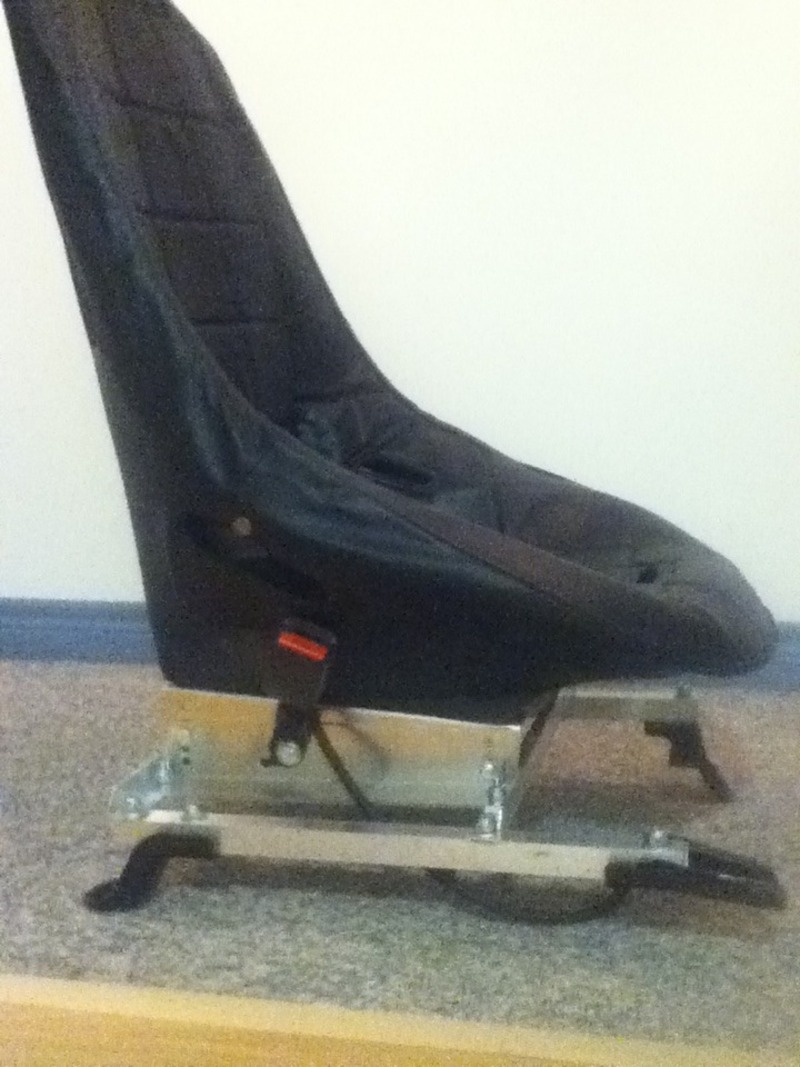
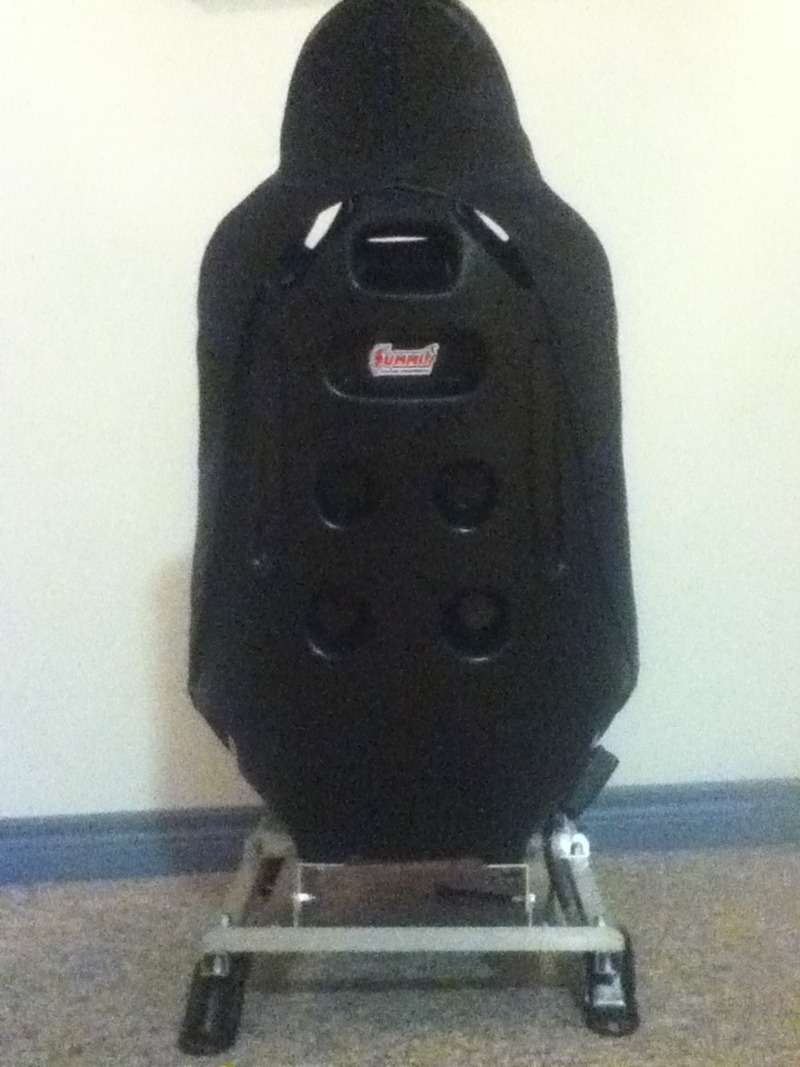
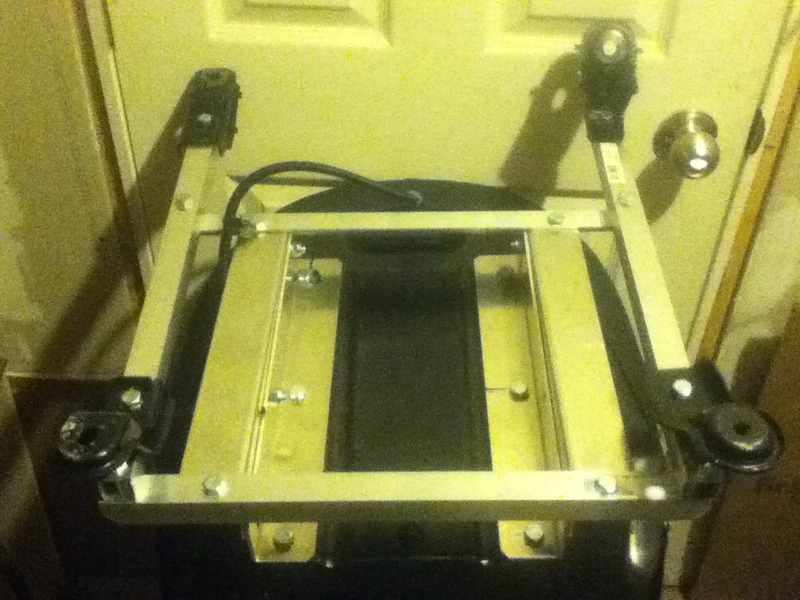
I'll eventually paint these black!
These brackets could be bolted back on to the stock sliders to reuse the stock seat. You'd just need to find a bolt with a small flat end on it to clear the movement of the sliders.
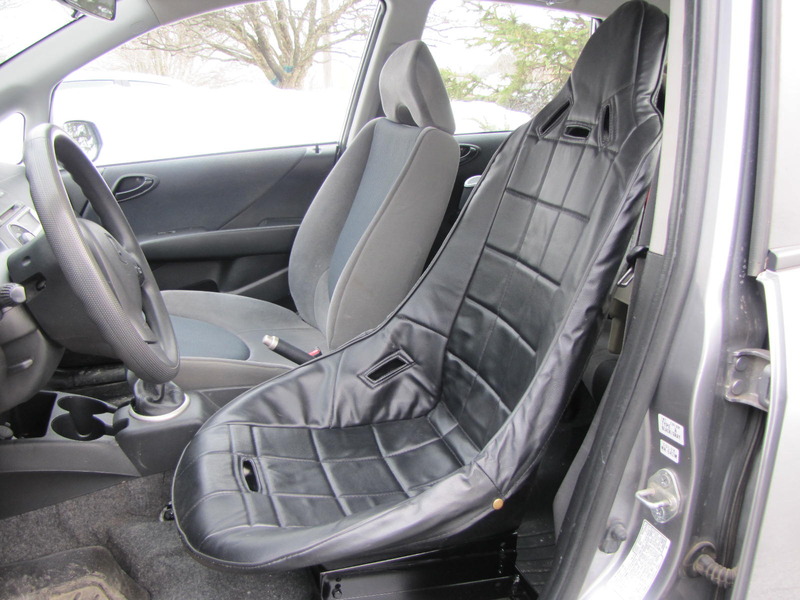
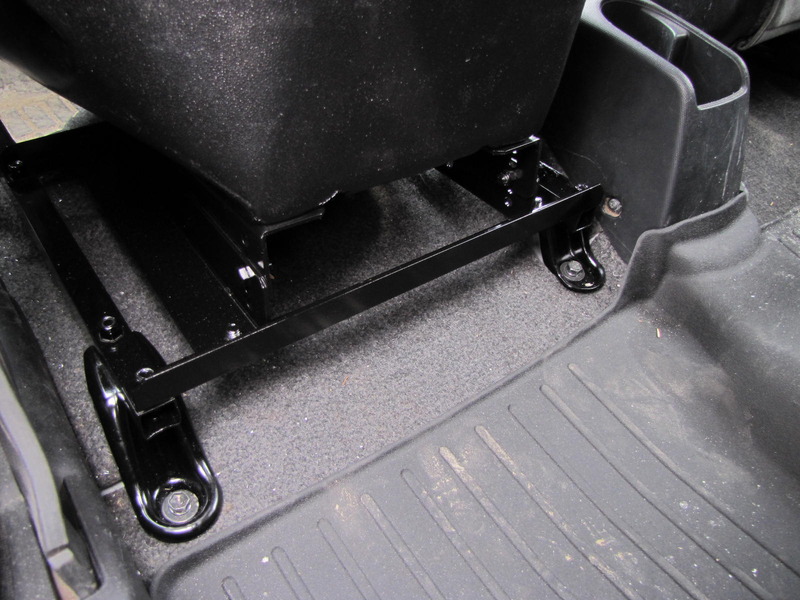
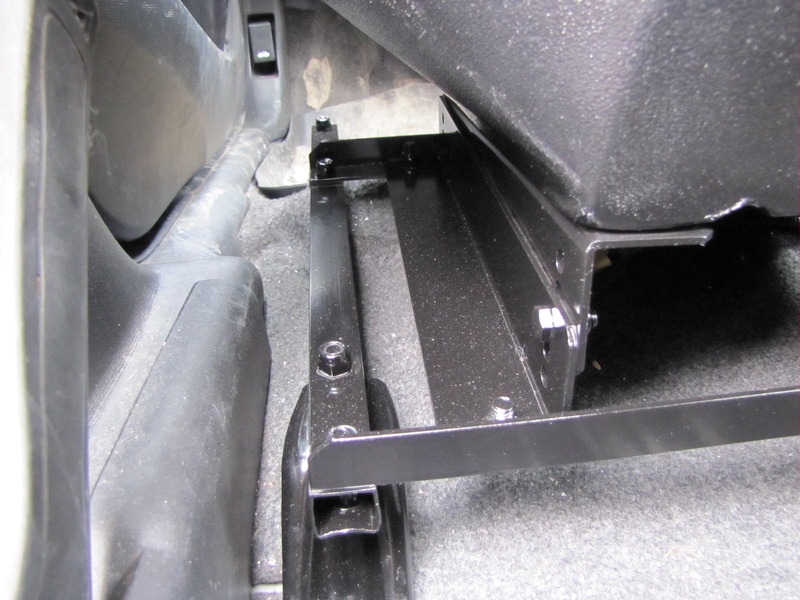
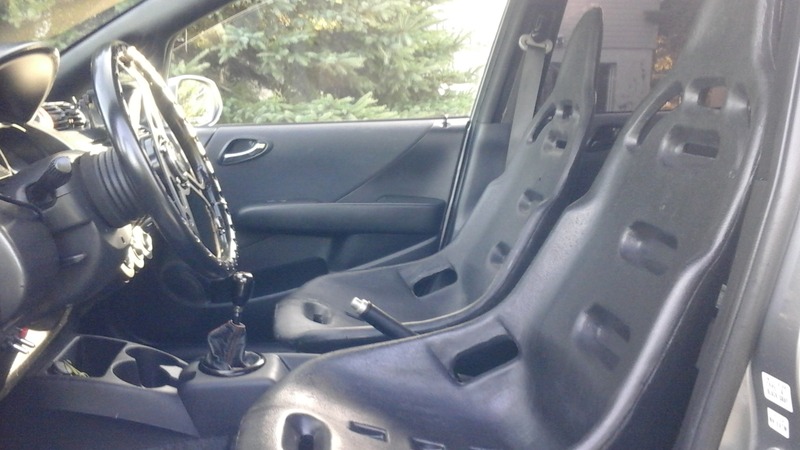
Here they are finished, painted and in the car.

The Summit Racing G2100 seat is 12.2 lbs without brackets or cover. I ordered this along with the vinyl cover and universal aluminum brackets. To my door in Canada it cost me $225. Now this seat might not be for everyone as it is not going to be as comfortable as most aftermarket seats but the price can't be beat. I was going to order a buddy club seat that weighed 11 lbs but it would have cost me $1000 CAD for a $400 seat...and that's before duty. This might be a race only seat for me but so far it's doing the trick as my daily seat.
This DIY will not cover the addition of the sliding brackets that are also available for sale at Summit. I don't move my seat and therefore didn't need it or want the extra weight.
The stock driver's seat weighs 42.6 lbs. This seat with it's universal brackets attached to the brackets I made comes in at 19.0lbs, that's a savings of 23.6 lbs!
I considered reusing the stock sliders but they are very heavy and it would not have been worth it. I did remove the stock seat brackets however, the part that curves and connects with a bolt into the frame.So here is what you will need:
Seat:
Stock driver's seat
G2100 Seat from Summit Racing
Aluminum Universal Seat brackets w/ bolts from Summit Racing
(optional) Black Vinyl Seat cover (provides minimal cushion)
Tools: adjustable wrench, socket set, drill with 7/16" and 3/8" steel bit, rubber mallet, tape measure, marker, rotary tool with 8-10 cut off wheels (Dremel, comes in packs of 5)
Materials:
aluminum square tube, 1/8" thick x 1" square x 4' long(seat position can be lowered with a smaller tube)
aluminum angle 1/8" x 1" x 3'
bolts: (4) 3/8" x 16 in 3/4" length, (8) 3/8" x 16" in 1 1/2" length
nuts: (12) 3/8" locking nuts
*the pictures show washers which I later realized I didn't need plus it also gives more threads
for the locking nuts to grip
Step 1
Remove the stock driver's seat. There are 4 bolts to remove underneath some tricky-to-remove plastic coverings. Before removing the seat be sure to tilt it back and remove the 3 wiring harness clips for the airbags, seatbelt light etc. Carefully remove the seat.
Step 2
Remove the stock seat attachment brackets. These are held on by a large silver rivet, spot welding on the edges and a small spot weld on the underside: 1) Using the drill and 7/16" bit, drill through the silver rivet.

2) Using the rotary tool and cut off wheel, cut through the welds in between the bracket attachment and slider. There are 2 areas on each attachment. Some need to be cut in a vertical direction, others horizontal.

3) Using the rubber mallet, beat the attachment in a downward direction until the last spot welding on the underside lets go. Then you will have the bracket free.

Step 3
Install stock seat bracket attachments, measure and cut the aluminum square tubing and angle to be bolted on. IMPORTANT: Allow extra length on the back end of this tubing as the seat and universal bracket will rest further back than where the actual stock bracket attachments connect. I'm 5'10" and needed about 3" extra at the back. Cut the aluminum square tube into the 2 needed lengths. Drill the 4 holes with 7/16" bit for the stock brackets to attach to and bolt them up with the 1 1/2" bolts. Now you will need to cut the aluminum angle into 2 pieces, as these will run perpendicular to the square tube and will hold the front and back portions of the universal bracket.
Step 4
Attach the universal brackets to the G1200 seat after drilling the proper holes with 7/16" bit. Do this one hole at a time as the bottom of the seat is not perfectly flat. Use the included bolts.
Step 5
Find the correct seat position for yourself. Place the seat on top of the aluminum angle which is resting perpendicular on the aluminum square tube. you will need to find the correct forward/backward position AND side to side position. Mark these on the aluminum angle with the marker after finding just the right spot.
Step 6
Drill the holes with 7/16" bit and attach the aluminum angle to the square tubing (1 1/2" bolts) and the universal brackets/seat to the aluminum angle (3/4" length bolts).
Step 7
Sit in the seat, adjust the tilt on the universal brackets and drill holes for the seat belt connector. I had to tilt the seat back up and the front down for a near stock feel. Also keep in mind this position will be a little on the high side, this can be remedied by using a small square tubing. For now I like this position better as I can see more of the road and other cars. Once you find the right tilt position of the seat on the universal brackets, only then drill the 2 holes for the seat belt attachment, the larger one for the bolt and the smaller 3/8" bit size for the piece of steel that keeps the belt piece from rotating.

Step 8
Sand/grind, paint if needed. Remove excess metal, round off corners.
Step 9
Install, don't forget about the seat belt light connector.
Here is a pic of the seat removed with brackets.


I'll eventually paint these black!
These brackets could be bolted back on to the stock sliders to reuse the stock seat. You'd just need to find a bolt with a small flat end on it to clear the movement of the sliders.
Here they are finished, painted and in the car.


Last edited by devmail; 04-06-2015 at 03:47 PM.
#2
03-29-2015, 10:03 PM
To lower the seat height a bit I may try using 1" aluminum angle in place of the square tube. This will need to be elevated about 1/2" to clear the heater duct under the seat and the edges of the stock bracket attachments.
Last edited by devmail; 03-29-2015 at 10:08 PM.
#3
04-06-2015, 02:36 PM
This is a great read. The original picture doesn't appear to have the 'cushion' that the end pics have of the seat. 23lbs is significant for one seat. Almost 50lbs with both front seats I assume (If you are using the passenger seat). Good stuff and thanks for documenting!
#6
05-26-2015, 04:01 PM
Fiberglass Counterpart
Hey Dev,
I was reading the reviews of the seat you purchased (nice review btw) and one of the reviewers mentioned that this seat is 'considerably heavier than its fiberglass counterpart'. Do you know what this seat's fiberglass counterpart is?
I was reading the reviews of the seat you purchased (nice review btw) and one of the reviewers mentioned that this seat is 'considerably heavier than its fiberglass counterpart'. Do you know what this seat's fiberglass counterpart is?
#7
05-26-2015, 04:48 PM
No I wish I did. I was more attracted to the price with this initially. It's 1 lb heavier than the Buddy Club seat I originally wanted, which would have cost me $1000 shipped, not including duty, friggin Canada eh?
I did find a crazy light carbon fiber seat by a company called Reverie in the UK, 5 lbs weight, 1000 GBP price!!
I did find a crazy light carbon fiber seat by a company called Reverie in the UK, 5 lbs weight, 1000 GBP price!!

#10
07-31-2016, 06:54 AM
Got 2 used rci seats for free and they are officially 2 lbs lighter than the summit g2100 seat. Just some finishing touchs left but they are mounted in the car.
Will weight the whole setup when finished.

Will weight the whole setup when finished.
#11
09-12-2016, 10:06 PM
Made more updates to the RCI brackets. The wife requested an adjustable slider for the driver's seat so I installed the Summit Racing universal slider (it's cheaper than the RCI). Since this would have added more than another inch in height to the current setup, I had to go back to the drawing board and figure out a way to lower everything. It was a bit of a pain in the ass since the gas tank comes up under the seat quite a bit in the front.
What I did was use some aluminum flat on the underside of the square tubing at the front and moved the aluminum angle also to the underside and forward a few inches. This angle requires some trimming on the right hand side, but is way stiffer than the flat aluminum would be. The front flat aluminum is not too flexible since it is somewhat supported by the frame underneath.
To make room for the adjustment arm of the slider (it pulls outward towards the door and the aluminum tubing of the bracket gets in the way), i made similar fixed brackets as the summit one but oriented them so they had a narrower attachment point to the bracket. The total weight is now 22 lbs for the adjustable seat.
AND in doing all this I was able to improve the weight and height of the passenger seat by mounting 2 pieces of aluminum flat to the underside of the RCI seat insead of using the 4 pieces of aluminum angle (which enabled anlge adjustment). This was simply bolted to the aluminum angle running across to the square tubing and now is not only lower but is at a good angle forward. This dropped the weight to 15 lbs!
The weight I gained in the driver's seat I lose on the passenger's side.
Pics to follow!


Thread
Thread Starter
Forum
Replies
Last Post

