devmail's 2007 SSM GD3 build - The Grey Goose
#21
 09-16-2015, 09:40 PM


My AEM AFR gauge installed and powered up.
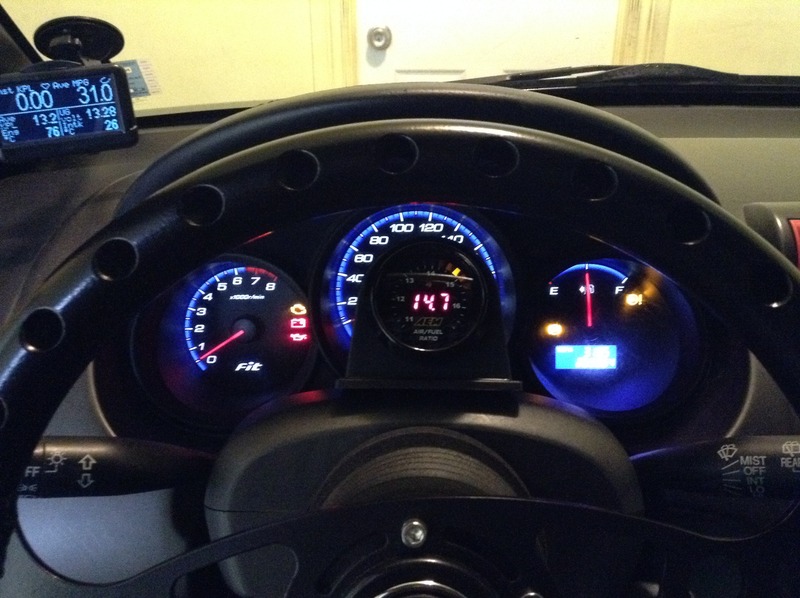
Will hook up the sensor wiring when the new header is in.
The weapon R race has a 2.25" collector which should match up to this DC Sports 2.25" catback.

This will be replacing my current axleback. Which is for sale, $200 US shipped! Here is a sound clip:

I also took a sound clip of my PRM intake with ram air duct, taken right in front of the duct!

It's a great place to launch rice rockets from! lol
Also had the rear windows tinted:
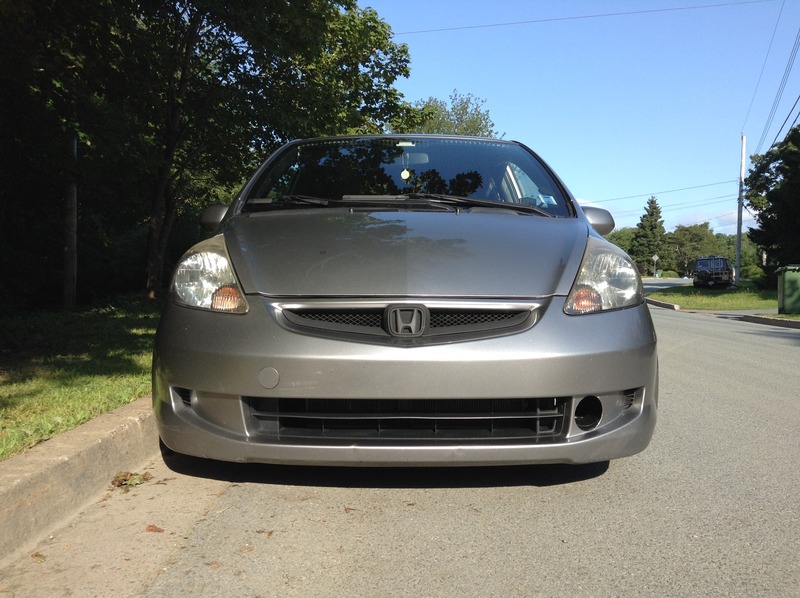
And here is just a low front shot:

Will hook up the sensor wiring when the new header is in.
The weapon R race has a 2.25" collector which should match up to this DC Sports 2.25" catback.

This will be replacing my current axleback. Which is for sale, $200 US shipped! Here is a sound clip:
I also took a sound clip of my PRM intake with ram air duct, taken right in front of the duct!
It's a great place to launch rice rockets from! lol
Also had the rear windows tinted:

And here is just a low front shot:


#23
09-23-2015, 07:03 AM
I'll measure again to make sure but it was 2.25" outer diameter and a little less that that on the inner diameter. I'll check the piping later and I will have a new video as well. 


#27
10-16-2015, 08:15 PM
Didn't get a vid in motion done before I had the DC exhaust silencer installed. When I have it out again I will. It's amazing how much they quiet it down! It's almost as quiet as the Tanabe muffler was.
#28
11-10-2015, 07:52 PM
Grrr.........video...Video.....VIDEO.

Great job on your ride so far. Loving every bit of it. Bad ass! The steering wheel, the headliner, the intake. Gawd...... Definitely stands out!
Last edited by Myxalplyx; 11-10-2015 at 07:59 PM.
#29
11-11-2015, 10:32 AM
Thanks! I'll get s video up of the silenced DC.
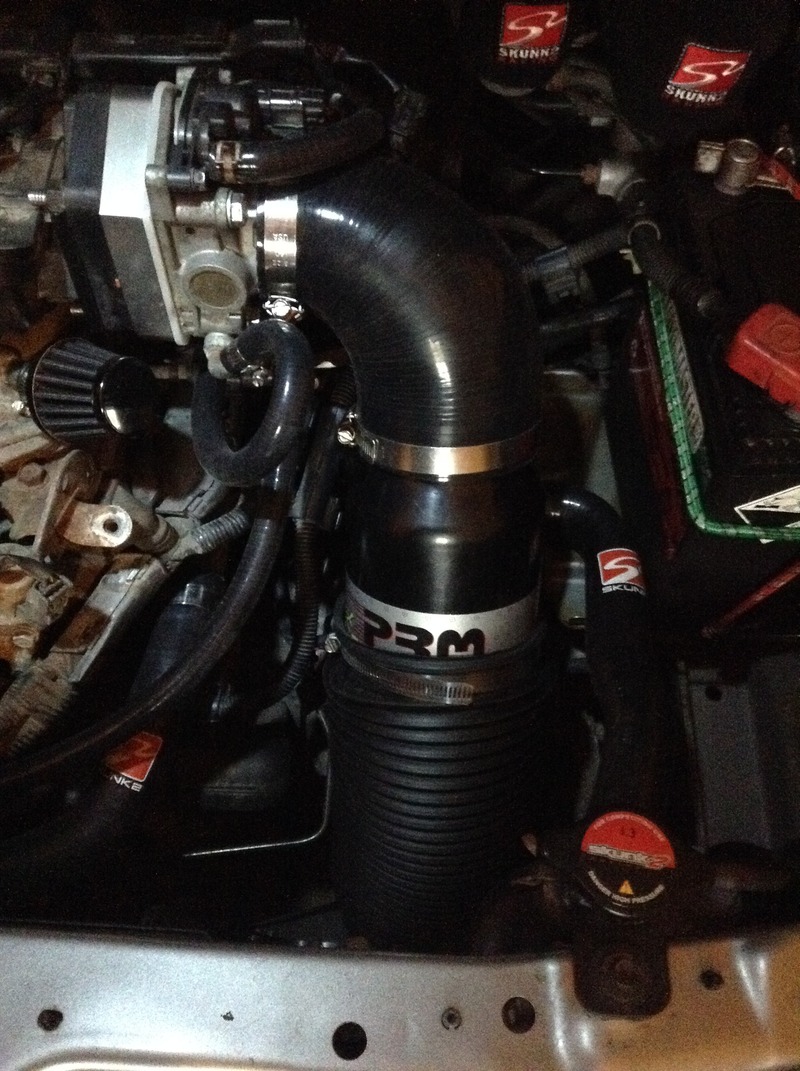
Also made some changes to the intake: 4 1/8" duct now facing straight ahead, 5" flex tube, removed one 90 degree bend. Will update the intake post soon.
Also made some changes to the intake: 4 1/8" duct now facing straight ahead, 5" flex tube, removed one 90 degree bend. Will update the intake post soon.
#30
11-20-2015, 12:44 PM
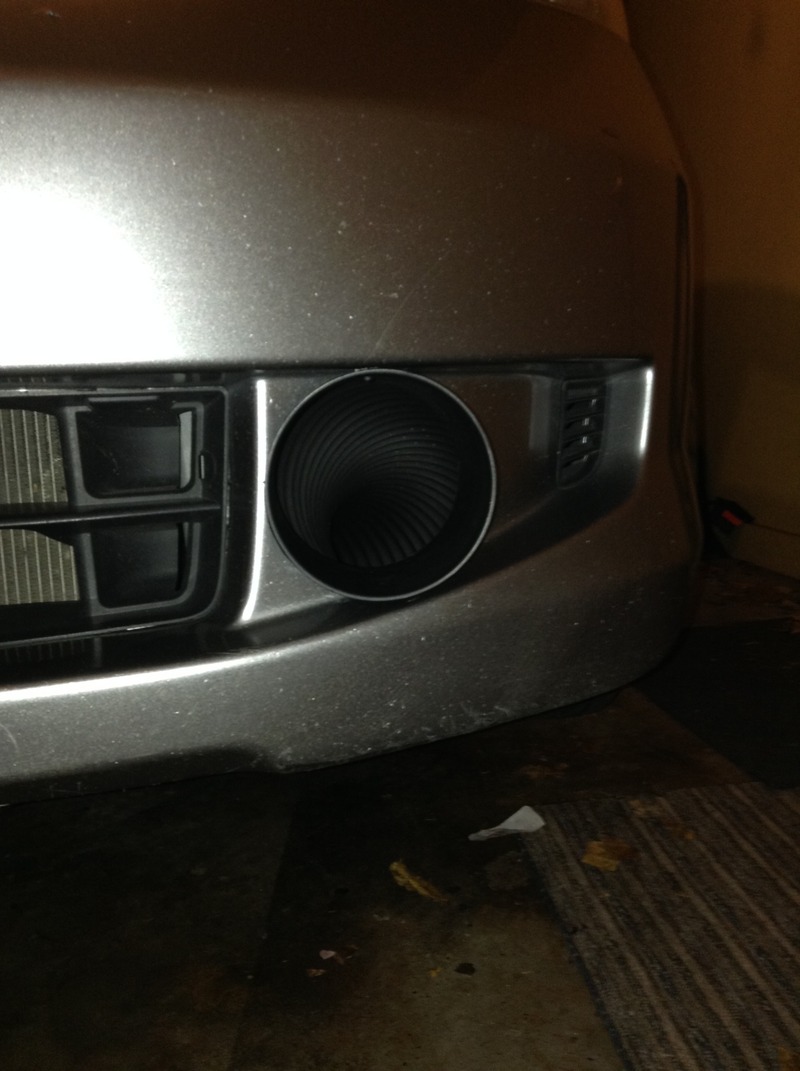
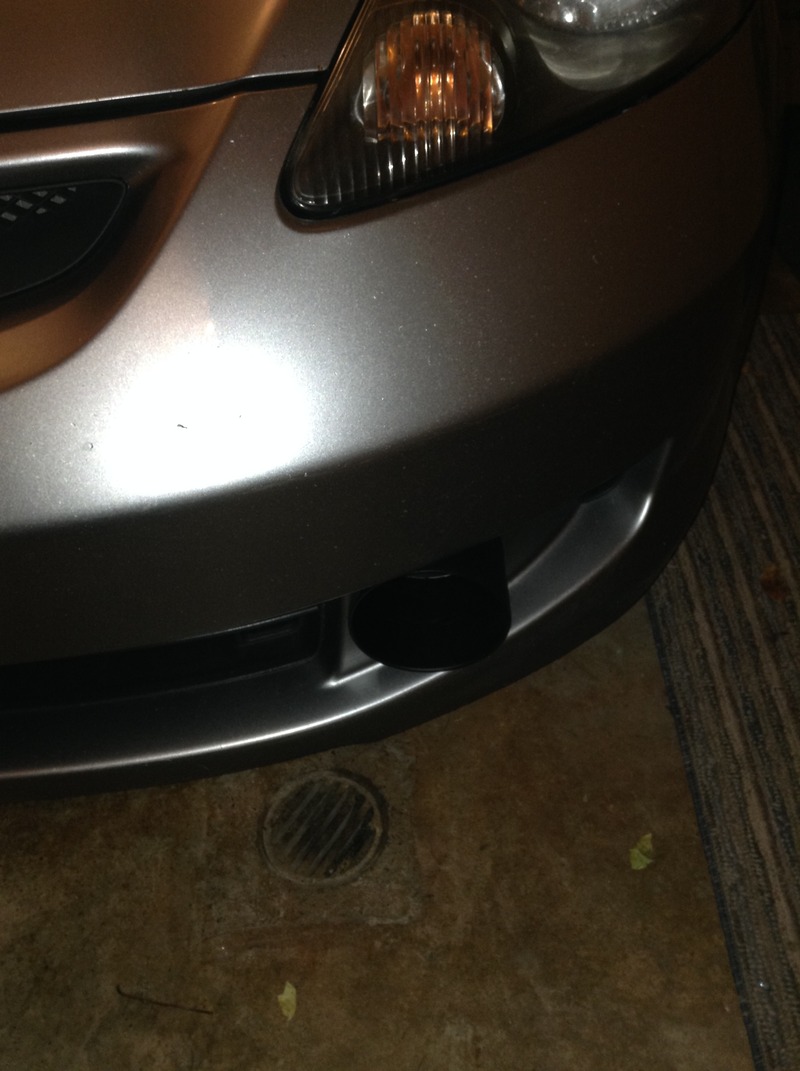
Intake update complete. From the throttle body I used a silicone 2.5"-3.5" 90 degree elbow. This points almost down and the PRM filter is connected to it. Connected to this is a 5" March Performance air duct, coupled to a 5" joiner to a second 5" air duct going into the fender well and connected to a flat black pvc coupler (the ram air inlet) with an OD of 4.5". Didn't want to cut the inlet hole any bigger and it still sits neatly in that part of the bumper. This is held in place at the top vertically with a bolt.
The improvements:
1) Inlet is bigger and also faces straight forward for more air flow.
2) Tubing to the filter is bigger for more flow.
3) Eliminated one 90 degree curve to keep the velocity up. This required extending the forward part of the upper rad hose so the PRM could angle downwards.
Next up is a valve lash adjustment. This should also help out the upper RPM band.
Last edited by devmail; 11-20-2015 at 01:00 PM.
#31
11-20-2015, 03:12 PM
That intake is PERFECT. Exactly how I'd do it. Man...this is awesome. Don't mind me.... But that is the way people should've been doing their PRM setup. Large PRM filter, larger inlet leading to air going straight into it. Then narrow down to the throttle body. You simply can't get better than that. I KNOW gains are there. I like this one much better than the first one. May have to make one similar without all the nasty bends I had. Even with my nasty bends, I still gained 2-3mph and dropped 2/10ths off the 1/4 mile. While changing it at the track.
This is exciting!
Question! What is the clamp holding onto between the outlet of your PRM and your throttle body? I'm not talking about the clamp at the throttle body but the one on the outlet side of the PRM filter (Between the filter and throttle body). Trying to see how you got that connected because I simply had a silicone hose pushed inside this opening and it filled it out. Nothing was there to clamp too.
I like how you have the dryer hose attached to the outside of the PRM filter. I had pushed a metal pipe into the opening on the PRM filter then clamped the dryer hose to that. Your setup keeps the filter sucking freely with nothing going into its inlet. I like that much better than my setup and will do this when/if I set it up again. Thanks!
Last edited by Myxalplyx; 11-20-2015 at 03:23 PM.
#32
11-20-2015, 05:58 PM
That intake is PERFECT. Exactly how I'd do it. Man...this is awesome. Don't mind me.... But that is the way people should've been doing their PRM setup. Large PRM filter, larger inlet leading to air going straight into it. Then narrow down to the throttle body. You simply can't get better than that. I KNOW gains are there. I like this one much better than the first one. May have to make one similar without all the nasty bends I had. Even with my nasty bends, I still gained 2-3mph and dropped 2/10ths off the 1/4 mile. While changing it at the track.
This is exciting!
Question! What is the clamp holding onto between the outlet of your PRM and your throttle body? I'm not talking about the clamp at the throttle body but the one on the outlet side of the PRM filter (Between the filter and throttle body). Trying to see how you got that connected because I simply had a silicone hose pushed inside this opening and it filled it out. Nothing was there to clamp too.
I like how you have the dryer hose attached to the outside of the PRM filter. I had pushed a metal pipe into the opening on the PRM filter then clamped the dryer hose to that. Your setup keeps the filter sucking freely with nothing going into its inlet. I like that much better than my setup and will do this when/if I set it up again. Thanks!
This is exciting!
Question! What is the clamp holding onto between the outlet of your PRM and your throttle body? I'm not talking about the clamp at the throttle body but the one on the outlet side of the PRM filter (Between the filter and throttle body). Trying to see how you got that connected because I simply had a silicone hose pushed inside this opening and it filled it out. Nothing was there to clamp too.
I like how you have the dryer hose attached to the outside of the PRM filter. I had pushed a metal pipe into the opening on the PRM filter then clamped the dryer hose to that. Your setup keeps the filter sucking freely with nothing going into its inlet. I like that much better than my setup and will do this when/if I set it up again. Thanks!
Thanks for the compliments, hopefully all the time and $ was worth it.
#33
11-21-2015, 02:31 AM
That explains it, thanks! I didn't realize the silicone piece was that huge. I have a 3" piece going inside of the PRM air filter. I like your setup MUCH better. I have a 3" 180 degree silicone that I was using so that's the reason I inserted it inside. Giving me ideas! Great setup...keep it coming.
#37
12-10-2015, 07:03 AM
I've driven this in the rain and water can collect at the bottom after the first 90 degree turn but the filter is high up and stays dry. Submerging would be a different story of course.
I know of no way to measure airflow at the moment. :-/
I know of no way to measure airflow at the moment. :-/
#38
12-10-2015, 06:24 PM
to measure air flow on this intake, replace one of the straight sections with a pvc T of the same size. Buy a pvc cap and cut a slot in it big enough to fit this:
Then you can record air velocity and volume easily.
I got the idea from here:
Then you can record air velocity and volume easily.
I got the idea from here:
#40
12-10-2015, 11:43 PM
I wasn't sure if something could be plugged into the OBD2 port to measure something for airflow. I didn't see a maf sensor so thinking you are map. Maybe the difference in manifold absolute pressure or something. Was just curious! I'm always looking at my maf g/s to compare before and after mods. It's all over the place but has generally moved higher after mods.
Last edited by Myxalplyx; 12-10-2015 at 11:47 PM.