When you click on links to various merchants on this site and make a purchase, this can result in this site earning a commission. Affiliate programs and affiliations include, but are not limited to, the eBay Partner Network.
I'm not sure which is the bigger sin, to revive an ancient thread or to start a duplicate thread years later. (Yes I searched). The original thread is here:
Sorry for invoking an ancient thread. I reached out to Zeta recently to offer to purchase a large quantity of the GD dead pedals at once if they will custom run a large order for me. They replied that it is impossible because they had destroyed all the associated tooling for it. Sad. I guess I am forced to try to reproduce one. If you gentlemen ever take yours out and can take measurements for me, I will see about having a quantity sheet cut and bent as a one-off run. I like the idea of bolting it to the hood release bolts but wanted to hear what your thoughts were for improvement over the original. I'll likely try to design something and do a small batch run over the upcoming summer in case anyone is interested. I have access to a laser cutter and a metal bender.
I wanted to see if there was any interest and also suggestions for improvement. I am only going to do a LHD version since I don't have access to a RHD GD for fitment. Some folks mentioned that the original was uncomfortable, what would you do different if i could redo the GD aftermarket dead pedal. Pictures of the underside of the dead pedal would be helpful. My goal is to have this design flat cut from sheet metal and bent, barring that, it will be a lot of brazing.
Finally someone to undertake this dead pedal task is here! Be if no one else wants one and you do end up making 1 please make me one.
I also contacted zeta and they told me no can do months ago and nobody sells their personal ones for me to buy either.
Im getting a set of dot legal ss brake /clutch line made in the near future and will get 2 sets fabbed. Trades? Lol all in the sky for now.
Pretty straightforward, 5 major visible pieces to weld together (2 x bolt supports, 1 x L brace, 1 x pedal face, and 1 x pedal underside support). 3 pieces to bend (2 bolt supports and 1 L brace). Summer project most likely. I'll make extra few prototypes. Based on the response, I don't see great demand for this product. Not doing this commercially, so if you want an guarantees on beauty or whatever, keep looking for a used Zeta. This will likely stay a prototype product, enough to share some costs to offset just making a single unit. I just need a unit for myself.
I'll do it in cardboard first to get a template. See if I can rent time on a sheet metal cutter. My TIG welds are ugly guys, be warned. I guess I can also sell an unwelded kit for you DIYers with nice MIG welding rigs. Lol.
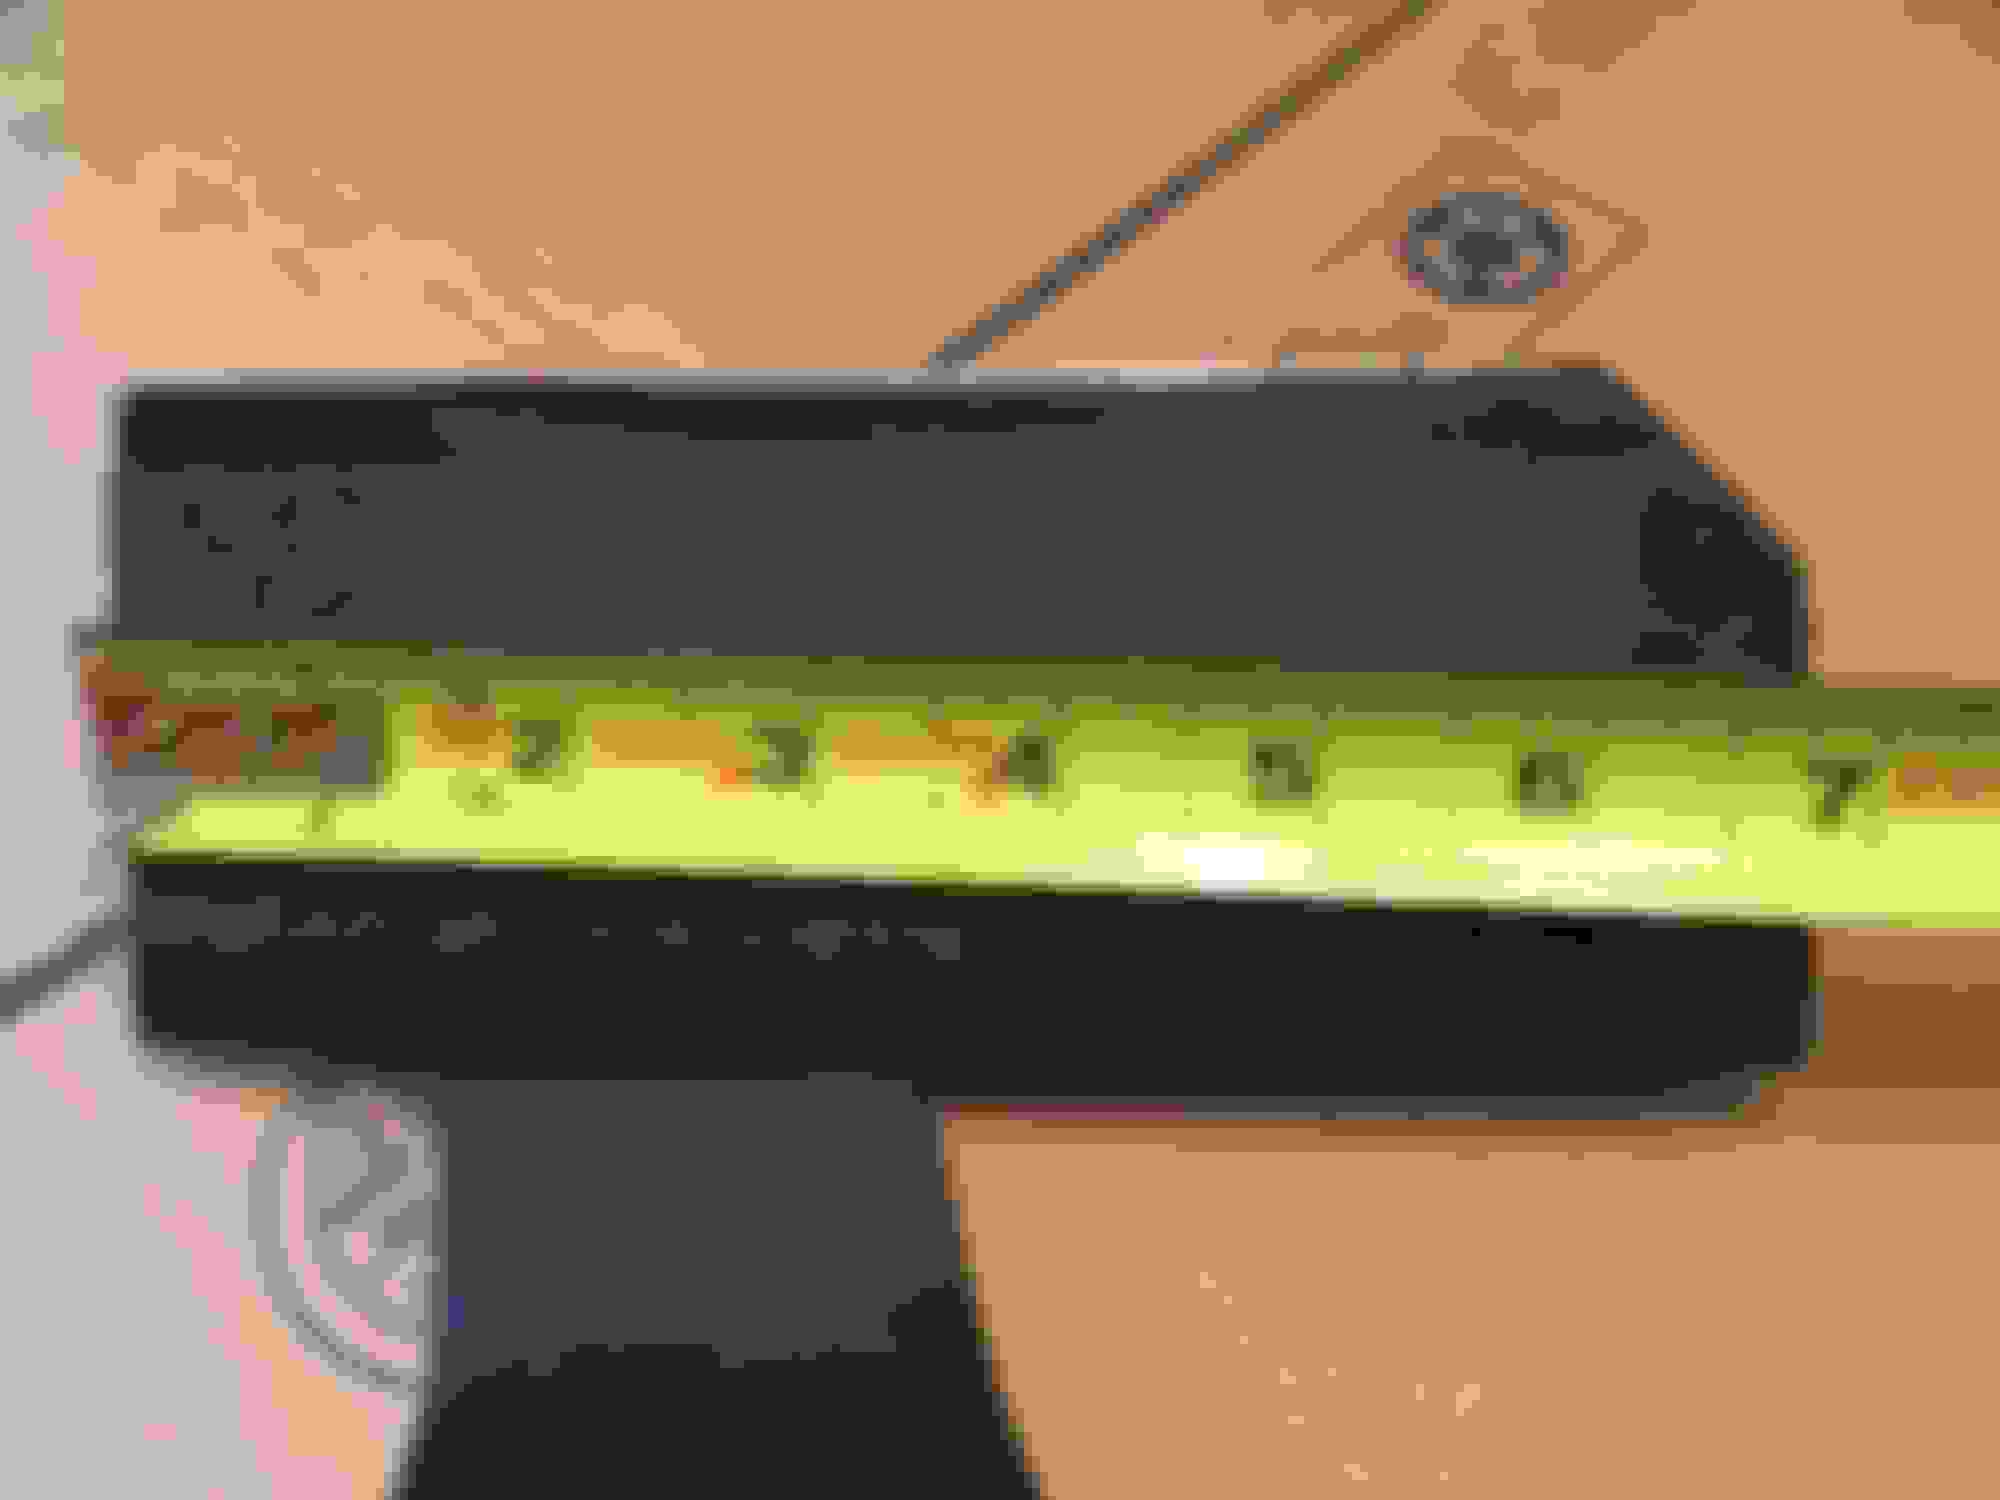
Can you put a tape measure to each of the bendy pieces? So I can get rough measurements for the items in red? Photos are fine. Thanks for the pictures of the rear. Still pretty straightforward, but you were right about it being a bit complex still. Can you also give me a thickness measurement. Look like 1/8" thick sheet steel, hard to bend.
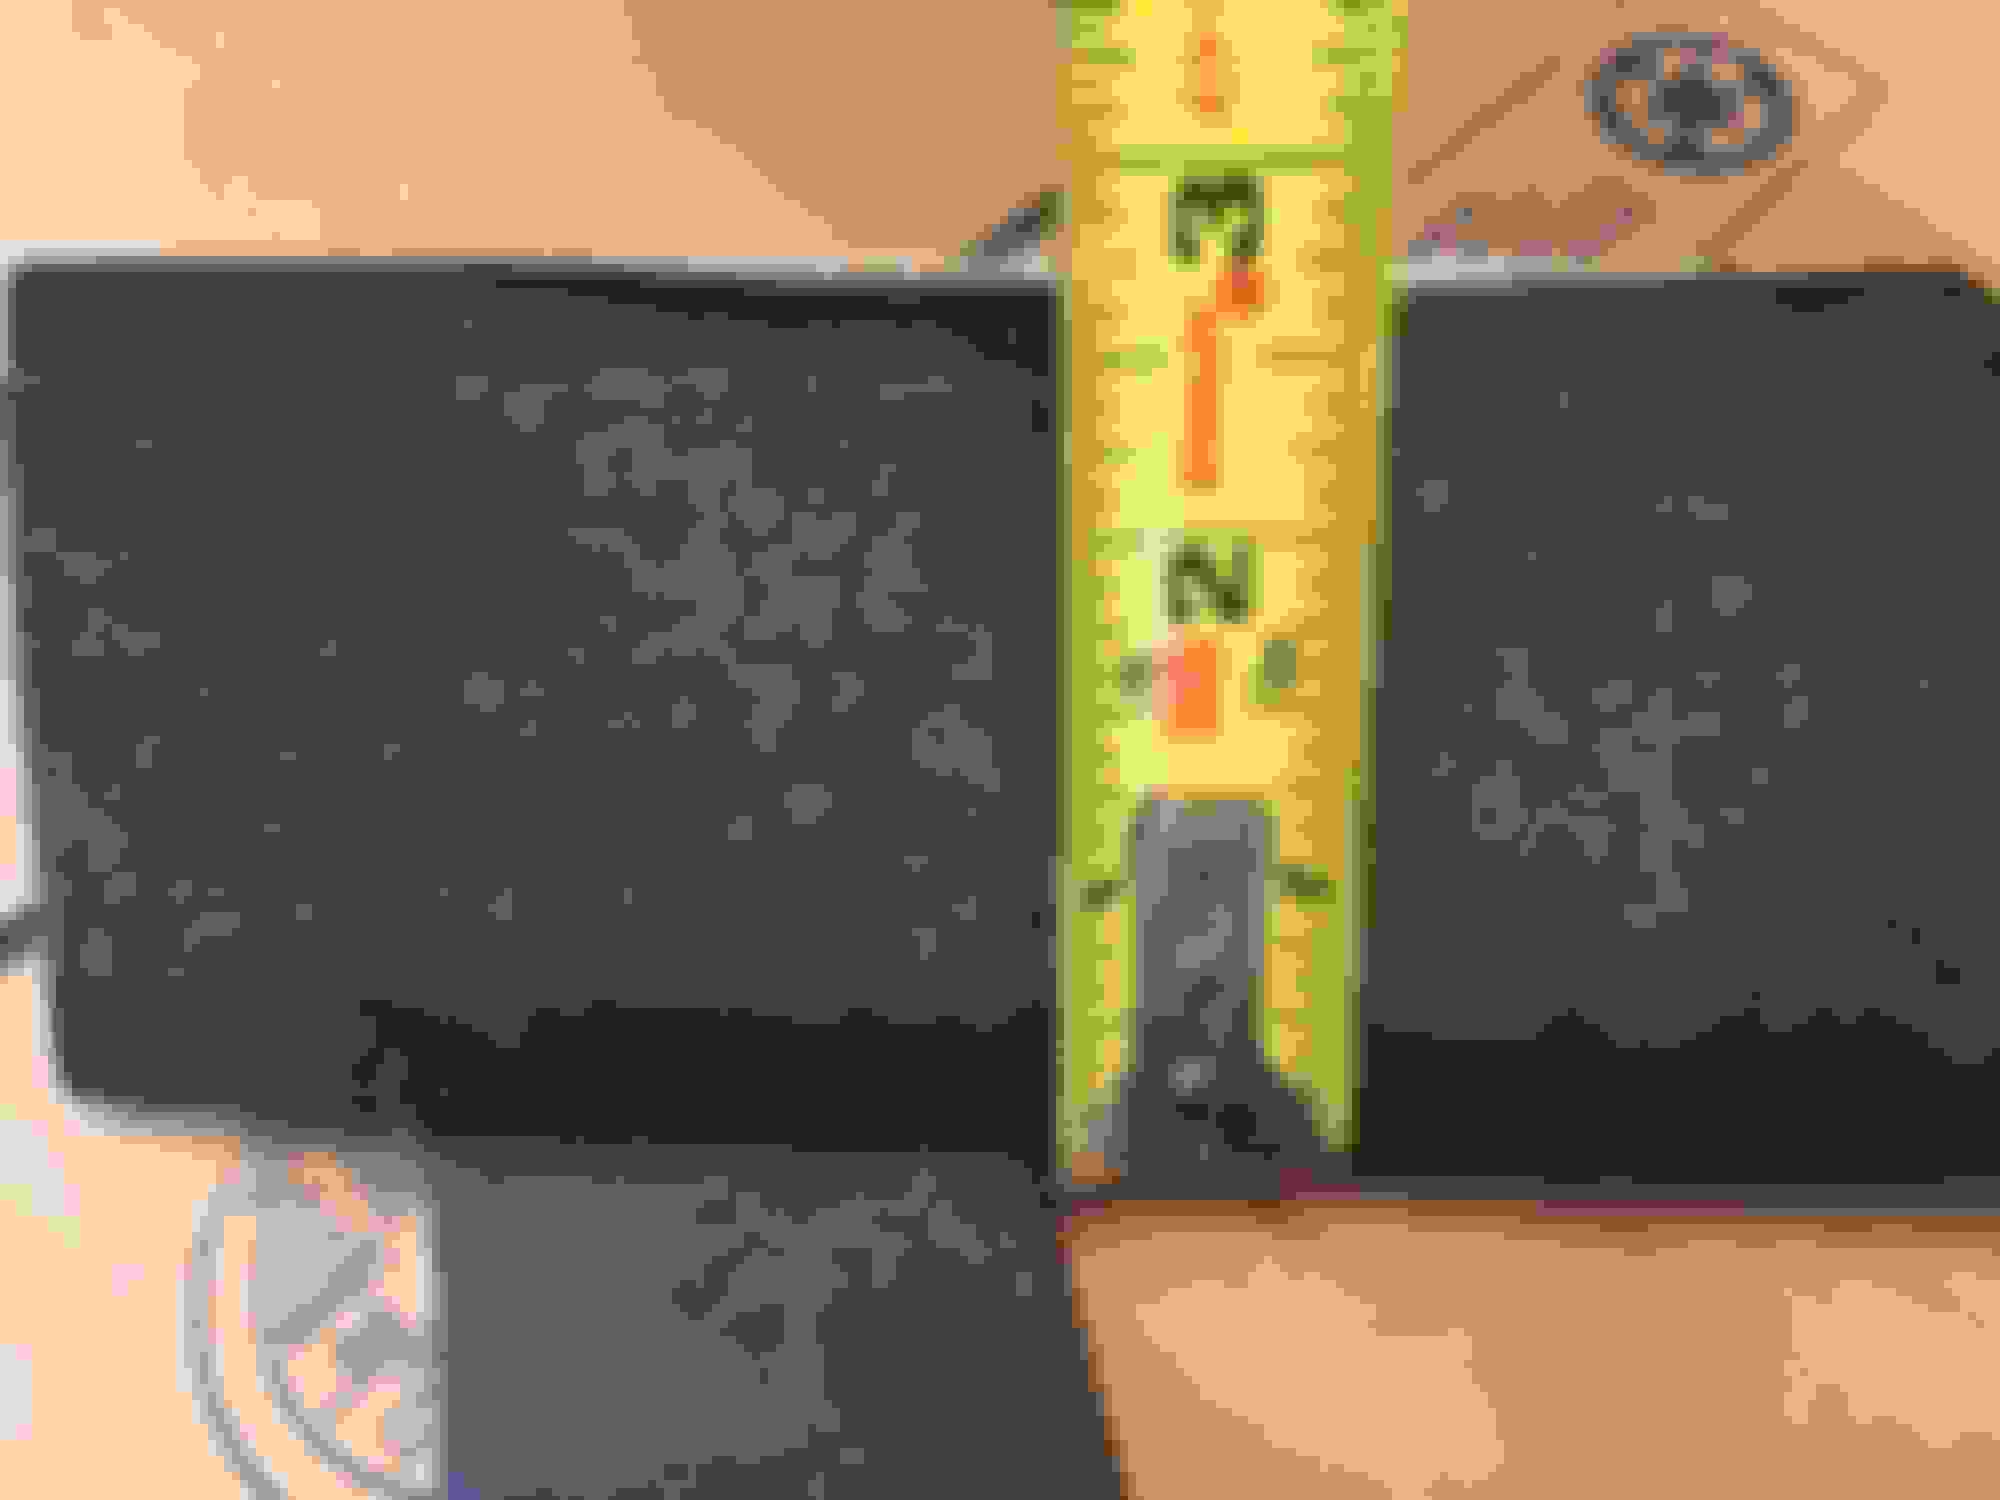
Since you are clearly better at photoshop than I am , could you add letters to the lines? That way I can give you A measurement, B measurement, etc.
I don't know why, but they used four different thicknesses of metal. The large bracket is actually 3/16" (7 gauge), the short C in the back is 9/64" (10 gauge), the parts that bolt to the hood latch seem to be 1/8" (11 gauge), and the pedal itself is 5/64" (14 gauge).
Wife put her calipers to use for those. We subtracted some for the powdercoating to get those numbers.
Since you are clearly better at photoshop than I am , could you add letters to the lines? That way I can give you A measurement, B measurement, etc..
Here you go. Thanks for taking time to do this. Also let me know where the improvements can be made.
E1 is distance from center of one hole to the center of the other hole. Also tell me in F1 how large the hole is while you are in there. 8)
Also can you take a photo of the side of this bracket. I'd like to better understand the angle.
A1 - 1.25"
A - 2 1/4" (flat part is just under 2")
B1 - 2 1/2"
B2 - 1 1/2"
B3 - 1 3/4"
B - 7"
C - 2 1/8"
D - 2 1/8"
E - 3/4"
E1 - 2"
F - 3/4"
F1 - 3/4"
G - 3"
H - 1 3/4"
i - 1 1/2"
J - 3 1/2"
That bracket is a compound angle as you apparently suspect. Not sure how to even describe it. Will work on a pic.
F and F1 should not be the same. F1 should be the diameter of the hole. F should be the plate that has the hole and should be larger than F1. Don't forget about K. Just checking. Thanks for the measurements!
Thank you GAFIT for the pics and measurements. That bracket is a lot beefier then I had thought.
Welcome! It is a well made piece. I wouldn't be posting dimensions and details if it were still available from Zeta. At this point, it's just a community service to provide details.
We have the zeta hood deflector also and, 10 years later, it's still a good piece as well.
I'm in for one if it's reasonable in price. I'm hoping the pedal doesn't take that much needed space. My seat is to the back all the way as it is now, and that's without a dead pedal.
BTW, I'd go with a thinner metal if I was building this. Something some might consider "flimsy".
As a engineer who works on sheet metal parts, I'm thinking we could reduce it from 5 parts welded together to 2 parts (maybe 3 worst case). This would keep costs down. We should be able to get these made for about $50 even after a nice high quality powder coat.
Last edited by skiboarder119; 04-24-2018 at 03:41 PM.
The thickness is a bit beyond what i expected for "sheet metal". Definitely thicker than what my local sheet metal folding jigs normally do. This is more like a thick sheet of metal in some places. I think we can still make it work. Again folks this is a summer project.
 03-22-2018, 05:42 PM