
DIY: 11 Pin Door Mirror (Folding, Heated, Smart Key)


For LEFT Mirror:
Downward Movement:
Yellow/White - (Green) : (Polarity Negative)
Yellow/Red - (Orange) : (Polarity Positive)
Upward Movement:
Yellow/White - (Green) : (Polarity Positive)
Yellow/Red - (Orange) : (Polarity Negative)
For RIGHT Mirror:
Downward Movement:
Yellow/White - (Green) : (Polarity Negative)
Blue - (Light Green) : (Polarity Positive)
Upward Movement:
Yellow/White - (Green) : (Polarity Positive)
Blue - (Light Green) : (Polarity Negative)
hope this help you
Downward Movement:
Yellow/White - (Green) : (Polarity Negative)
Yellow/Red - (Orange) : (Polarity Positive)
Upward Movement:
Yellow/White - (Green) : (Polarity Positive)
Yellow/Red - (Orange) : (Polarity Negative)
For RIGHT Mirror:
Downward Movement:
Yellow/White - (Green) : (Polarity Negative)
Blue - (Light Green) : (Polarity Positive)
Upward Movement:
Yellow/White - (Green) : (Polarity Positive)
Blue - (Light Green) : (Polarity Negative)
hope this help you
I should be able to figure it out now.
Below is a part of the install instructions for the kptech auto-tilt unit.
5. BLUE � MIRROR �UP� OUTPUT
a. Find and cut the �mirror up� wire. This wire will read 12vdc when the
power mirror is being motored up. Once cut, connect the mirror side of
the cut wire to this Blue �Mirror Up Output� wire.
6. GREEN � MIRROR �UP� INPUT
a. Connect this wire to the switch side of the �mirror up� wire found and cut
in step 5.
7. BROWN � MIRROR �DOWN� OUTPUT
a. Find and cut the �mirror down� wire. This wire will read 12vdc when the
power mirror is being motored down. Once cut, connect the mirror side of
the cut wire to this Brown �Mirror Down Output� wire.
8. ORANGE � MIRROR �DOWN� INPUT
a. Connect this wire to the switch side of the �mirror down� wire found and
cut in step 7
Polarity Positive mean you apply +12v DC to that wire
Polarity Negative mean it is Ground at that moment
Now for the KPTech auto tilt,
if I am not mistaken, (well I read it a few days ago when you point me out so I had forget some of it again hahaha)...
it is a Timed Movement right?
and with Timed Movement instead of Position sensor,
the amount of tilt back to it's original position might not be enough to actually make your mirror goes back to it's original position after you move from Reserve to Drive several times...
so is the timed of tilt down and tilt up can be set independently of each other ?
I figure the tilt up movement would need just a little bit more time then the tilt down...
Yeah, it's timed. There's 2 switches to adjust for fine tuning. It will require fine tuning for the first few days or so, that's why I plan on mounting it somewhere accessible (hopefully by the fuse box). After that it should be ok.

TUNING:
In order for this module to work properly it must be tuned for the car that it has been
installed in. This is done by adjusting the small knobs on the top of the module. There
are two knobs total, the left knob is the �Down Timer� adjustment and the right knob is
the �Tweak Timer� adjustment.
NOTE: It is important to park the car in a manner that mirror adjustments can be made. For this
reason it recommended (but not necessary) to park the car on a curb.
Tuning starts with the Down Timer knob. Turn the Down Timer knob all the way to the
clock wise position and adjust the Tweak Timer knob to 50% of its travel.
As you turn the Down Timer knob in the counter-clockwise position you will add time to
the down stroke of the mirror. Slowly increase this value, testing it after each adjustment.
Once the mirror tilts down the require amount the Down Timer tuning is complete. The
Down Timer is fully adjustable between 0 and ~4 seconds.
4
NOTE: It may be necessary to reposition the mirror to its normal position occasionally during this
tuning step.
Next, the Tweak Timer must be tuned. While the Tweak Timer is set to 50% the mirror
will travel up the exact same amount of time that it traveled down. In most cases, this
will cause the mirror to not return to its exact original position. The Tweak Timer allows
for the mirror to travel up either shorter or longer then it traveled down. As the knob is
adjusted in the counter-clockwise position it will add up to ~1 total second to the up
travel time. As the knob is adjusted toward the clockwise position it will subtract up to
~1 total second of travel time.
Tilt the mirror 2-3 times and observe the position where the mirror returns. If it finishes
lower then it started turn the knob slightly counter-clockwise. If it finishes higher then it
started at turn the knob slightly clockwise and retest.
Tuning this system is critical to the overall accuracy of the module. If not tuned properly
it may be necessary to readjust the mirror after every tilting cycle. If tuned properly it
may still be necessary to slightly adjust the mirror, but not before a minimum of 10 tilting
cycles.
Please note that this is strictly a time based tilting system and it may be required to retune
the Down Timer if the mirror is adjusted to a new start position. This module is best
suited for a �one driver� car where mirror adjustments are kept to a minimum. Once set,
the Tweak Timer shouldn�t need anymore adjustment unless the mirror motor is replaced
or the mirror motor starts to wear out.
Quick Questions..
1.For the switch, the terminals 4 and 9, one goes to earth and the other one goes to +12V lt green, where would be the closest way to connect these to, to get light on the switch...
Gauge connector or ?
2. Could be that the fit switch having those 4 and 9 pin connectors, doesn't produce light because of lack of LED inside? otherwise why would those pins be there and no have any light?
3. For the heated mirrors the electrical diagram mentions a couple of black going to ground, Left is G502 and Right is G501, where are those locations, or ground anywhere would be okay?
Thanks in advance....

2. you need to buy the CR-V switch which had LED light inside the switch, the Fit switch do NOT have any light
3. Any ground directly to the body is good.
Did Open the Switch
There is no led, as you said in the FIT one, even if there is pins for light, but at least the inside of the button is white which let the lighting to be seen outside the switch...
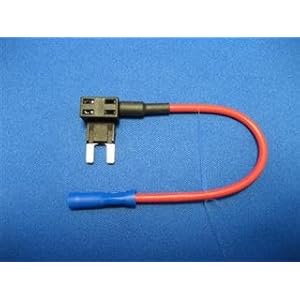
I used a Neo Wedge Bulb as seen in the pic
And i got my Amber lighting, so my switch is ready....
yey!

Last edited by camivill; Nov 8, 2013 at 11:07 AM.
so the different is just a bulb inside

Why did Honda want to save cost on a bulb is beyond me ...
Thanks for the information,
by the way,
since now you have install the switch,
do you know whether I had to run another wire for the lighting into the switch,
if yes, which wire?
I just want to make sure cause some people said I need to run another wire to the switch for the lighting, other say no need to do that.
My fit doesn't have cables on the pins 4 or 9, the test I did was using a 12V battery on those pins... the harness I got from Taiwan for the DIY of Auto Climate Control also doesn't have those connections, only a Pin 7 and 8 ( Yellow, Gray) for folding mirrors ( thats what i am gonna use).... So i need to know where to get 12V otherwise no light i think...
Also I checked the Fixing Manual - electrical wiring and there is no Bulb mentioned in the switch as bulbs are detailed in any switch inside the console or any button....
If you get to find a source for that i would appreciate.... i was thinking on using the Gauge plug or the switch that controls the height of the front lights....
and this:
The 2 items above were the cheapest and best value one I could find so far at amazon.
here are the pictures:
then the best way is to connect this to parking light circuit fuse.
so whenever the parking light is on, your back lighting will be on too.
another way is to connect to the cigarette lighter fuse,
this way, your back lighting will be on, once your car is ON but independent of the light switch.


Alpina, how was your experience with Amayama? It seems their OEM parts pricing is really good.
New switch doesnt light up with current wiring, therefore will have to add something up.
I also opened the original switch:

As you can see the bottom quality is different, if you see the octagon, the center is black, the mirror imagine outside the switch is painted... even if you work magic to put a led in there it wont be seen.
The Upgraded switch with mirror folding, feels better, softer than the original one, plus inside plastic is white, allowing the light from inside to show outside...
I also opened the original switch:
As you can see the bottom quality is different, if you see the octagon, the center is black, the mirror imagine outside the switch is painted... even if you work magic to put a led in there it wont be seen.
The Upgraded switch with mirror folding, feels better, softer than the original one, plus inside plastic is white, allowing the light from inside to show outside...
Because my new CR-V switch is lighted, and all I did was a basic swap... no added pins/wires. And it dims with the dimmer switch.


and I guess the Shanghai wiring must be similar to the JDM Fit wiring,
because JDM Fit also need new wiring to light up the switch.
It is surprising that once in a while, USDM version have better wiring
Got the folding units for both sides

Once the unit for the automatic folding function arrives, gonna get busy....
What worries me, is that the Automatic Unit, that connects between the switch and the Harness may not give power to my DIY lighting...
Lets see....
Once the unit for the automatic folding function arrives, gonna get busy....
What worries me, is that the Automatic Unit, that connects between the switch and the Harness may not give power to my DIY lighting...
Lets see....
Last edited by camivill; Nov 8, 2013 at 11:13 AM.
Member
Joined: Apr 2012
Posts: 1,779
From: edmonton, canada

Man you're really killing it with your DIY skills. Where are you buying your new parts from? Seems like you have a source that's cheaper than lings, which would be awesome for all of us over here.
Also are you guys saying that the stock ge8 switch can accept a bulb? Is honda really that cheap to have the wiring there but no bulb?!
Also are you guys saying that the stock ge8 switch can accept a bulb? Is honda really that cheap to have the wiring there but no bulb?!
I am just following you guys!
Do living in China has it's advantages.... I hope i am not killing anything...
... by the way all this starter after doing your DIY AutoClimate control, so basically is your fault hehehehe
yey!
Do living in China has it's advantages.... I hope i am not killing anything...
... by the way all this starter after doing your DIY AutoClimate control, so basically is your fault hehehehe
yey!
The GE8 JDM folding mirror switch it seems. The stock OEM one that we (NA) get with our cars is lit anyway, but the stock JDM one isn't. The JDM CR-V (folding) mirror switch is lit.
Member
Joined: Apr 2012
Posts: 1,779
From: edmonton, canada
Oh yeah you're right fitstir, it's really dim so I guess I never noticed lol.
I had to torrent parallels for Mac and run windows Xp in it. He ESM only works in windows xp unfortunately. But once your get it working it's very much worth it.
I will definitely check that site out, drooling thinking about what they have.
I had to torrent parallels for Mac and run windows Xp in it. He ESM only works in windows xp unfortunately. But once your get it working it's very much worth it.
I will definitely check that site out, drooling thinking about what they have.
Yeah, it dims with the dimmer switch.
I gotta get the ESM to work on my MacBook... it works ok on my desktop PC though.
Yeah..... me too.
It's a keyless entry where once you approach the car it automatically unlocks for you, and then you push button to start, no actual key technically. Like what's available on higher end cars like Lexus, etc.
It would at the very least require dealer programming of ECU, if not new smart key ECU. Should be quite difficult to say the least. They do sell after marker systems that are very similar with mixed reviews.
I gotta get the ESM to work on my MacBook... it works ok on my desktop PC though.
It would at the very least require dealer programming of ECU, if not new smart key ECU. Should be quite difficult to say the least. They do sell after marker systems that are very similar with mixed reviews.