
J's Racing Brake Master Cylinder + Kuo's Garage Strut Tower Bars + Goodridge


J's Racing Brake Master Cylinder + Kuo's Garage Strut Tower Bars + Goodridge
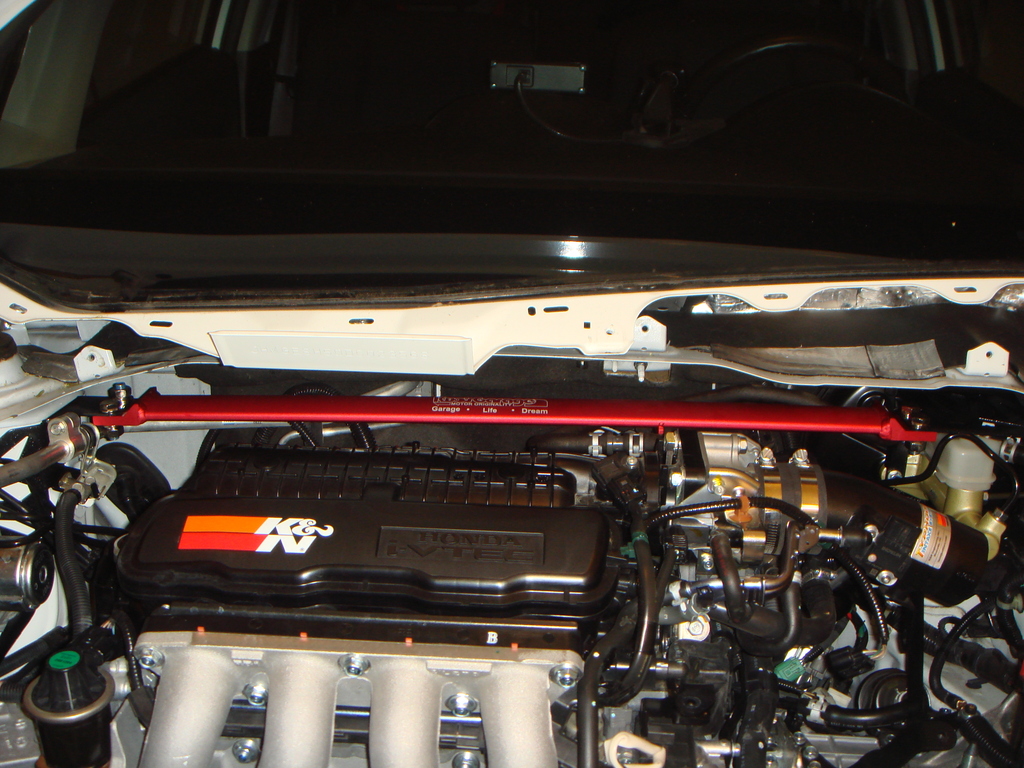
I had bought the Kuo's Garage Strut Tower Bar since... I think a year ago,
Never installed it because I don't want to take it out again when I upgrade
my brake MC,
well, now that I am going to install my J's Racing MC, then it is a good time
to install the Kuo's Garage Strut Tower Bar at the same time.
The Kuo's Garage Strut Tower Bar also function as Brake Master Cylinder
Stopper Bar !!!
I also take this opportunity to install the Goodridge Brake Lines
since I had to bleed the whole system anyway...
Ok, here are the steps and pictures:
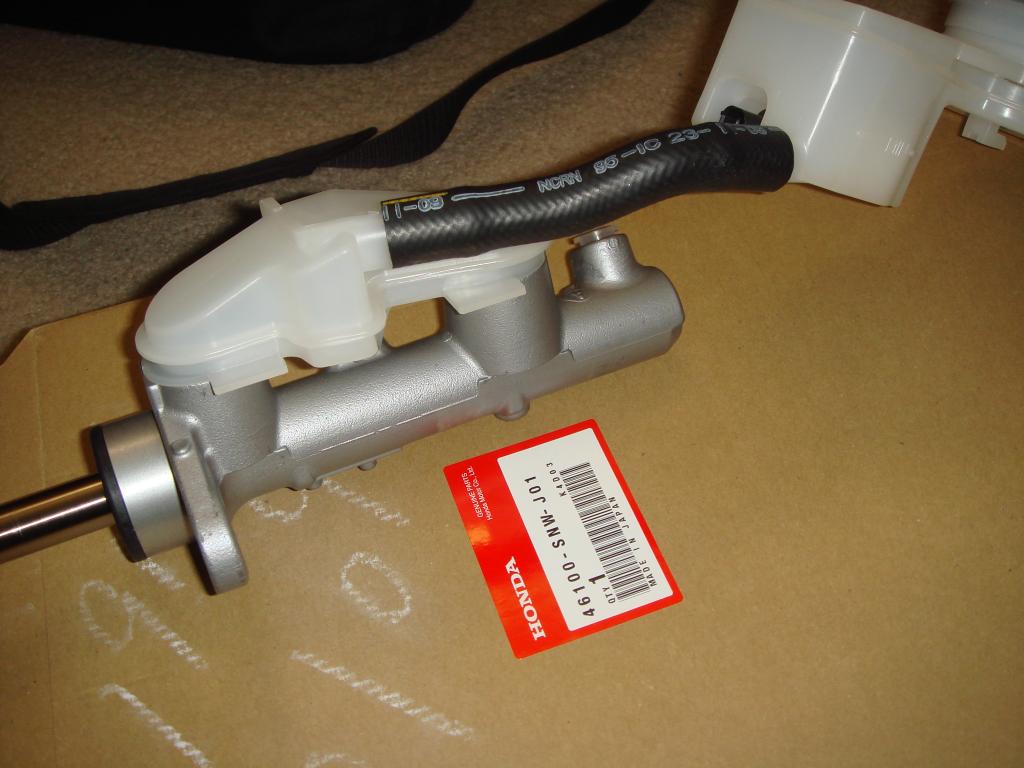
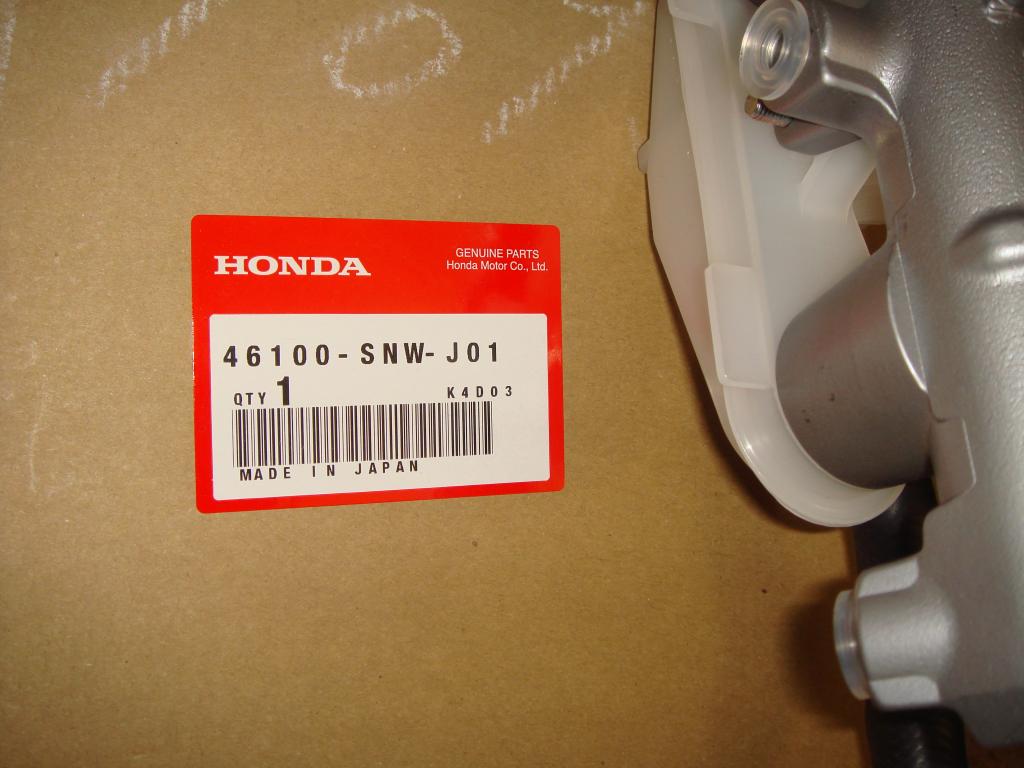
First Pictures when the J's Racing MC just arrived:

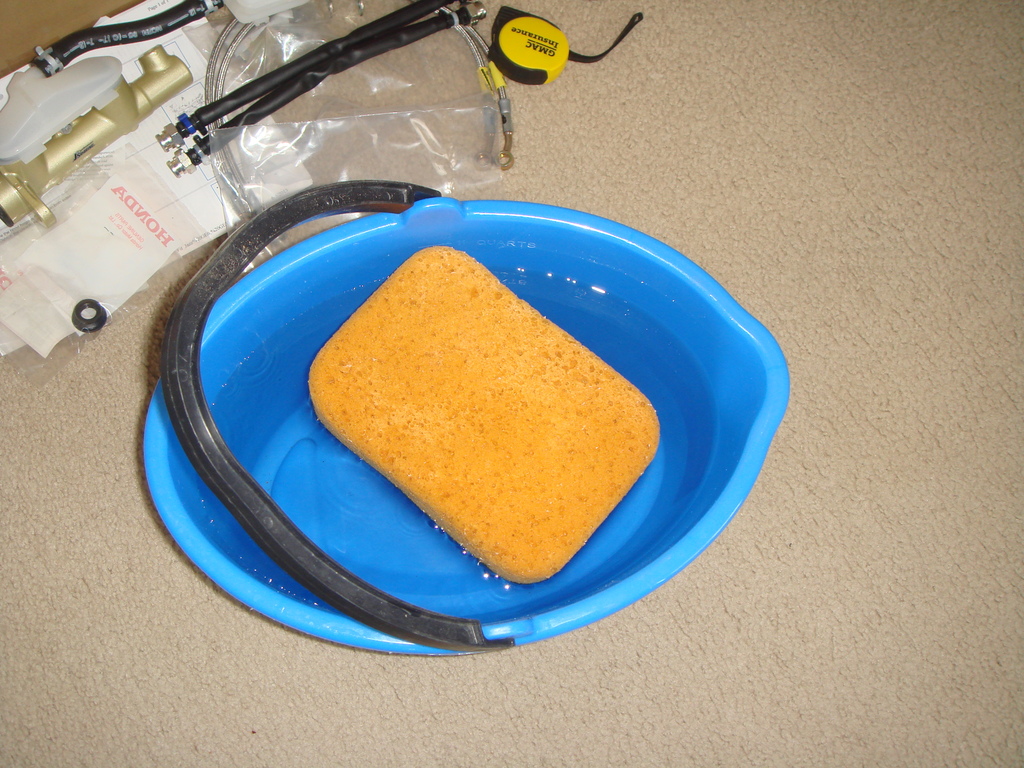
Preparation, One Bucket of water just in case I drop brake fluid on the paint finished of my car...
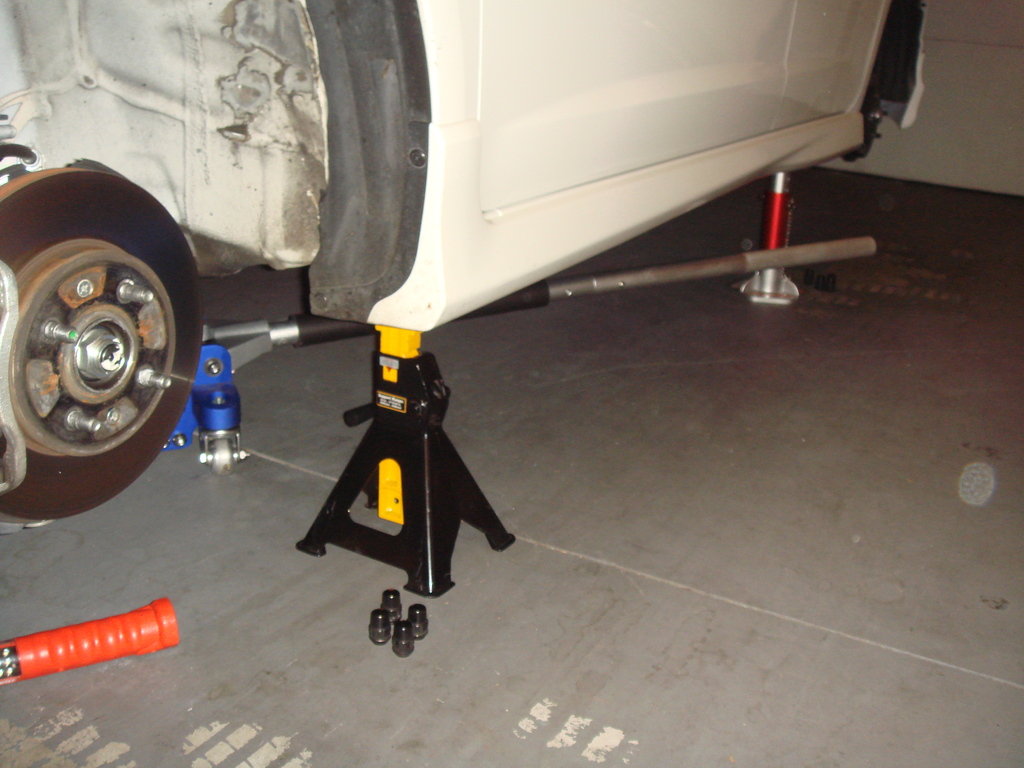
Jack Up four wheels on Jack Stand, Remove all four wheels (to bleed the brakes and change the brake lines)
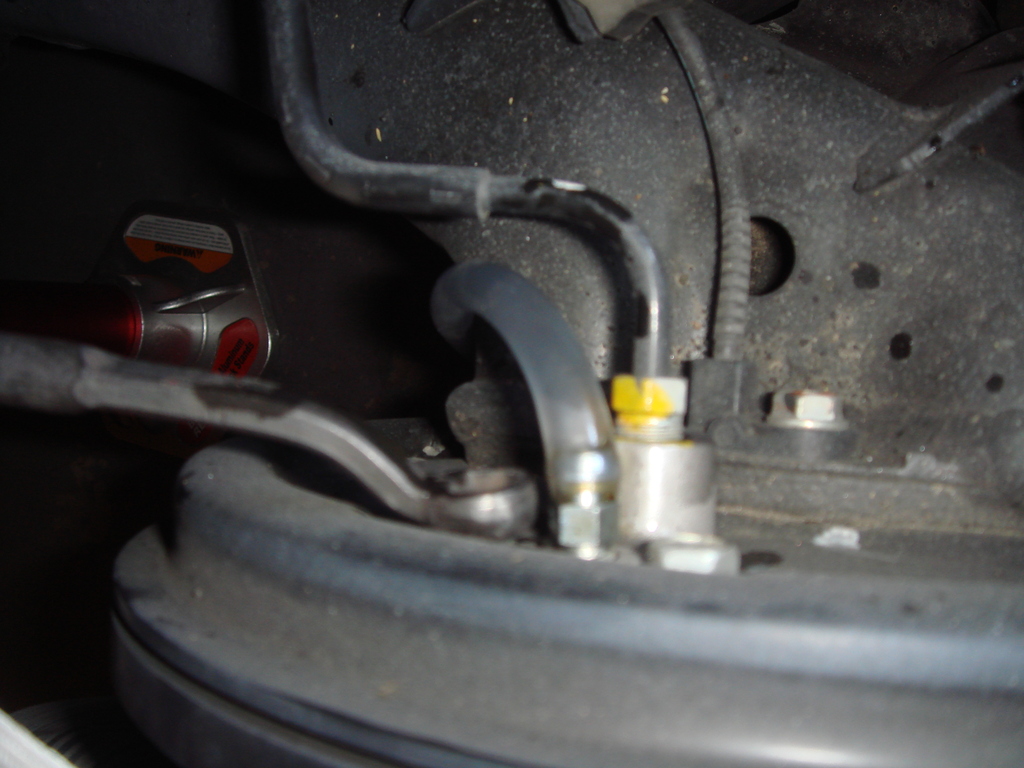
Bleed the brake starting with the Rear Left Drum Brakes:
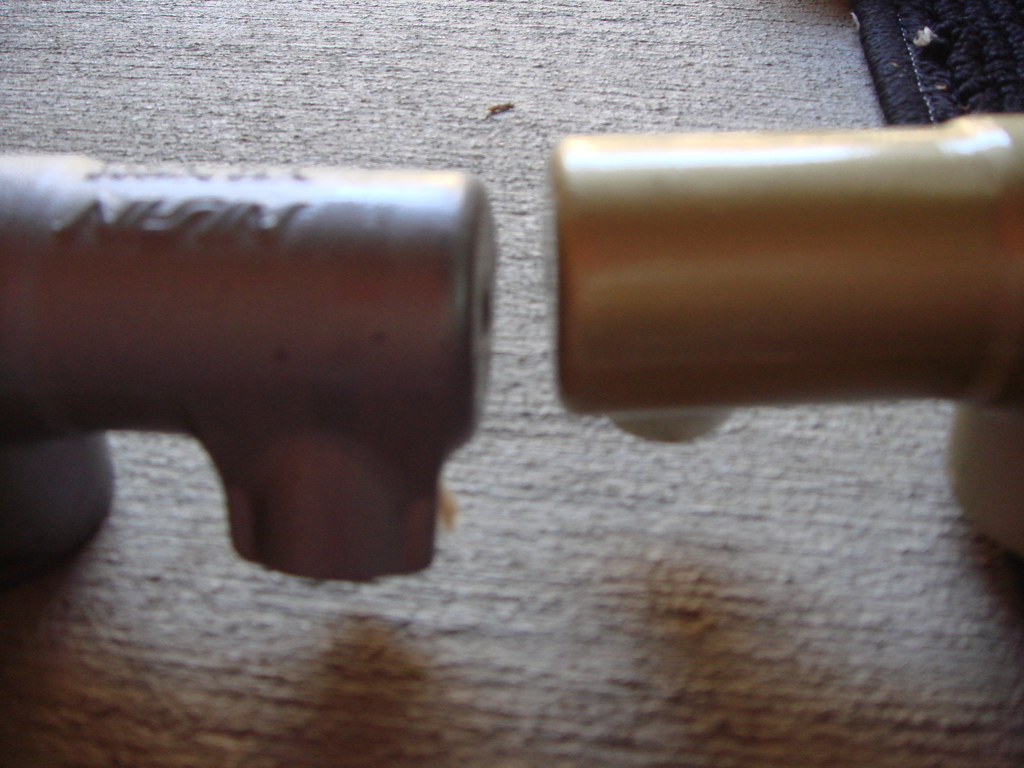
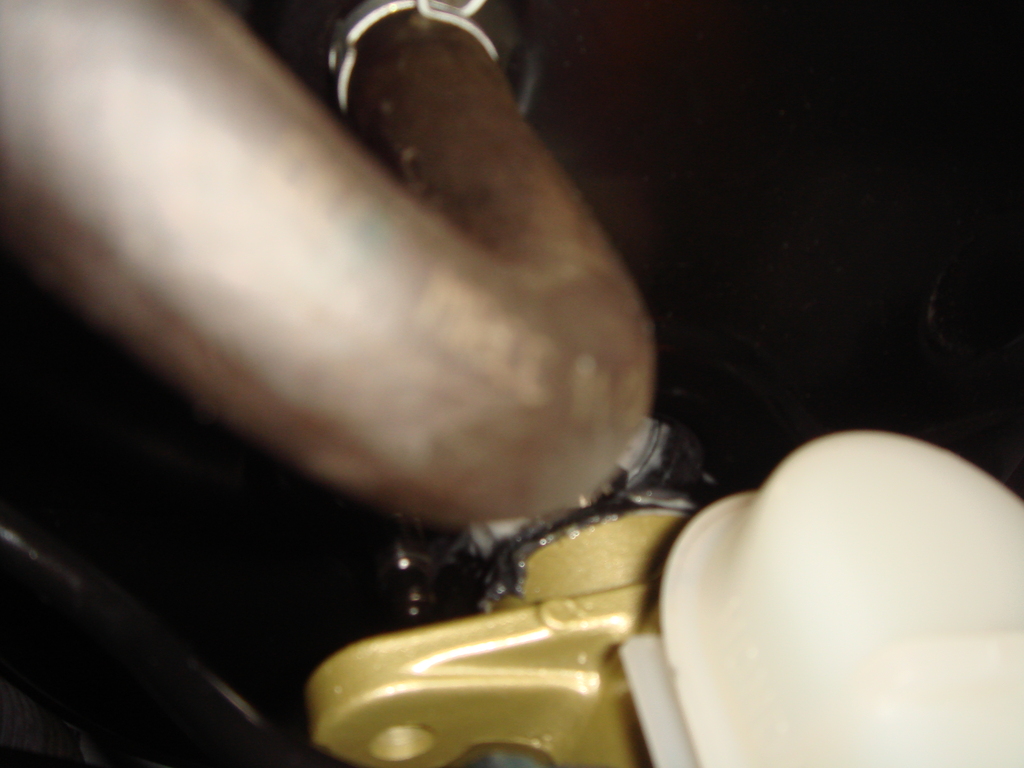
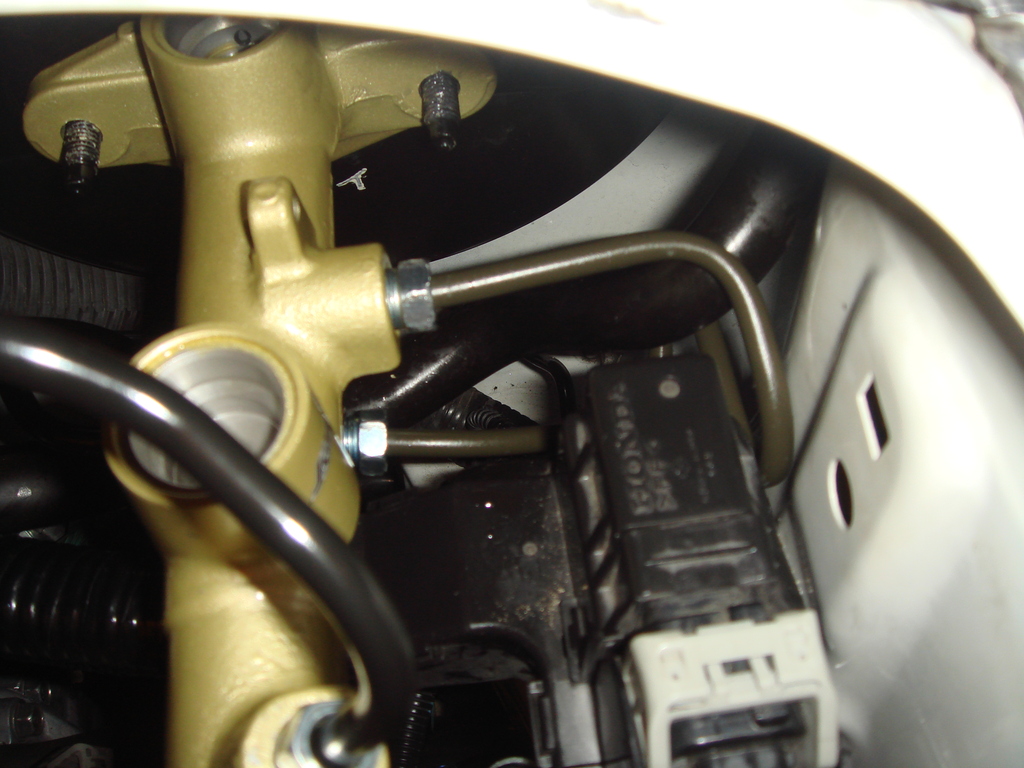
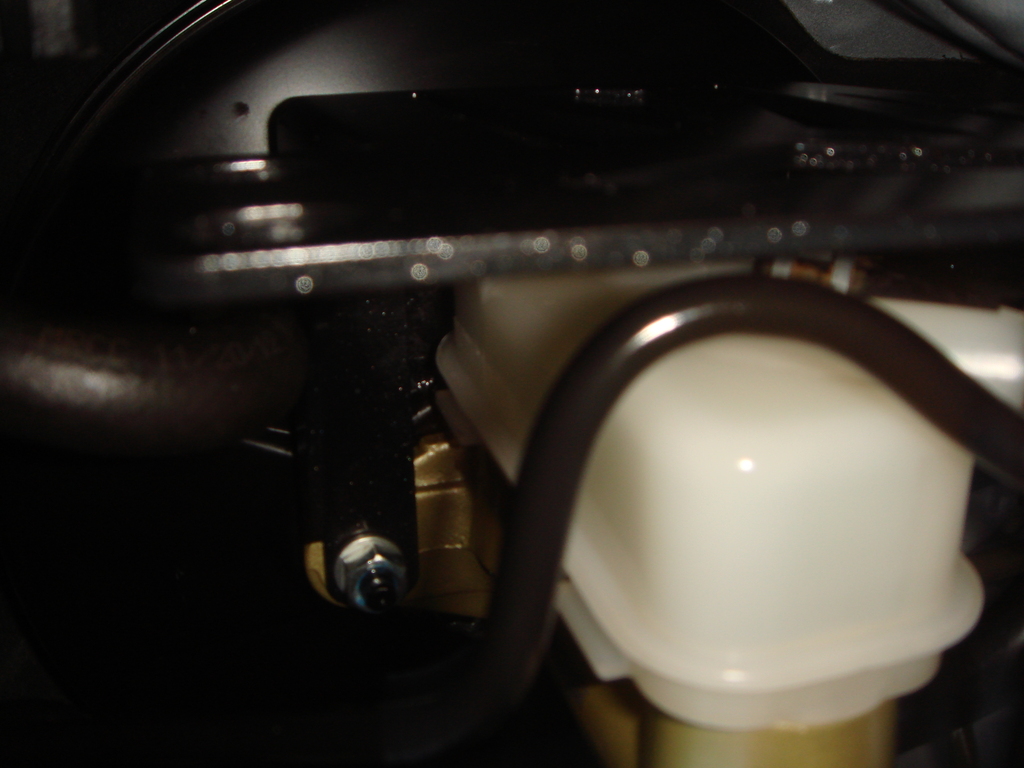
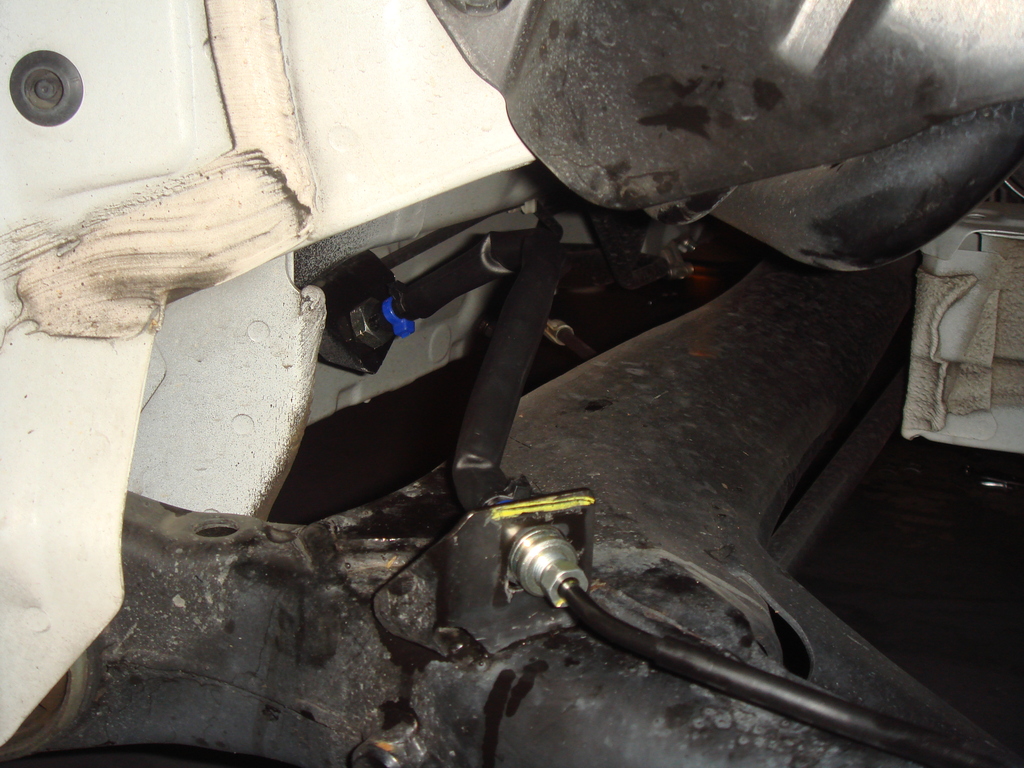
This is how the Stock Brake Master Cylinder connected to the Brake Lines:
Notice that J's Racing MC had different OUTLET PORT Orientation:

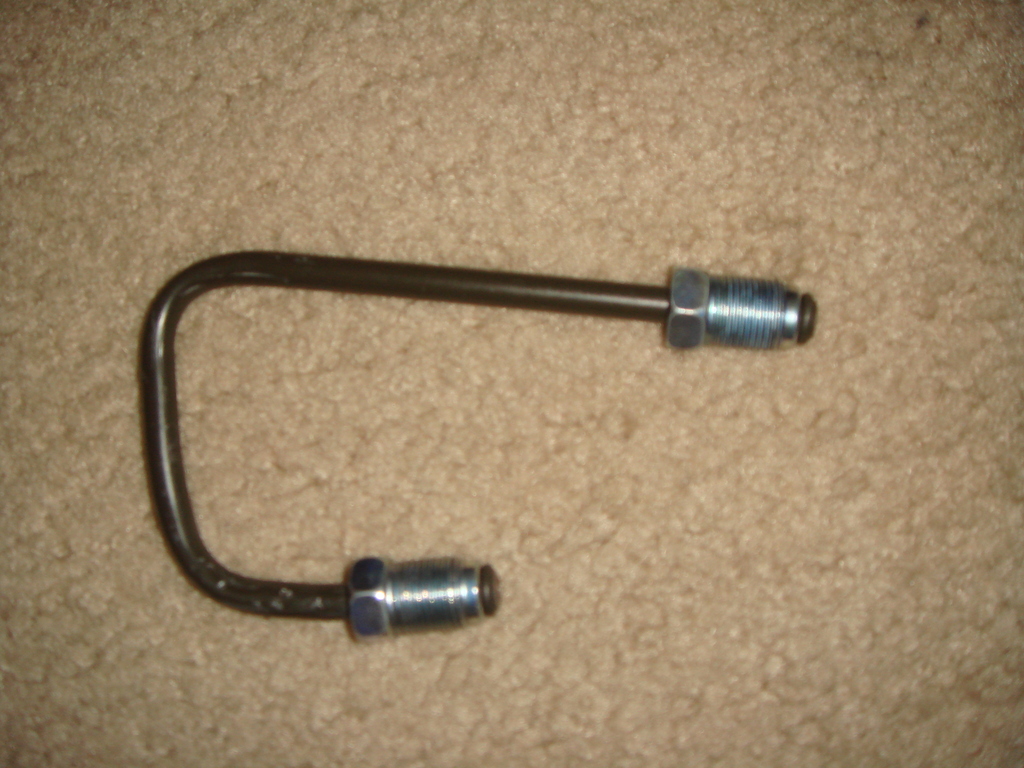
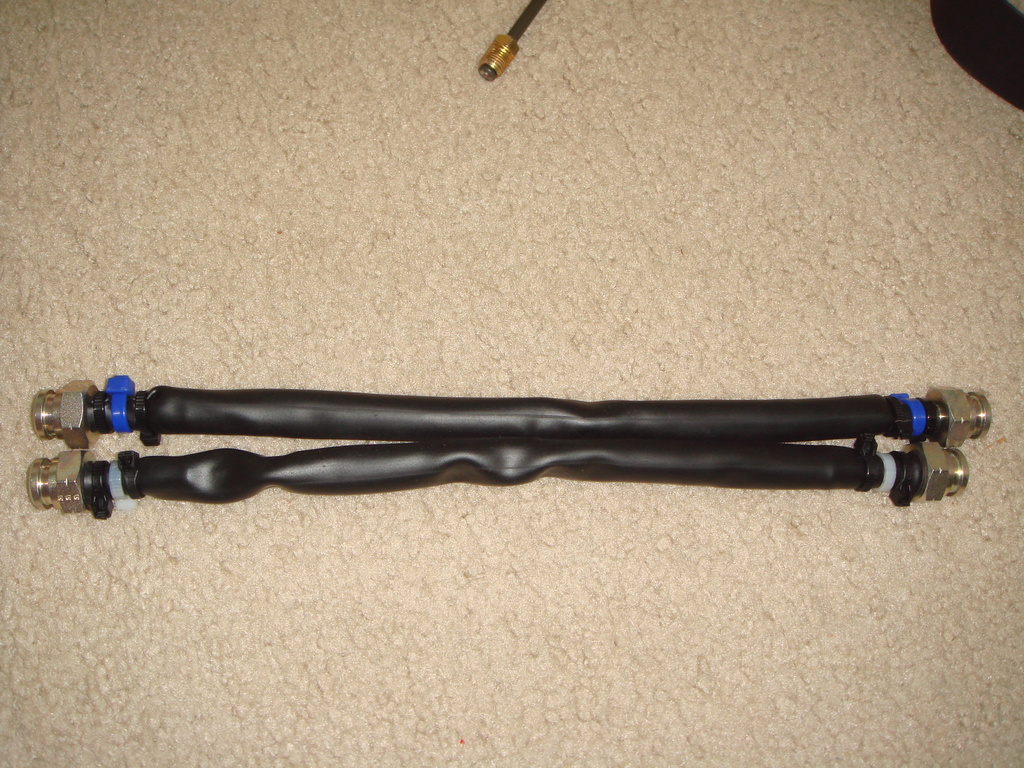
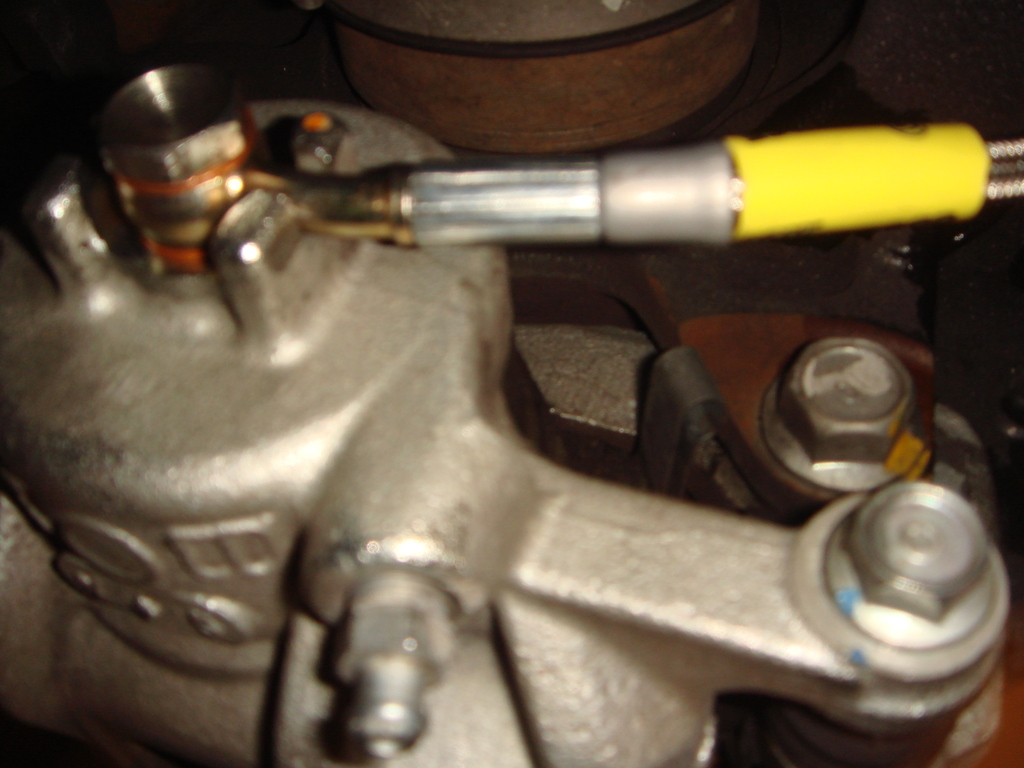
Using special tools, I bend the pre made brake lines...
The Pre made brake lines already had 2 end fitting in form of 12mm Bubble so I don't have to buy flare tools:
This is how my lines adapters look like to connect the second outlet port that had different orientation between
the stock and the J's MC, unfortunately, this lines adapters got kink when I bend it using my other tools,
so I had to discard the lines adapter below and make another one (lucky I had back up line adapters):
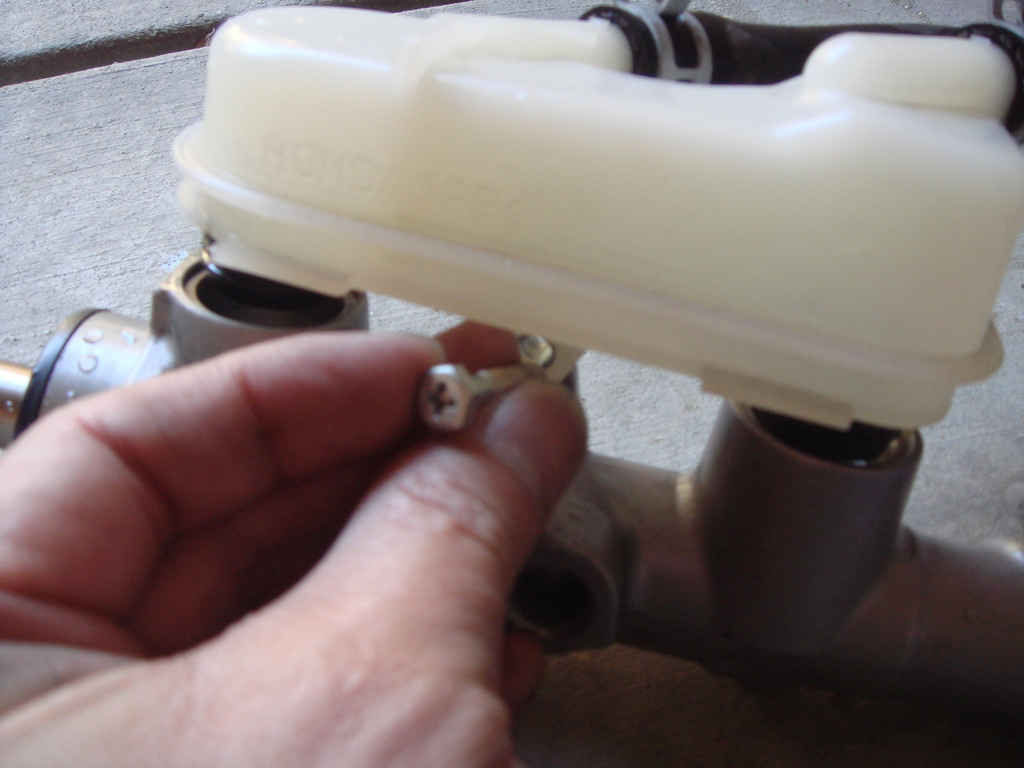
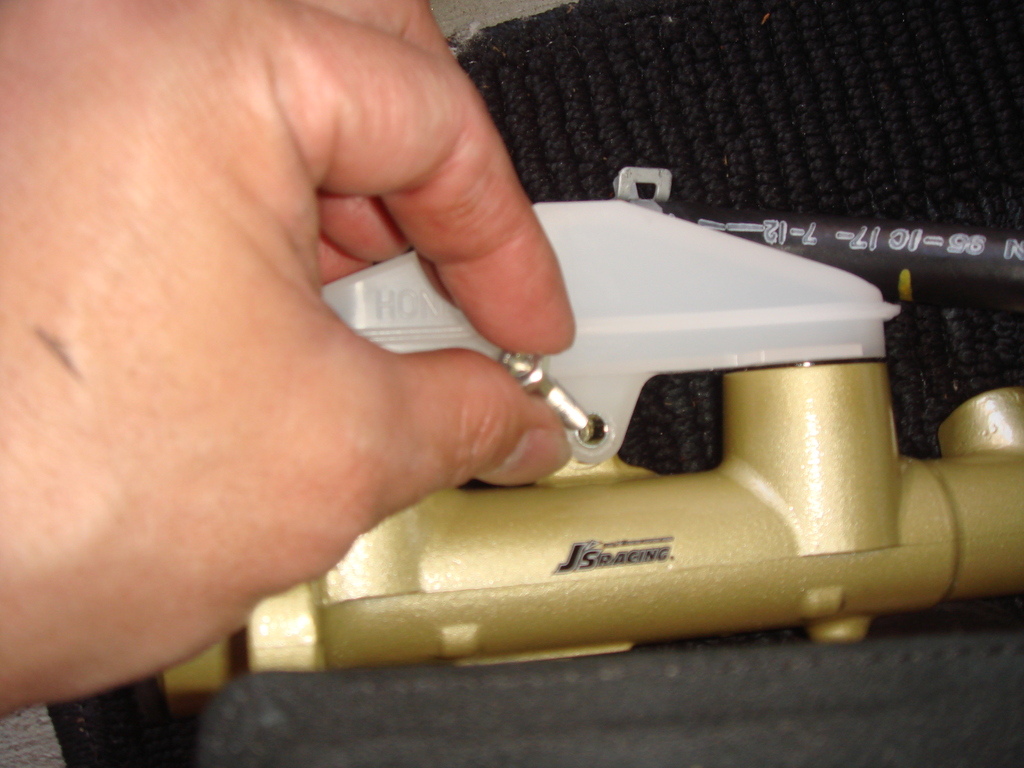
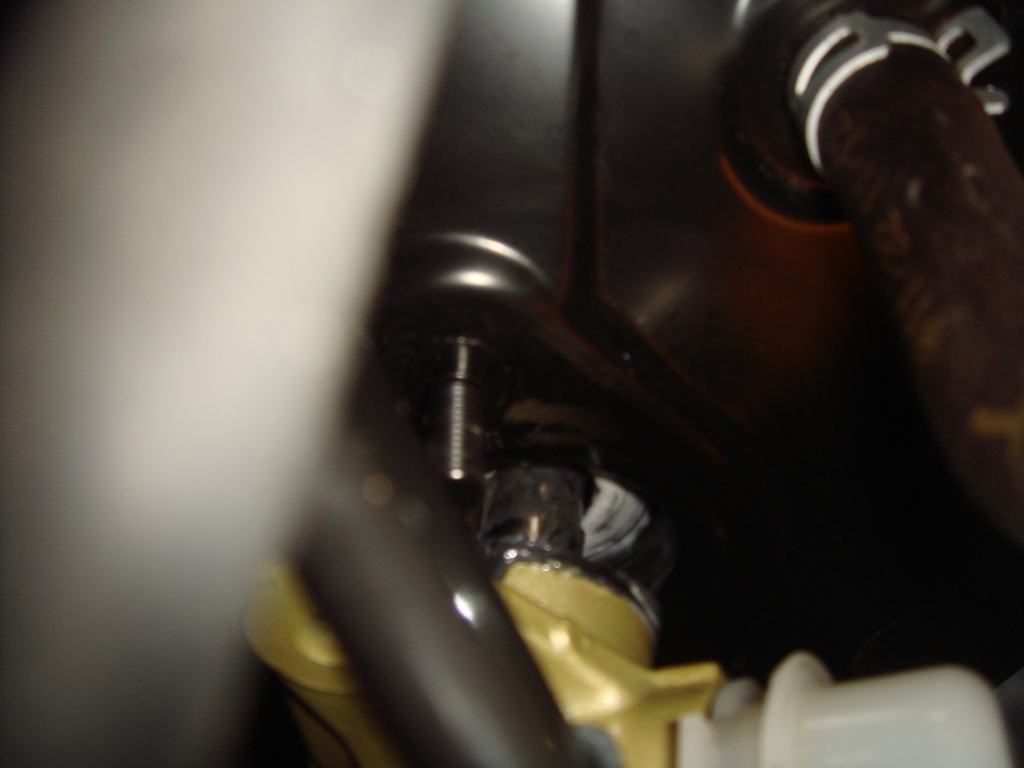
First step, unscrew the plastic fluid reservoir, and then remove 2 screw that hold the stock MC to the brake booster:
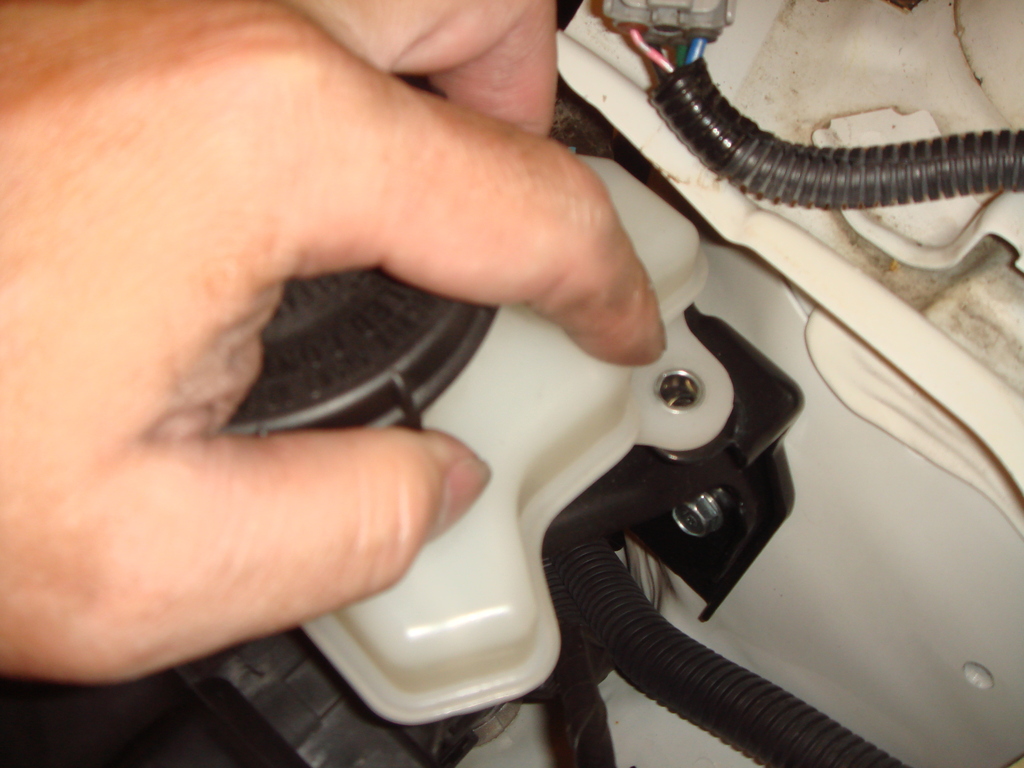
After the stock MC were removed,
then removed the stock plastic reservoir from the stock MC, (just removed one screw and pull up)
because we need to reuse this stock plastic reservoir.
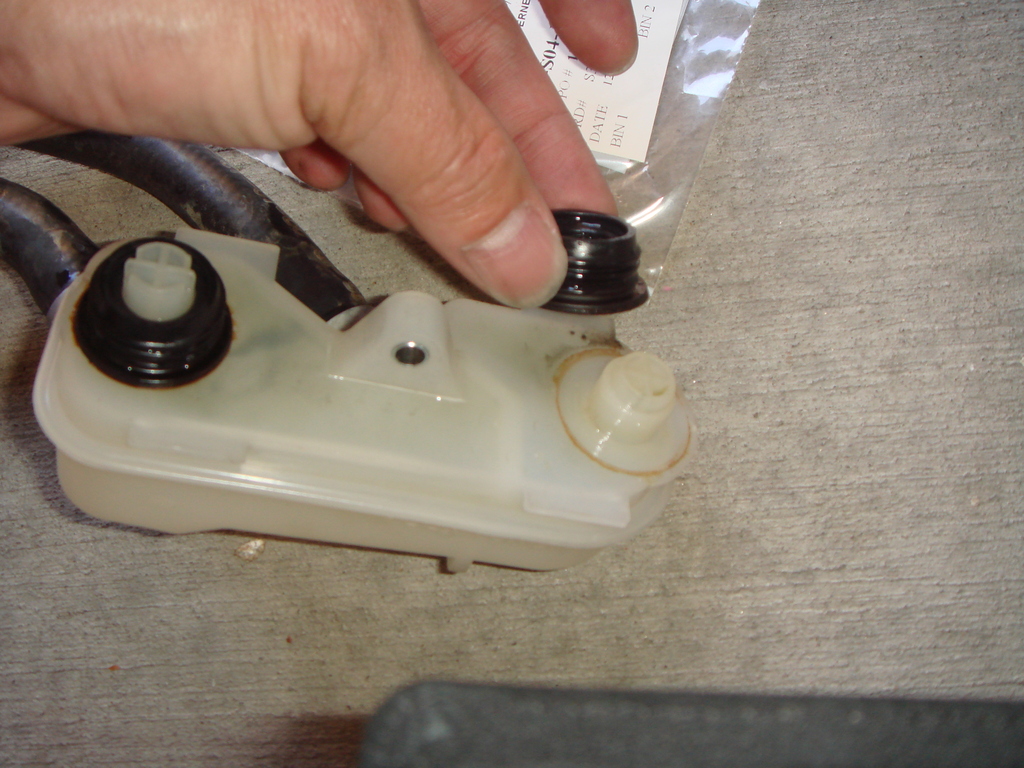
the plastic reservoir that came with J's MC are meant for JDM Right Hand Drive car,
so it won't fit our USDM car:
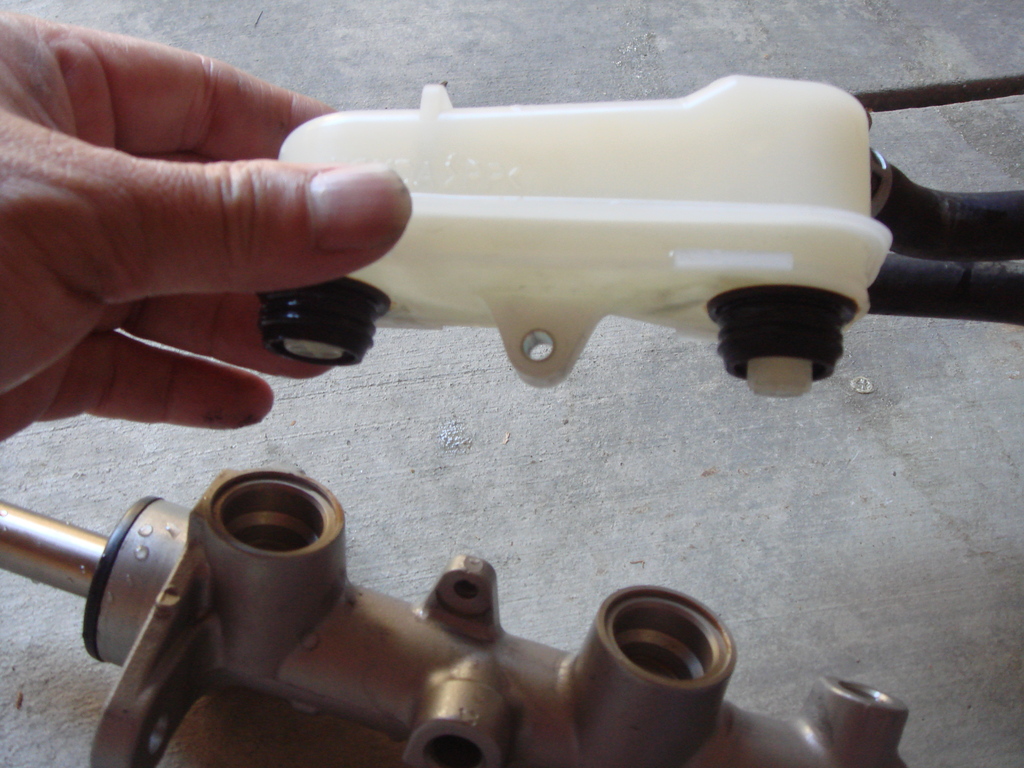
Don't forget to use a NEW seal:
Install it on the J's Racing MC:

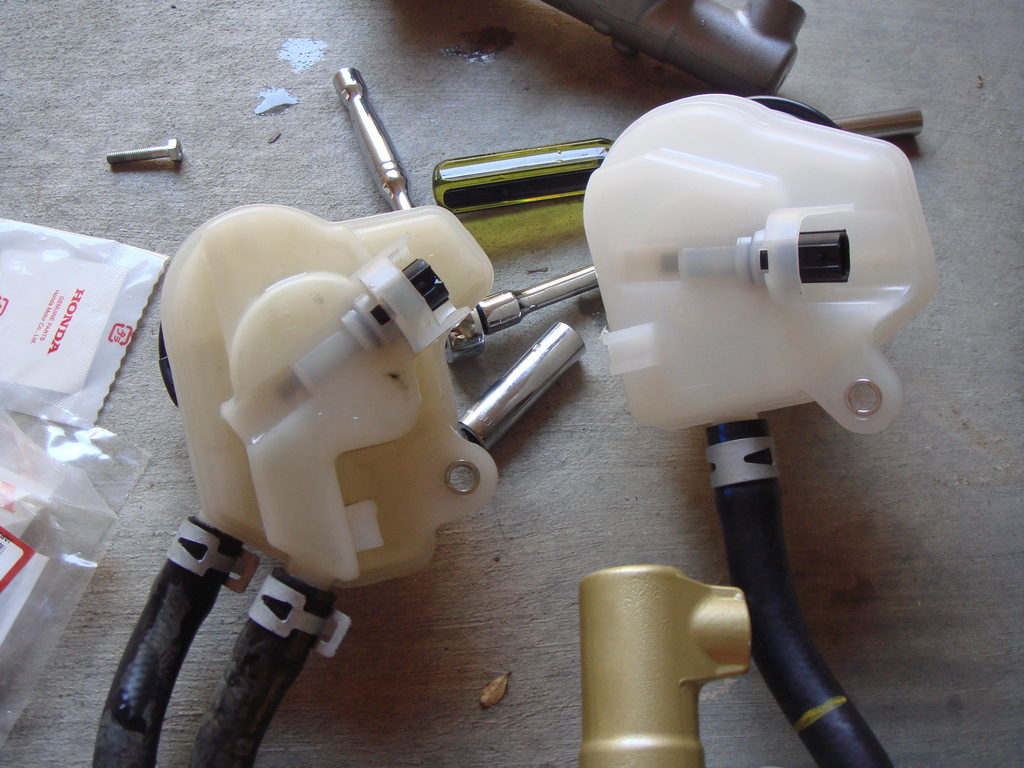
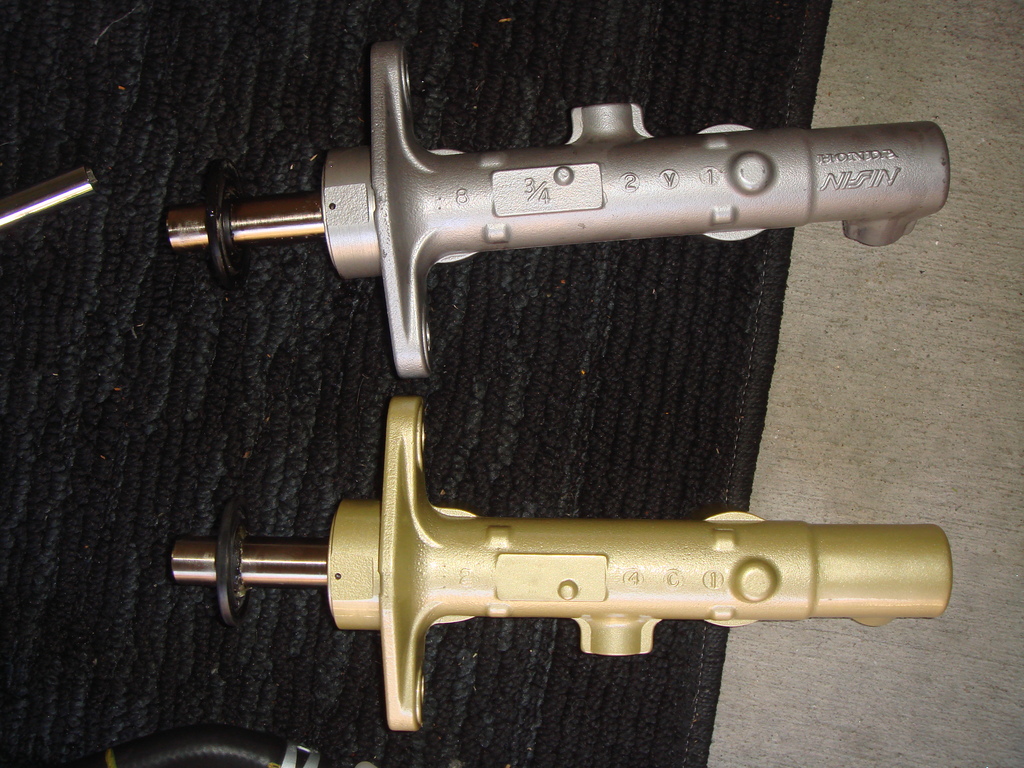
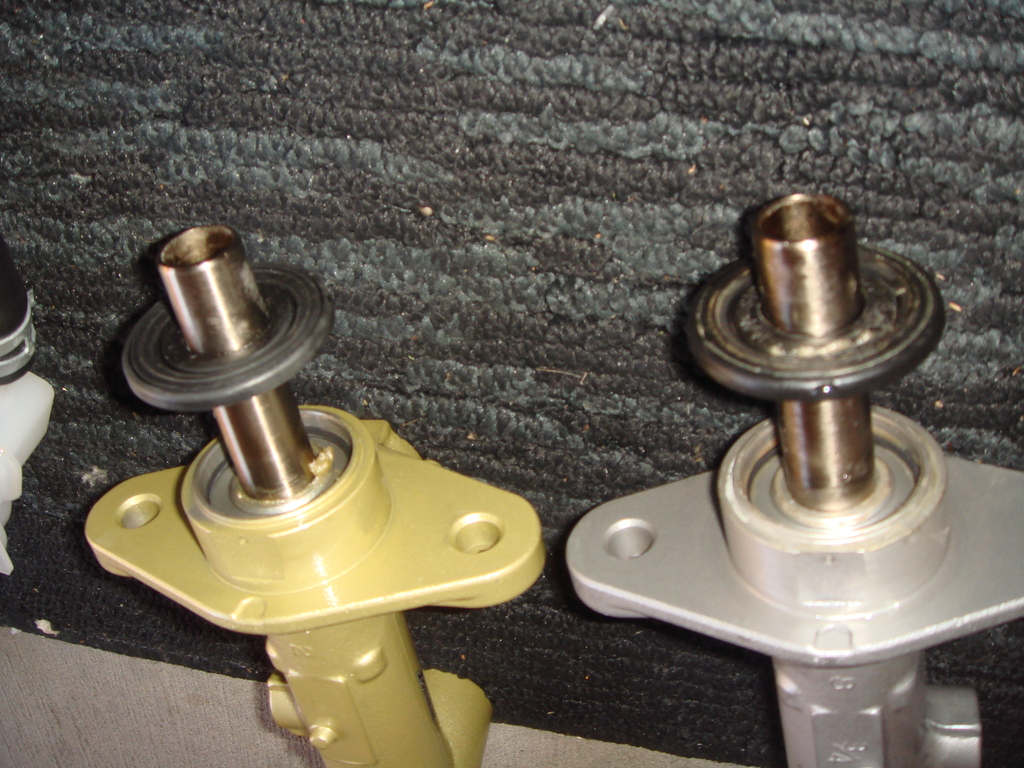
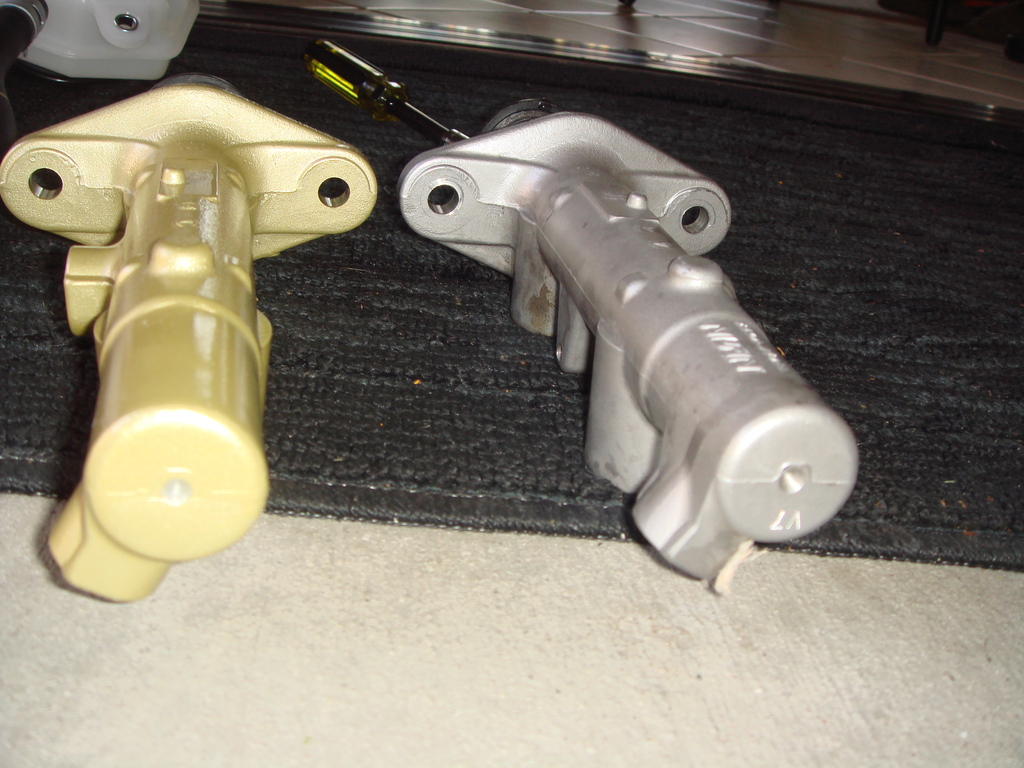
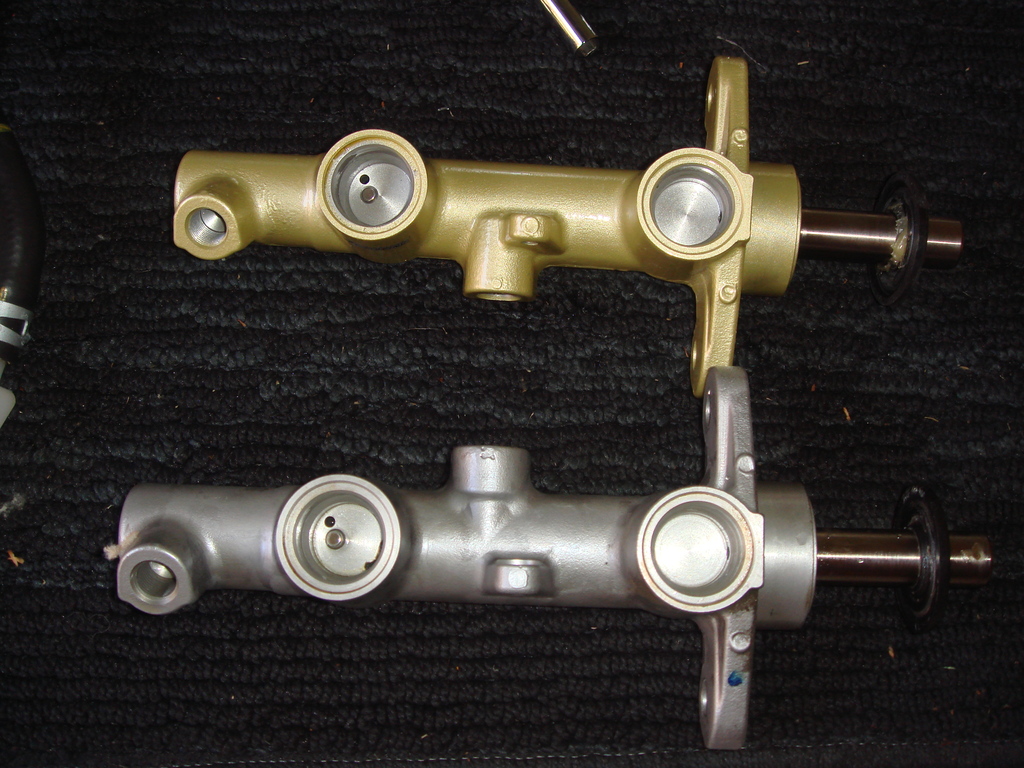
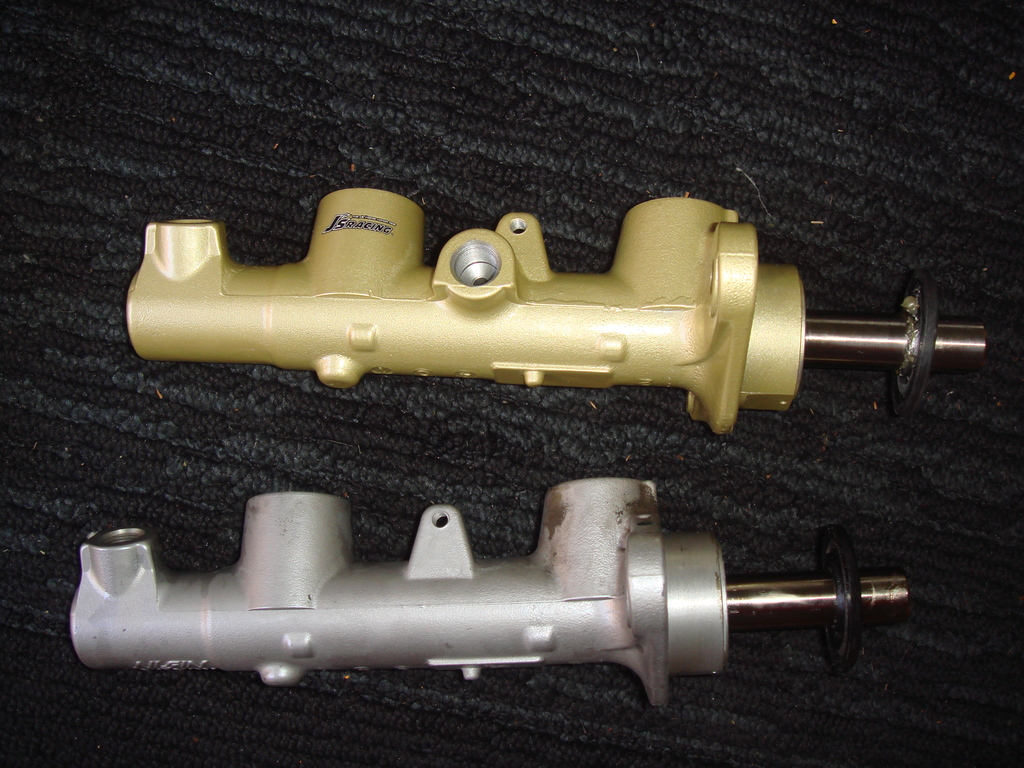
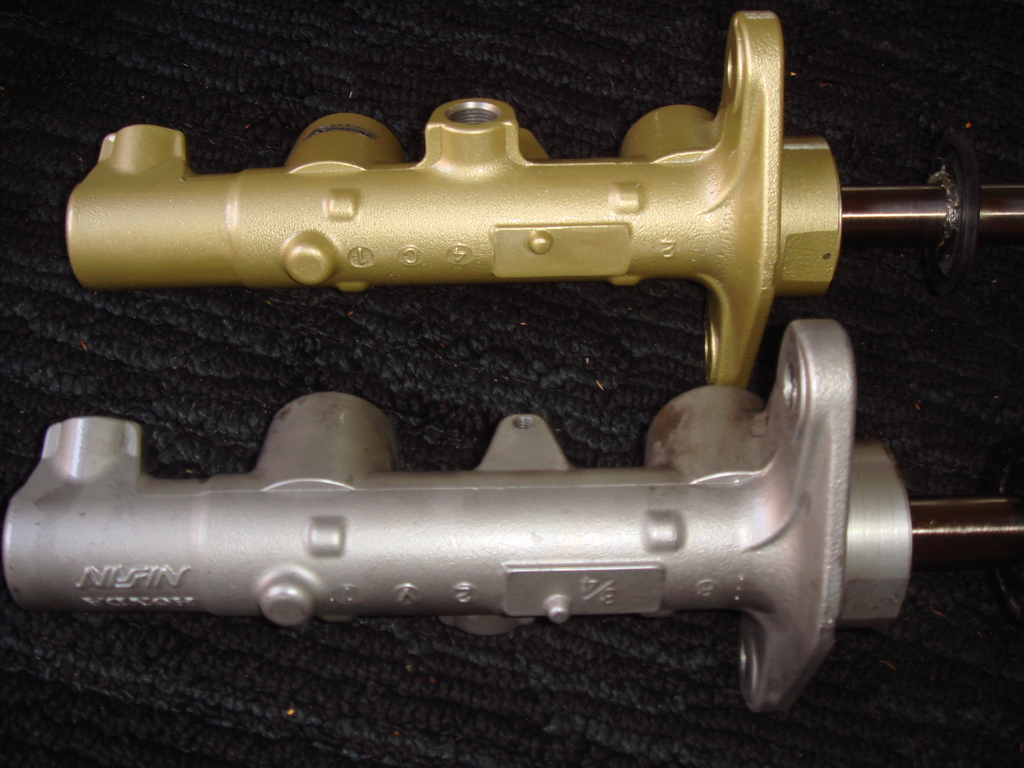
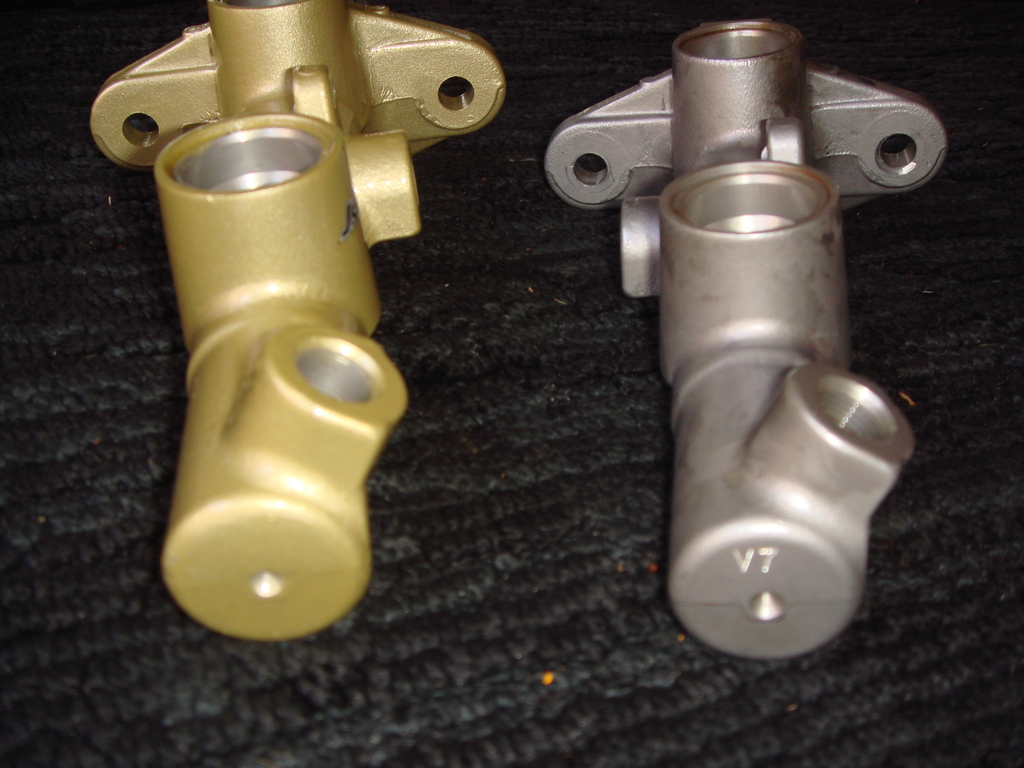
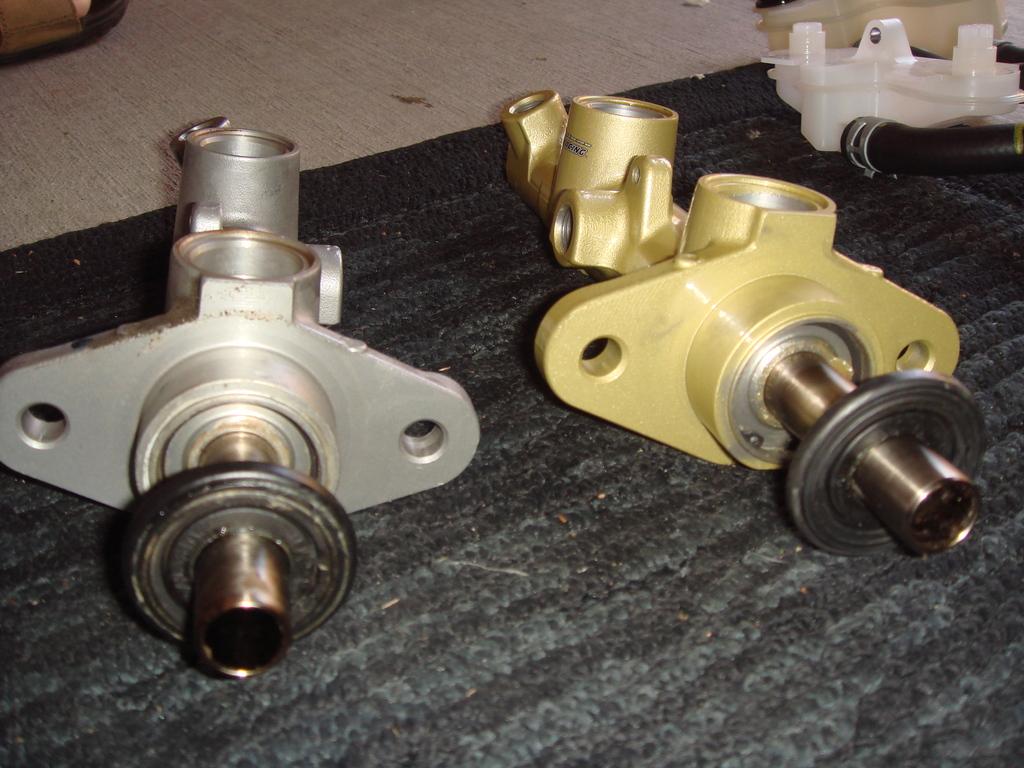
Now, below is just the side by side comparison between stock MC and J's Racing MC.
From outside they look IDENTICAL... the different is on stock MC, there is one dot that cast on different side
then J's, so unless I dismantled the piston inside the MC, I will not know the differences between the two...

To be continued...
Never installed it because I don't want to take it out again when I upgrade
my brake MC,
well, now that I am going to install my J's Racing MC, then it is a good time
to install the Kuo's Garage Strut Tower Bar at the same time.
The Kuo's Garage Strut Tower Bar also function as Brake Master Cylinder
Stopper Bar !!!
I also take this opportunity to install the Goodridge Brake Lines
since I had to bleed the whole system anyway...
Ok, here are the steps and pictures:
First Pictures when the J's Racing MC just arrived:
Preparation, One Bucket of water just in case I drop brake fluid on the paint finished of my car...
Jack Up four wheels on Jack Stand, Remove all four wheels (to bleed the brakes and change the brake lines)
Bleed the brake starting with the Rear Left Drum Brakes:
This is how the Stock Brake Master Cylinder connected to the Brake Lines:
Notice that J's Racing MC had different OUTLET PORT Orientation:
Using special tools, I bend the pre made brake lines...
The Pre made brake lines already had 2 end fitting in form of 12mm Bubble so I don't have to buy flare tools:
This is how my lines adapters look like to connect the second outlet port that had different orientation between
the stock and the J's MC, unfortunately, this lines adapters got kink when I bend it using my other tools,
so I had to discard the lines adapter below and make another one (lucky I had back up line adapters):
First step, unscrew the plastic fluid reservoir, and then remove 2 screw that hold the stock MC to the brake booster:
After the stock MC were removed,
then removed the stock plastic reservoir from the stock MC, (just removed one screw and pull up)
because we need to reuse this stock plastic reservoir.
the plastic reservoir that came with J's MC are meant for JDM Right Hand Drive car,
so it won't fit our USDM car:
Don't forget to use a NEW seal:
Install it on the J's Racing MC:
Now, below is just the side by side comparison between stock MC and J's Racing MC.
From outside they look IDENTICAL... the different is on stock MC, there is one dot that cast on different side
then J's, so unless I dismantled the piston inside the MC, I will not know the differences between the two...
To be continued...
Last edited by BMW ALPINA; Apr 2, 2015 at 12:47 AM.
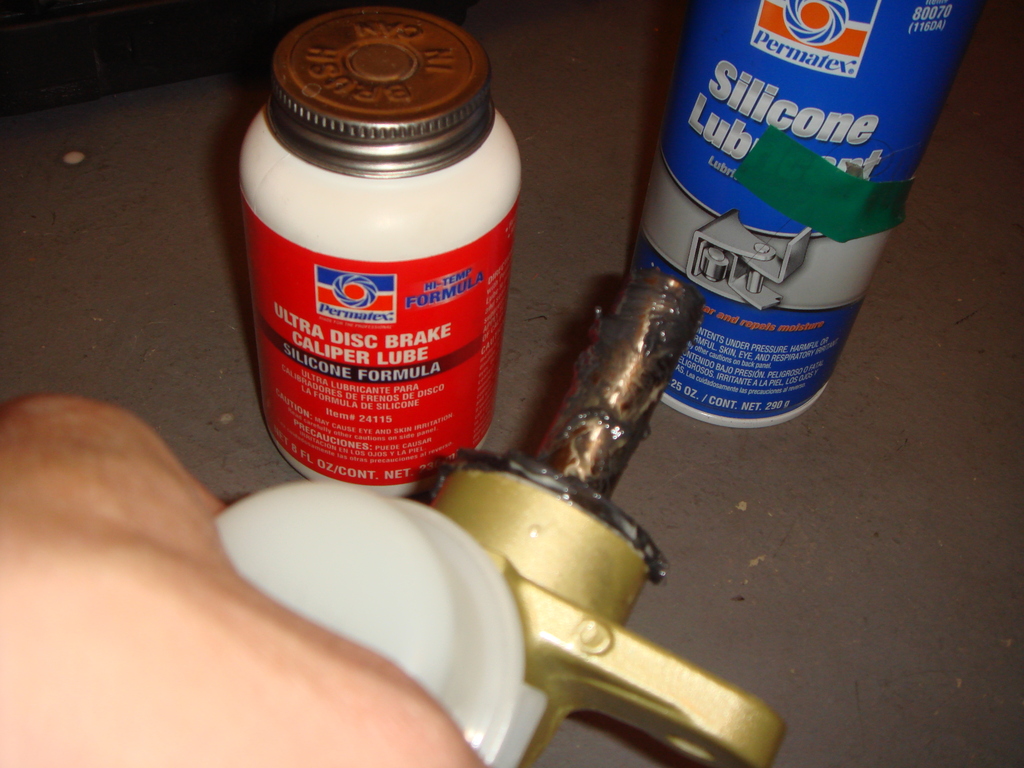
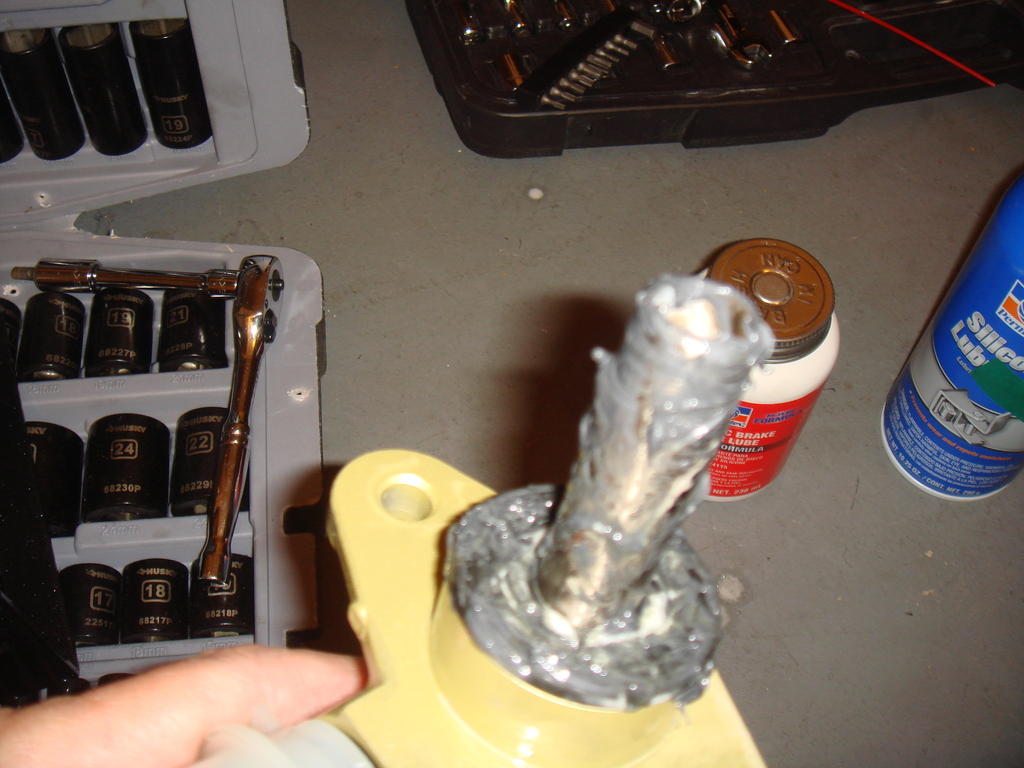
Honda Service Manual say that we should put Silicone Grease on the seals and the MC rods, so that is what I did 

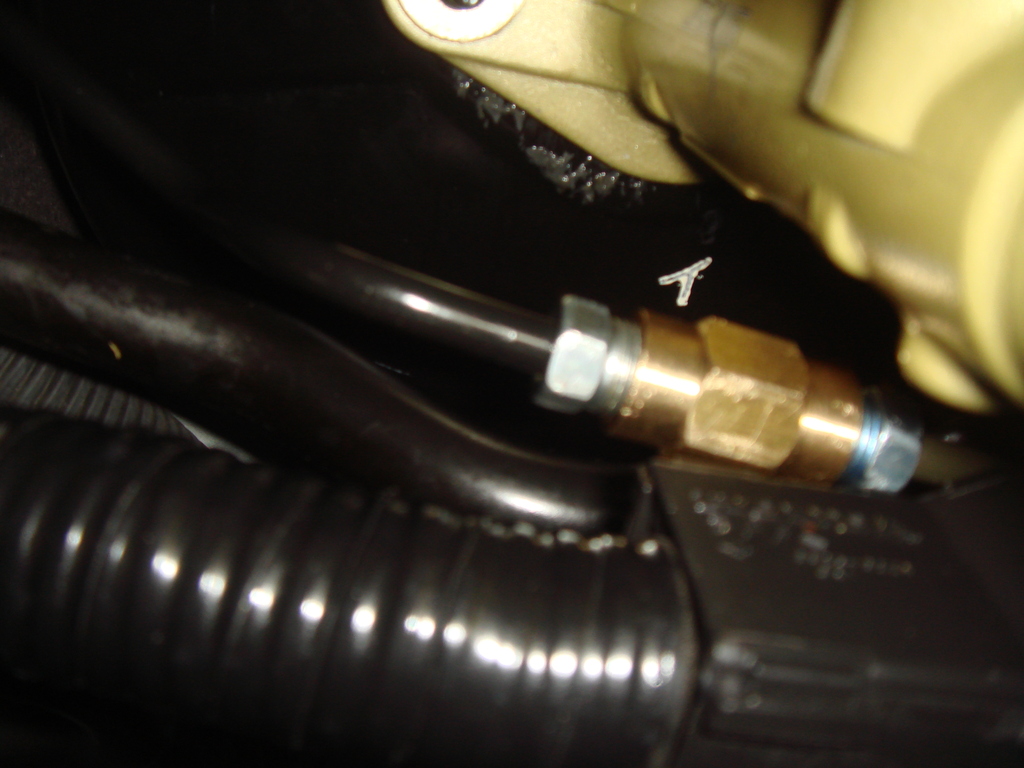
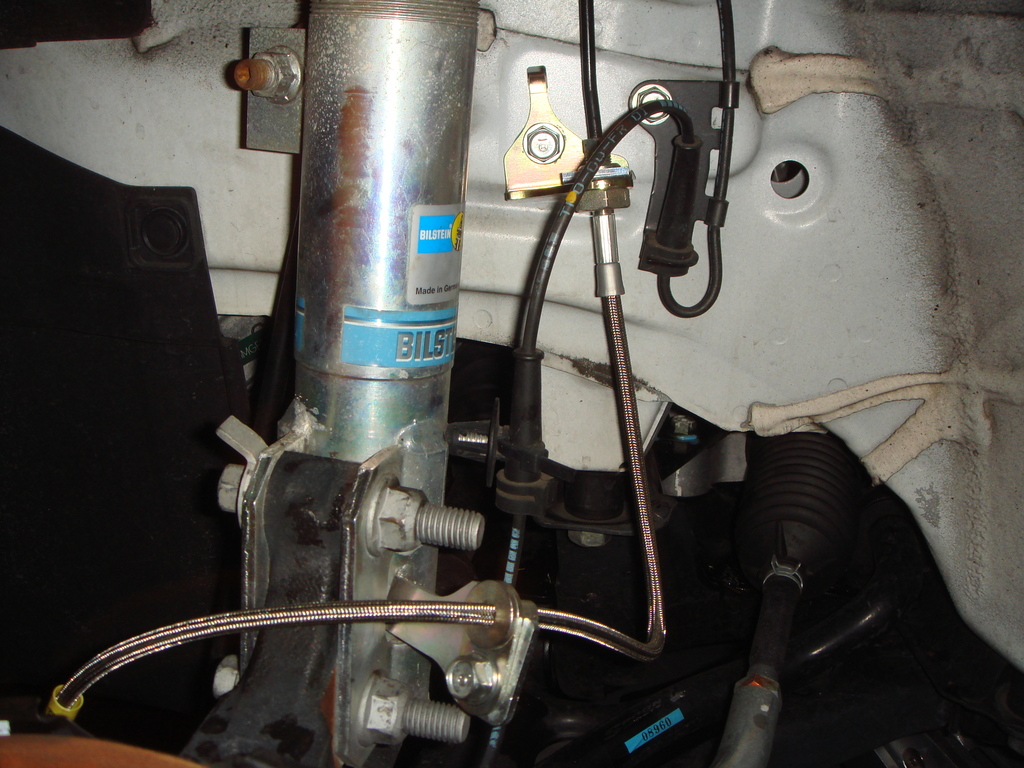
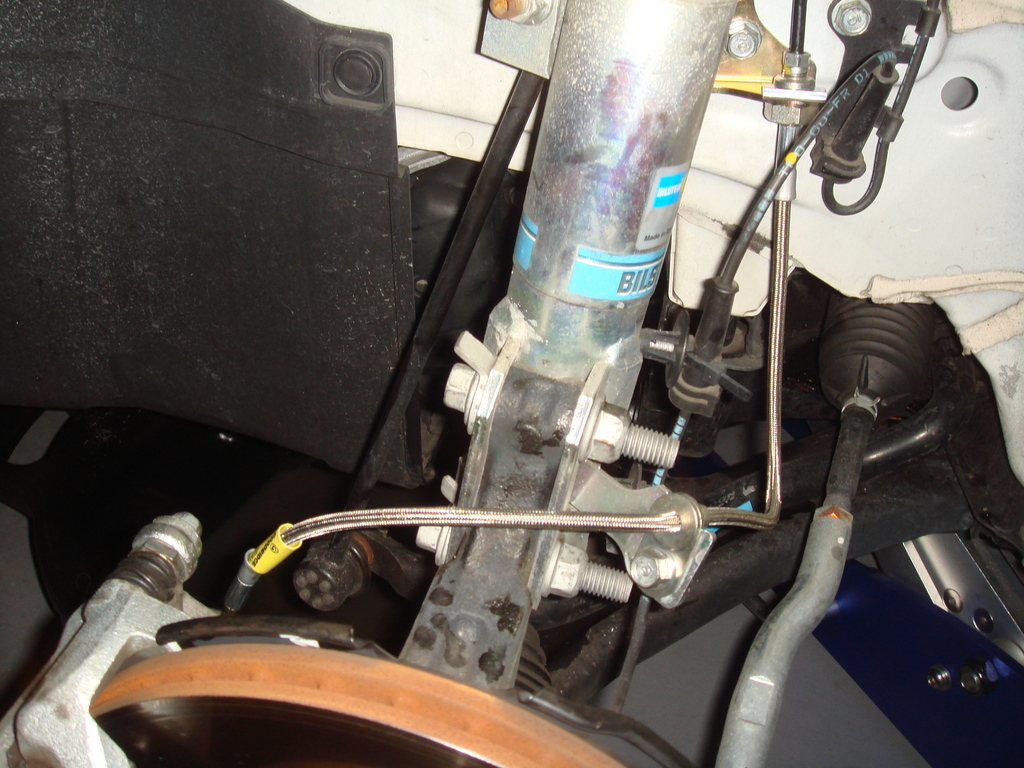
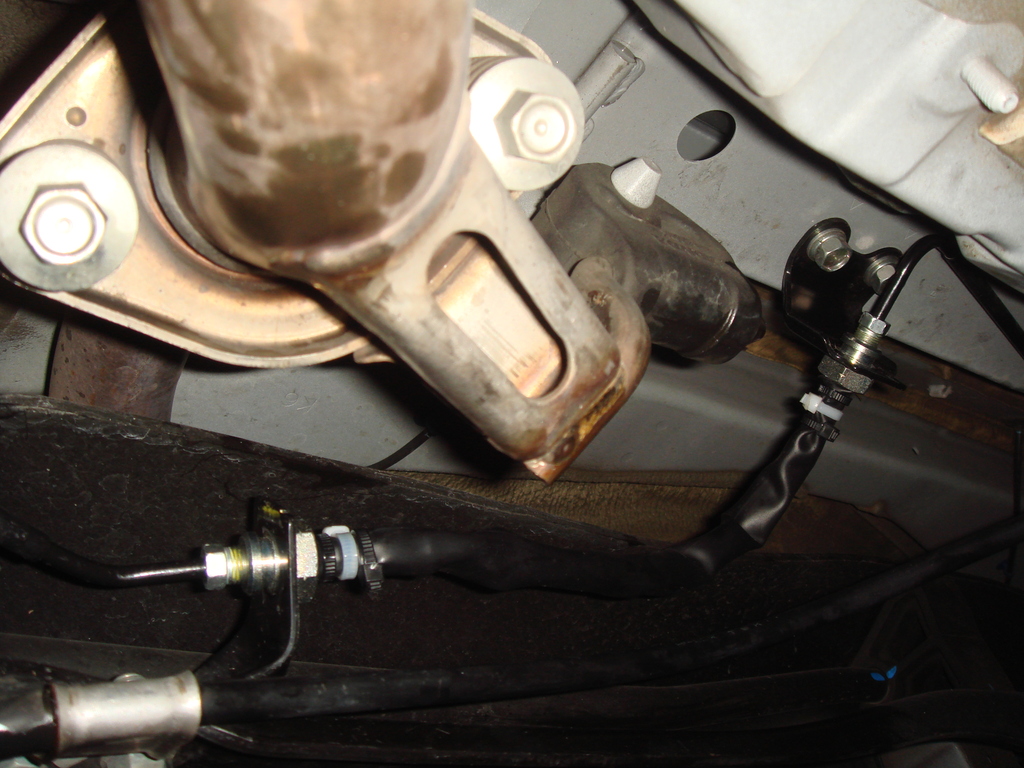
Below, take notice on how I bend the Adapter Line and use a BRASS Female to Female adaptor to make connection
between the Factory Brake Line to the Adapter line.
Again, my Adapter line is very curvy because I don't have a shorter adapter line (the first adapter line that I made
(and have kink) were the only short one I had, the second one is longer, so I got to make more curve so it fit.
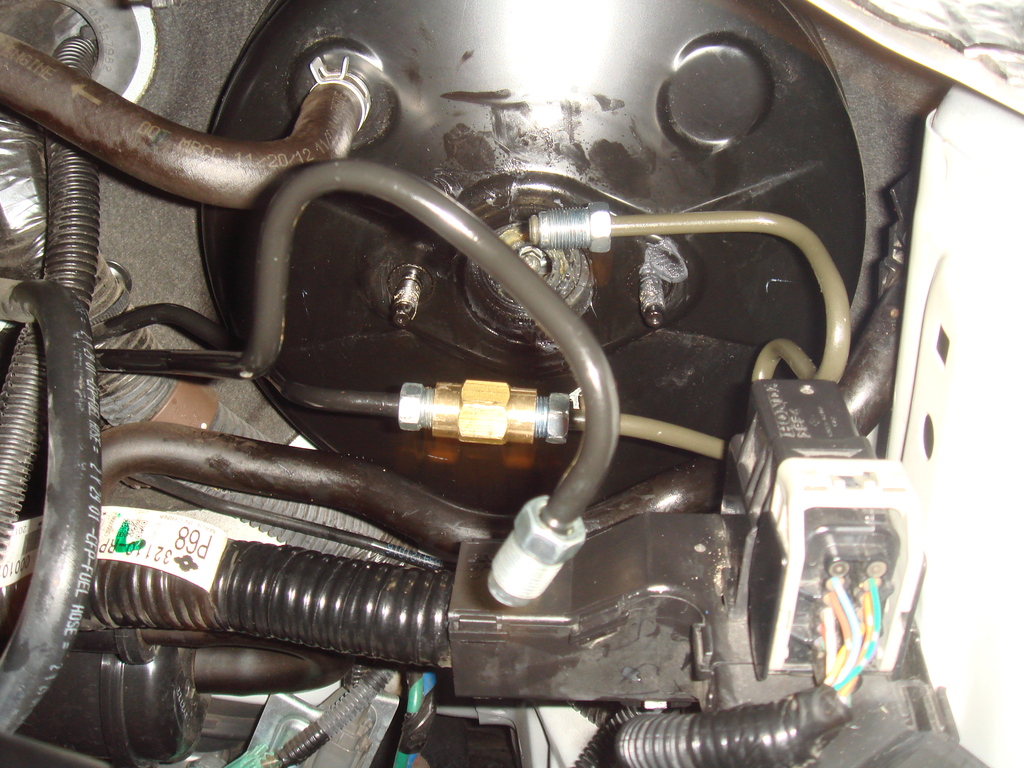
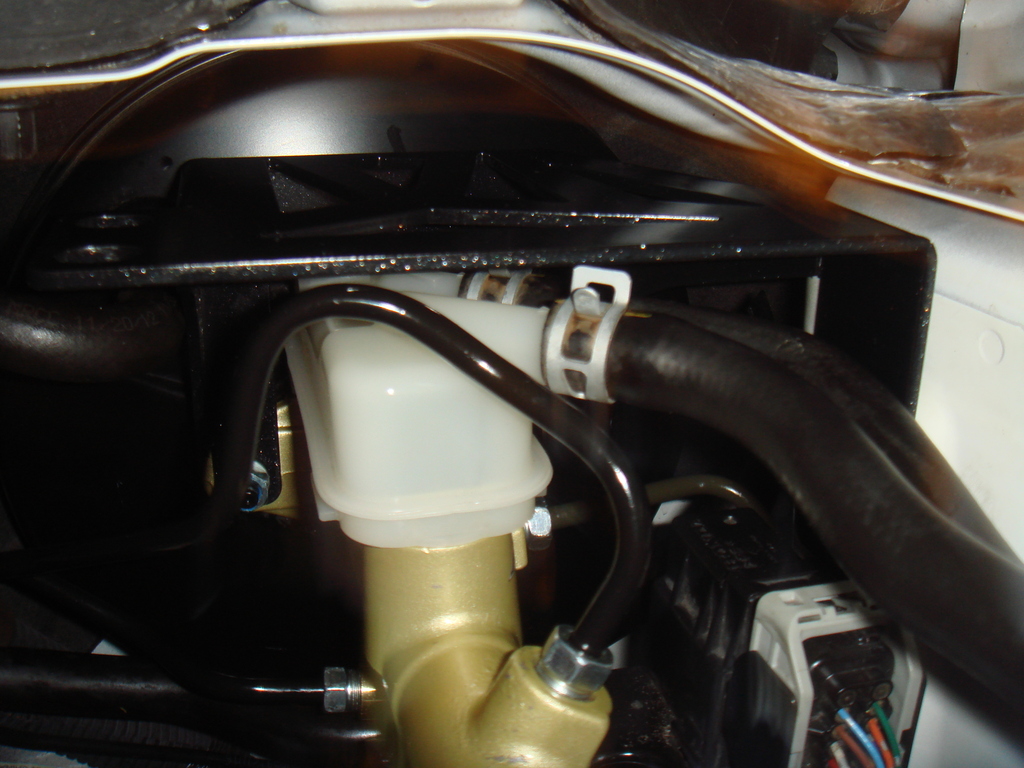
Here, the J's Racing MC had been installed with the adapter line.
Oh, here are the Torque value for the brake line, 15nm
for the 2 screw that hold the MC (master cylinder) to the brake booster also 15nm.
It was really a pain to "HAND FIT" the brake line at the final moment of installation,
but after 2 hours of struggle, I finally able to "connect" the brake line to the adapter line and the adapter line to the J's MC.
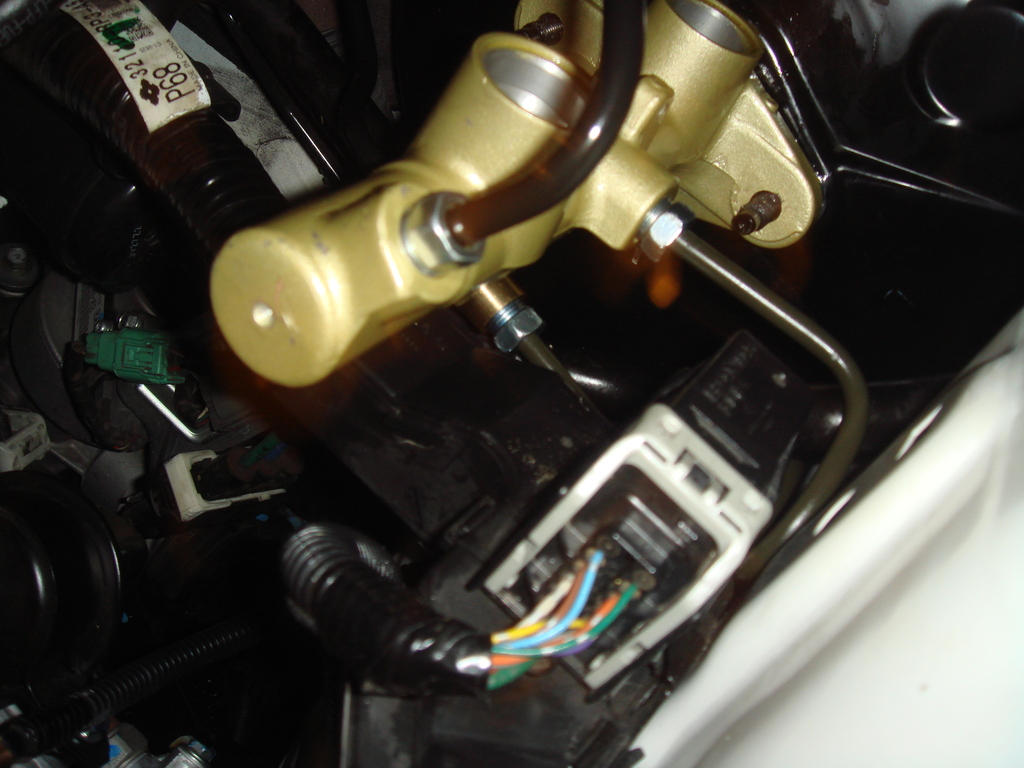
so J's Racing MC is installed, now it is time to install the Kuo's Garage Strut Bar....
Below, take notice on how I bend the Adapter Line and use a BRASS Female to Female adaptor to make connection
between the Factory Brake Line to the Adapter line.
Again, my Adapter line is very curvy because I don't have a shorter adapter line (the first adapter line that I made
(and have kink) were the only short one I had, the second one is longer, so I got to make more curve so it fit.
Here, the J's Racing MC had been installed with the adapter line.
Oh, here are the Torque value for the brake line, 15nm
for the 2 screw that hold the MC (master cylinder) to the brake booster also 15nm.
It was really a pain to "HAND FIT" the brake line at the final moment of installation,
but after 2 hours of struggle, I finally able to "connect" the brake line to the adapter line and the adapter line to the J's MC.
so J's Racing MC is installed, now it is time to install the Kuo's Garage Strut Bar....
Last edited by BMW ALPINA; Apr 2, 2015 at 12:57 AM.
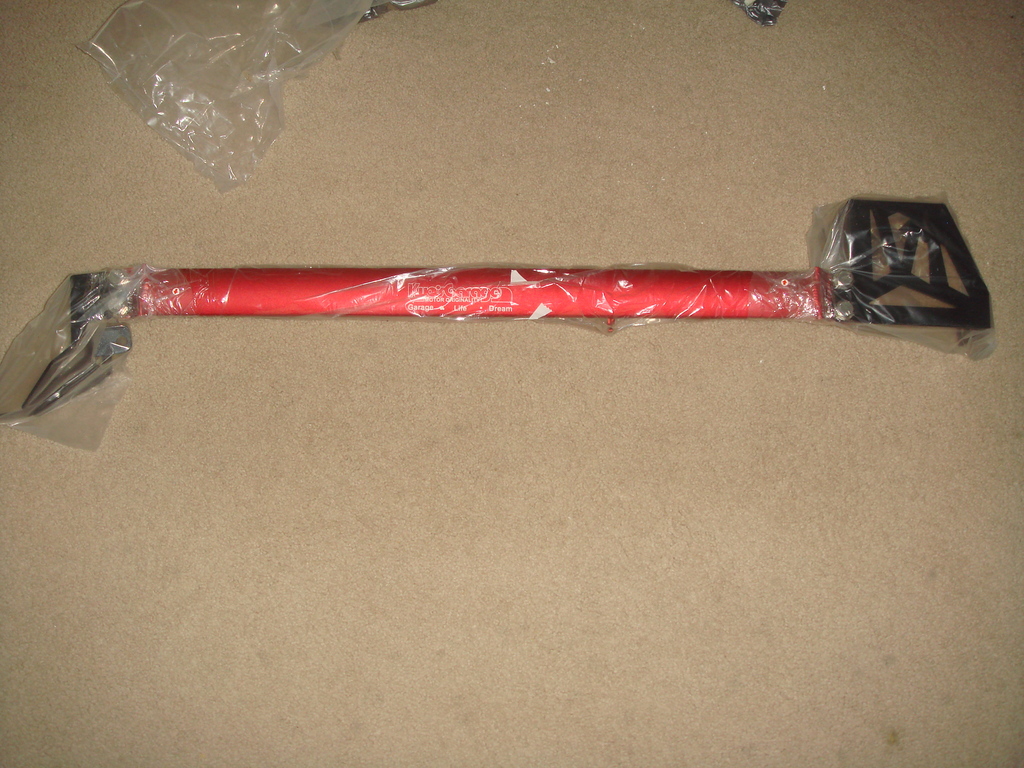
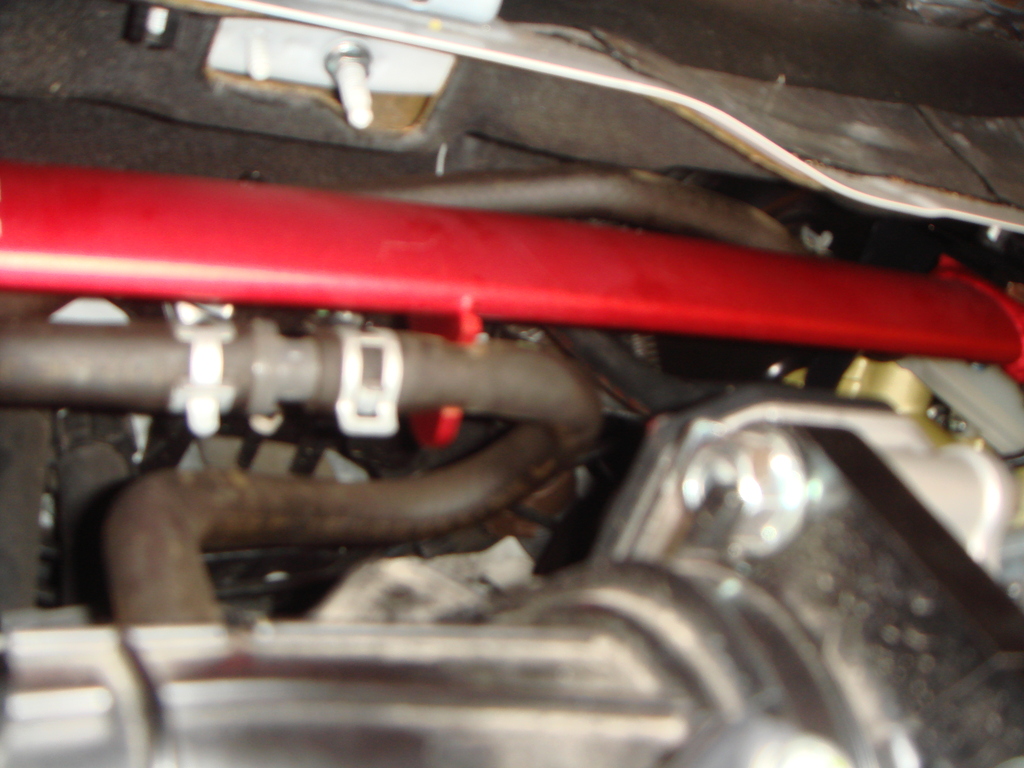
Here is the Kuo's Garage Strut Bar when it just arrived last year:
oh I also get the Kuo's Garage Battery Clamp:
now, back to installing the Kuo's Garage Strut Bar,
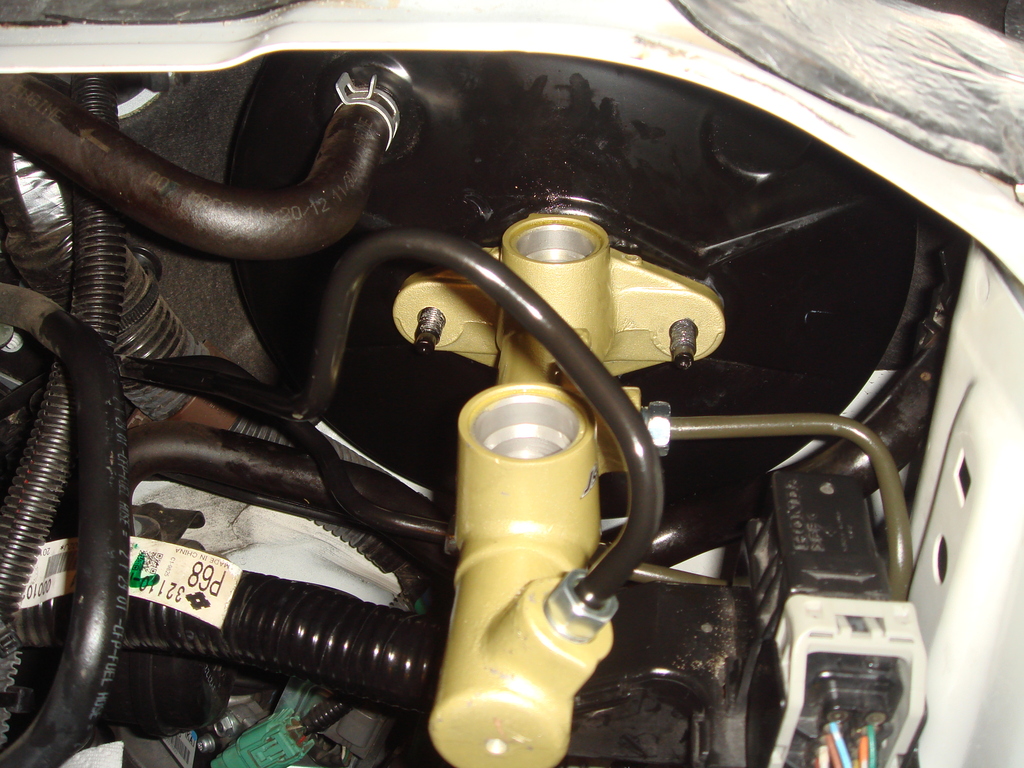
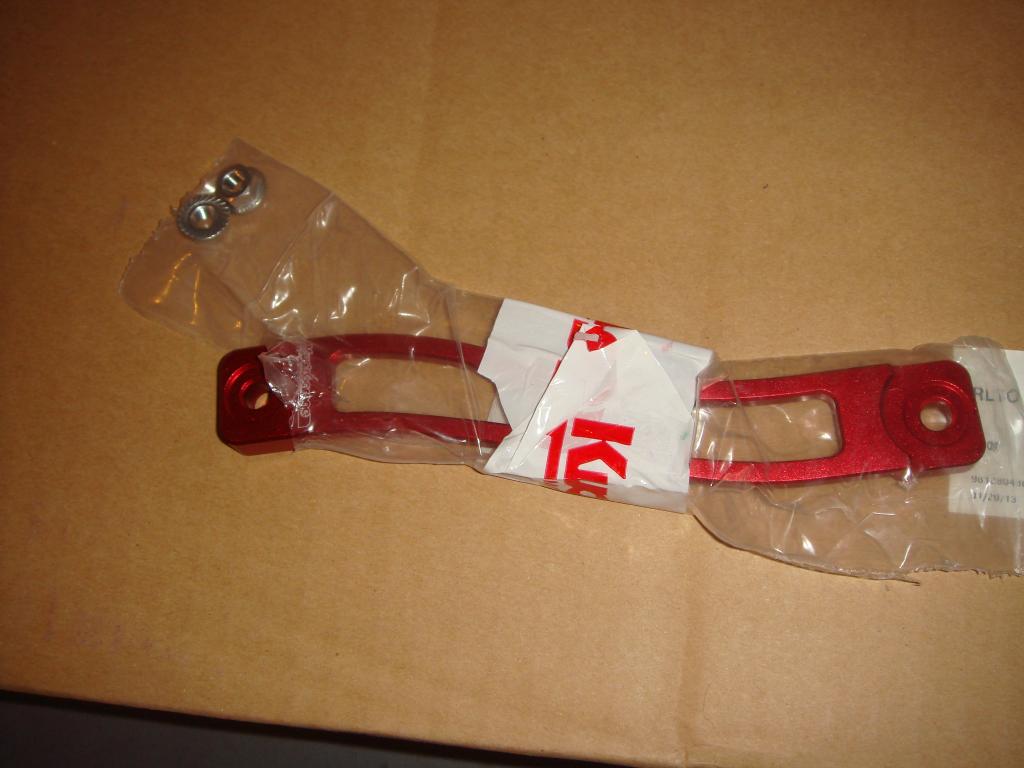
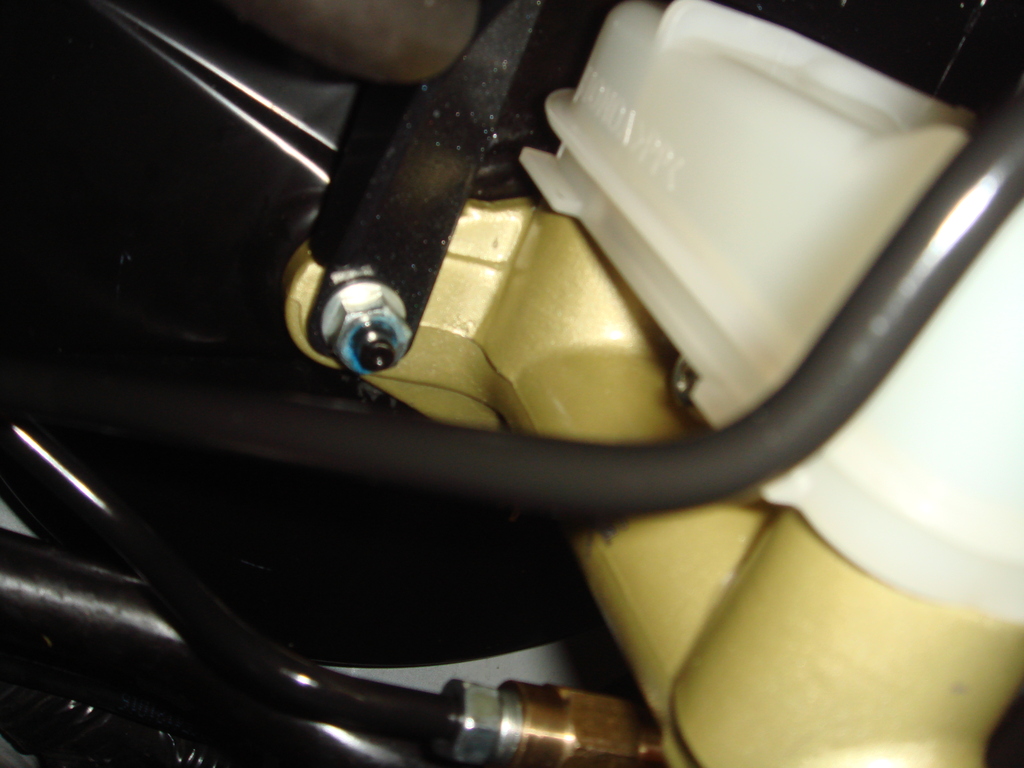
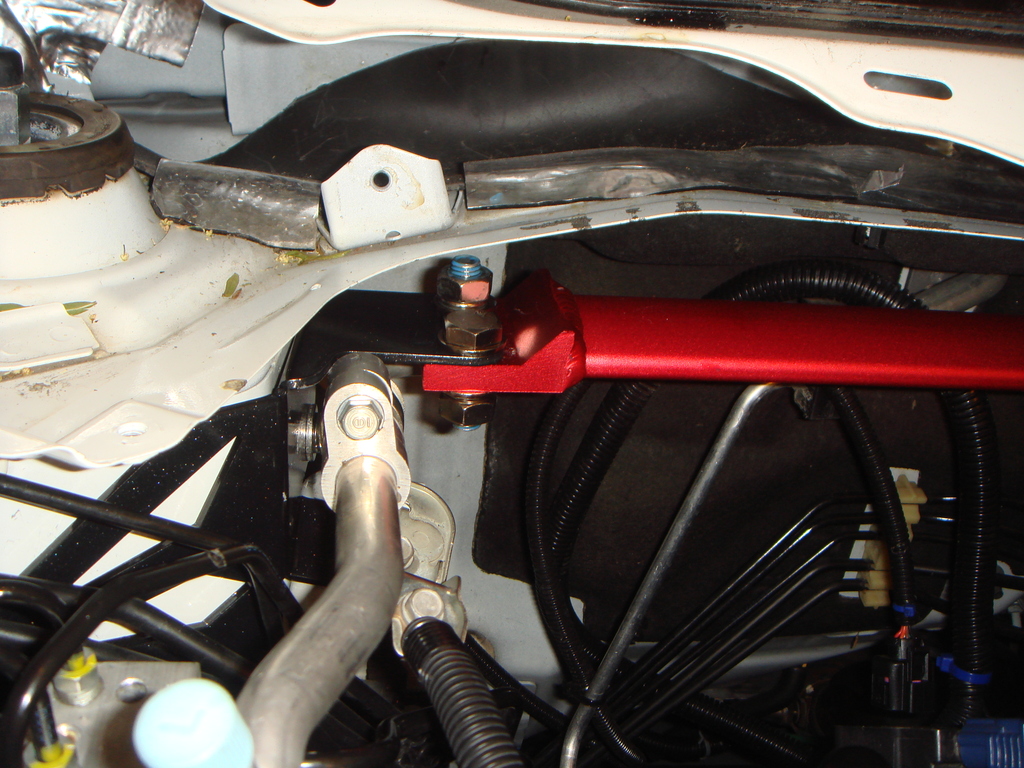
First install the Right Bracket that also function as Master Cylinder Stopper:
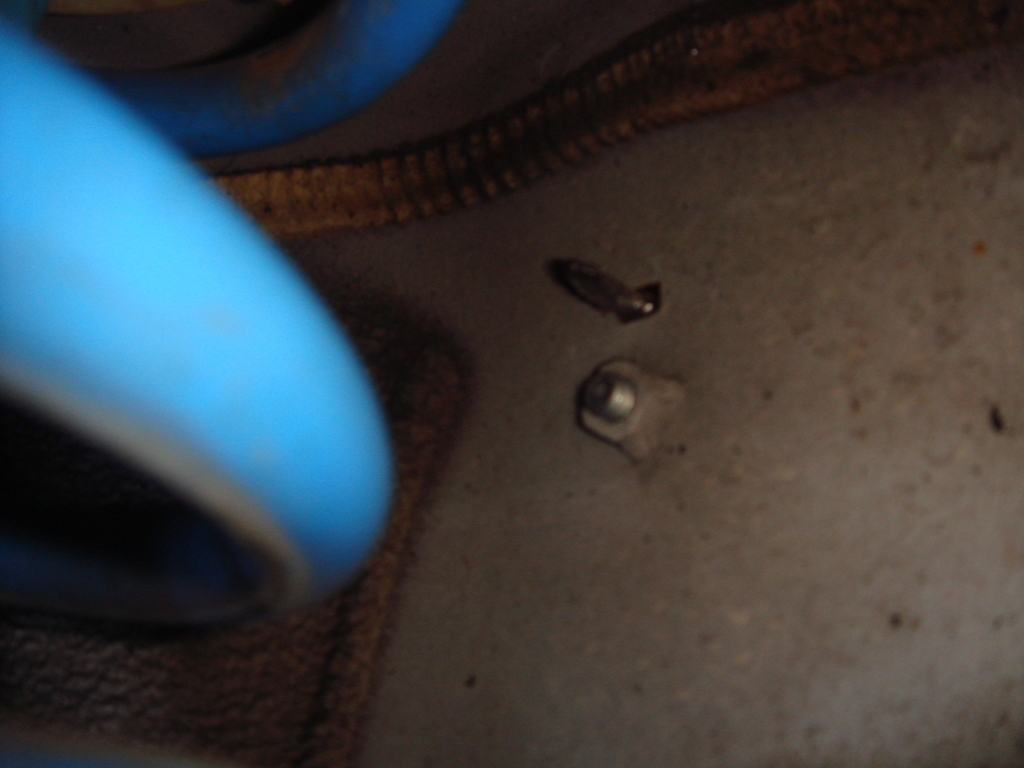
The hard part is when I need to install the 2 screw that hold the Kuo's Garage bracket to the inner fender wall,
the reason is the strut goes inside the fender well and the nut were behind the strut/spring, so it is very hard for hand to get into that area,
and even harder to have a wrench to hold that nut while I tighten the
screw !!!
I mean it is really hard...
here are the pictures so you can understand what I mean,
that 2 shiny nuts is what I am talking about:
oh I also get the Kuo's Garage Battery Clamp:
now, back to installing the Kuo's Garage Strut Bar,
First install the Right Bracket that also function as Master Cylinder Stopper:
The hard part is when I need to install the 2 screw that hold the Kuo's Garage bracket to the inner fender wall,
the reason is the strut goes inside the fender well and the nut were behind the strut/spring, so it is very hard for hand to get into that area,
and even harder to have a wrench to hold that nut while I tighten the
screw !!!
I mean it is really hard...
here are the pictures so you can understand what I mean,
that 2 shiny nuts is what I am talking about:
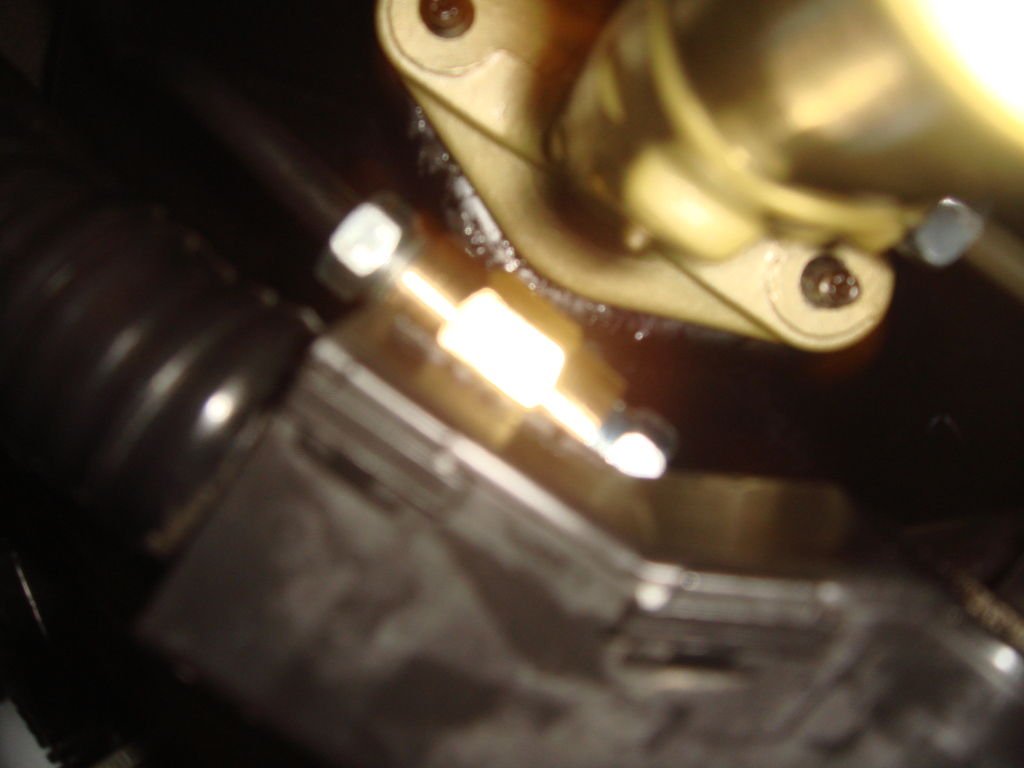
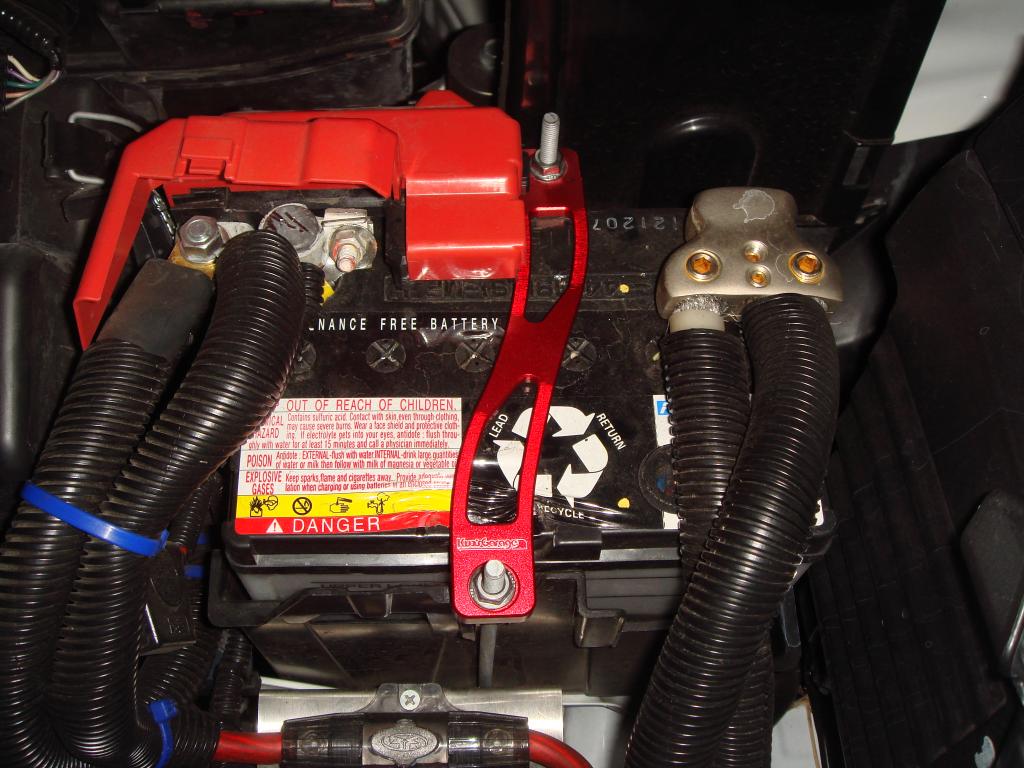
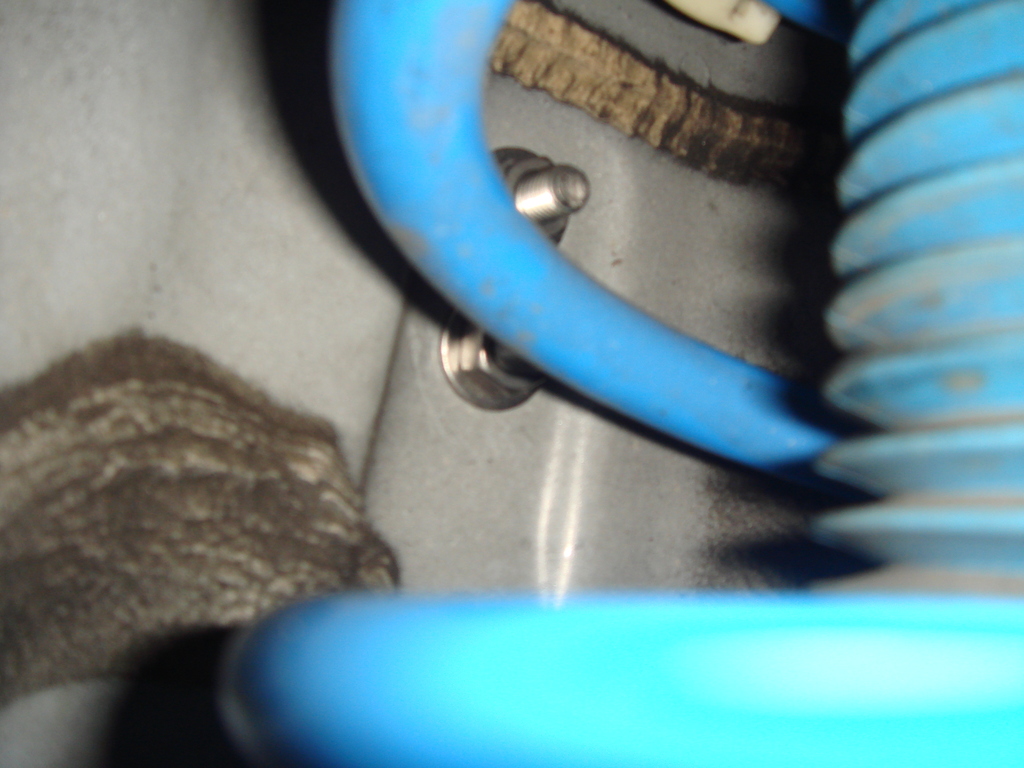
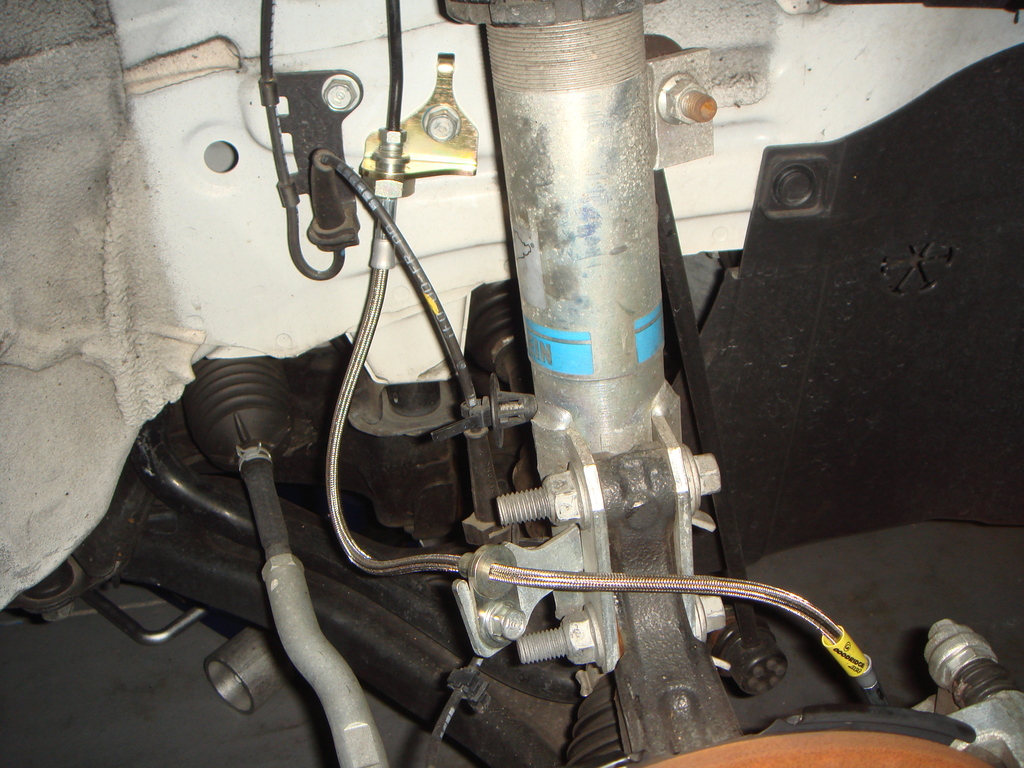
and here are the 2 screws that goes through the fender
if you look at it from inside the engine bay, right next to the MC:
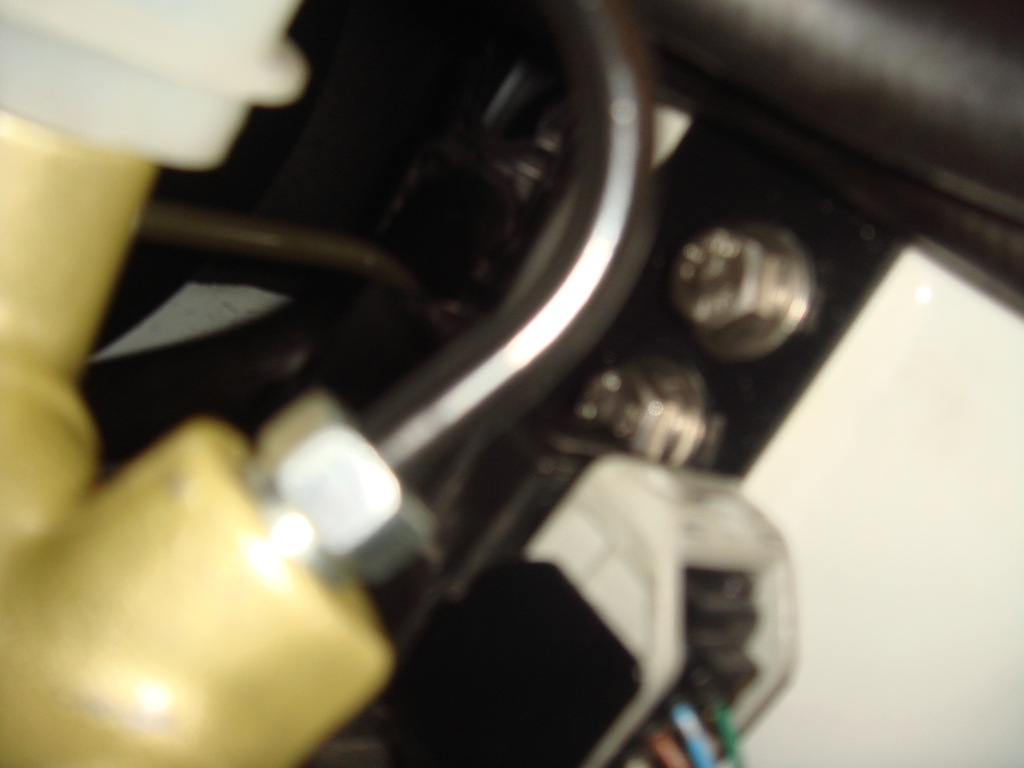
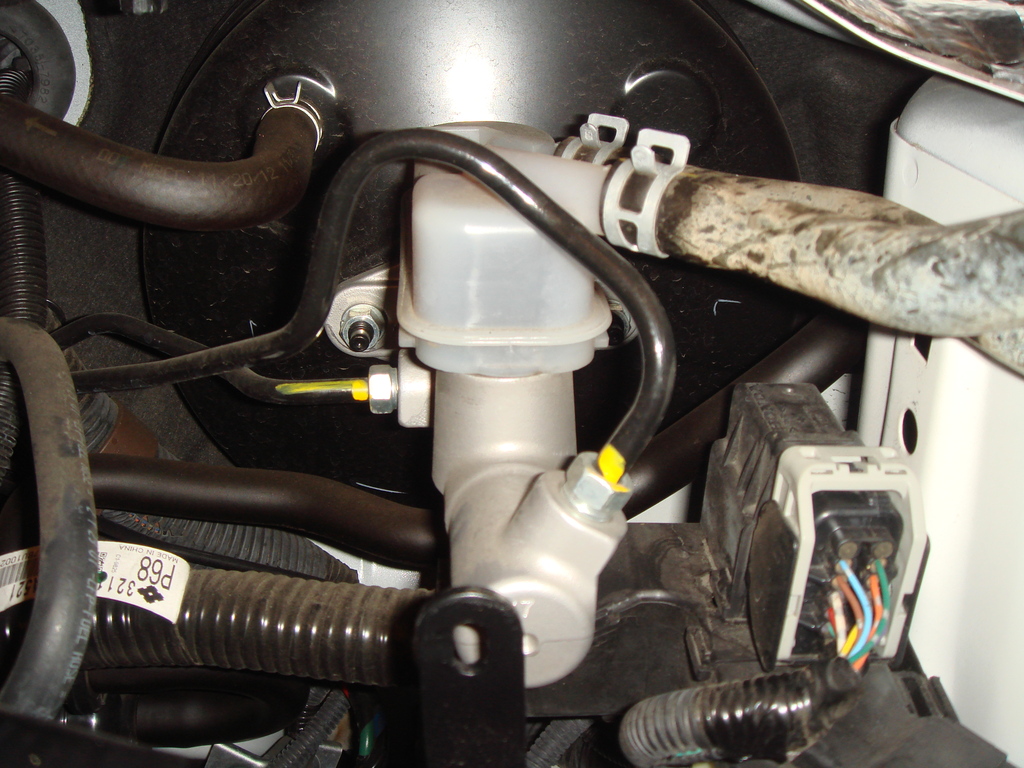
below is how the Kuo's garage bracket HOLD
the J's Racing MC in place:
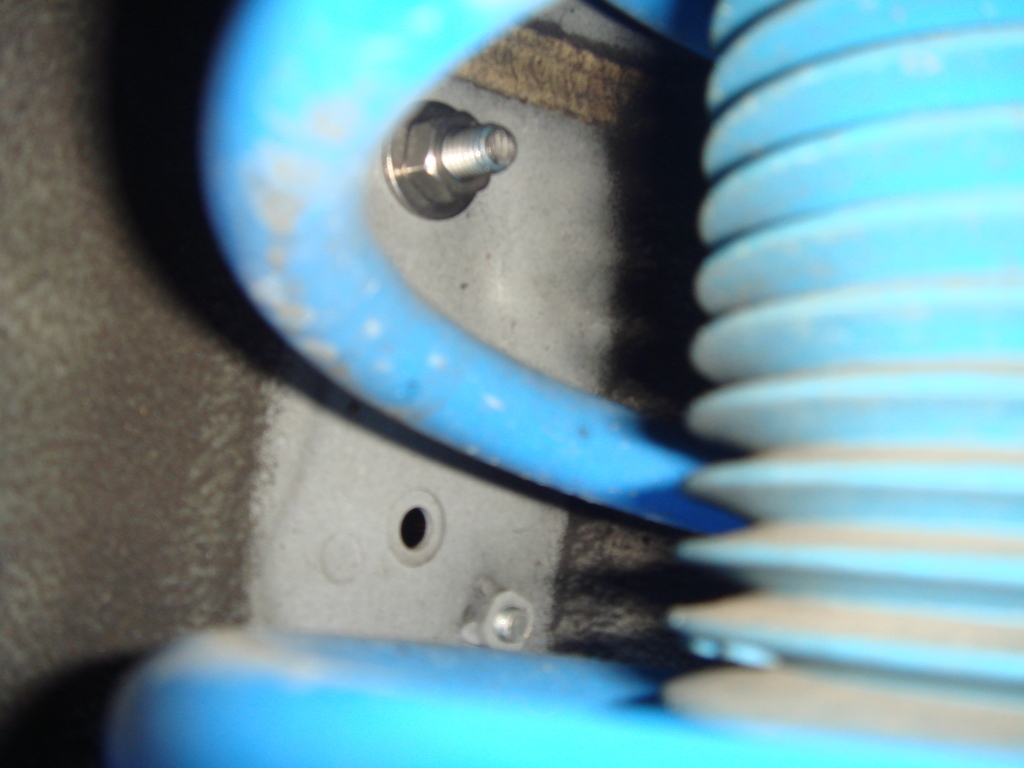
Now if you think the left bracket is a PAIN,
well turn out the RIGHT bracket that sit behind
the ABS Modulator was EVEN WORSE !!!
I had to unscrew all the ABS modulator bracket,
then there is also a METAL tap that I need to bent
from inside the fender well that hold the ABS modulator bracket
(I am confuse with Honda, after 3 screw holding the ABS
Modulator bracket, why they need to have another metal tab???)
that sharp looking piece of metal on top of the nut is
the metal tab that I need to bent:
now after that, of course another screw
that goes into the fender well behind the Right Strut/Spring...
luckily on this right side it is only 1...
Here is how the Kuo's garage bracket slip behind the ABS Modulator
Bracket and then hold by screwed together:

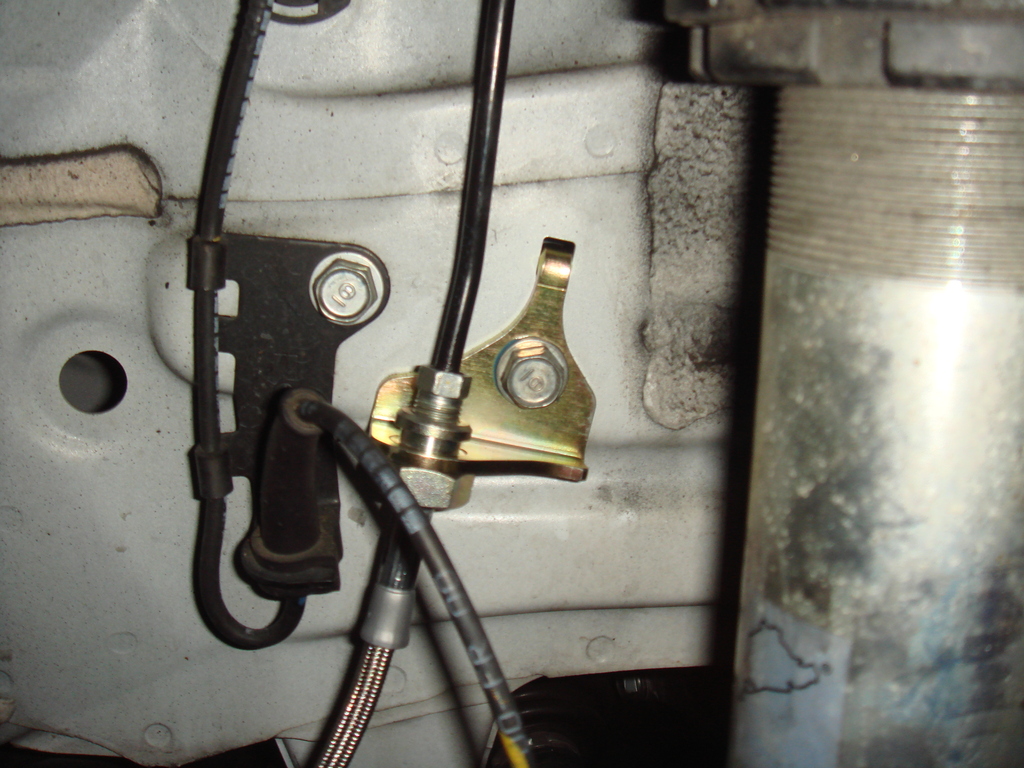
Remove the center bracket that hold a hose,
because Kuo's garage strut bar had their own
integrated bracket to hold this hose, it is really another
nice touch
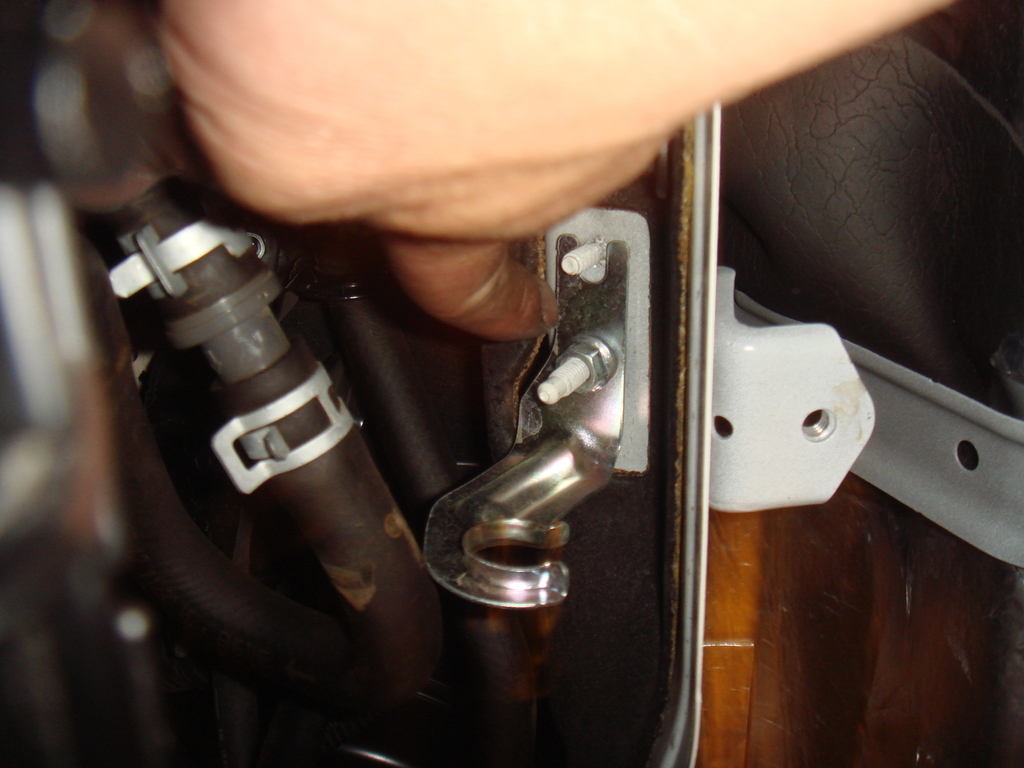
Here is the hose hold by the strut bar:
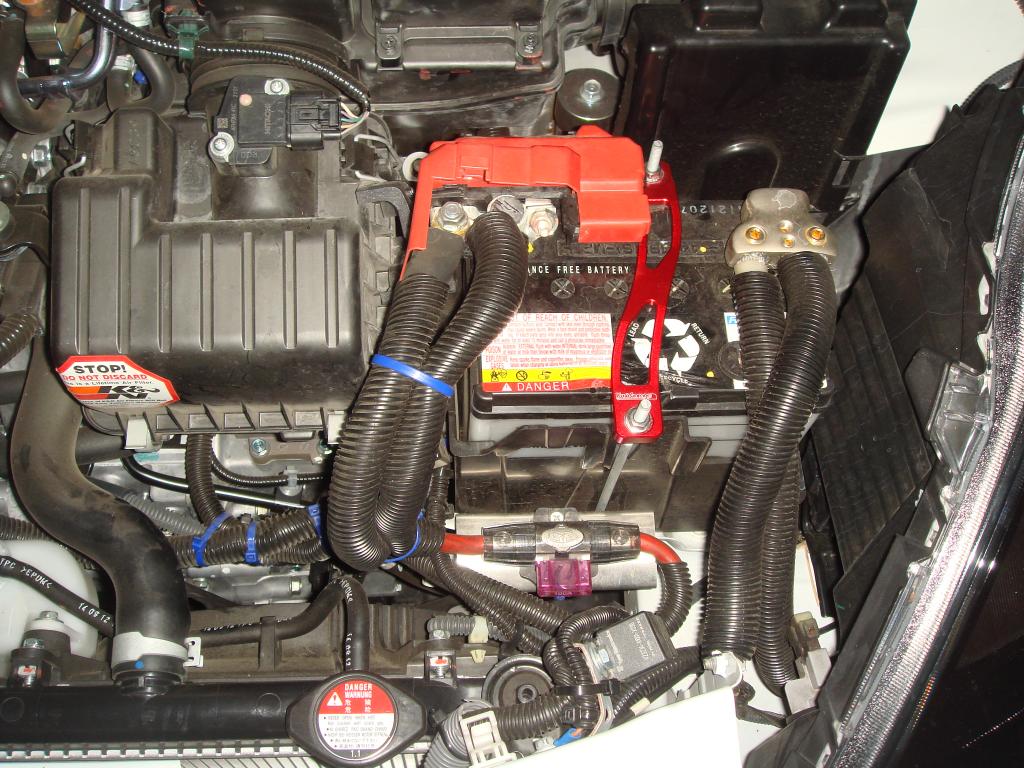
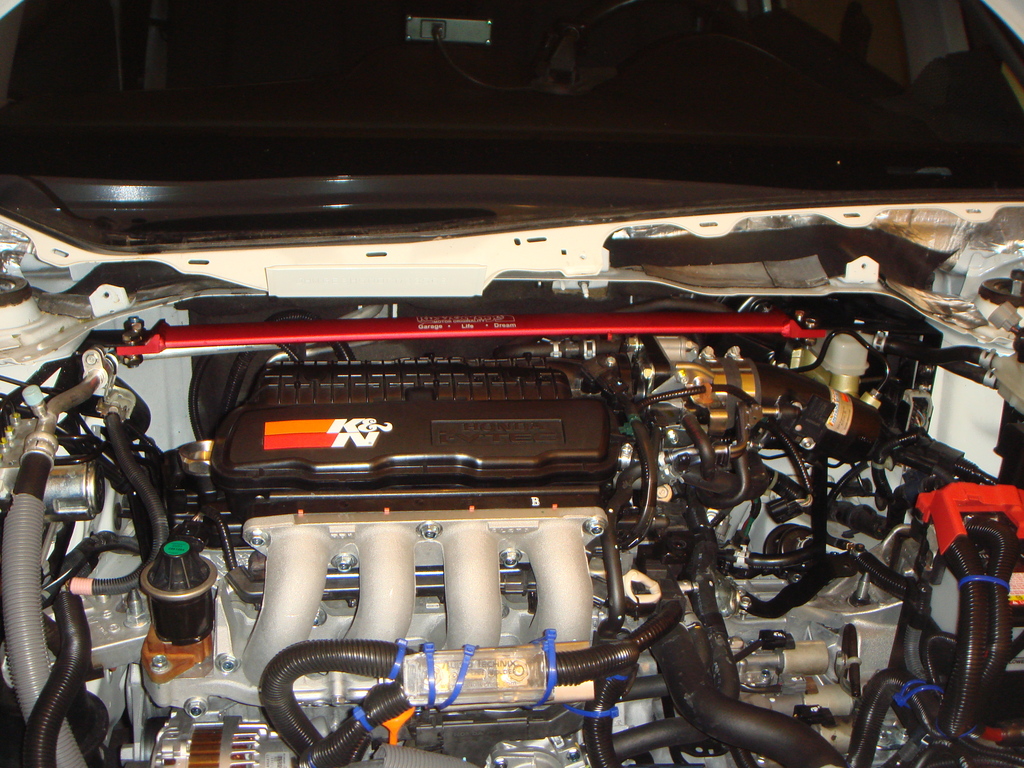
and now I can install the center strut bar piece
to connect between the Left and Right Bracket...
notice their finished is FIRST CLASS,
all their bolt/screw/nut looks like it made from Stainless Steel !!!
the only problem is they are really hard to install,...
I think I spend like 4 hours installing this Strut Bar !!!
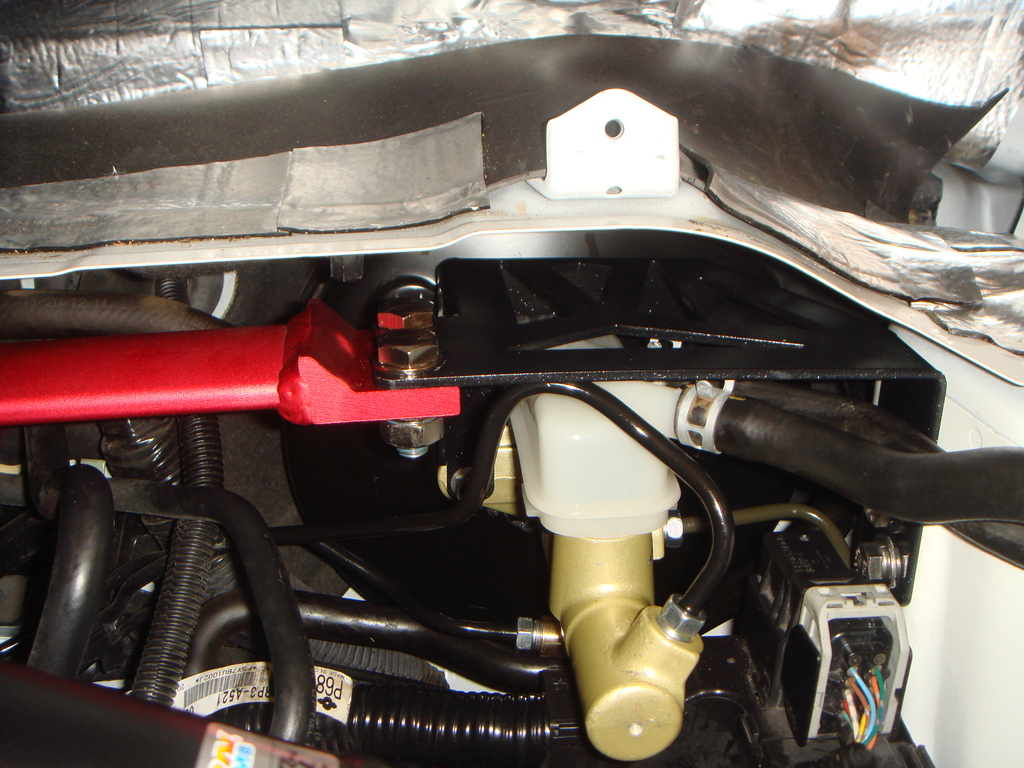
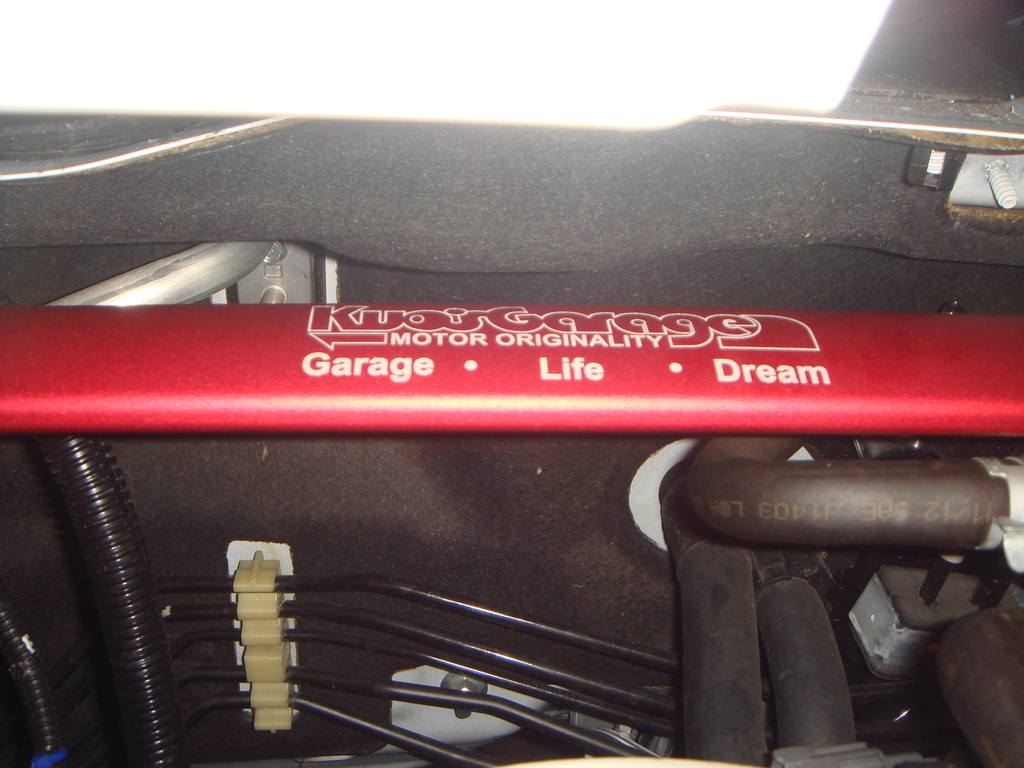
if you look at it from inside the engine bay, right next to the MC:
below is how the Kuo's garage bracket HOLD
the J's Racing MC in place:
Now if you think the left bracket is a PAIN,
well turn out the RIGHT bracket that sit behind
the ABS Modulator was EVEN WORSE !!!
I had to unscrew all the ABS modulator bracket,
then there is also a METAL tap that I need to bent
from inside the fender well that hold the ABS modulator bracket
(I am confuse with Honda, after 3 screw holding the ABS
Modulator bracket, why they need to have another metal tab???)
that sharp looking piece of metal on top of the nut is
the metal tab that I need to bent:
now after that, of course another screw
that goes into the fender well behind the Right Strut/Spring...
luckily on this right side it is only 1...
Here is how the Kuo's garage bracket slip behind the ABS Modulator
Bracket and then hold by screwed together:
Remove the center bracket that hold a hose,
because Kuo's garage strut bar had their own
integrated bracket to hold this hose, it is really another
nice touch
Here is the hose hold by the strut bar:
and now I can install the center strut bar piece
to connect between the Left and Right Bracket...
notice their finished is FIRST CLASS,
all their bolt/screw/nut looks like it made from Stainless Steel !!!
the only problem is they are really hard to install,...
I think I spend like 4 hours installing this Strut Bar !!!
Now, it is time for installing the Goodridge Brake Lines:
I bought this kit from Goodridge USA,
and unlike the kit available in Europe,
the Goodridge USA kit is only 4 lines (since our USDM is rear drum brake),
and it is also the basic hose WITHOUT any PVC/Plastic covering outside
the stainless steel layer...
When I upgrade my front brake to Big Brake later,
I will change again the front line to a custom stainless steel braided line
with PVC/Clear Plastic coating !!!
but for the middle (rear) lines, I plan to keep the one from this Goodridge
USA kit,
so I decide to cover them with a black shrink wrap...
it does look ugly but nobody will see them anyway
since they are hidden below...
again this middle (rear) lines is the one that connected between
the vehicle line to the axle lines...
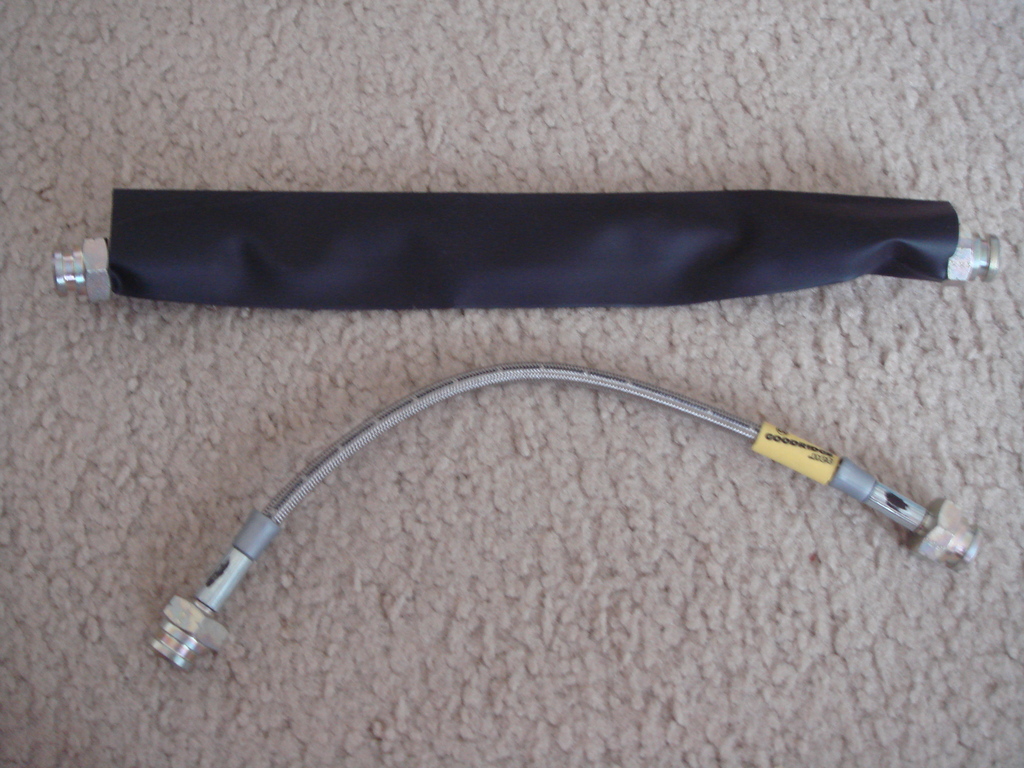
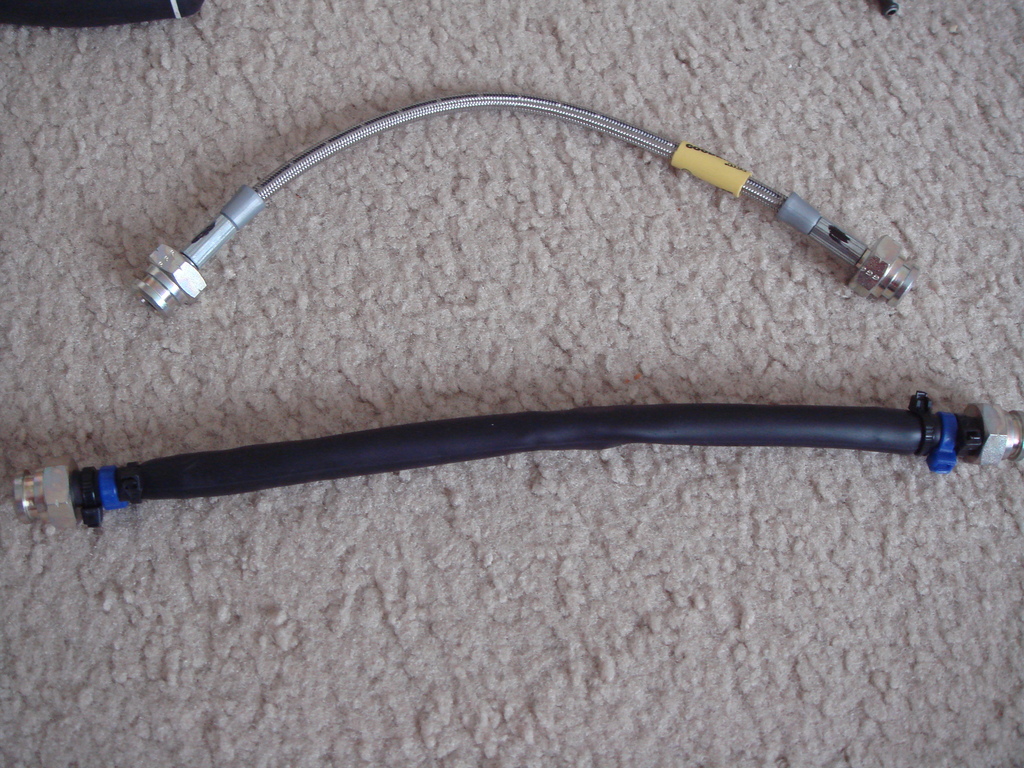
Here are the pictures of the Middle (rear) line before black shrink wrap,
and after:
and here are the pictures of them installed and bleeding process:
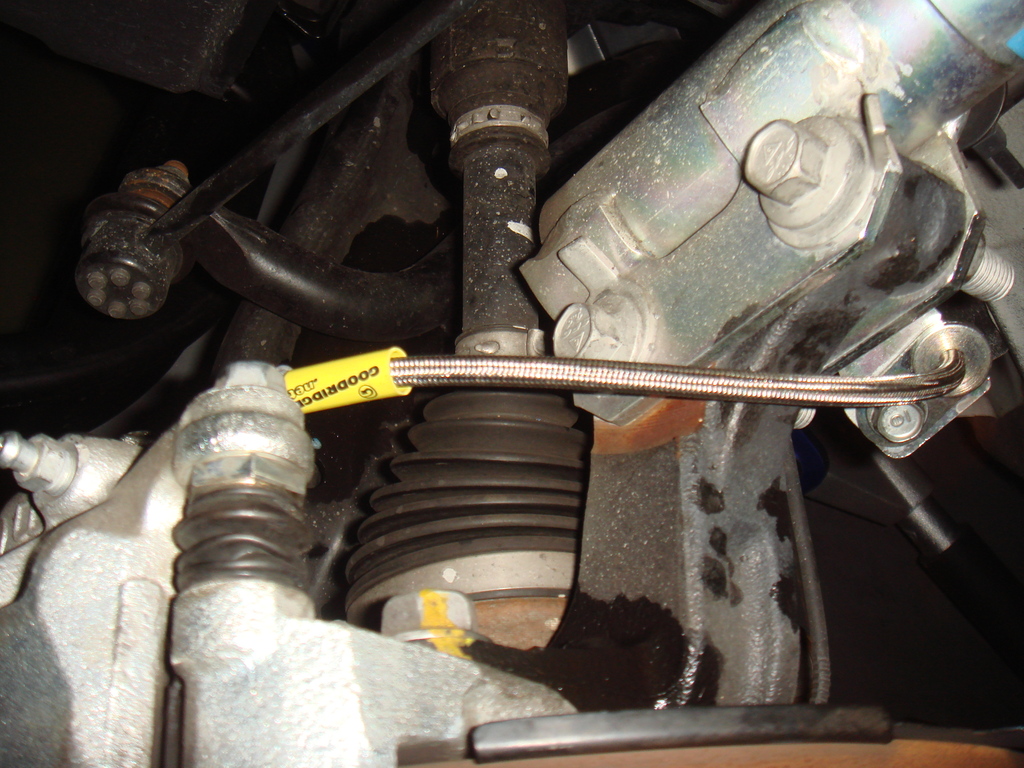
Oh, again the brake line screw torque was 15nm,
but the Goodridge Banjo I use 30nm (well inside the
range that Goodridge recommend).
I test drive the car and my impression:
The J's racing MC is definitely larger since I feel that
it took more effort to push the brake pedal,
but less distance needed to activate the brake,
but I think it is NOT a 1" master cylinder,
hopefully it is big enough for me
when I upgrade to Big Brake (Brembo 6 piston front and Integra
Type R rear disk caliper)...
if not, then I just got to buy the JDM Honda Odyssey MC
with an Old Civic brake booster that work with that Odyssey MC...
hopefully not though cause it really a pain to install an MC...
now the upper strut bar do have little effect in making
the front of the car feel more solid, and the suspension track
truer... but it is really a pain to install, I got to say it one more time hahaha...
the goodridge brake line...
well the pedal now do feel less spongy (a bit)...
but still not as hard as I want...
well perhaps our brake caliper is not solid enough anyway...
really need to save money now to upgrade the Front and Rear caliper now...
I bought this kit from Goodridge USA,
and unlike the kit available in Europe,
the Goodridge USA kit is only 4 lines (since our USDM is rear drum brake),
and it is also the basic hose WITHOUT any PVC/Plastic covering outside
the stainless steel layer...
When I upgrade my front brake to Big Brake later,
I will change again the front line to a custom stainless steel braided line
with PVC/Clear Plastic coating !!!
but for the middle (rear) lines, I plan to keep the one from this Goodridge
USA kit,
so I decide to cover them with a black shrink wrap...
it does look ugly but nobody will see them anyway
since they are hidden below...
again this middle (rear) lines is the one that connected between
the vehicle line to the axle lines...
Here are the pictures of the Middle (rear) line before black shrink wrap,
and after:
and here are the pictures of them installed and bleeding process:
Oh, again the brake line screw torque was 15nm,
but the Goodridge Banjo I use 30nm (well inside the
range that Goodridge recommend).
I test drive the car and my impression:
The J's racing MC is definitely larger since I feel that
it took more effort to push the brake pedal,
but less distance needed to activate the brake,
but I think it is NOT a 1" master cylinder,
hopefully it is big enough for me
when I upgrade to Big Brake (Brembo 6 piston front and Integra
Type R rear disk caliper)...
if not, then I just got to buy the JDM Honda Odyssey MC
with an Old Civic brake booster that work with that Odyssey MC...
hopefully not though cause it really a pain to install an MC...
now the upper strut bar do have little effect in making
the front of the car feel more solid, and the suspension track
truer... but it is really a pain to install, I got to say it one more time hahaha...
the goodridge brake line...
well the pedal now do feel less spongy (a bit)...
but still not as hard as I want...
well perhaps our brake caliper is not solid enough anyway...
really need to save money now to upgrade the Front and Rear caliper now...
Yes, outside it physically the same,
I actually ask J's Racing directly,
what is the size of their MC,
and their reply to me was "It is a secret",
but it is slightly larger then stock MC

at that point I almost cancel buying their MC,
because I do want to know the size first...
I was hoping it is 1" in size,
but
I got this extra point on rakuten Japan worth $120,
which I try using the point to buy JDM RS Mugen Rear LED Fog Light
to match my JDM RS Mugen Rear Under Spoiler,
but all the shop at Rakuten that sell that LED fog light do NOT
accept Foreign Credit Card and
J's Racing do accept foreign credit card... that is why I decided to just buy
the J's Racing MC, so by Rakuten Point do not went expired and unused...
and when I got the J's Racing MC,
I actually see that they actually ERASE the marking
on their MC, so it did NOT show what size it is anymore...
They really mean it when they say it is a secret hahaha
like I said,
the only way is to dismantle the piston and rod,
but I just don't want to do it since,
I might... broke it
plus I have not bought a circlip tools needed to dismantle a MC...
Im just thinking its like upgrading the MC from the standard civics with a type r MC. I believe the upgraded size was 15/16 for all type r applications.
Now if J's just bored out a stock unit and put in a bigger plunger I would not be surprised since the cylinder body is virtually identical.
So here is a thought, what is the difference in the Japanese ge8 MC verses the ge8 RS MC if there is a difference?
Im guessing the port outlet is on the wrong side due to this being made for a RHD application.
I don't think there is any difference between JDM GE8 MC and JDM GE8 RS MC.
the only variant is the PRE VSA and AFTER VSA,
J's Racing had 2 different Part number for their MC to accommodate Pre VSA and After VSA,
the only different is the outlet port thread on the Pre VSA is 10mm bubble,
while the After VSA is using 12mm bubble thread type,
so what J's Racing do is they only made one version with 12mm bubble,
but in Pre VSA application they screw in a thread adapter so
now it will fit the 10mm bubble connection...
and yes, the port is at the wrong side because this was design for RHD application...
I also suspect they bore out the stock MC...
J's racing do said that this MC is a must if user decided
to install J's Racing 6 piston front brake caliper...
so this MC must have bigger bore than stock...
heck...
the more I think the more I am curious on the bore size of this J's Racing MC of mine...
by the way,
This link below is Another solution that I found,
and this one surely use 1in Master Cylinder,
it is just that it is even more complicated to install and cost more too
if I want to buy all the parts brand new, which I will since
I don't want to risk having a failure on braking system :
?????????????????????????????fitrs/HONDA?Maintenance Handbook?hiromen?Minkara - The Car & Automobile SNS (Blog - Parts - Maintenance - Mileage)
So running a quick google search, using a 98-01 integra master cylinder is 1" and looks to have the same ports as the ge8.
Regardless of what J's racing did to make this an upgrade, this is an awesome DIY.
+ imaginary rep.
Regardless of what J's racing did to make this an upgrade, this is an awesome DIY.
+ imaginary rep.
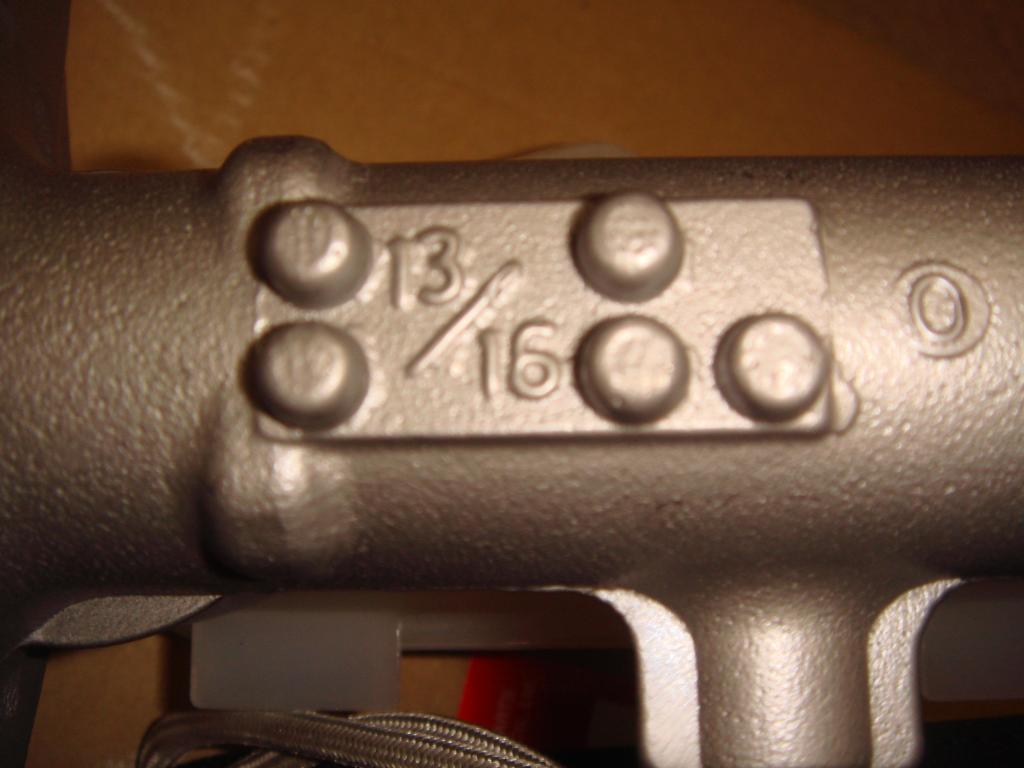
I had look at many MC and the older Honda like the Integra,
use Inverted style Port instead of the Bubble, plus most of them had 10mm thread on the port.
another thing is the stroke is something different.
I actually already buy a JDM Civic Type R MC (FD2 model),
and turn out they are only 13/16 in size,
so I have to sell them again ... (which I did)...
I always suspect that J's racing MC is just a Repaint JDM Civic Type R (FD2) MC... (I hope not though because a 13/16in is only very
slightly bigger than 3/4in that our stock USDM use)...
oh the other different is the JDM Civic Type R MC (FD2)
Outlet port use a 10mm bubble port while the J's have 12mm
bubble port from the start and only goes to 10mm for Non VSA
with the adapter...
here are the pictures on the JDM Civic Type R MC (FD2) when
it arrived few months ago:
then I bought a USDM Honda CR-V 1in MC,
but turn out their stroke is very different,
plus the inlet port spacing for the brake fluid reservoir is different too,
so I can't transfer USDM GE8 brake fluid reservoir,
and the CR-V brake fluid reservoir is far too high to fit,
so I have to return this back to the vendor (eBay) minus restocking fee..
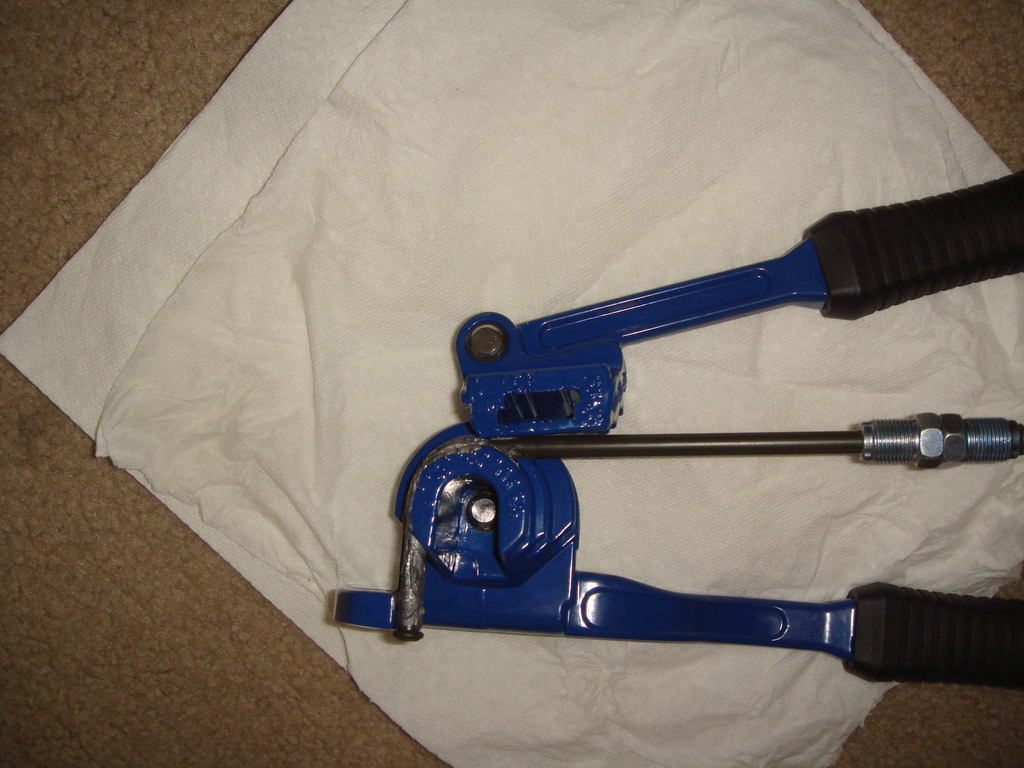
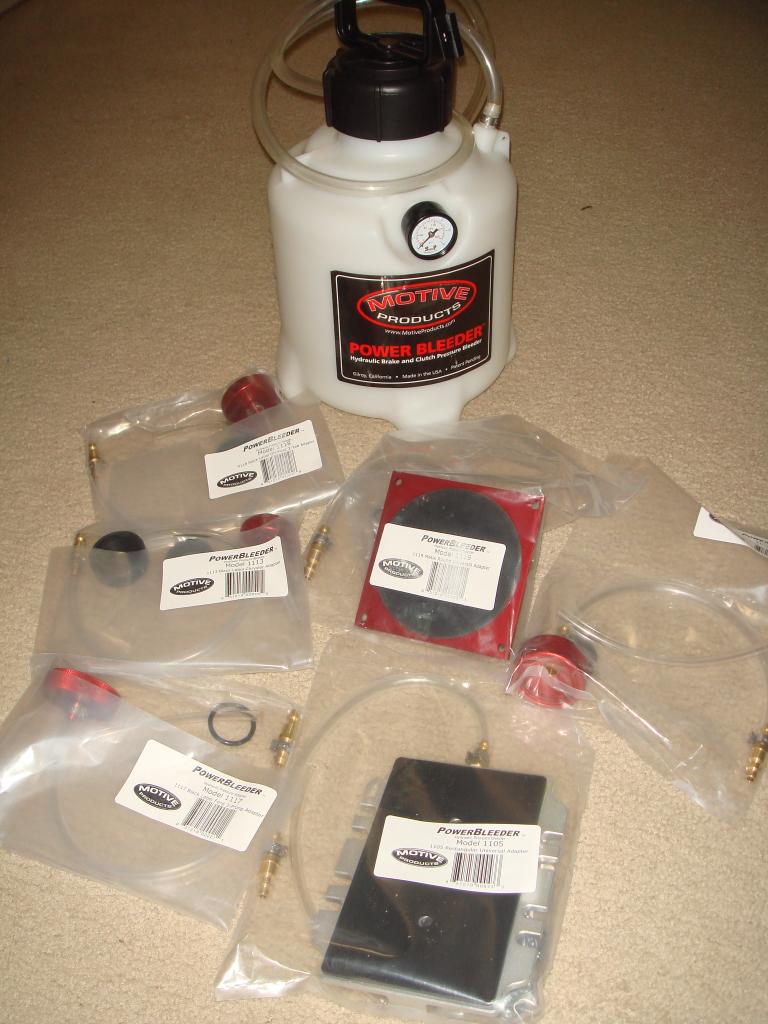
oh, I forgot to post this pictures,
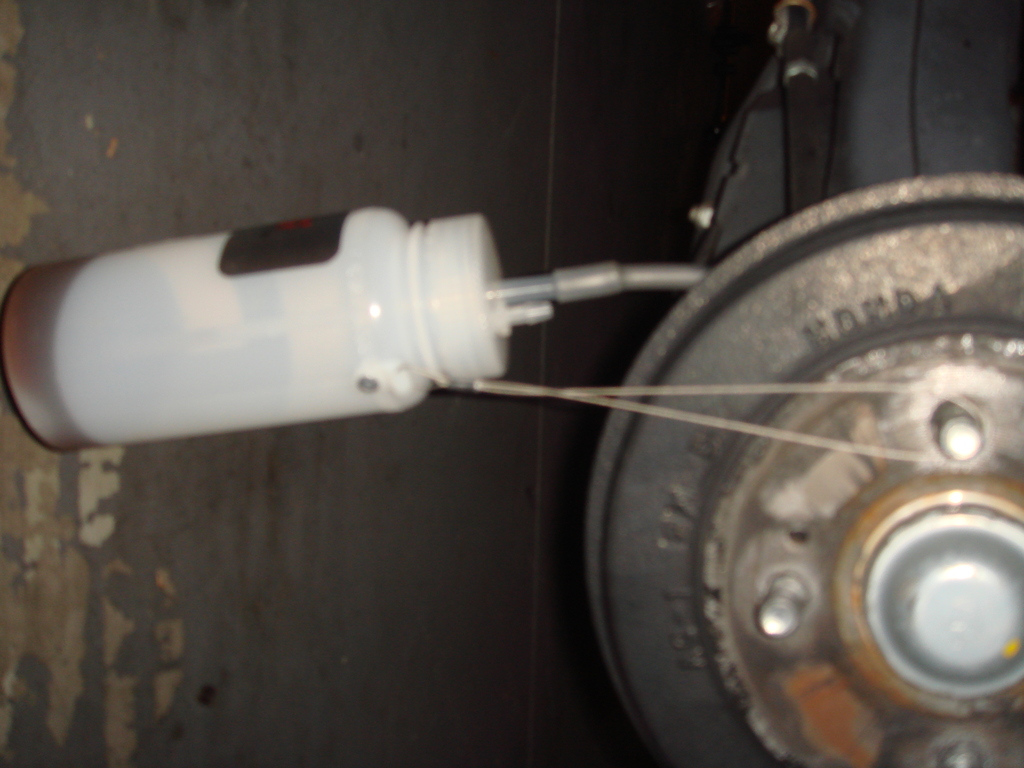
I did my brake bleeding using this tools, really make my life simple:

Member
Joined: Jan 2009
Posts: 259
From: Tampa, FL

Cool. Upgrading the master cylinder is on my TODO list. I brought a used master cylinder from a CR-Z on ebay. Unfortunately the size is 13/16�. Where did you source the J-Racing master cylinder? I might go that route if I cannot find 13/16� flare make to make my own adapter line.
Were you able to get any seat time with the J-Racing master cylinder and did it improve pedal feel?
Were you able to get any seat time with the J-Racing master cylinder and did it improve pedal feel?
most likely the 13/16" is the bore diameter of the Master Cylinder (MC),
it is not the size of the line, so I don't think you need flare tools.
is your honda fit equipped with VSA or not?
because mine is 2013 so it have VSA and it have the 12mm thread
for the brake line,
the NON VSA have 10mm thread.
I actually have bought and sold a brand new Civic Type-R MC
before I get this J's Racing one, the reason was,
the Civic Type-R is only 13/16 in diameter and it have 10mm thread
for the brake line too, and I want larger then 13/16 and need 12mm thread.
I bought this J's racing MC directly from J's racing at their rakuten japan webstore. if you need the one with 10mm thread, J's racing sold it too.
Just make sure you buy the right one.
as you know I install it at the same time as the Goodridge and Kuo's garage strut bar with MC stopper, so yes, my pedal is now very very firm,
but I don't know which part out of 3 above make the most different.
Member
Joined: Jan 2009
Posts: 259
From: Tampa, FL
Thanks for the info. My 2009 5 Speed Honda Fit sport doesn't have traction control or VSA. So the brake flare should be M10-1.0. I went to Advance Auto Parts to buy a couple of Dornan-Pik-a-Nut Brake Line Adapter-Bubble Flare-M10-1.0 x 3/16� x M12-1.0 and see if these would work with the CR-Z master cylinder. If I knew the Type R Civic master cylinder is M10-1.0, I would brought a used one instead of the CR-Z master cylinder. Oh well!!! The Dorman-Pik-a-Nut is cheap at $1.99 each. If they don't fit I will have to locate a Civic Type R master cylinder.
Last year I installed the FastBrakes drum to disk conversion. This time I am installing the Fastbrakes 11� front brake kit and I definitively want a larger brake master cylinder. My rear brake setup has stainless steel brake lines but currently my stock front is still OEM rubber brake lines. Stainless steel brake line on all 4 corners should give me a firmer brake pedal. Eventually I would get a Kuo garage strut tower bar.
Dorman - Pik-a-Nut Brake Line Adapter-Bubble Flare-M10-1.0 x 3/16 In. x M12-1.0 327857.1: Advance Auto Parts
Last year I installed the FastBrakes drum to disk conversion. This time I am installing the Fastbrakes 11” front brake kit and I definitively want a larger brake master cylinder. My rear brake setup has stainless steel brake lines but currently my stock front is still OEM rubber brake lines. Stainless steel brake line on all 4 corners should give me a firmer brake pedal. Eventually I would get a Kuo garage strut tower bar.
Dorman - Pik-a-Nut Brake Line Adapter-Bubble Flare-M10-1.0 x 3/16 In. x M12-1.0 327857.1: Advance Auto Parts
Dorman - Pik-a-Nut Brake Line Adapter-Bubble Flare-M10-1.0 x 3/16 In. x M12-1.0 327857.1: Advance Auto Parts
After you install the Rear Disk Brake from FastBrakes,
was the brake pedal have longer initial travel or
shorter travel compare to when you still have the stock drum brakes?
Thanks
Member
Joined: Jan 2009
Posts: 259
From: Tampa, FL
I installed the CR-Z master cylinder this weekend and drove ~125 miles. The brake pedal seem to be shorter compare to the stock OEM. Stopping distance seem to be shortened as well. I should have installed the CR-Z master cylinder last year when I did the drum to disk conversion. The CR-Z master cylinder IMOHO is better suited for my car's disk brake setup on all corners.
I installed the CR-Z master cylinder this weekend and drove ~125 miles. The brake pedal seem to be shorter compare to the stock OEM. Stopping distance seem to be shortened as well. I should have installed the CR-Z master cylinder last year when I did the drum to disk conversion. The CR-Z master cylinder IMOHO is better suited for my car's disk brake setup on all corners.
What is the bore size of the CR-Z Master Cylinder?
Do you have any pictures of it?
The size usually stamped on the bottom part of the MC.
Thanks
Member
Joined: Jan 2009
Posts: 259
From: Tampa, FL
I don’t have any photographs of the Honda CR-Z 2011 brake master cylinder. But it has 13/16 stamped on the bottom. My eBay purchase history doesn’t have any pictures of the brake master cylinder. When I install the Kuo’s Garage brace this coming weekend I will try to take some pictures.