Hella 6" Fog Lights Install
#1
 02-18-2019, 03:09 PM

Hella 6" Fog Lights Install
OK so here's the beginning of my Fit Battle Car... or just my car that needs better lighting.
I purchased the bull bar plate mount and hella fog light kit on Amazon.
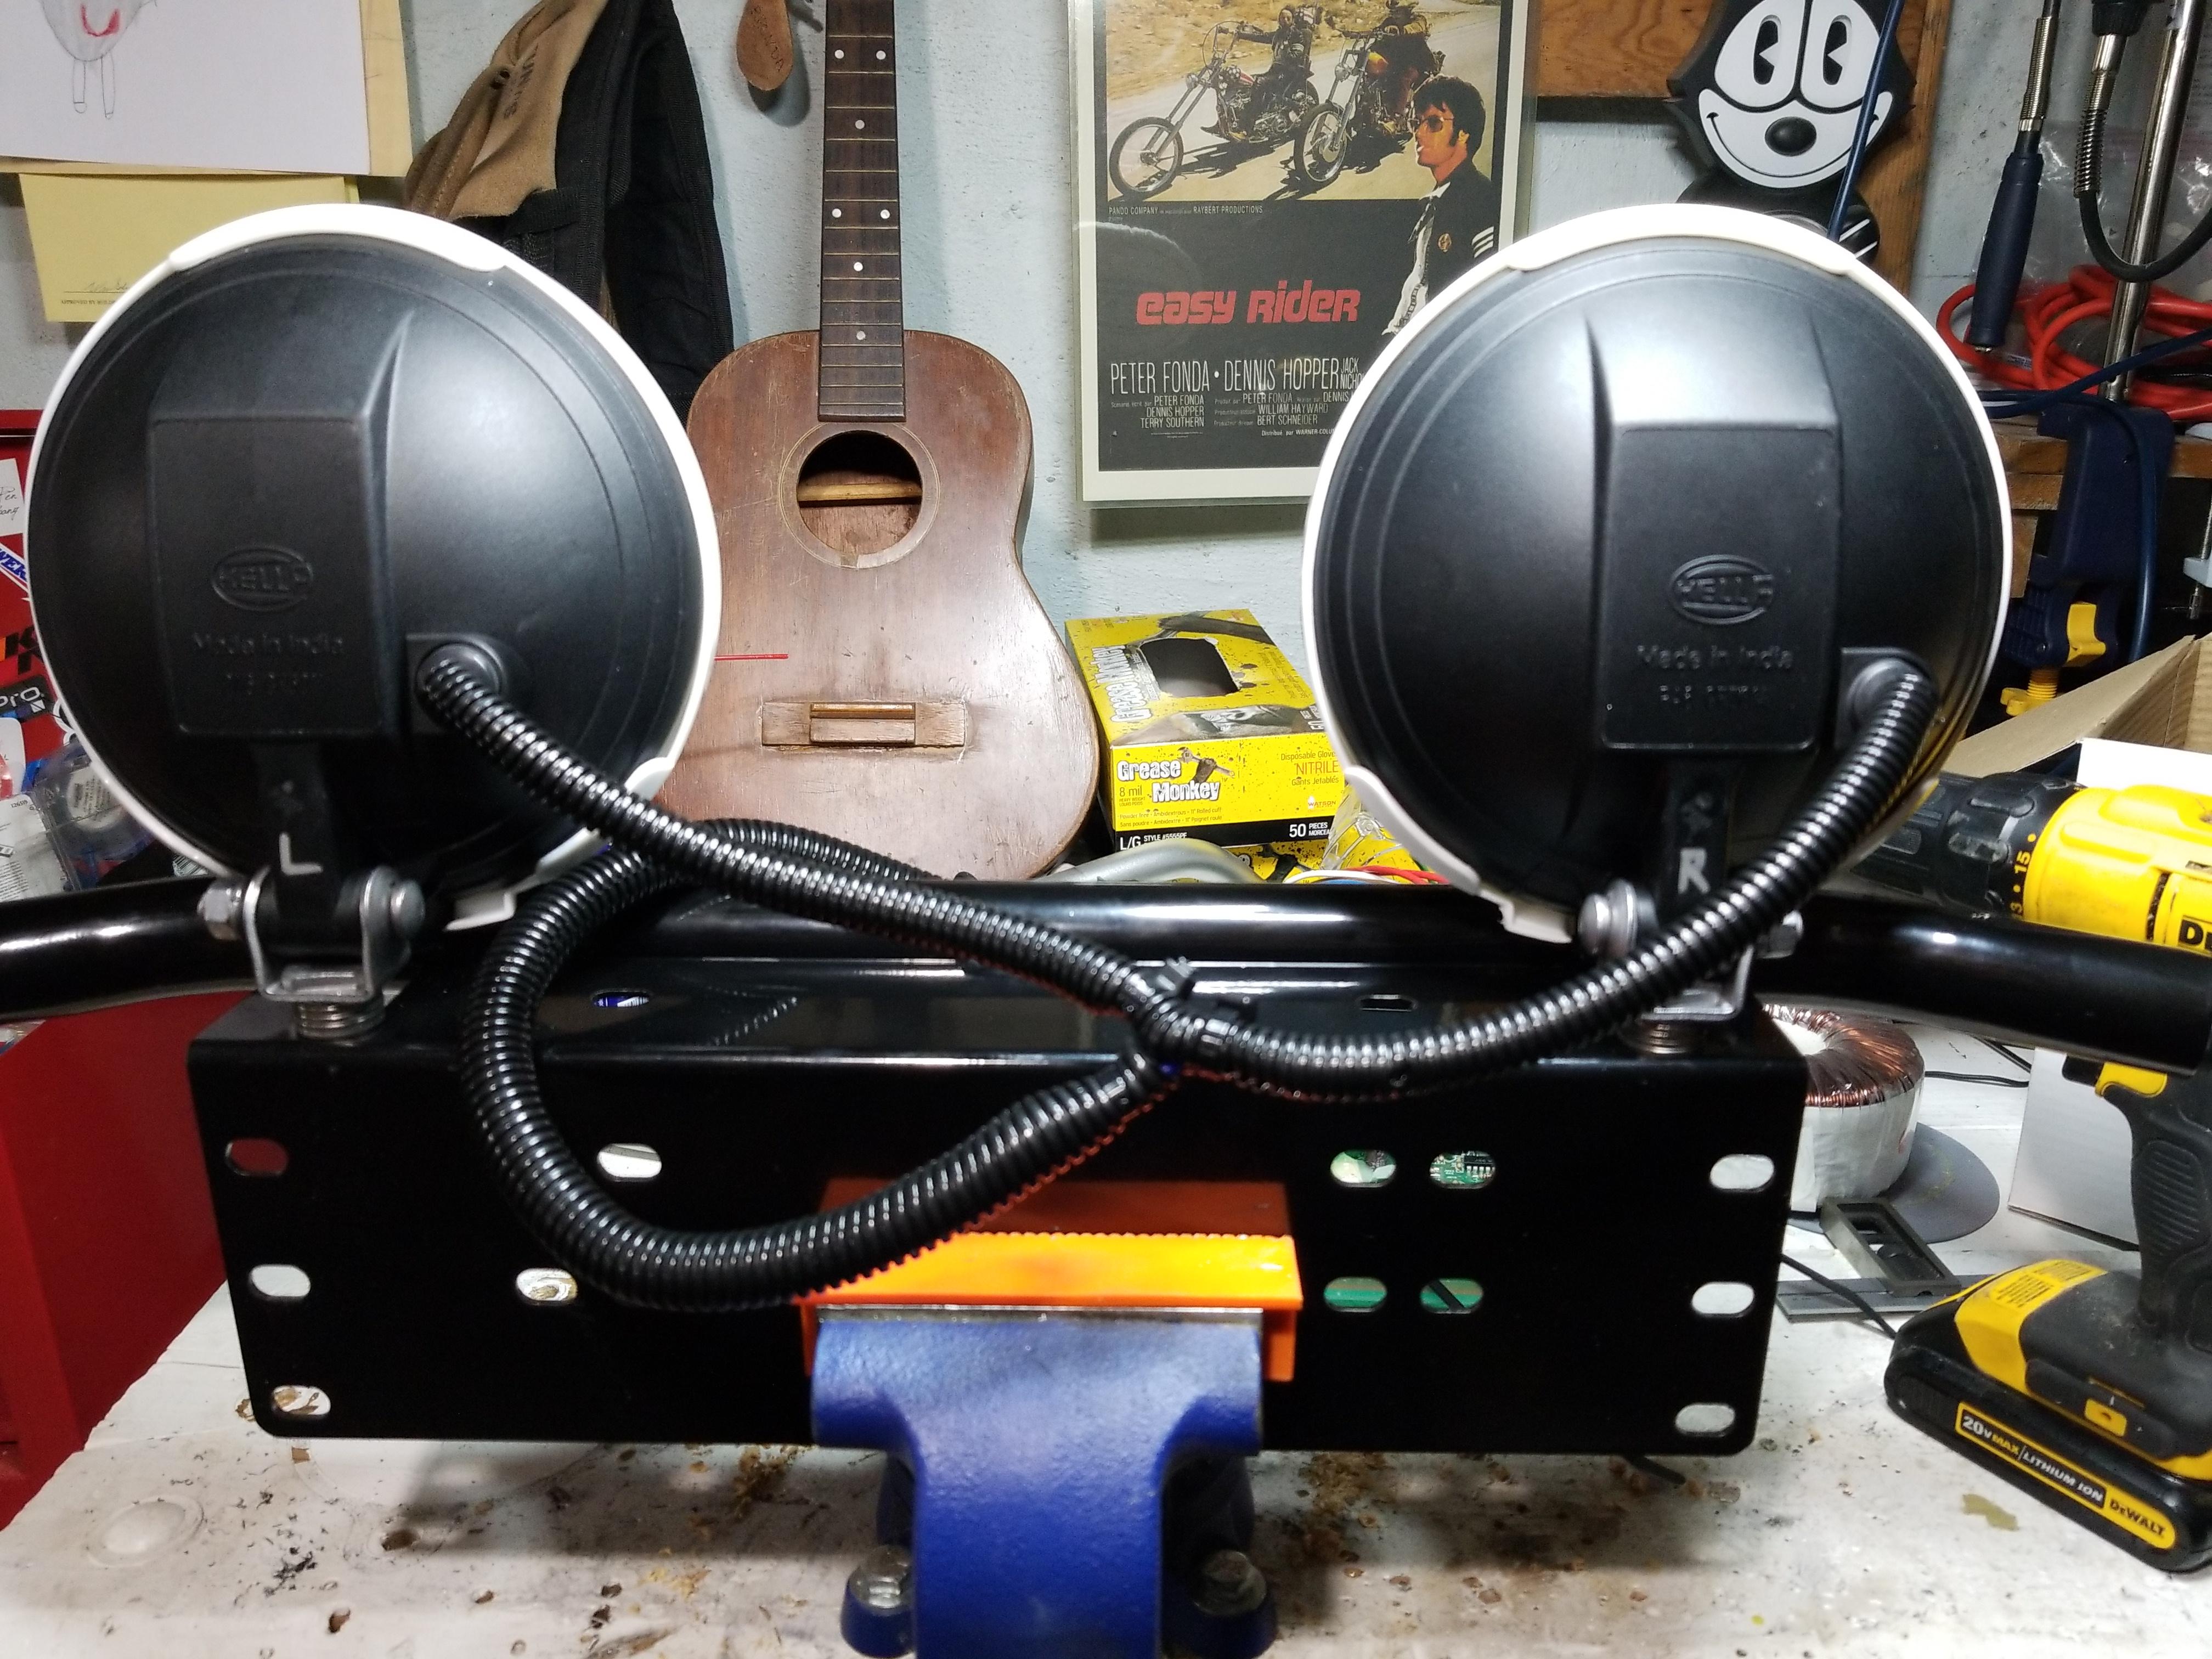
Mounted front and back
Had to elongate the holes, stack 5 10mm washers and cut off the bottom off the rock guards.
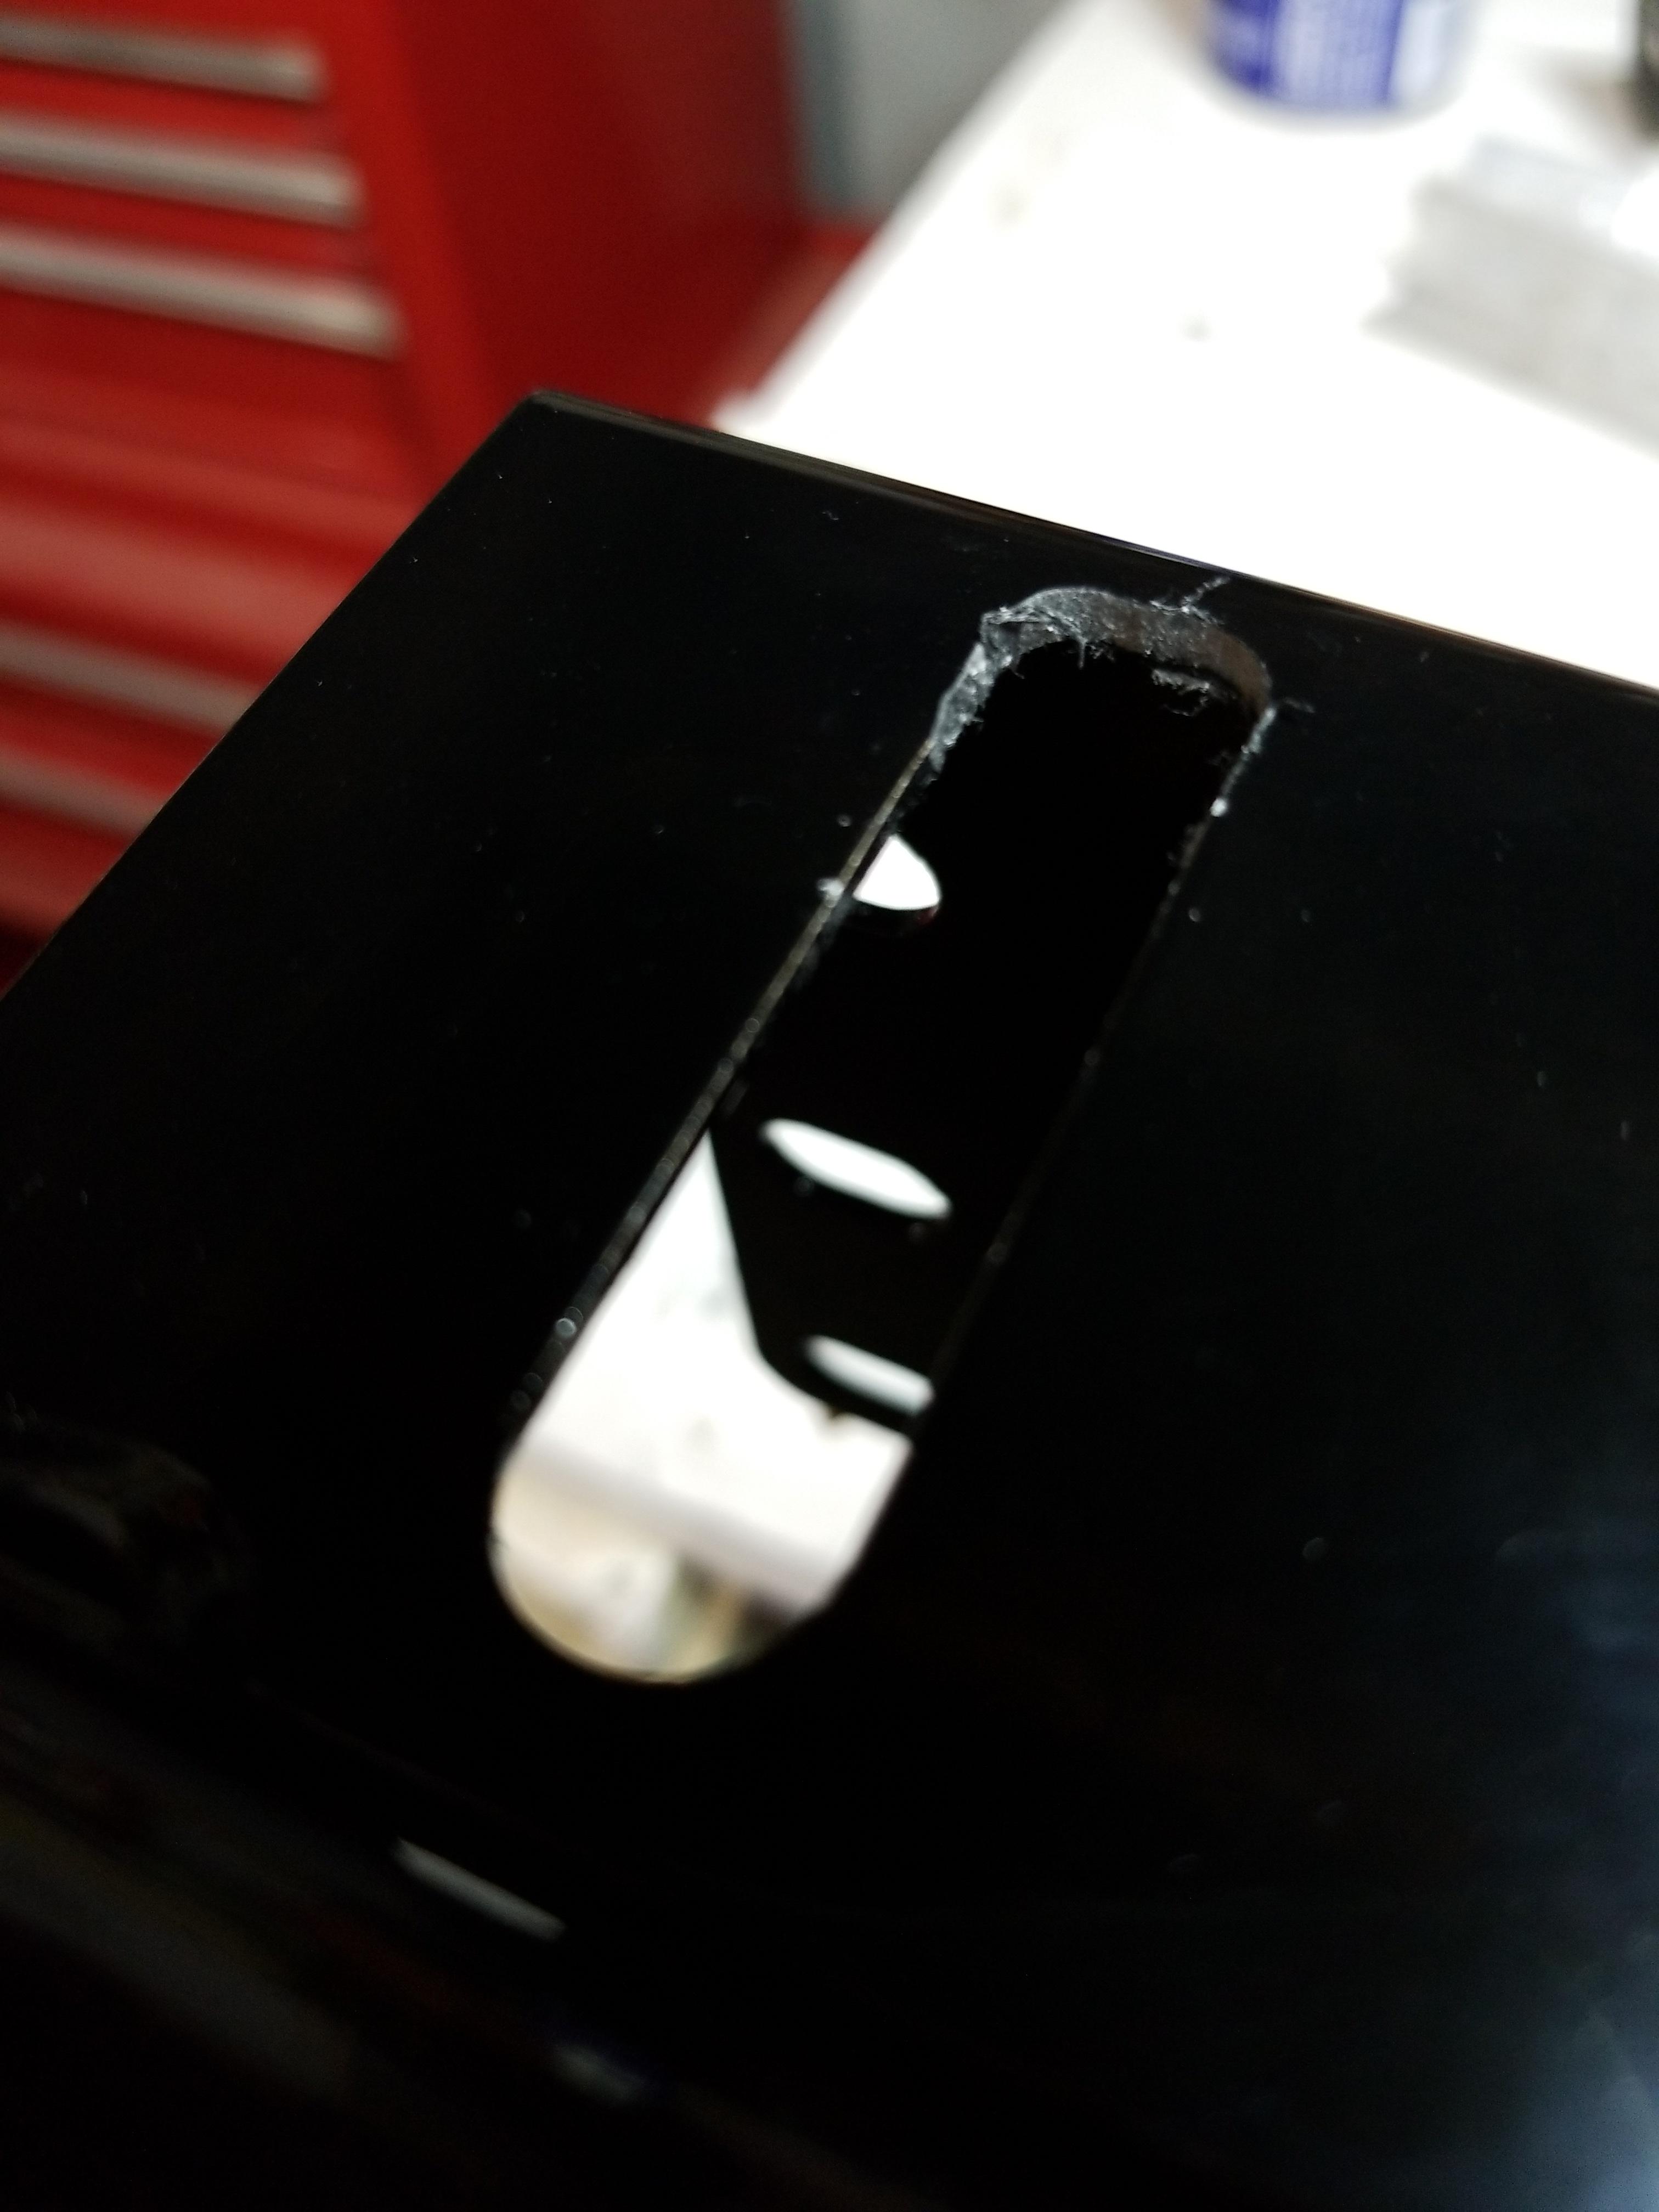
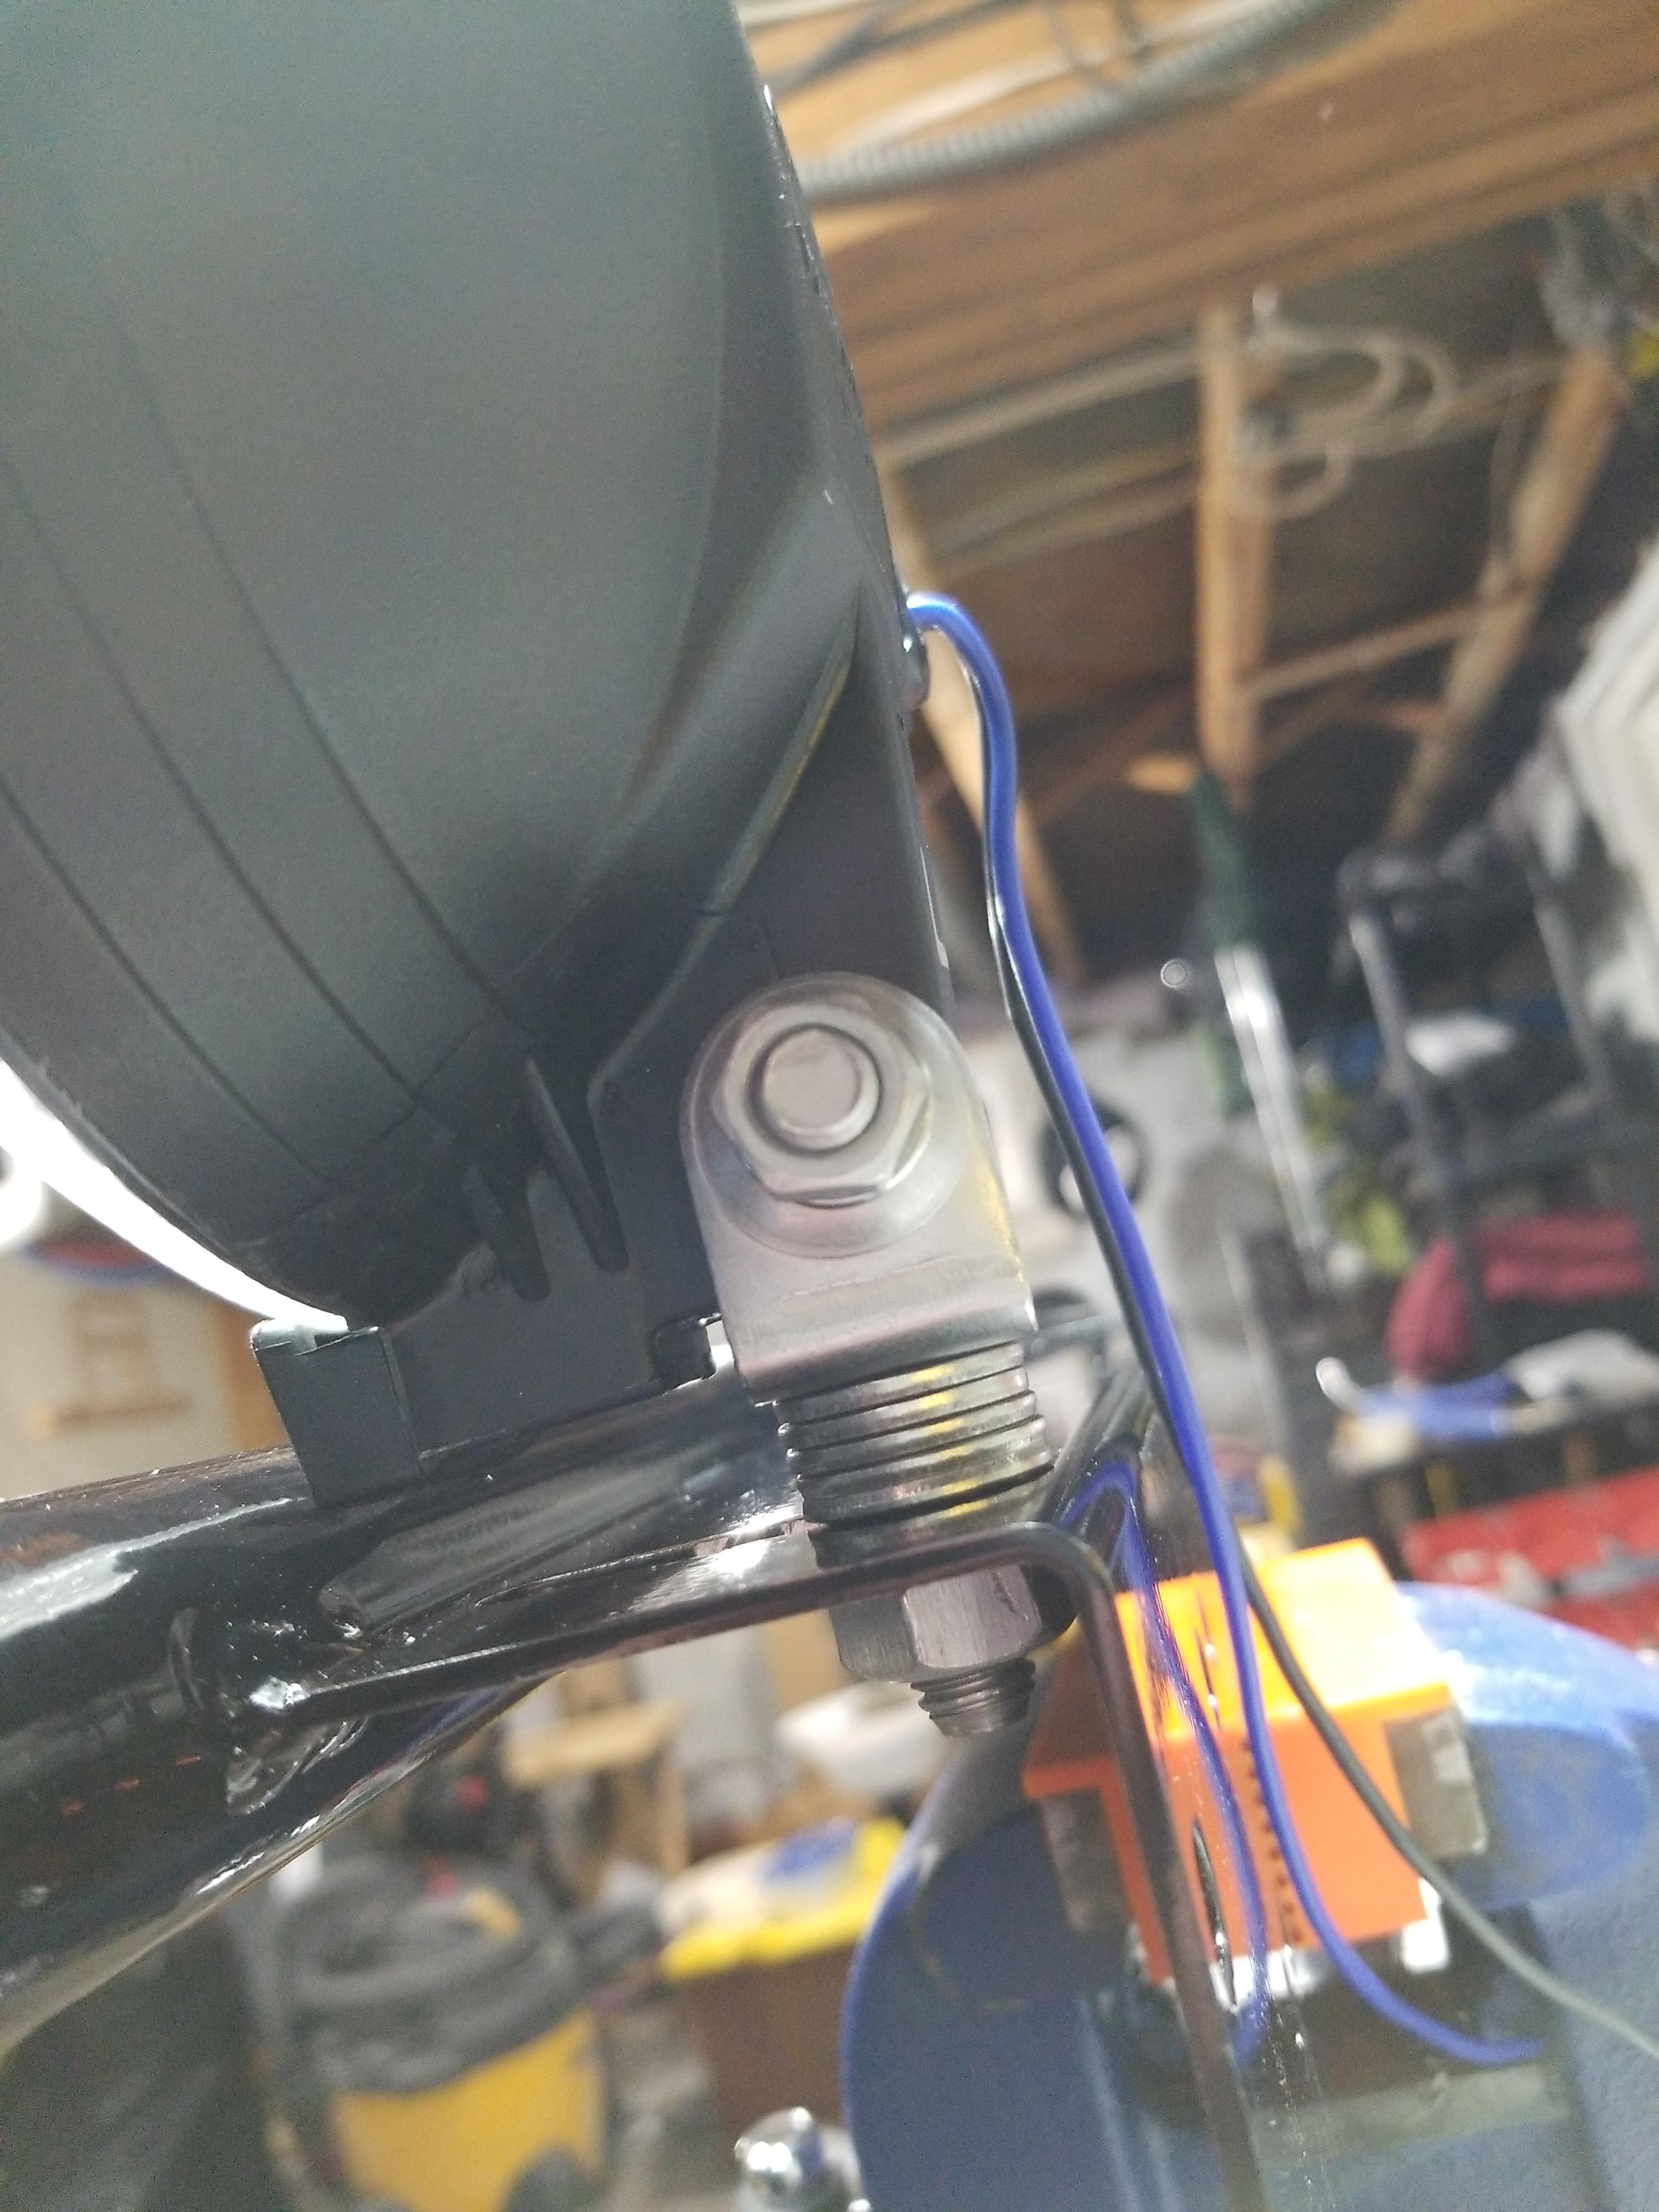
Plate comes off the front by unscrewing two 6mm bolts (10mm socket). I had mocked up where it would be according to the two bolts that hold the plate on the mount and their location on the bumper.

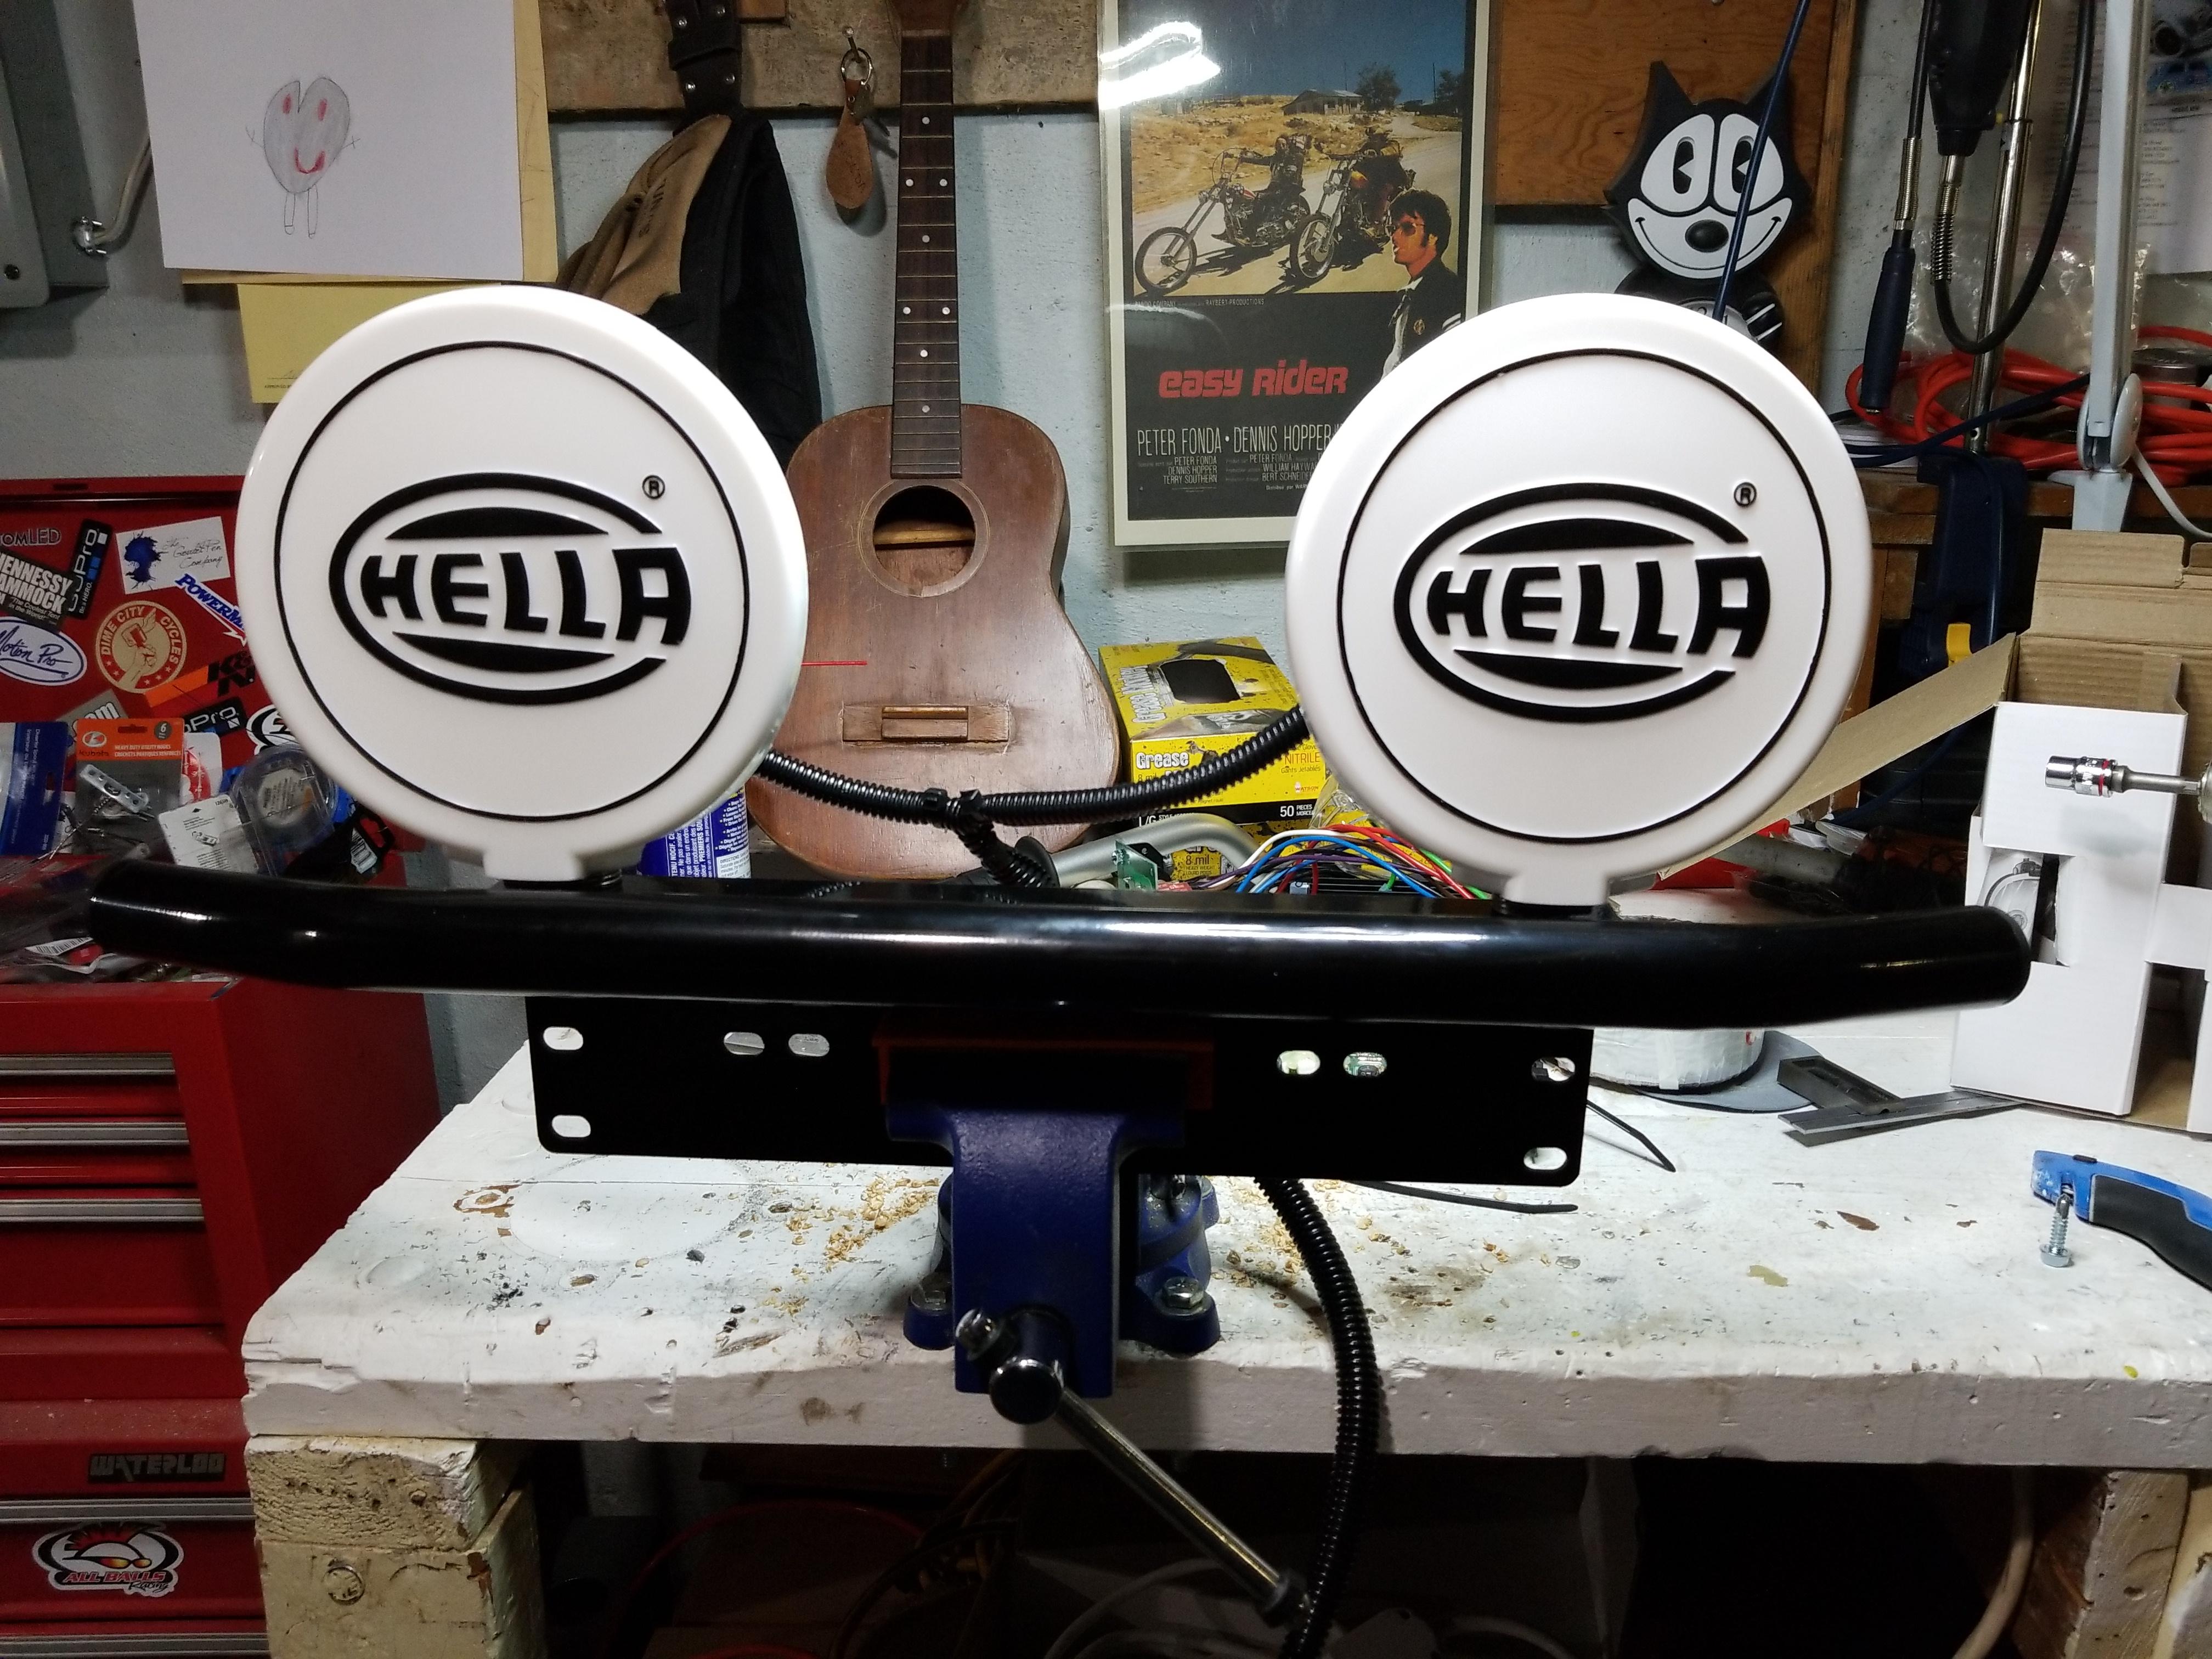
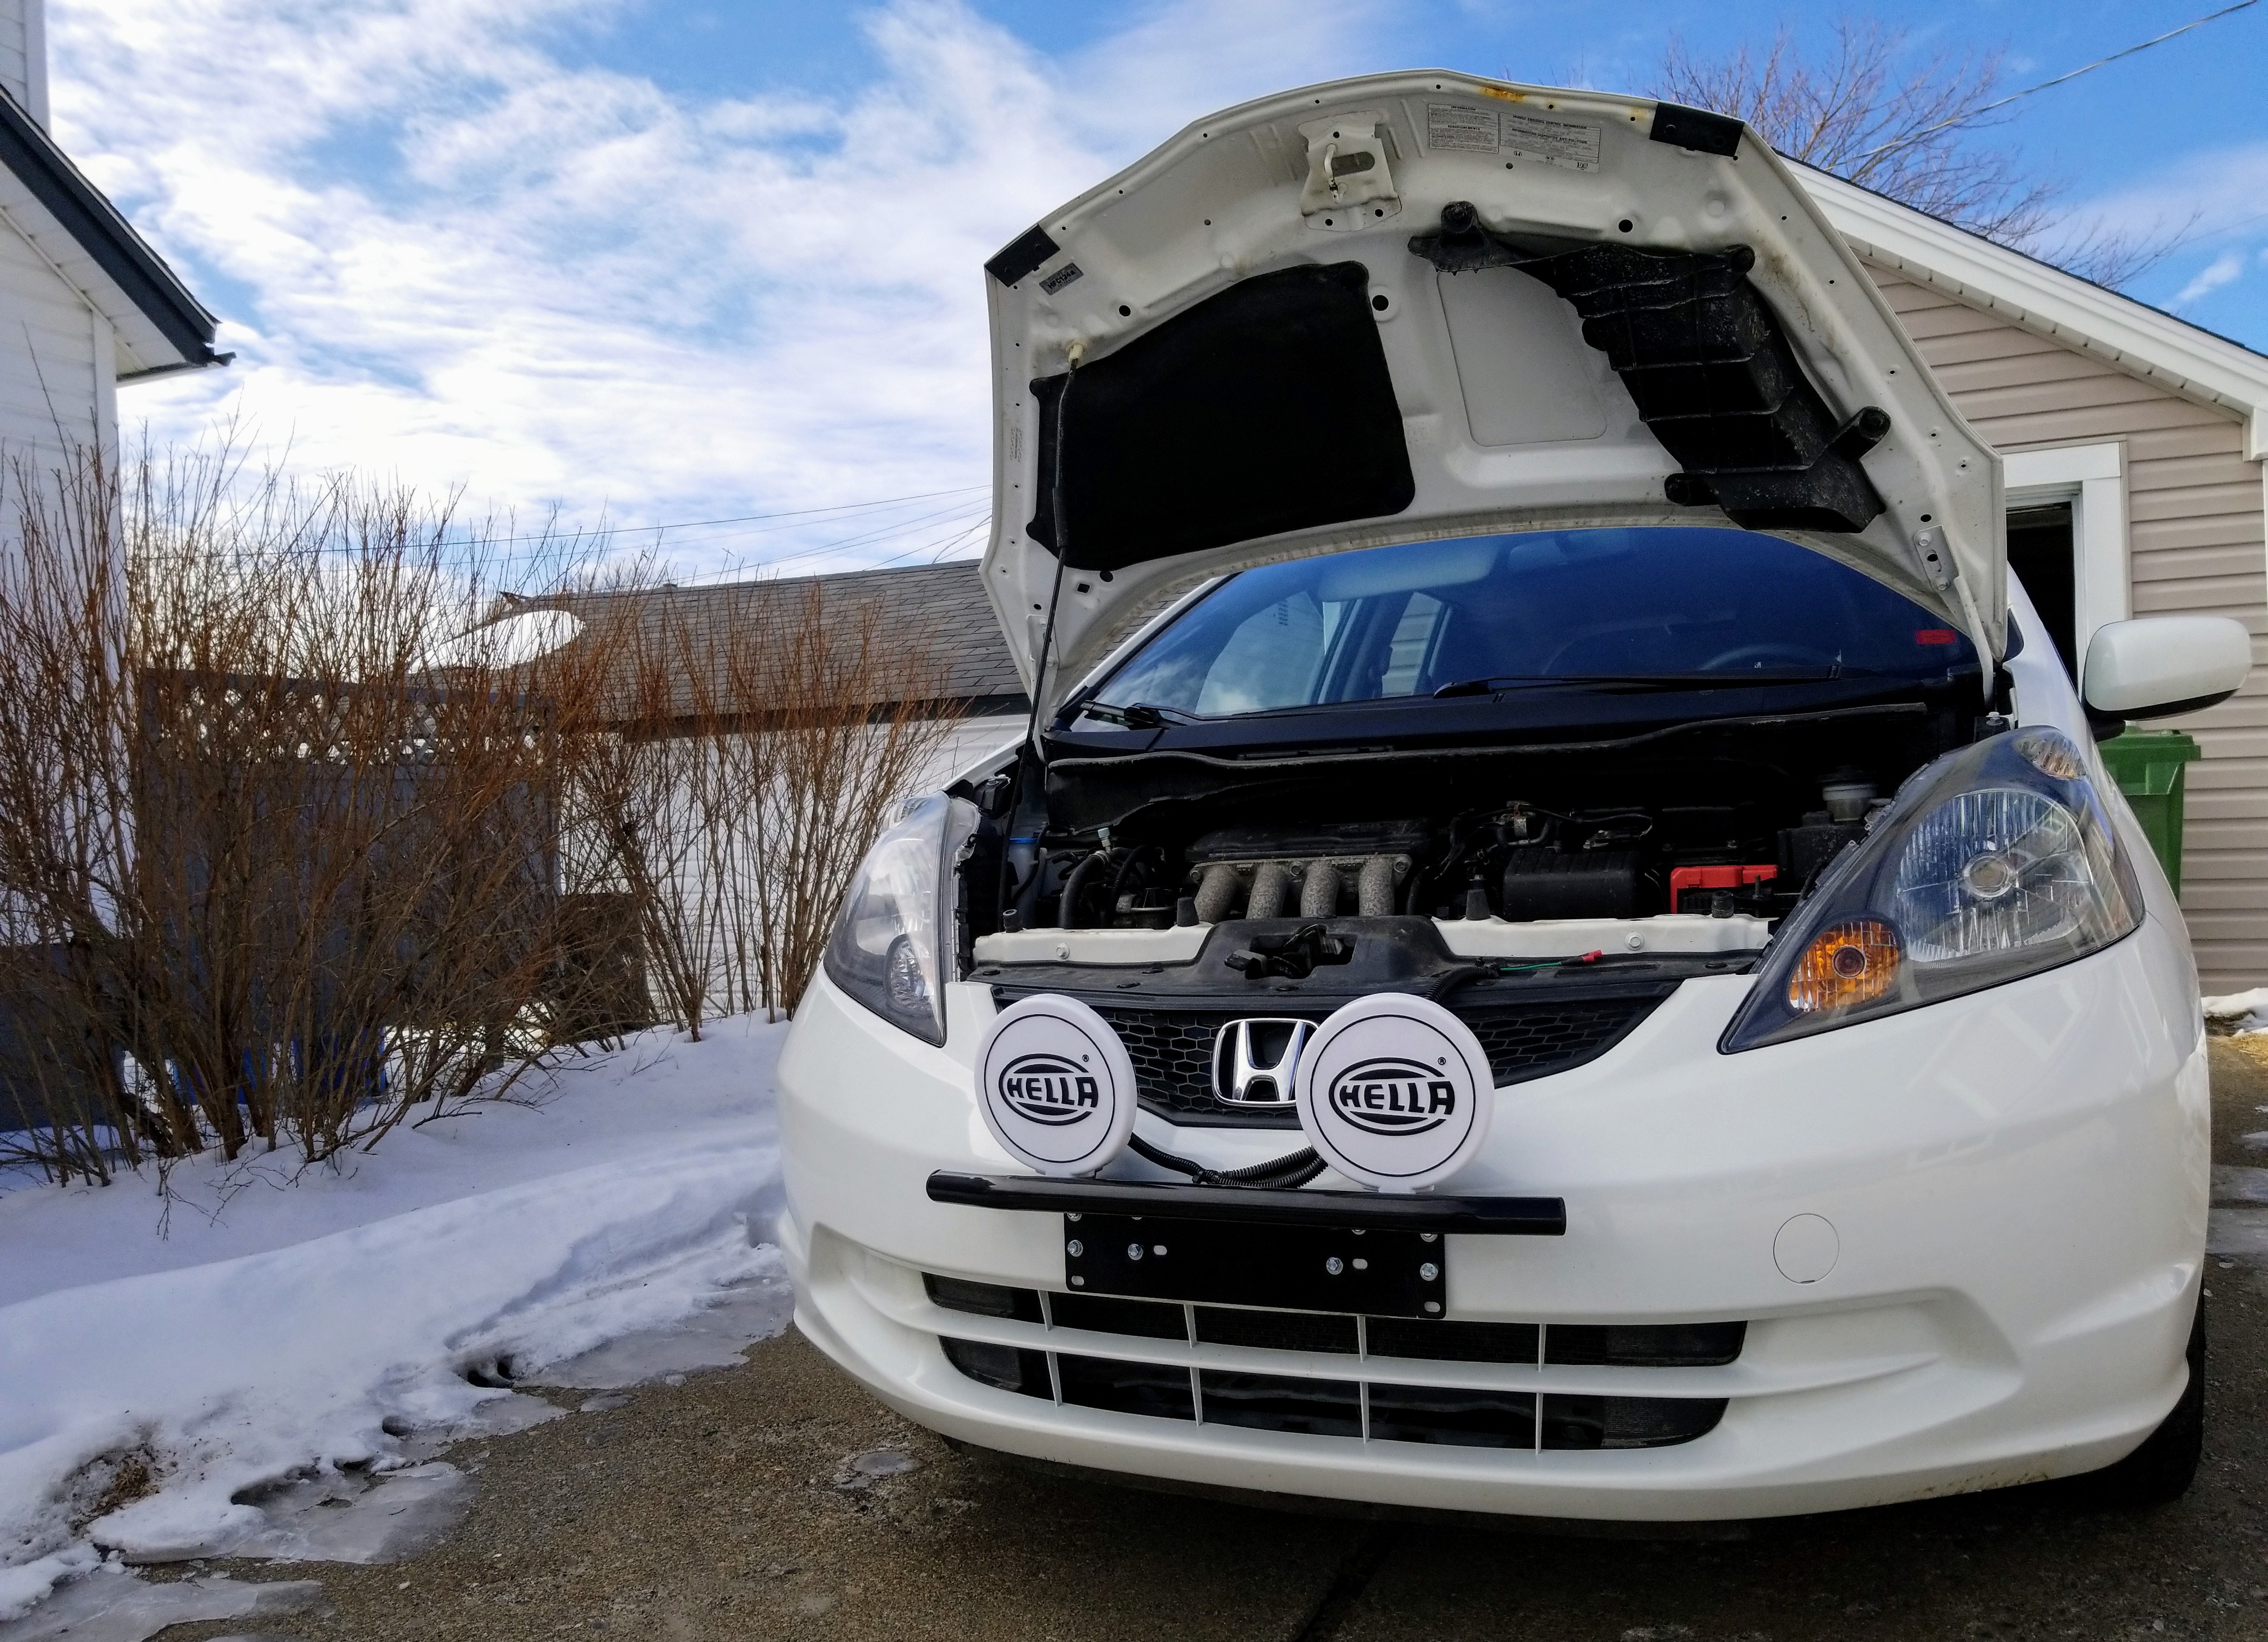
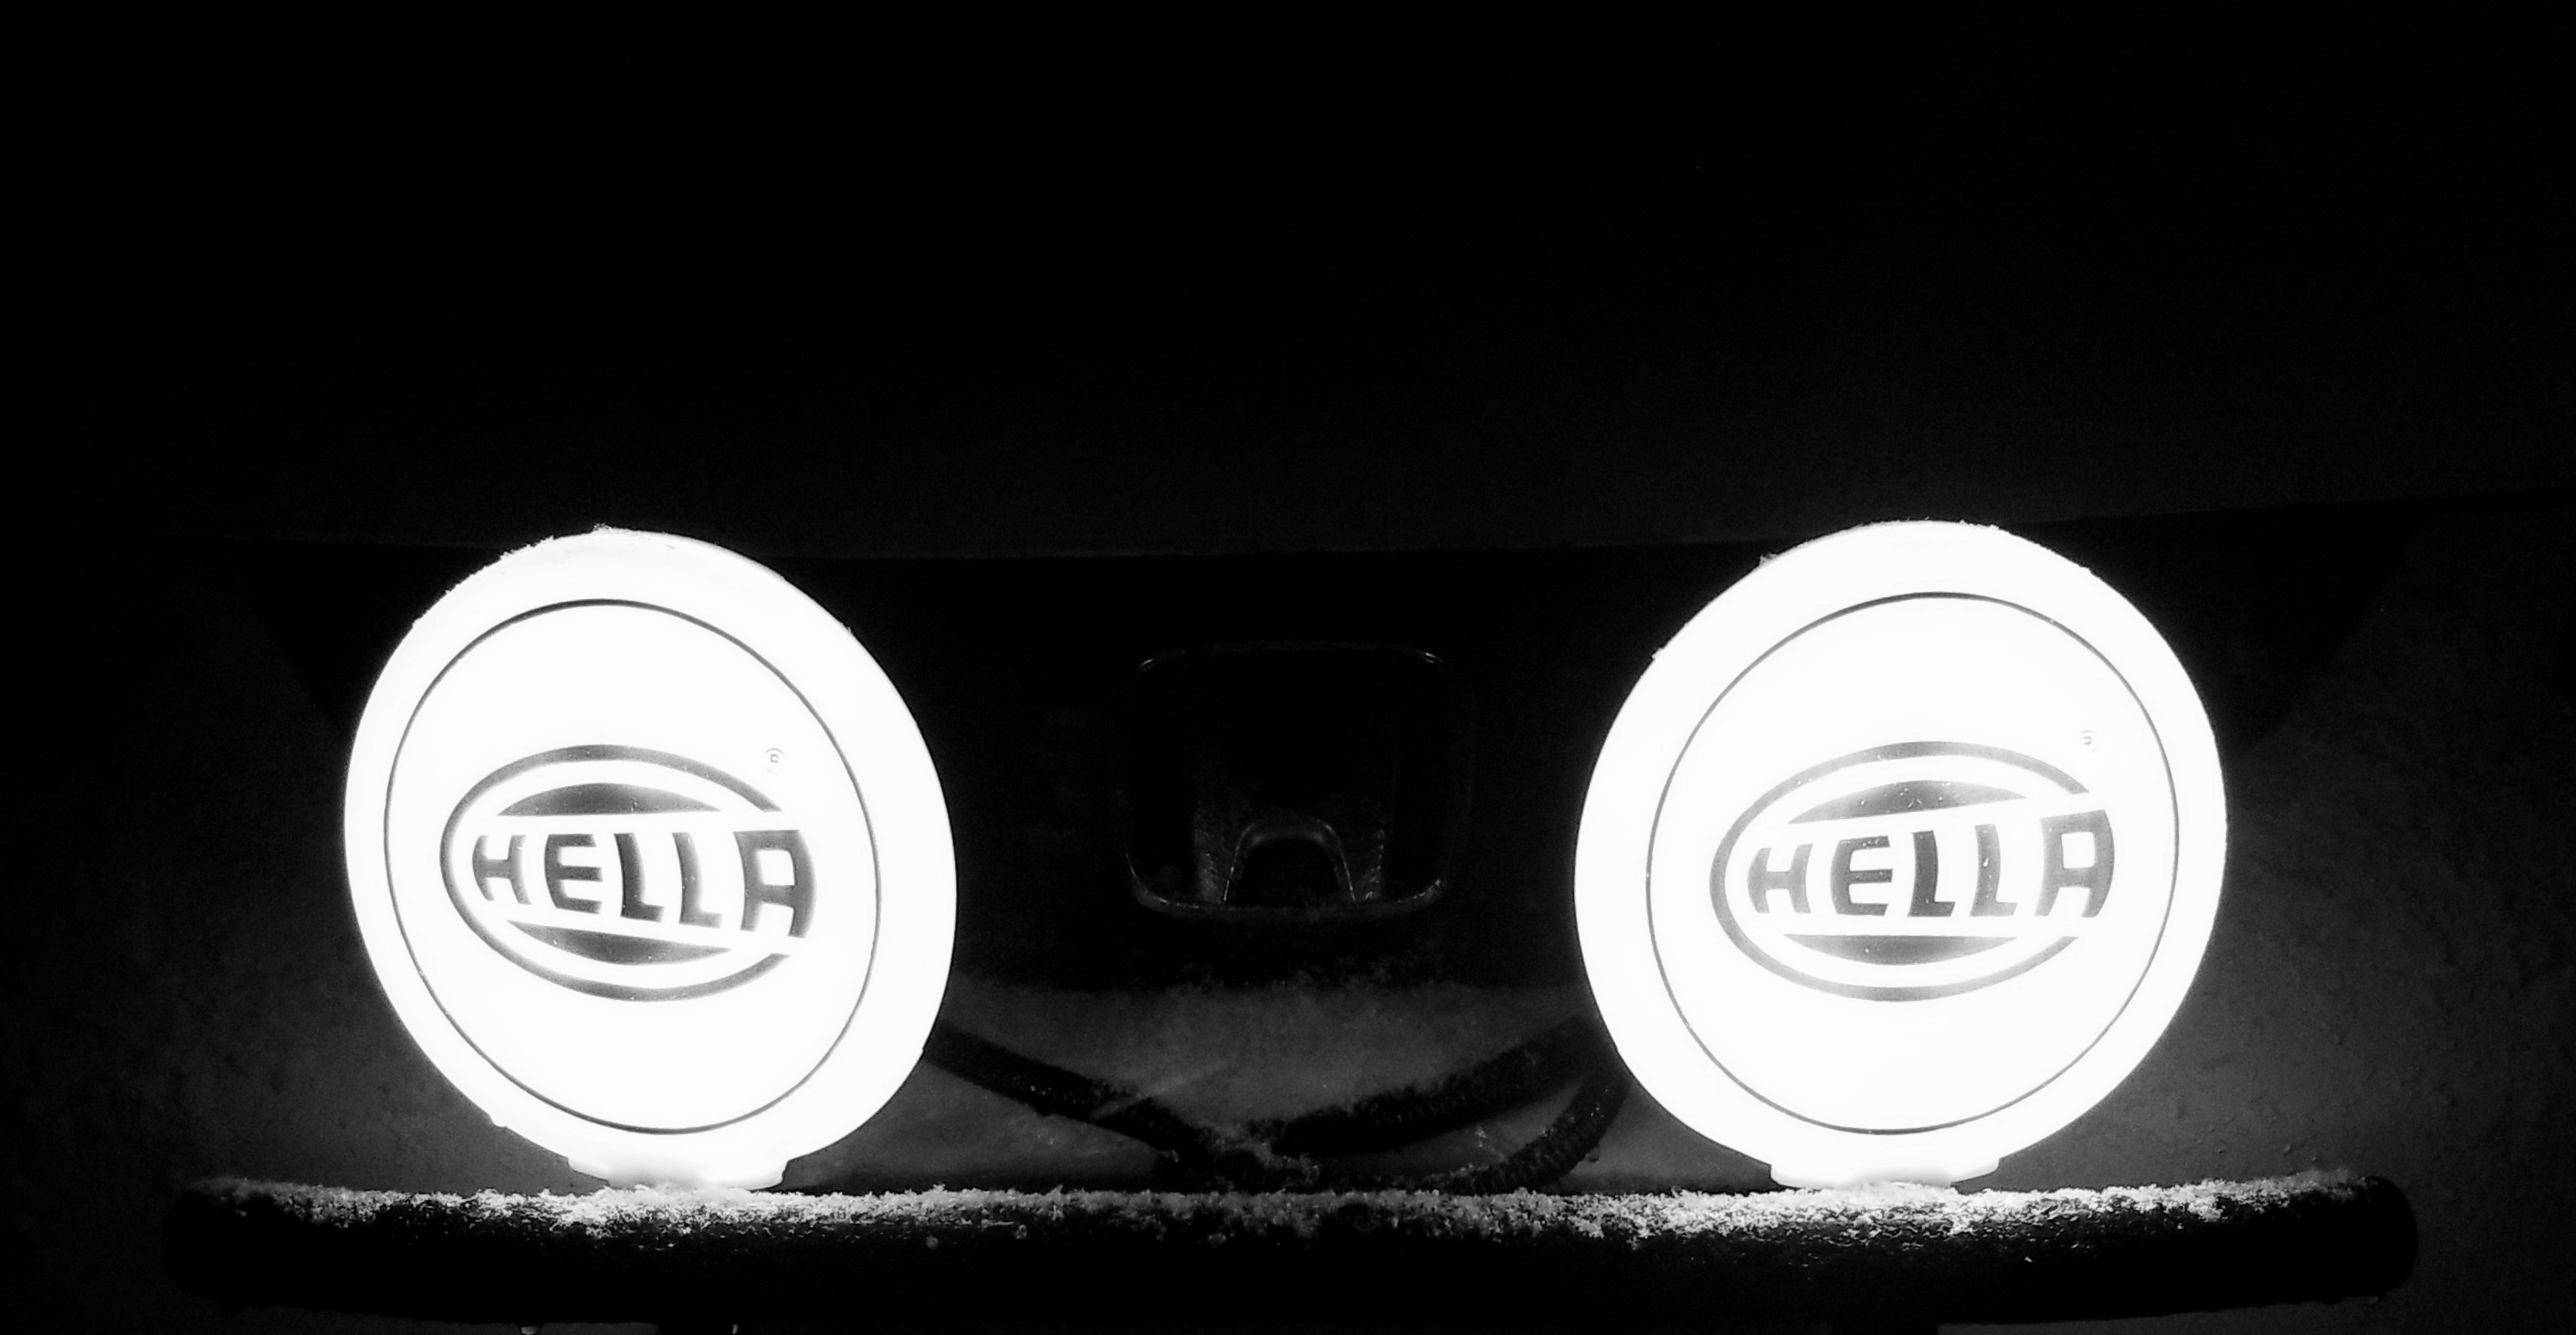
Then slap some lights on there:
Now onto the wiring...
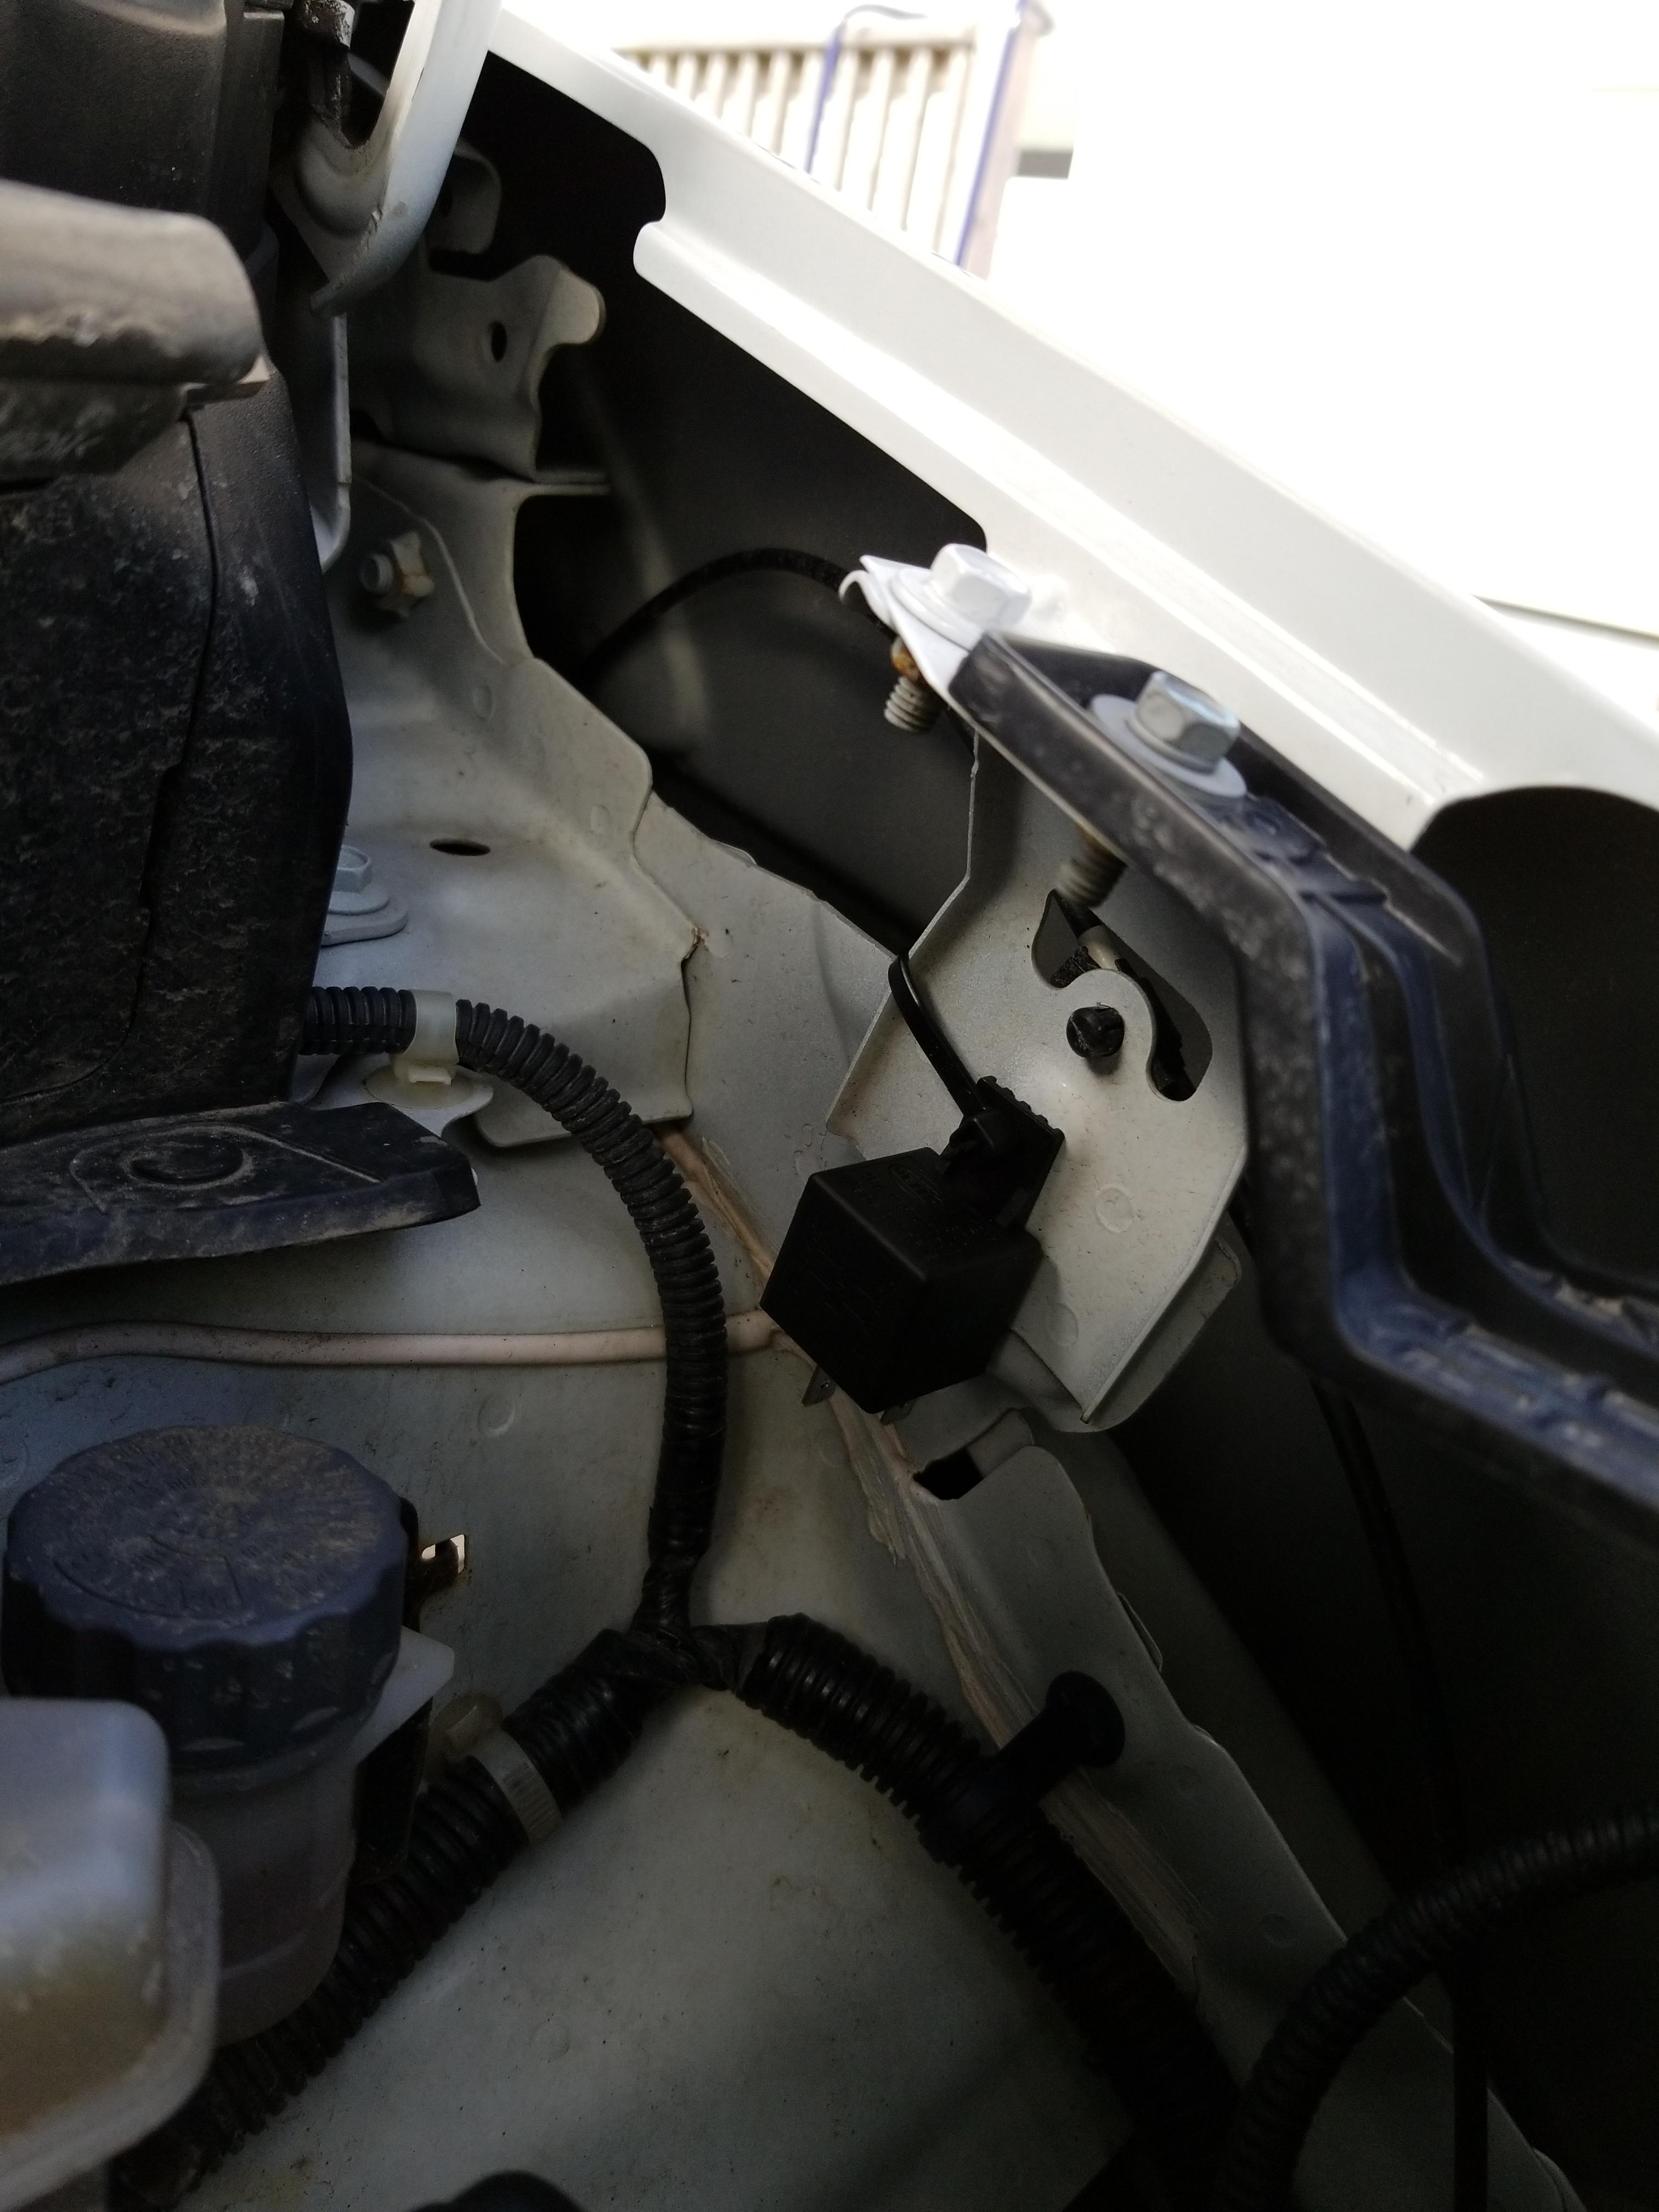
Relay location
Wiring tidied up. The instructions in the Hella kit are awesome. But you can look up any "how to wire a relay" video and it'll tell the same thing.
Red with 15A fuse direct to battery
Blue is ground
Black is switched power to the lights
Yellow is the switched 12V pickup to trigger the relay
The green wire is the ground to the lights themselves. I went with old Honda ground colour (from my motorcycle) as I didn't have any blue.
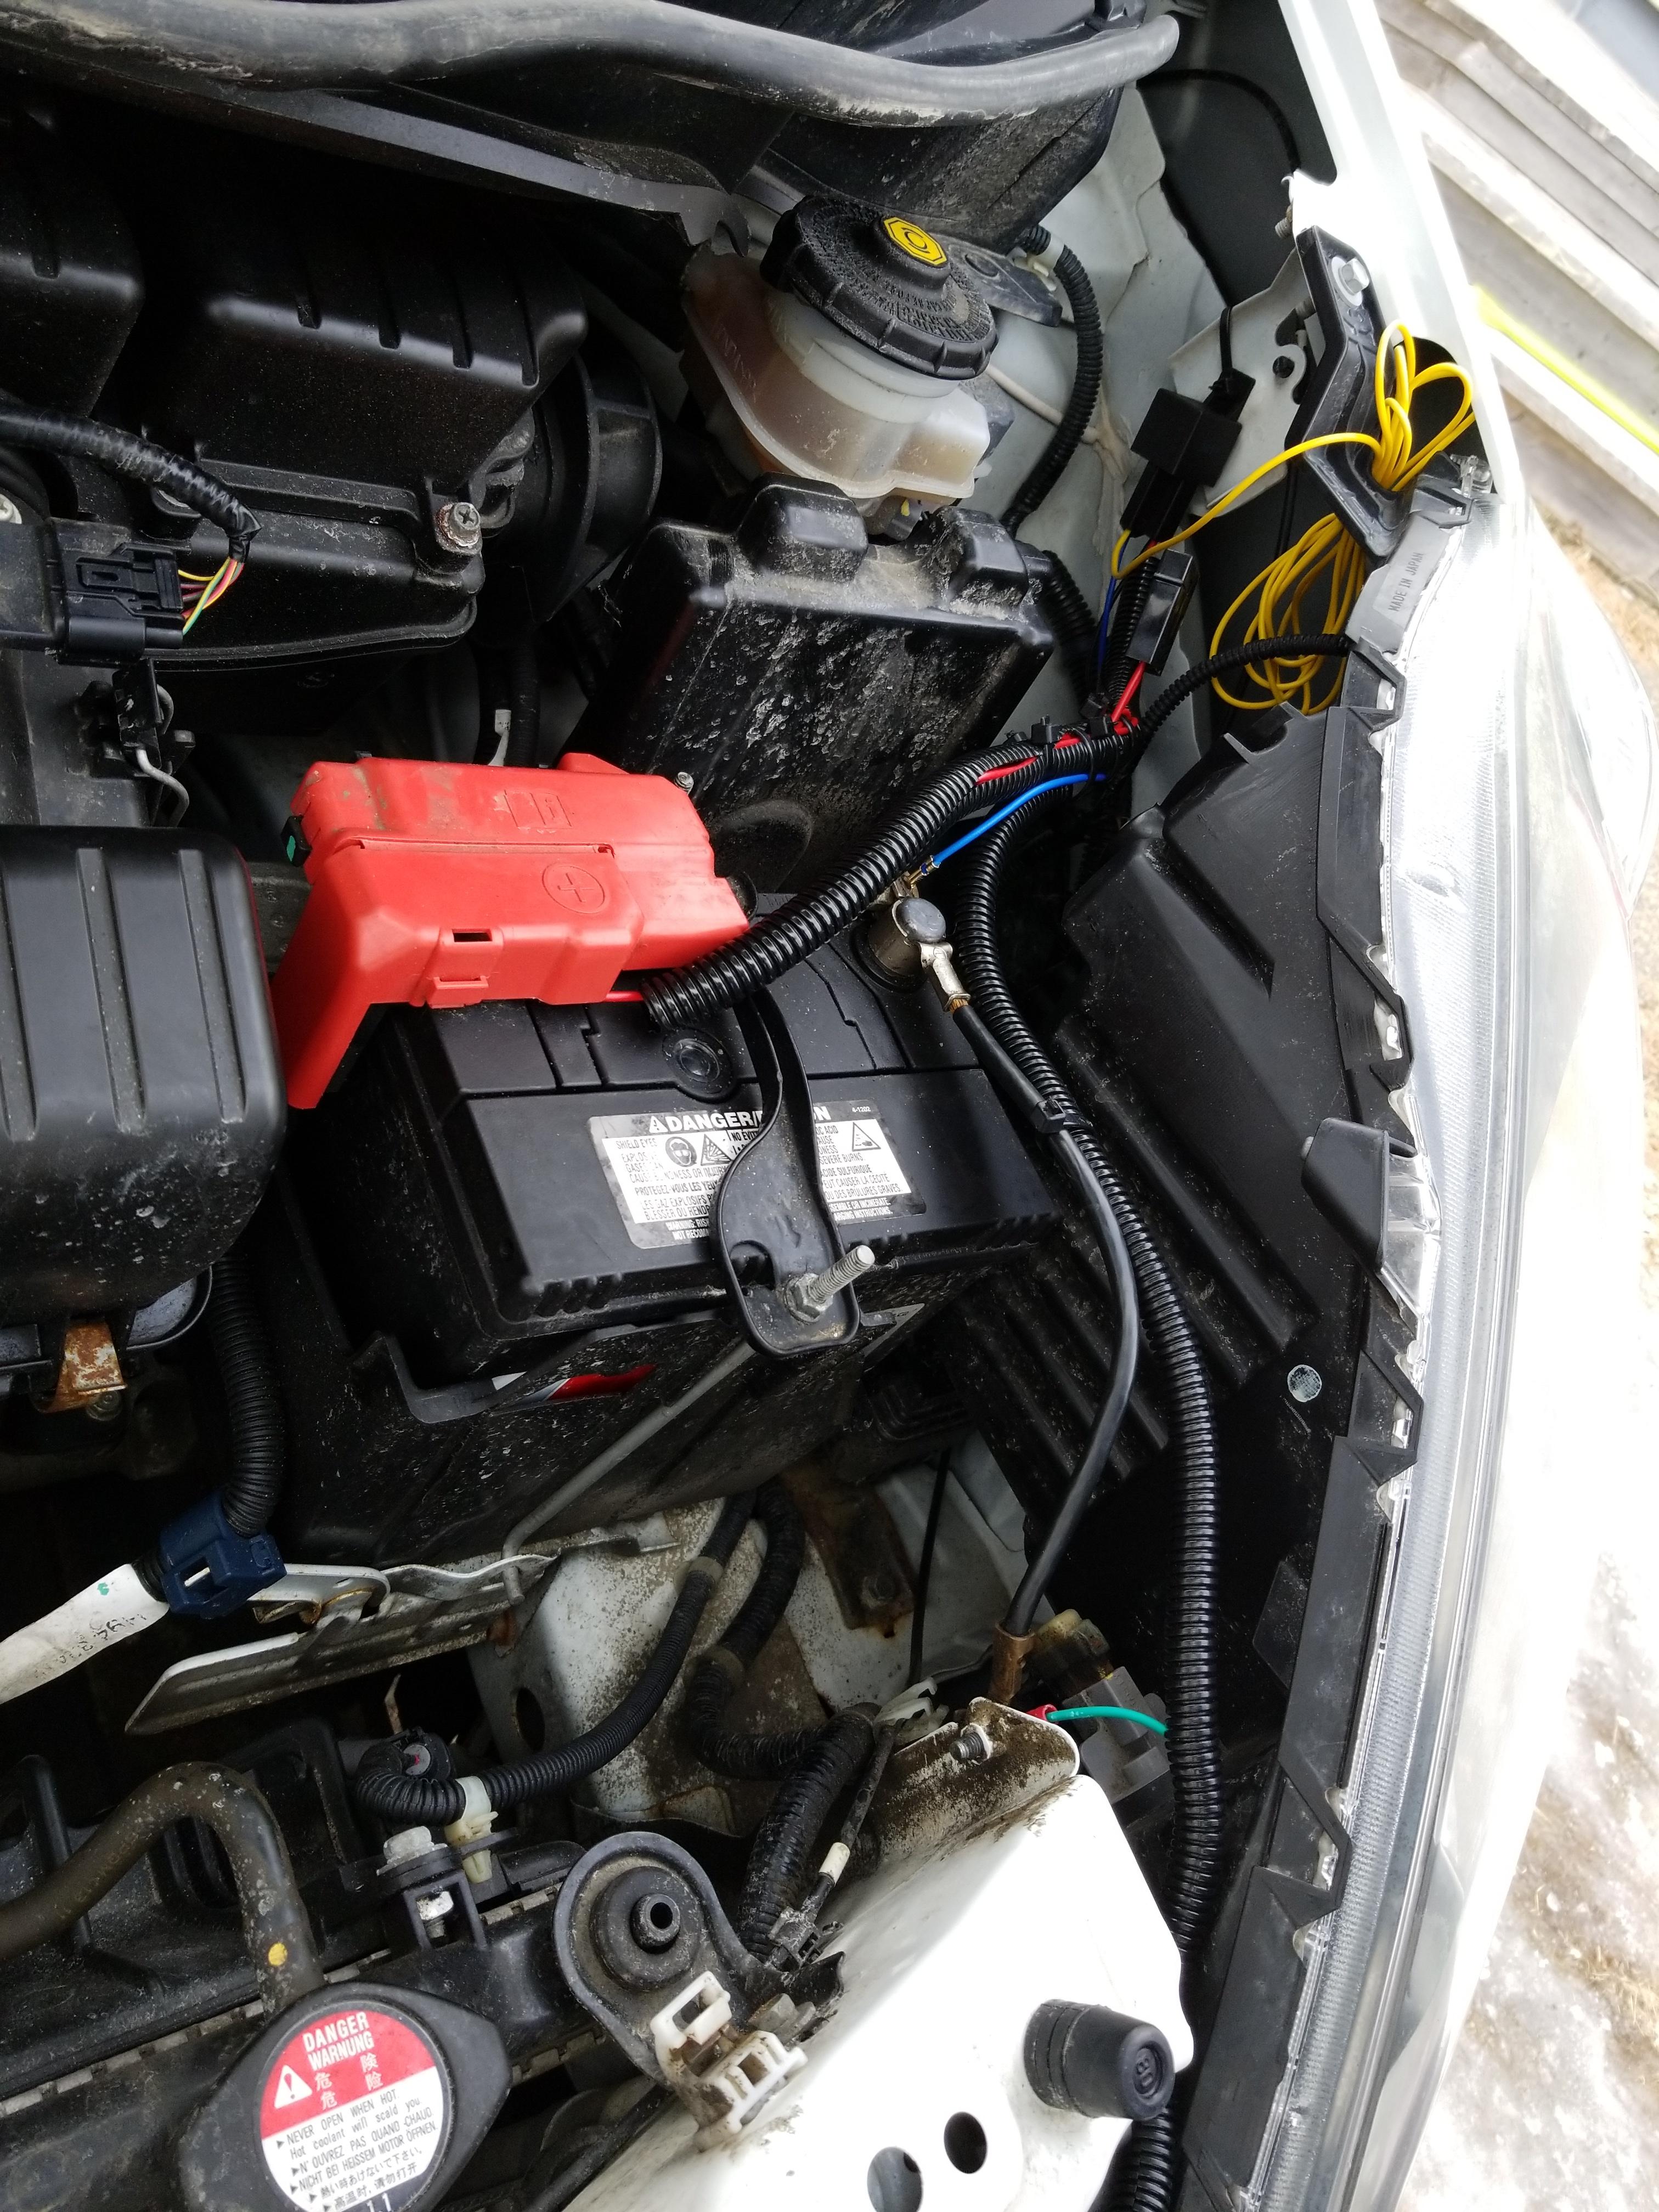
Full shot of the wiring
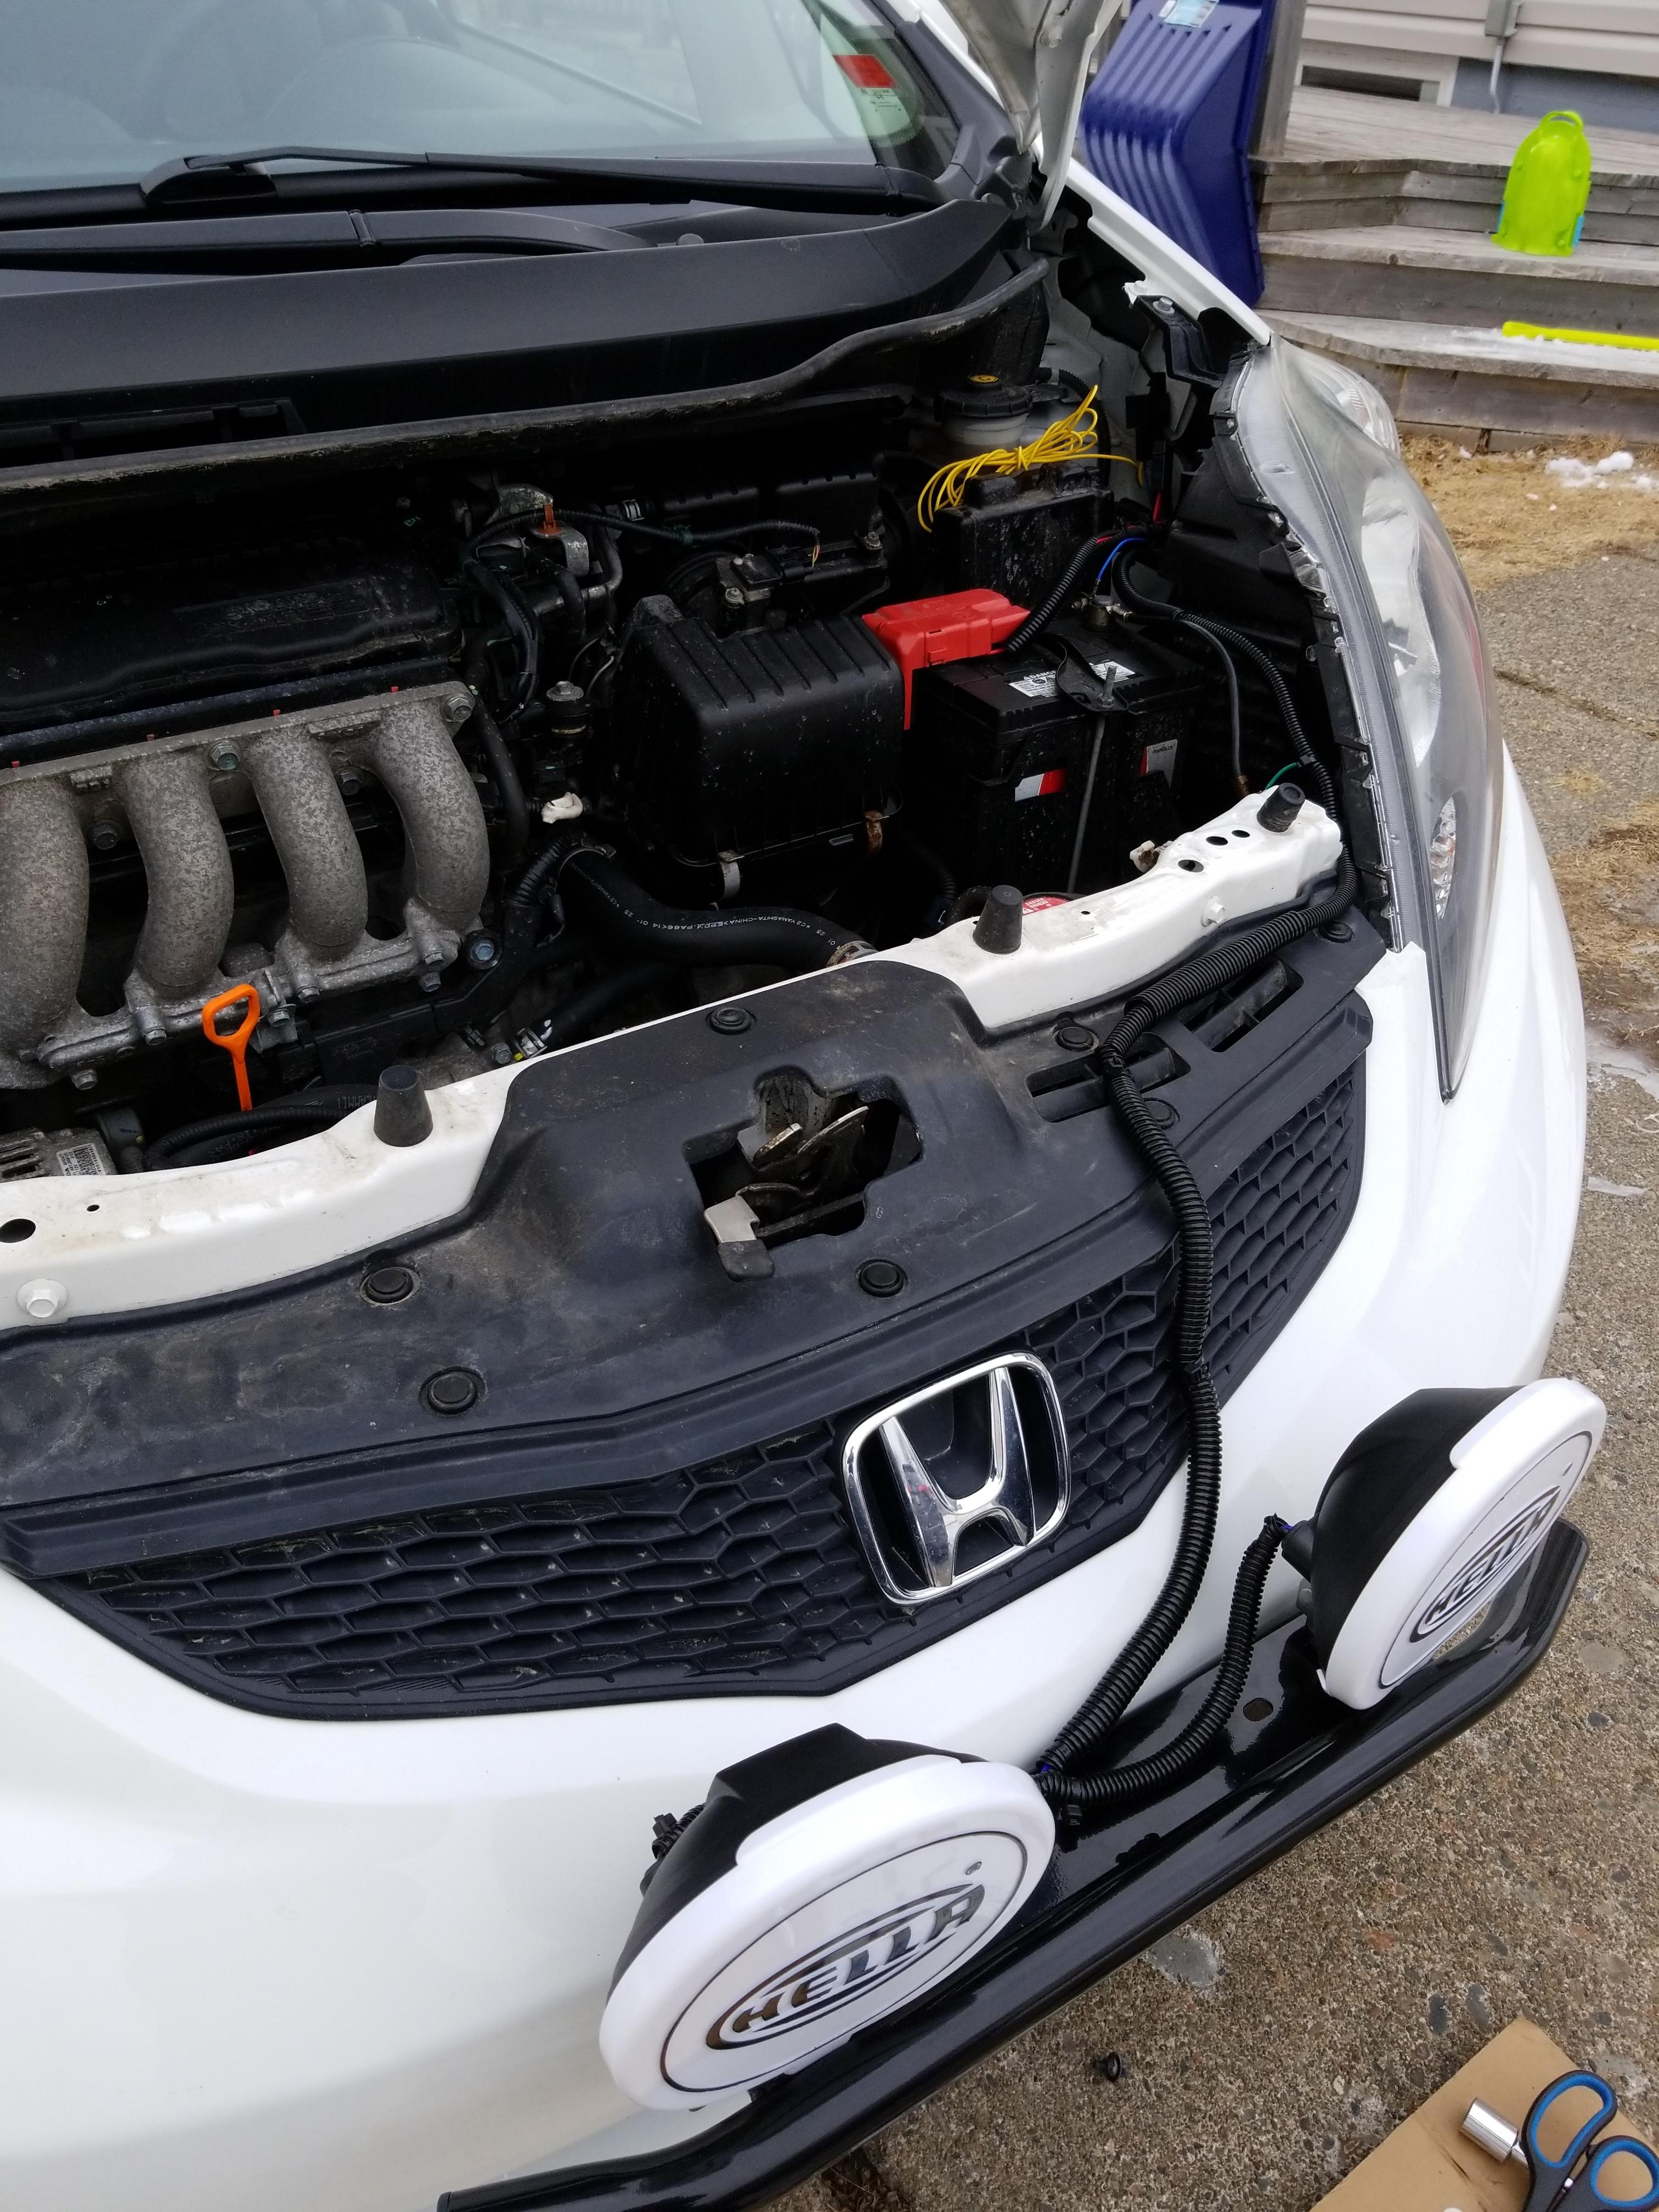
Closed up. The plate mount wouldn't go back on with the original two bolts underneath (which are used so you don't have to drill holes in the bumper). So I just did the single bolt through the middle of the plate mount which went right into the light mount and bumper. This also allowed the plate to sit a bit lower to clear the nuts underneath that hold the lights on.

Looks pretty badass if you ask me!
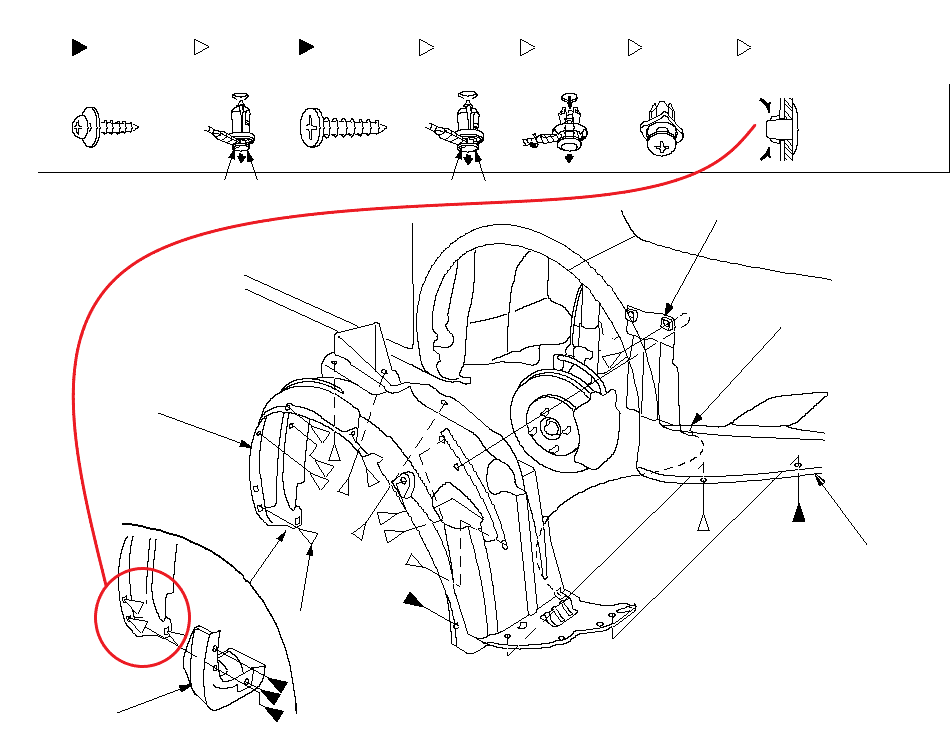
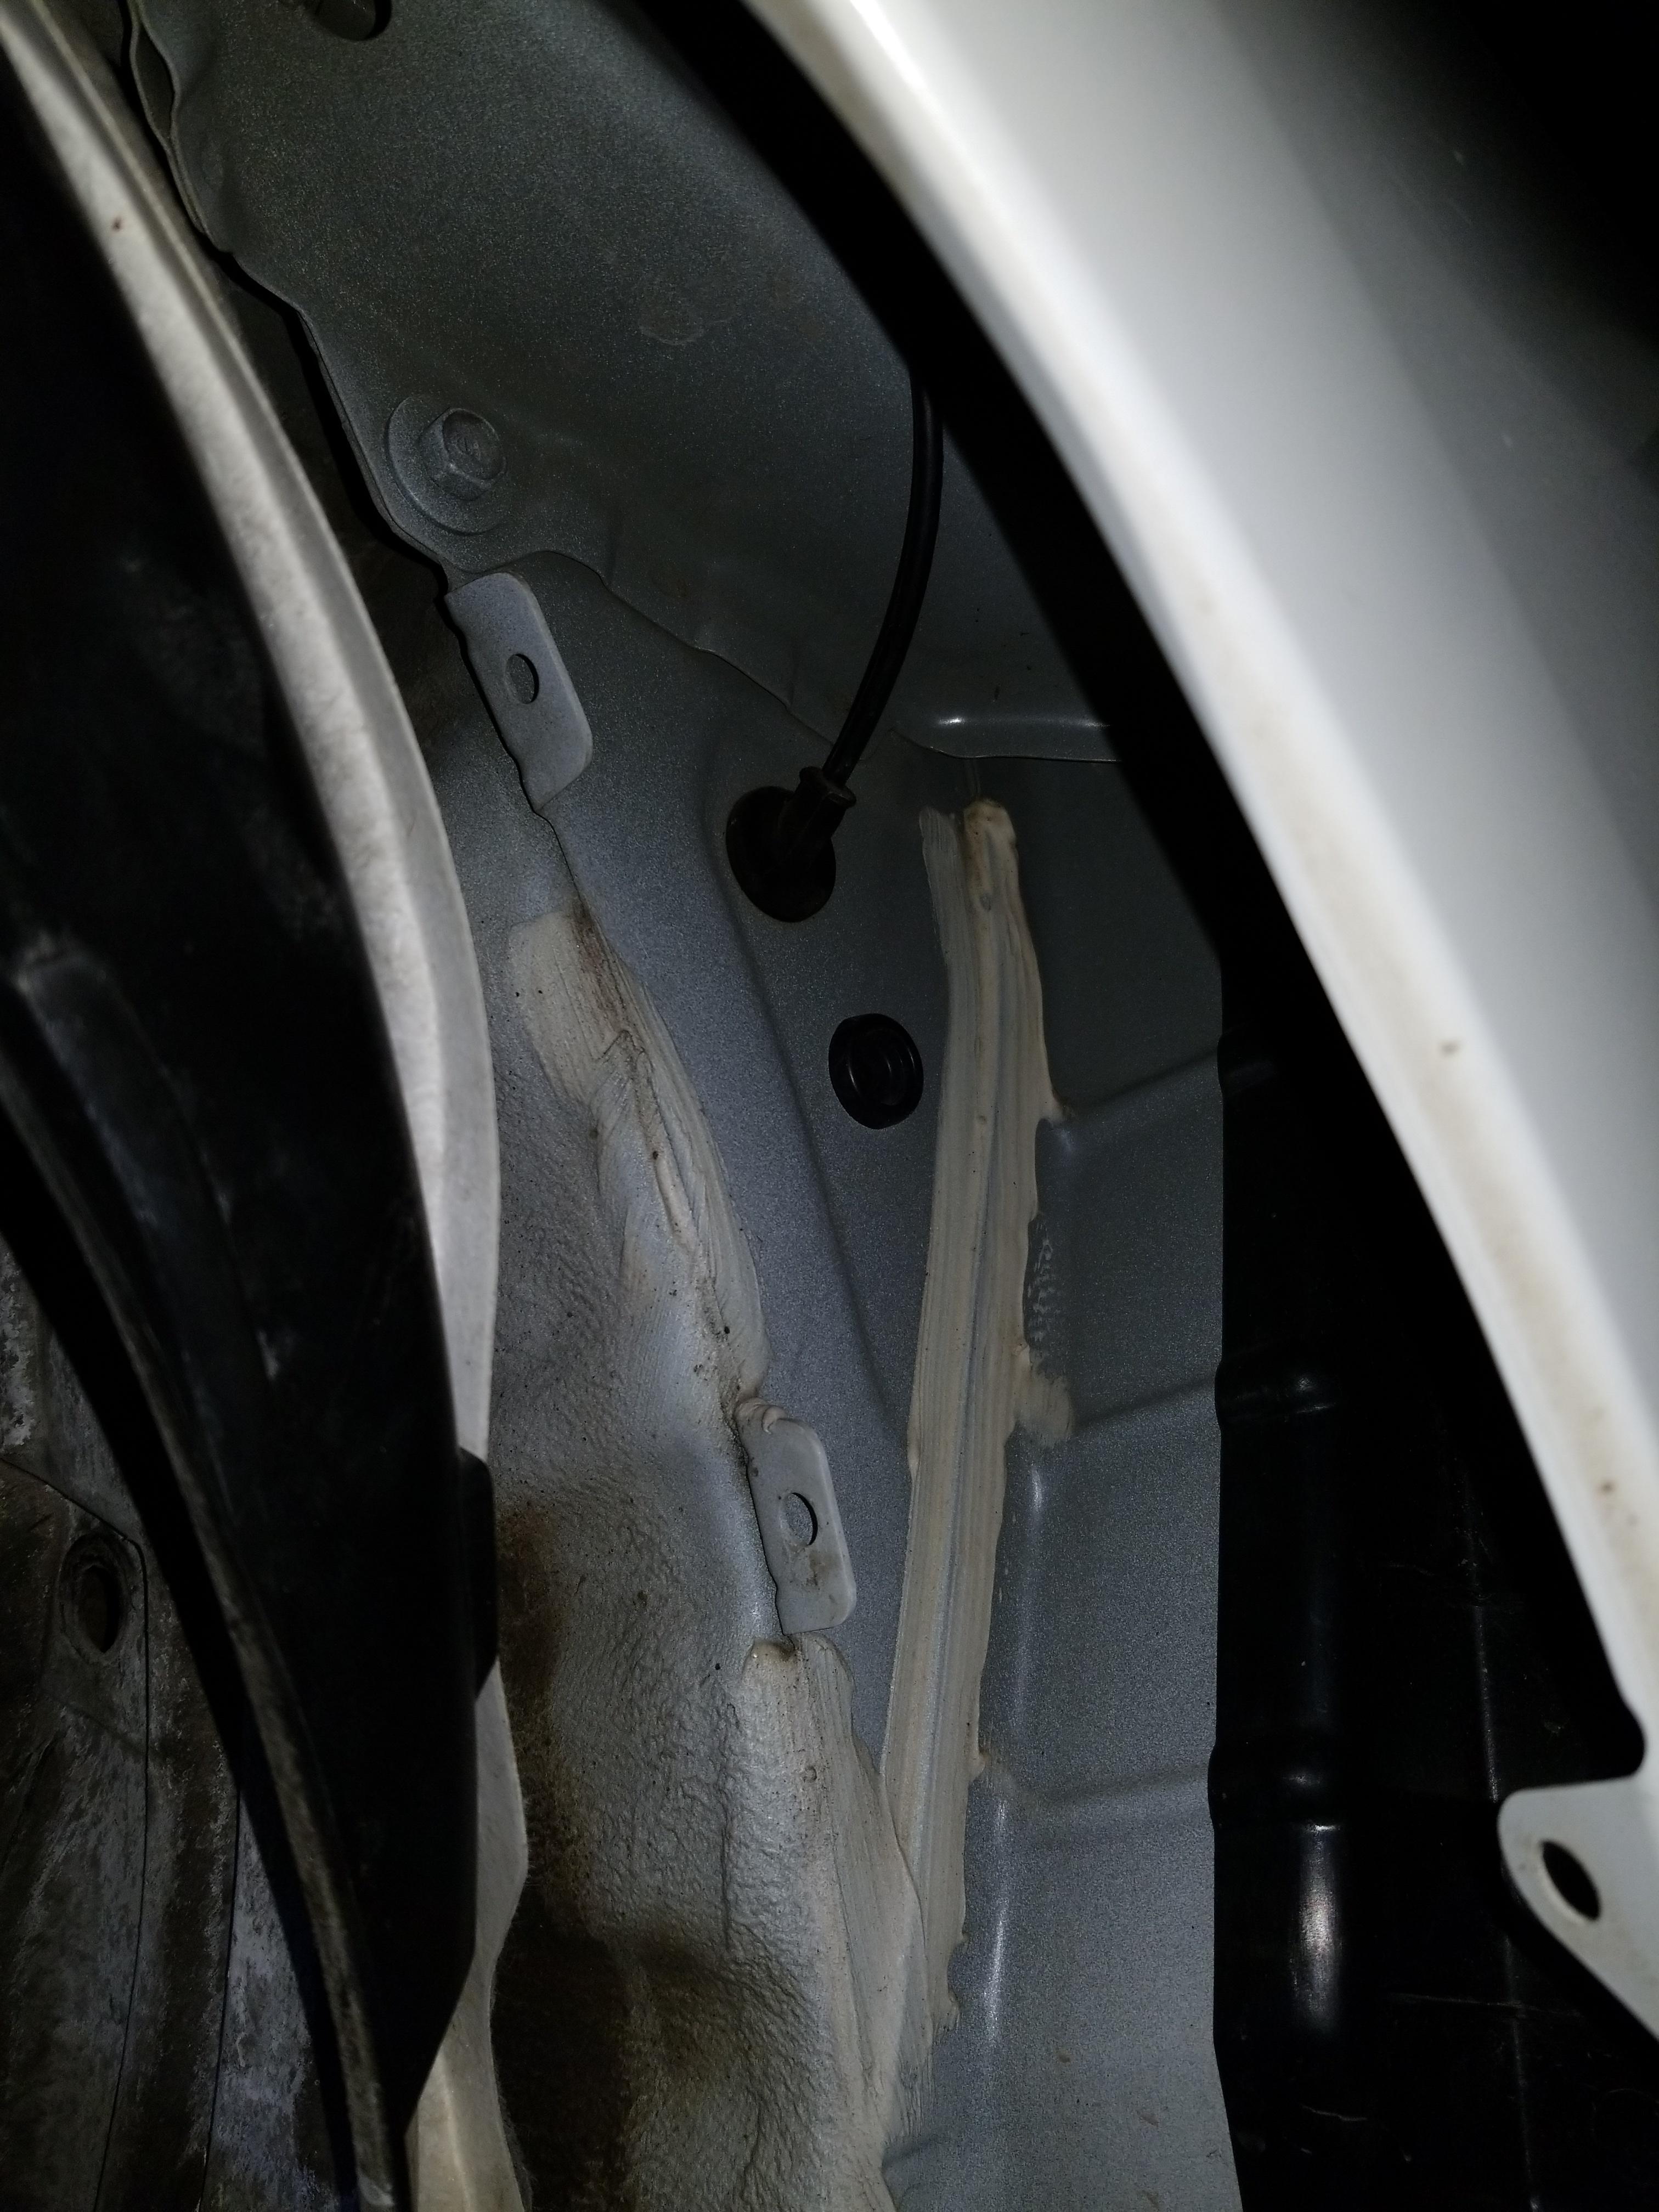
Now what about the inside wiring...? Well that's going to have to wait. I need to get that yellow wire into the cabin. Ideally it would go in through the hood release cable grommet, but the fender liner is proving a challenge. Canadian models have this extra bit at the bottom and those three screws hold it on. The liner is really held on tight at the bottom by these blind holes/clips. Any idea how to get them off? Another option is go go through the door wiring flex rubber... but I don't want to put a hole in such a high-moisture area if I can help it.
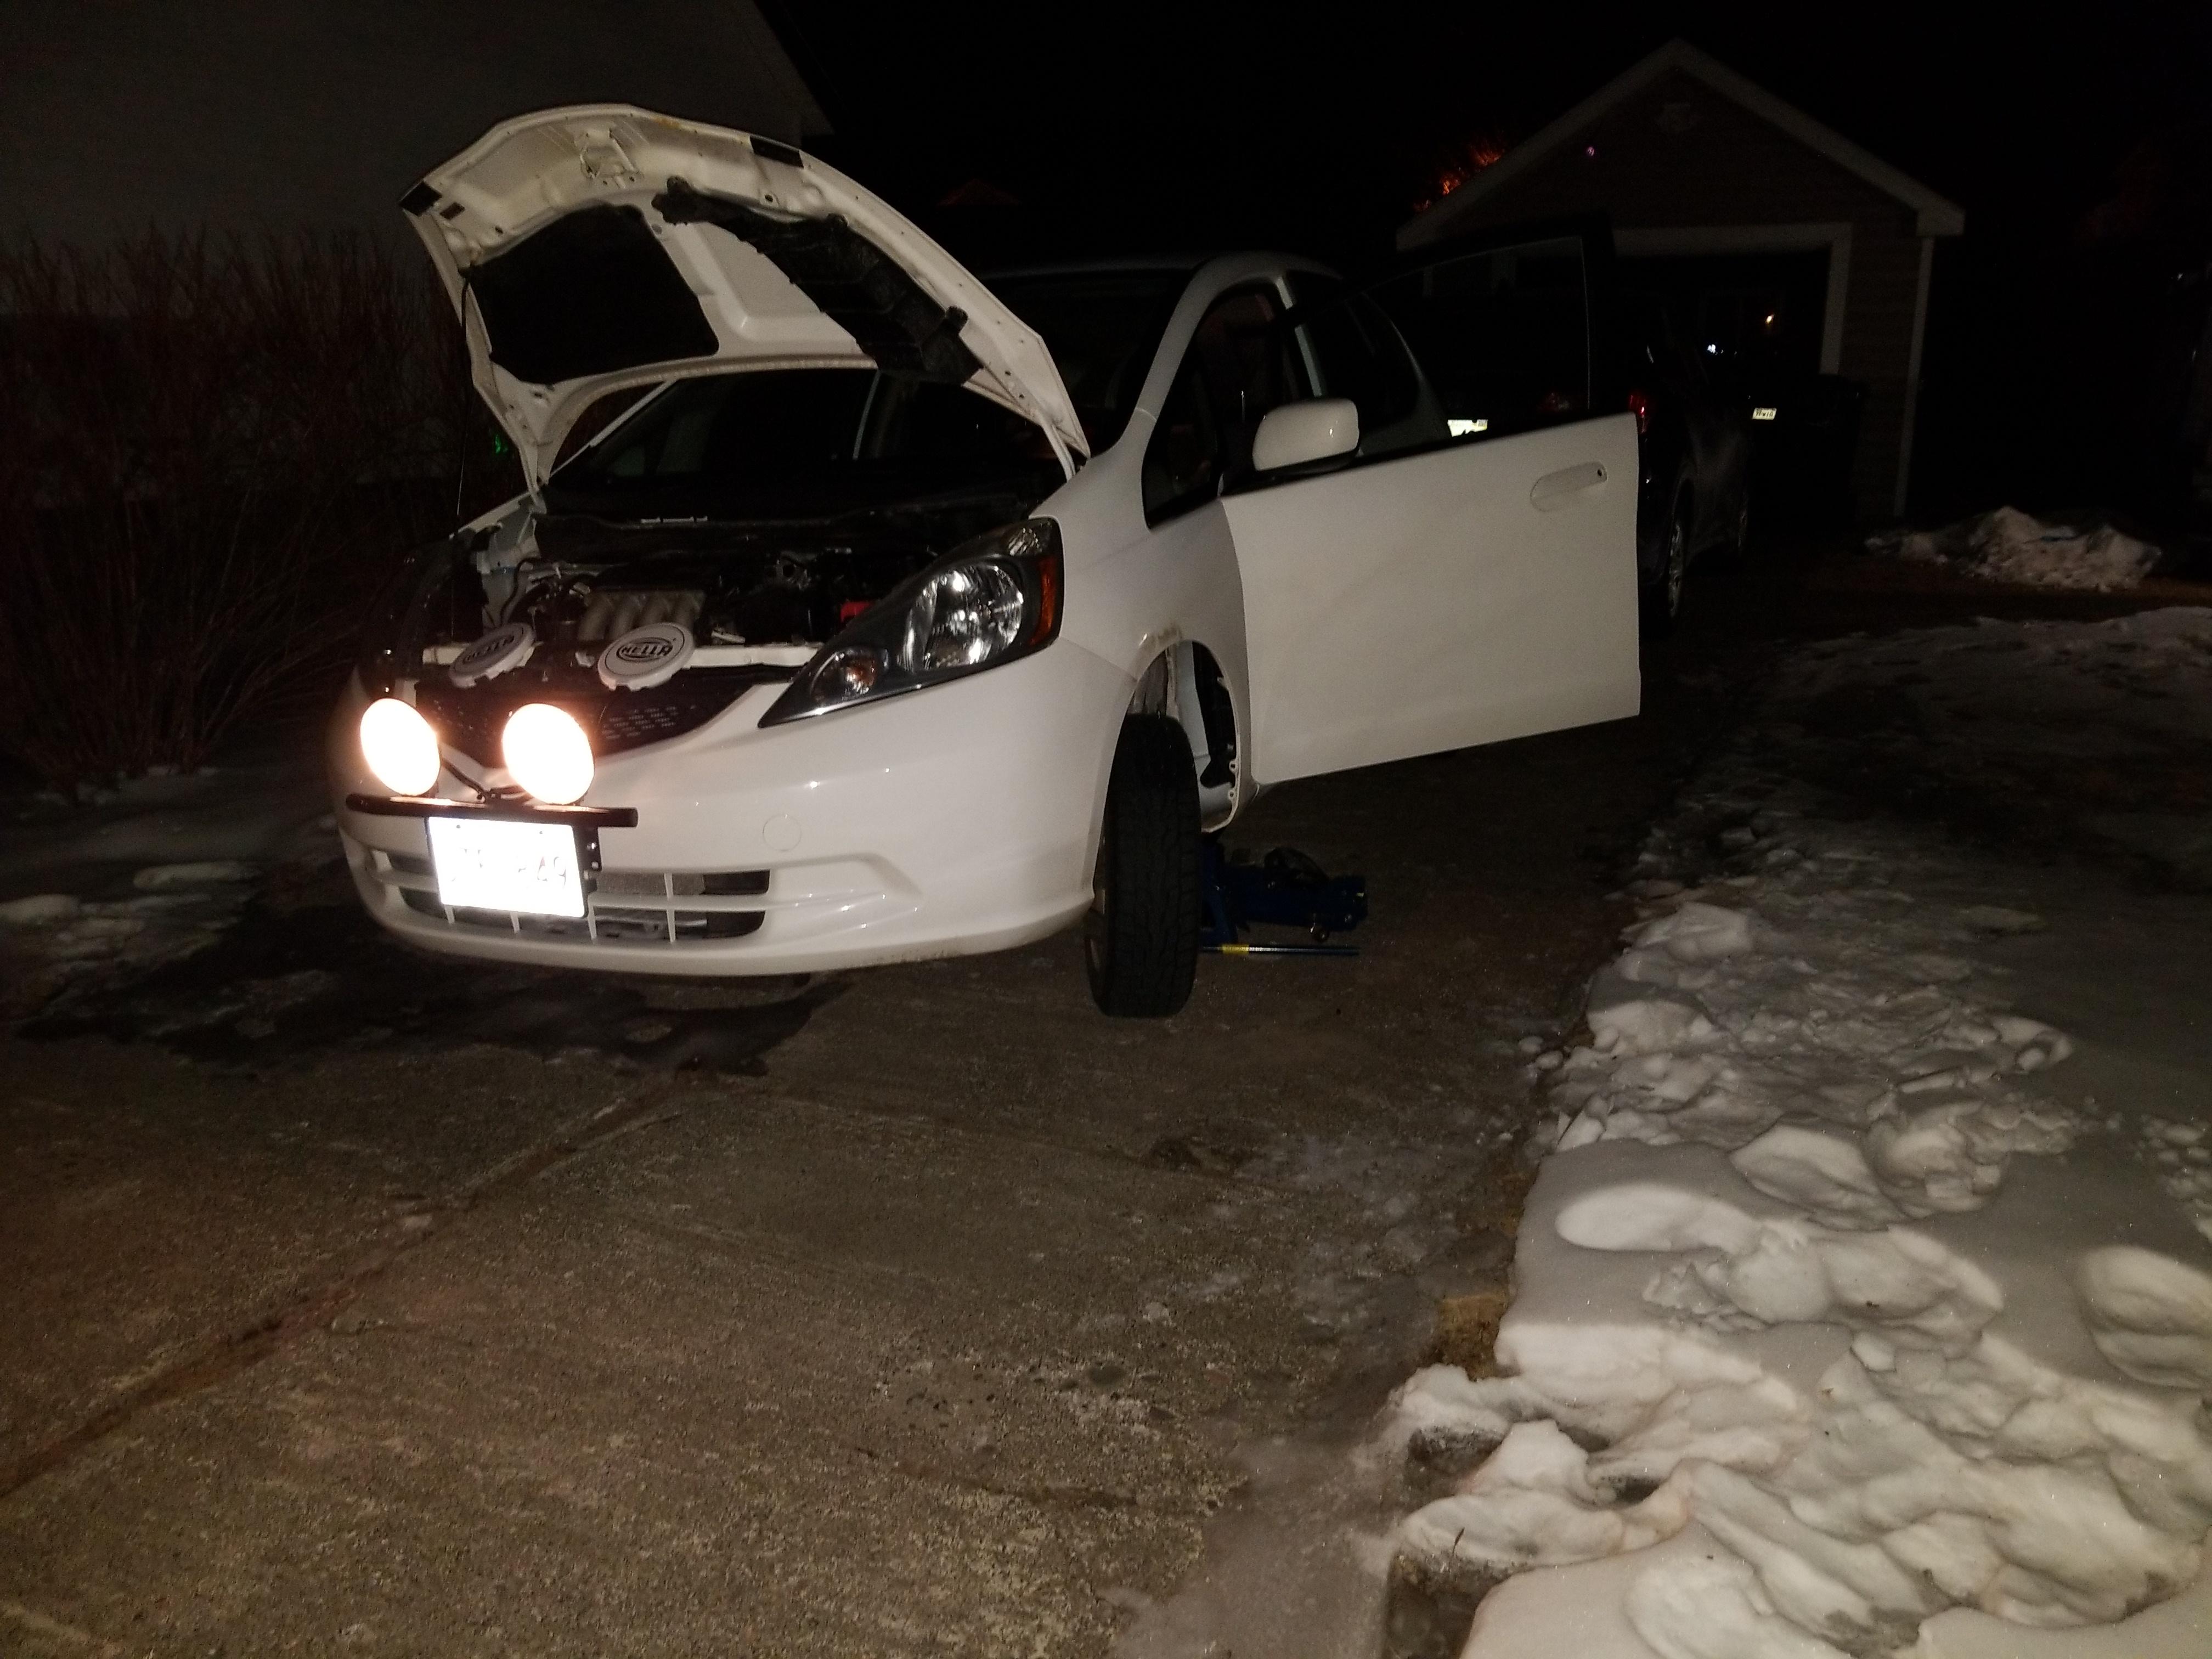
[img]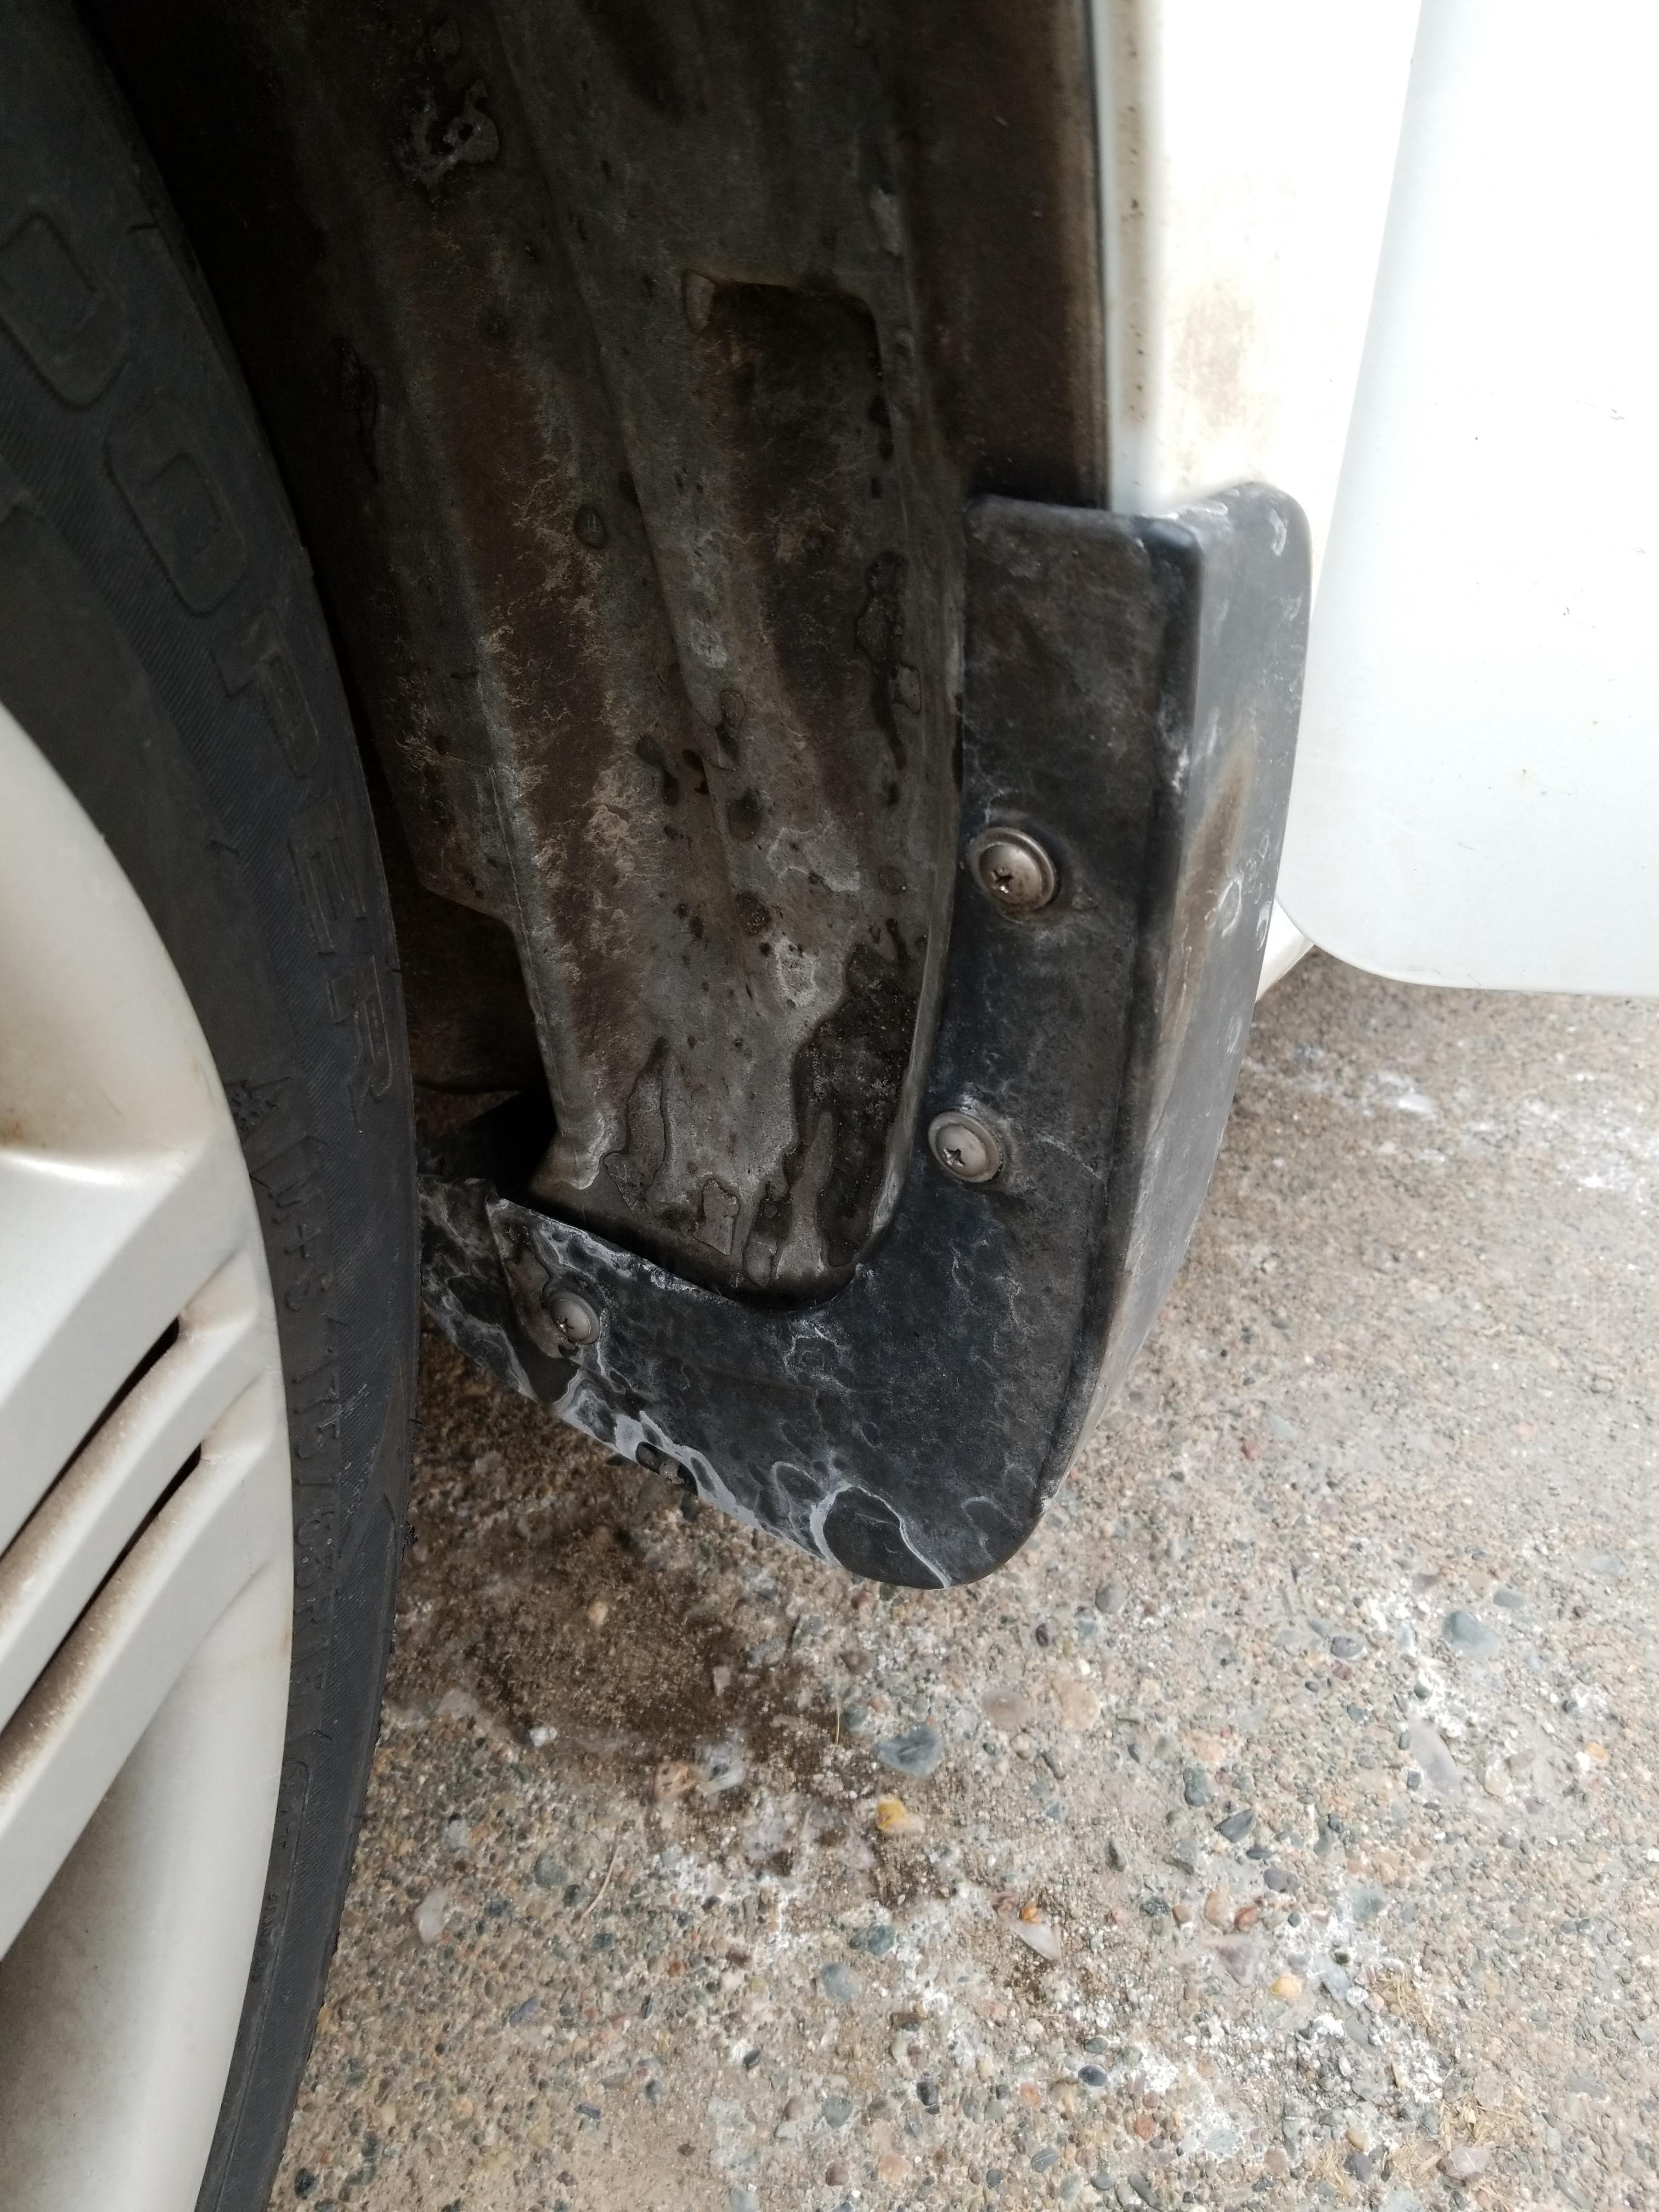
So this is where I now sit. Some badass fog lights installed, but no power for them just yet...
I purchased the bull bar plate mount and hella fog light kit on Amazon.
Mounted front and back
Had to elongate the holes, stack 5 10mm washers and cut off the bottom off the rock guards.
Plate comes off the front by unscrewing two 6mm bolts (10mm socket). I had mocked up where it would be according to the two bolts that hold the plate on the mount and their location on the bumper.
Then slap some lights on there:
Now onto the wiring...
Relay location
Wiring tidied up. The instructions in the Hella kit are awesome. But you can look up any "how to wire a relay" video and it'll tell the same thing.
Red with 15A fuse direct to battery
Blue is ground
Black is switched power to the lights
Yellow is the switched 12V pickup to trigger the relay
The green wire is the ground to the lights themselves. I went with old Honda ground colour (from my motorcycle) as I didn't have any blue.
Full shot of the wiring
Closed up. The plate mount wouldn't go back on with the original two bolts underneath (which are used so you don't have to drill holes in the bumper). So I just did the single bolt through the middle of the plate mount which went right into the light mount and bumper. This also allowed the plate to sit a bit lower to clear the nuts underneath that hold the lights on.
Looks pretty badass if you ask me!
Now what about the inside wiring...? Well that's going to have to wait. I need to get that yellow wire into the cabin. Ideally it would go in through the hood release cable grommet, but the fender liner is proving a challenge. Canadian models have this extra bit at the bottom and those three screws hold it on. The liner is really held on tight at the bottom by these blind holes/clips. Any idea how to get them off? Another option is go go through the door wiring flex rubber... but I don't want to put a hole in such a high-moisture area if I can help it.
[img]
So this is where I now sit. Some badass fog lights installed, but no power for them just yet...
Last edited by evanphi; 02-18-2019 at 05:35 PM.

#3
02-18-2019, 06:08 PM


Why don't you route the wiring through the lower front grill?
You might still be able to have the wire 'exit' at the point where the headlight and the rad support meets and/or you'll have to remove part of the upper covering between the front grill and rad support to make access easier.
When I did my horn upgrade, I also used a waterproof relay.
Then again I do have a GK.
#5
02-18-2019, 06:53 PM
https://www.hondapartsnow.com/genuin...2-sea-003.html
These are the little bastards that stopped me short today. Everywhere I look people are saying the quickest way to change them out is to break them... Grr. Looks like I have to buy some replacements.
These are the little bastards that stopped me short today. Everywhere I look people are saying the quickest way to change them out is to break them... Grr. Looks like I have to buy some replacements.
Last edited by evanphi; 02-19-2019 at 01:56 PM.
#6
02-18-2019, 07:03 PM
Maybe it's a bit late now... but, if you're willing to spend a little more money to get an "official" interior look... you could go the route of buying the wiring for the accessory fog lights.
The engine harness already has the needed wiring to get from the front to the interior, you only need the interior button and the pigtail at the front to wire to the Hellas. Or in the case it doesn't provide enough power, wire the Hellas to the battery and use the accessory wires to control the Hellas through a relay.
The engine harness already has the needed wiring to get from the front to the interior, you only need the interior button and the pigtail at the front to wire to the Hellas. Or in the case it doesn't provide enough power, wire the Hellas to the battery and use the accessory wires to control the Hellas through a relay.
#8
02-19-2019, 11:04 AM
Had to go with ordering the screw clips from the stealership. Nobody local carries aftermarkets, and ordering a bunch online would take a few weeks. I only need the three, and they get here tomorrow! 12$ just in case I break them.

#10
02-19-2019, 06:36 PM
Parts list (including things I already have that you might need)
License plate bar:
Split Loom (I ordered 10ft each of 3/8" and 1/2" and that was MORE than enough. You could do the whole thing in 3/8 if you stagger your connectors properly, which I did not):
Add-a-fuse (this will tap into the fuse panel on an unused fuse location that is switched power. I'll have more details and photos on this soon. The Hella kit comes with a wire tap for this, but I don't like those taps because it exposes wiring where it doesn't need to be exposed. This way you can also have the lights on without having the headlights on.):
The lights will be up to you... KC HiLites makes a similar fog lamp kit to Hella. I've just always been a Hella fan. I also like the Hellas because they have solid stone shields. The KC HiLites mount at the bottom of the light also really limits your options in terms of how it can be mounted:
Hella: KC HiLites:
Stainless 1/4" Self-Drilling Screws:
Washers for stacking the lights and mating the self-tapping screws to the bracket:
Butt connectors, blades, etc (with heat shrink on already!):
Crimp tool:
Then you'll need a drill and sockets of a couple different sizes as well as a ratchet to put it all together... Oh and a round bastard file to make the mounting hole longer on the top of the bracket.
Stay tuned for the wiring inside the car. It is pretty simple and I've already found where I'm going to ground everything to.
Last edited by evanphi; 02-19-2019 at 07:39 PM.
#11
02-20-2019, 12:28 PM

Were those screw clips not available on Amazon or eBay? They are not the OEM ones, but the generic clips I have purchased work well.
The setup looks fantastic! I am glad you detailed your work clearly. I had planned on doing this as well when I saw the light-bar/license-plate on Amazon. But as I am quite proficient at starting projects and only getting halfway before stopping, I figure I would pass.
Now I am considering it again.
#12
02-20-2019, 09:17 PM
OK the continuing stoooooooooooooory (Muppets anyone?) of the lights:
WIRING!!!
To get access to all the following areas, you can watch this video here:
It is for changing a hood release cable, but we want access to the same areas! You can ignore the bits about the grille/bumper.
Alright. I bit the bullet and purchased three of those screw clips. They came overnight from my local dealership and they were 16$ CAD for the three. Just pry off the old ones and pop them out. If you're in the US or other markets without this trim piece, you're in luck because it is just the normal pop-out clips down here. Lucky you...
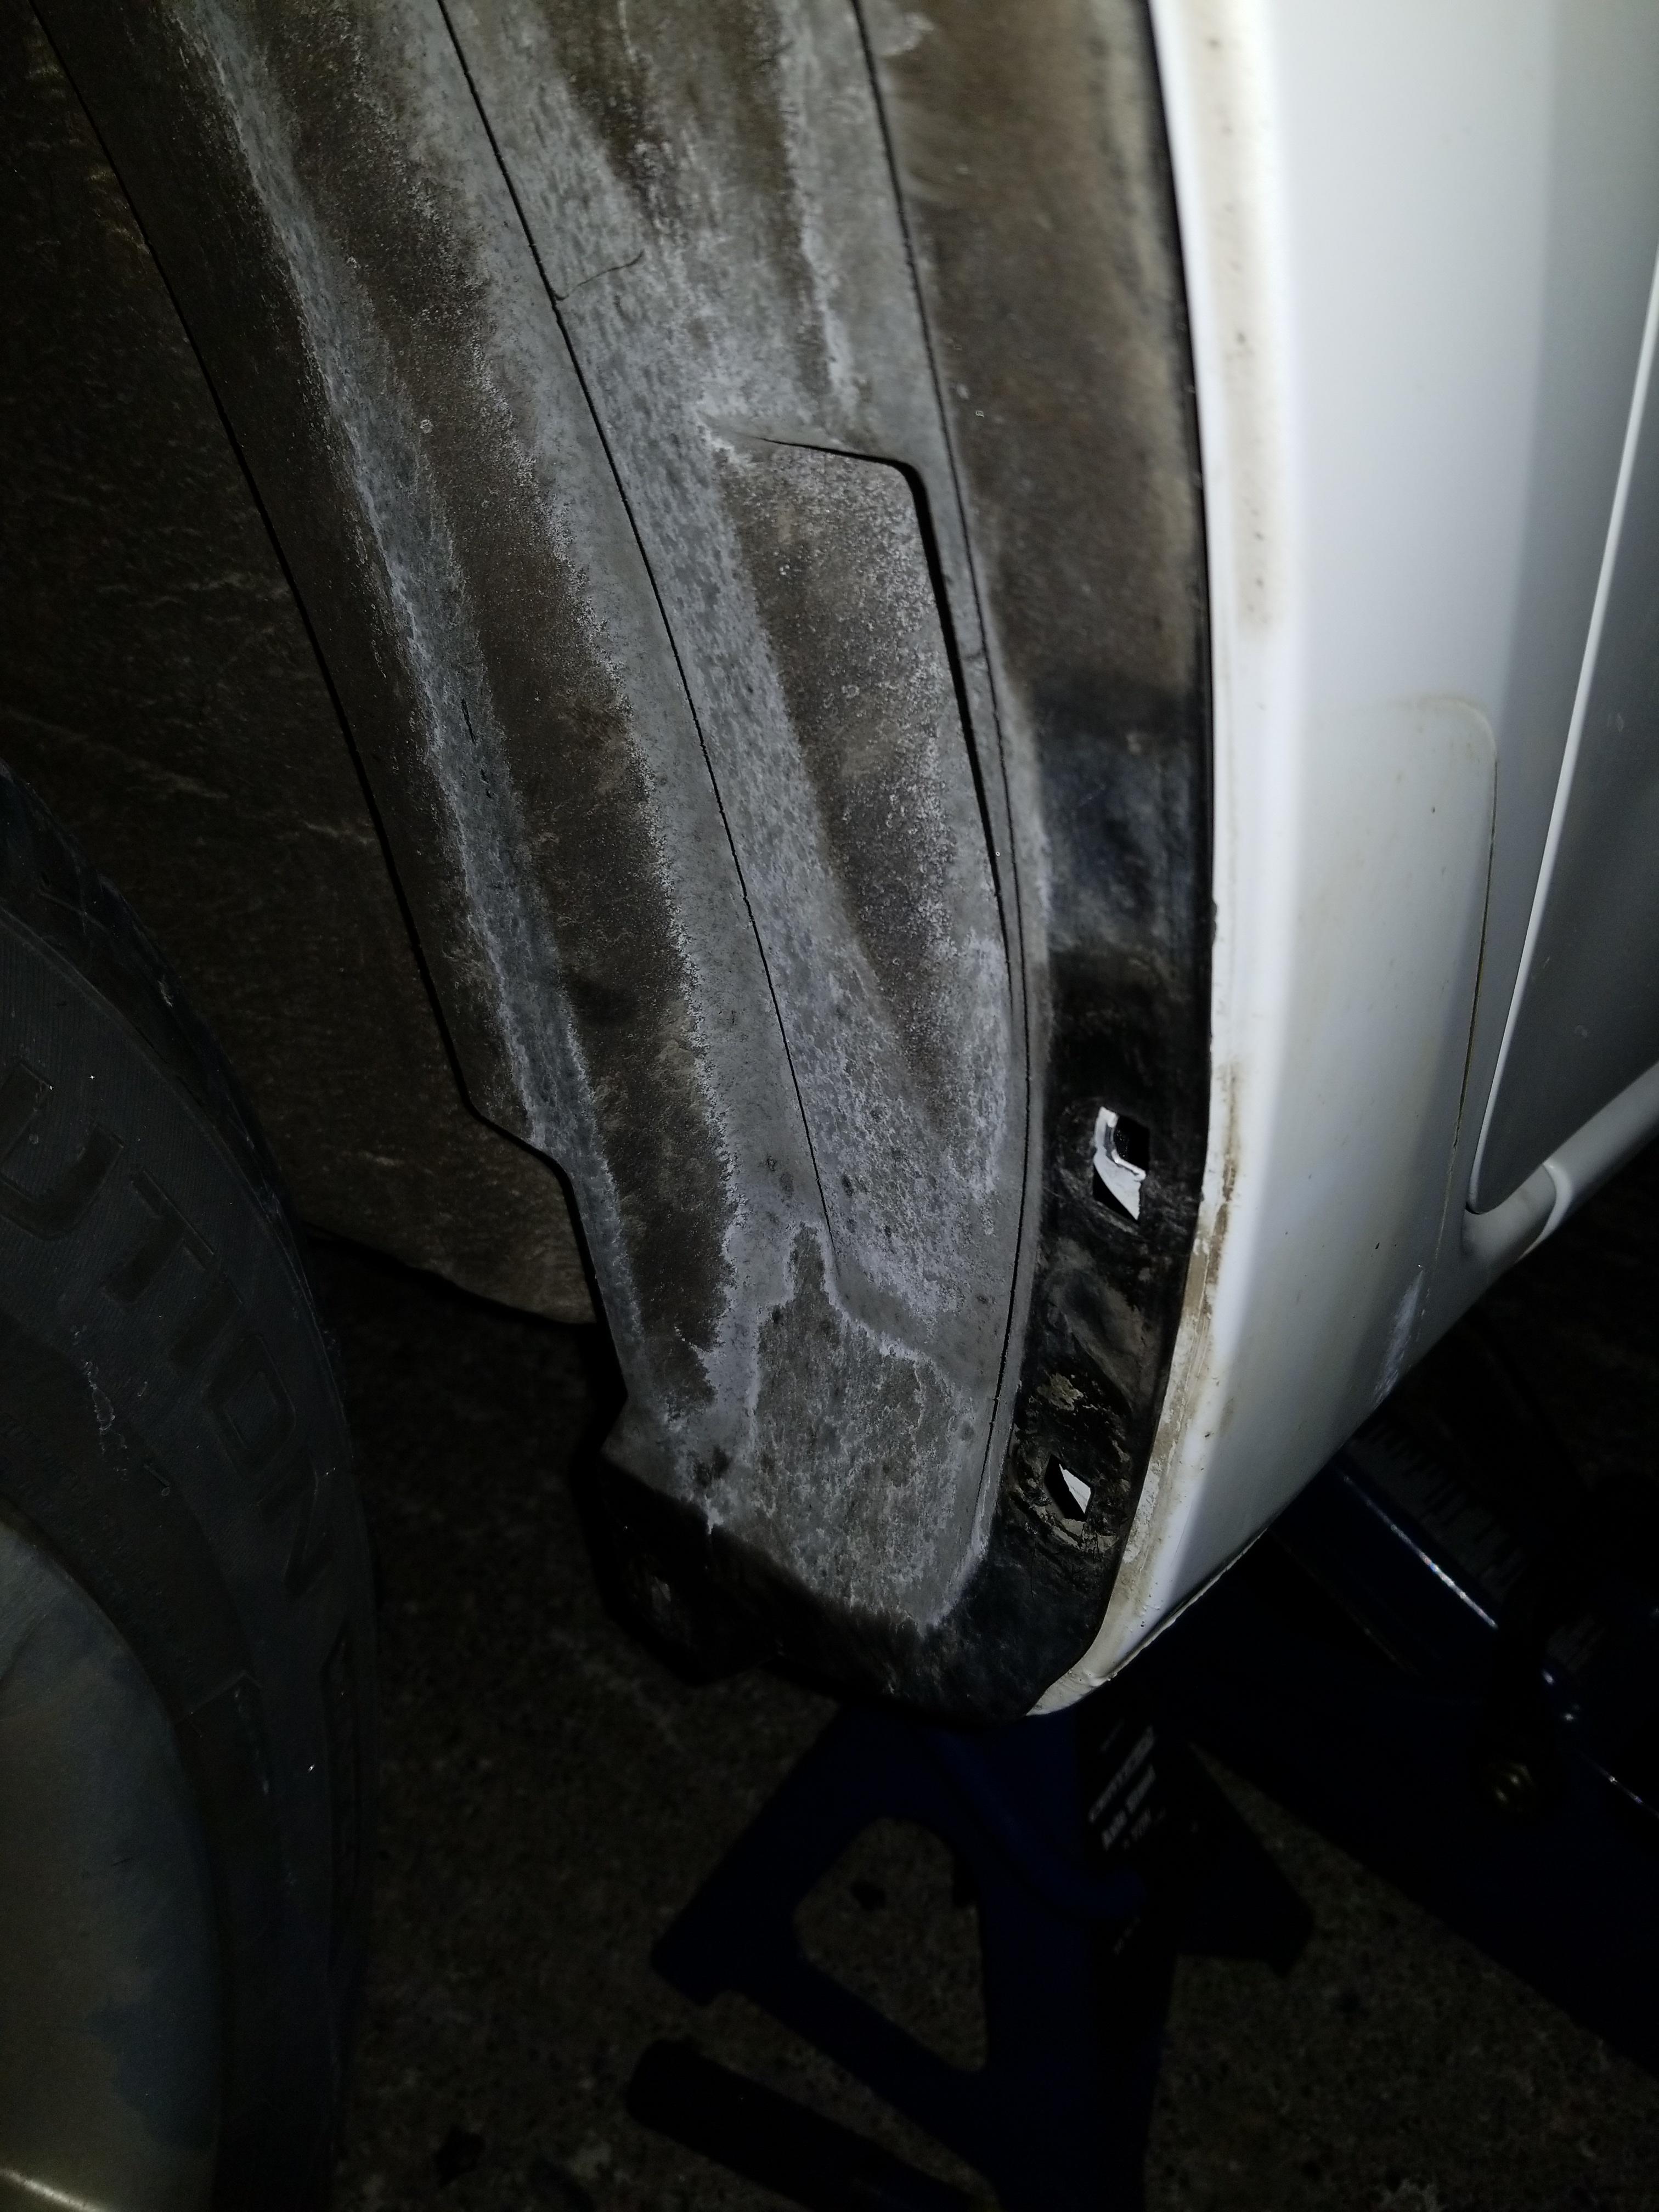
Now you can remove the pop-out clips that hold the fender liner in, basically from the shock back. When you pull it out of the way you will see this:
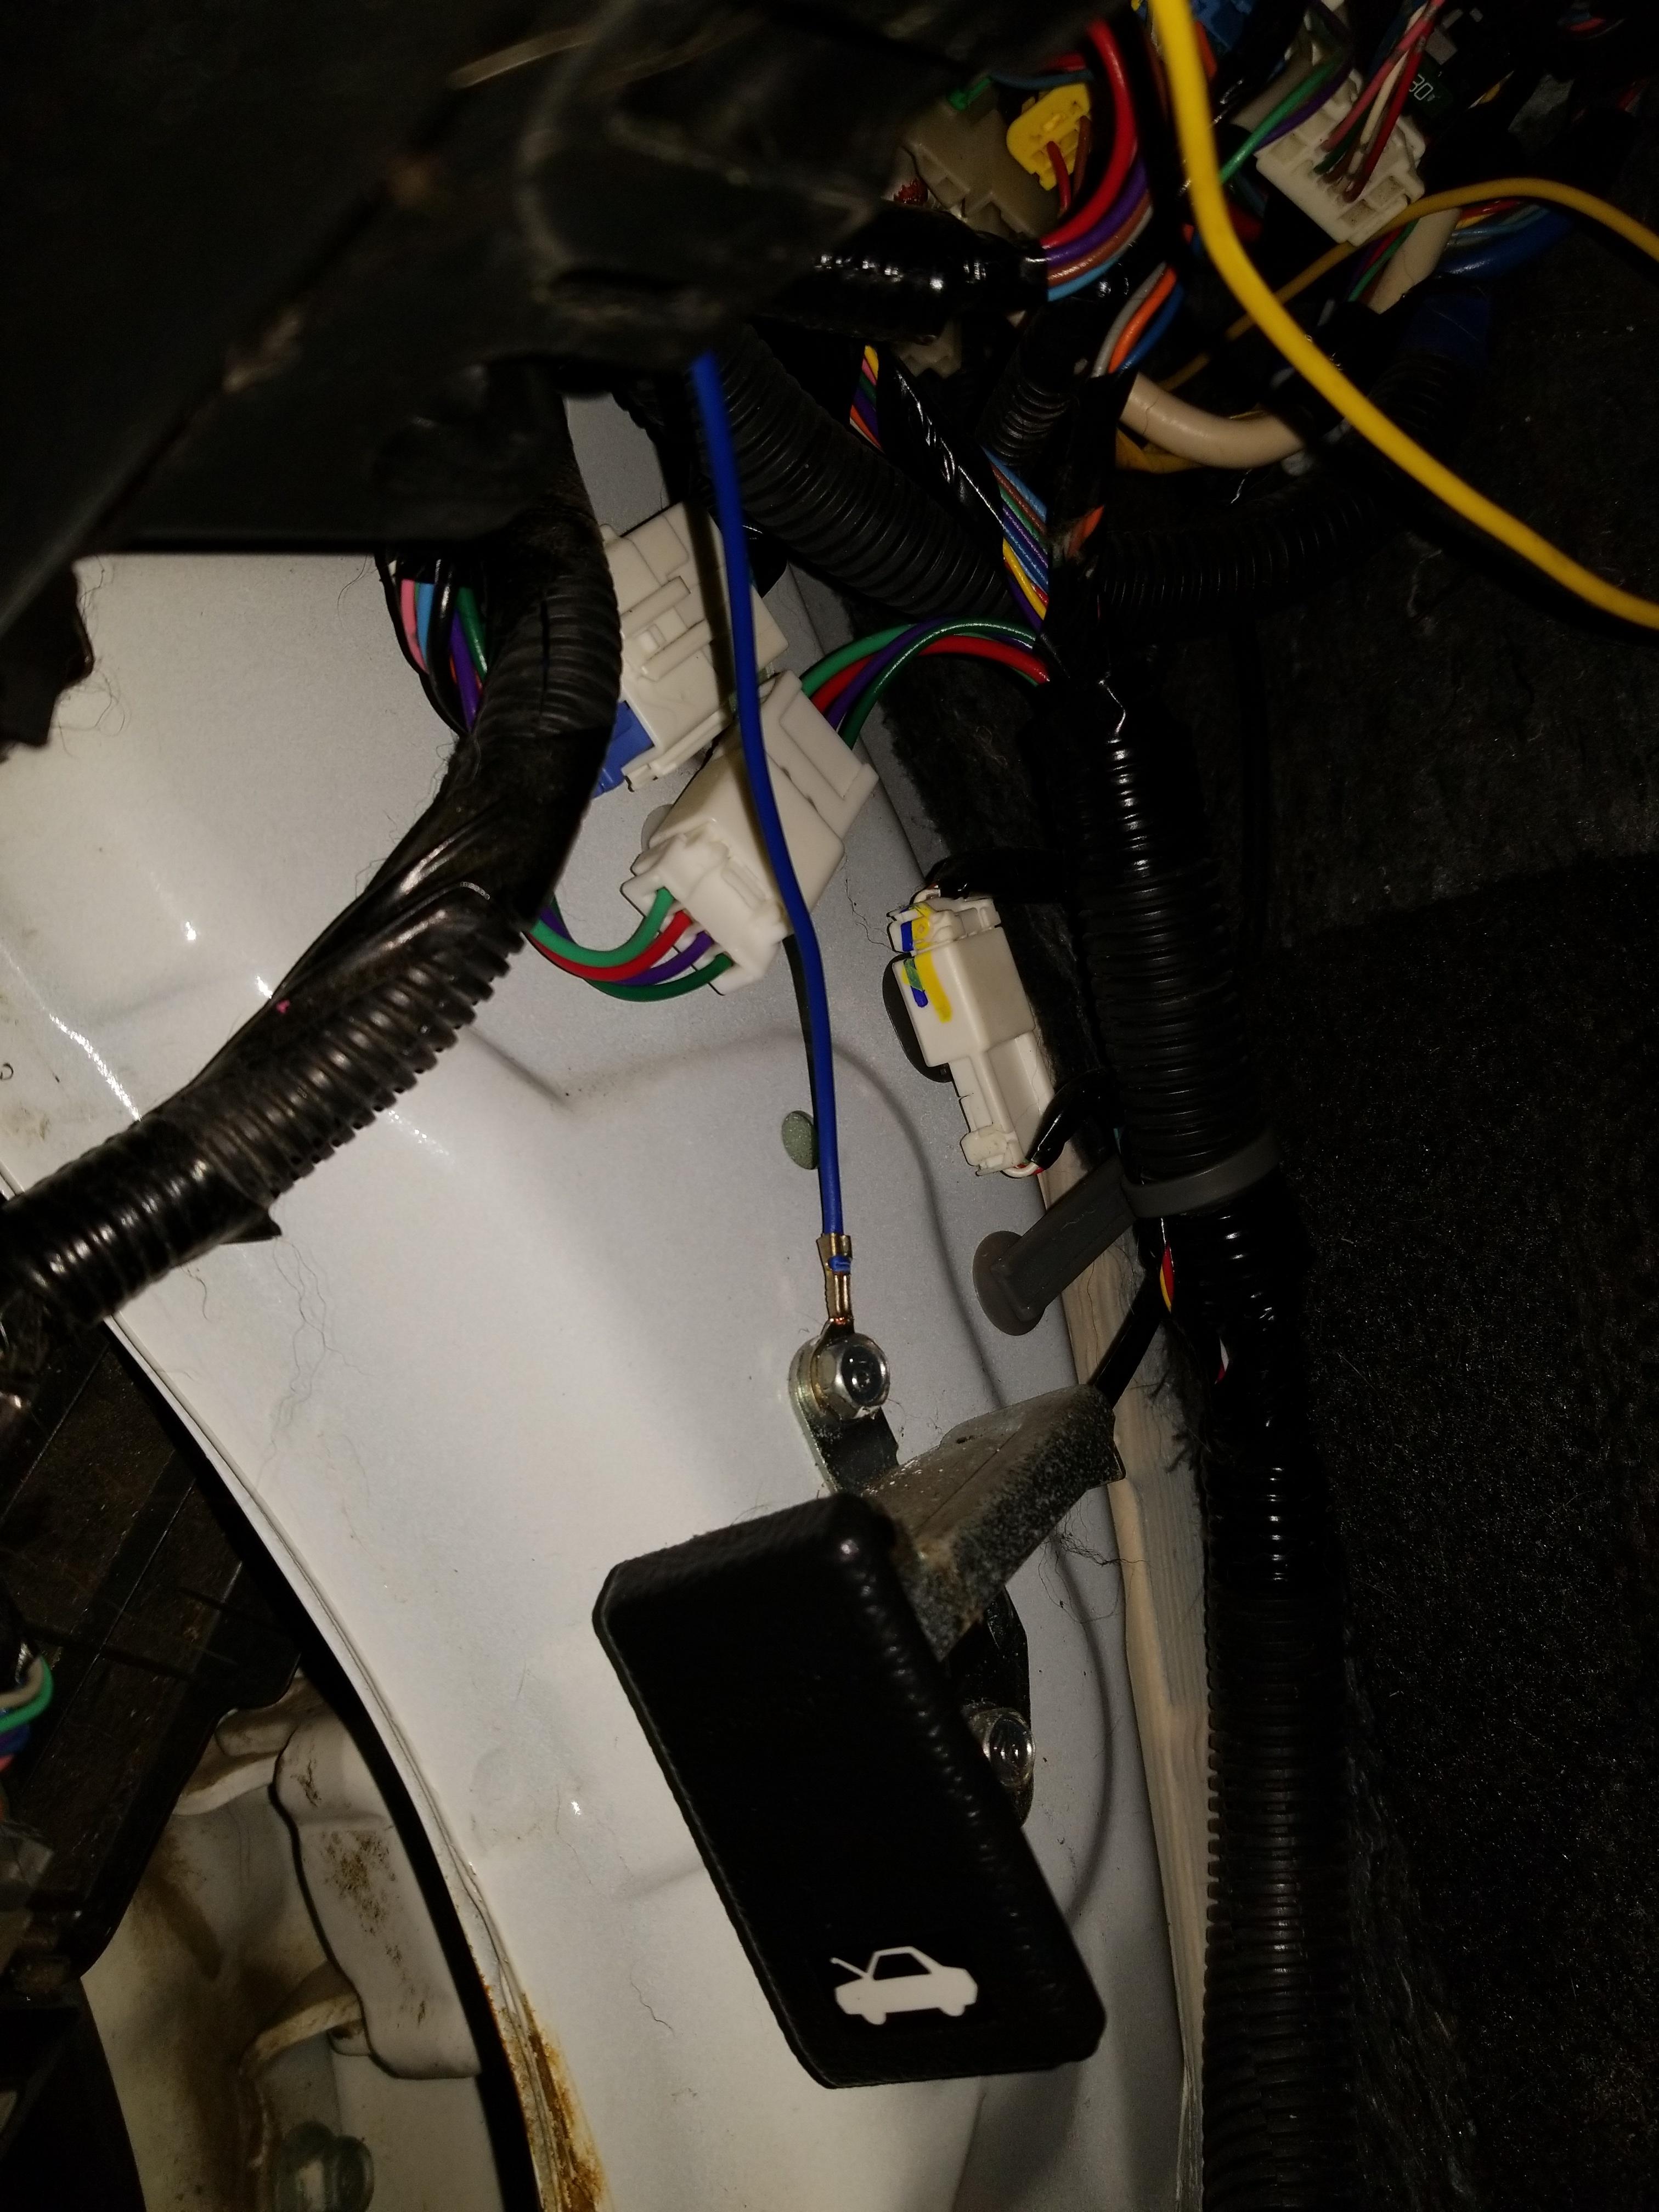
The cable is the hood release cable. Good to know if you can't get your hood open some time! The other grommet beside it would be a great spot for running a LARGE power wire, such as for an amplifier. I'm pretty sure it goes through to the cabin, but I couldn't lift up the carpeting inside to verify this. What you're going to do now is pass your trigger wire back from the relay following the hood release cable, and then pass it through the same grommet as the cable. A little bit of lubrication here works wonders. Spit works... or if you're fancy use siliconelube grease. Pull it through and then add some of the split loom to protect the wire (forgot pic of this, sorry), and be sure to ziptie it in place. I ziptied mine right to the hood release cable.
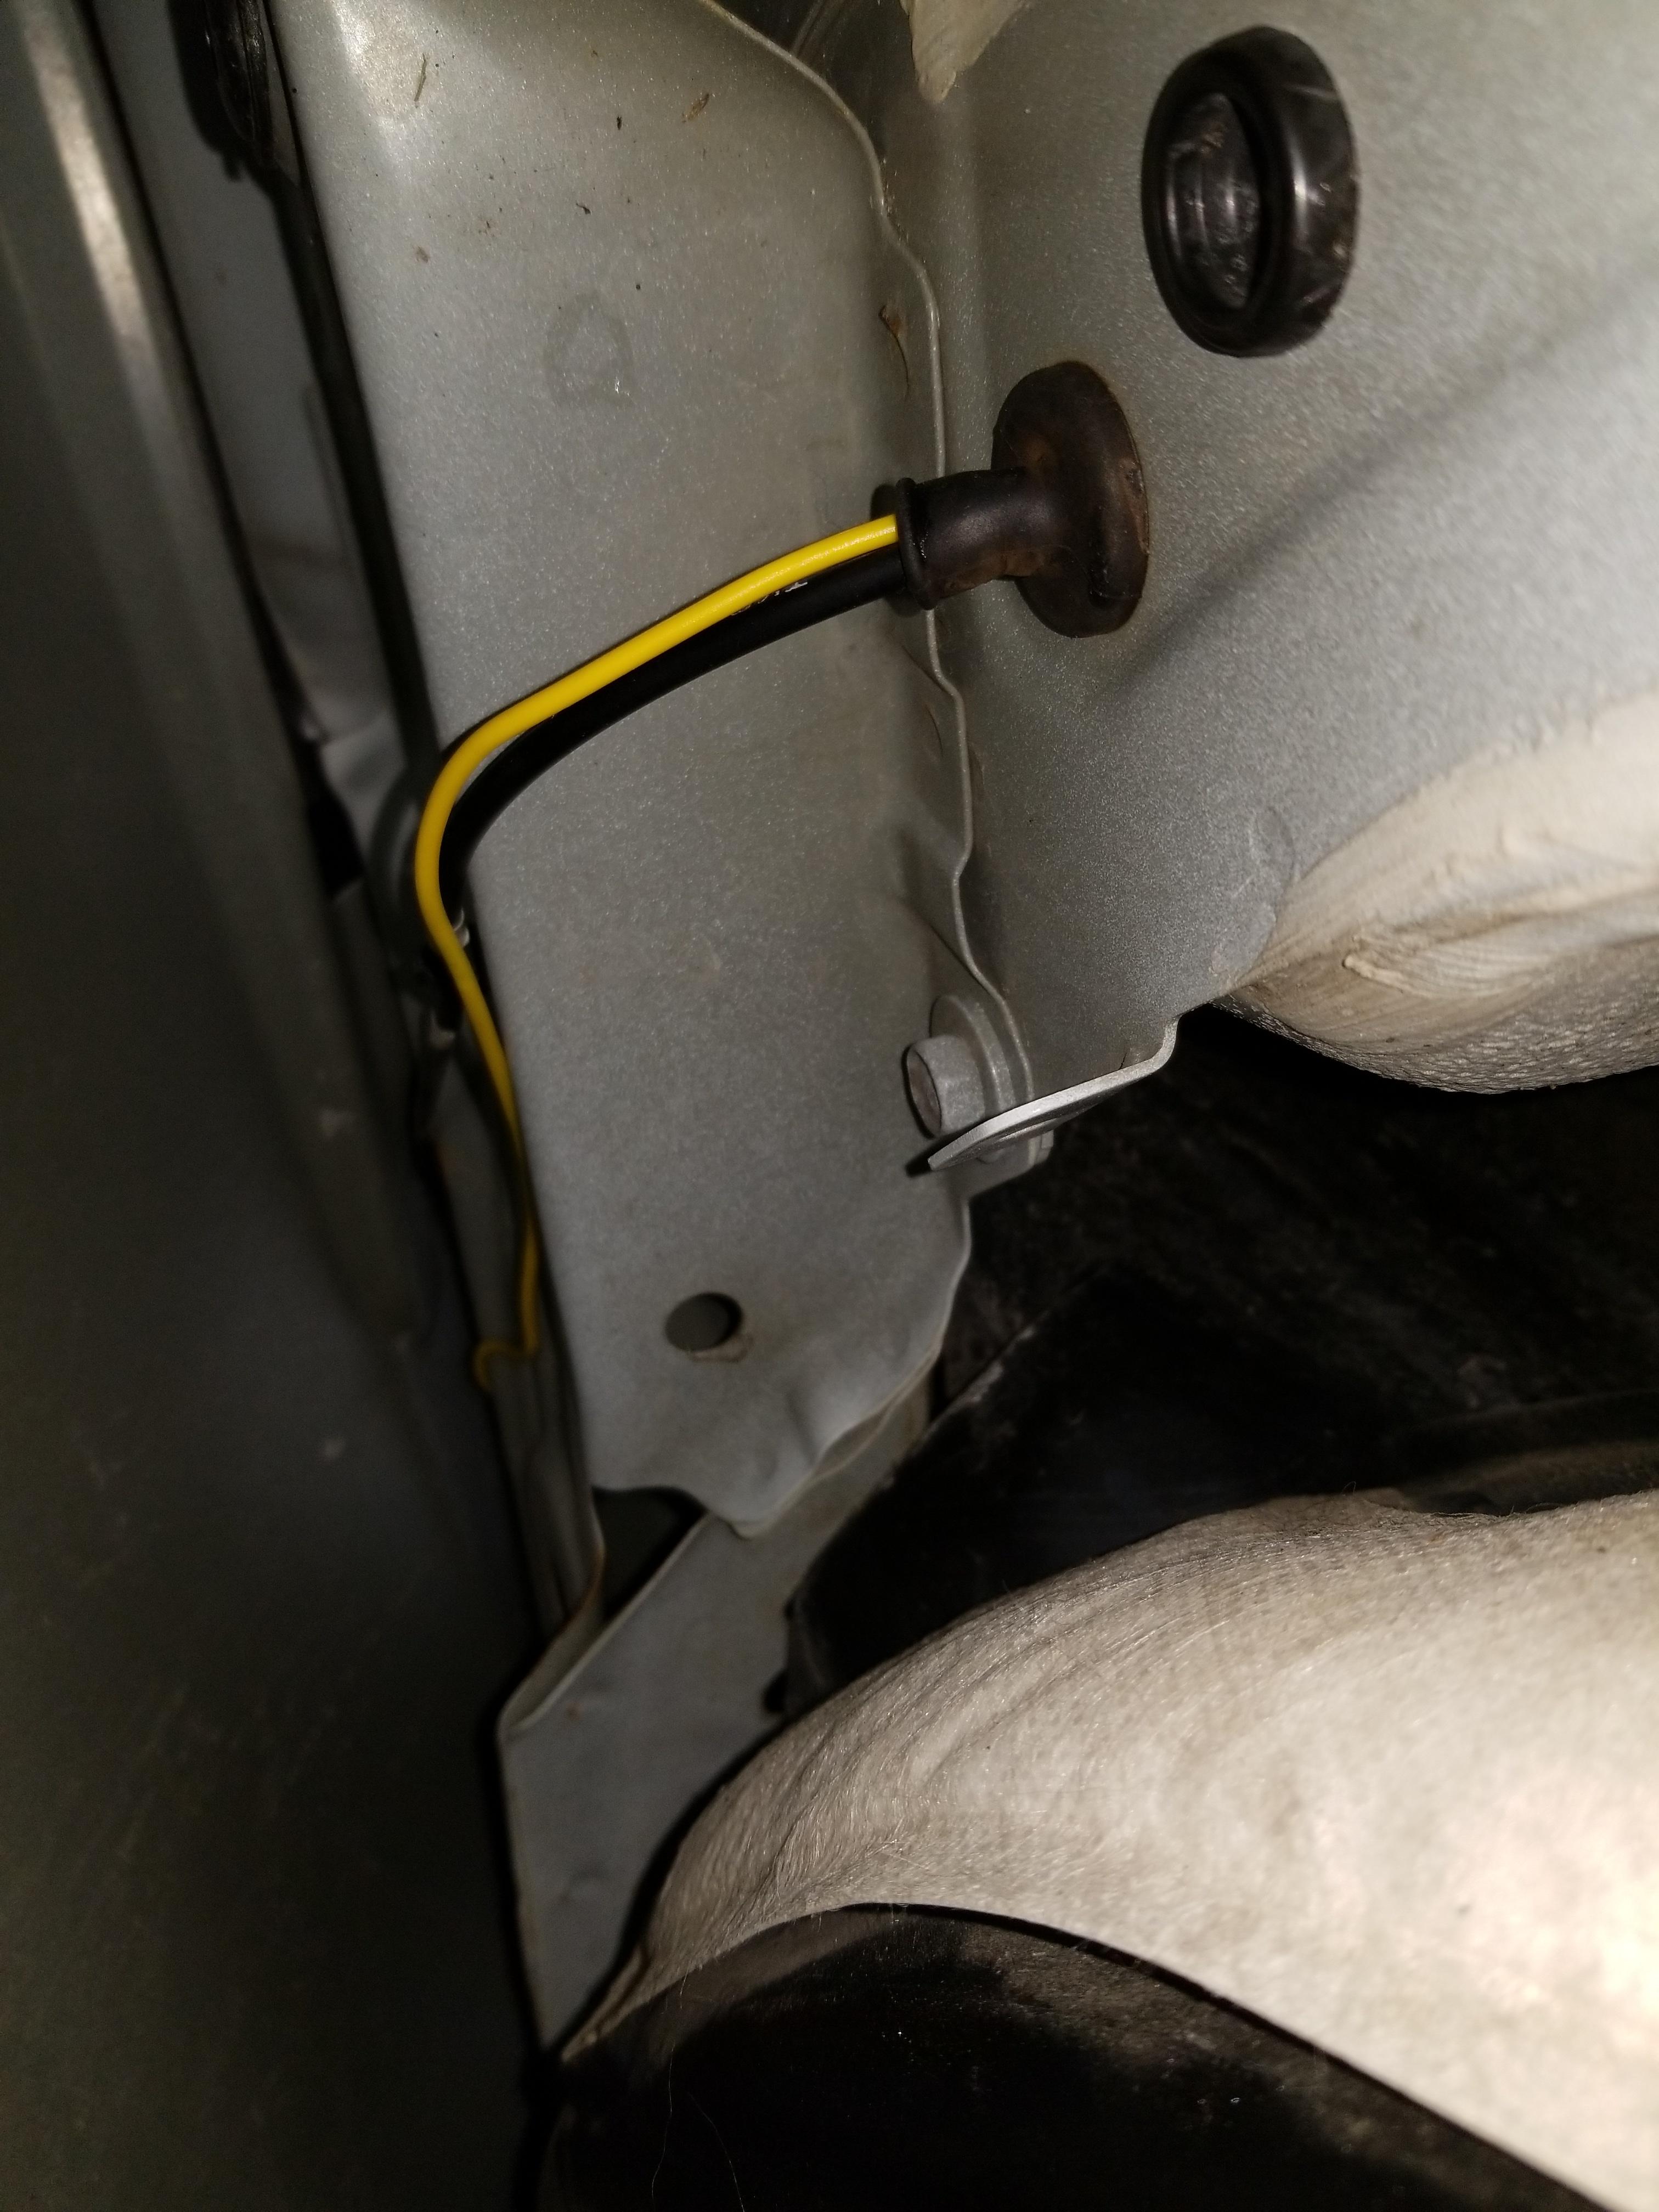
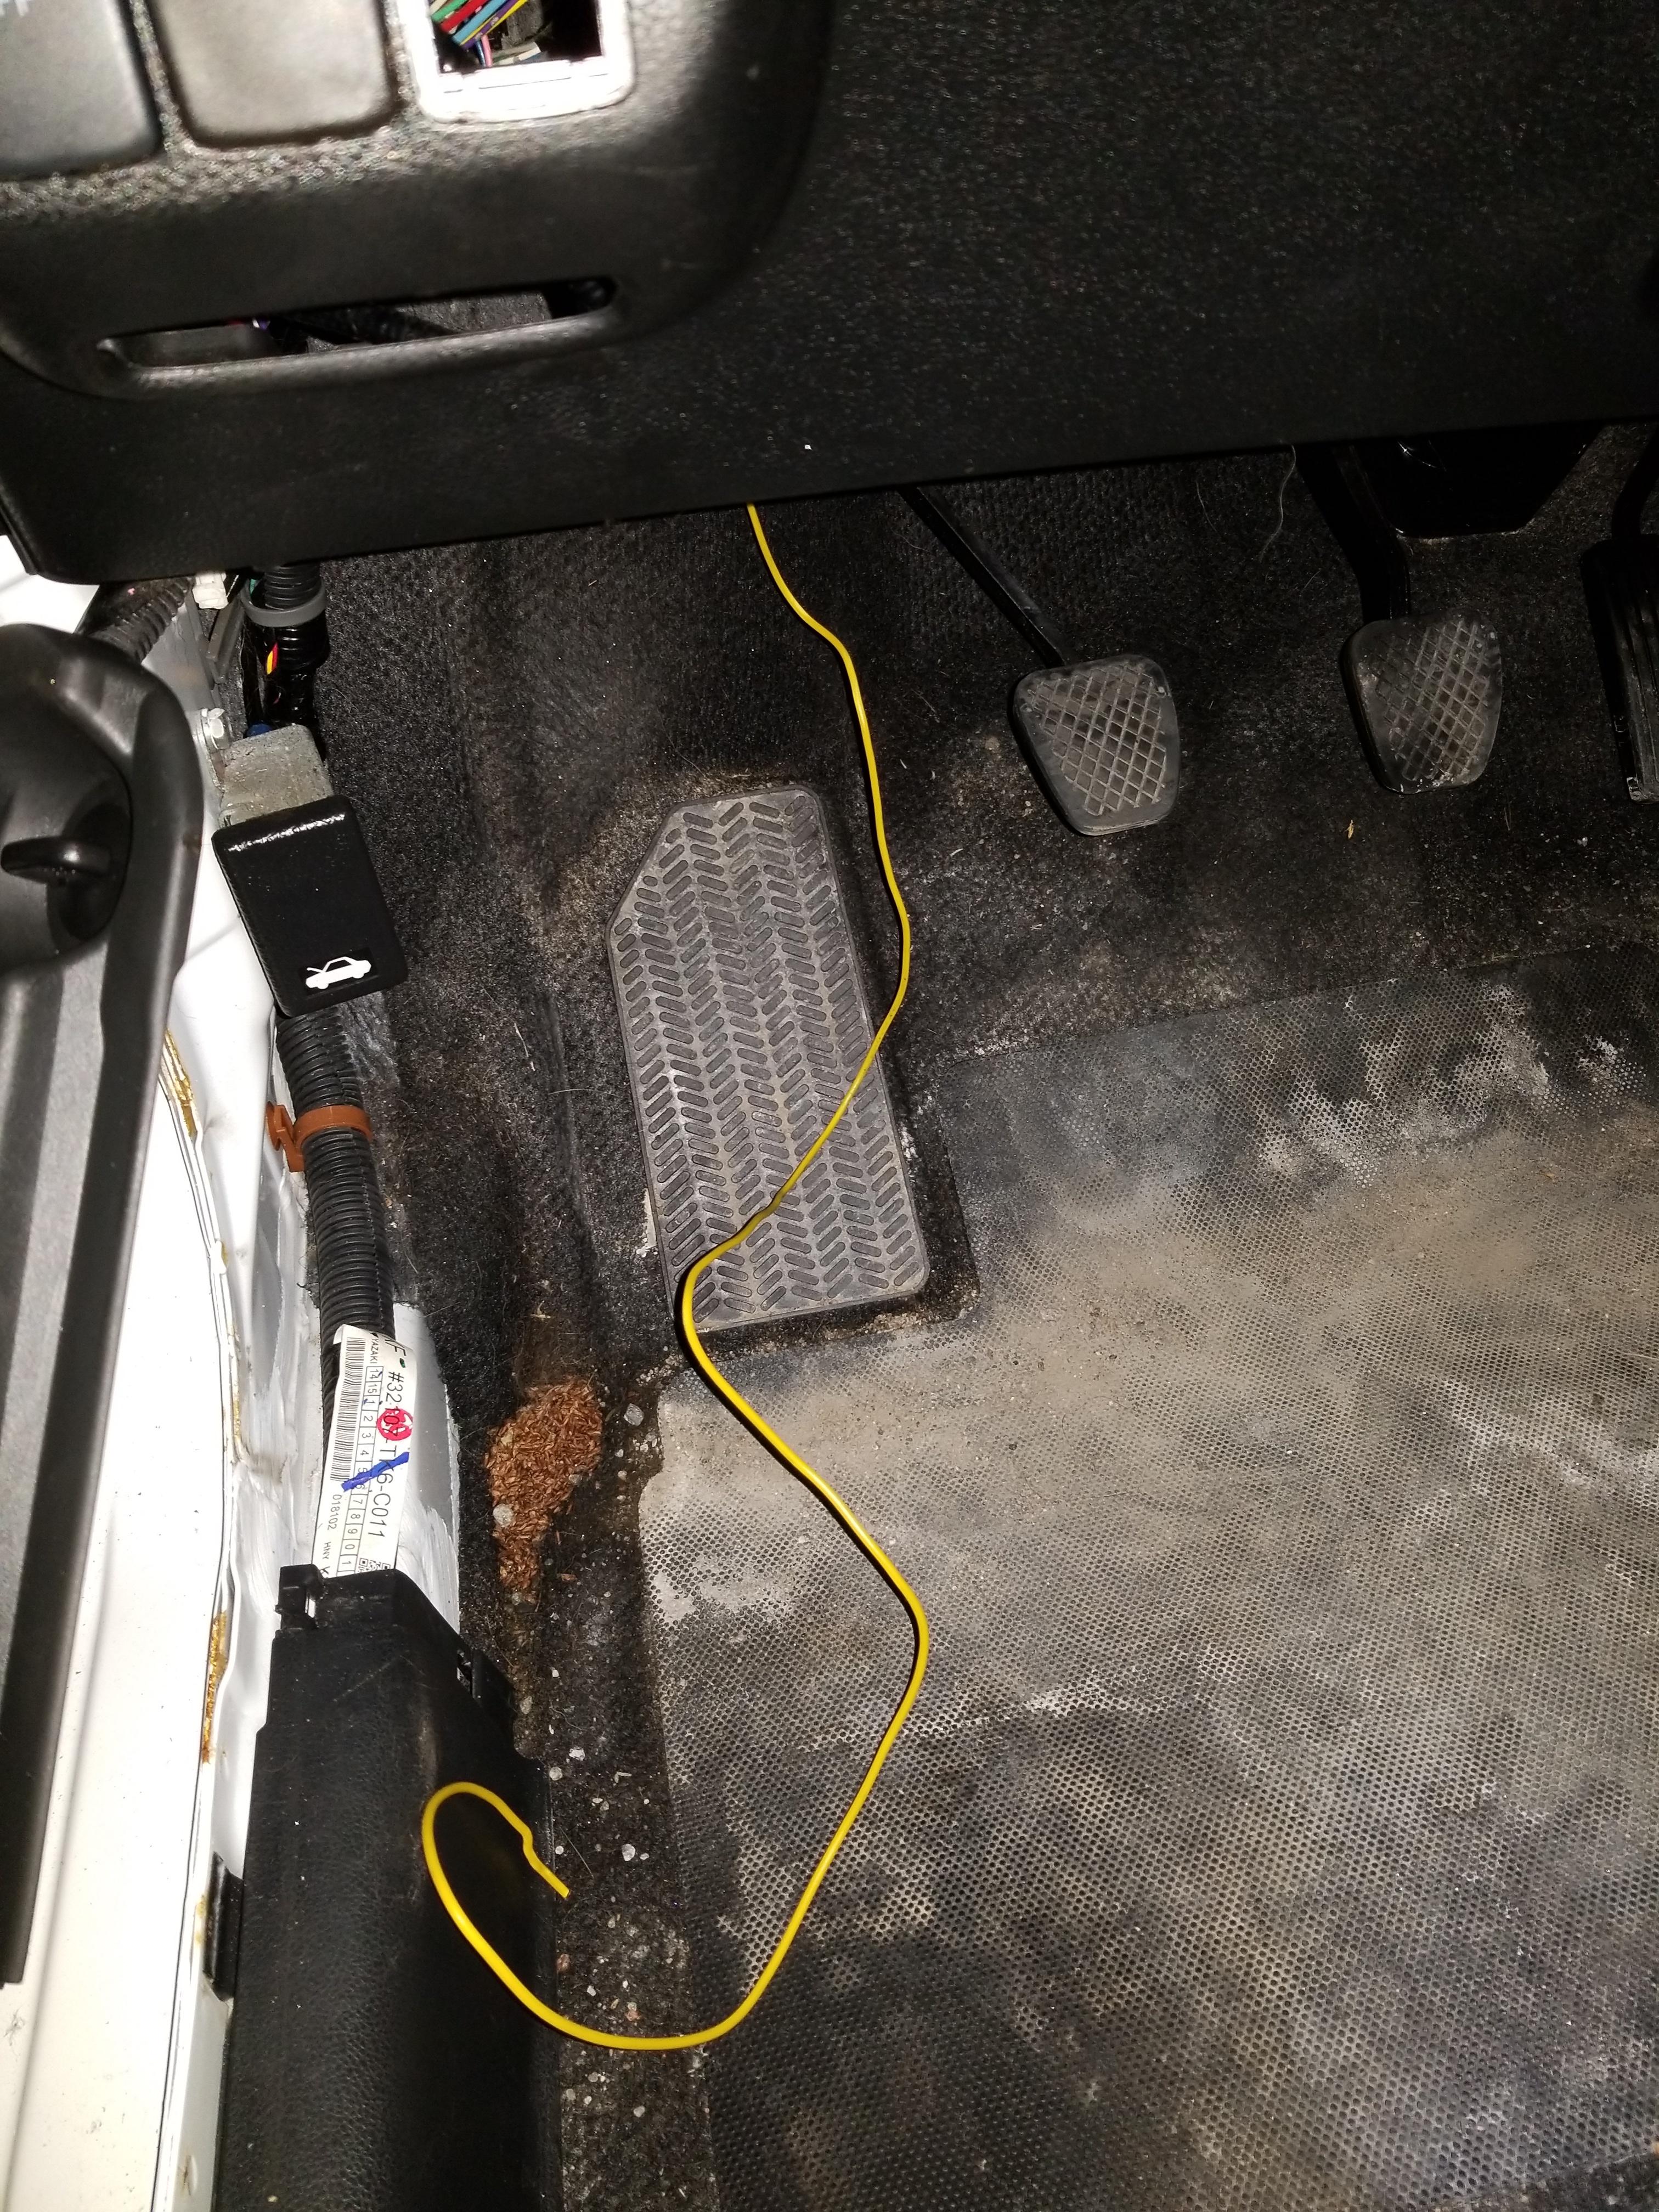
Passed to the inside
Lots to work with! Just in case I ever have to cut it off or something, I left the whole length and coiled it up and ziptied it.
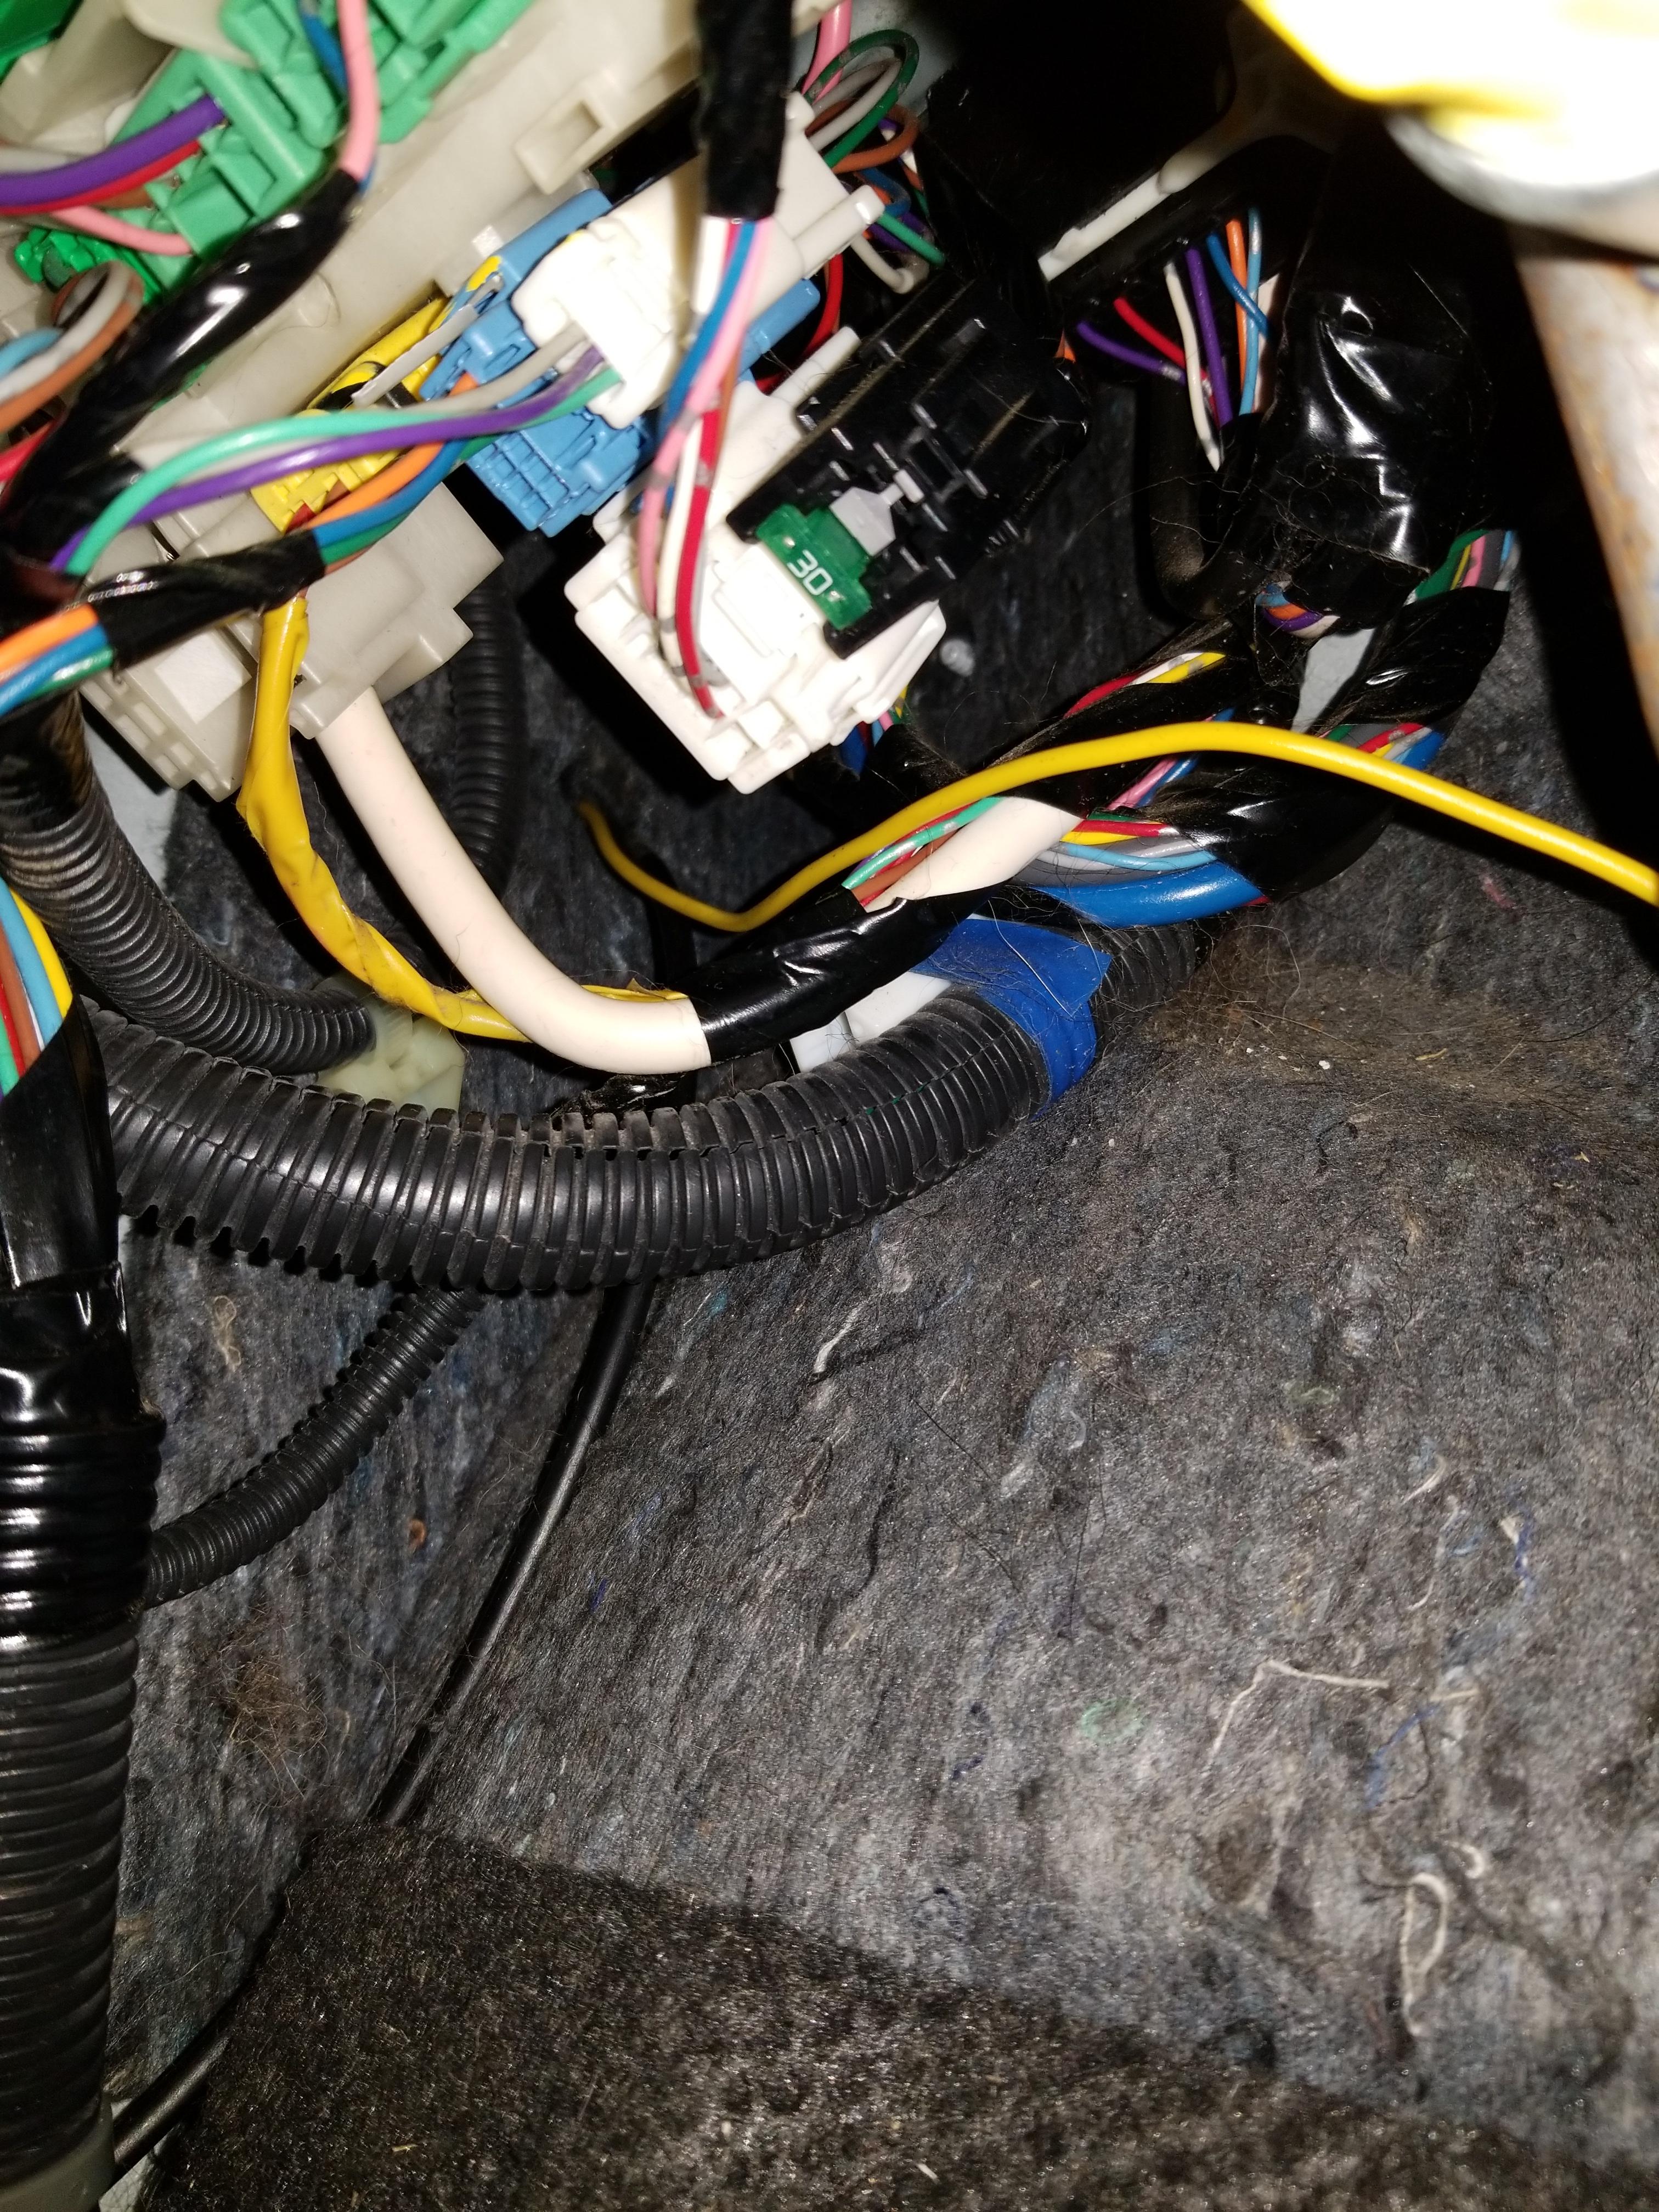
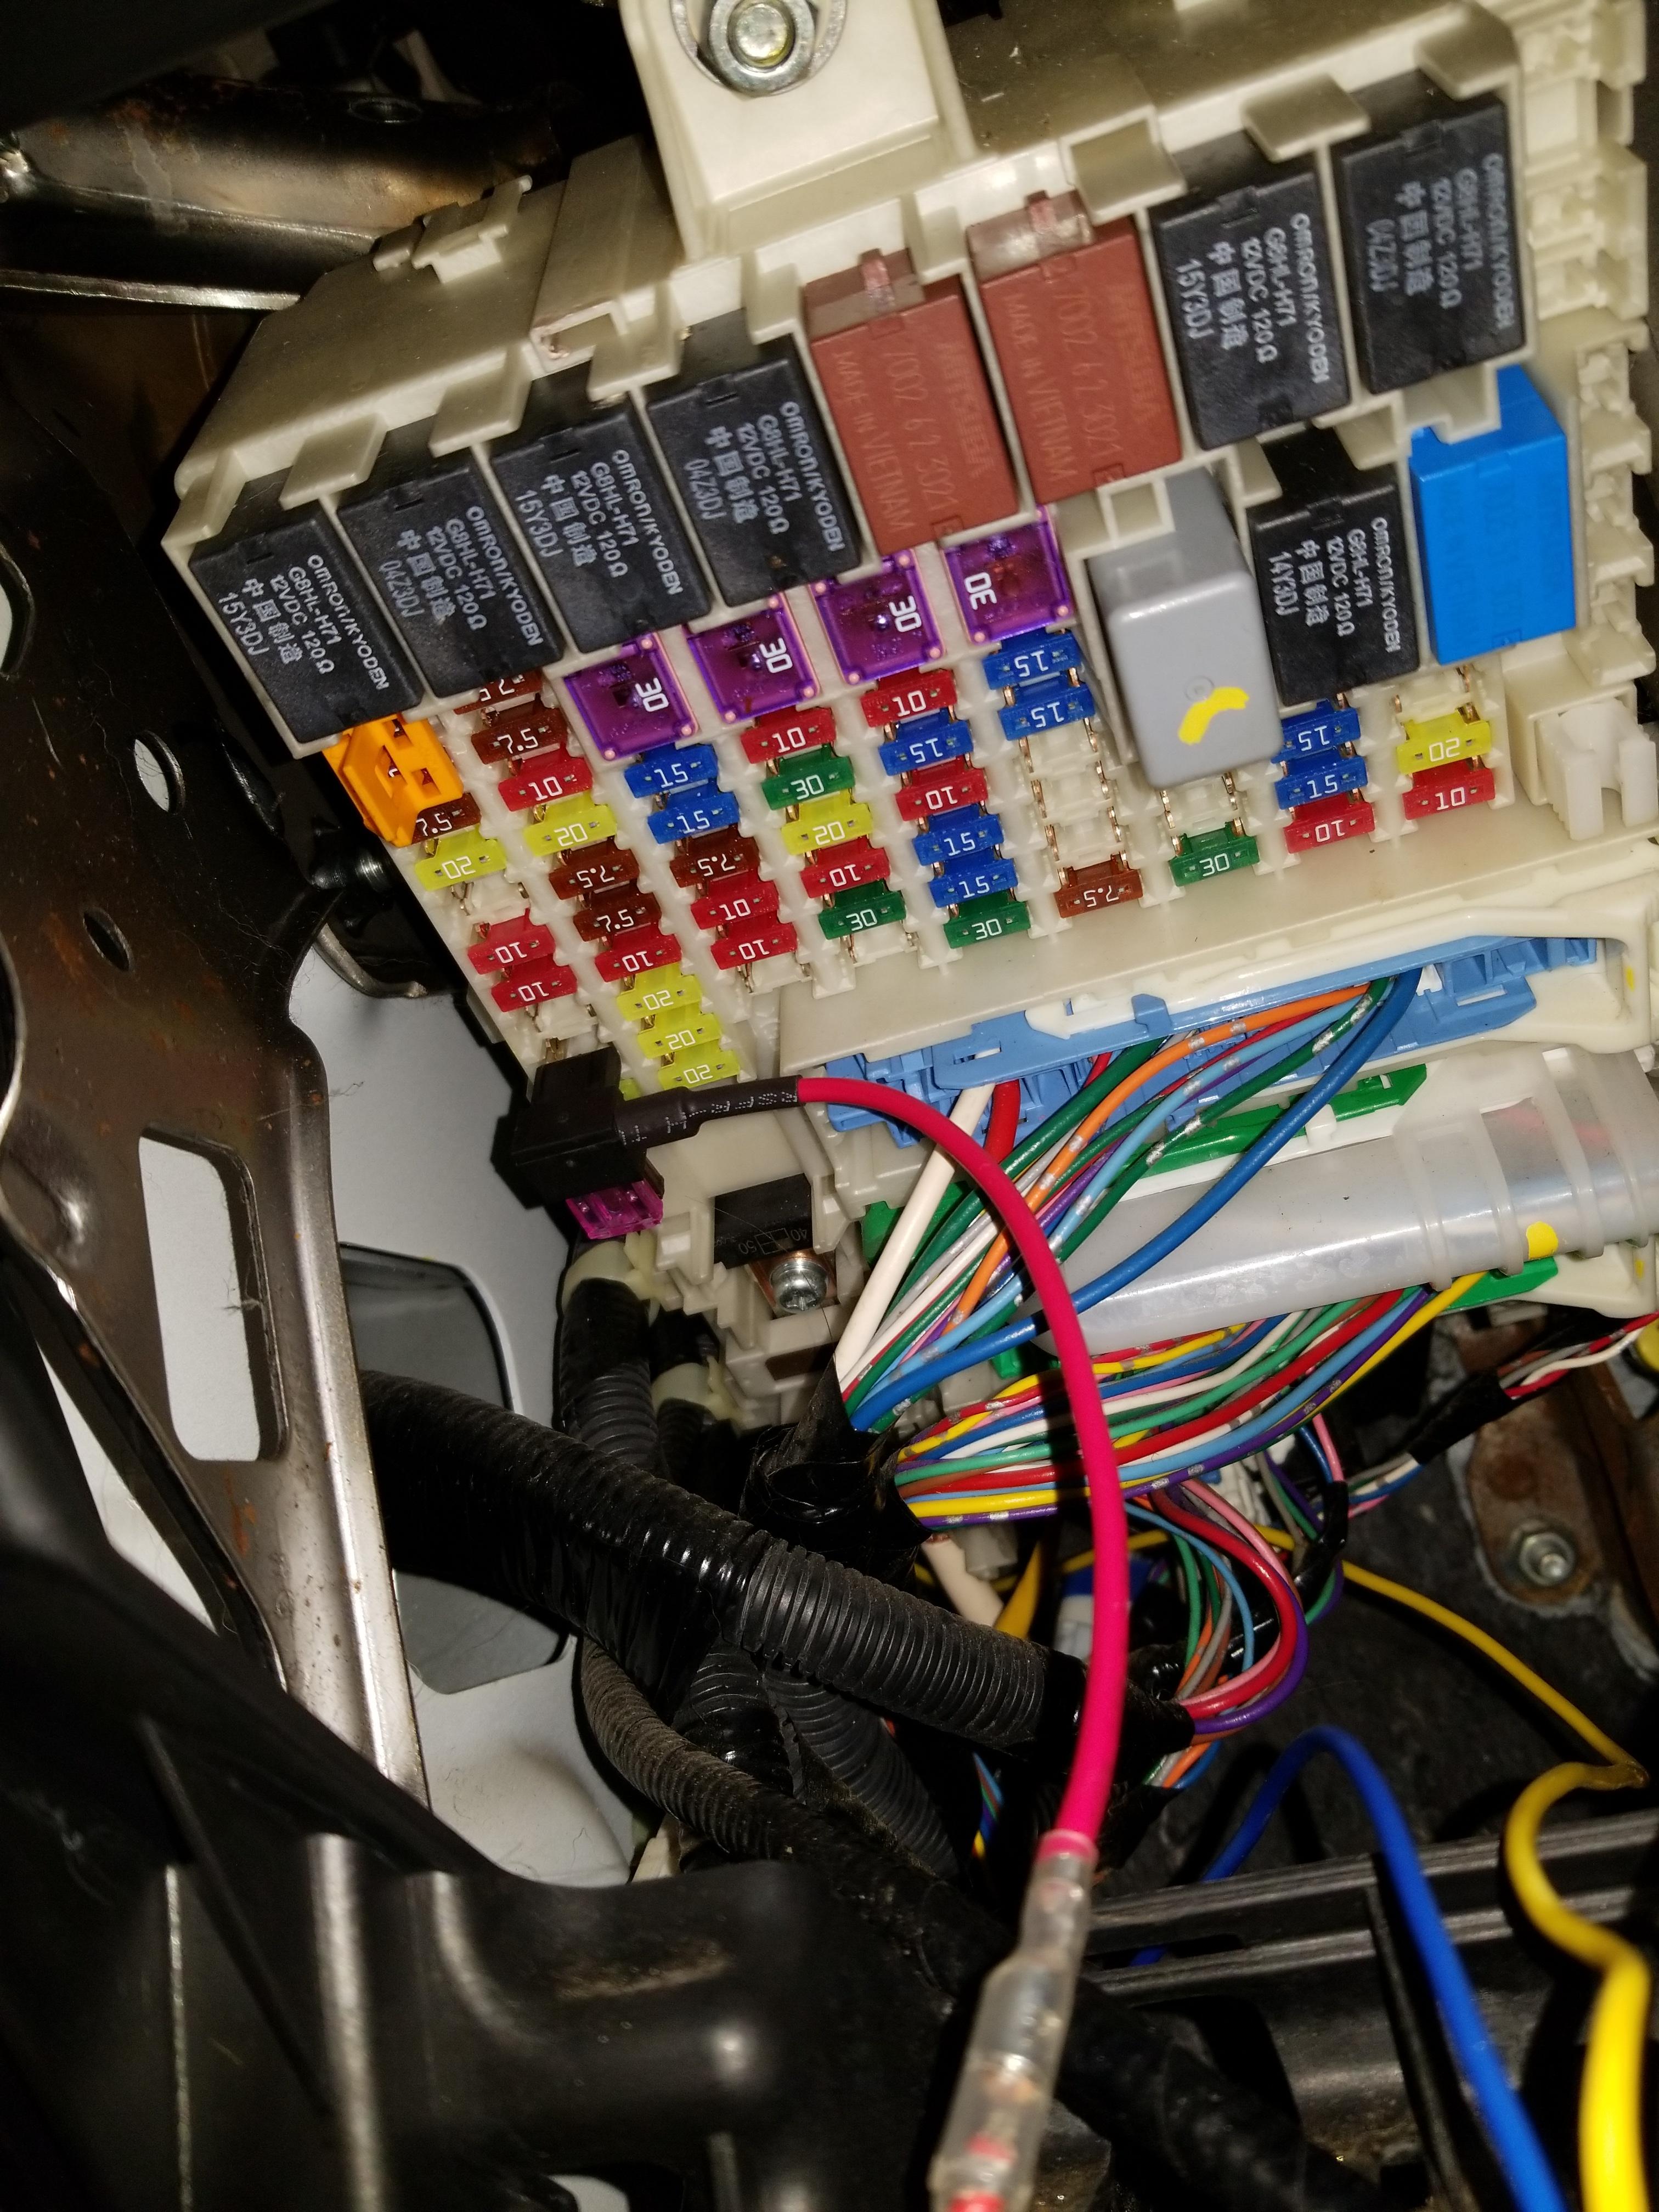
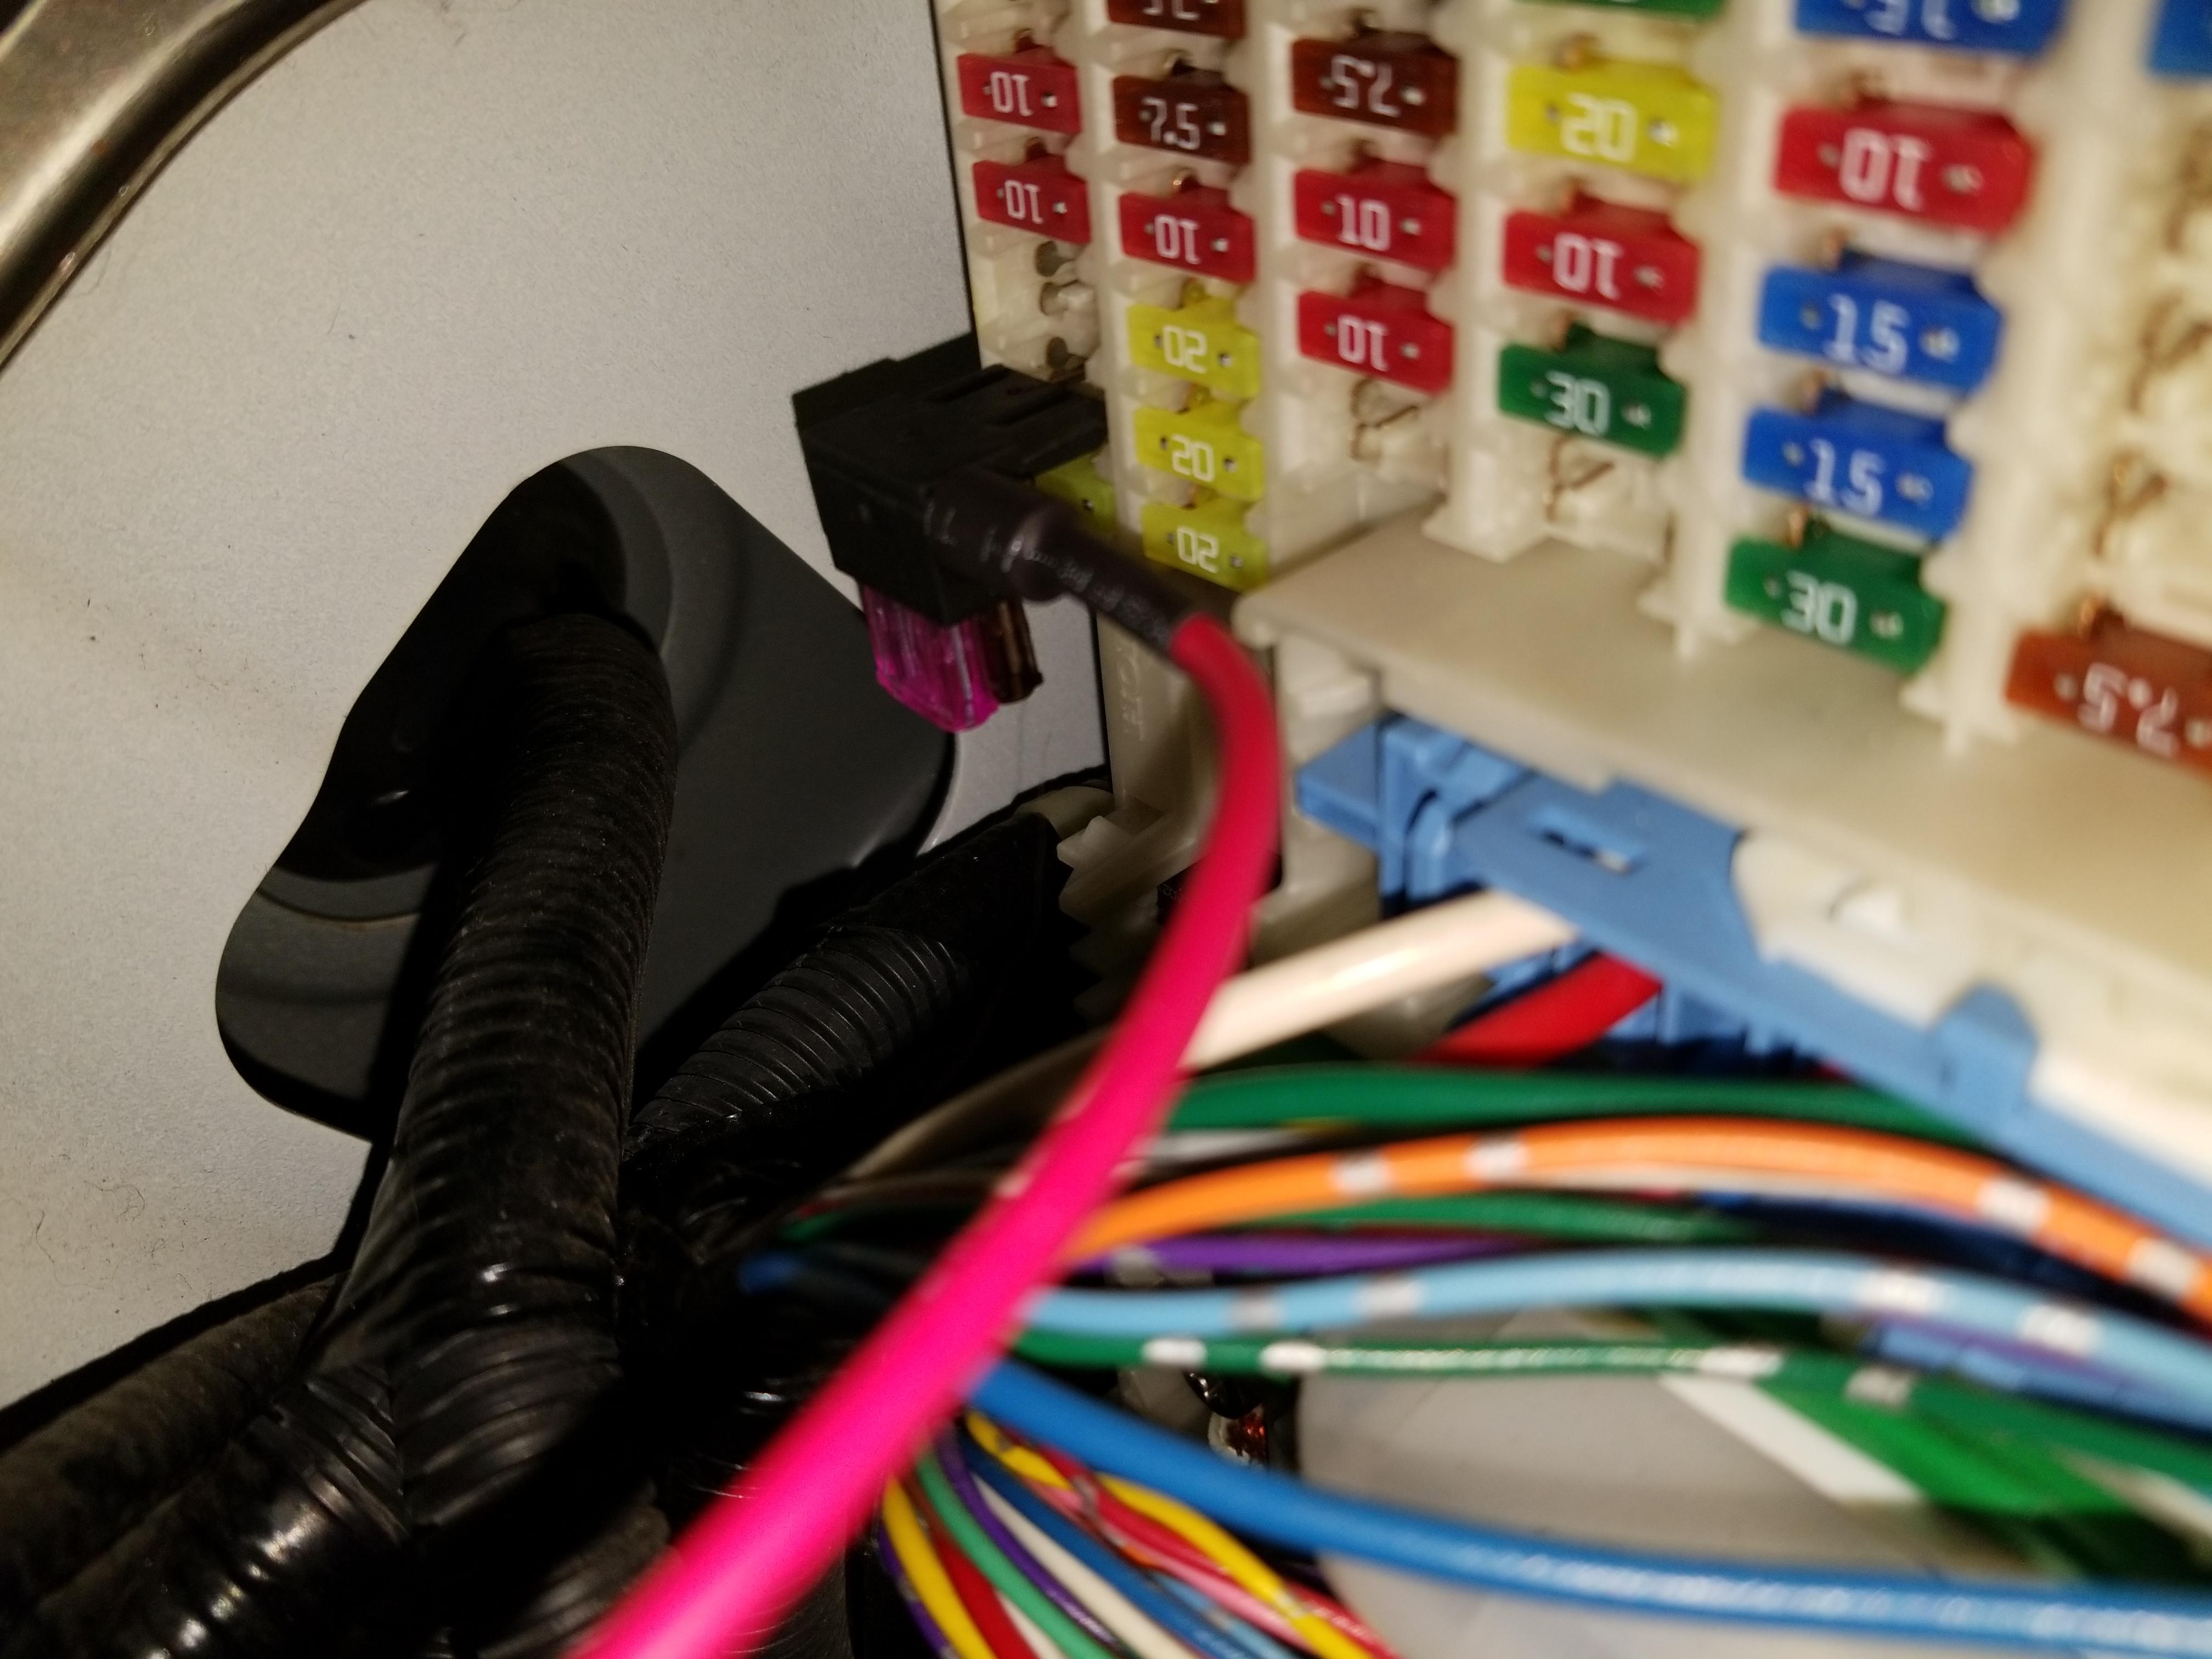
Now we need a 12V source to trigger the relay. I used the SRS fuse as it is switched power, which means I must have the key in the ON position for the lights to work. FWIW, the Fog Light fuse is just below it (20A) but it is constant power. Put the original fuse (7.5A, brown) in the slot closest to the fuse panel on your add-a-fuse, and the trigger fuse (2A, purple) in the outside one.
Detail
Ground wire to the switch can be attached to the hood release
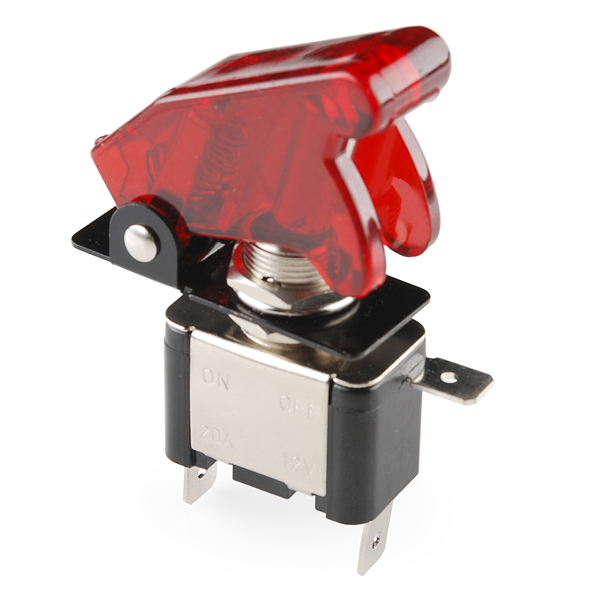
These then get worked onto your switch. Bottom is 12V from the add-a-fuse, middle is the yellow trigger back to the relay, and the top is the ground so the switch will light up when it is on.
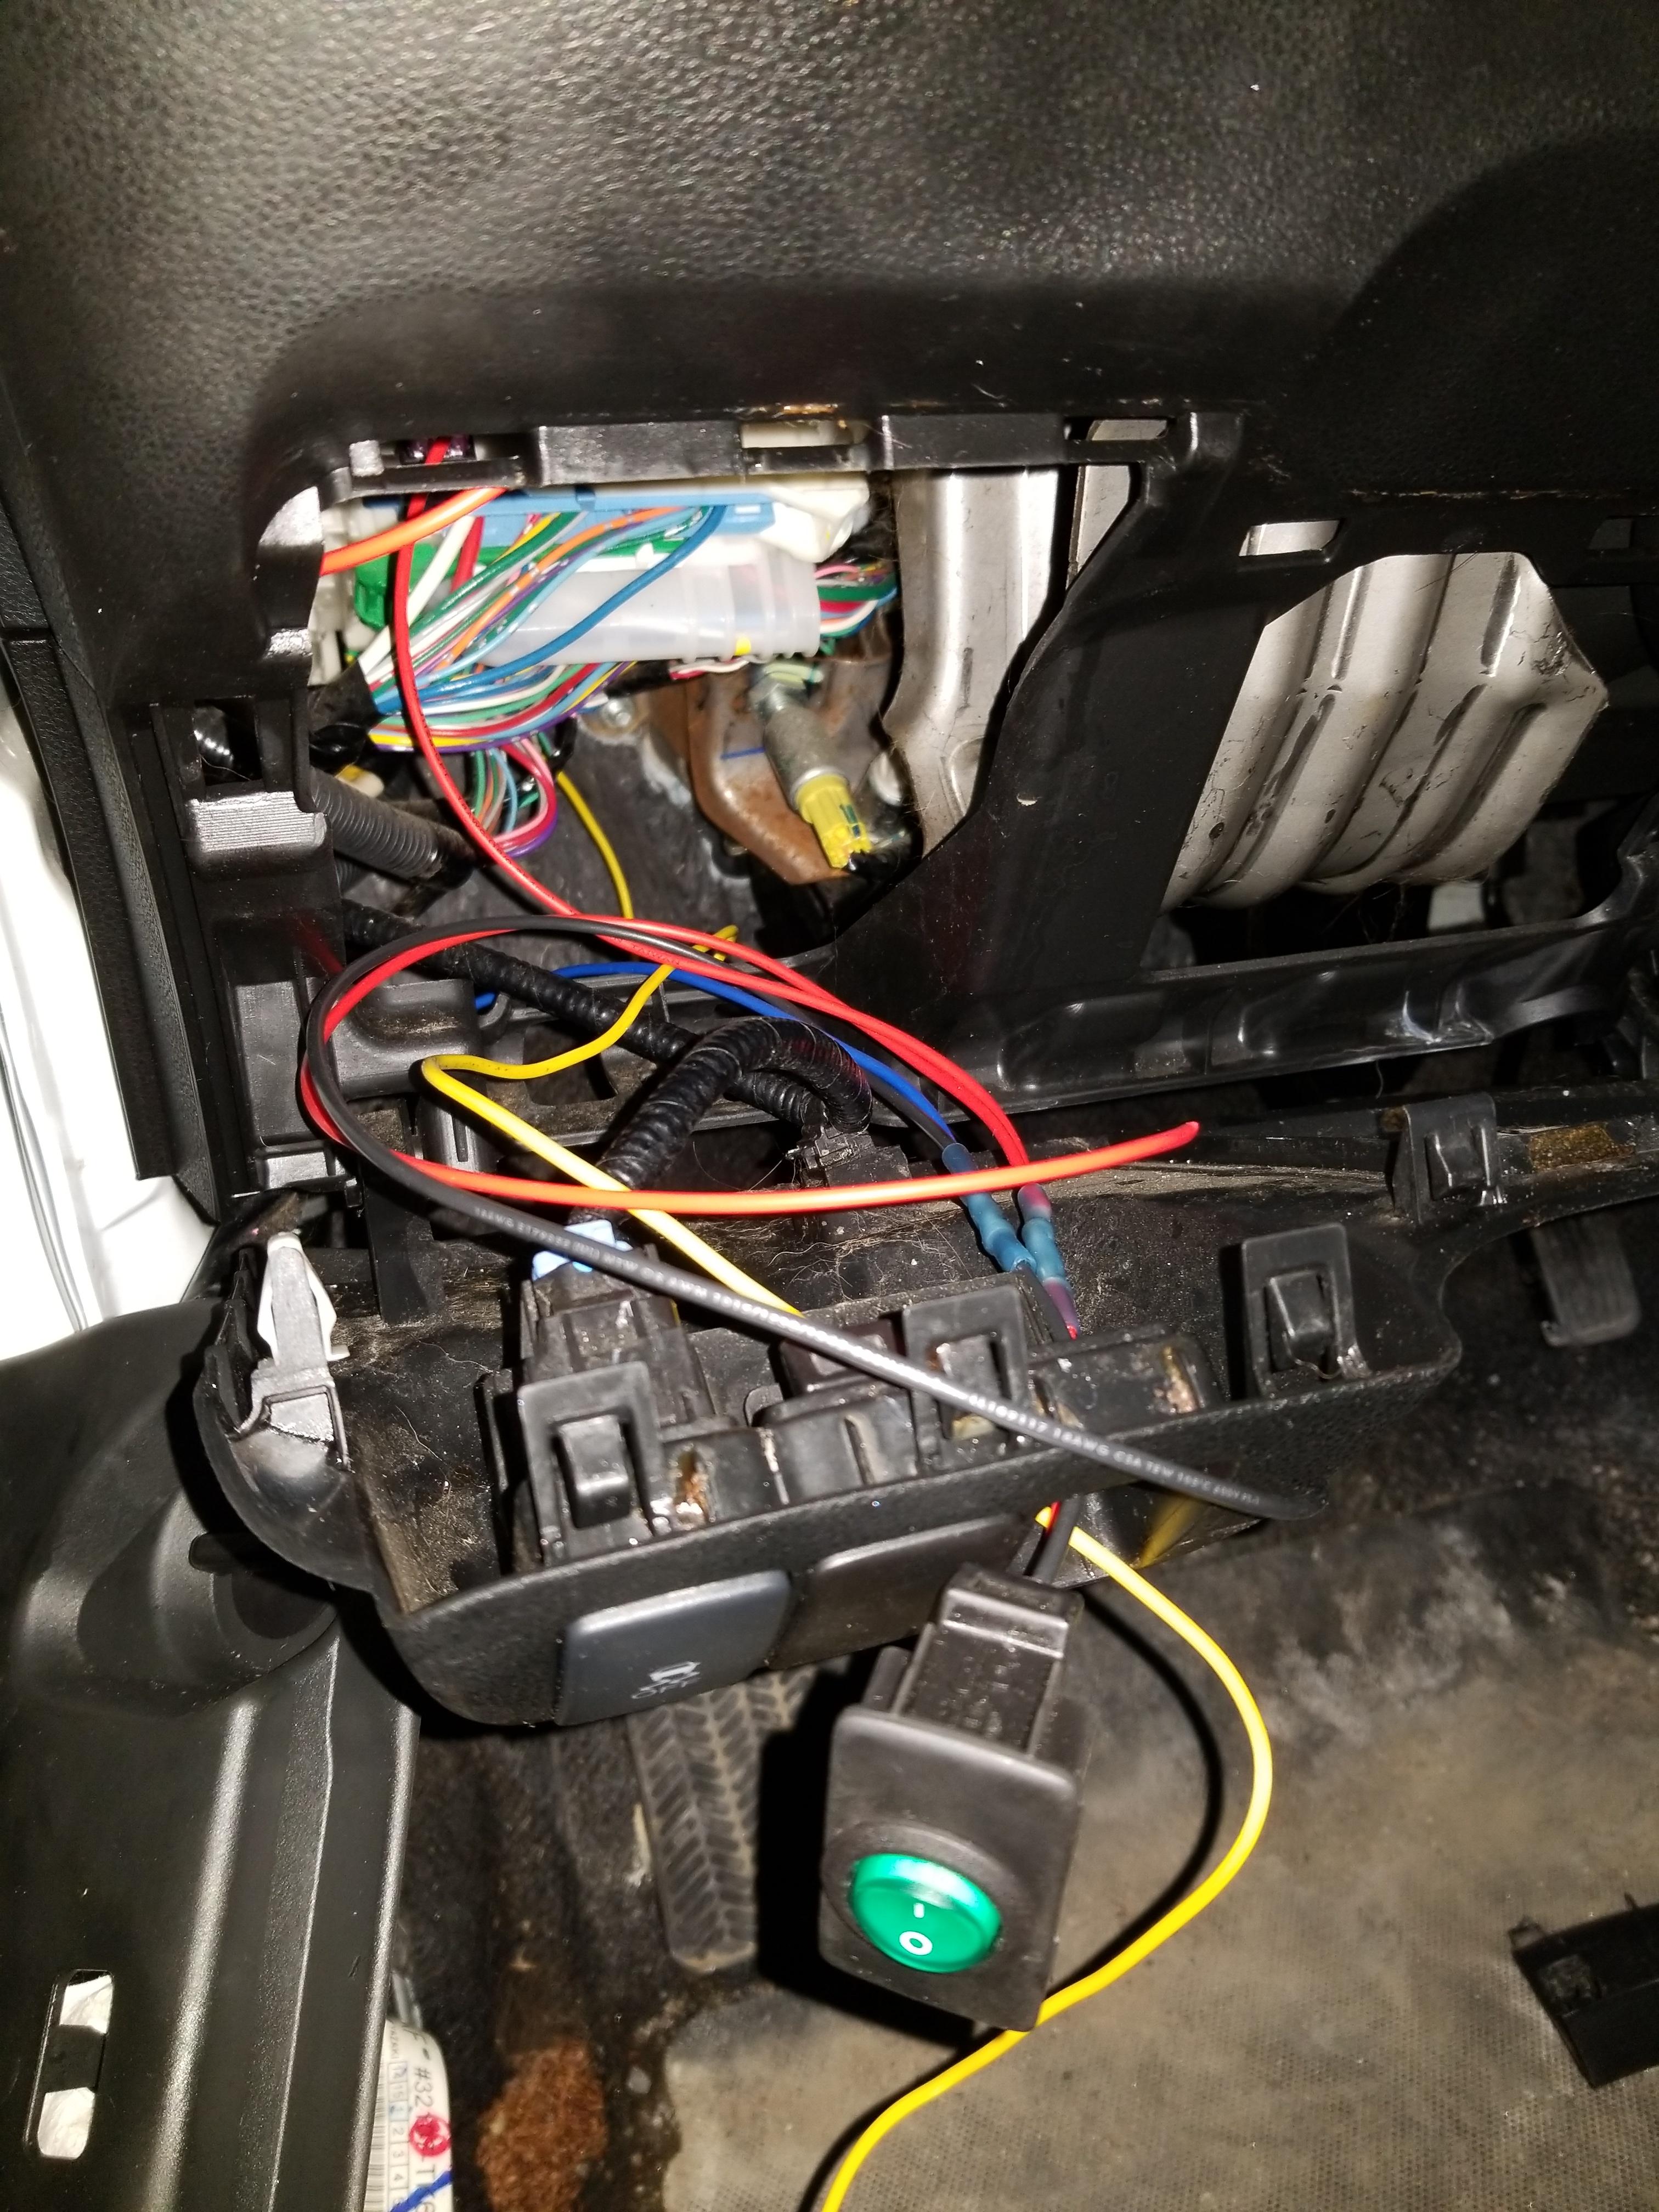
BONUS: I also added a voltmeter, also tapped off that 12V feed and grounded to the same spot. Just jumpers off the light switch. I LIKE FARKLES. I SHOULD RIDE A BMW 1200GS TO STARBUCKS.
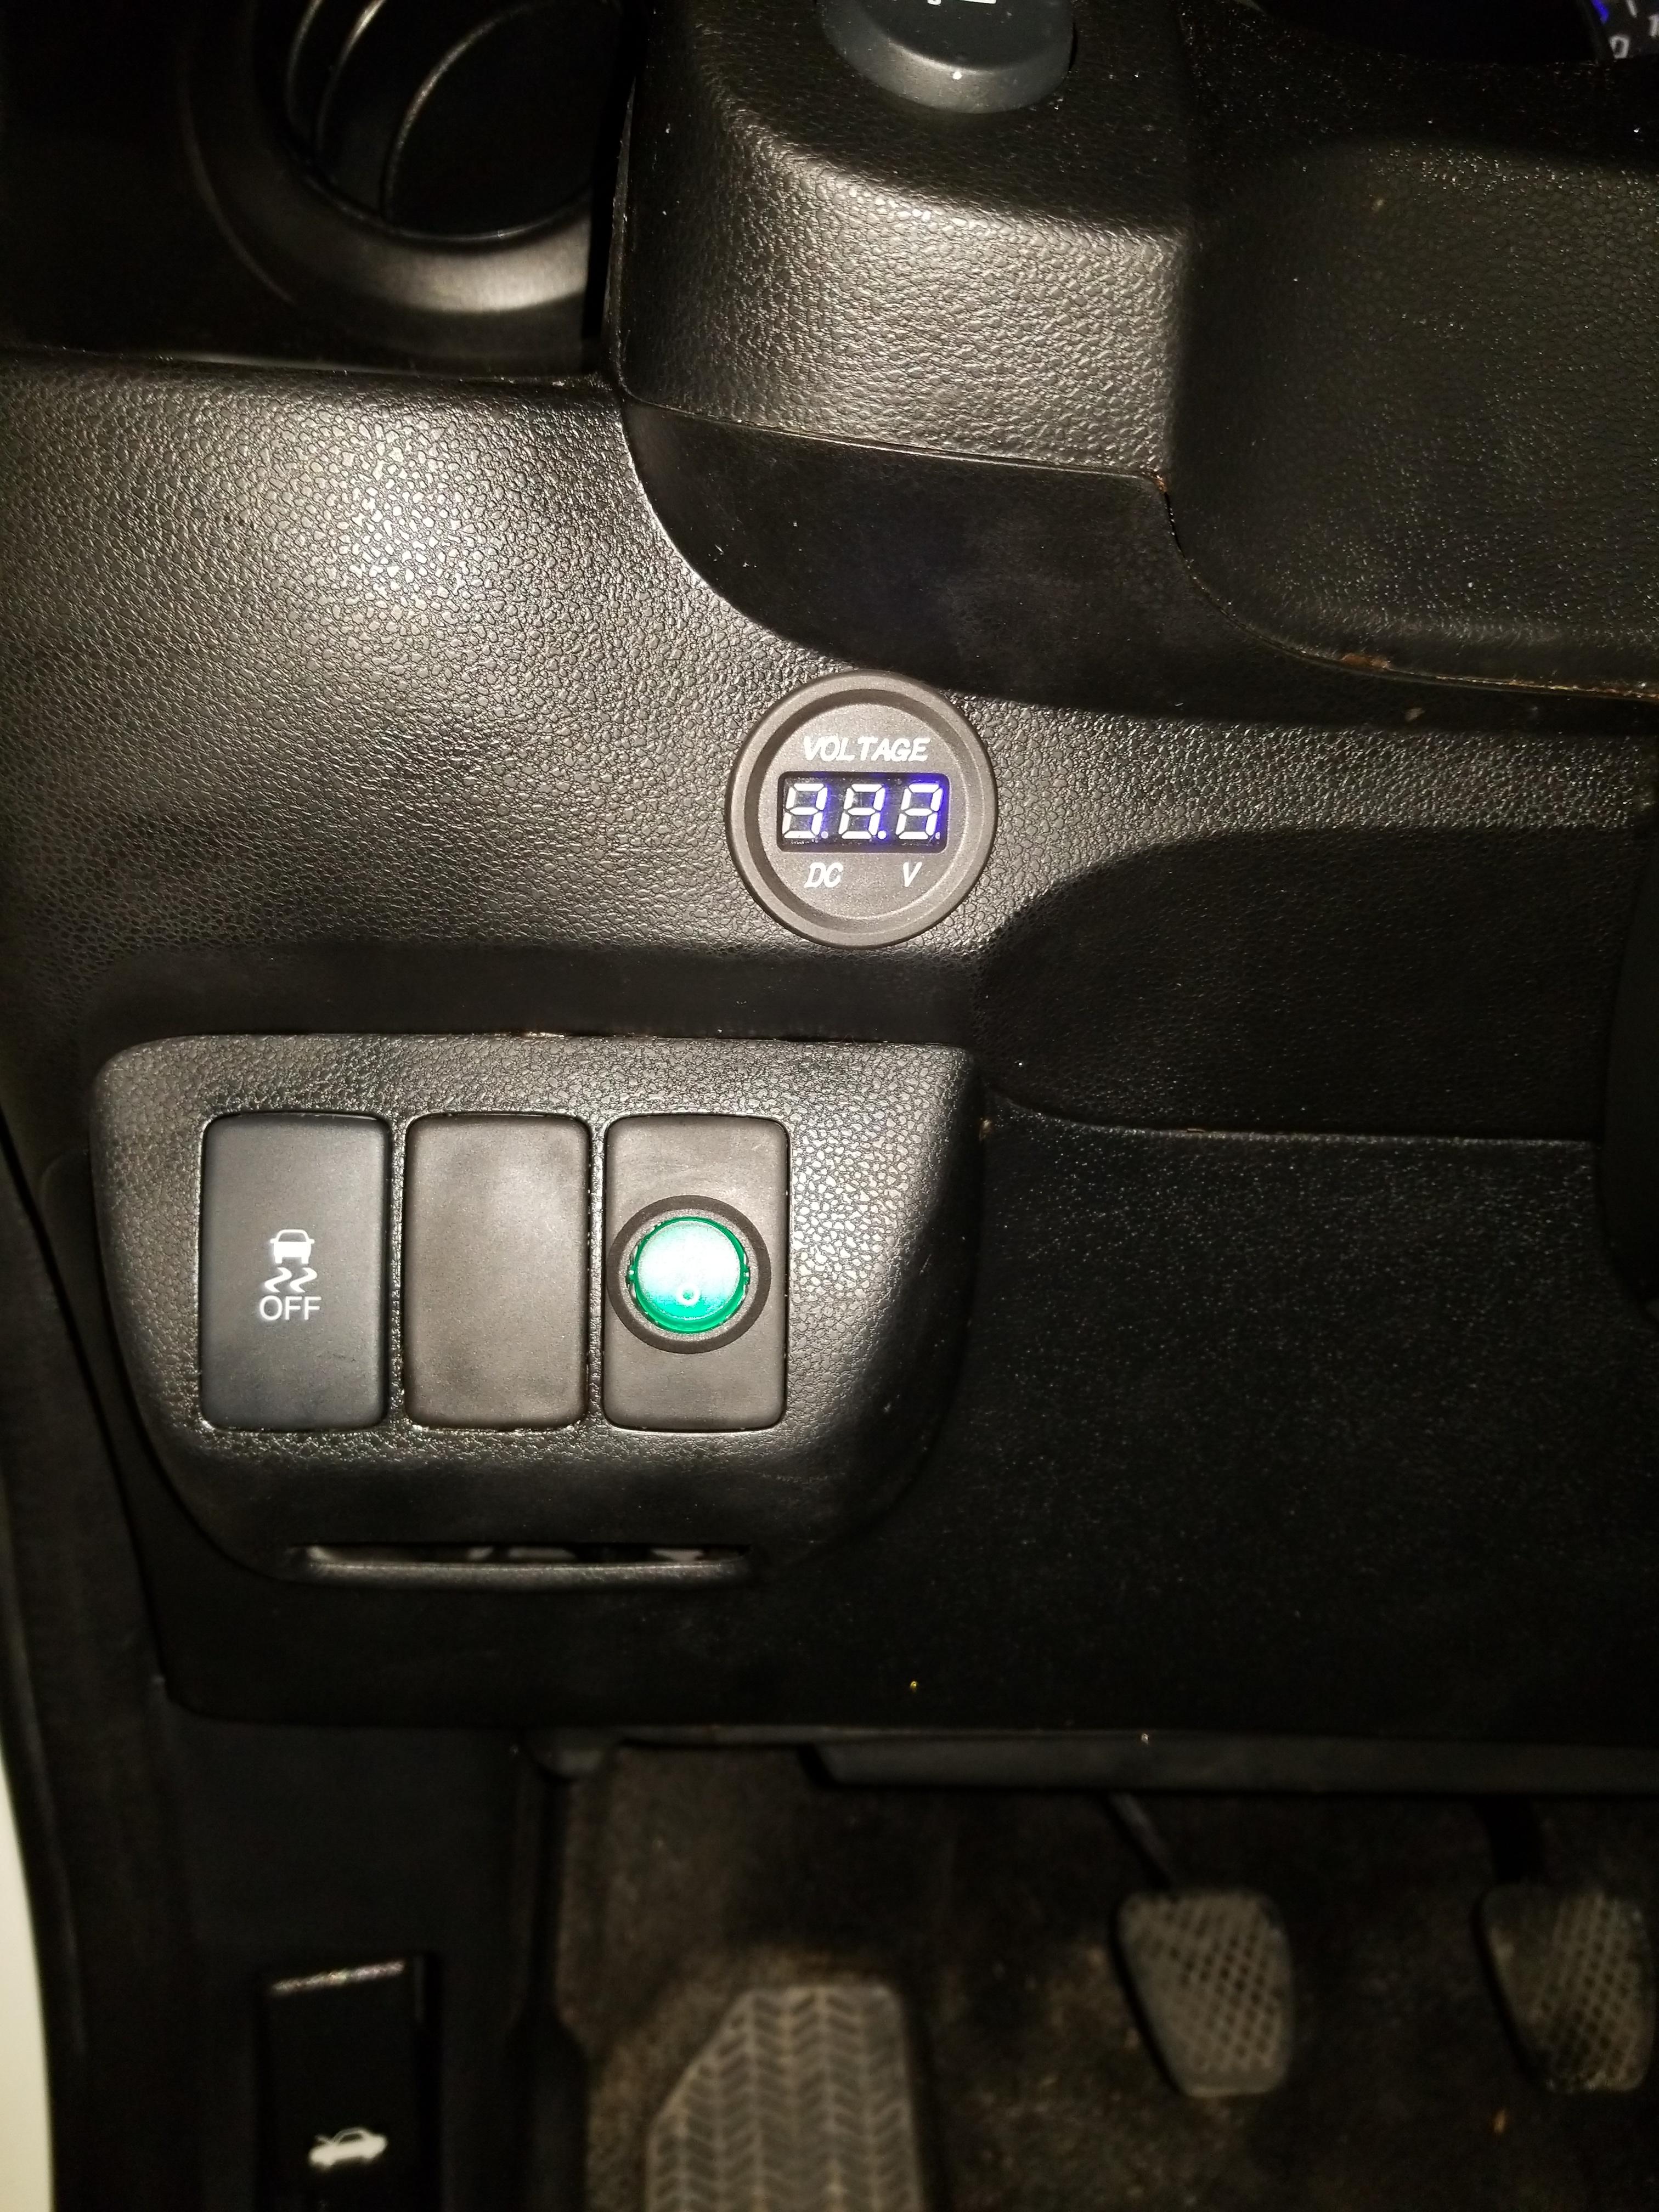
Key on, but engine off. Woohoo it works!
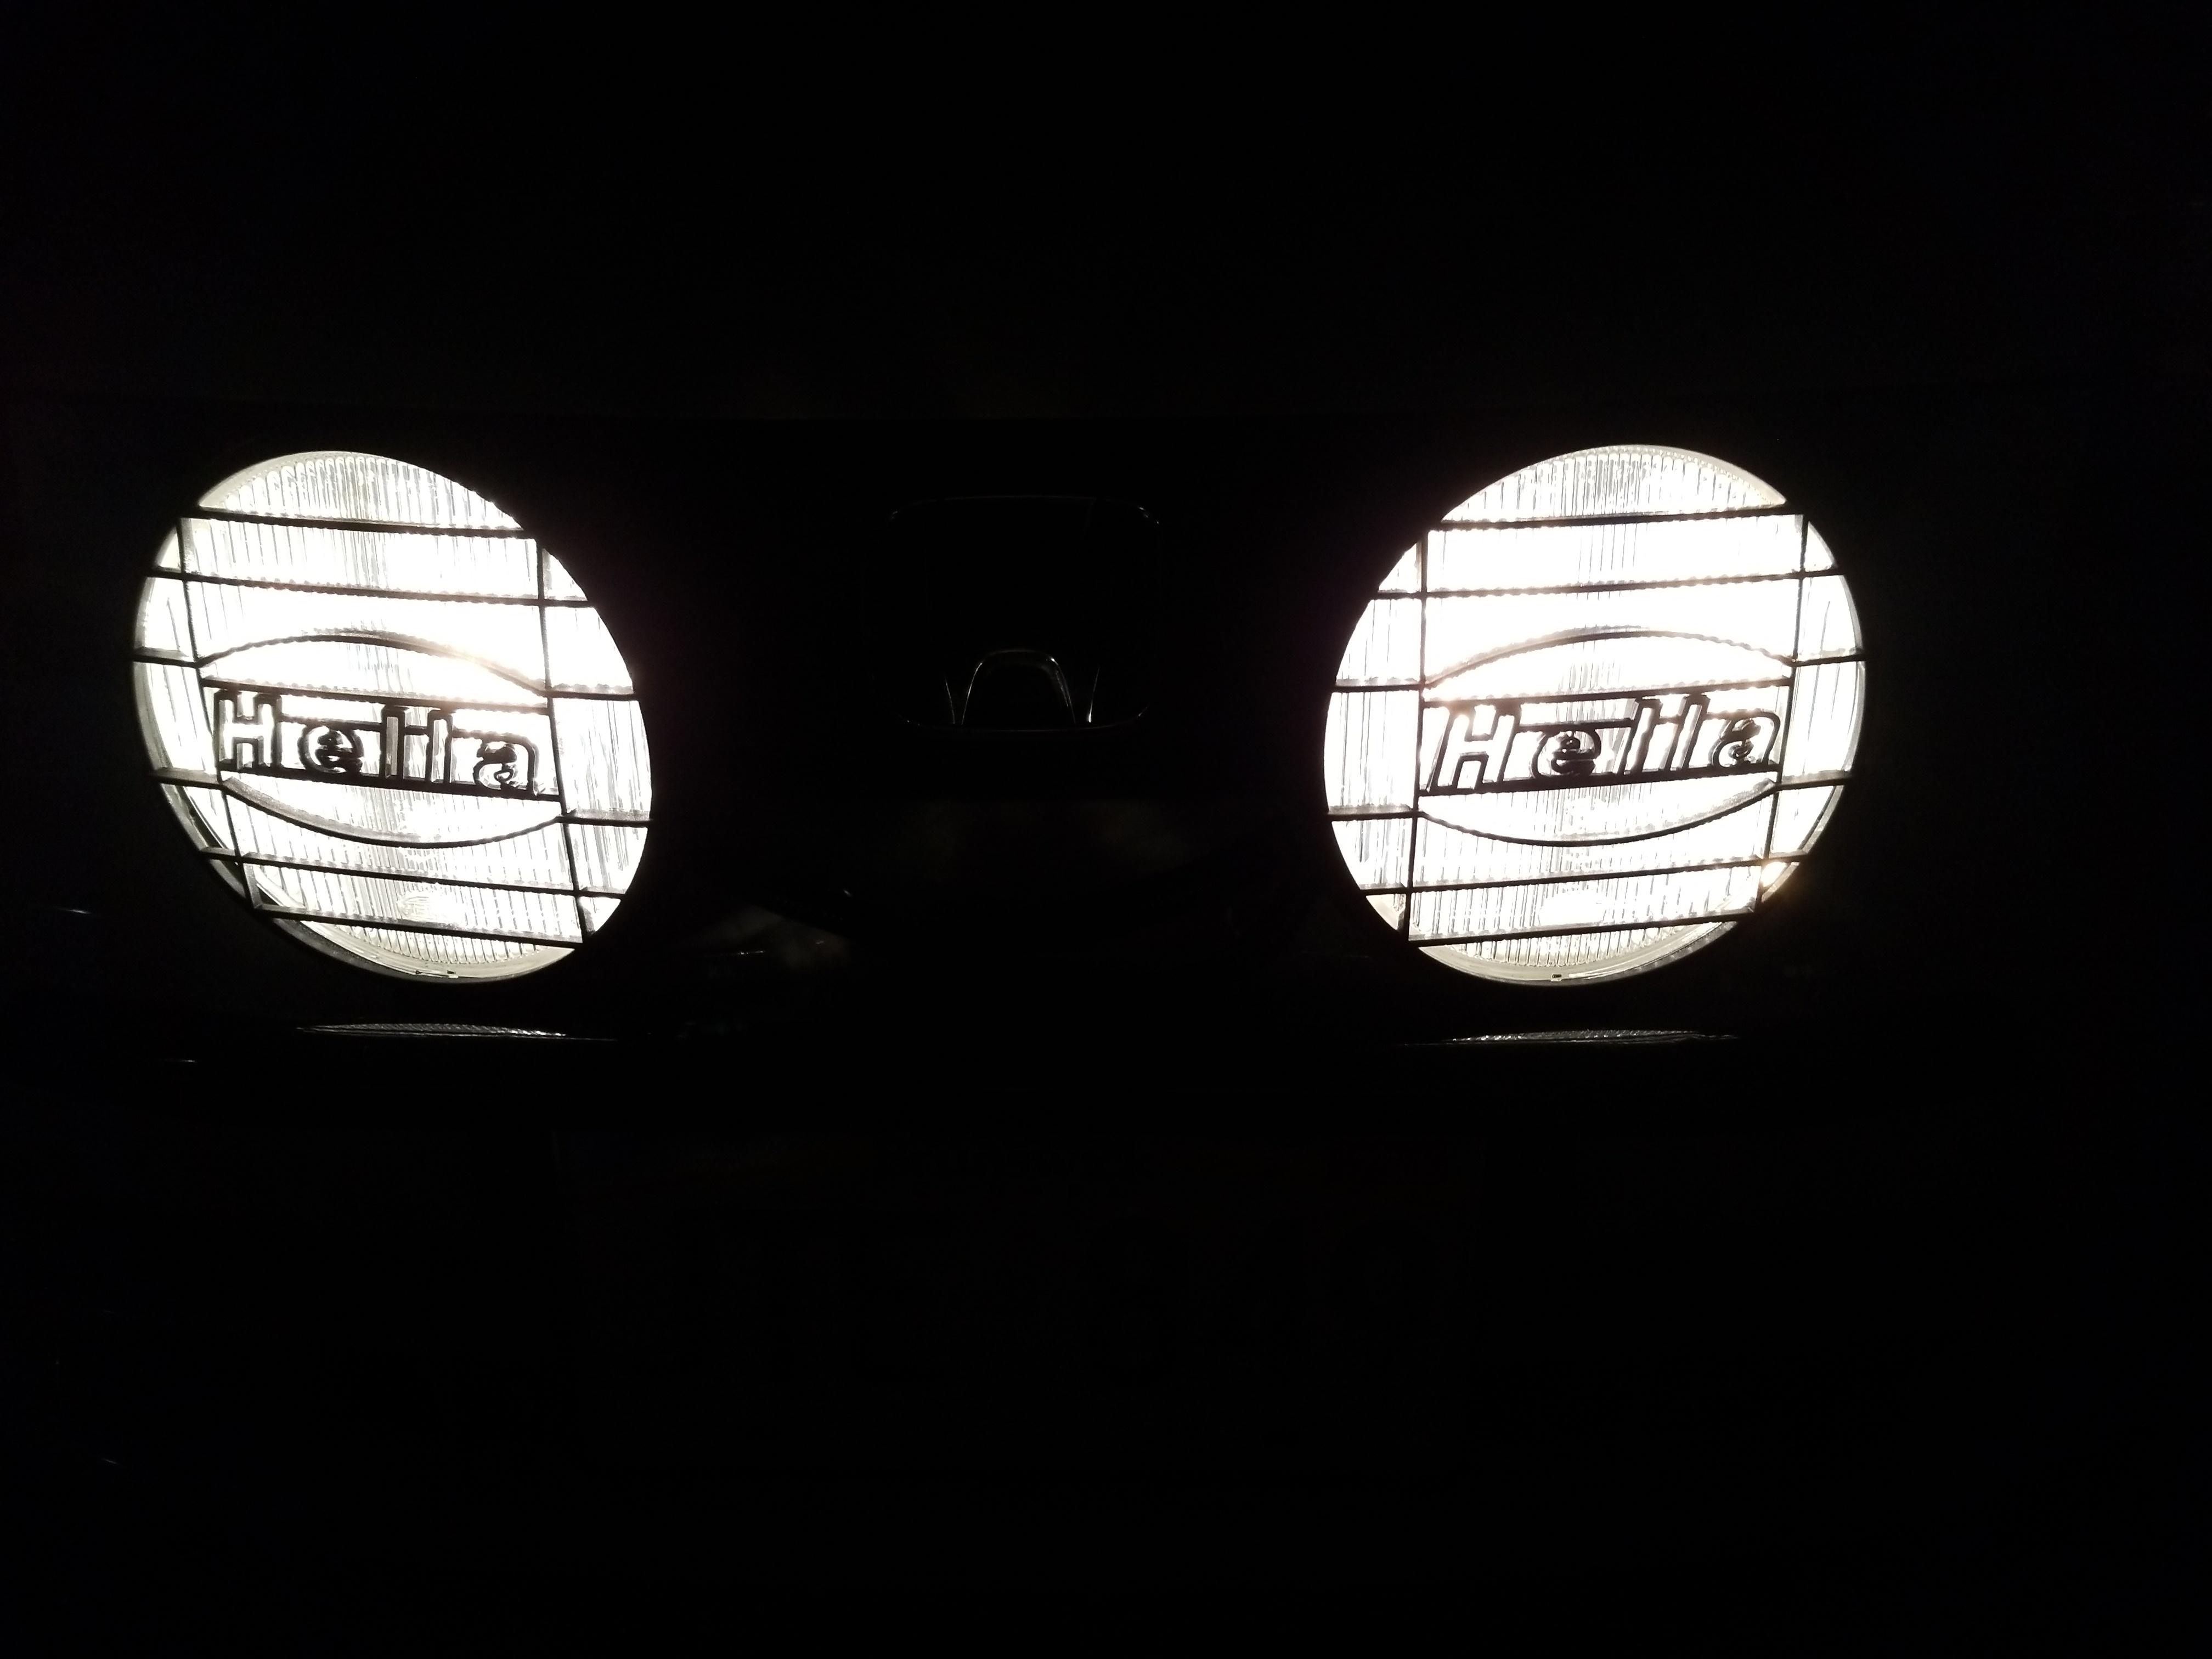
DRUMROLL PLEASE...
WOOHOO IT WORKS
My stone shield/grills
RE-assembly is reverse of all this... really you just need to reinstall the interior panels and reattach the fender liner using your (Canadian) as-expensive-as-starbucks-coffee clips. Take a look at the video at the top of the post to see more detail.
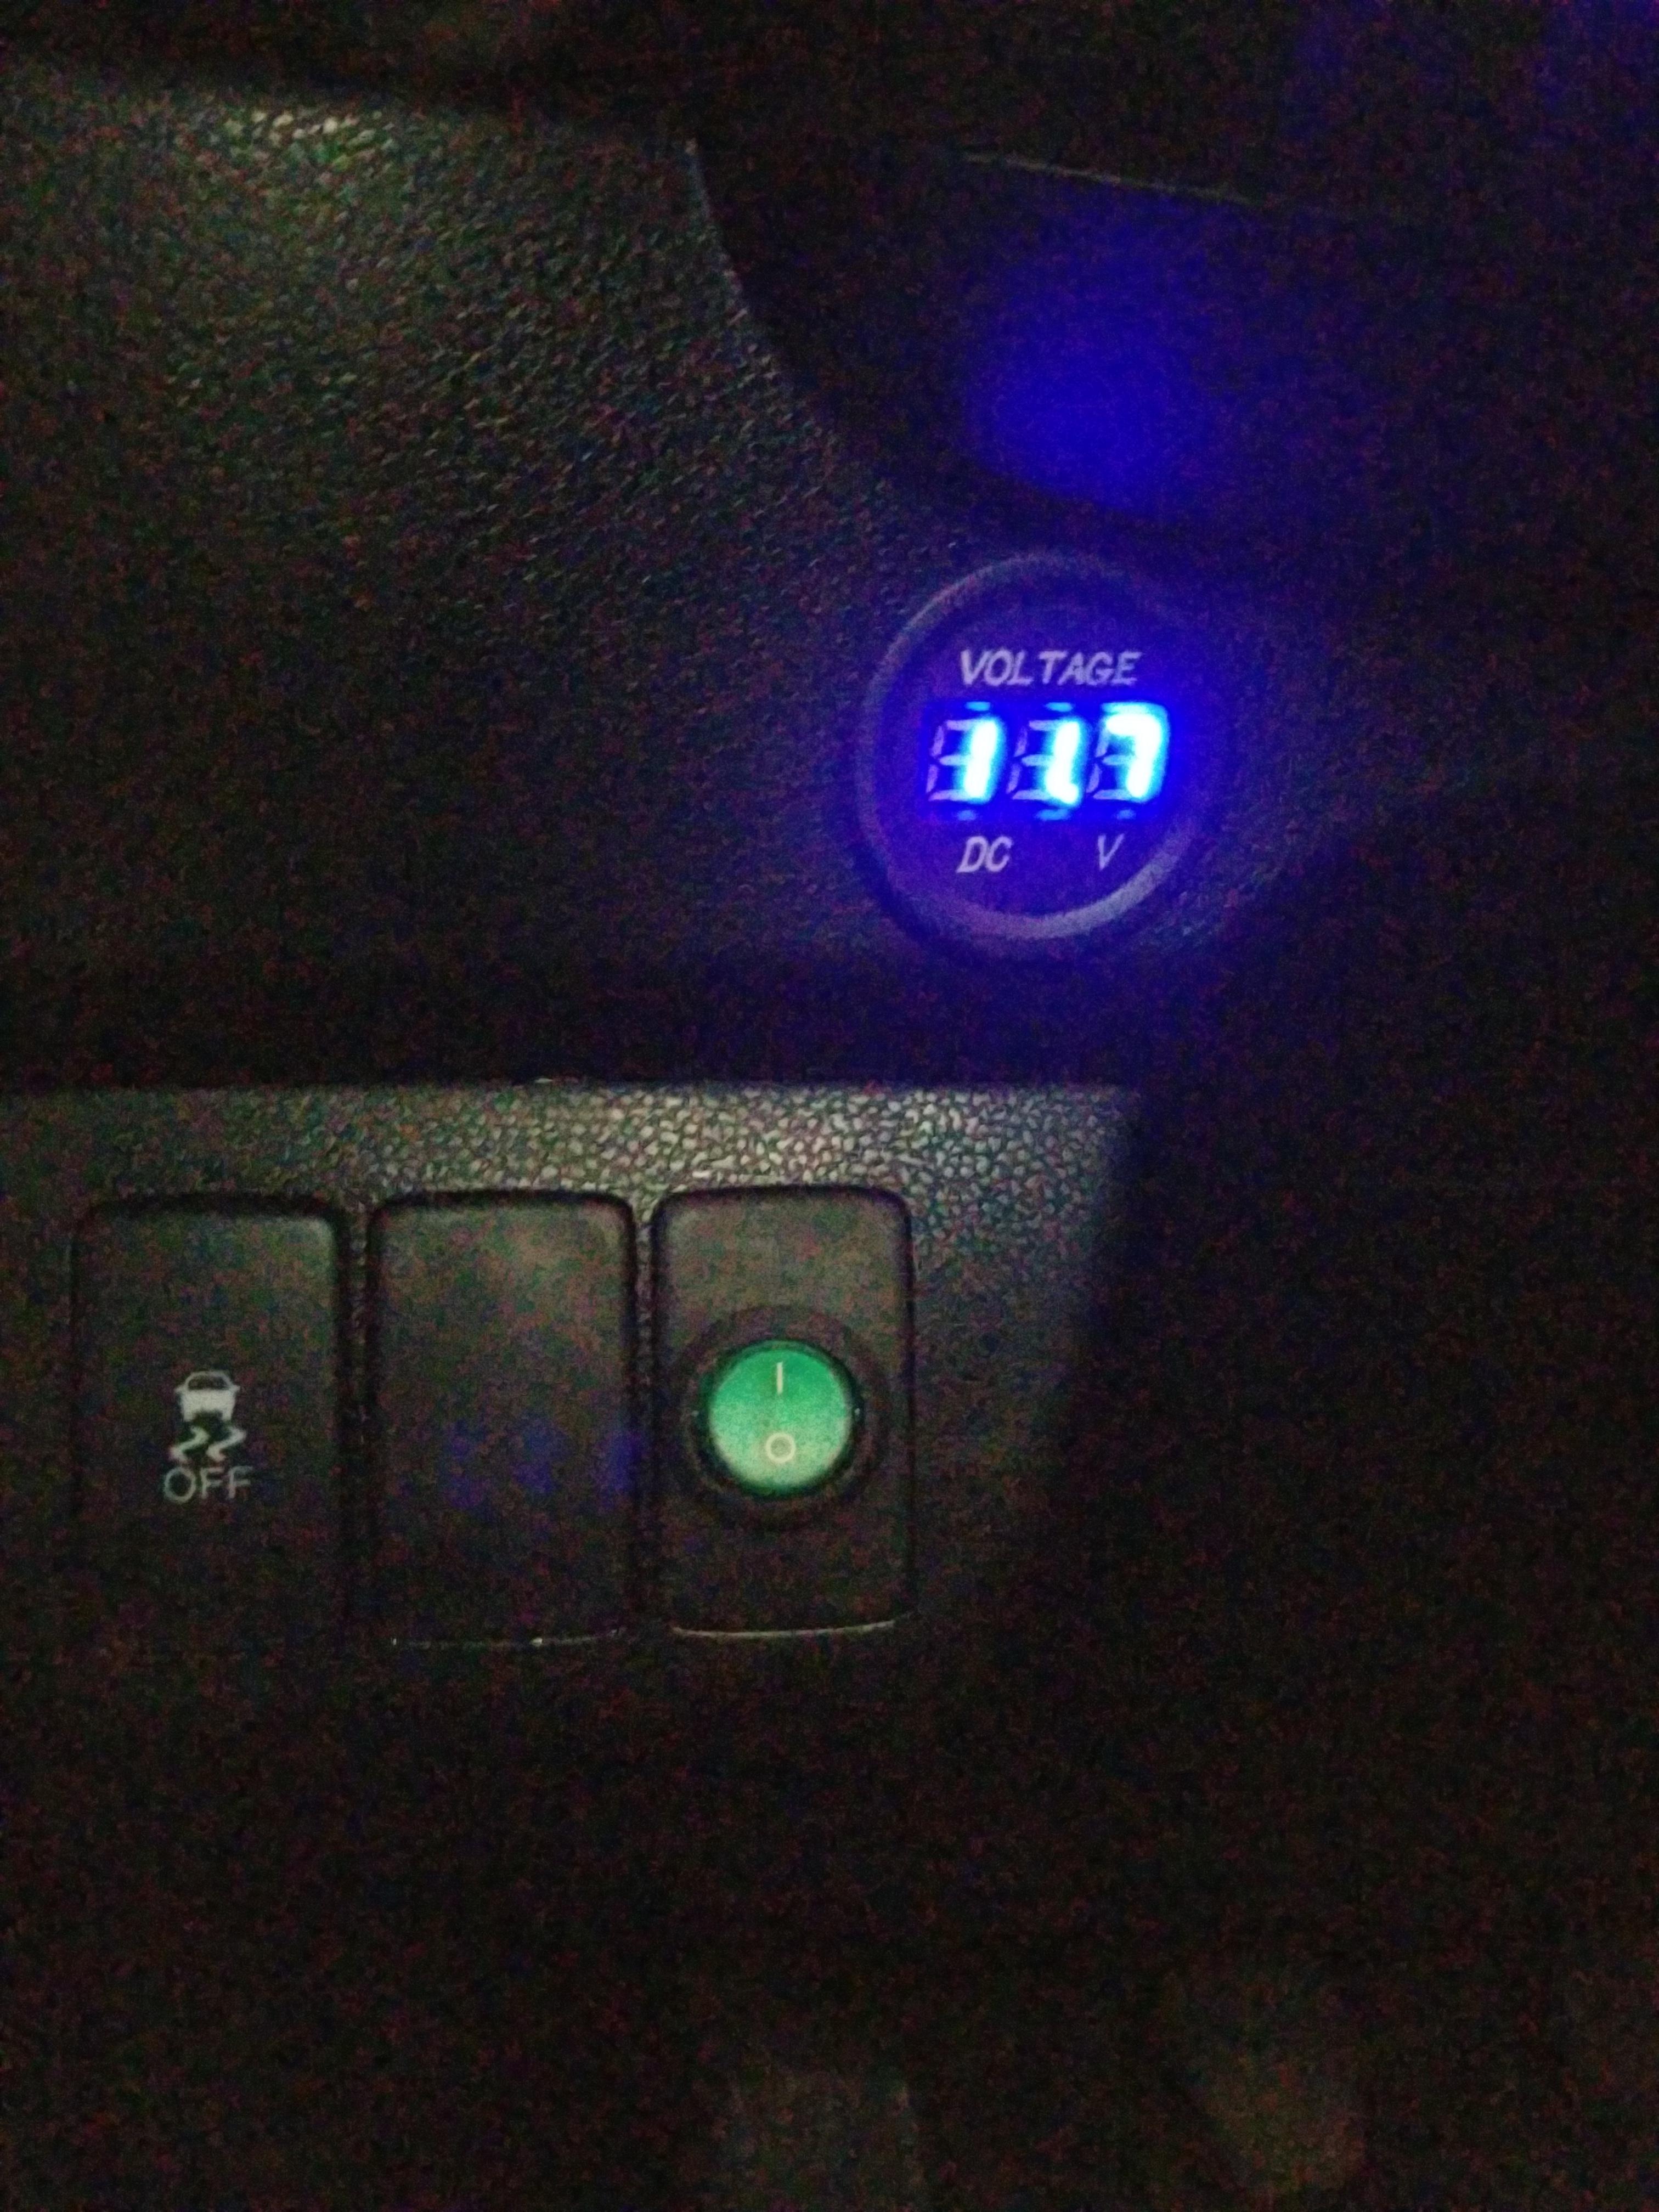
Final thoughts/issues: The previous owner of this car had a dog. And smoked. And had some critter problems... some of the sound dampening was chewed away, and you can see the pile of seeds under the hood release! Also... my switch doesn't light up. It likely just has a bad LED inside it, and some people on Amazon were reporting the same thing. I'll probably go to Princess Auto and get something like this:
Otherwise this project was super fun and relatively easy to do.
How to aim your foglights: 25 feet from a wall on level ground, the beam cutoff should be 4" below the height of the center of your light.

If you have questions feel free to post them here and I'll answer what I can!
WIRING!!!
To get access to all the following areas, you can watch this video here:
It is for changing a hood release cable, but we want access to the same areas! You can ignore the bits about the grille/bumper.
Alright. I bit the bullet and purchased three of those screw clips. They came overnight from my local dealership and they were 16$ CAD for the three. Just pry off the old ones and pop them out. If you're in the US or other markets without this trim piece, you're in luck because it is just the normal pop-out clips down here. Lucky you...
Now you can remove the pop-out clips that hold the fender liner in, basically from the shock back. When you pull it out of the way you will see this:
The cable is the hood release cable. Good to know if you can't get your hood open some time! The other grommet beside it would be a great spot for running a LARGE power wire, such as for an amplifier. I'm pretty sure it goes through to the cabin, but I couldn't lift up the carpeting inside to verify this. What you're going to do now is pass your trigger wire back from the relay following the hood release cable, and then pass it through the same grommet as the cable. A little bit of lubrication here works wonders. Spit works... or if you're fancy use silicone
Passed to the inside
Lots to work with! Just in case I ever have to cut it off or something, I left the whole length and coiled it up and ziptied it.
Now we need a 12V source to trigger the relay. I used the SRS fuse as it is switched power, which means I must have the key in the ON position for the lights to work. FWIW, the Fog Light fuse is just below it (20A) but it is constant power. Put the original fuse (7.5A, brown) in the slot closest to the fuse panel on your add-a-fuse, and the trigger fuse (2A, purple) in the outside one.
Detail
Ground wire to the switch can be attached to the hood release
These then get worked onto your switch. Bottom is 12V from the add-a-fuse, middle is the yellow trigger back to the relay, and the top is the ground so the switch will light up when it is on.
BONUS: I also added a voltmeter, also tapped off that 12V feed and grounded to the same spot. Just jumpers off the light switch. I LIKE FARKLES. I SHOULD RIDE A BMW 1200GS TO STARBUCKS.
Key on, but engine off. Woohoo it works!
DRUMROLL PLEASE...
WOOHOO IT WORKS
My stone shield/grills
RE-assembly is reverse of all this... really you just need to reinstall the interior panels and reattach the fender liner using your (Canadian) as-expensive-as-starbucks-coffee clips. Take a look at the video at the top of the post to see more detail.
Final thoughts/issues: The previous owner of this car had a dog. And smoked. And had some critter problems... some of the sound dampening was chewed away, and you can see the pile of seeds under the hood release! Also... my switch doesn't light up.
It likely just has a bad LED inside it, and some people on Amazon were reporting the same thing. I'll probably go to Princess Auto and get something like this:Otherwise this project was super fun and relatively easy to do.
How to aim your foglights: 25 feet from a wall on level ground, the beam cutoff should be 4" below the height of the center of your light.
If you have questions feel free to post them here and I'll answer what I can!
Last edited by evanphi; 02-22-2019 at 08:37 AM.
#15
02-21-2019, 06:36 PM
No I was talking about the grilles on the lights themselves. The radiator grille is still nice and clear!

#18
02-22-2019, 12:38 PM
they do look neat when lit up
any plans to route the cables so they dont just sit on the upper grille and remain exposed like that? perhaps, route under towards the lower grille? or, somehow feed wires through the upper grille itself?
any plans to route the cables so they dont just sit on the upper grille and remain exposed like that? perhaps, route under towards the lower grille? or, somehow feed wires through the upper grille itself?
#19
02-22-2019, 12:53 PM
Yes I think I might put them through the upper grille, then poke up through the louvre that they are currently ziptied to. Just to clean it up a wee bit. As it stands you can't see it from the front.
#20
03-31-2019, 09:11 PM
Maybe it's a bit late now... but, if you're willing to spend a little more money to get an "official" interior look... you could go the route of buying the wiring for the accessory fog lights.
The engine harness already has the needed wiring to get from the front to the interior, you only need the interior button and the pigtail at the front to wire to the Hellas. Or in the case it doesn't provide enough power, wire the Hellas to the battery and use the accessory wires to control the Hellas through a relay.
The engine harness already has the needed wiring to get from the front to the interior, you only need the interior button and the pigtail at the front to wire to the Hellas. Or in the case it doesn't provide enough power, wire the Hellas to the battery and use the accessory wires to control the Hellas through a relay.
I'm taking inspiration from evanphi and copying his install onto my fit. I'm trying to capitalize on the OEM wiring instructions though to avoid routing the wires through the car. Any suggestions on how to make a Fog light relay harness? Or would you know which wire from the 2 pin connector inside thew foot-well I would use to wire my relay? I'm a cheap person, so I'm trying to save $60 and DIY this part.
08V31-TK6-10030 - HARNESS, FOGLIGHT SWITCH (1)
OEM Fog light Instructions