Action Jackson's tinkering
#81
 11-29-2017, 10:17 AM


Dungu LED fogs - yellow plus yellow film on fog lens:
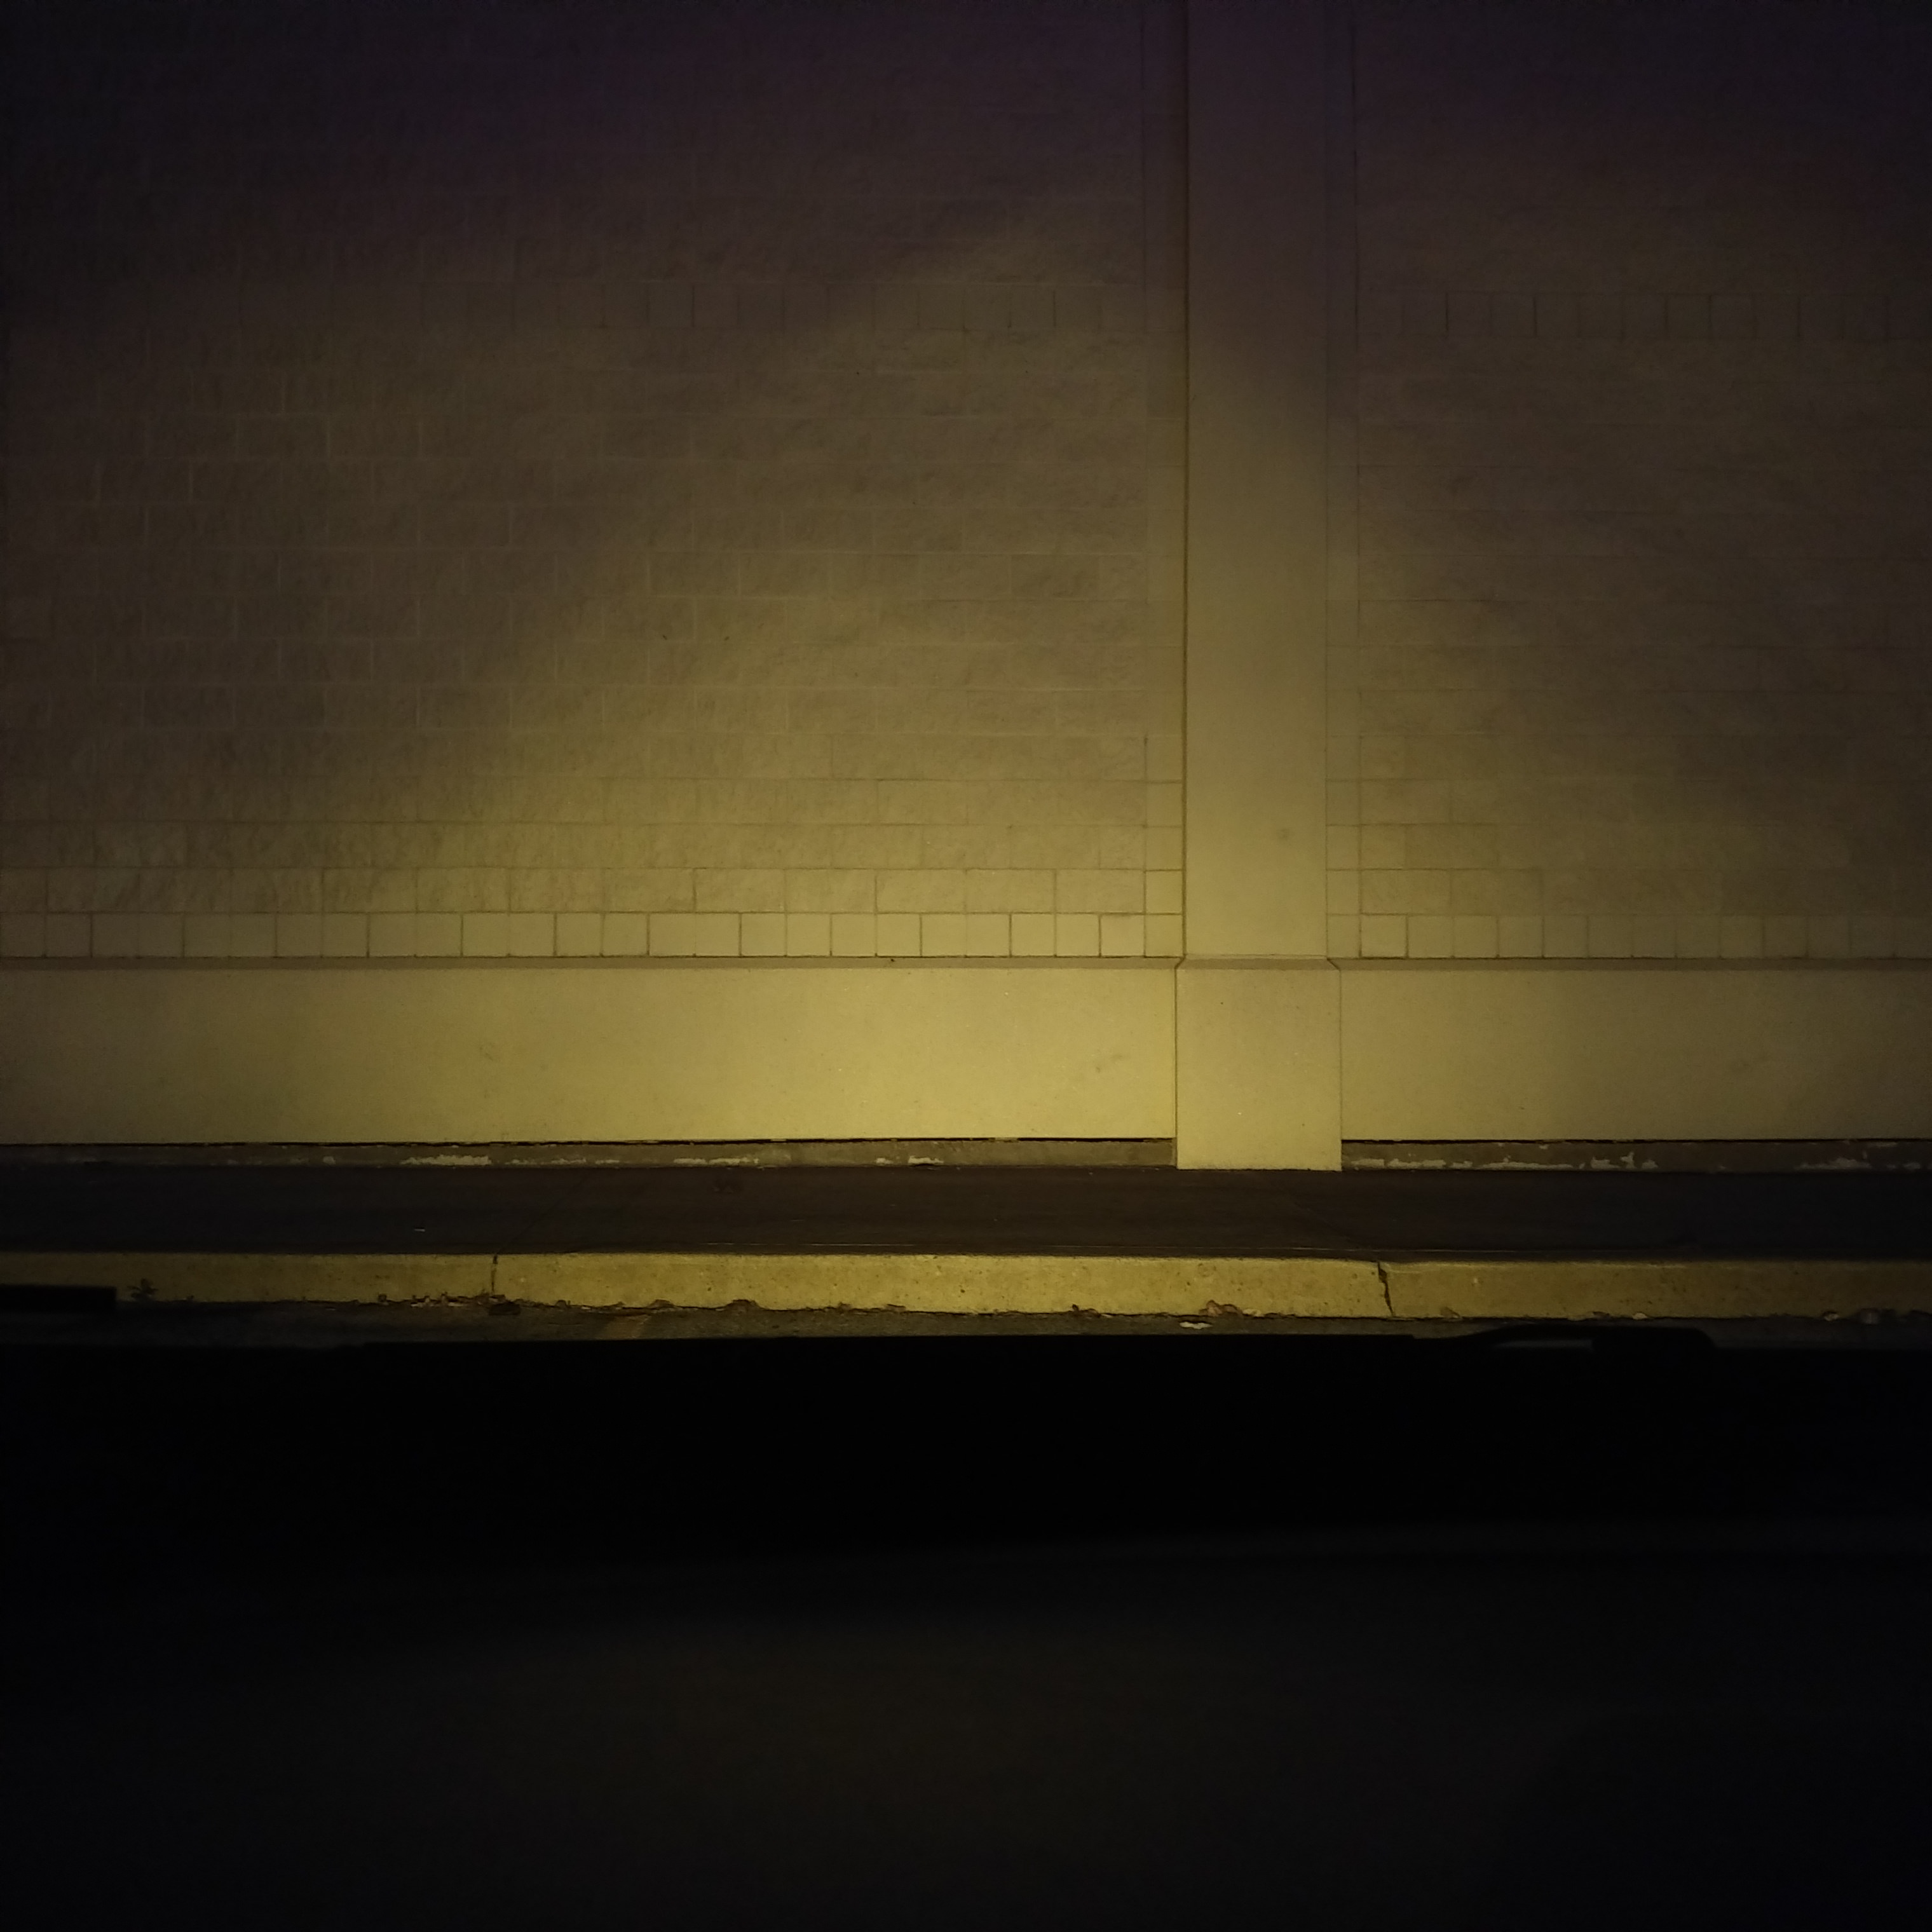
Philips X-treme Ultinon LED Golden Yellow 2700K 12793UNIX2 with yellow film on fog lens:
They're actually close in color, but the Philips is obviously aimed properly, giving much more width.
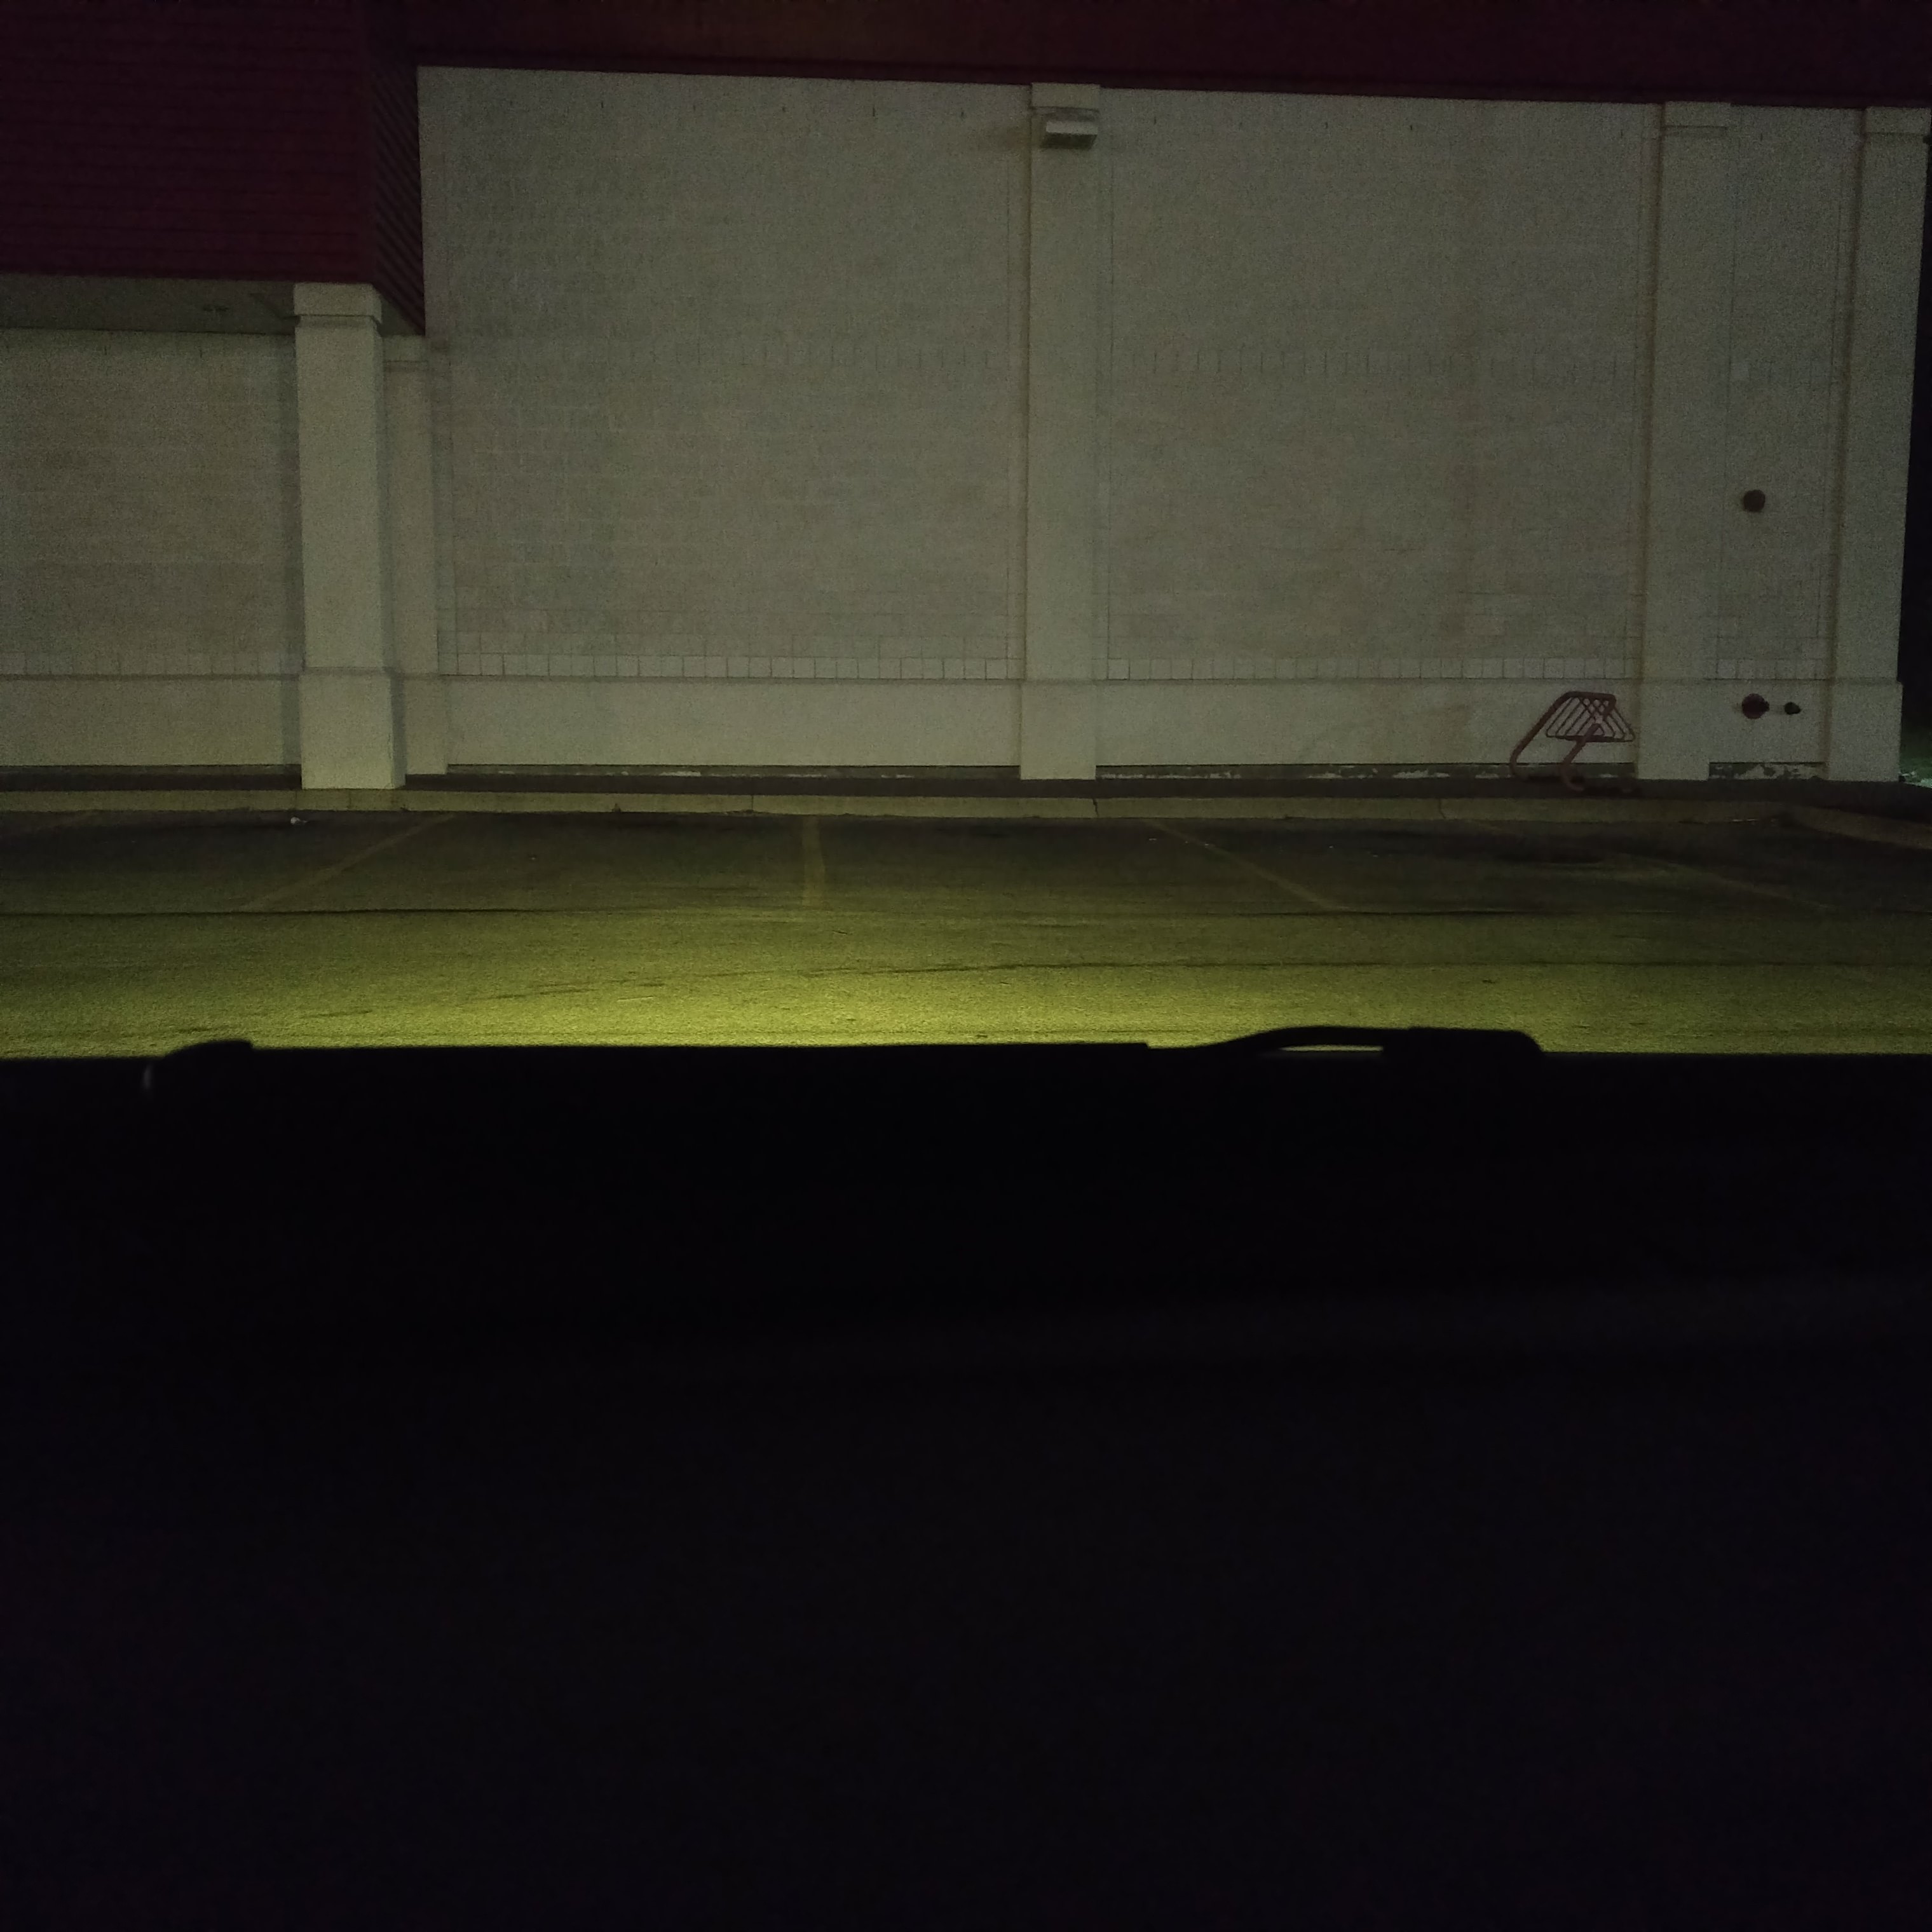
Philips X-treme Ultinon LED Golden Yellow 2700K 12793UNIX2 with yellow film on fog lens:
They're actually close in color, but the Philips is obviously aimed properly, giving much more width.
Last edited by Action Jackson; 11-29-2017 at 10:23 AM.
#82
01-07-2018, 09:46 PM

nice ride and lots of handy mods, i'm a new fit owner...any fit owners in GTA for meets and greets?
#83
02-13-2018, 12:00 AM

Carbon wrap
Added some 3M clear protection to where a roof rack mounting points would go, and to the front, rear and side of fender for kayak tie downs.
Also used Vvivid carbon fibre vinyl to do the roof, and smudge magnet points - front cowl, and the side pillars.


Really like the carbon wrap. I tried to do the rear garnish and failed. I


Also used Vvivid carbon fibre vinyl to do the roof, and smudge magnet points - front cowl, and the side pillars.
Really like the carbon wrap. I tried to do the rear garnish and failed. I
#84
02-16-2018, 01:53 PM

https://youtu.be/88Z0FoOXrQs
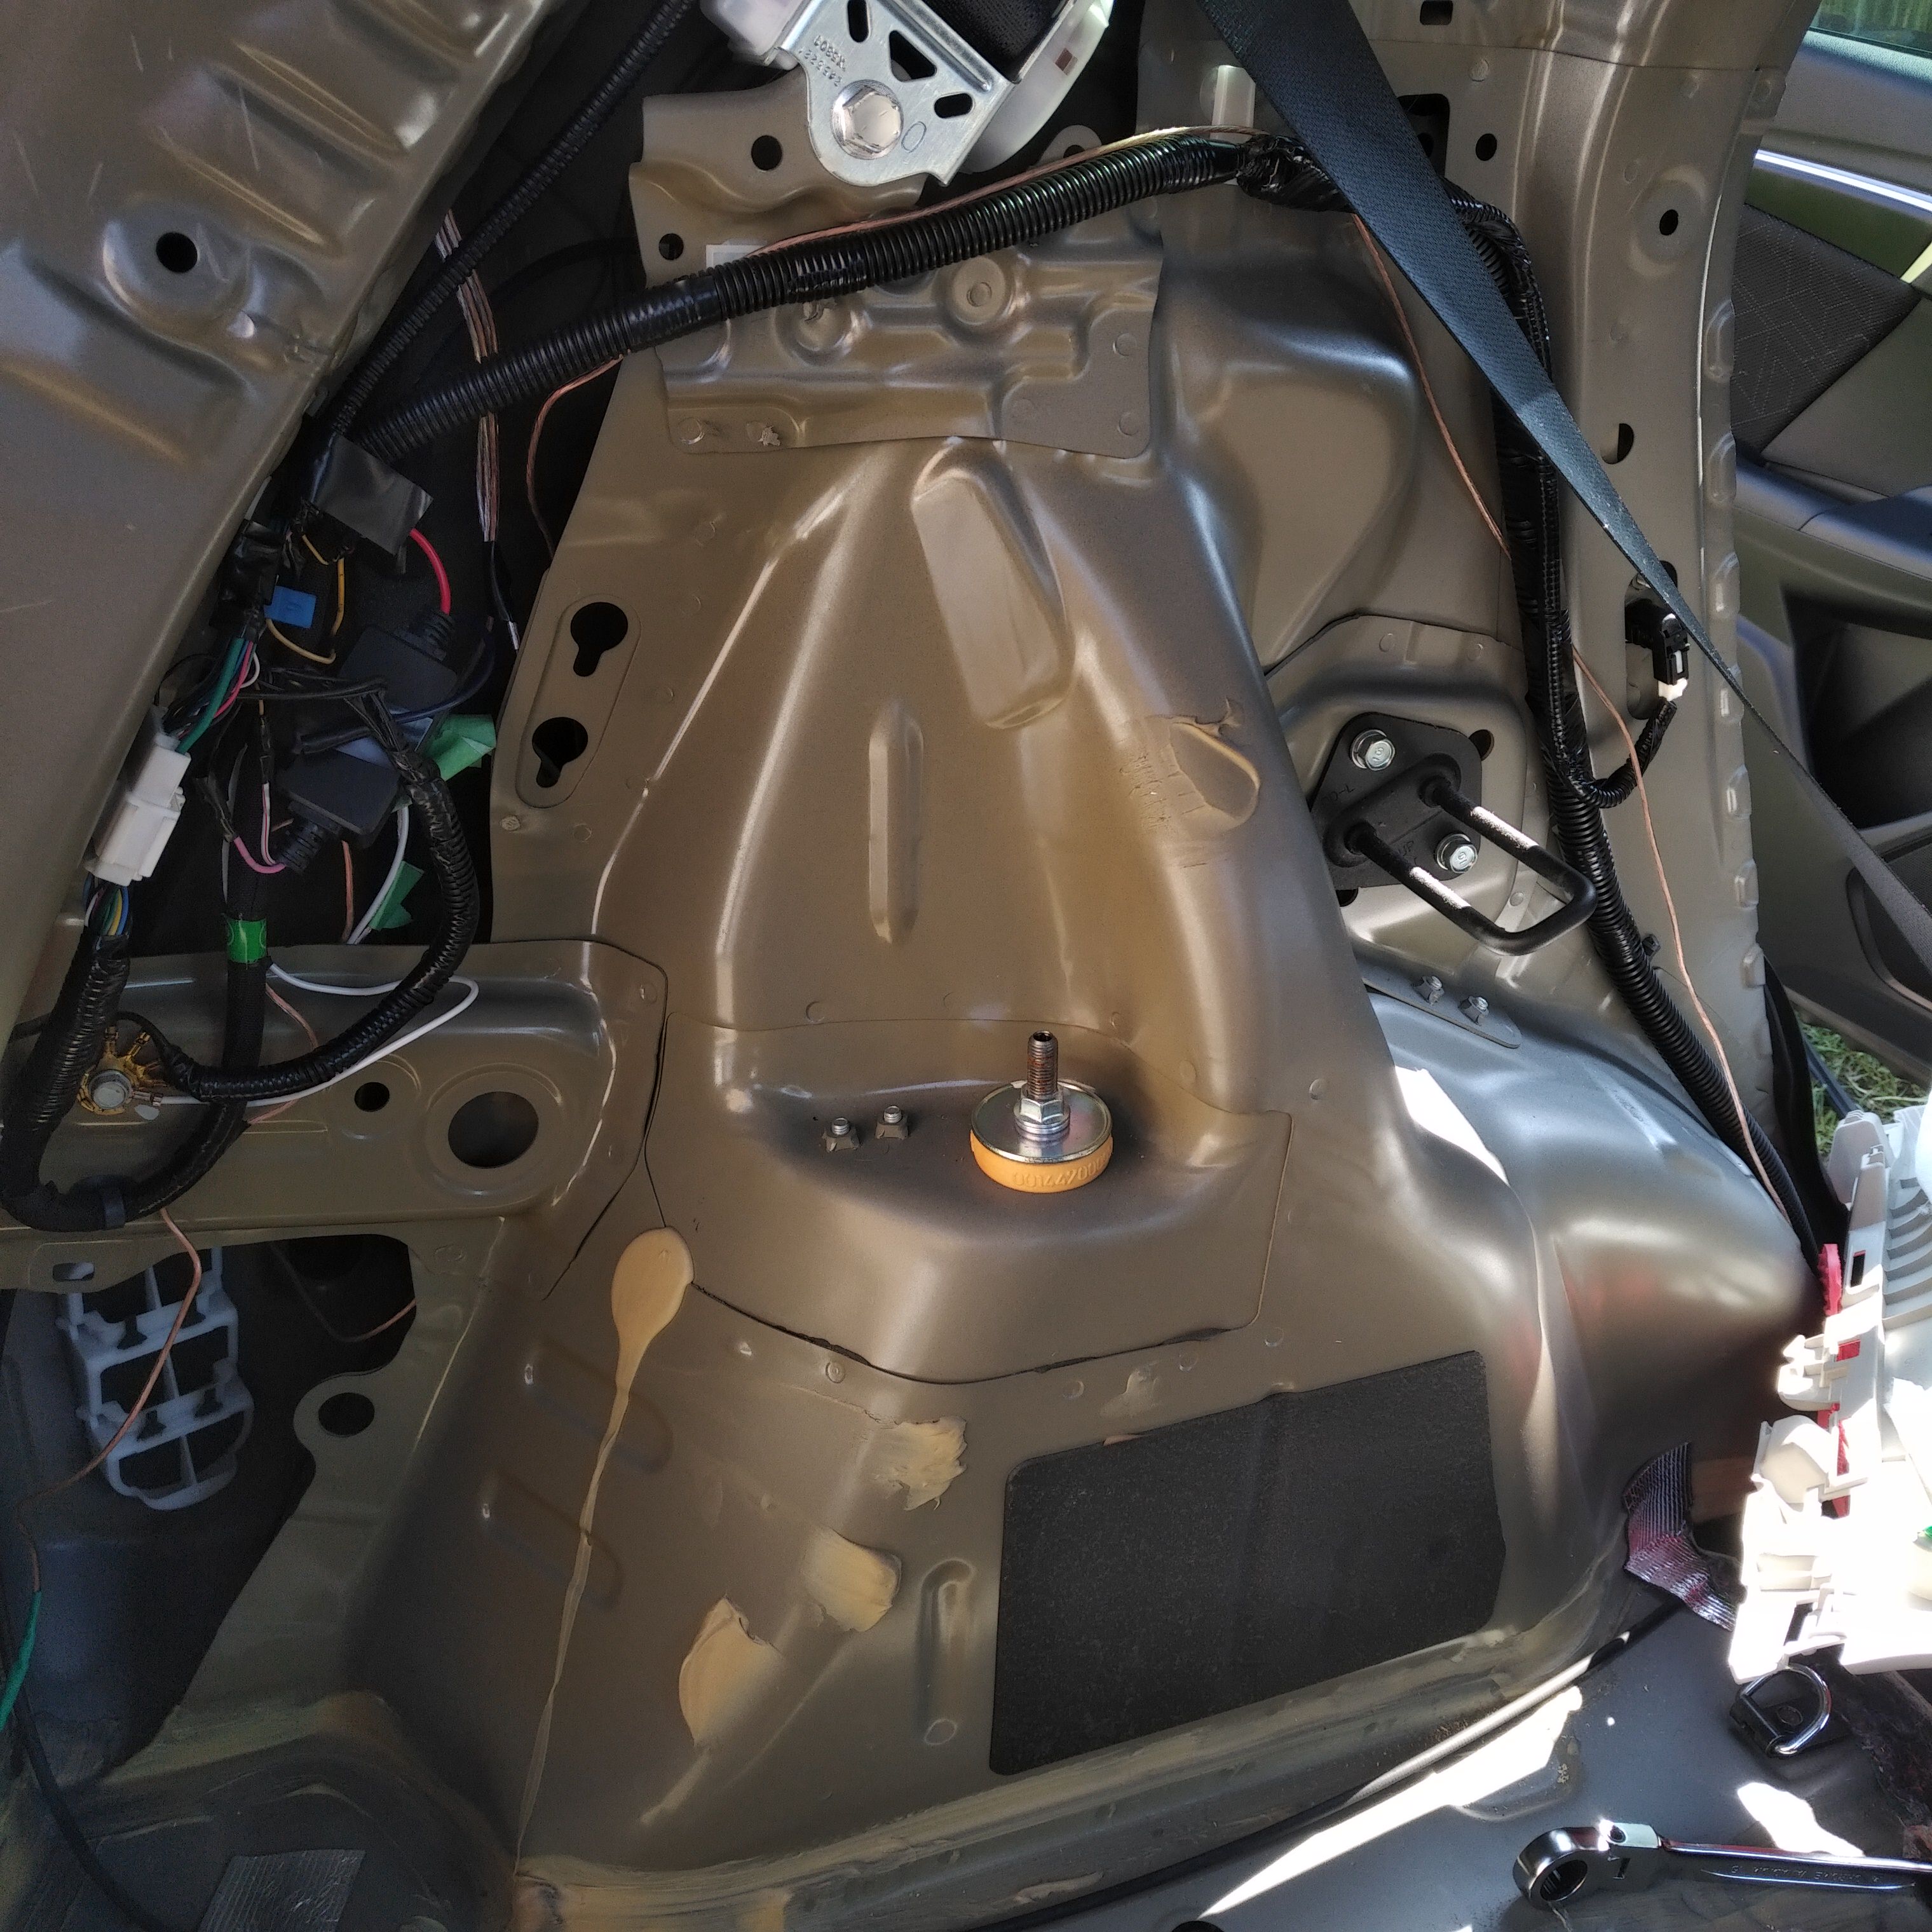
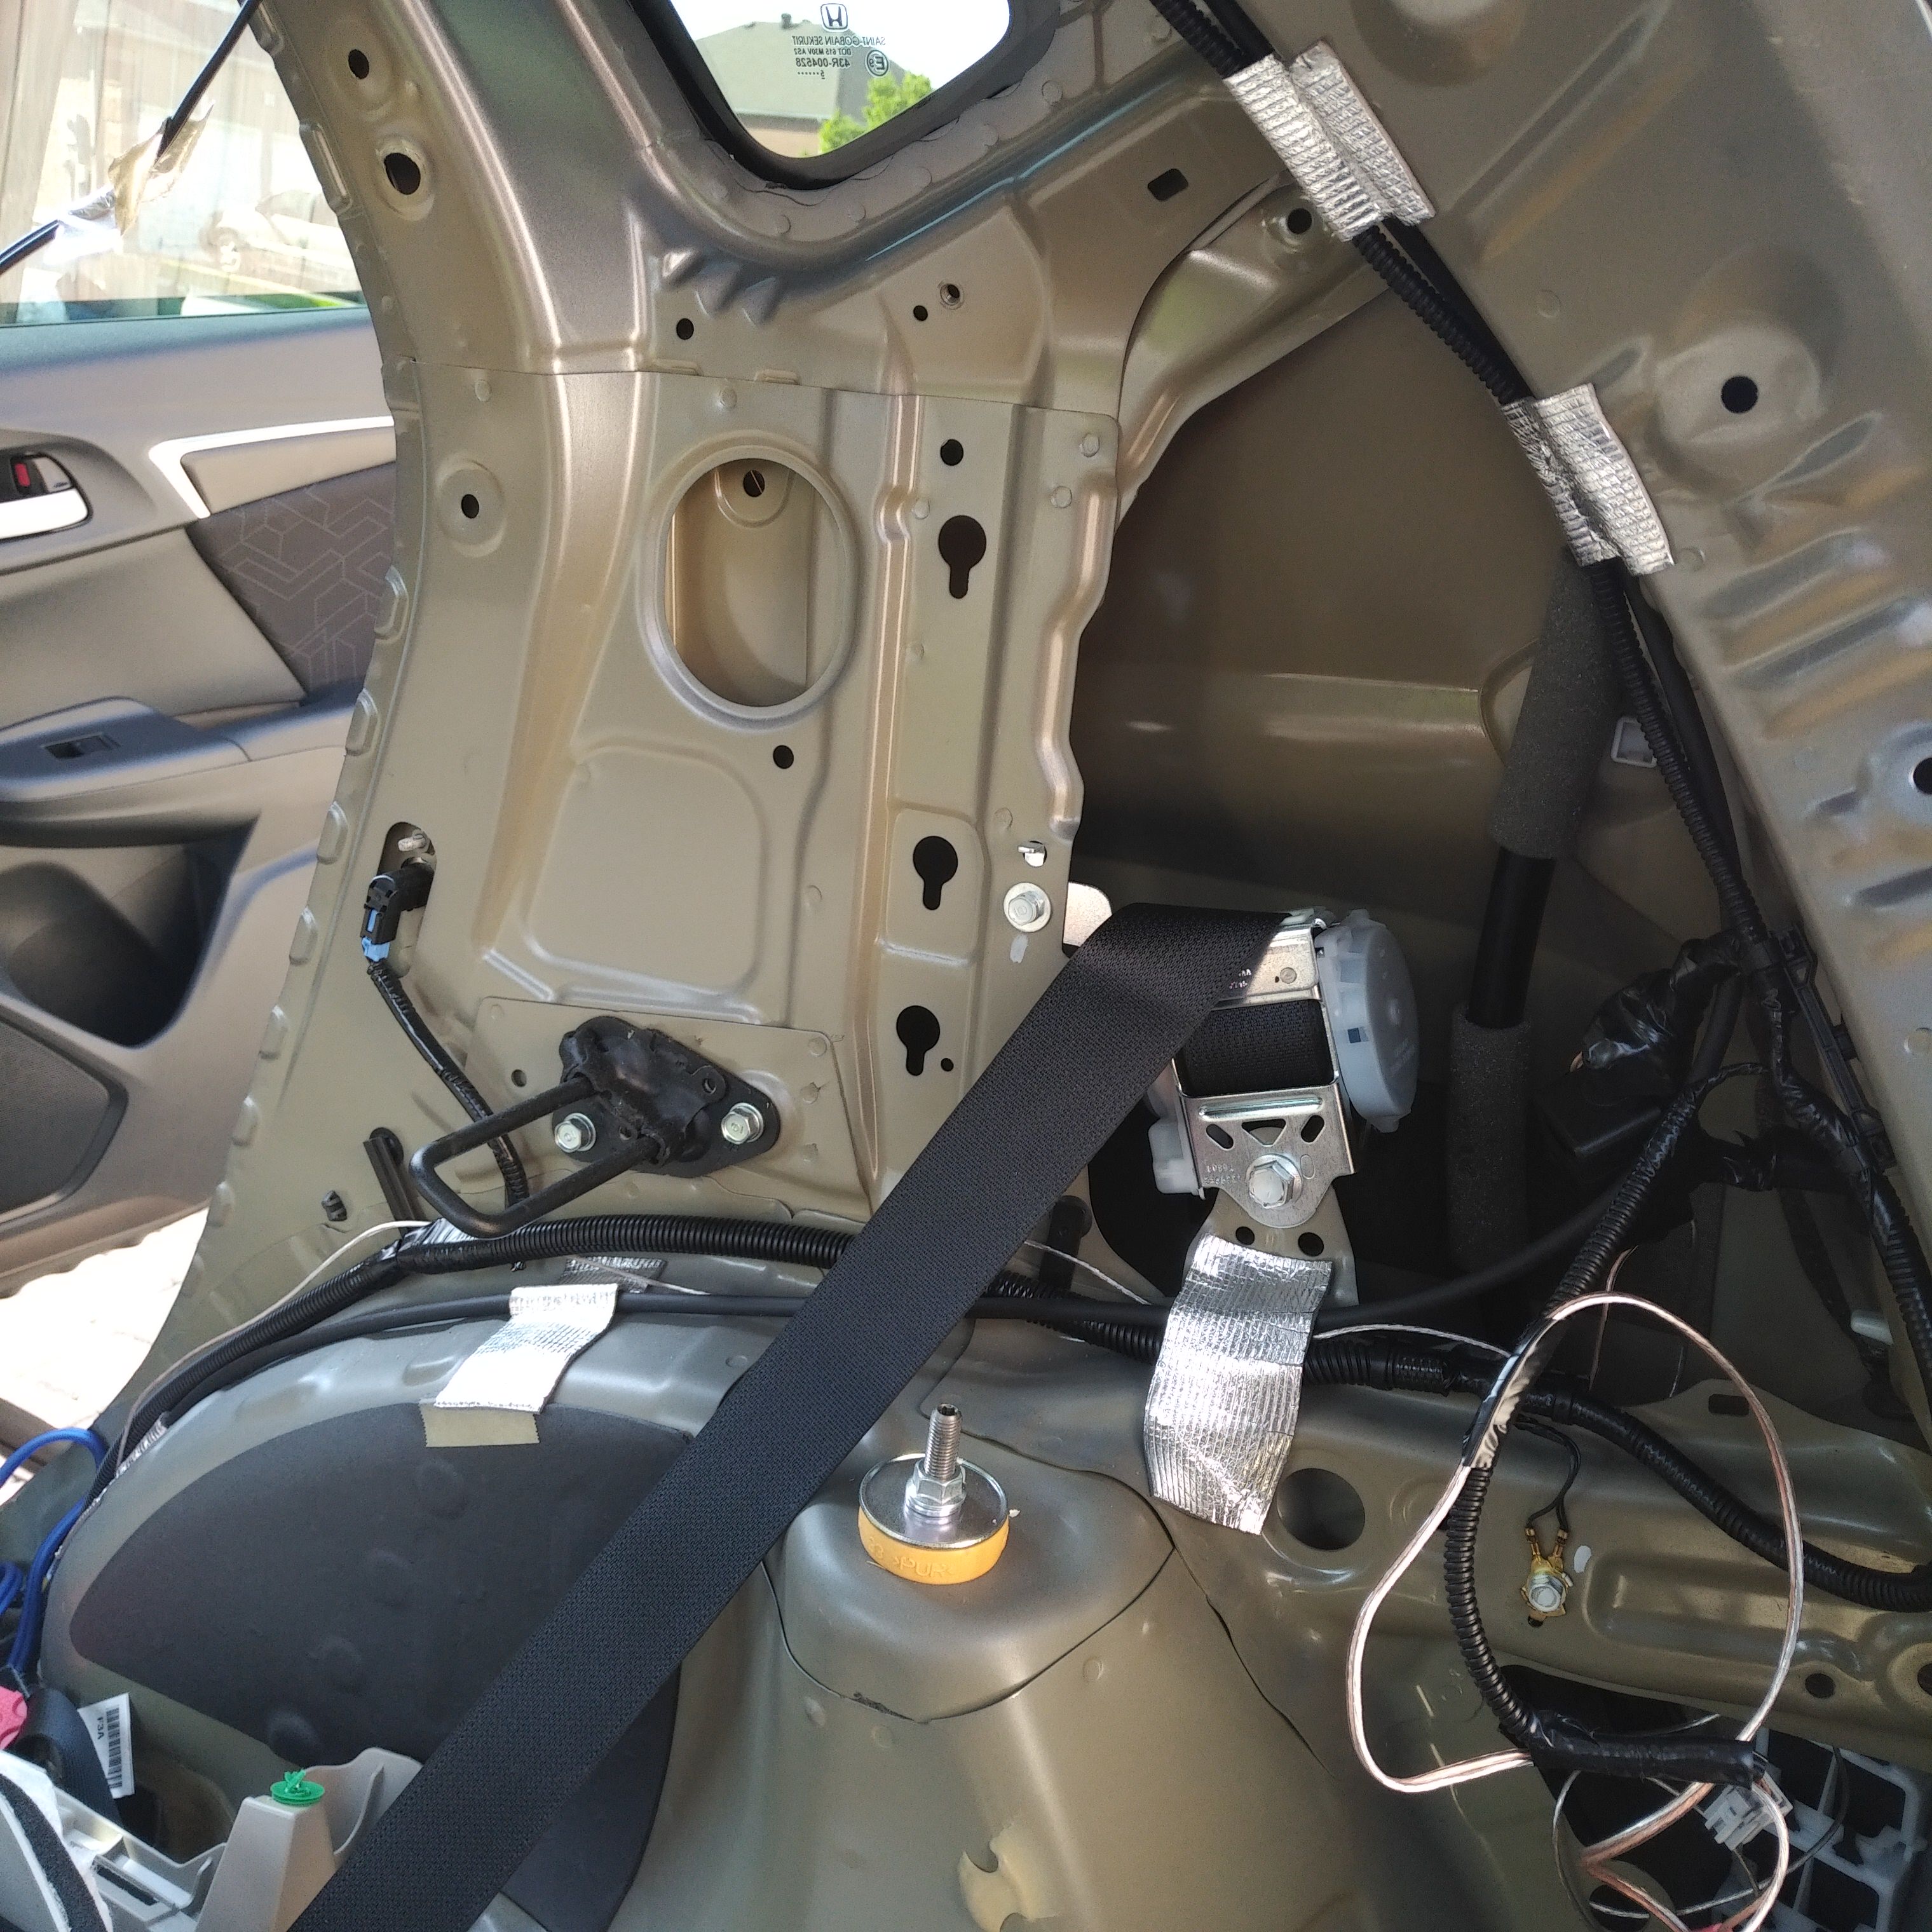
Attachment 9667
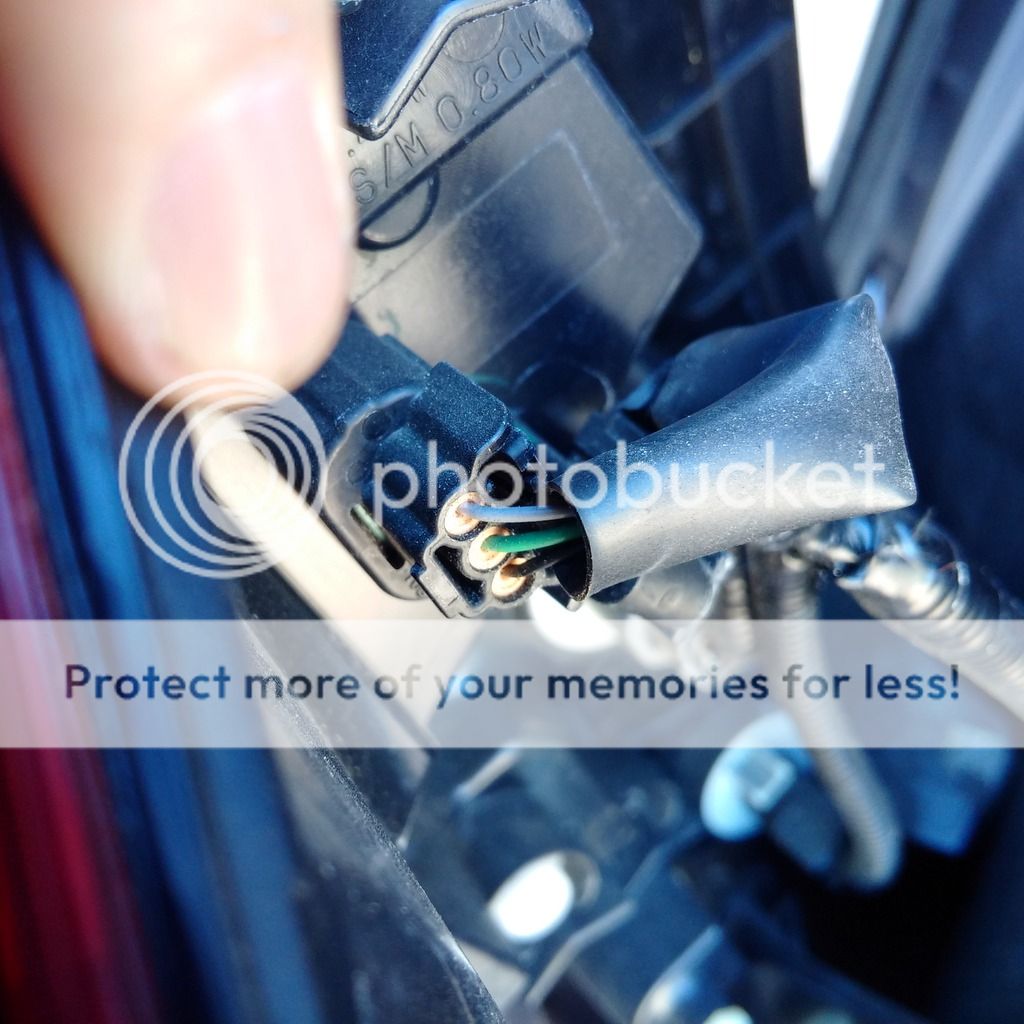
The above is the right turn signal wire. Use this green to the pillar light signal (red).
Attachment 9668
The above is the left tail light wire bundle.
Attachment 9669
The above is another picture of the left side tail light bundle. You can see where I tapped into the green wire for the brake light.
Attachment 9670
The above is the left brake light wires. Use this green to both of the pillar light brake (yellow and green)
Attachment 9671
The above is the left turn signal wire. Use this yellow to the pillar turn signal (red).
Attachment 9672
The above shows my alternative to drilling a new hole. I removed this "guide pin" from the pillar light assembly.
Attachment 9673
The above shows that with the "guide pin" removed, the pillar light is still water sealed. I taped the wires to reduce chaffing. Extra wiring added, and all feed into the OEM rubber covering between the body and rear hatch door.
Attachment 9674
The above shows the OEM female counterpart to the "guide pin".
Attachment 9675
The above shows the damage to the gasket when removed. If you have suspected water leaks, this thin gasket may be the culprit. I had to splice some of the pillar light wires to fit them into the hole, as the connectors do not fit in the hole. I used duct tape to seal over the hole, although I may use something else later on.
Attachment 9676
Finally, I used some O-rings to prevent excessive movement and vibration. I may switch to flat rubber washers.
#86
03-07-2018, 05:26 PM
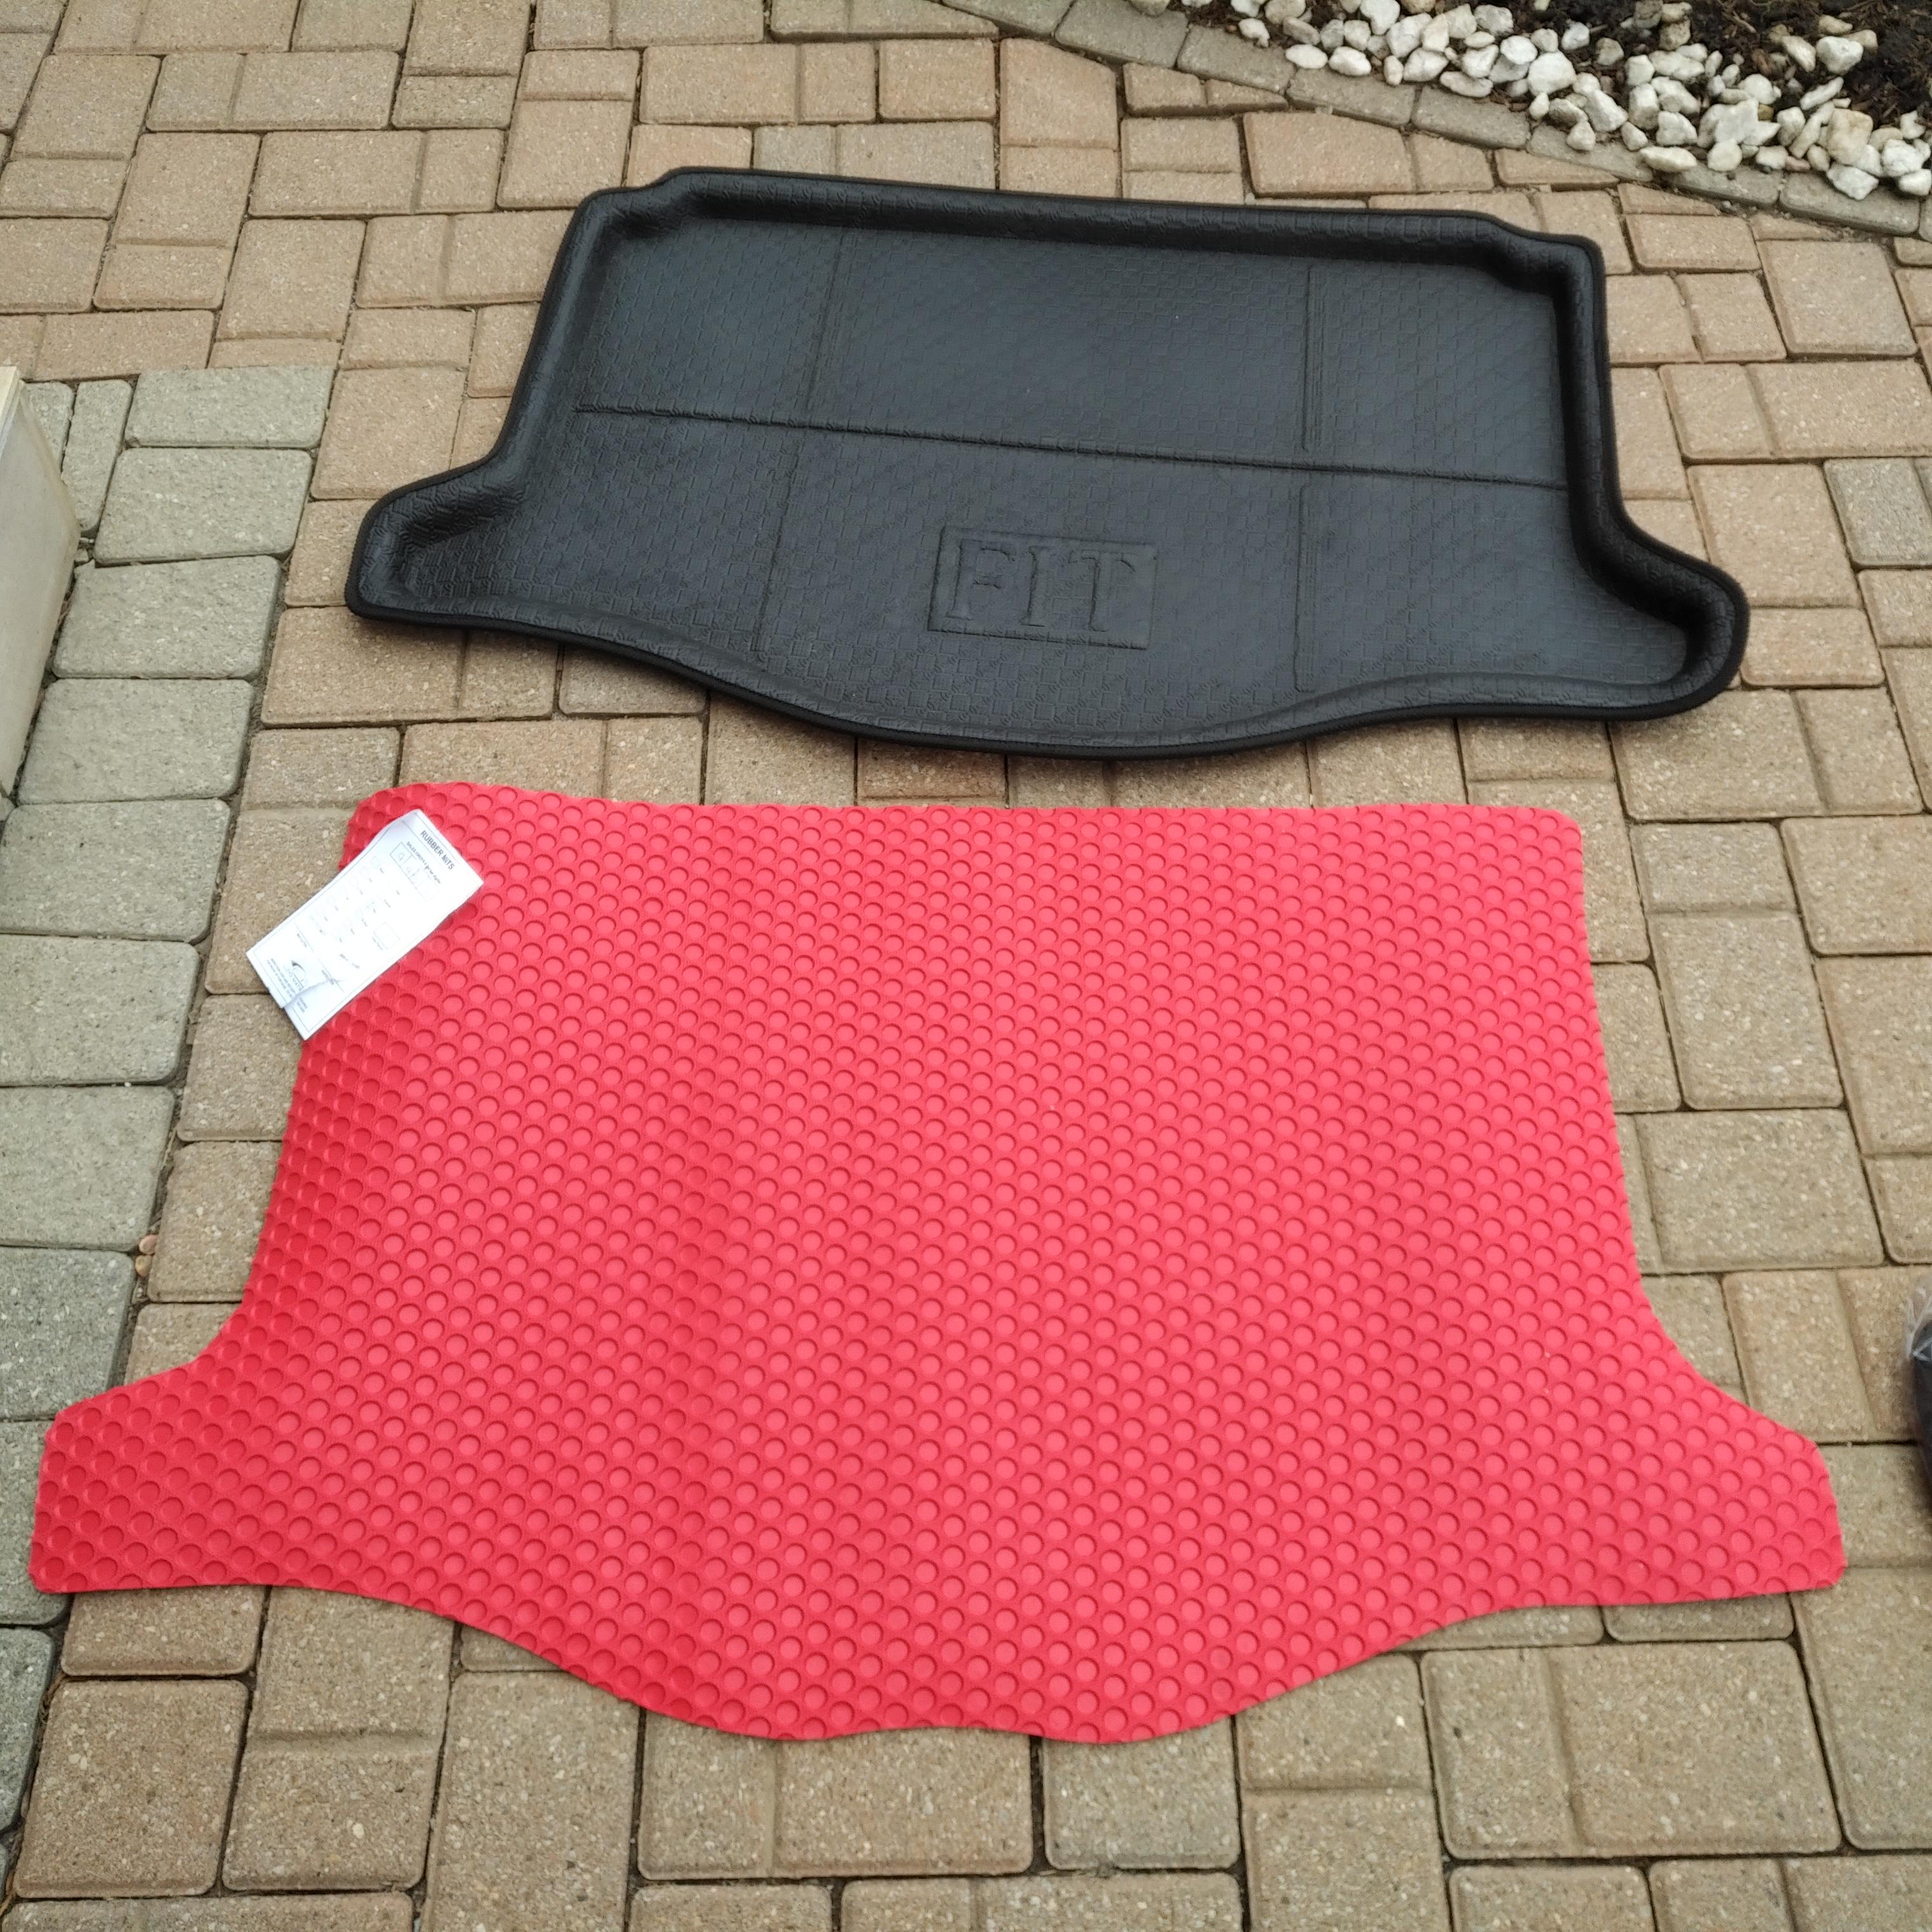
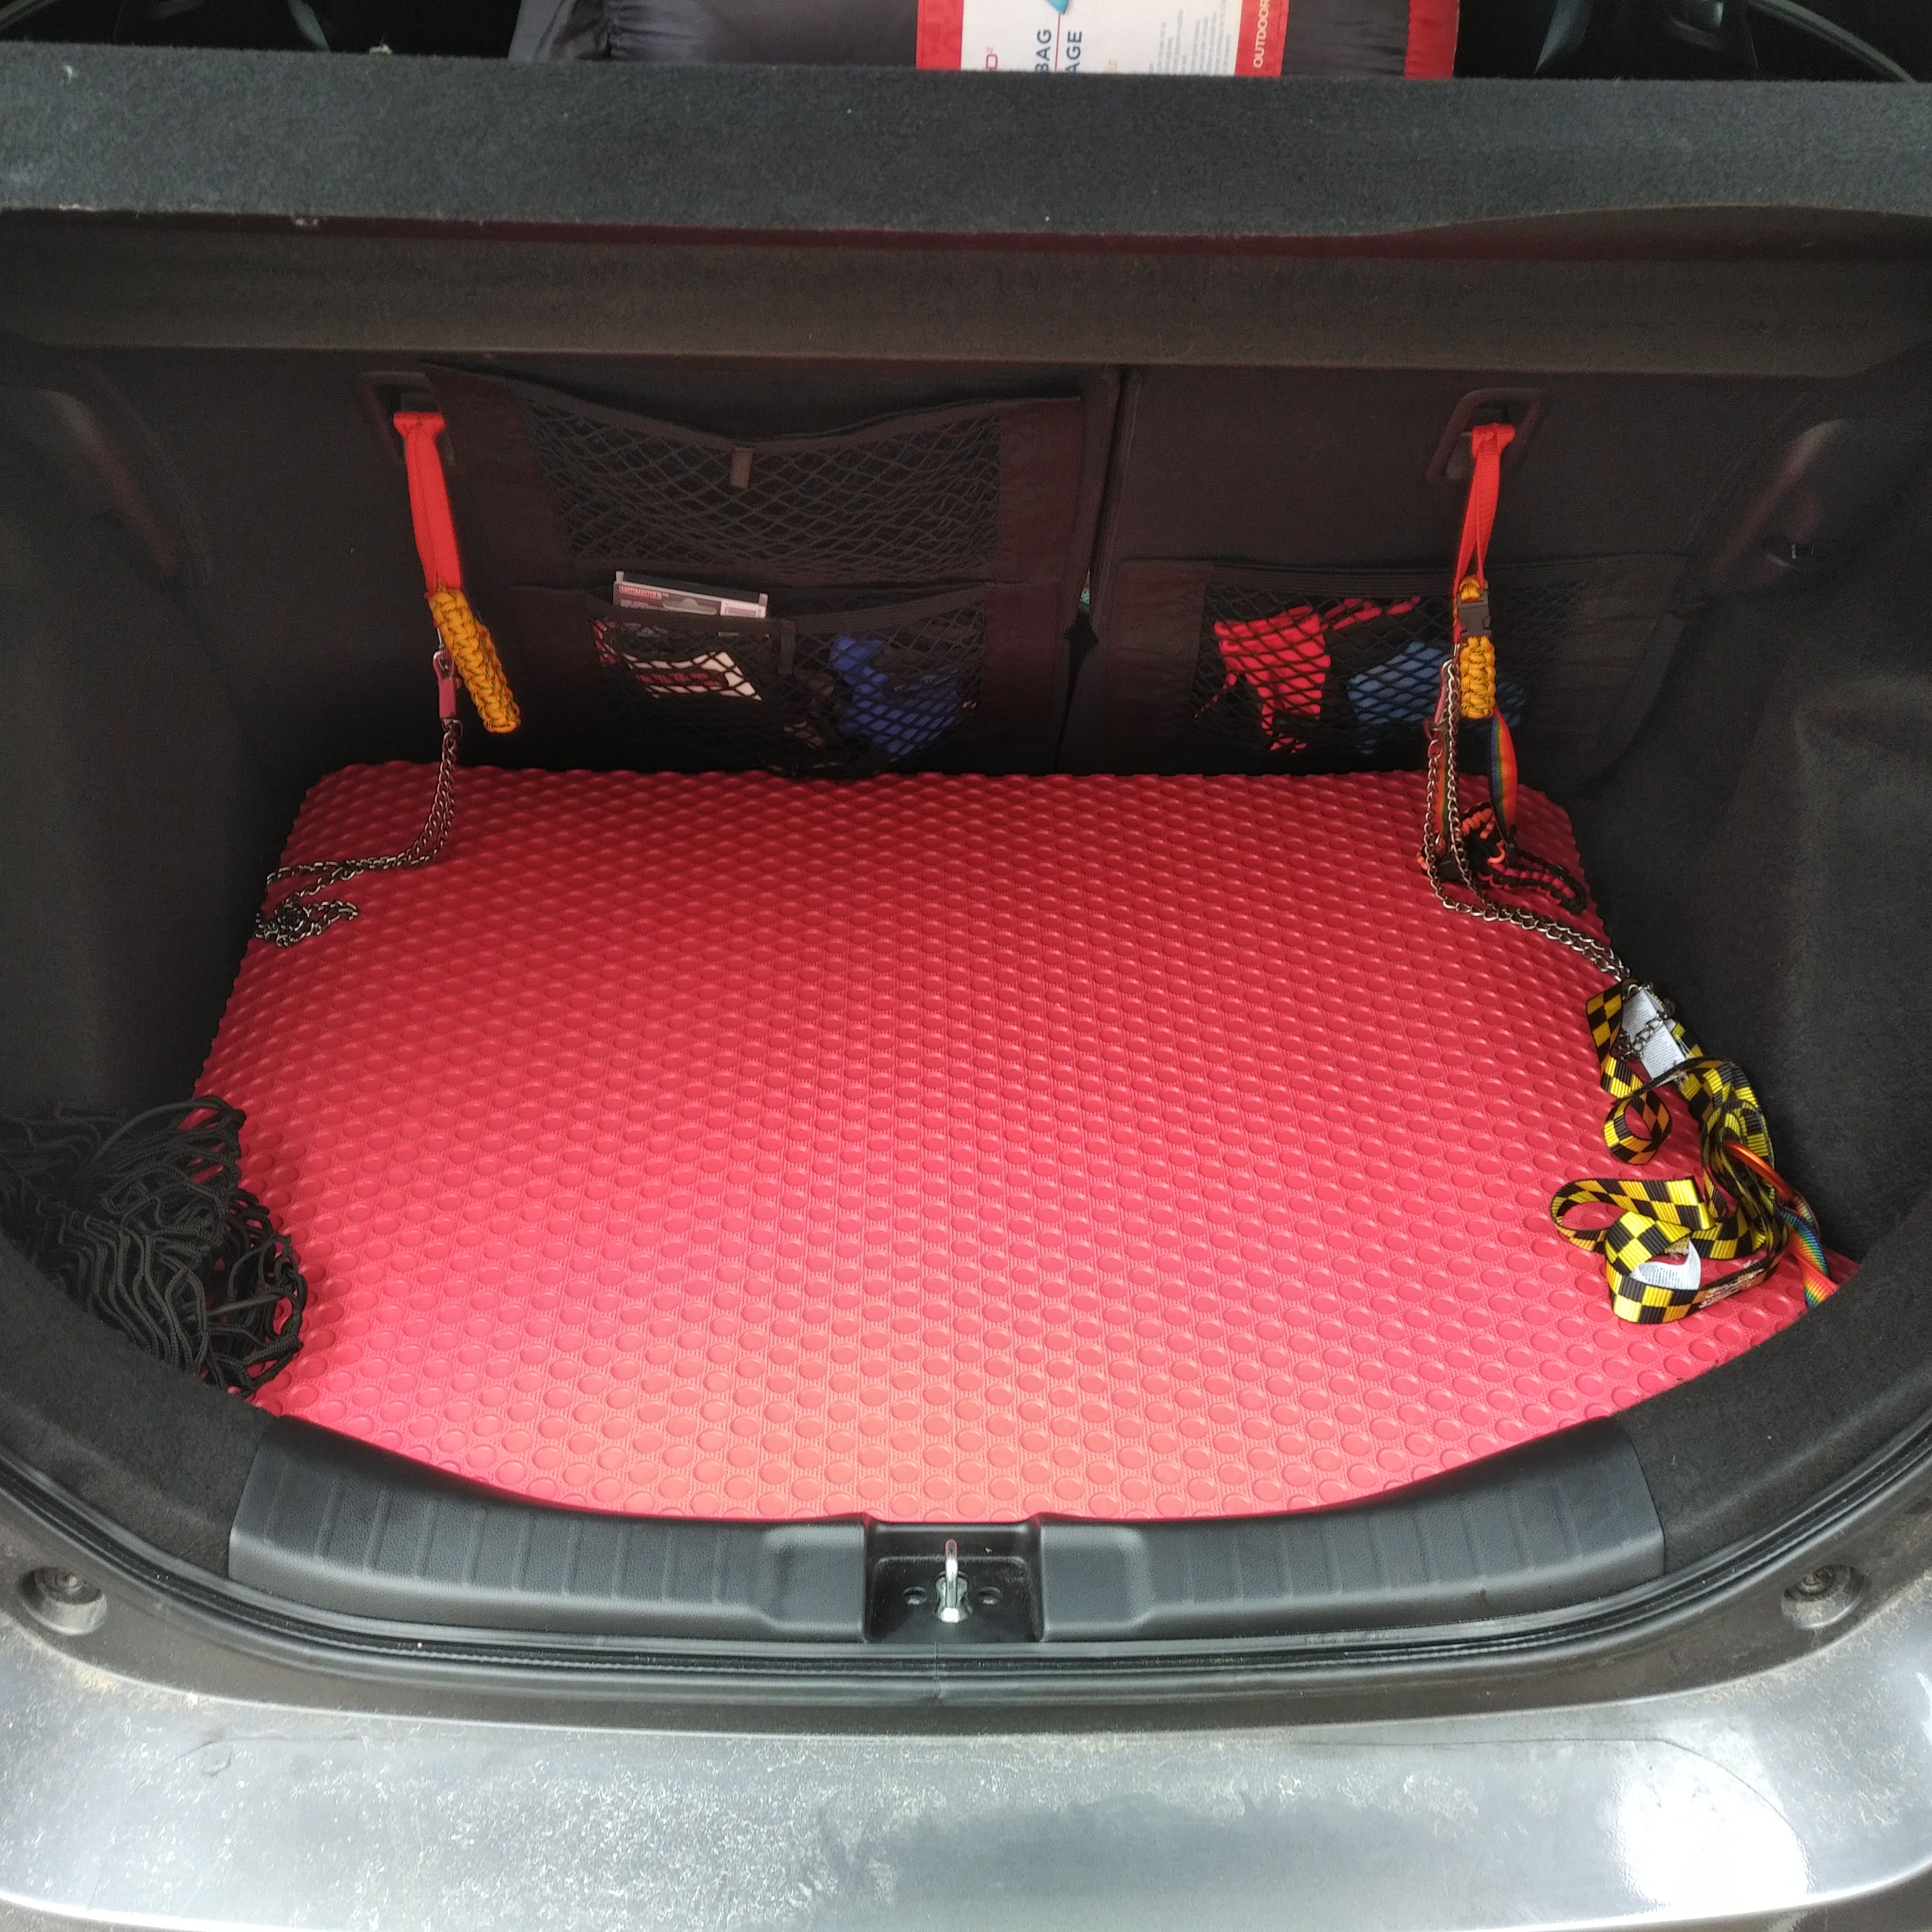
Lloyd's Rubbertite Cargo Mat in Red, shown with generic cargo mat:
Last edited by Action Jackson; 05-05-2021 at 01:04 AM.

#88
03-08-2018, 10:30 AM
Generic mat is more like blown EVA or some other foam. Everything slides on it.
The rubbertite feels more grippy and is designed to be more grippy. In my pic, it sits well, even though it's on top of 3/4" wood. The underside has the nubs for gripping carpet and it doesn't slide around on top of the wood.
The rubbertite feels more grippy and is designed to be more grippy. In my pic, it sits well, even though it's on top of 3/4" wood. The underside has the nubs for gripping carpet and it doesn't slide around on top of the wood.
Last edited by Action Jackson; 09-12-2018 at 12:10 PM.
#89
03-08-2018, 10:34 AM
Is the generic one waterproof? I don't mind things sliding. I use milk crates to keep things organized back there. I can see the generics ones for < $20 so my cheap self is leaning towards that option.
#91
03-28-2018, 01:40 PM
Had to remove the Fiamm Lo Tone horn. Even though I aimed the opening downwards, water somehow got in there and killed it. The lo tone horn is located behind and slightly above the passenger side fog.
#93
05-11-2018, 10:45 PM
The light mechanism itself is from Honda. The lights are COB LED's from eBay. I bought them in various sizes for different projects.
Funny, I'm thinking about adding even more lighting to the hatch area.
Funny, I'm thinking about adding even more lighting to the hatch area.
#96
05-17-2018, 10:38 PM
Rear view of USB port (on left) and HDMI port.
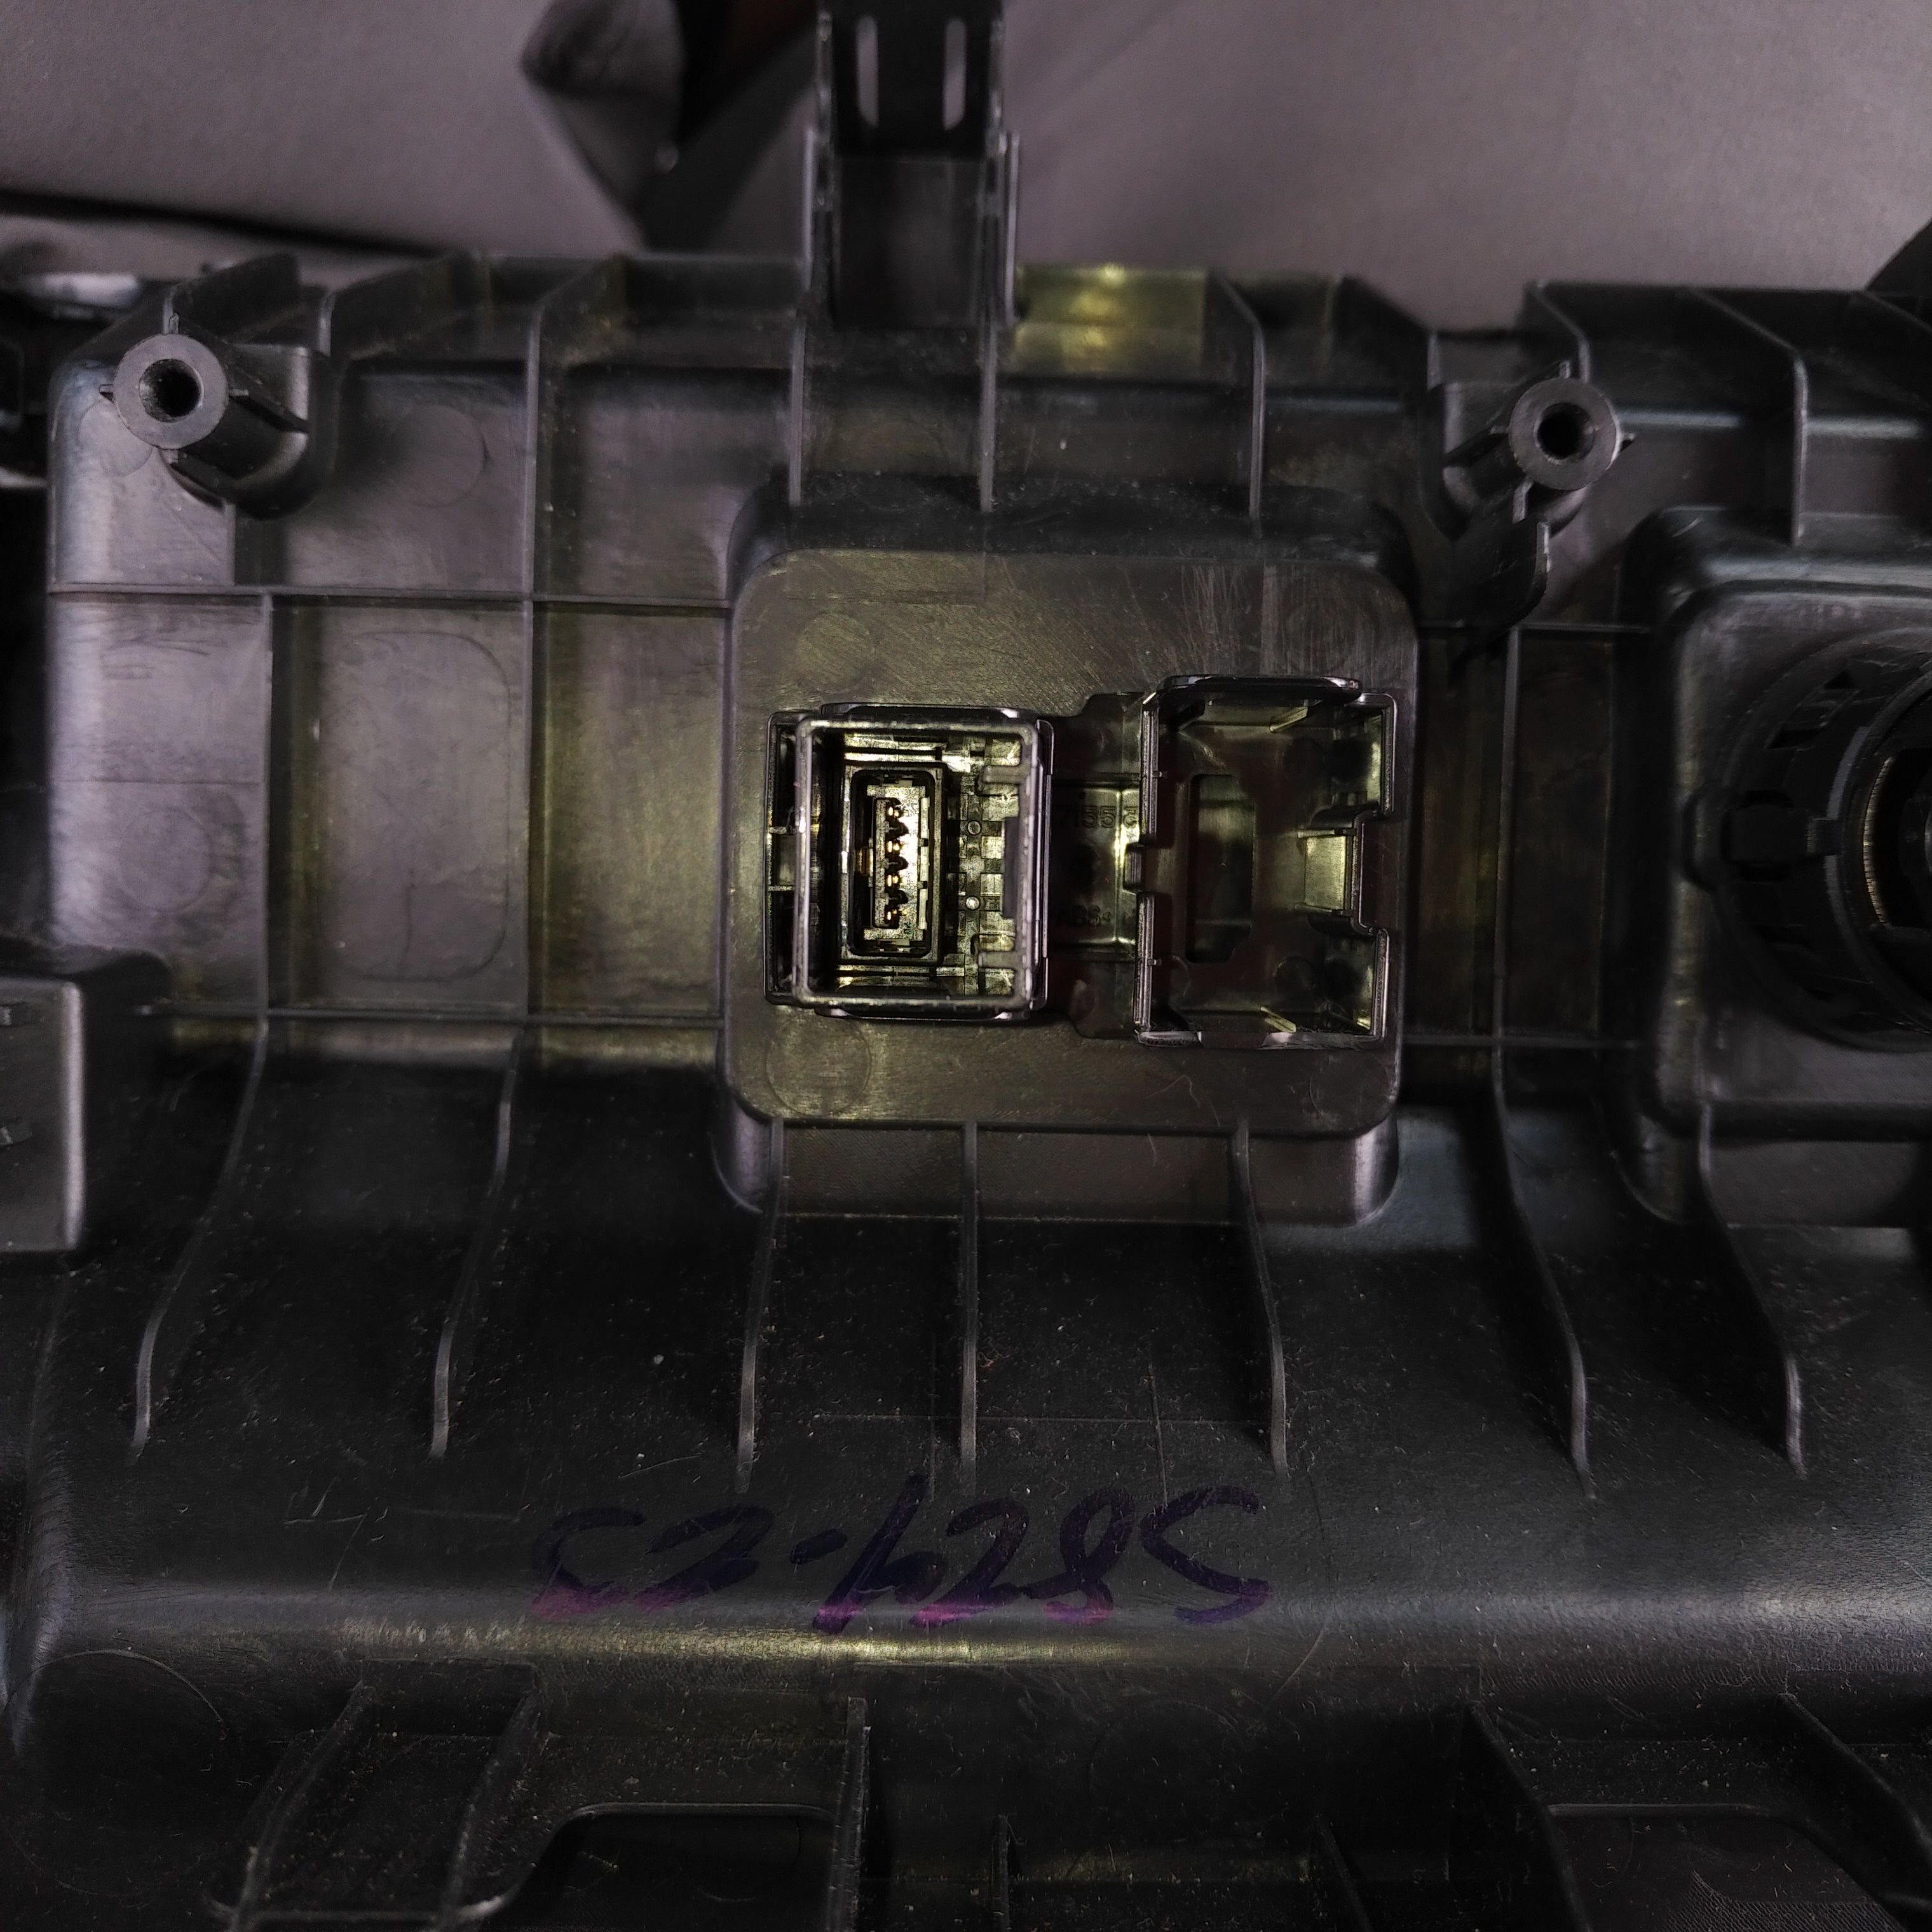
And the OEM USB interface harness. No this doesn't fit a standard USB.

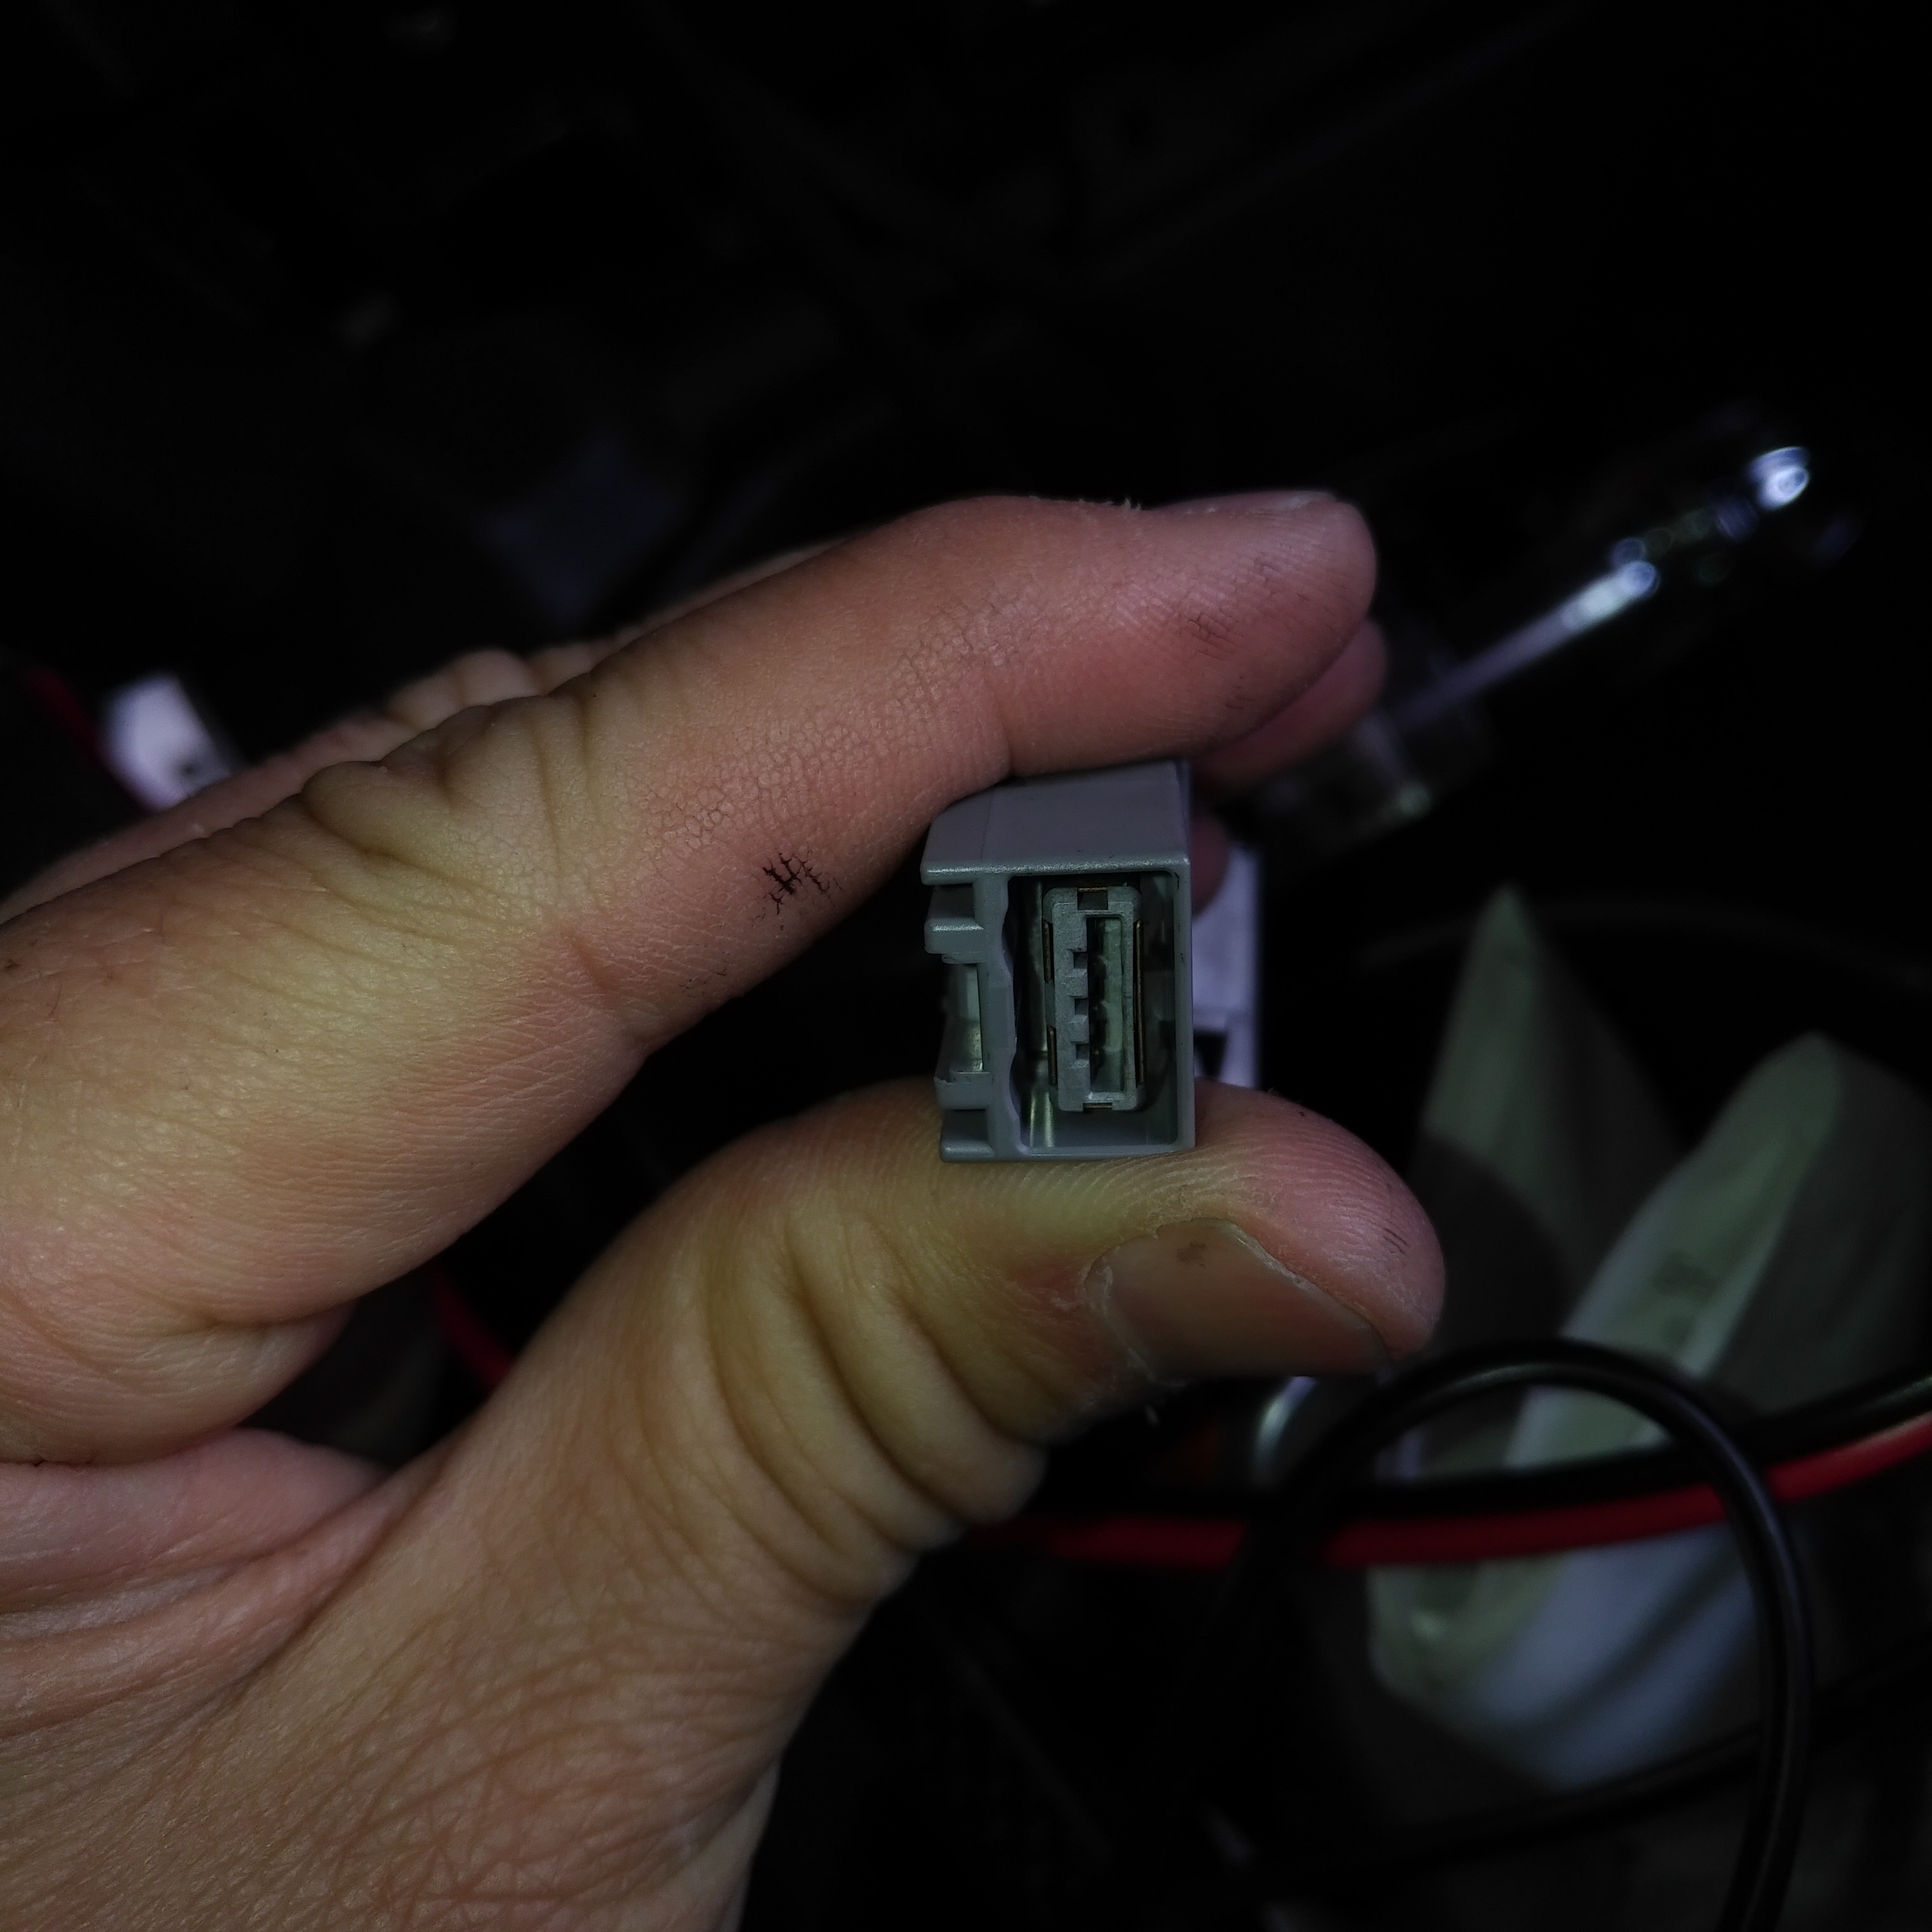
And the OEM USB interface harness. No this doesn't fit a standard USB.
Last edited by Action Jackson; 03-03-2019 at 10:46 AM.
#98
05-21-2018, 10:38 PM
So after tinkering with my sound system's DSP with built in analyzer (not real time, just input and output signals), I've come to these conclusions of the factory system:
- front channels are geared for mid to high range
- rear channels are geared for mid to low range
- if there is some bass roll off, then it's subtle enough that I'll use it to protect the sub at high volumes. I didn't use my amp's bass restoration feature.
- front channels are geared for mid to high range
- rear channels are geared for mid to low range
- if there is some bass roll off, then it's subtle enough that I'll use it to protect the sub at high volumes. I didn't use my amp's bass restoration feature.