Beatrush UnderPanel
#1
 05-16-2008, 11:50 PM

Beatrush UnderPanel
Does anyone have one of these yet?
Kami Speed - Beatrush UnderPanel- Fit - Beatrush, C-ONE, C-West, Fujitsubo, JDM OEM Parts for RSX DC5, Celica ZZT231, & More JDM.
I plan on getting one and just wondered if anyone has done this yet and what they thought of it. How difficult it was to install, how happy they are with it etc... Or if anyone has any pictures


#5
05-17-2008, 12:43 AM
It's been installed on a USDM Fit. Slight modifications.
https://www.fitfreak.net/forums/fit-...oys-fit-2.html
https://www.fitfreak.net/forums/fit-...oys-fit-2.html
#6
05-17-2008, 07:36 AM
but that thing's only like 4 screws right? my G35C has at least 12screws
and a clip for the lower cover. if you use a cordless drill to remove and
install the bolts it's not a big deal.
and a clip for the lower cover. if you use a cordless drill to remove and
install the bolts it's not a big deal.

#11
05-17-2008, 08:41 PM
lower temps.

https://www.fitfreak.net/forums/fit-...oys-fit-2.html

#14
05-19-2008, 02:48 PM
I like the idea of it but GD3kamiwannab is the only member i know that has one and i havent really heard enough about it to get one. I have Honda do my oil changes so they can deal with pulling it off if i decide to get one
#15
06-14-2008, 11:41 PM
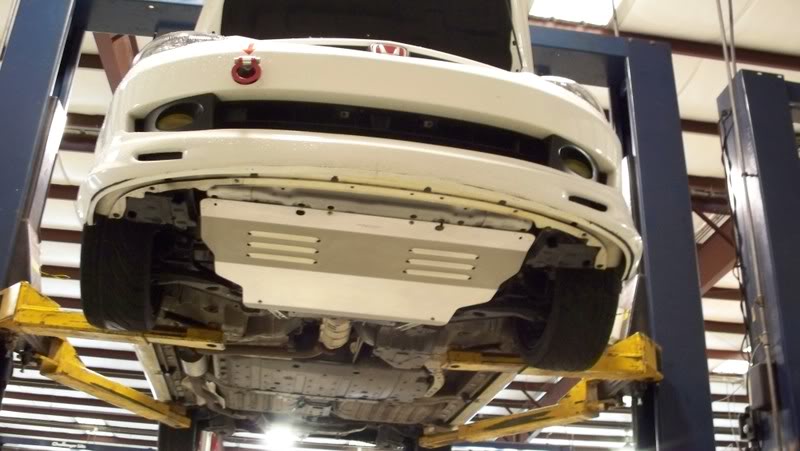
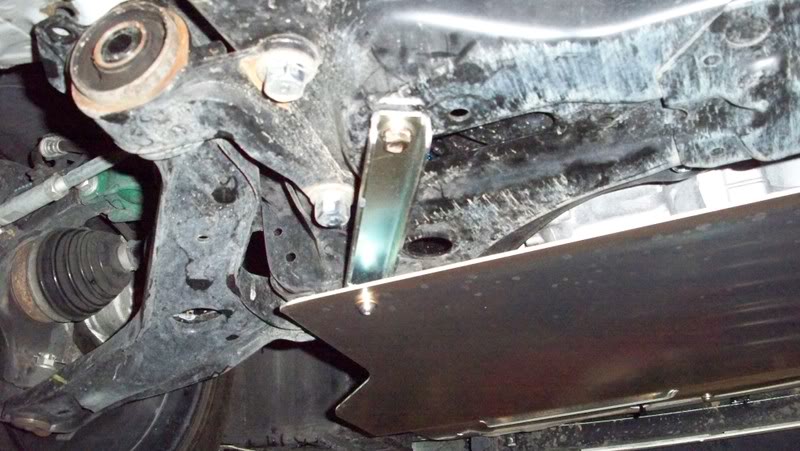
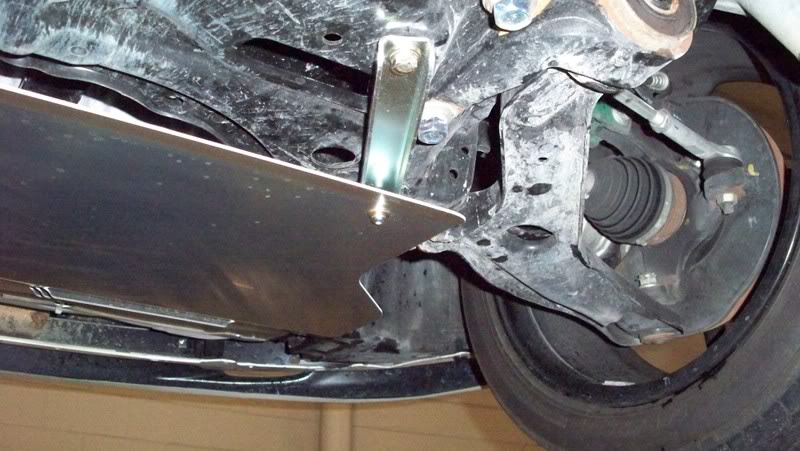
I just installed my Beat Rush underpanel on my Fit today. I had a little problem installing it because the instructions were in Japanese but it went on without a problem.
I did notice a little more stability at speeds over 60 MPH, but that could just a placebo effect. More testing at higher speeds will continue..
I just bought it to see if it actually improves gas mileage by smoothing out the airflow under the Fit and I'm gonna see if it does. So far I am getting about 38-40 MPG so I will continue to drive the same way to work in the same manner and see if any improvements follow with the underpanel.
#16
06-16-2008, 11:55 AM
I just bought it to see if it actually improves gas mileage by smoothing out the airflow under the Fit and I'm gonna see if it does. So far I am getting about 38-40 MPG so I will continue to drive the same way to work in the same manner and see if any improvements follow with the underpanel.
#17
06-16-2008, 12:29 PM
 highly agree placebo effect... but if it improves your MPG,
more to ya. good luck with the data collection!
#18
06-21-2008, 11:15 AM
As for the stability issue, as I stated before it might be a placebo effect, but what an effect. I have a nice freeway here in San Diego where I take off underpanel and see if I notice a difference at speed. I'll do this when I get a chance.
As for the gas mileage, my last tank with me driving with A/C on for about 3 hours total and lending my Fit to my wife for a day netted me a 39 MPG over 9.3 gallons of gas (well that was how much the pump said). I usually cruise between 65 to 75 MPH with some DFCO thrown in during hills and such.
This week looks like I might actually break over 40.3 MPG (my best to date) with some limited use of A/C and no wife driving it like she stole it (she has an RSX Type-S for that). I thank the Laille/BeatRush underpanel.... (small dose of sarcasm)
I have a nice freeway here in San Diego where I take off underpanel and see if I notice a difference at speed. I'll do this when I get a chance.As for the gas mileage, my last tank with me driving with A/C on for about 3 hours total and lending my Fit to my wife for a day netted me a 39 MPG over 9.3 gallons of gas (well that was how much the pump said). I usually cruise between 65 to 75 MPH with some DFCO thrown in during hills and such.
This week looks like I might actually break over 40.3 MPG (my best to date) with some limited use of A/C and no wife driving it like she stole it (she has an RSX Type-S for that). I thank the Laille/BeatRush underpanel....
(small dose of sarcasm)
#19
06-21-2008, 04:41 PM
As for the gas mileage, my last tank with me driving with A/C on for about 3 hours total and lending my Fit to my wife for a day netted me a 39 MPG over 9.3 gallons of gas (well that was how much the pump said). I usually cruise between 65 to 75 MPH with some DFCO thrown in during hills and such.
This week looks like I might actually break over 40.3 MPG (my best to date) with some limited use of A/C and no wife driving it like she stole it (she has an RSX Type-S for that). I thank the Laille/BeatRush underpanel.... (small dose of sarcasm)
This week looks like I might actually break over 40.3 MPG (my best to date) with some limited use of A/C and no wife driving it like she stole it (she has an RSX Type-S for that). I thank the Laille/BeatRush underpanel....
(small dose of sarcasm)
#20
06-21-2008, 08:35 PM
as of now...
As for my MPG average, I do get 38-40 MPG with 40.3 MPG my highest out of 5 tank fulls. The other 4 all got better than 38.5 to 39 on the tanks.
