Fit DIY: Repair & Maintenance Threads discussing repairs and maintenance you can do yourself

Awesome Car, Awesome Shop, Awesome Detail! 08 Jaguar XKR Portfolio

Thread Tools
 
Search this Thread
 
  #1  
Old 02-02-2011, 09:16 AM
Fallen_Rock's Avatar
Member
Thread Starter
iTrader: (2)
Join Date: Jun 2009
Location: Knoxville TN
Posts: 365
Awesome Car, Awesome Shop, Awesome Detail! 08 Jaguar XKR Portfolio


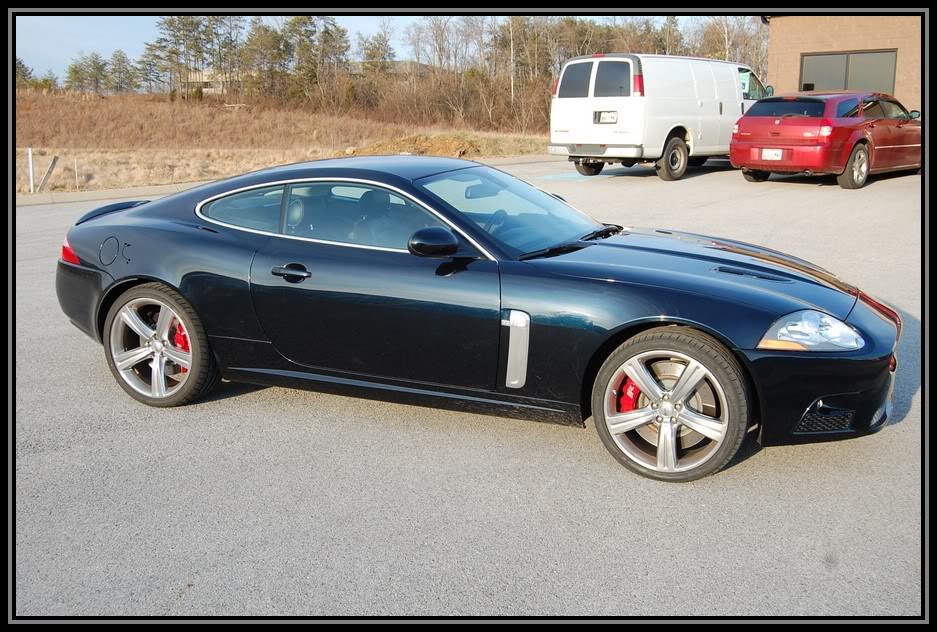
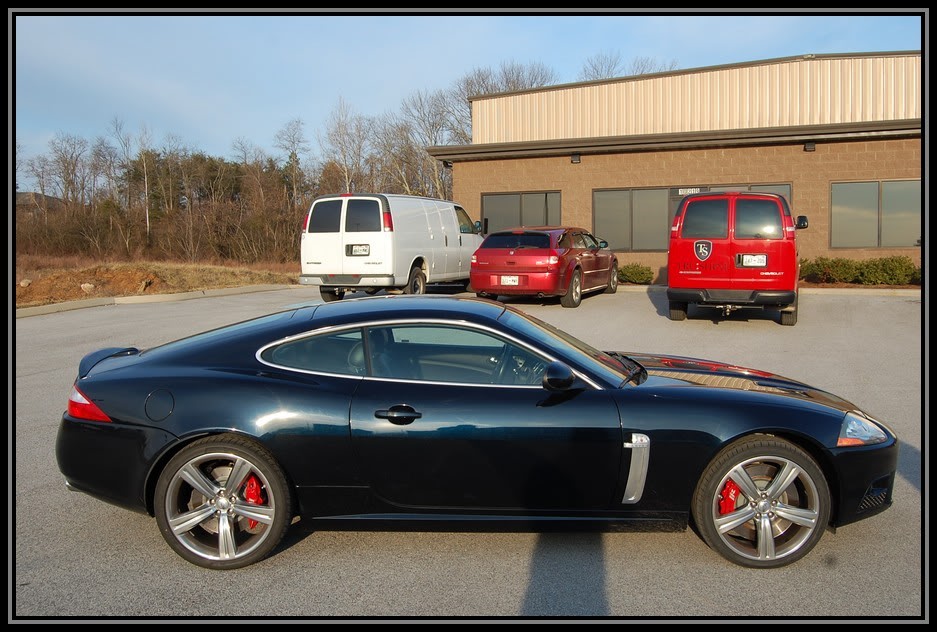
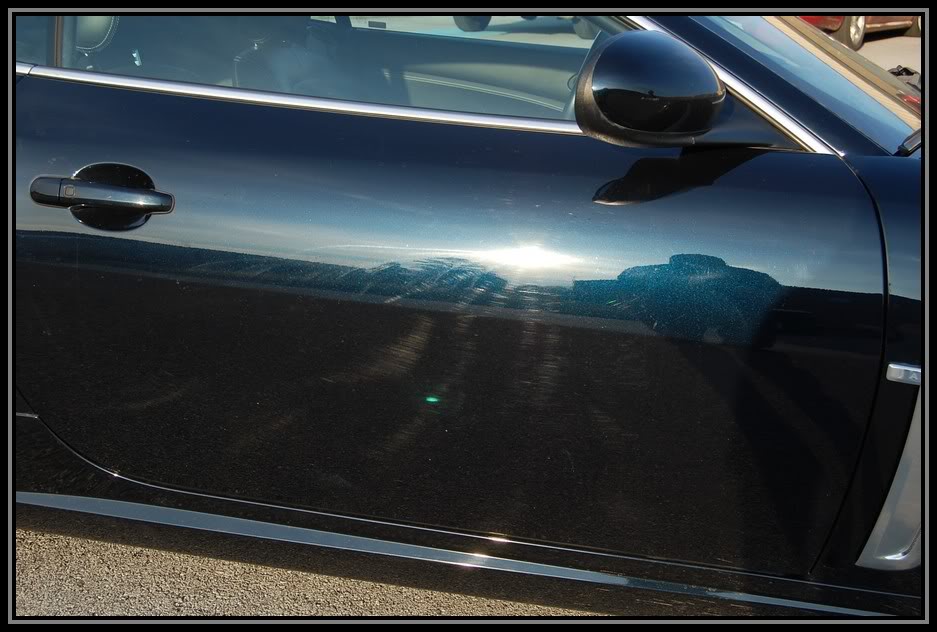
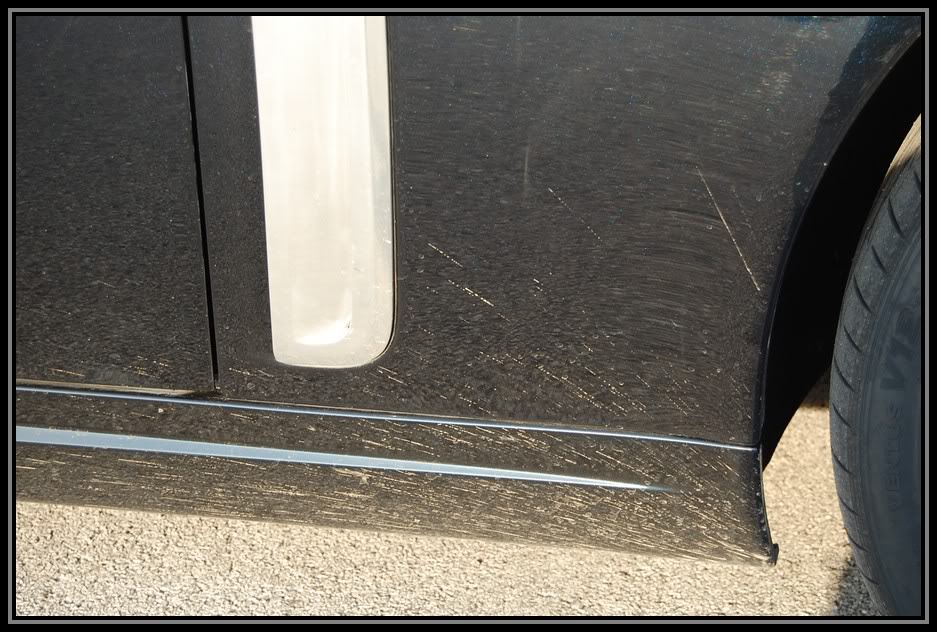
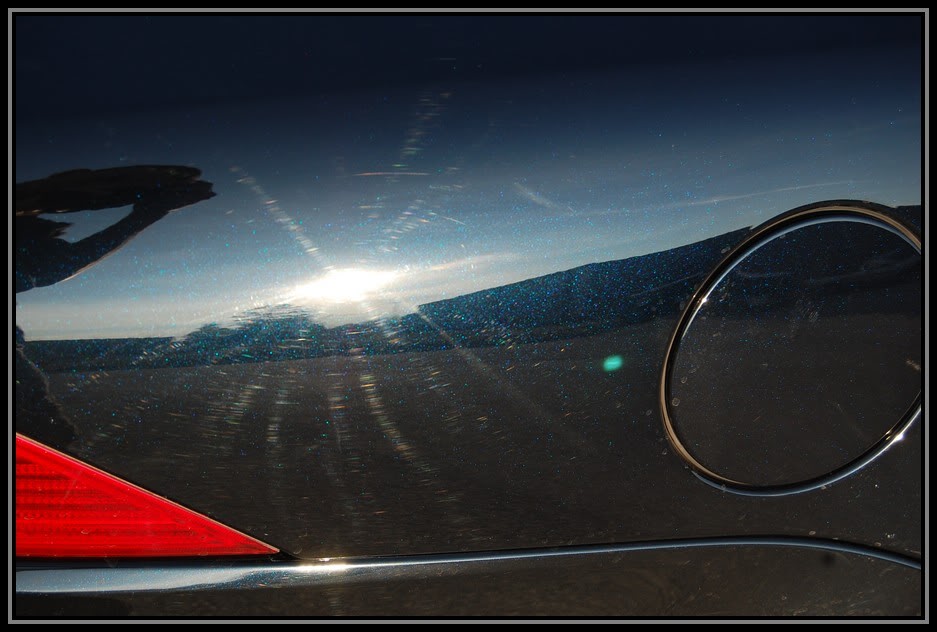
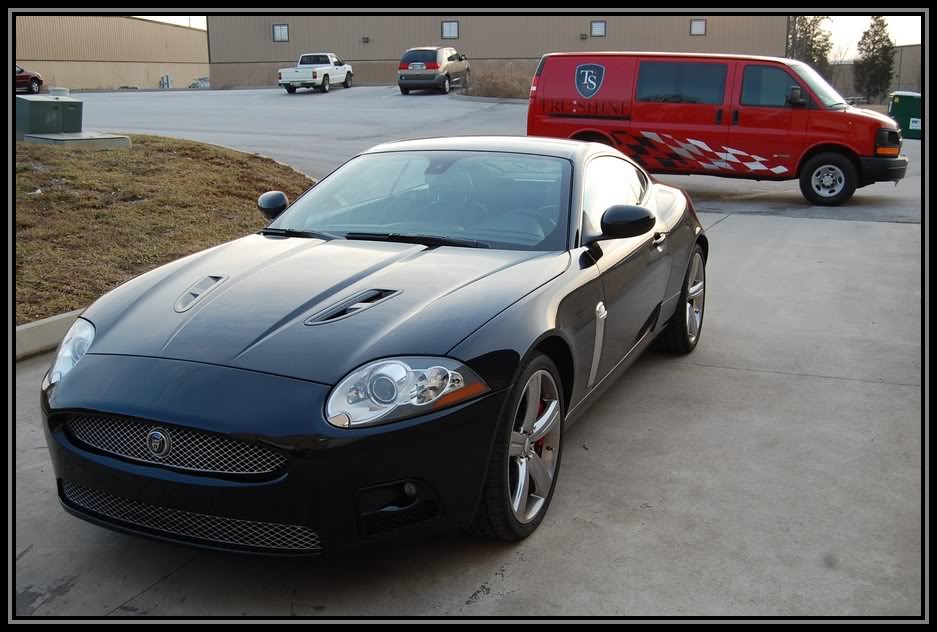
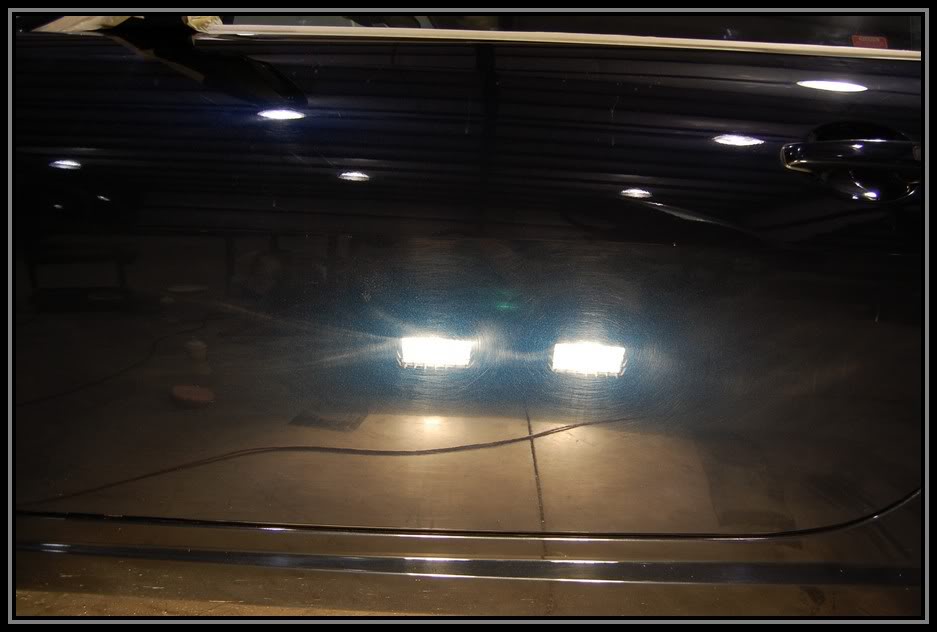
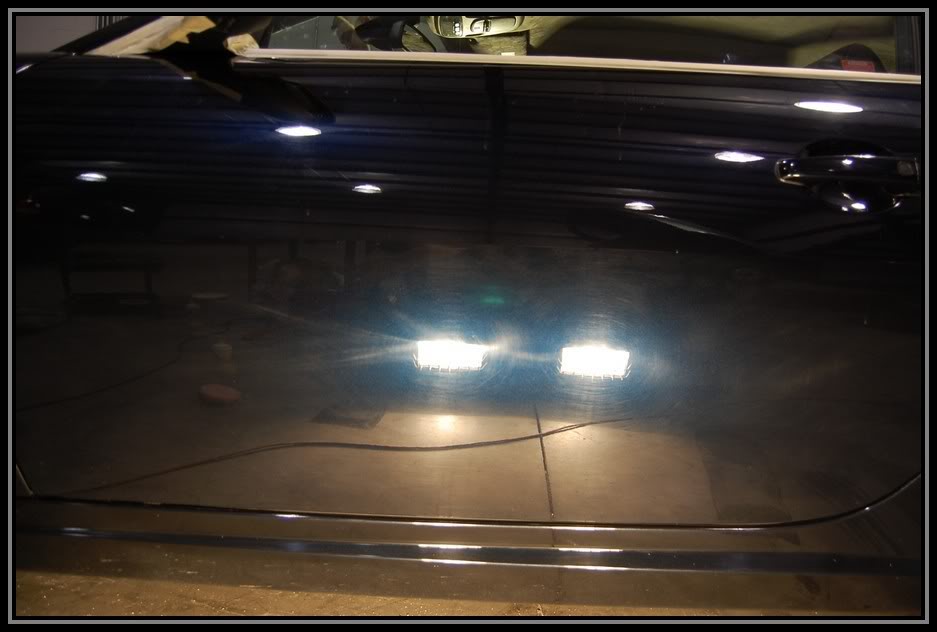
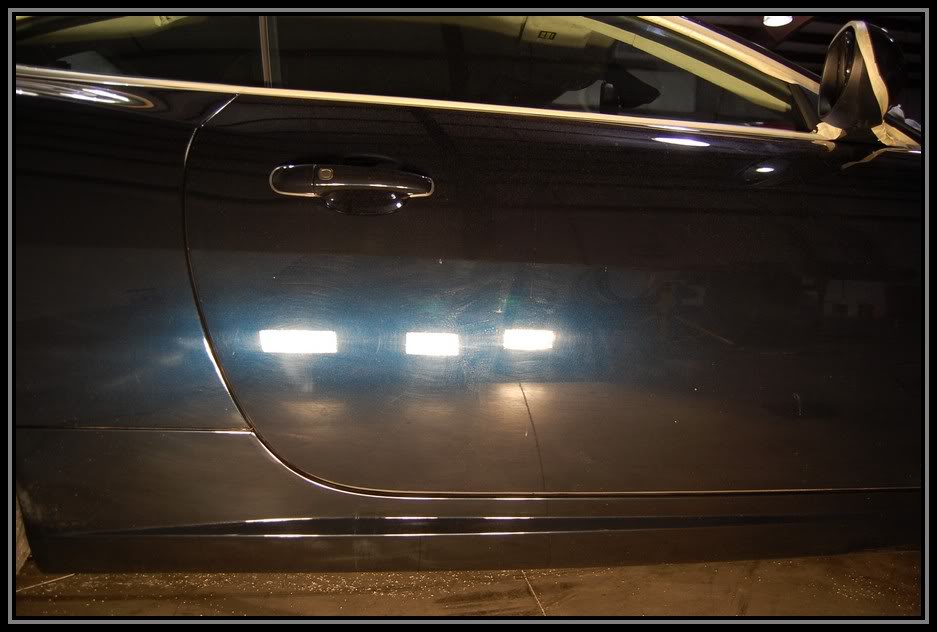
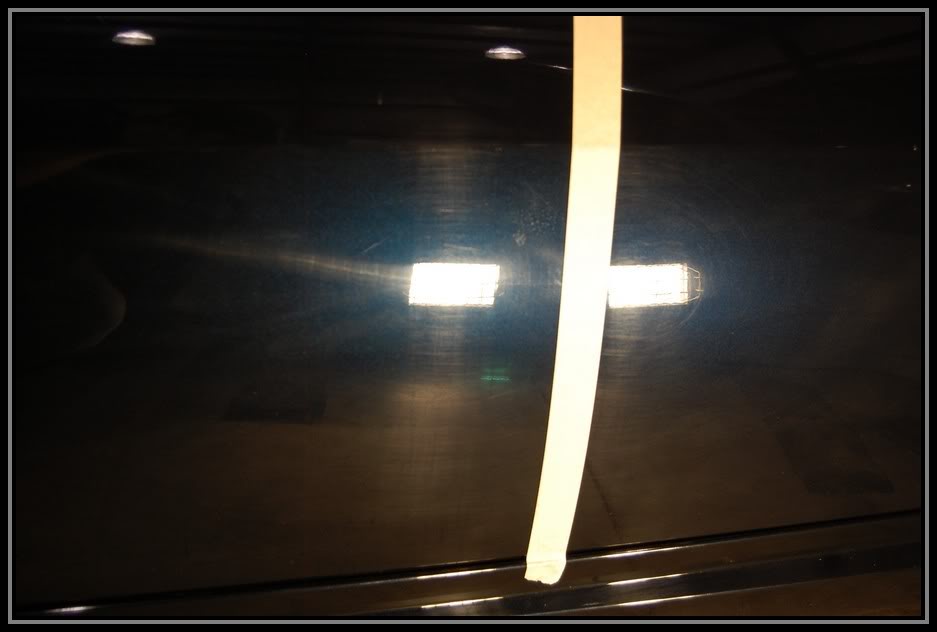
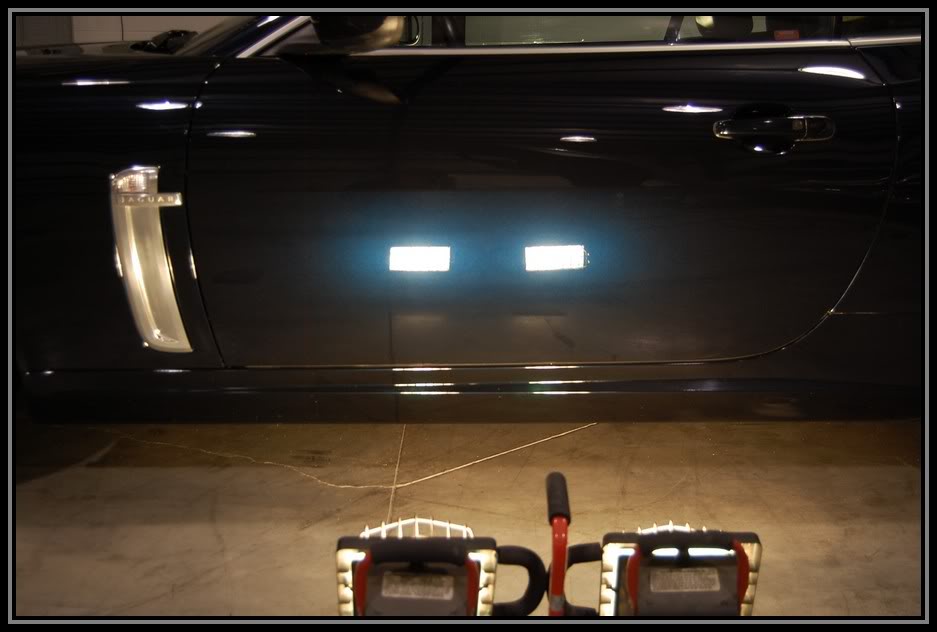
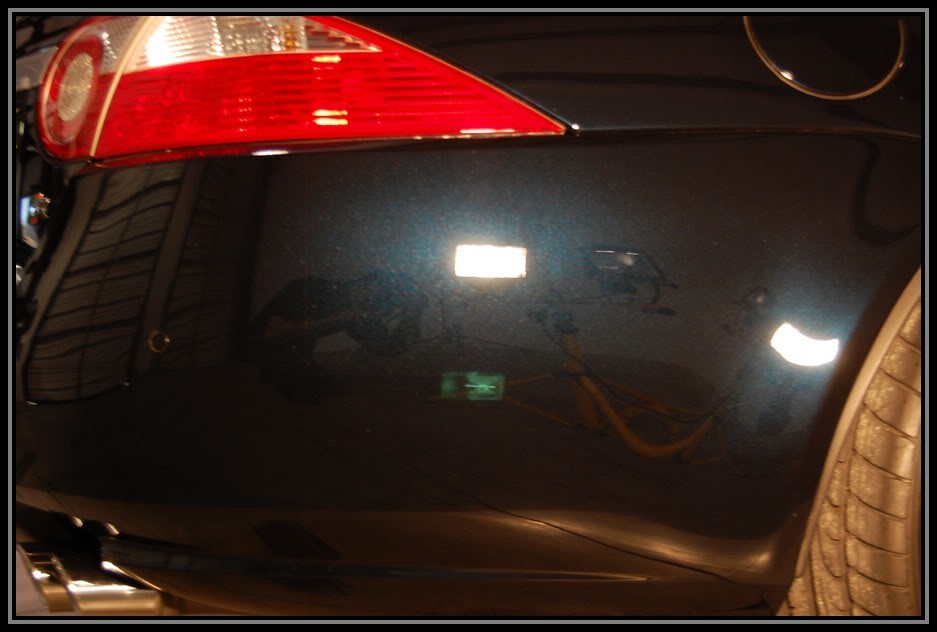
Ladies and Gentlemen.......I would like to introduce to you this very sexy and very rare 2008 Jaguar XKR Portfolio. This 4.2L 420hp supercharged V8 Jag has seen better days. The customer contacted me after seeing some of my work and asked if there was anything I could do to help with all the swirls and scratches in his paint. After pulling a few strings and calling in some favors, I had a buddy of mine let me use this shop that he works in for the detail. I called in my good friend Tim Buxton from Knox Details to Tag team this car with me. Overall time spent on this car was about 26 man hours over the course of 2 days. The car didn't appear to be that bad outside, but the halogen lights say it all. Let's see what I had to work with.


Name:  XKR0220.jpg
Views: 764
Size:  148.4 KB

Name:  XKR0221.jpg
Views: 265
Size:  128.8 KB

Name:  XKR0222.jpg
Views: 248
Size:  58.0 KB

Name:  XKR0223.jpg
Views: 303
Size:  152.1 KB

Name:  XKR0226.jpg
Views: 270
Size:  87.8 KB

Name:  XKR0230.jpg
Views: 254
Size:  129.9 KB

Name:  XKR0228.jpg
Views: 231
Size:  59.1 KB

Name:  XKR0232.jpg
Views: 222
Size:  134.6 KB

Name:  XKR0233.jpg
Views: 224
Size:  42.2 KB

Name:  XKR0234.jpg
Views: 228
Size:  78.7 KB

Name:  XKR0235.jpg
Views: 267
Size:  100.5 KB

Name:  XKR0236.jpg
Views: 231
Size:  111.5 KB

Name:  XKR0217.jpg
Views: 269
Size:  108.2 KB

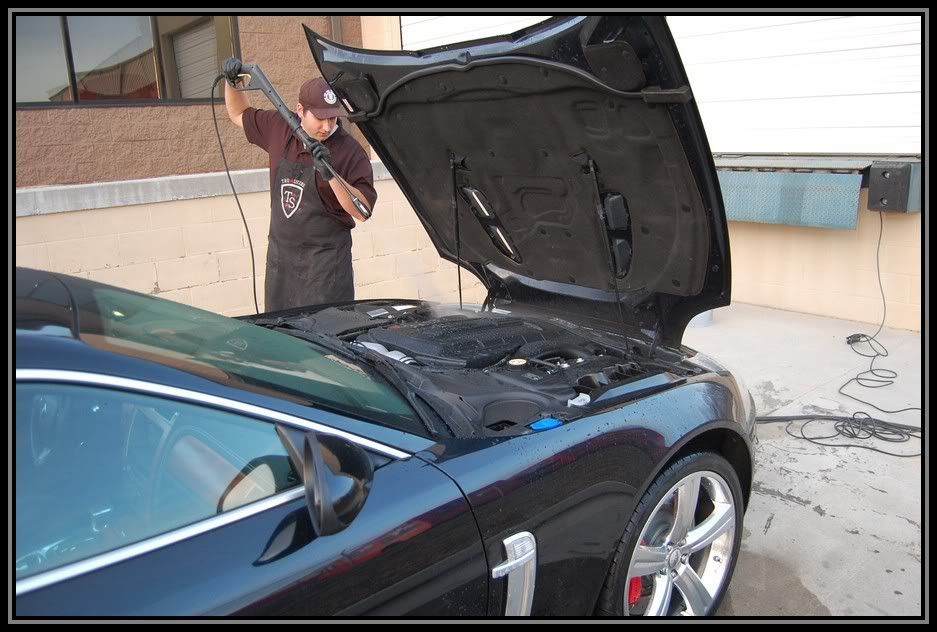
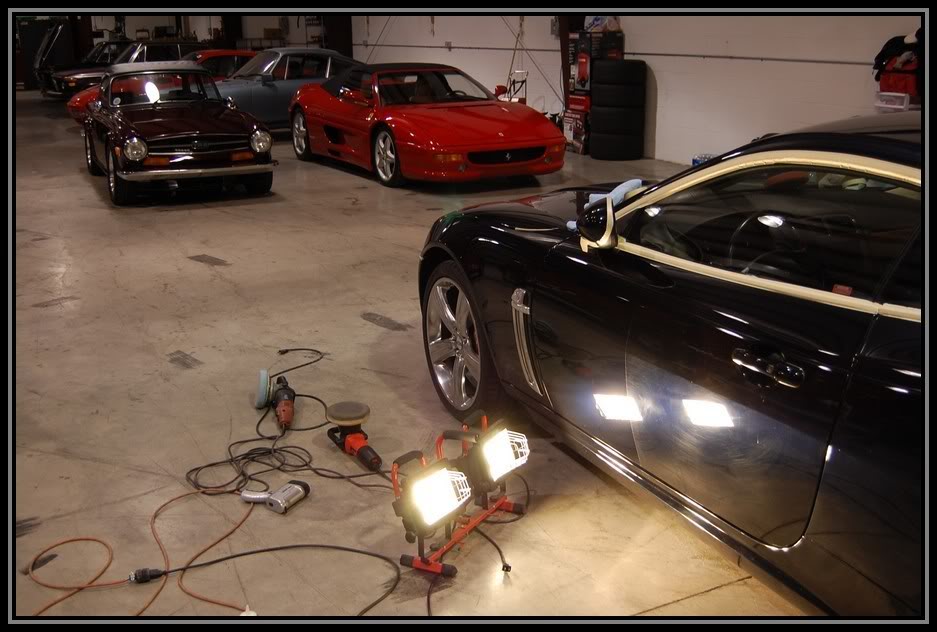
Now that I know what I am working with, time to gear up!

Name:  XKR0215.jpg
Views: 264
Size:  66.6 KB

Name:  XKR0213.jpg
Views: 232
Size:  98.2 KB


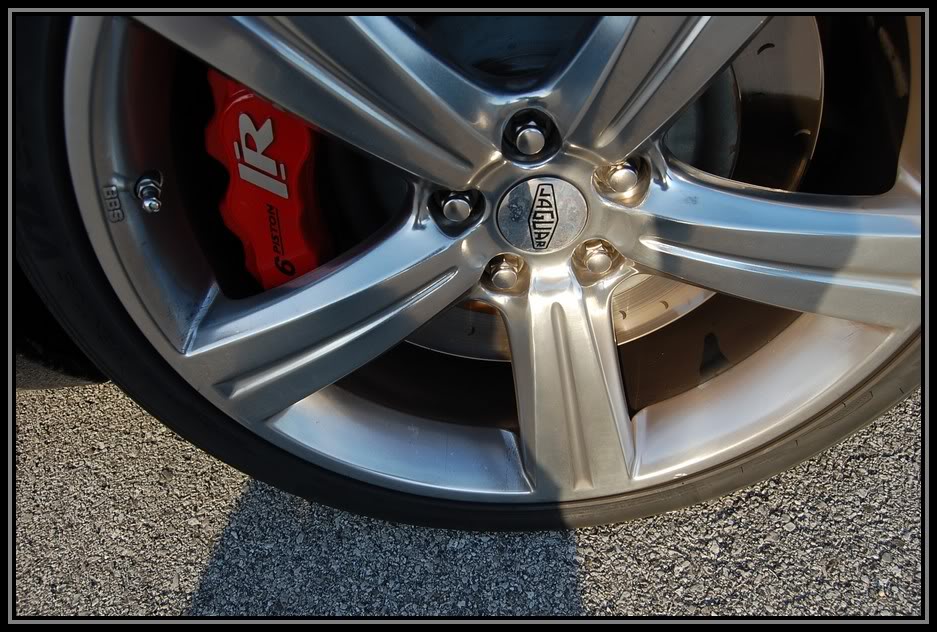
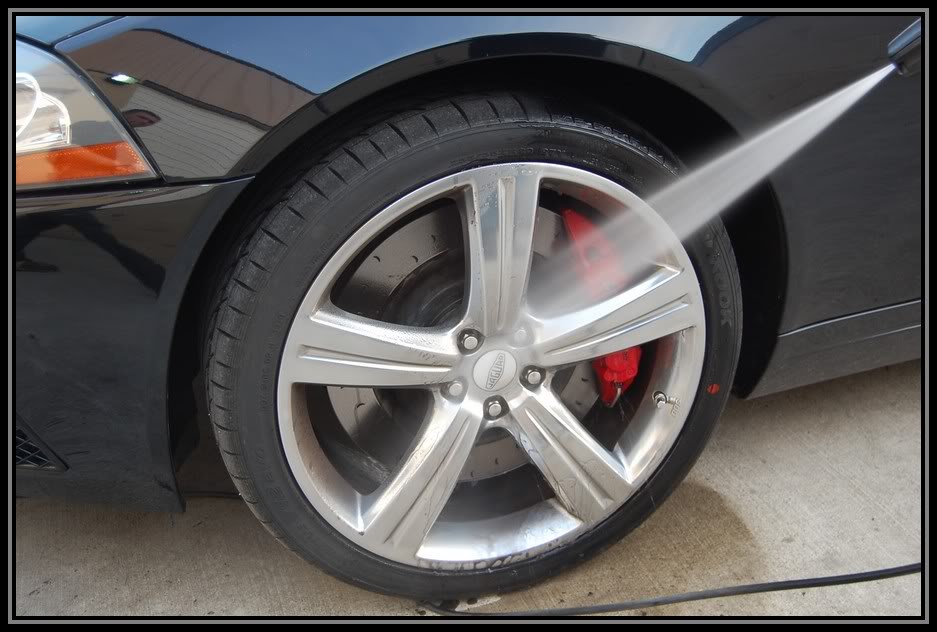
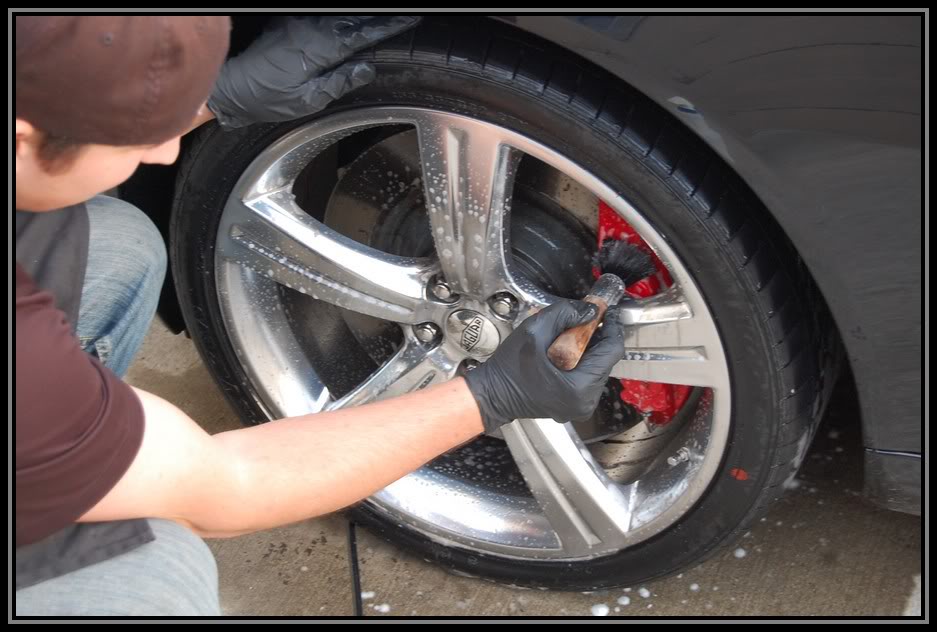
We started off with the wheels.

First we pre-rinsed the wheels getting most of the heavy break dust off.

Name:  XKR0209.jpg
Views: 230
Size:  80.8 KB

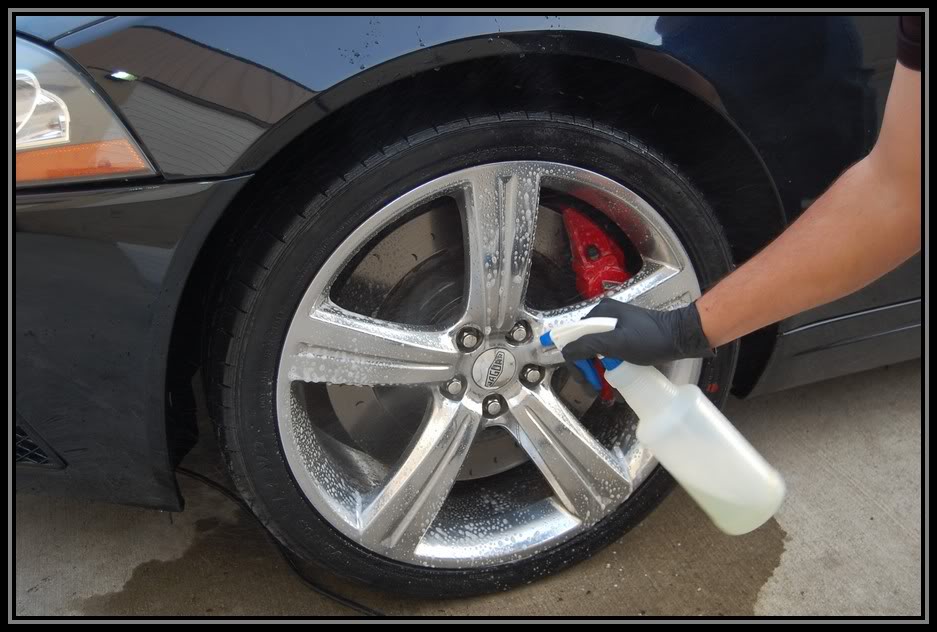
then I applied some P21s wheel gel to wheels. This is awesome pH balanced wheel cleaner, it's a little pricey but it gets the job done and its safe on all types of wheels and brakes.

Name:  XKR0208.jpg
Views: 221
Size:  87.5 KB

Then it was Agitated with an EZ-detail and other various brushes.
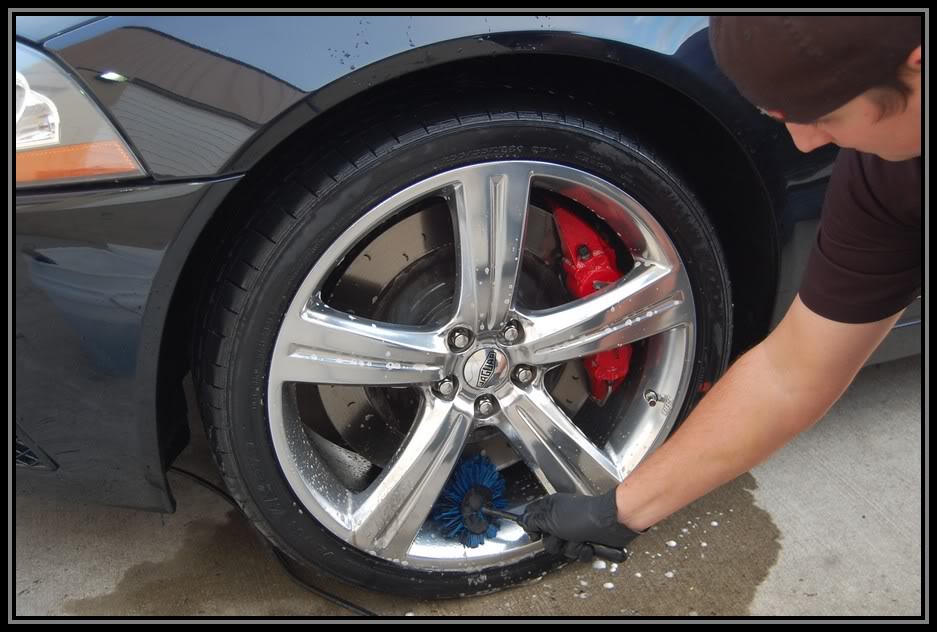
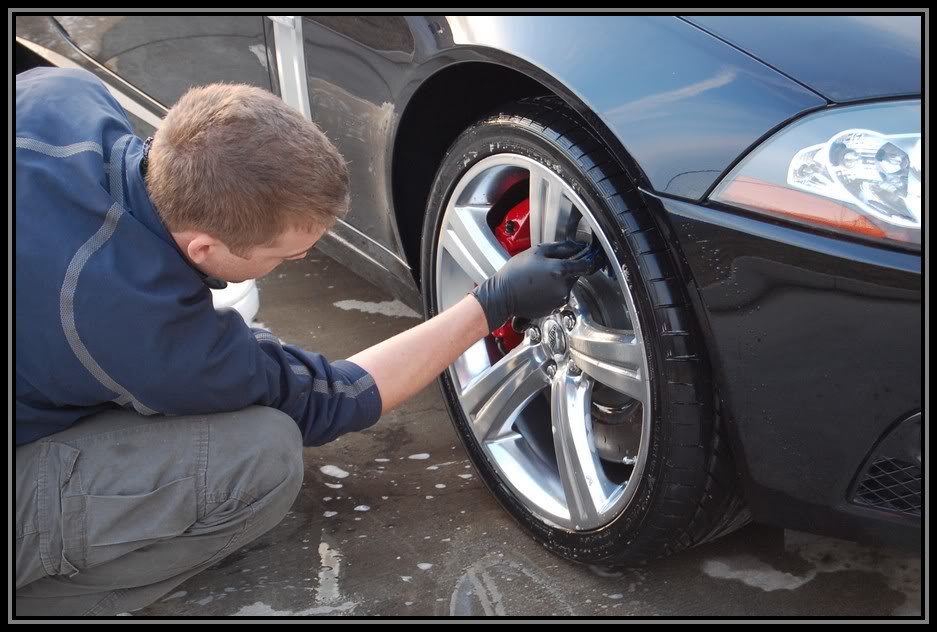
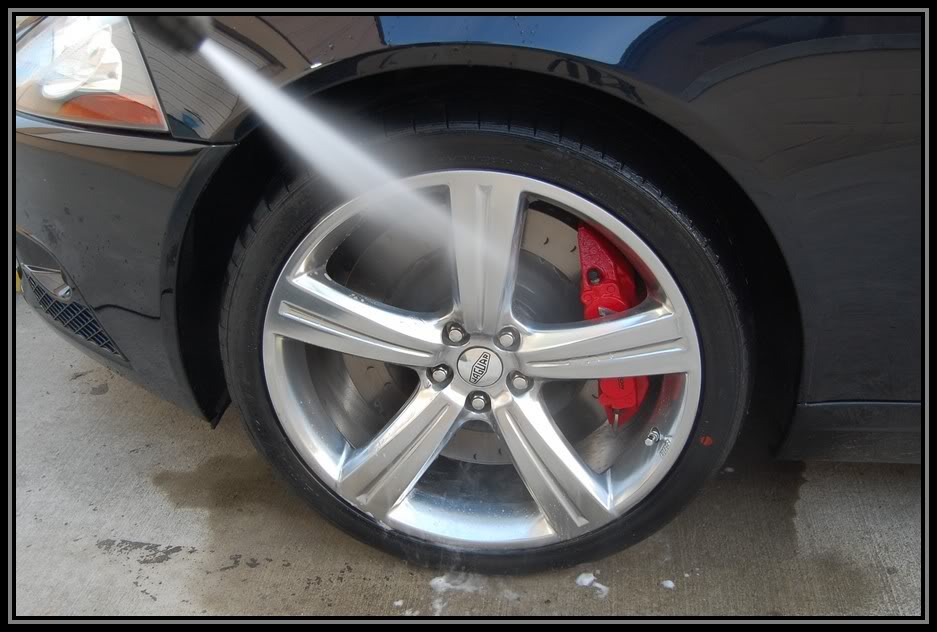
Name:  XKR0206.jpg
Views: 228
Size:  90.4 KB

Name:  XKR0205.jpg
Views: 234
Size:  82.4 KB

Name:  XKR0198.jpg
Views: 211
Size:  92.9 KB

Then rinsed

Name:  XKR0202.jpg
Views: 237
Size:  82.0 KB


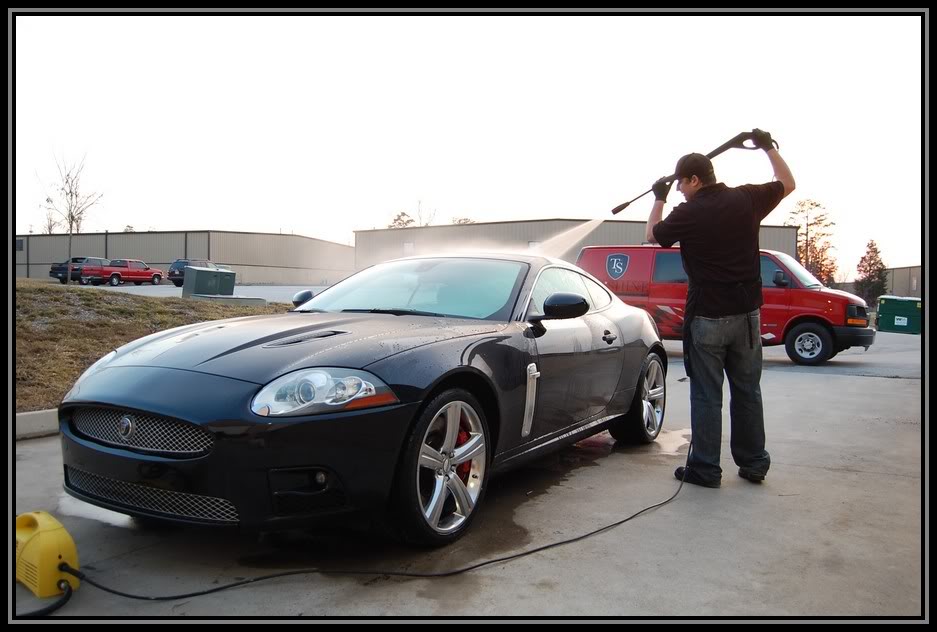
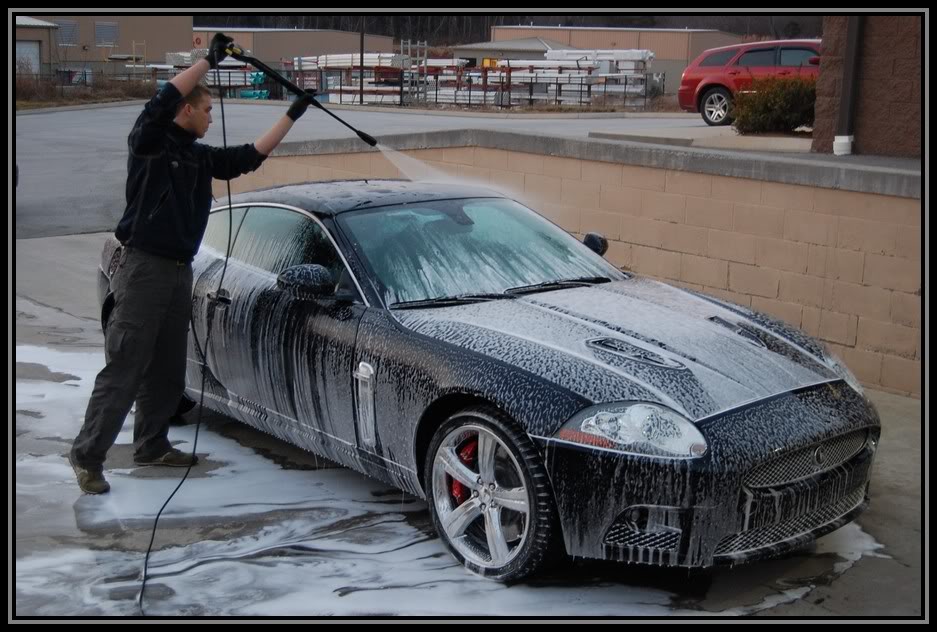
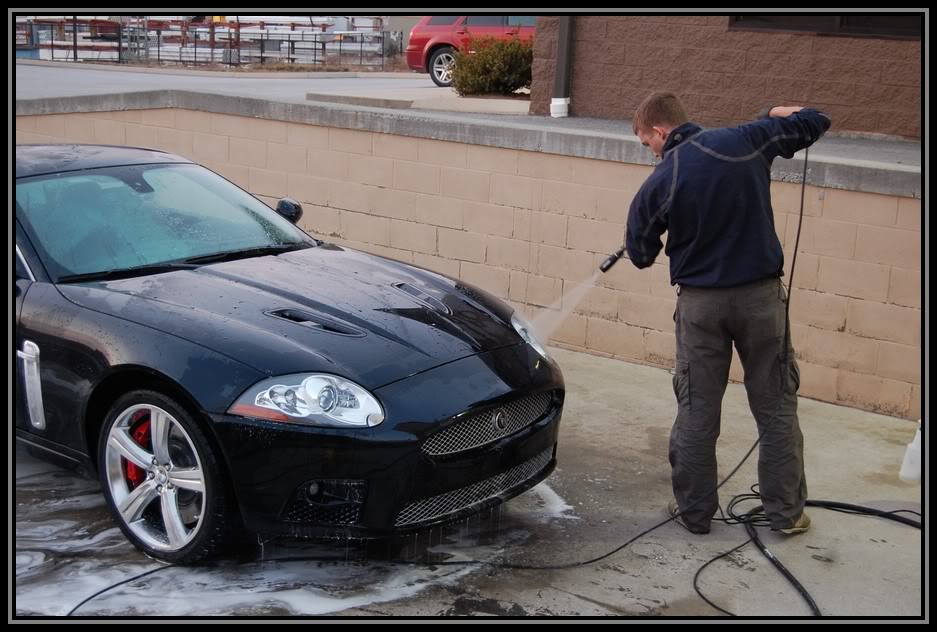
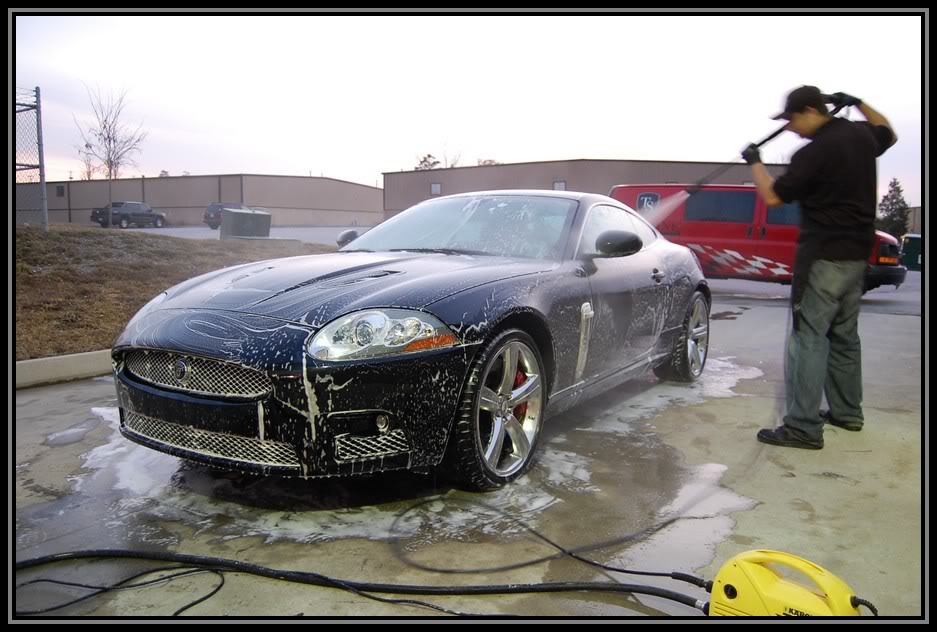
Next we pre-rinsed the car getting any heavy contaminants off the surface.

Name:  XKR0196.jpg
Views: 212
Size:  77.2 KB

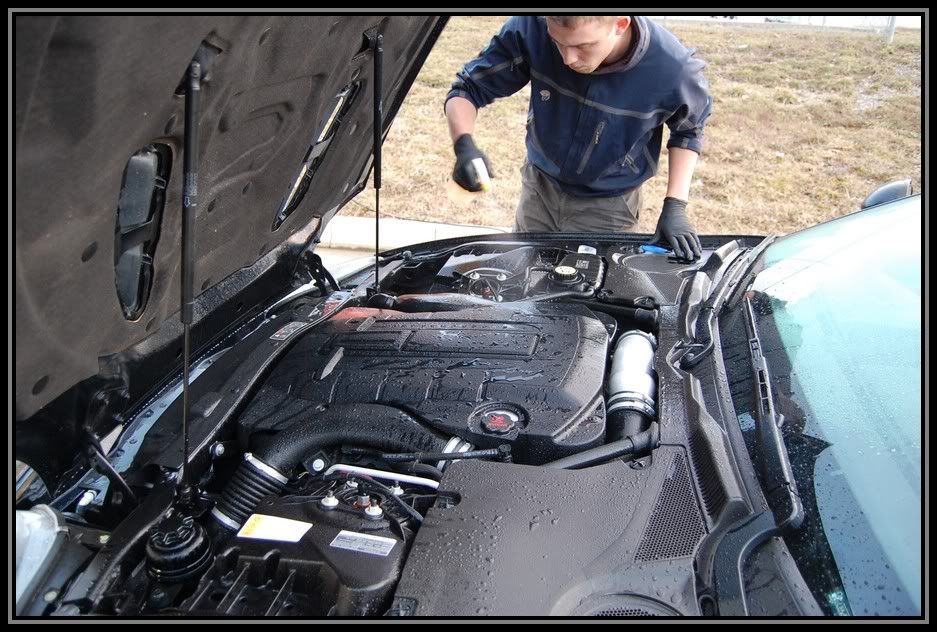
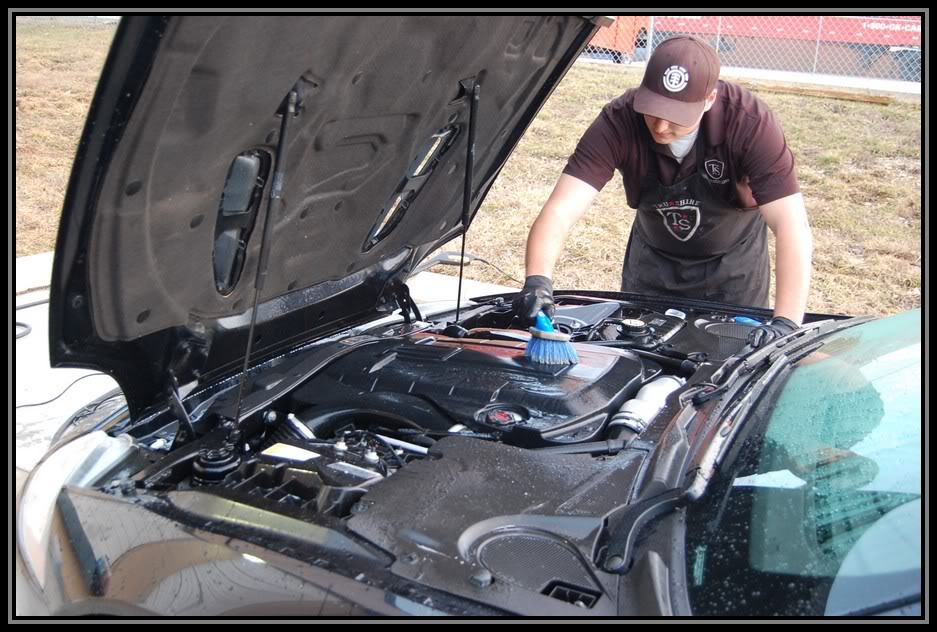
We pre-rinsed the motor and applied some meguiars APC+ and then agitated it with brushes.


Name:  XKR0189.jpg
Views: 246
Size:  127.9 KB

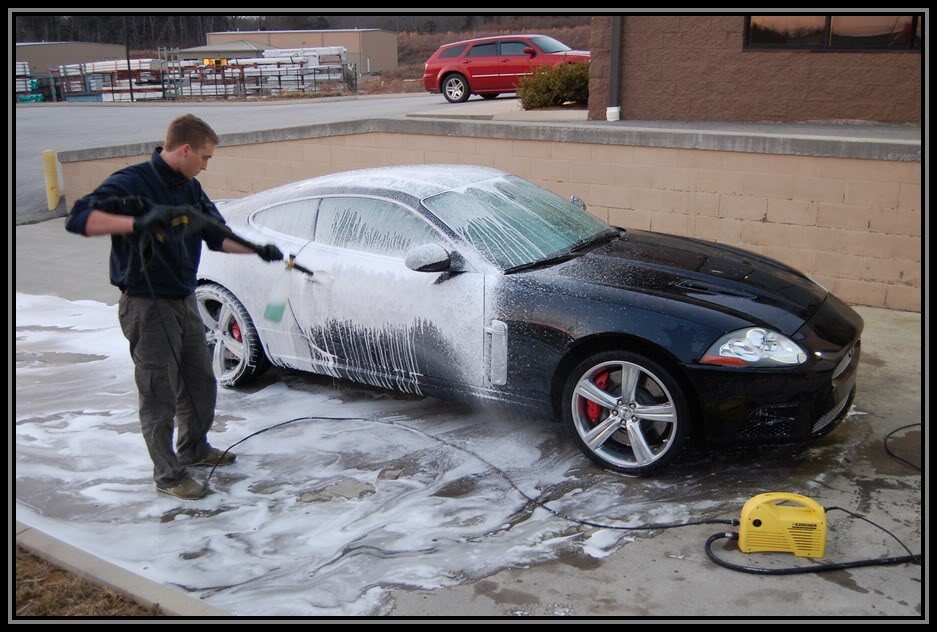
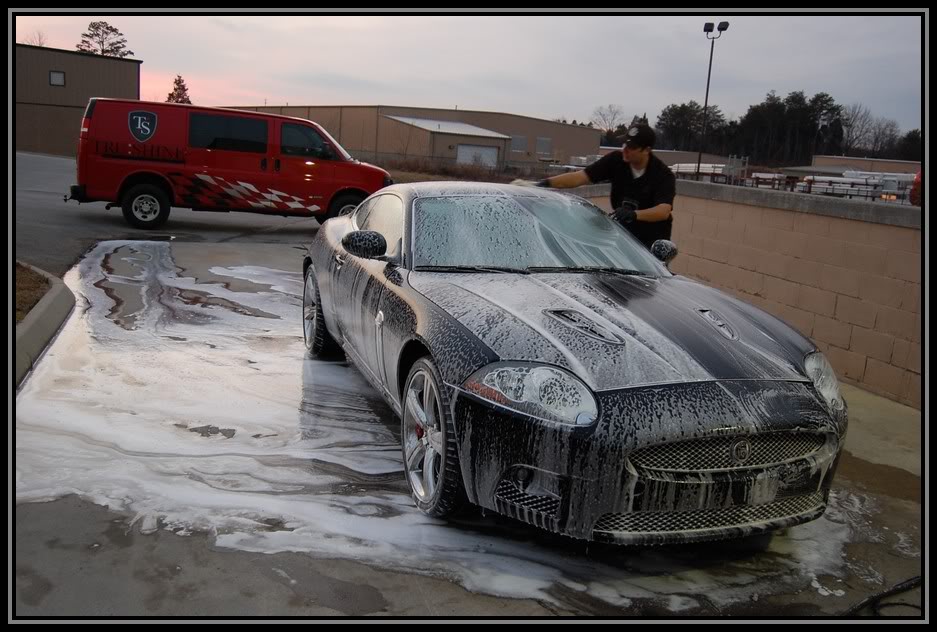
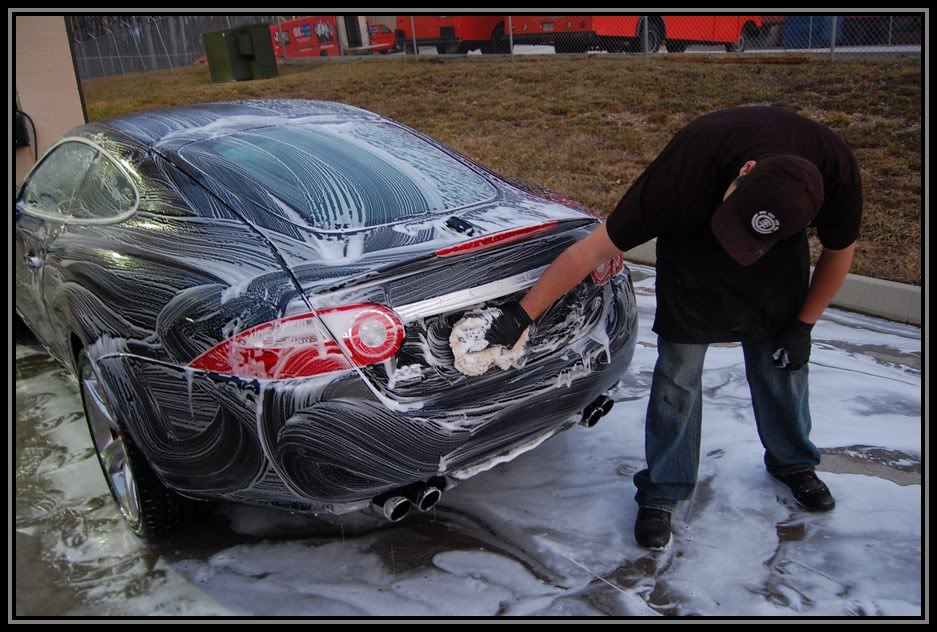
Next was the wash step.

I first foamed the car down with a mixture of Dawn ULTRA concentrate and Meguiars APC+ to strip off any protection,waxes or oils.

Name:  XKR0186.jpg
Views: 275
Size:  105.2 KB

Name:  XKR0185.jpg
Views: 228
Size:  125.0 KB

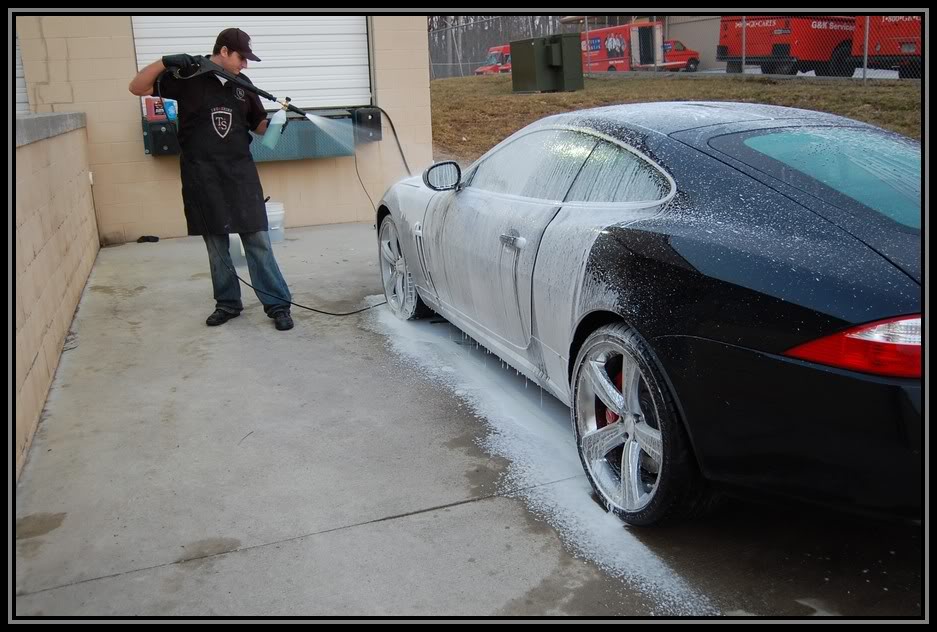
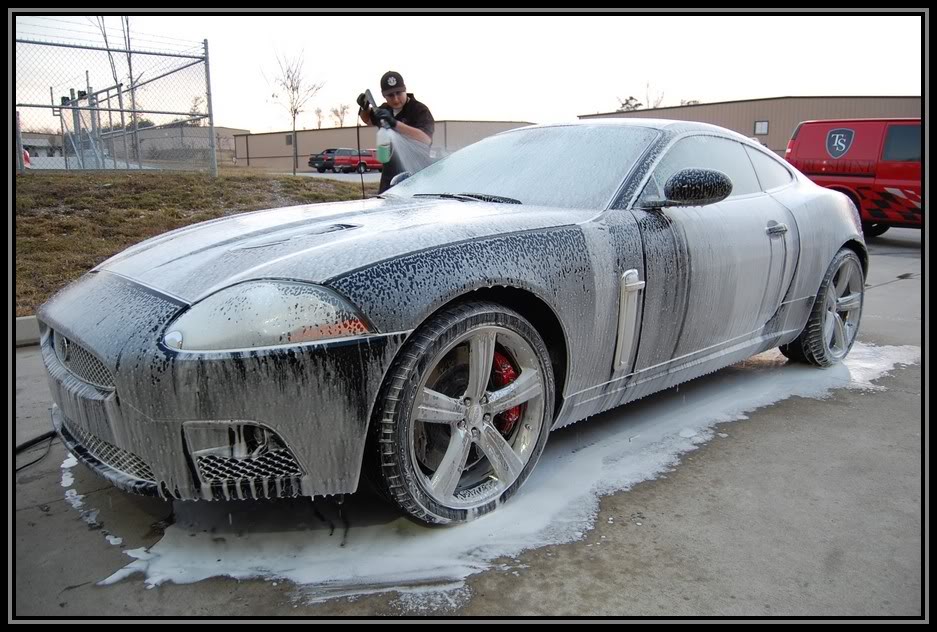
Isn't that a beautiful shot?

Name:  XKR0182.jpg
Views: 226
Size:  91.6 KB

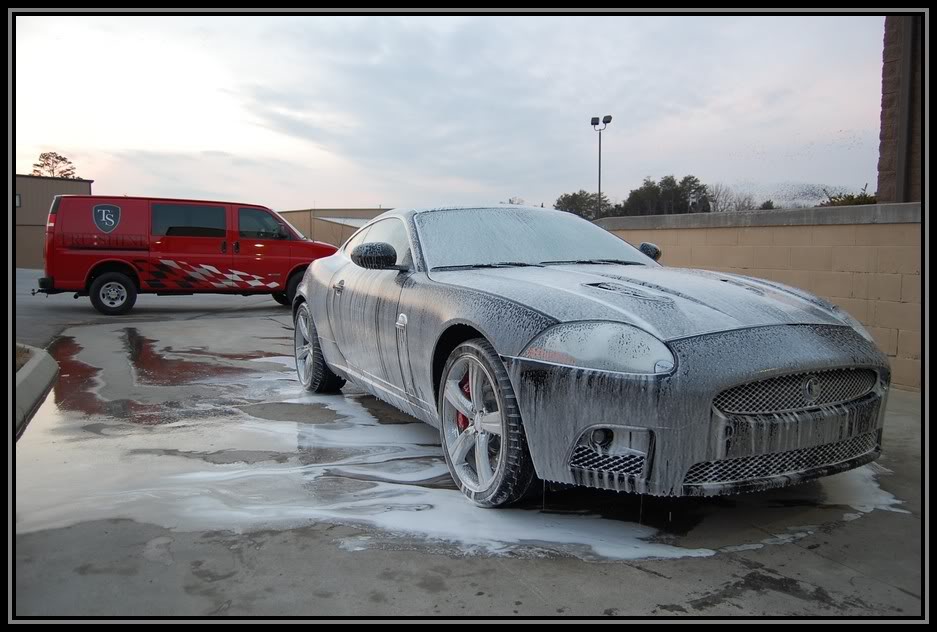
Then we rinsed off this foam and applied another coat to wash with.

Name:  XKR0179.jpg
Views: 212
Size:  114.6 KB

Name:  XKR0175.jpg
Views: 225
Size:  106.8 KB

Name:  XKR0173.jpg
Views: 235
Size:  112.3 KB

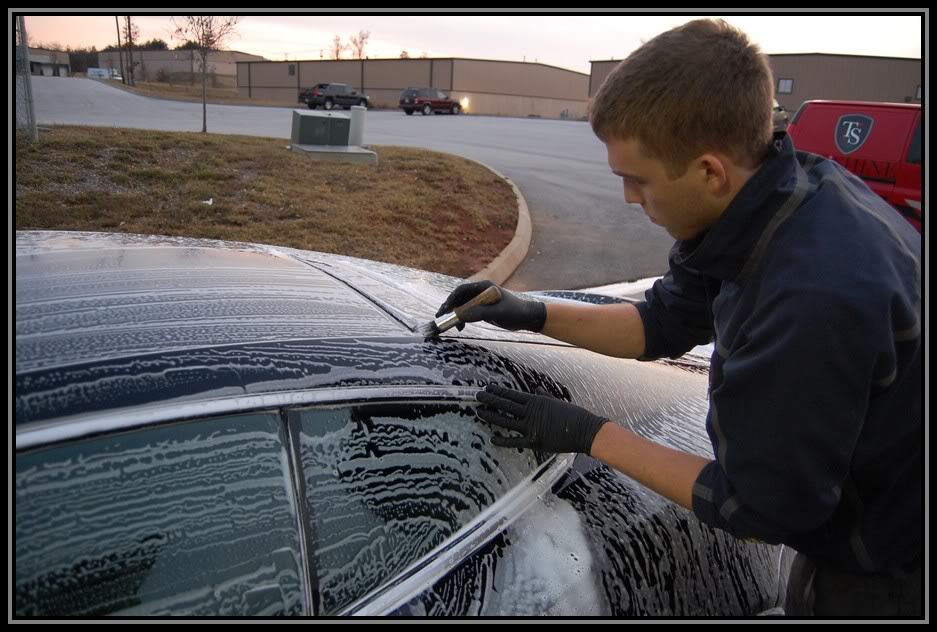
Using a 100% sheep skin wash mitt, I wash the car using straight lines reducing the chances of circular marring.

Name:  XKR0171.jpg
Views: 213
Size:  108.3 KB

Name:  XKR0170.jpg
Views: 255
Size:  122.5 KB

While I was washing the paint, Tim took care of all the jams.

Name:  XKR0167.jpg
Views: 275
Size:  104.8 KB

Name:  XKR0166.jpg
Views: 231
Size:  132.3 KB

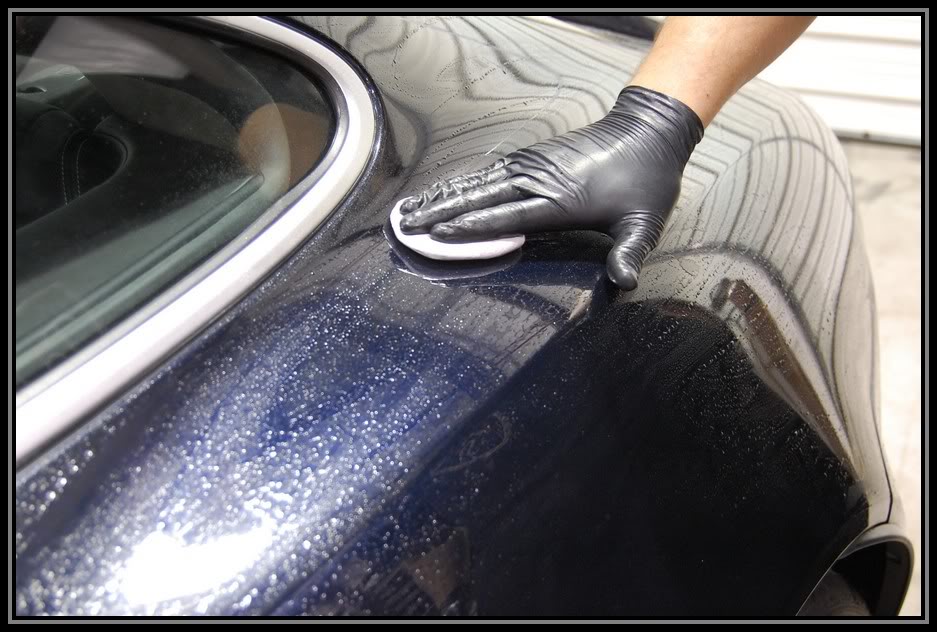
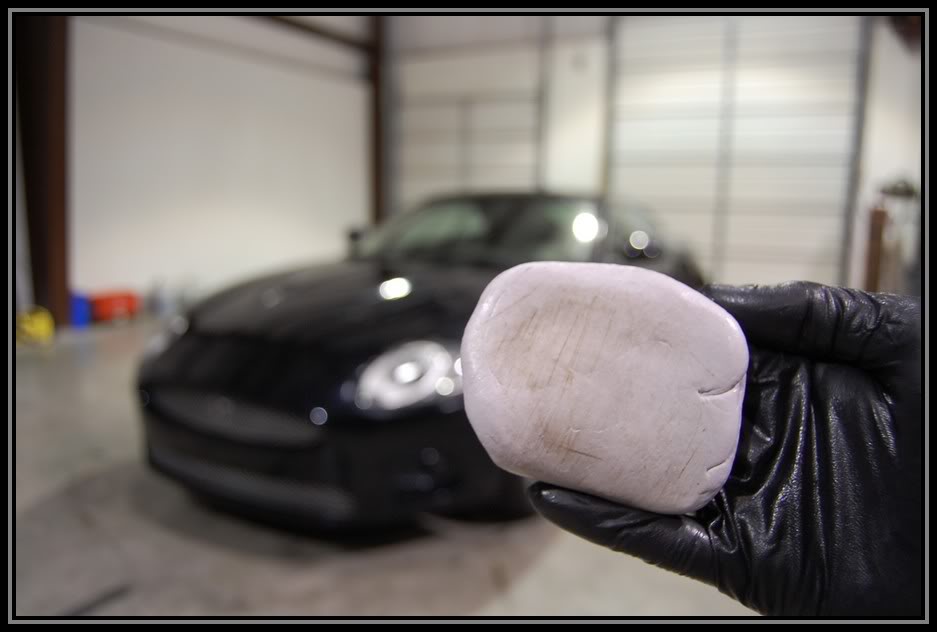
Once everything was rinsed, we pulled the car inside and began the prep stage.

Name:  XKR0164.jpg
Views: 235
Size:  105.0 KB

Name:  XKR0162.jpg
Views: 226
Size:  107.7 KB

The prep stage consist of clay baring, and taping up any plastic moldings, and fragile areas.

Name:  XKR0159.jpg
Views: 234
Size:  97.1 KB

Name:  XKR0157.jpg
Views: 220
Size:  71.3 KB

Name:  XKR0156.jpg
Views: 230
Size:  101.9 KB

Name:  XKR0155.jpg
Views: 224
Size:  45.7 KB

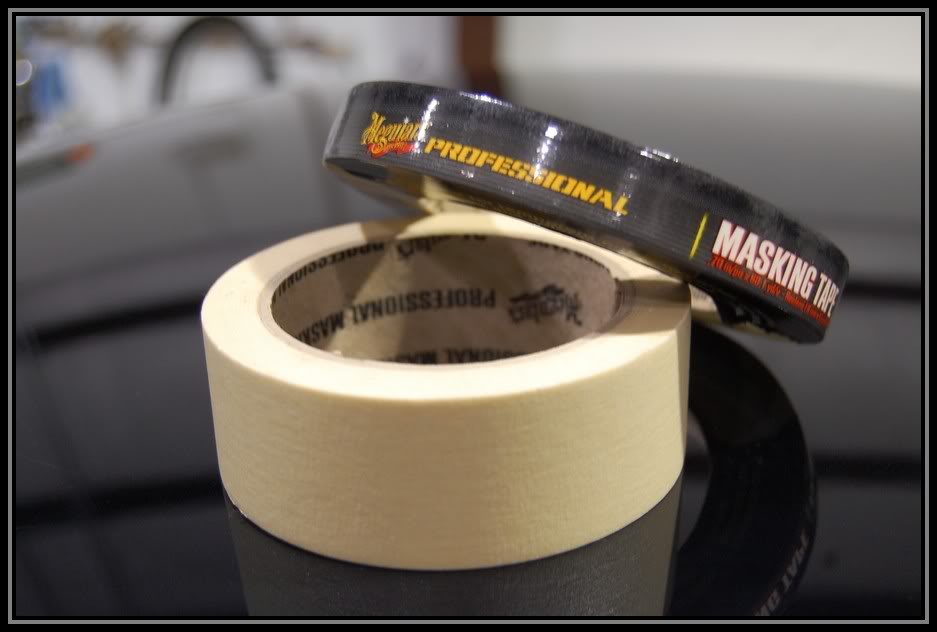
After wiping down the car we began the taping using Meguiars Professional Masking tape. this stuff is incredible tape. VERY high quality stuff, tears off evenly and sticks and releases nicely and doesn't leave behind any residue.

Name:  XKR0154.jpg
Views: 277
Size:  45.7 KB

Name:  XKR0152.jpg
Views: 259
Size:  71.5 KB

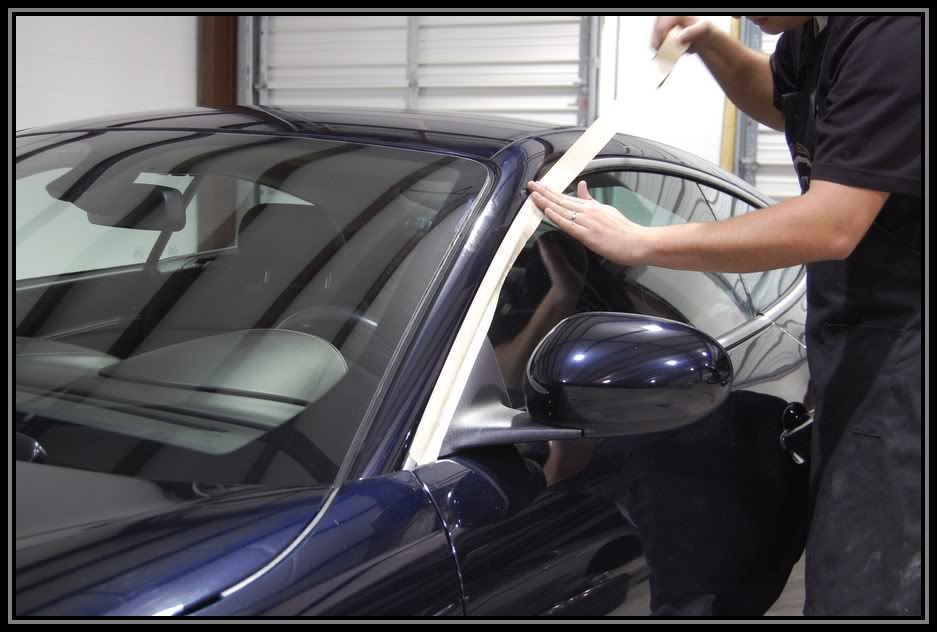
While I was taping off the trim, Tim was taping around the Clear bra that was on the front bumper, keeping any residue from getting in it.

Name:  XKR0151.jpg
Views: 267
Size:  64.8 KB

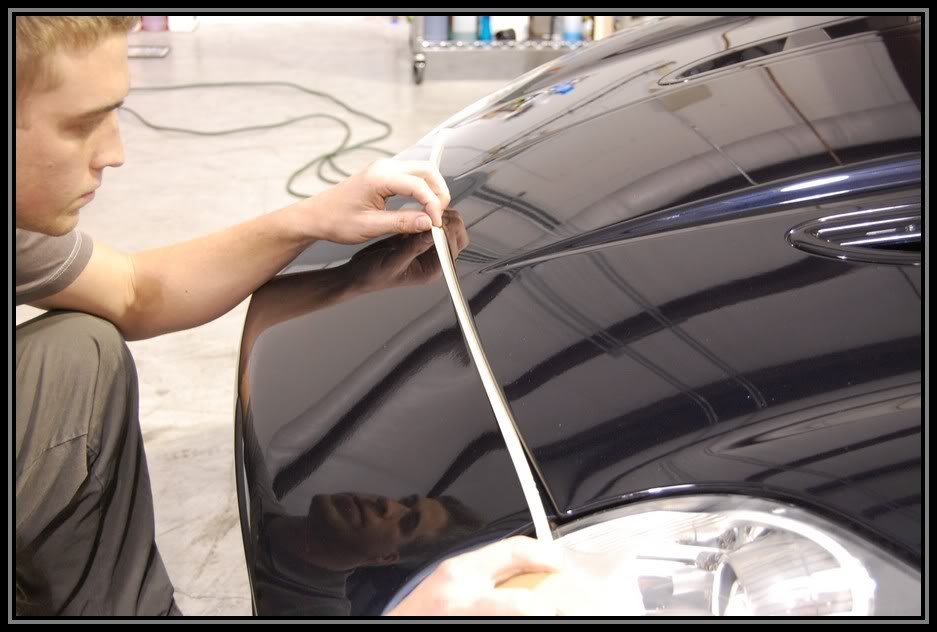
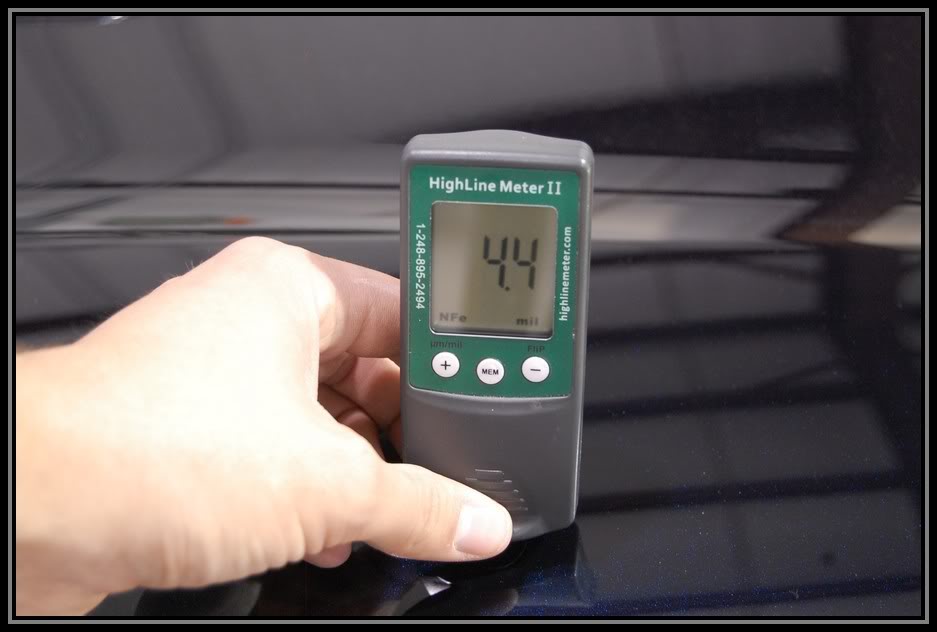
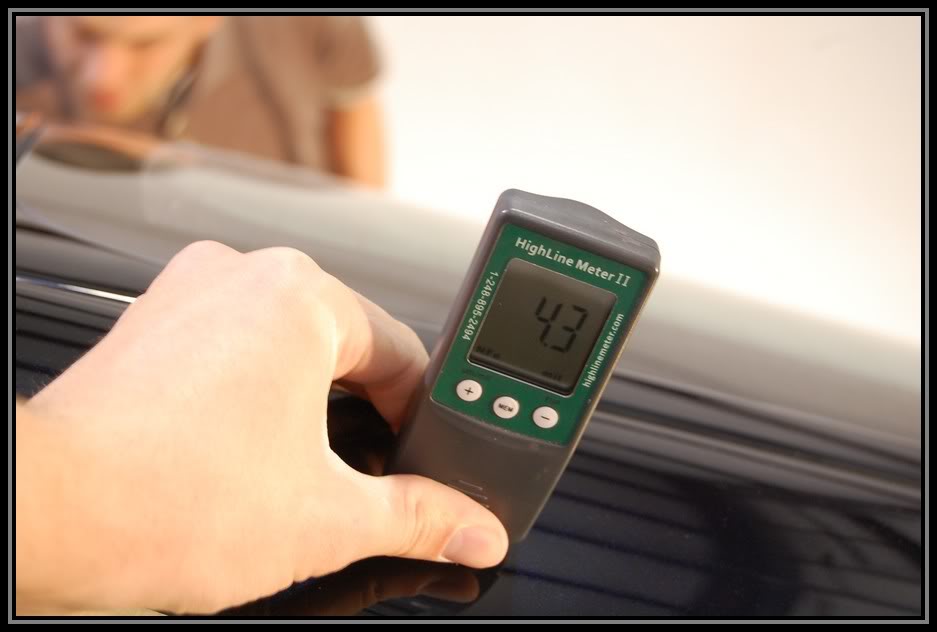
Next we took paint thickness measurements to make sure the paint was thick enough to safely correct the paint. 4.0-4.5 mils are typical thickness for original paint thickness (some make and models slightly differ).

Name:  XKR0097.jpg
Views: 250
Size:  44.6 KB

Name:  XKR0096.jpg
Views: 238
Size:  41.0 KB

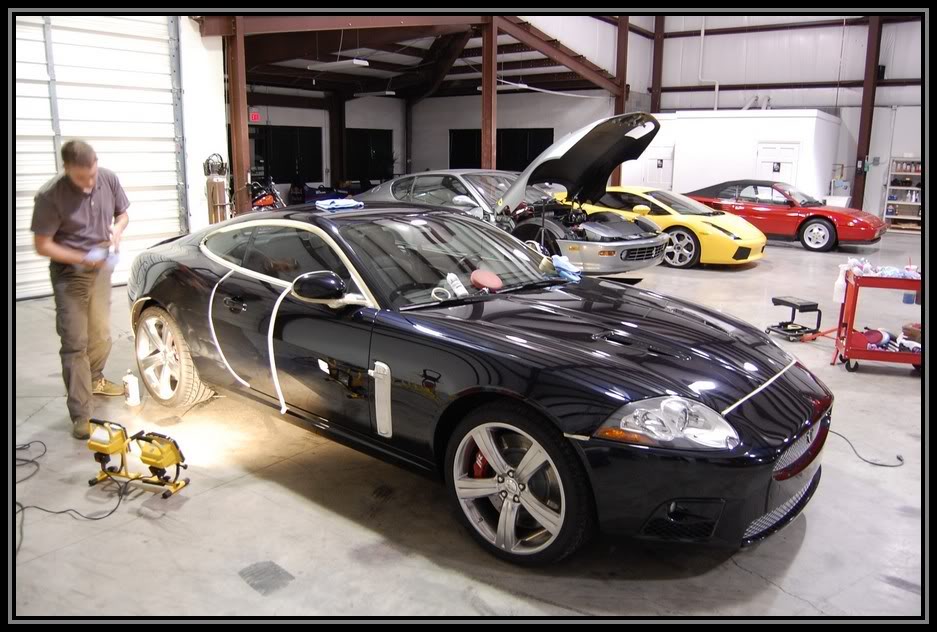
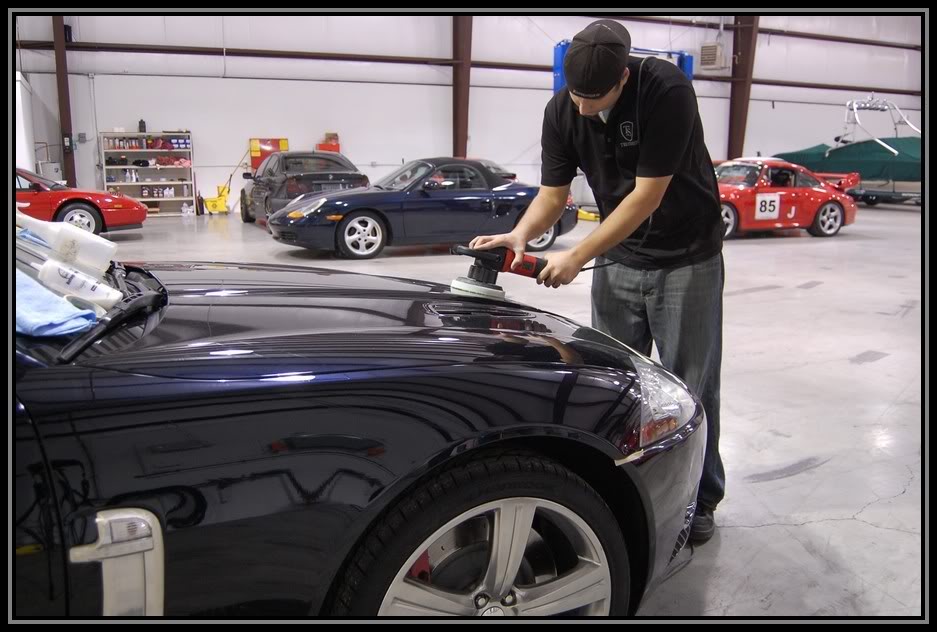
Now it is time for some paint correction!

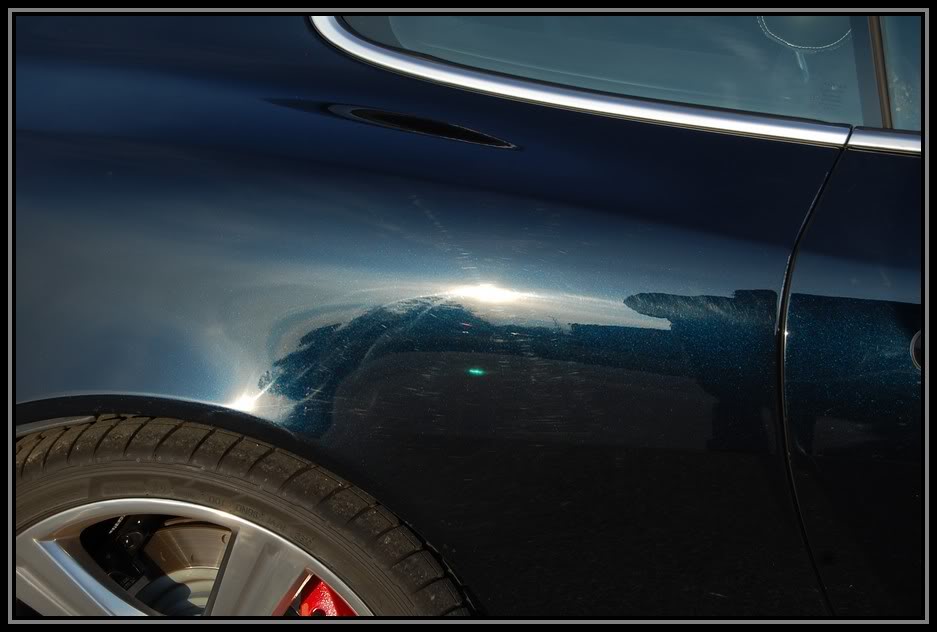
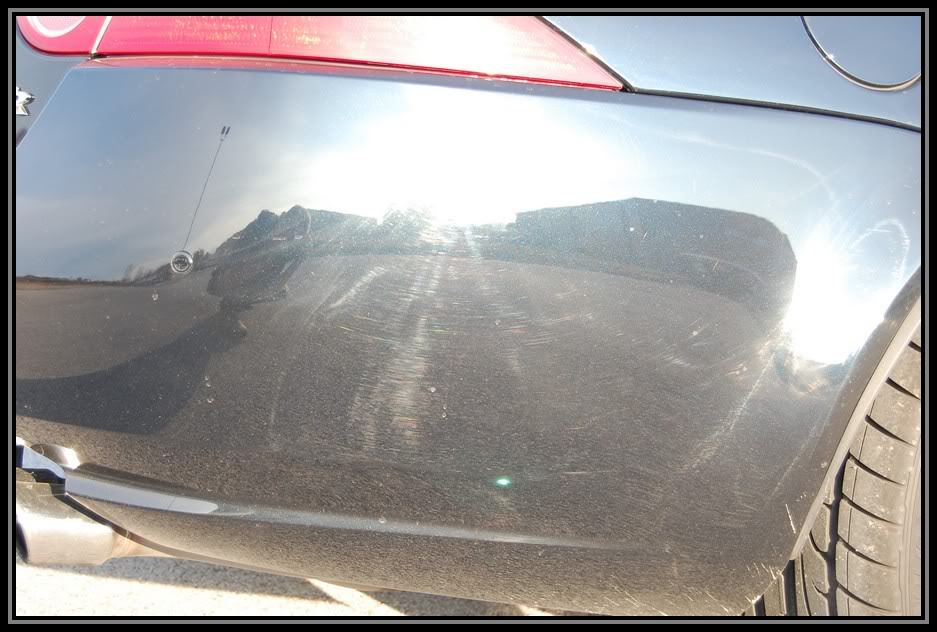
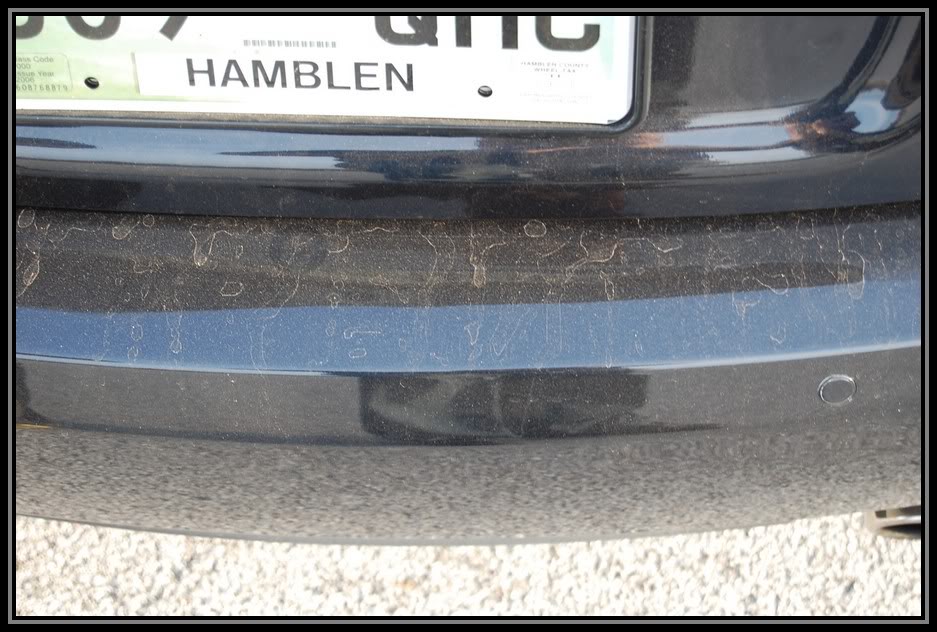
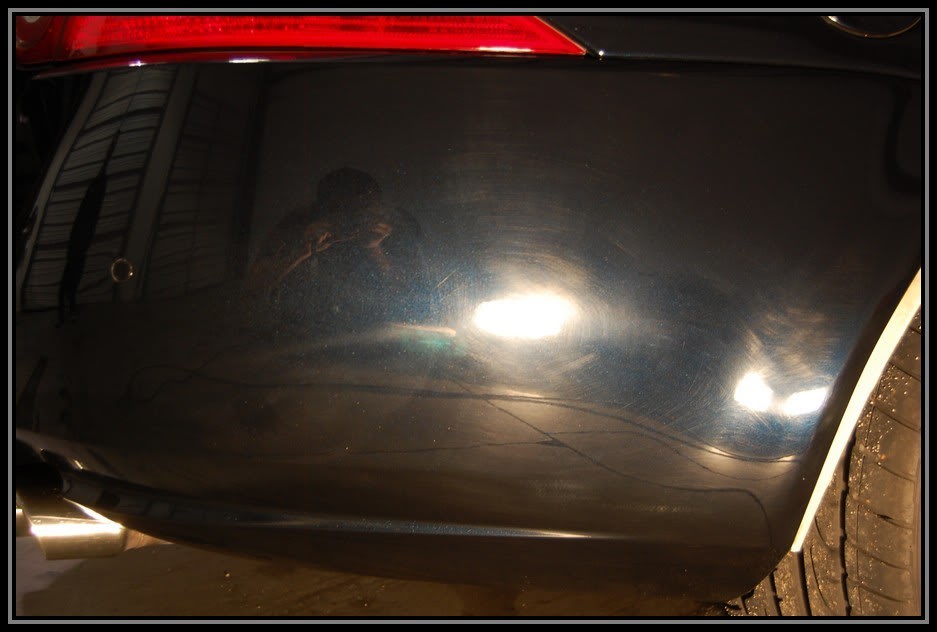
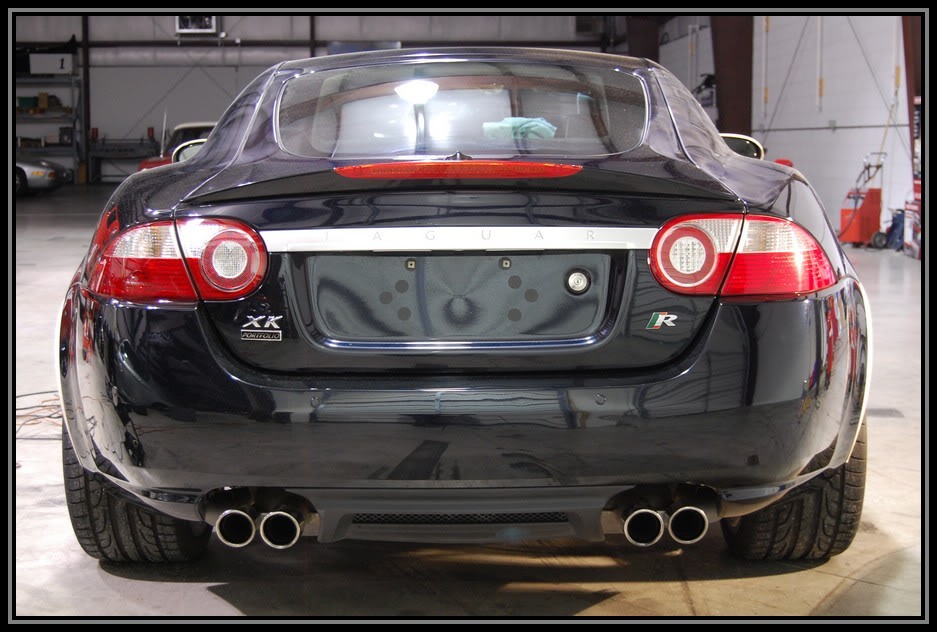
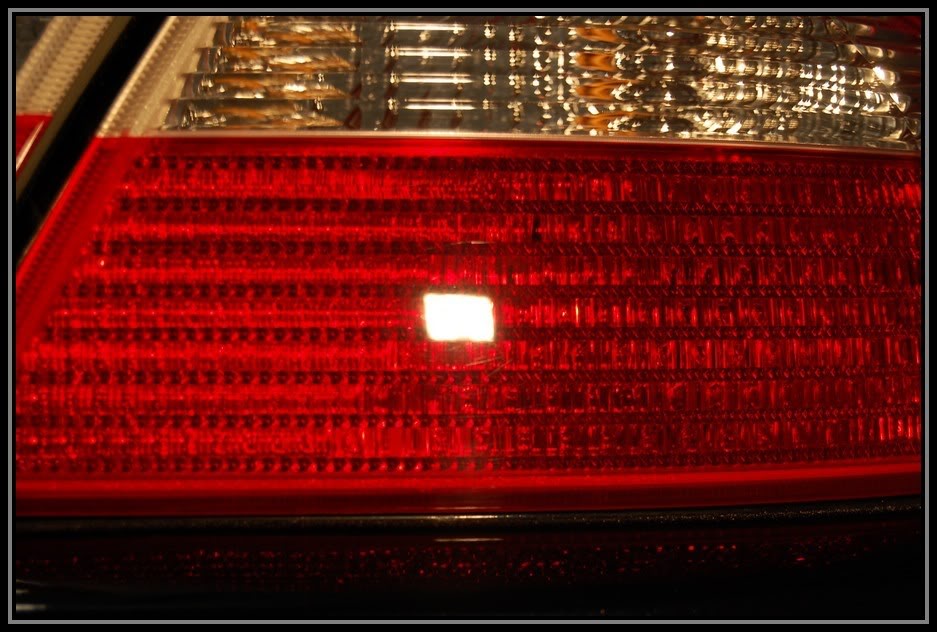
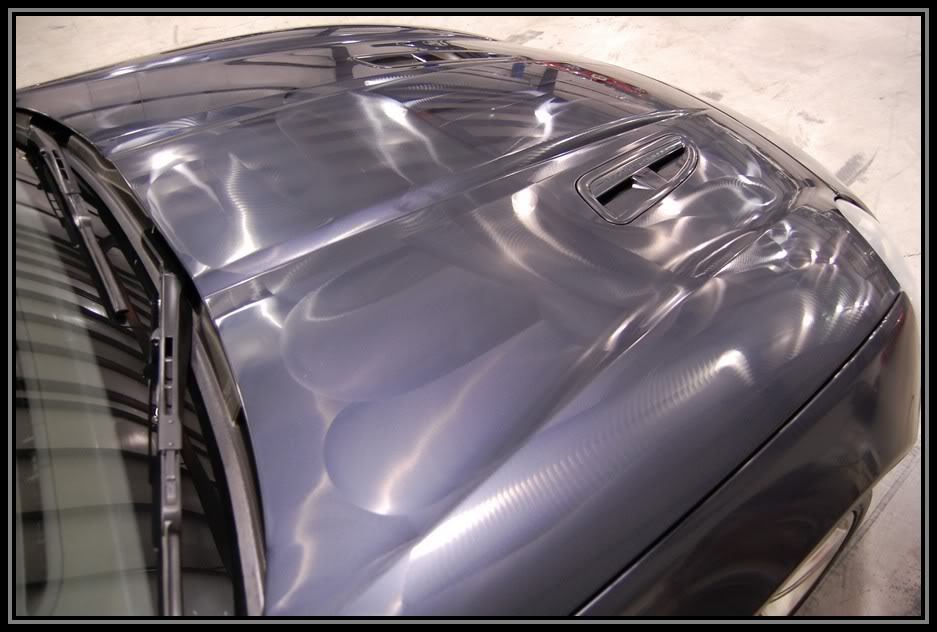
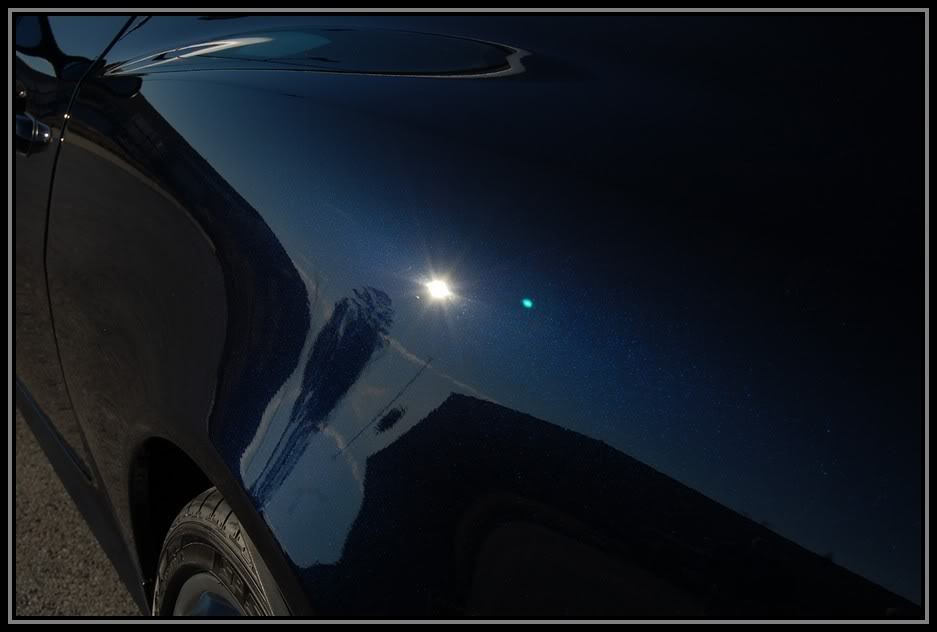
Check out what this car really looks like under the halogen lights!

Name:  XKR0138.jpg
Views: 238
Size:  53.6 KB

Name:  XKR0136.jpg
Views: 232
Size:  50.7 KB

Name:  XKR0134.jpg
Views: 228
Size:  63.7 KB

Name:  XKR0133.jpg
Views: 220
Size:  67.2 KB

Name:  XKR0127.jpg
Views: 217
Size:  58.7 KB

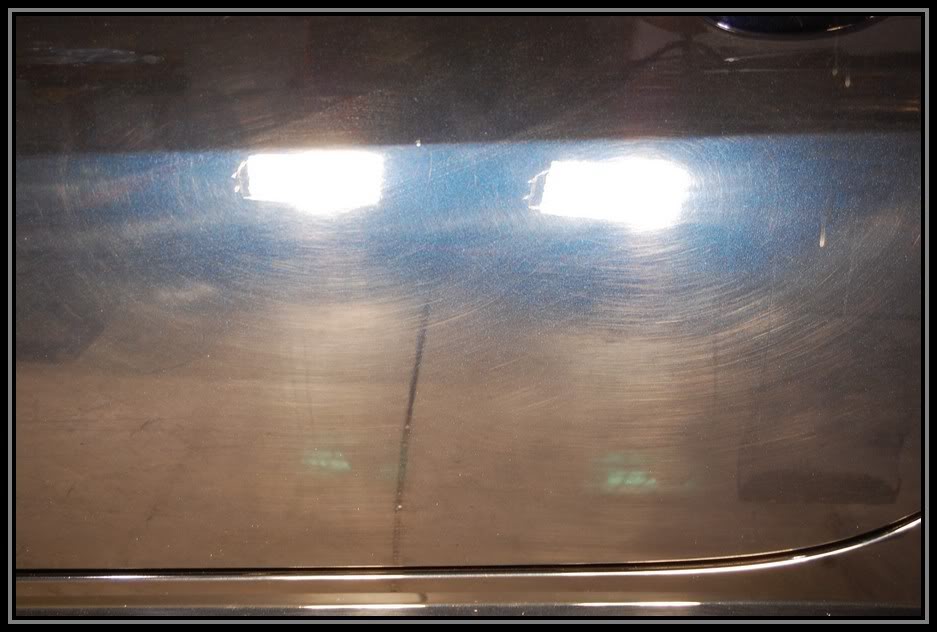
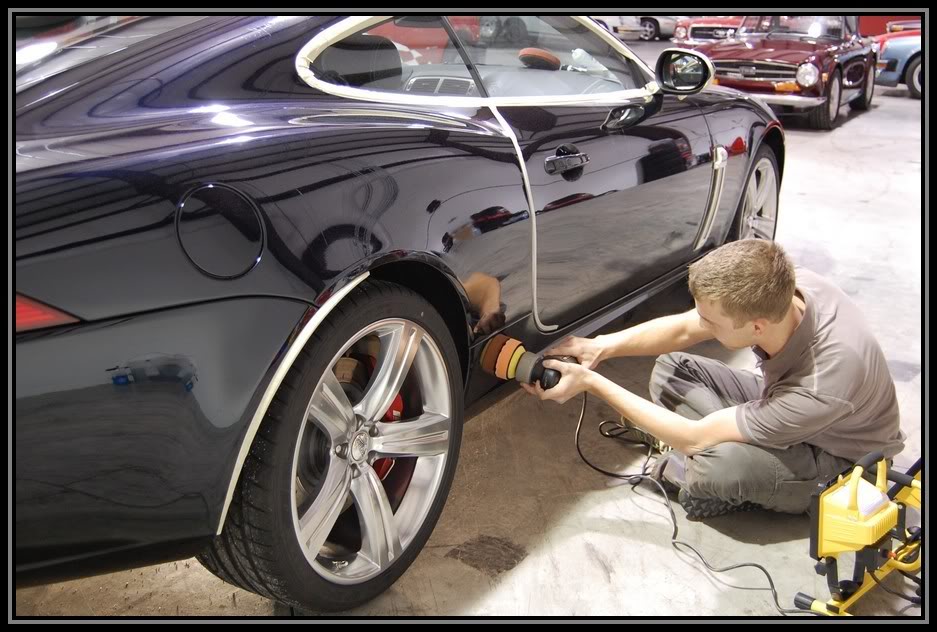
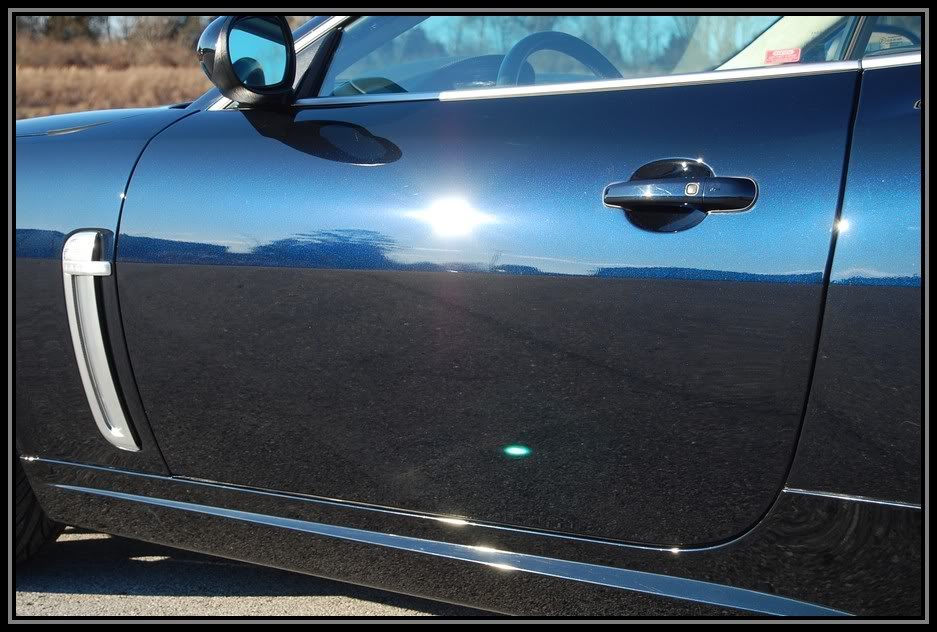
After test a few areas with different methods. the final choice for the cutting stage was non other then the Surbuff pad and M105 combo. This paint had some serious defects and needed leveled out badly!

I taped off an area for a 50/50 shot

Name:  XKR0132.jpg
Views: 226
Size:  34.8 KB

And this is what we got!

Name:  XKR0116.jpg
Views: 225
Size:  86.6 KB

BAM!..... A whole nother shade of blue!

Name:  XKR0115.jpg
Views: 227
Size:  62.1 KB

Name:  XKR0119.jpg
Views: 230
Size:  39.1 KB

Name:  XKR0117.jpg
Views: 212
Size:  67.9 KB

Name:  XKR0114.jpg
Views: 281
Size:  85.4 KB

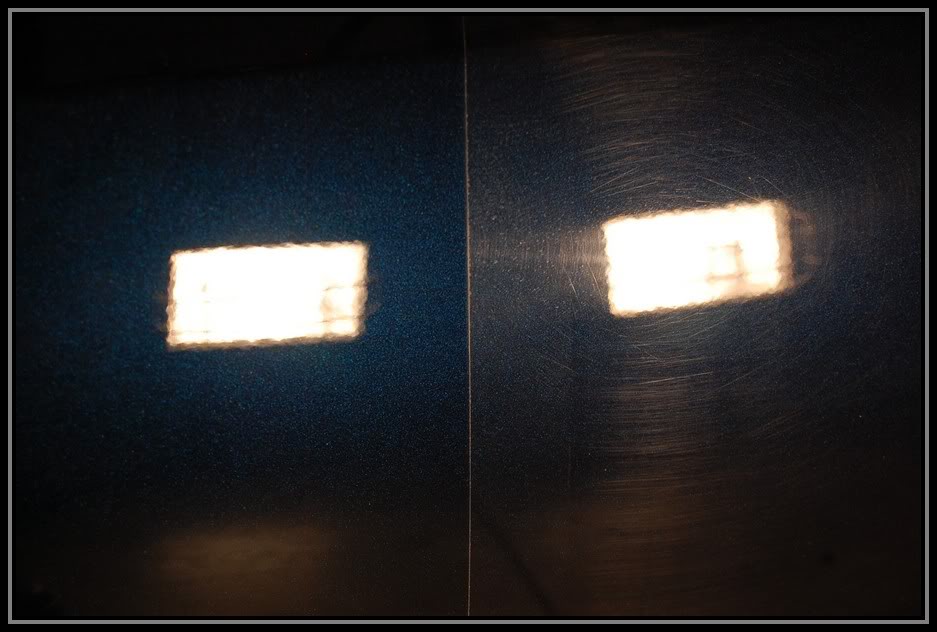
sorry got distracted......

Name:  XKR0113.jpg
Views: 216
Size:  90.8 KB

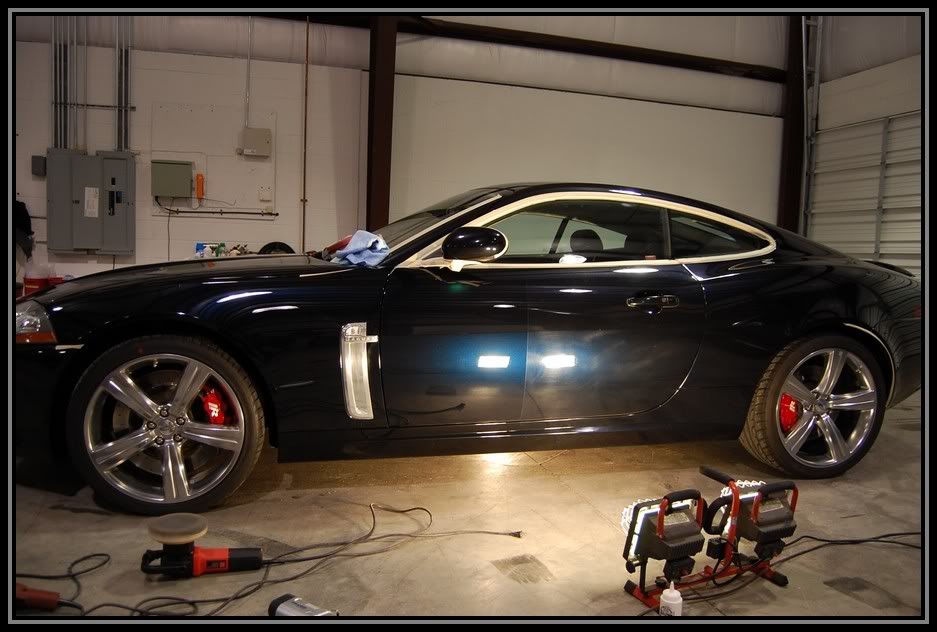
So while I was tackling the driver side, Tim was handling the passenger side.

Name:  XKR0112.jpg
Views: 222
Size:  111.7 KB

Name:  XKR0109.jpg
Views: 272
Size:  108.2 KB

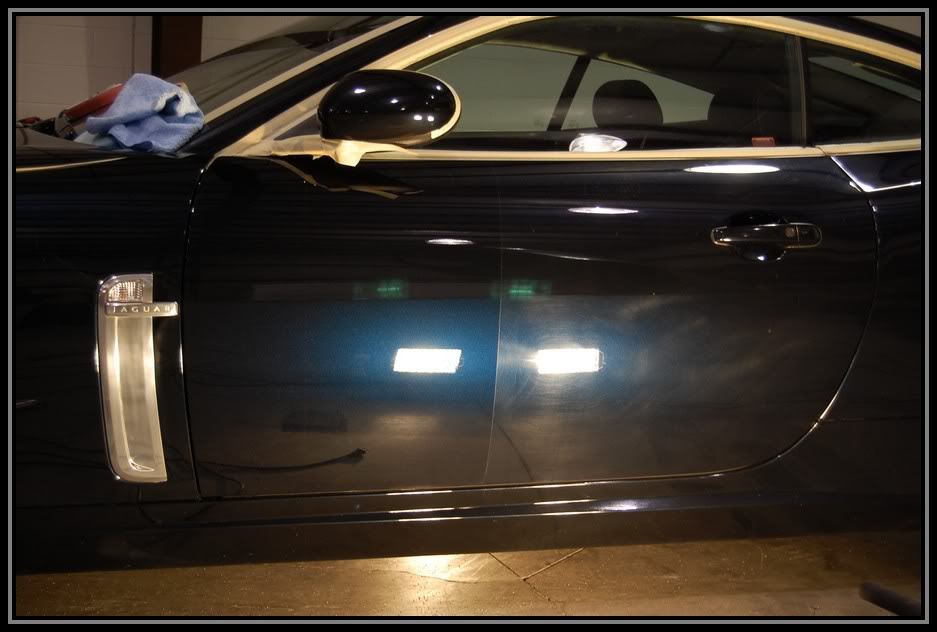
Look at that sexy bootay!

Name:  XKR0107.jpg
Views: 222
Size:  102.0 KB

Double time!

Name:  XKR0105.jpg
Views: 246
Size:  91.7 KB

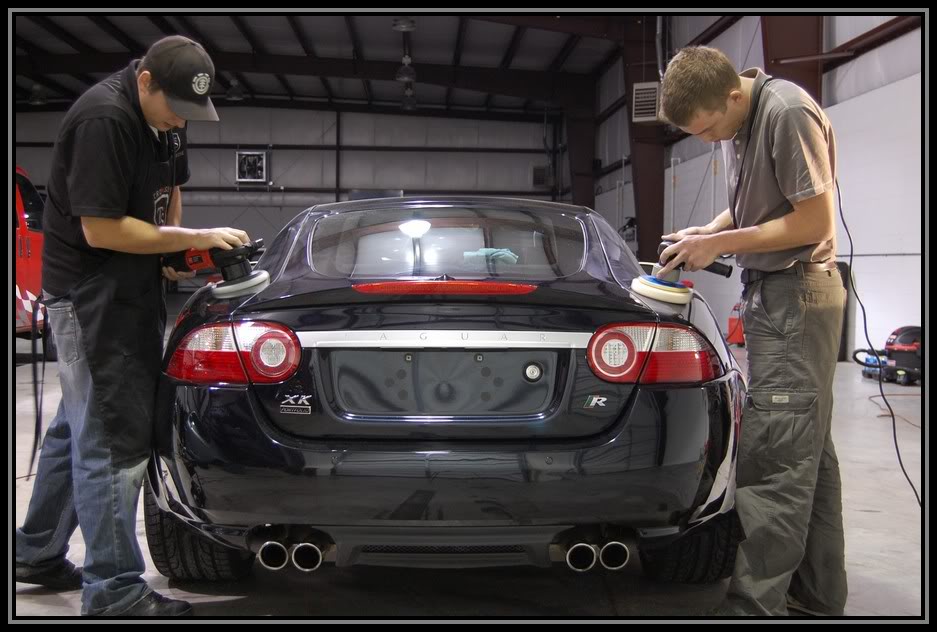
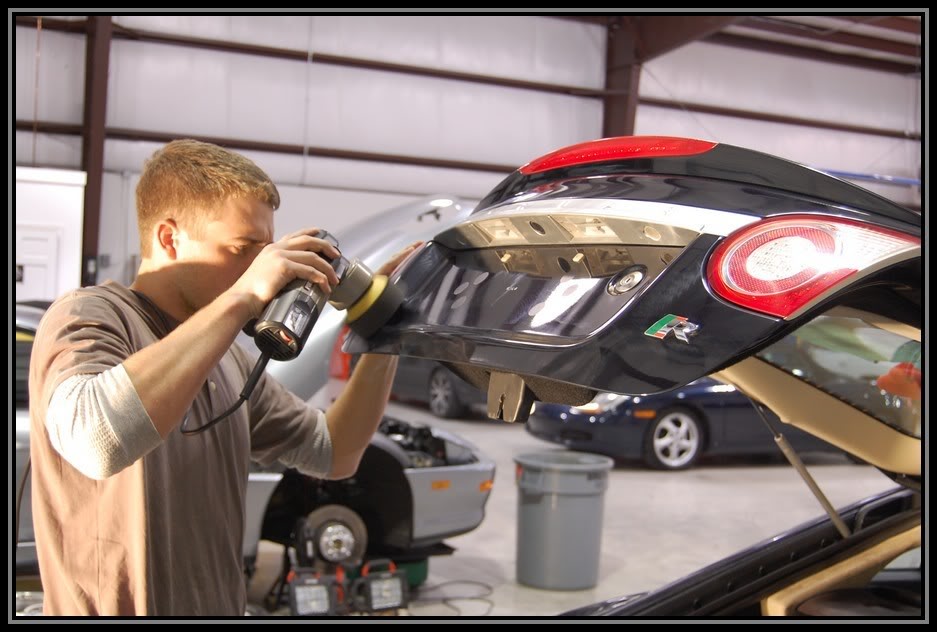
While I took on the hood, Tim took on the rear bumper and hatch.

Name:  XKR0104.jpg
Views: 210
Size:  91.1 KB

Name:  XKR0100.jpg
Views: 240
Size:  105.7 KB

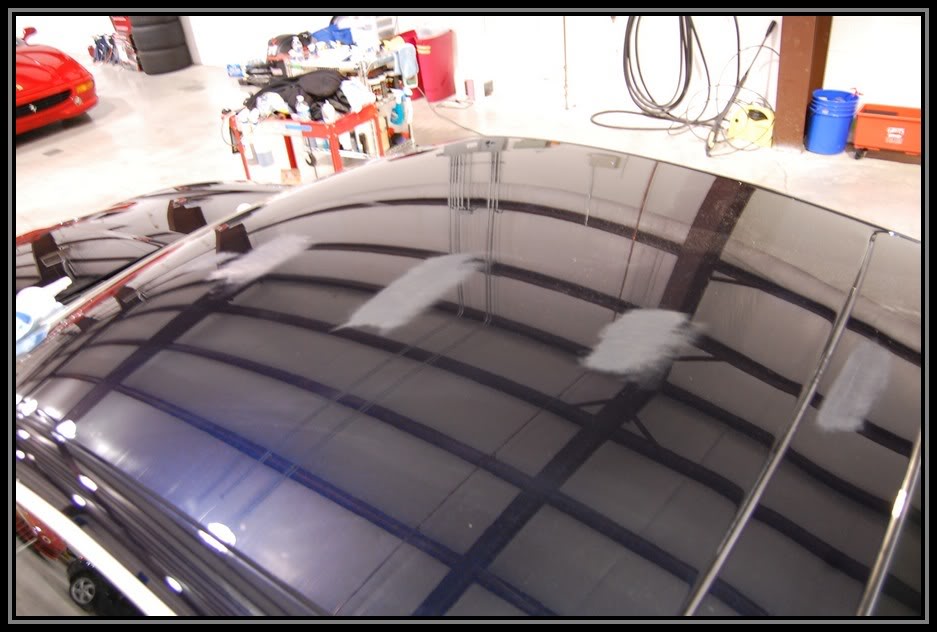
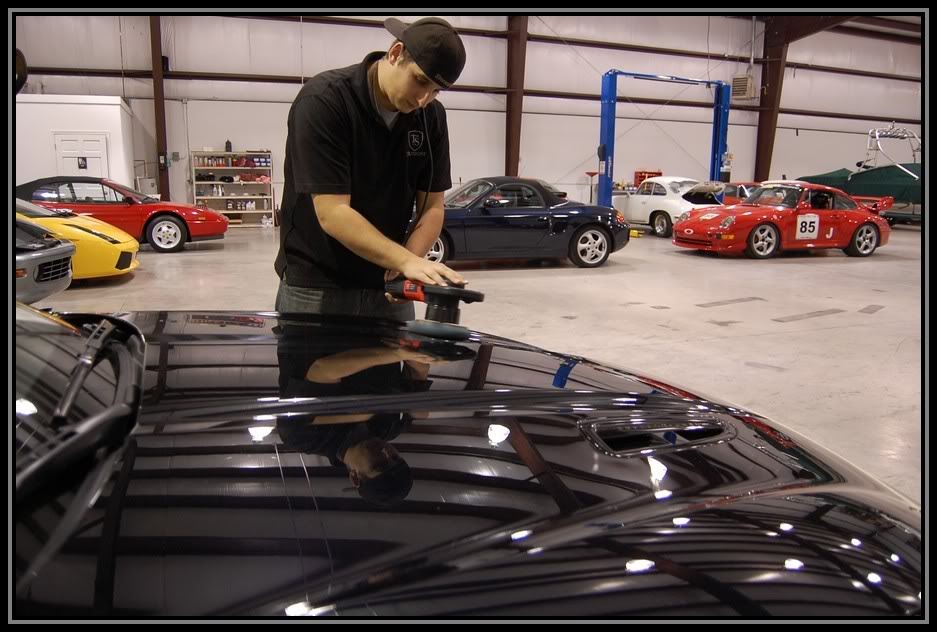
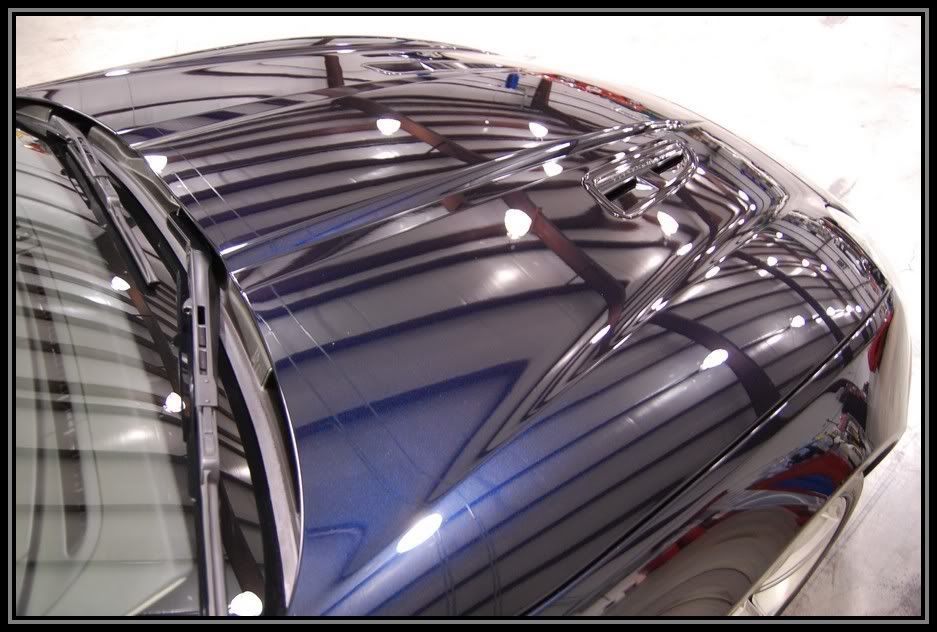
The roof had 4 deep scratches that needed wetsanded out, I used 3M 2000 grit sheets of sandpaper for this step. To remove the wetsand marks I buffed them out with Surbuff pads and M105, two passes of M105 cleared up the wetsand marks.

Name:  XKR0091.jpg
Views: 279
Size:  56.1 KB

Name:  XKR0090.jpg
Views: 214
Size:  77.6 KB

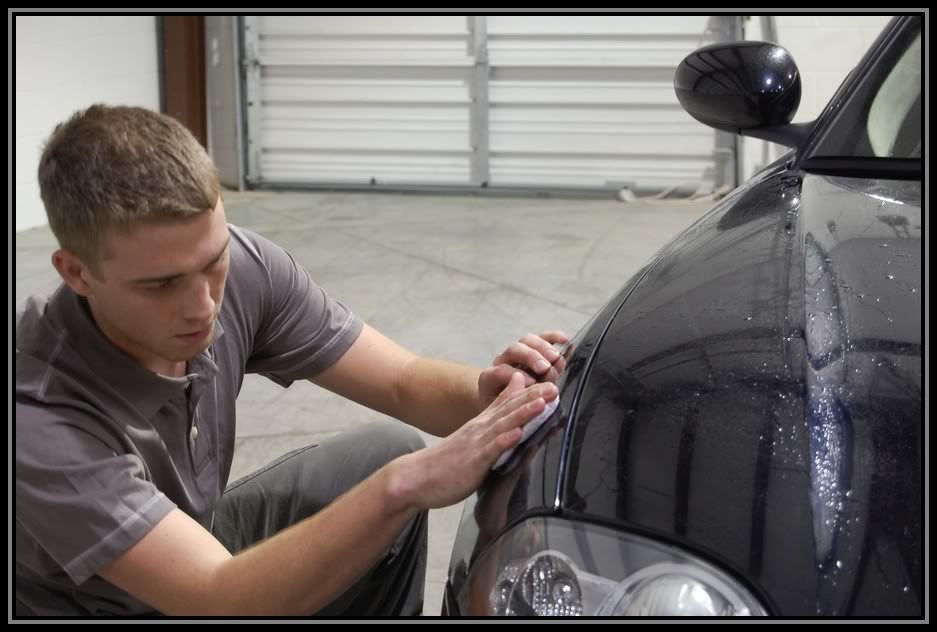
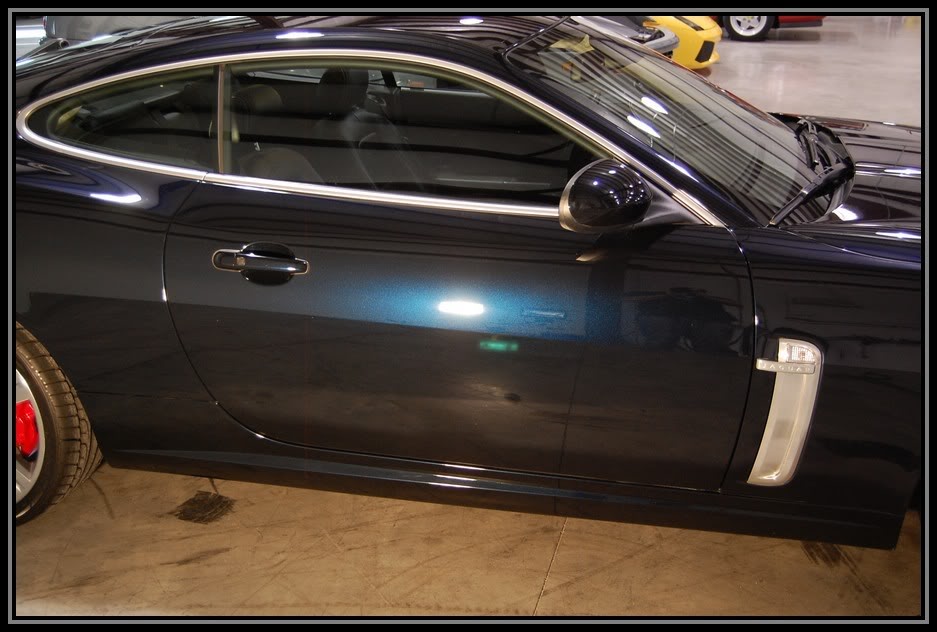
The paint was polished out using M205 and LC white pads and LC black finishing pads.

Name:  XKR0087.jpg
Views: 236
Size:  88.3 KB

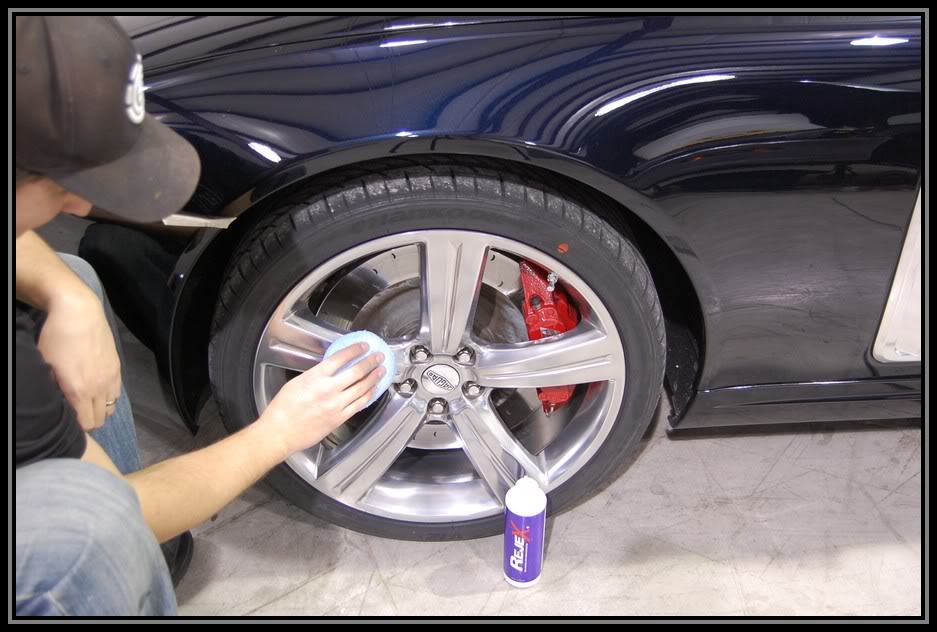
Next I sealed the wheels using some REJEX

Name:  XKR0083.jpg
Views: 248
Size:  86.6 KB

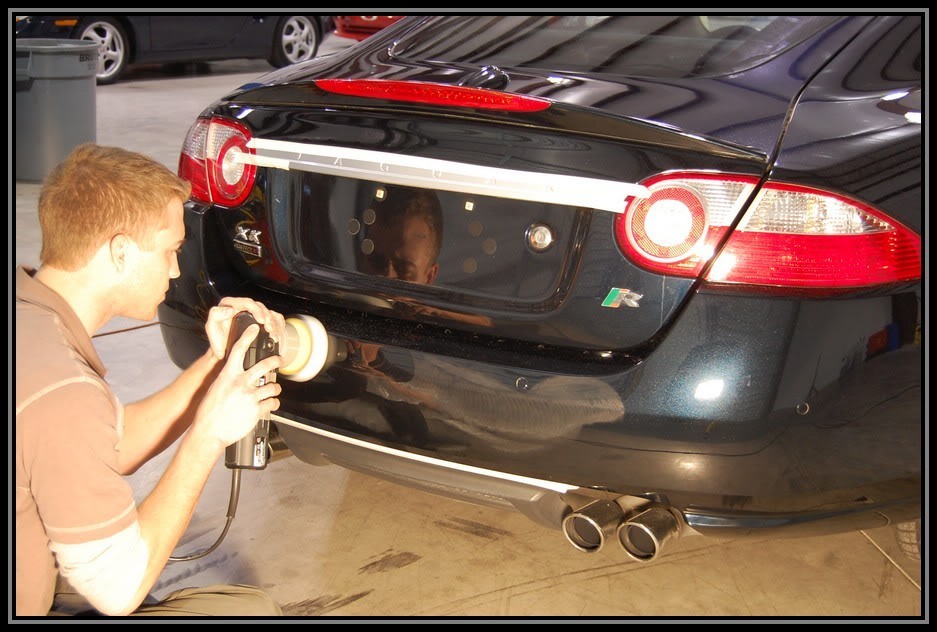
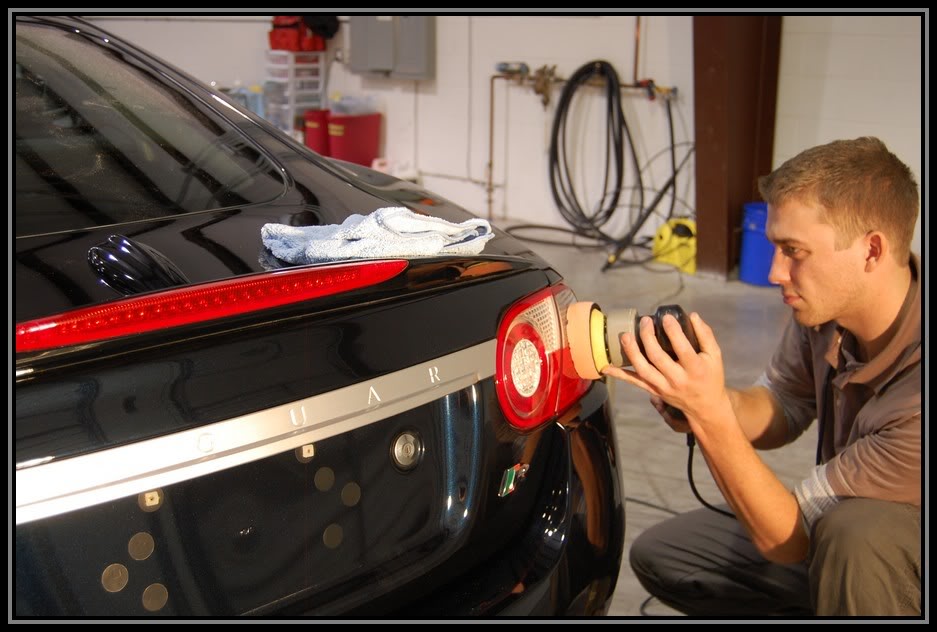
and Tim polished out the tail lights.

Name:  XKR0081.jpg
Views: 228
Size:  85.7 KB

Name:  XKR0077.jpg
Views: 236
Size:  104.5 KB

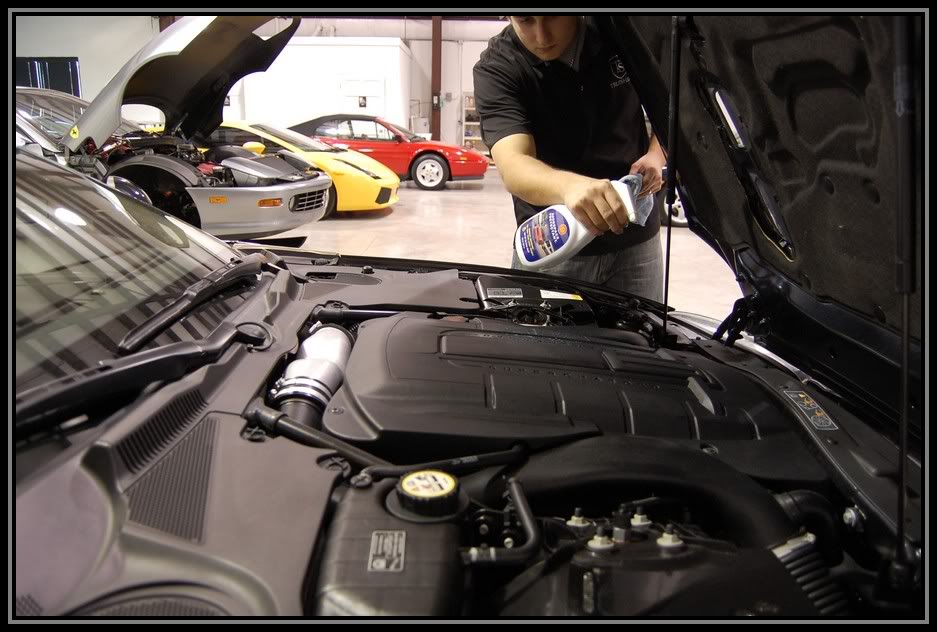
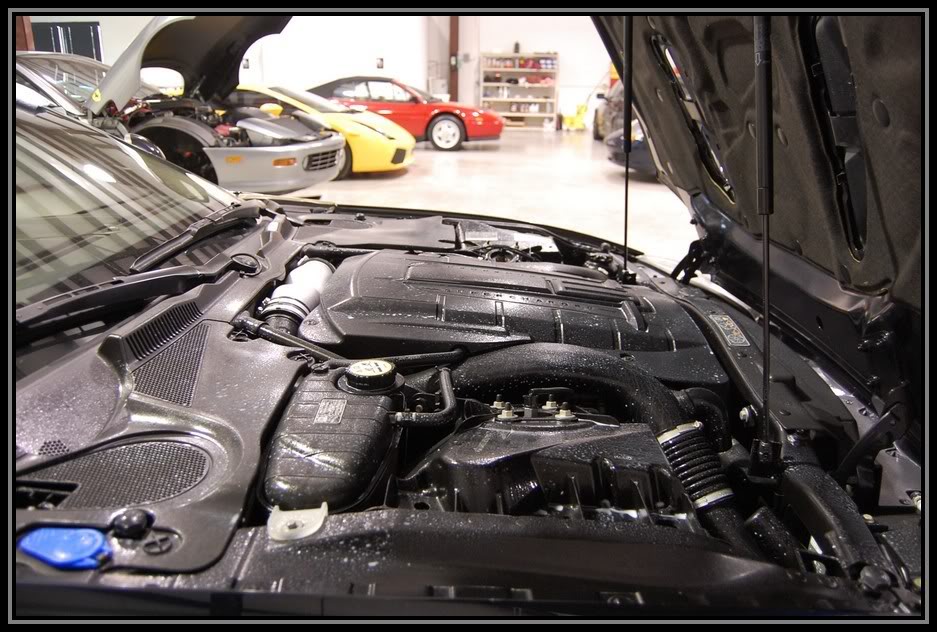
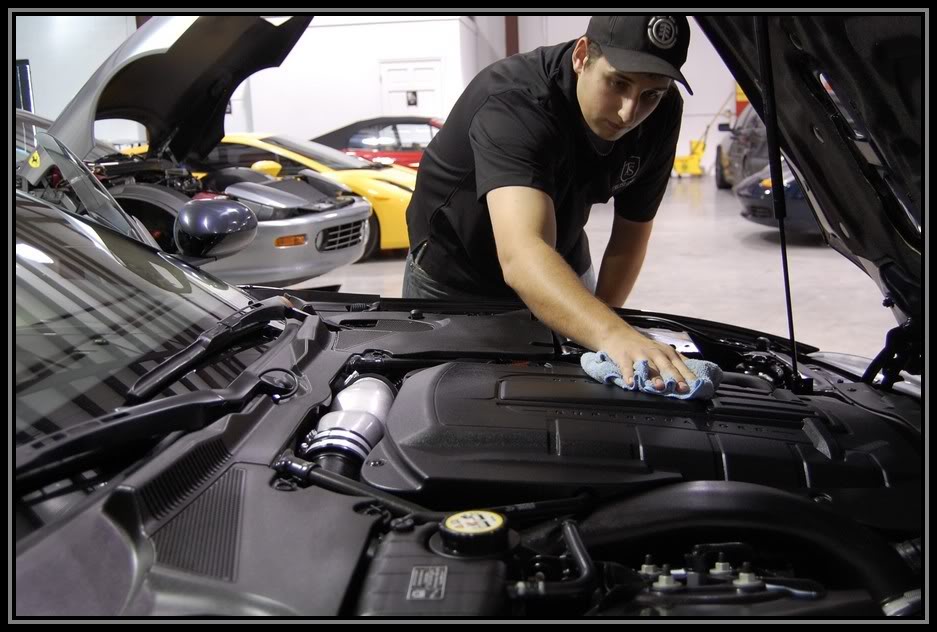
Next I sprayed down the engine bay with some 303 aerospace protectant and let it dwell for about 30 min before wiping away excess.

Name:  XKR0073.jpg
Views: 229
Size:  95.4 KB

Name:  XKR0072.jpg
Views: 280
Size:  126.2 KB

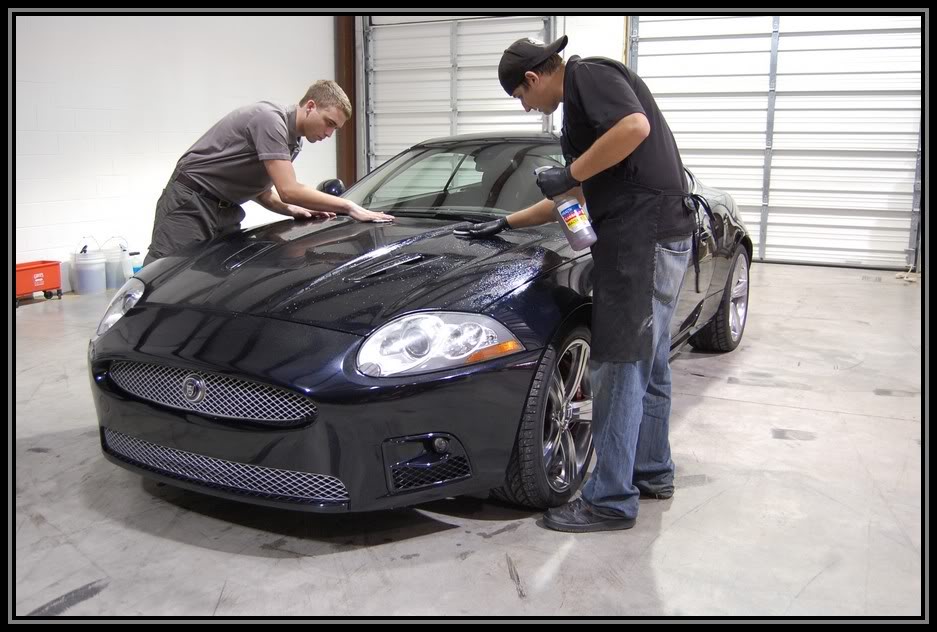
While that was Dwelling, I applied some Black Fire Wet Diamond paint sealant to the paint.

Name:  XKR0069.jpg
Views: 276
Size:  96.3 KB

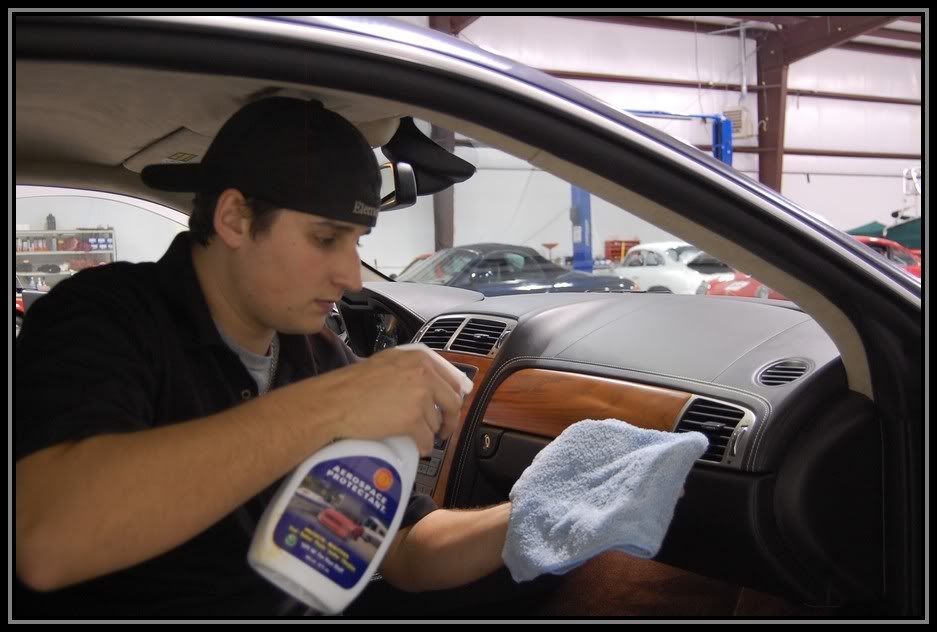
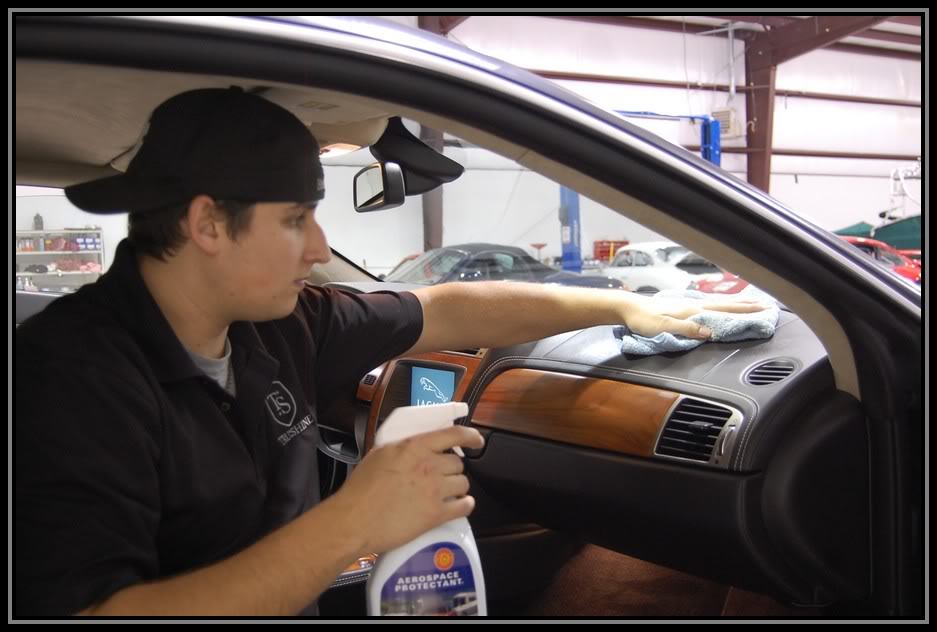
I used 303 aerospace protectant on the dash and seats and all the interior to condition and protect all the surfaces.

Name:  XKR0058.jpg
Views: 224
Size:  70.6 KB

Name:  XKR0057.jpg
Views: 237
Size:  69.2 KB

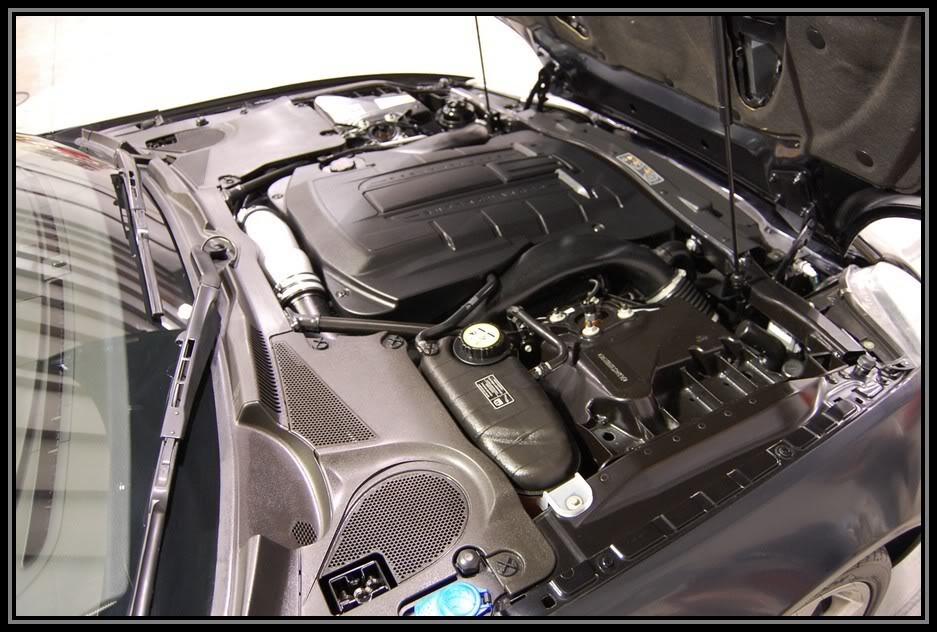
now it was time to wipe away any excess 303 in the engine bay

Name:  XKR0056.jpg
Views: 233
Size:  92.9 KB

Name:  XKR0053.jpg
Views: 331
Size:  112.4 KB

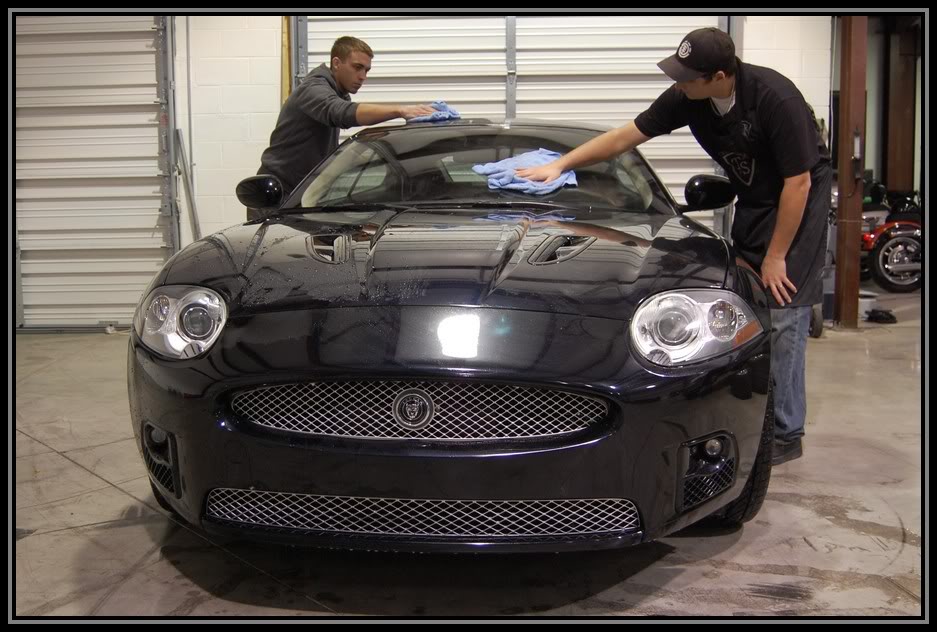
So we cleaned the windows and shined the tires and the Black Fire Wet Diamond has had time to cure, time to wipe it off!

Name:  XKR0047.jpg
Views: 252
Size:  72.5 KB

Name:  XKR0046.jpg
Views: 270
Size:  75.3 KB


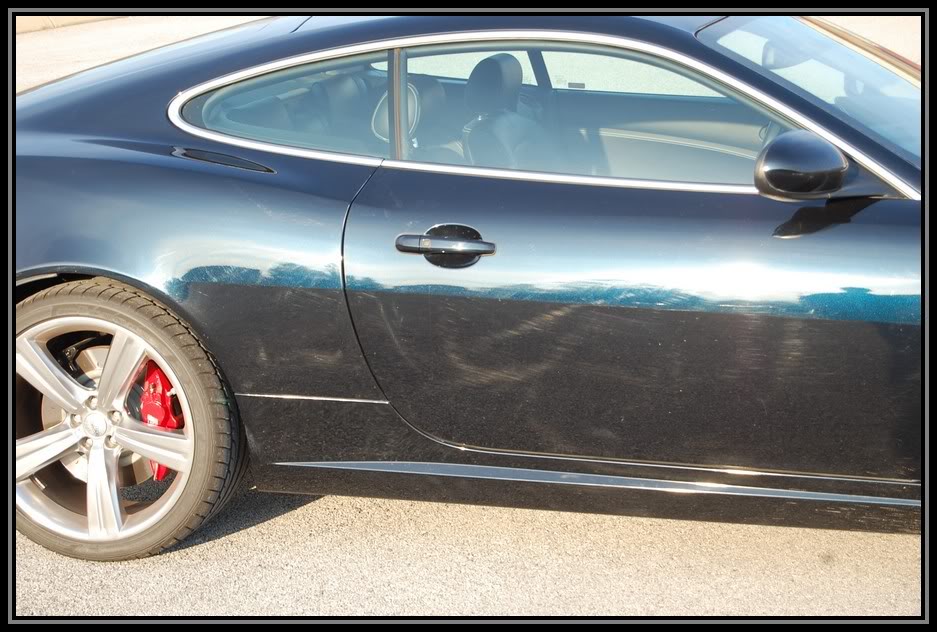
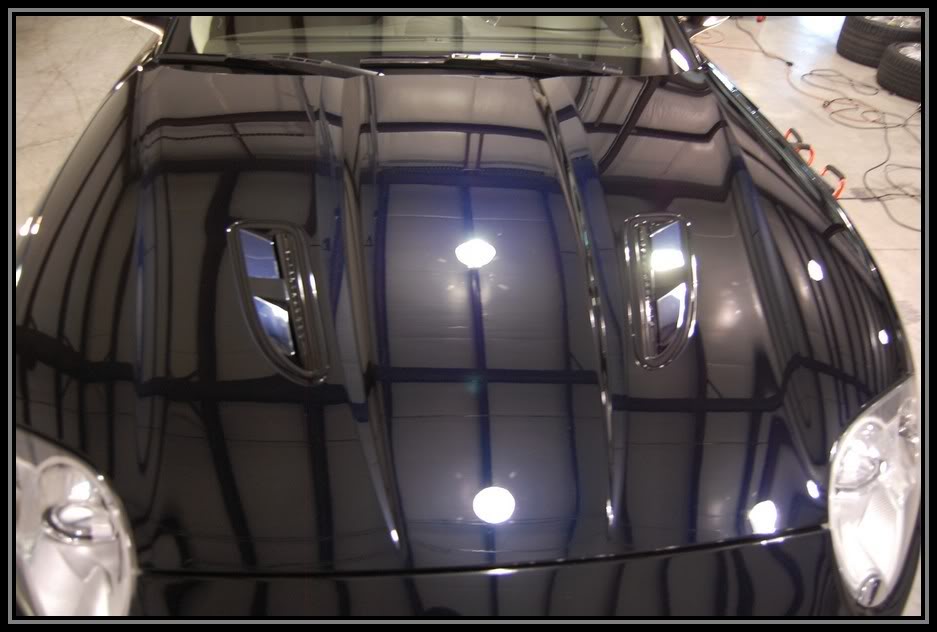
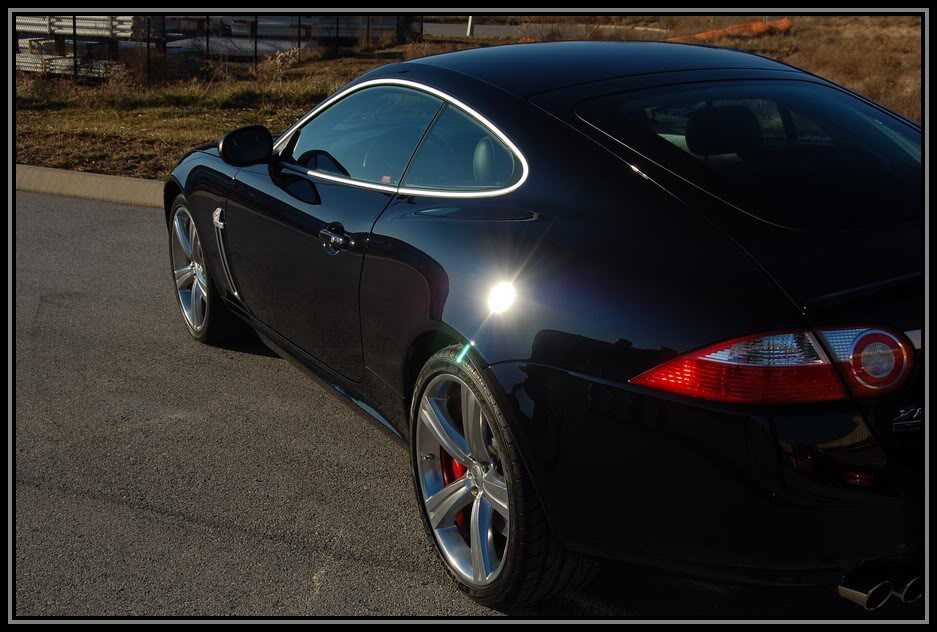
This is what we were left with.
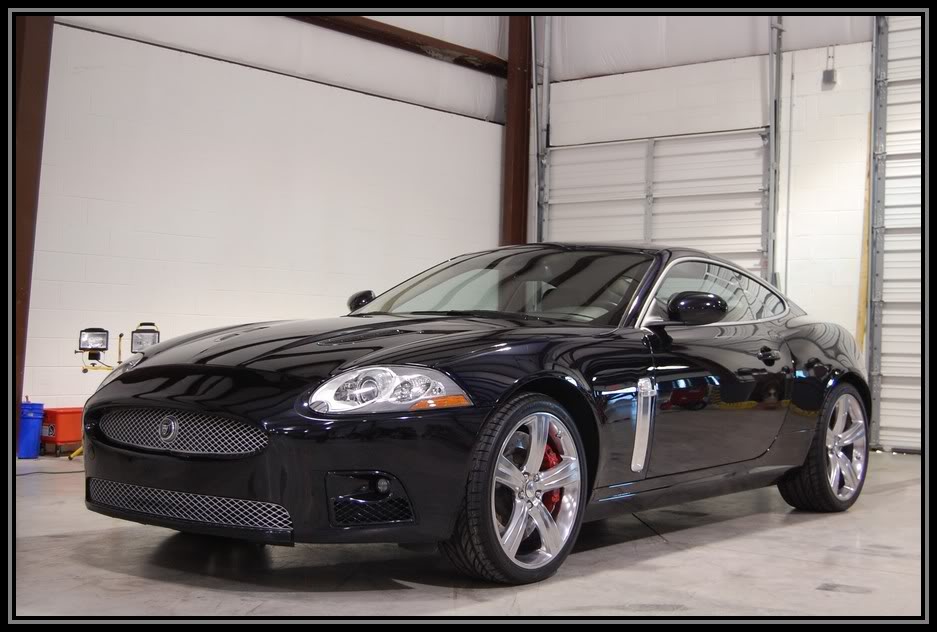
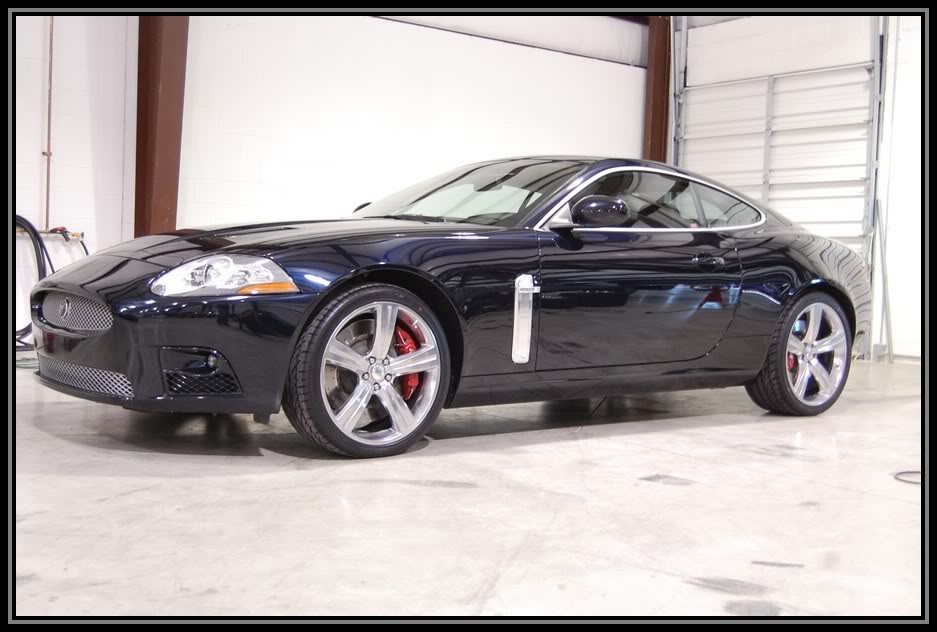
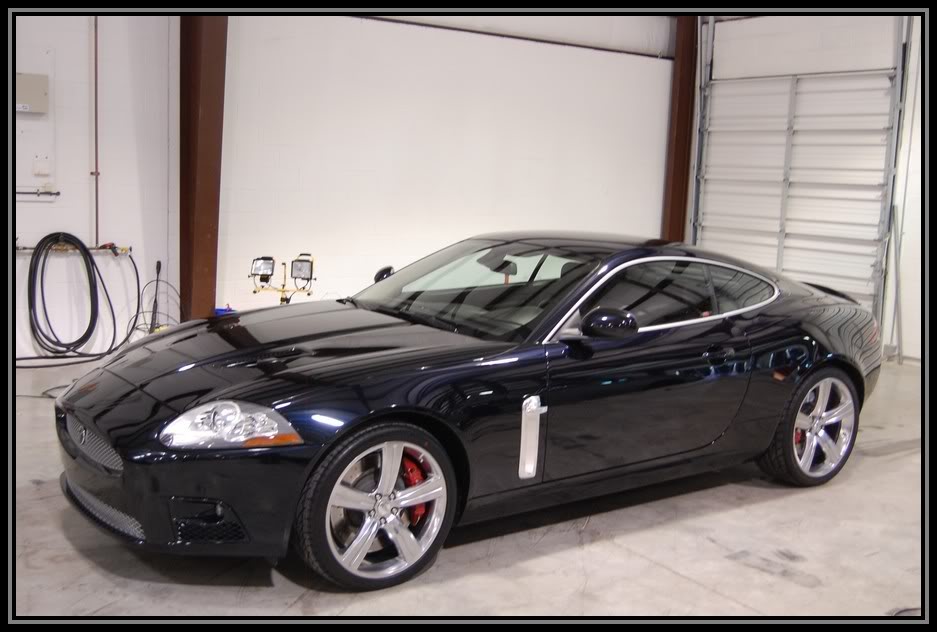
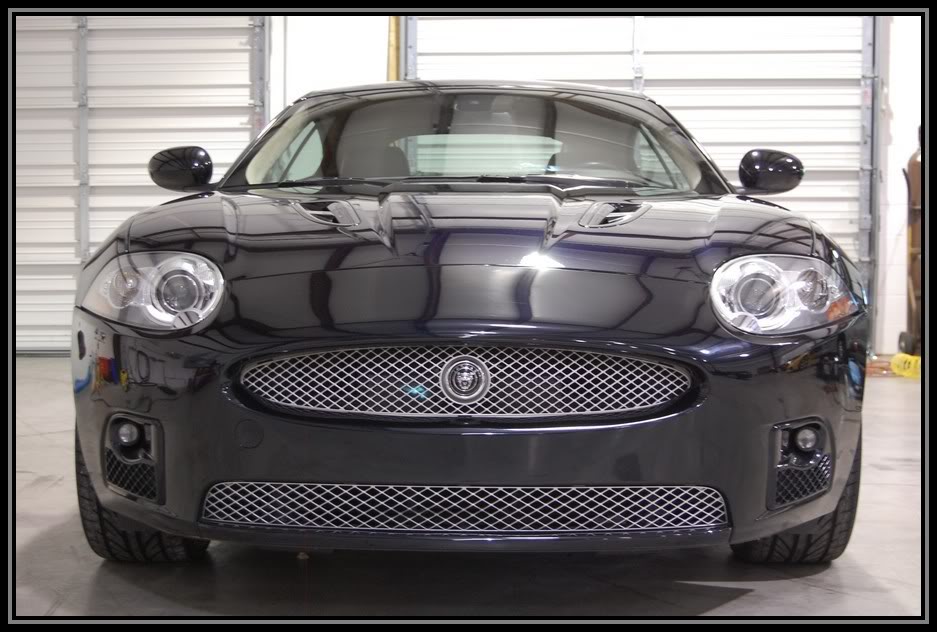
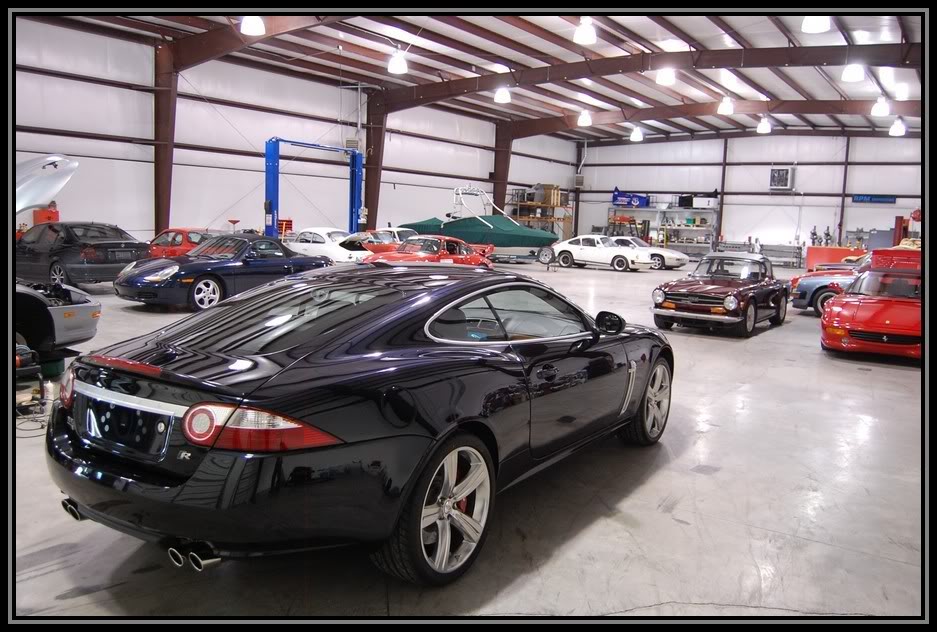
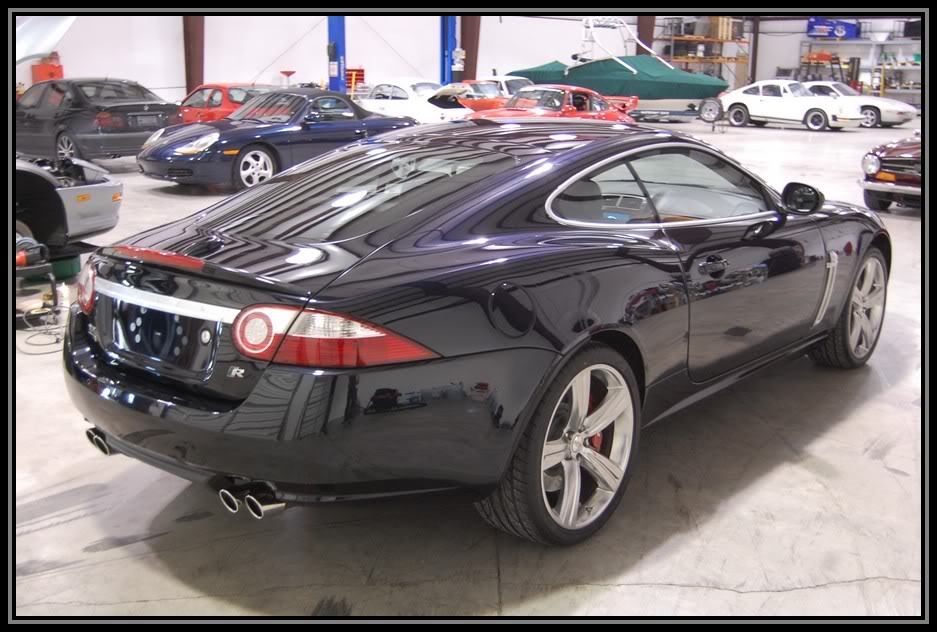
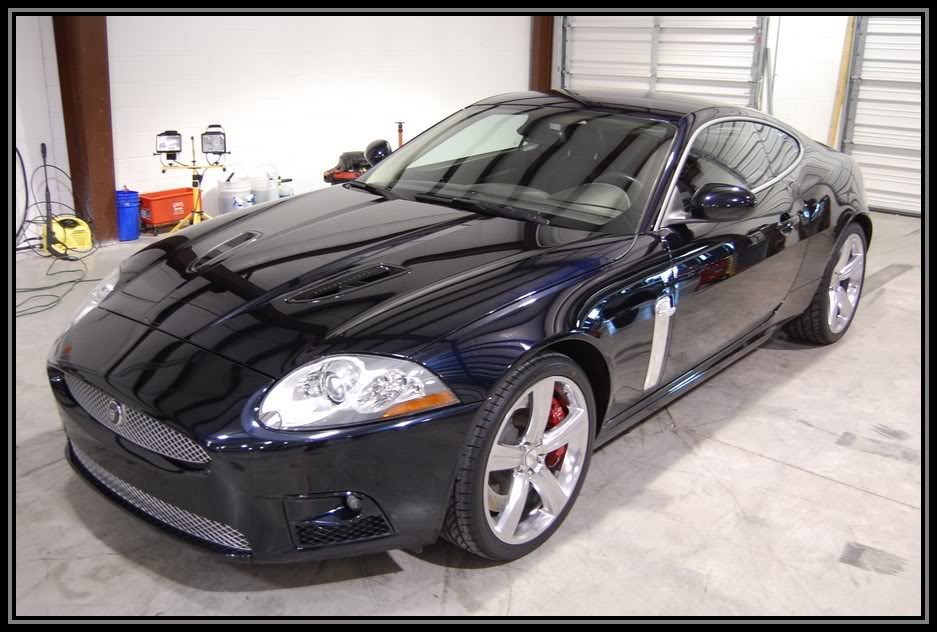
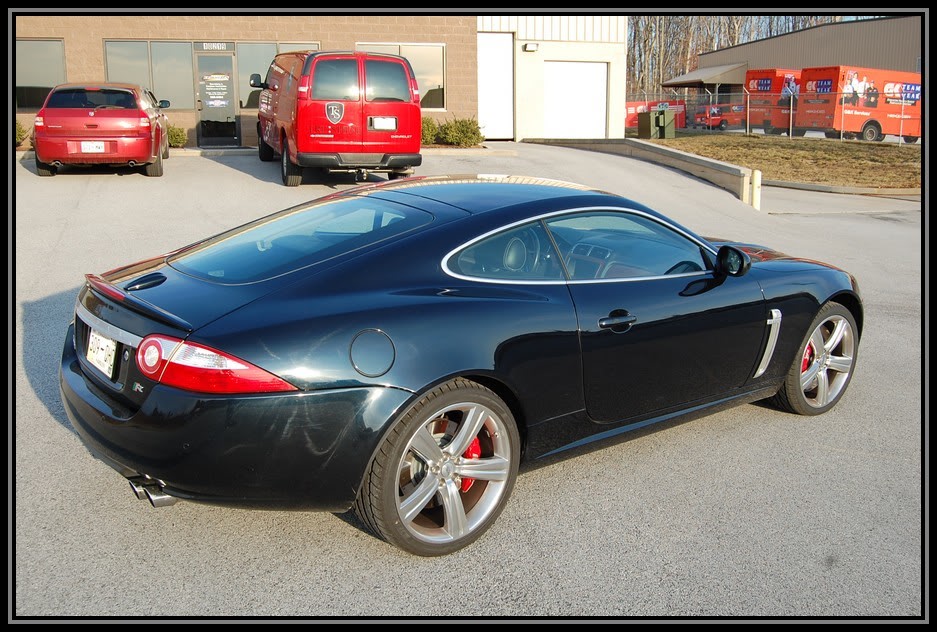
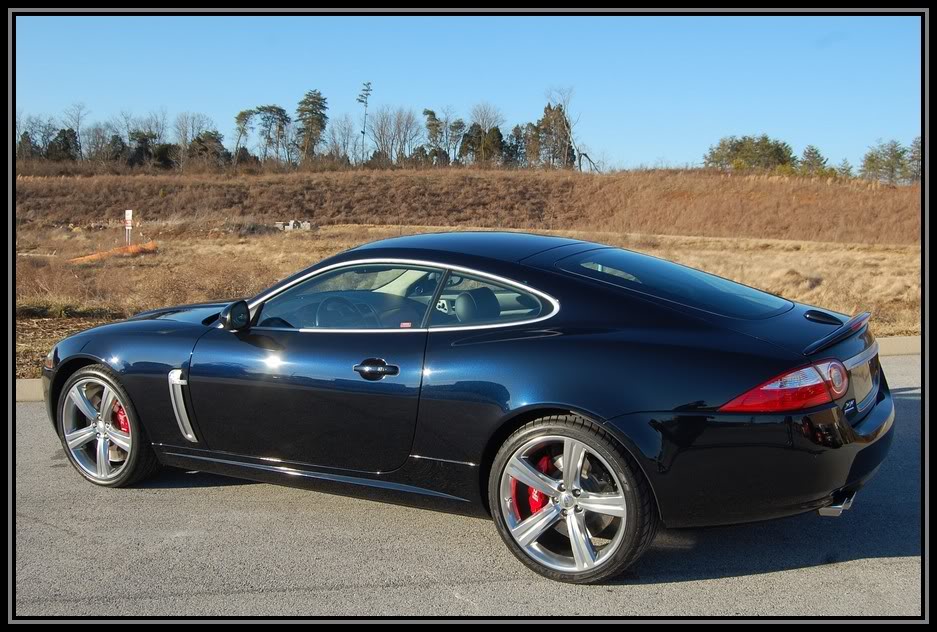
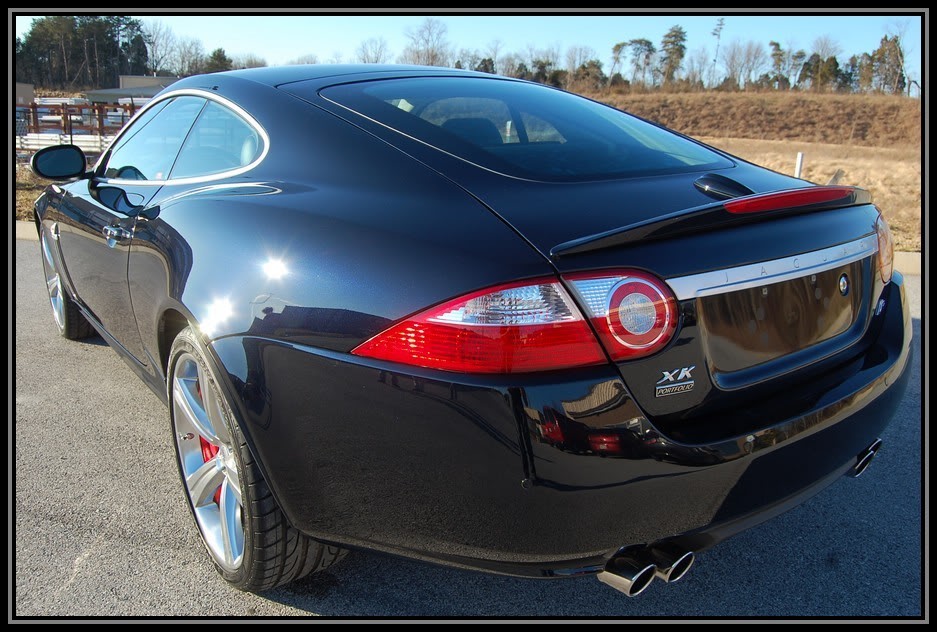
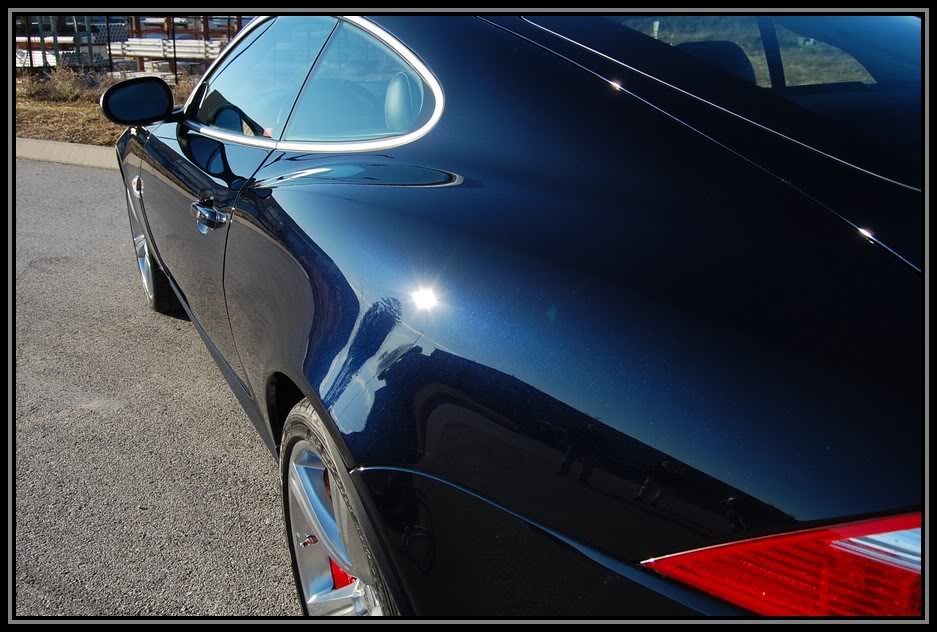
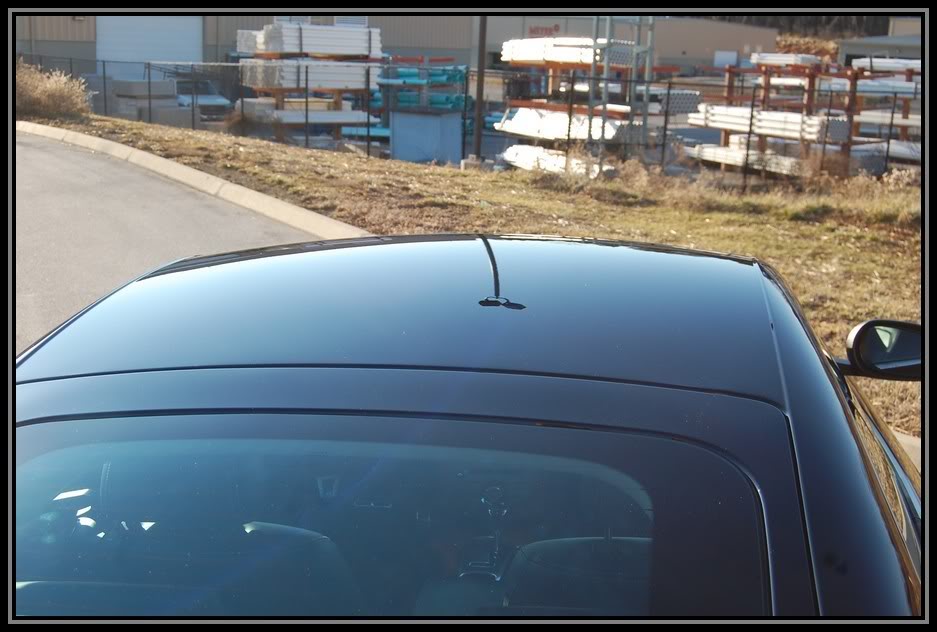
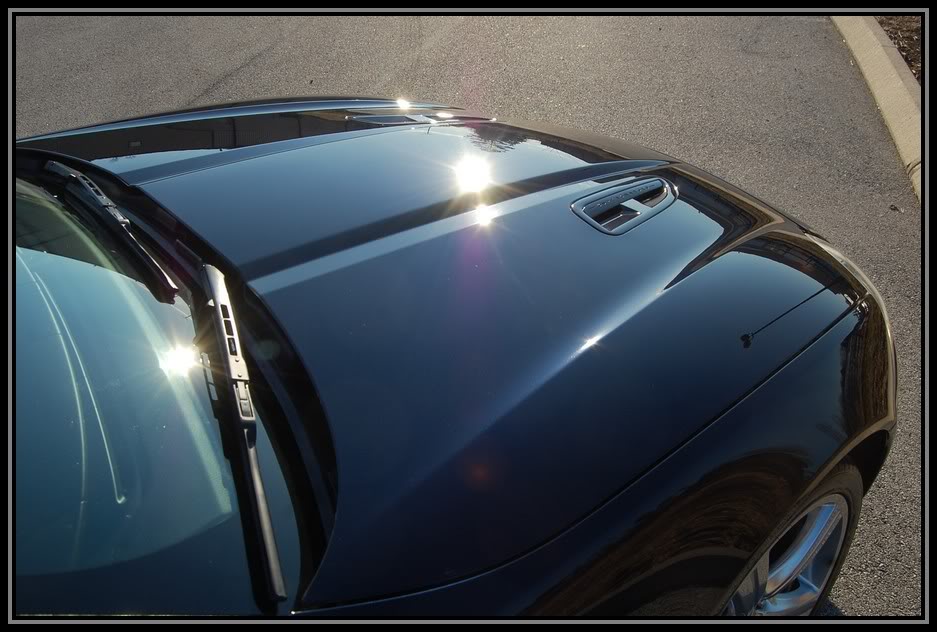


Name:  XKR0036.jpg
Views: 255
Size:  62.4 KB

Name:  XKR0032.jpg
Views: 238
Size:  83.6 KB

Name:  XKR0030.jpg
Views: 265
Size:  75.9 KB

Name:  XKR0028.jpg
Views: 231
Size:  73.4 KB

Name:  XKR0025.jpg
Views: 263
Size:  96.4 KB

Name:  XKR0024.jpg
Views: 254
Size:  120.1 KB

Name:  XKR0023.jpg
Views: 278
Size:  104.3 KB

Name:  XKR0021.jpg
Views: 237
Size:  95.6 KB

Name:  XKR0034.jpg
Views: 214
Size:  51.3 KB

Name:  XKR0039.jpg
Views: 199
Size:  85.7 KB

Name:  XKR0043.jpg
Views: 208
Size:  56.7 KB

Outside shots

Name:  XKR0015.jpg
Views: 216
Size:  97.7 KB

Name:  XKR0014.jpg
Views: 290
Size:  128.9 KB

Name:  XKR0012.jpg
Views: 211
Size:  136.8 KB

Name:  XKR0011.jpg
Views: 194
Size:  41.3 KB

Name:  XKR0010.jpg
Views: 213
Size:  108.1 KB

Name:  XKR0008.jpg
Views: 176
Size:  78.5 KB

Name:  XKR0003.jpg
Views: 192
Size:  92.1 KB

Name:  XKR0002.jpg
Views: 185
Size:  104.9 KB

Thanks for viewing, Have a blessed day!

 
Related Topics
Thread
Thread Starter
Forum
Replies
Last Post
jdmjunkie561
2nd Generation GE8 Specific Fit Photos & Videos Sub-Forum
23
08-04-2011 02:40 AM
WHTAFIT
Fit Photos & Videos
38
10-16-2009 03:04 PM
c_mack9
Fit Photos & Videos
83
08-11-2008 07:06 PM
gd3kamiwanaB
Fit Photos & Videos
11
05-19-2008 11:30 PM
Fitting
Car Shows, Events, and Racing
0
04-20-2008 07:56 PM


Quick Reply: Awesome Car, Awesome Shop, Awesome Detail! 08 Jaguar XKR Portfolio


All times are GMT -4. The time now is 10:00 AM.