Another Door Fabric DIY


Another Door Fabric DIY
I saw the one that Kirinzon posted a while back, but he didn't have any pics with his and it's in the middle of the thread, so here's one for the future "searchers". 
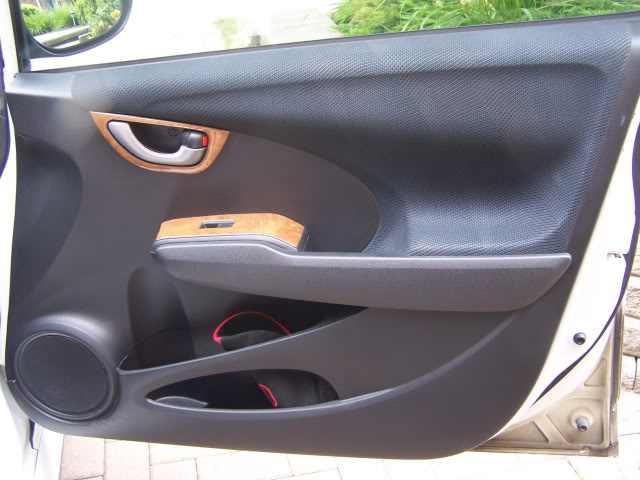
So, I wasn't a big fan of the blue stripes in the OEM fabric on our Fits. Not real sure why, I'm just not a fan. Anyhow, I know there are a couple different DIY's on here about replacing the fabric on our door panels, but it seems like there's always little things left out or the pictures are down, or something happens. So, here it is again, hopefully with just a little bit added to it.
I, nor FitFreak, or anyone else for that matter, are responsible for what you do to your car. (my lawyer made me say that)
I always like to start off with the project list. That way you don't have to keep scrolling through to find out what all I used.
-Your door panels
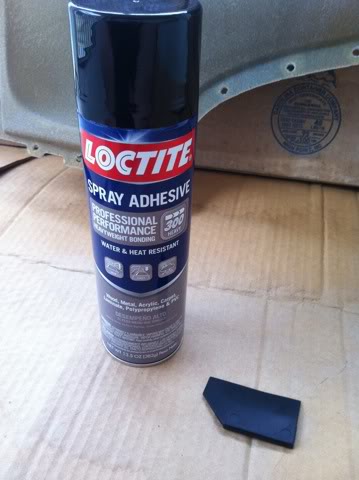
-LocTite 300 (1 can will probably do it, you can get it in the paint section at Lowe's with the gorilla glue)
-Philips Screwdriver
-Flathead Screwdriver
-Dremel with a cutoff wheel
-New Fabric (I got mine from HollywoodLightsLA on eBay, he has kits for a ton of cars, now including the GE Fit!! It comes in Red, Blue, or my choice�Black and look like the sparco fabric)
-Scotchguard (optional)
-Xacto knife
- 8x1/2 metal screws (about 30)
- #10 flat washers (get the 100 count box)
Step 1: Panel Removal
If you don't know how to remove your door panels, it's pretty easy. Pop off the cover on the armrest. There's a philips head screw in there, undo it. While you're there, unplug the power window switch. Where your handle is to open the door, there's another philips head screw. Remove that one. Now slide the door handle forward and it will release. Now pull around the edges of the door panel and you'll hear all the "pops" from the plastic holders. Slide the door handle through it's opening and tada!
Step 2: Remove the window seal.
Maybe seal isn't the right word, but there's the piece that feels like felt that rests against your window to keep anything from getting down in your panel. There are 6 little bent clips holding it on. Take your flathead, straighten them out, and it comes right off. Nice and Easy!
Step 3: Removing the fabric section.
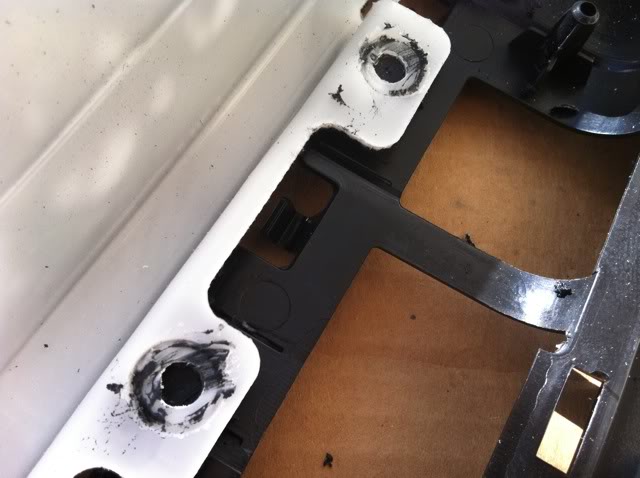
This is honestly the worst part. If you look on the back of your panel you'll see a bunch of plastic rivets holding the fabric section to the rest of the door. They're all those black circles that you see on the white. Take your dermal and cut all of those off without taking off any of the white. This is what it'll look like when it's done:
This takes forever, I'm not even gonna try to sugarcoat it. There's also one philips head screw (not sure why) towards the center of the door panel:
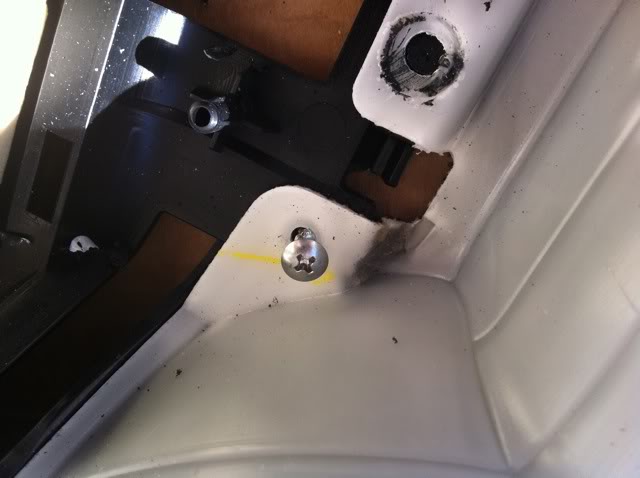
Remove it.
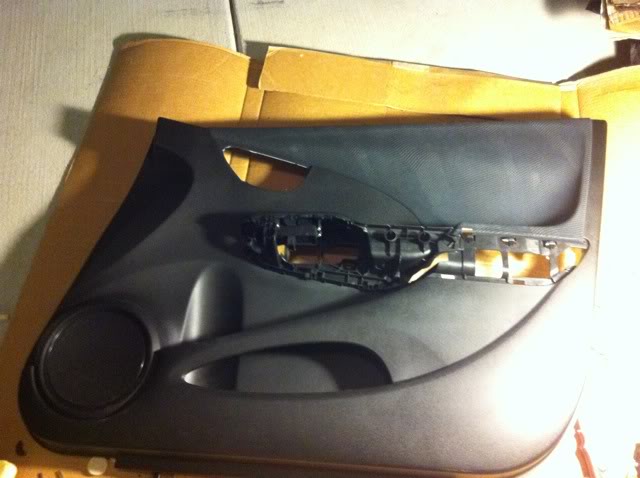
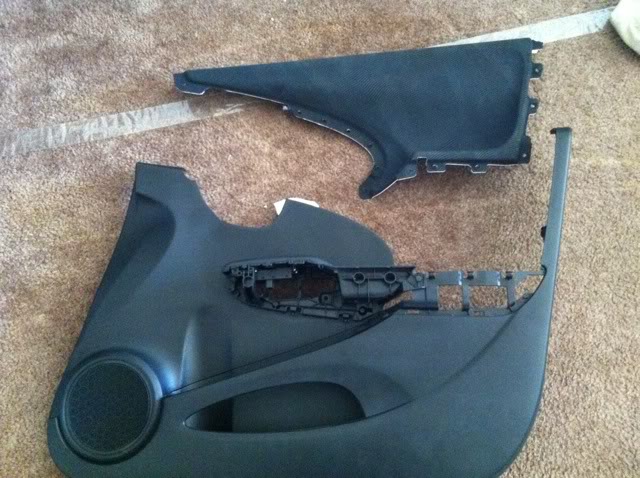
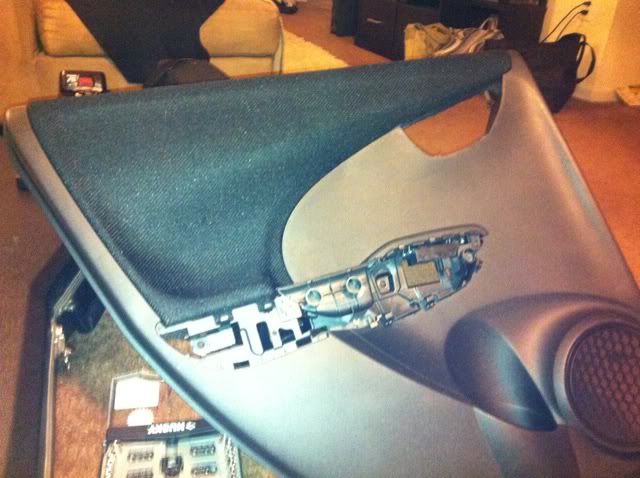
Ok, at this point you should be able to take the panel apart. It'll take just a little pushing because all those rivets are still sort of holding it together. Be careful, the plastic isn't too strong on these panels. When you get it apart, it'll look like this:
Step 4: Taking off the old stuff.
There's no magic to this, grab a corner and peal it off!
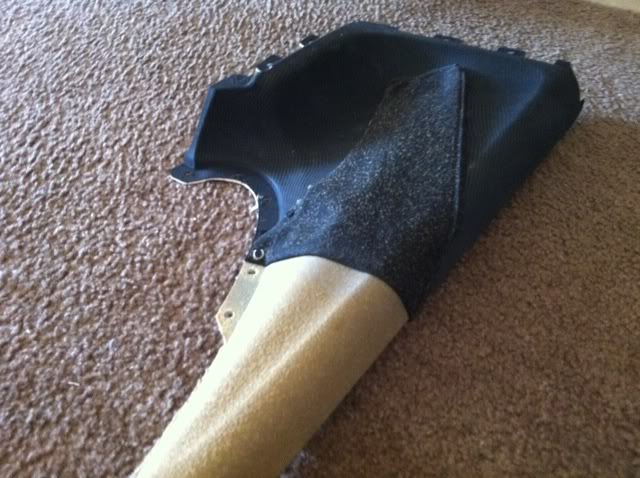
Pull until it's all off!

TIME TO GET YOUR NEW FABRIC!!
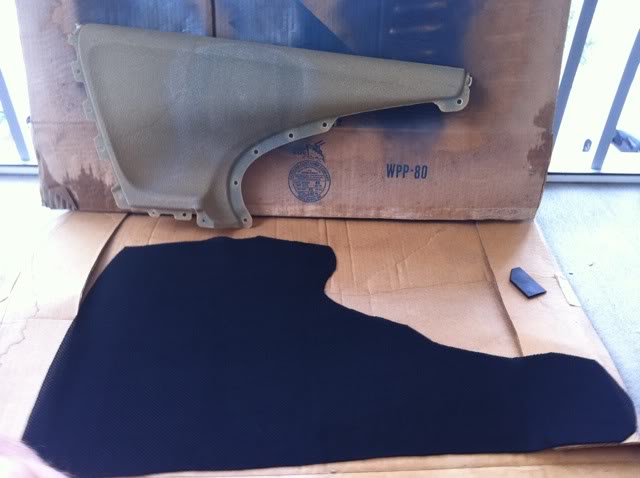
Alright, here's the old stuff:

and here's the new!

I took this pic so you could see the front and back. The back is the smooth side (top) and the front has basically the same texture as spark seats or the Civic Si seat's centers. It looks thin, but when you put it against the door panel, and reinstall, it's black. Nothing shows through, don't worry.
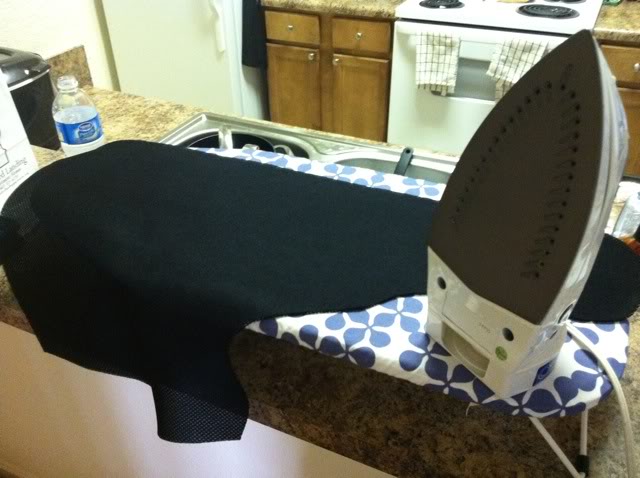
This step is optional, we'll call it Step 4.5: The OCD step.
When I got my fabric, it had been shipped from Cali, so it was a little wrinkled. Bust out the ironing board, put it on low heat with steam, and only iron the BACK.
Step 5: Time to glue.
Alright, grab your LocTite 300. I chose this over Super 80 because it says heat and water resistant, Super 80 is not. The trade off, you only get 1 shot to get it right. There's no re-applying with this stuff. I live in Florida though, so heat resistant was a BIG factor.
You're supposed to spray this stuff to a vertical surface, so I laid the door panel against my patio wall, and my fabric on the ground. Spray out a medium coat on the bottom half of the panel and the corresponding spot of the fabric. I did mine one half at a time because like I said, No reapplying this stuff.
Let me just re-note that� Spray BOTH the fabric AND the door panel. Let them sit for 1 minute, then spray another medium coat on BOTH. Let them sit for another minute, then begin applying the fabric to the panel. I started in the middle and worked my way down to the curves of the door. Go slow, use your hands to really press into the curves, just keep rubbing the fabric on the panel. The glue sets in about 2 minutes. If it takes you longer than 2 minutes, you'll have to re-spray again whatever hasn't been pressed.
(I couldn't get any pics while i was pressing the fabric due to the time restraints)
Now, turn the panel to where you can get at what you haven't sprayed. Apply the same way. 2 coats to both the fabric and the panel, wait 1 minute, and press firmly. Make sure you really press against the "body line" in the panel. You want to be able to tell it's still there.
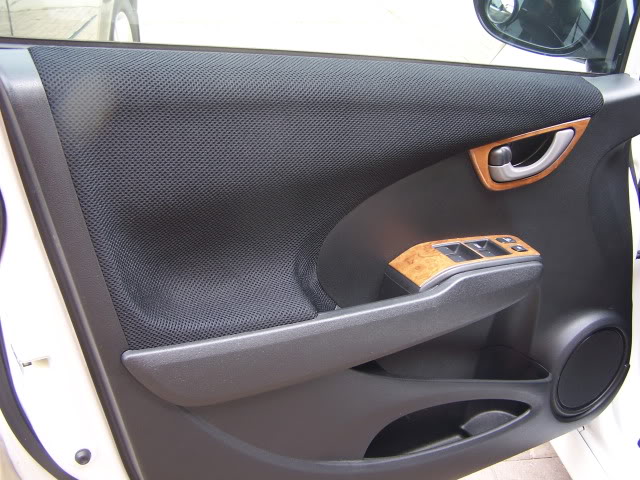
This is what you'll see when you're done!
Step 6: Protect it! (optional)
Alright, If you have the time and care, you can scotchguard your panels now. I did it before I started putting stuff back together. I had to let it dry over night though. I figured it was worth the wait.
Step 7: Putting it all back together.
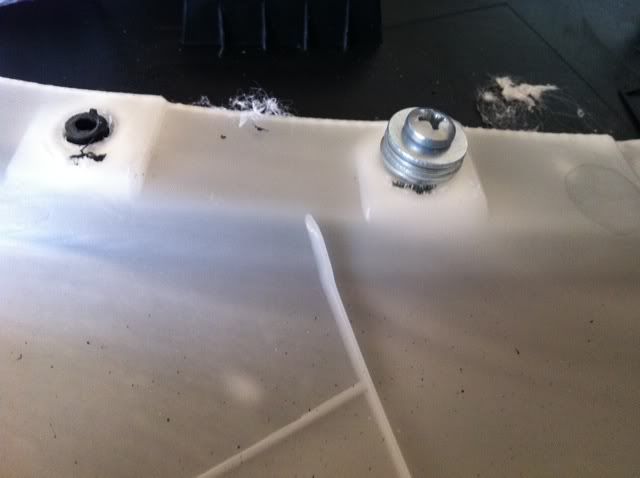
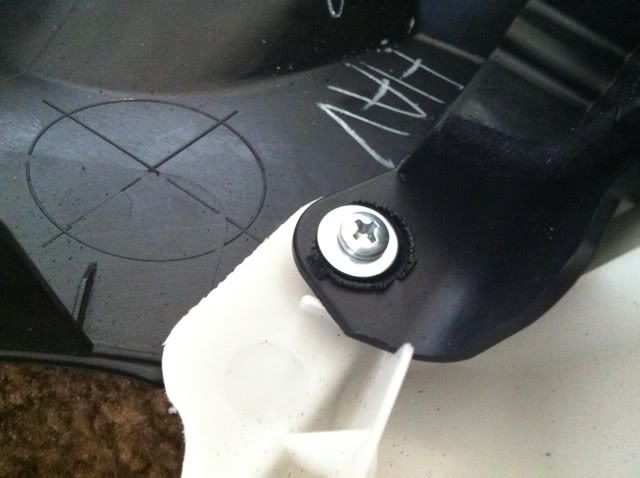
Here's the other "fun" part. Take an xacto knife, punch the holes in the fabric where they go. You don't want the screws that you're gonna use ripping your hard work. Now, how many screws you wanna put in is up to you, but the most important thing is making sure that you don't put a screw through your door panel. (some people just use hot glue to hold it all back together, I wanted something stronger)
You can start off with the screw that Honda put in the panel, then chose a couple of the places that used to have the plastic rivets, and stick a couple washers on the screw and screw down into the left over base.
Make sure you do the corners, and I made sure to do at least one by the handle.
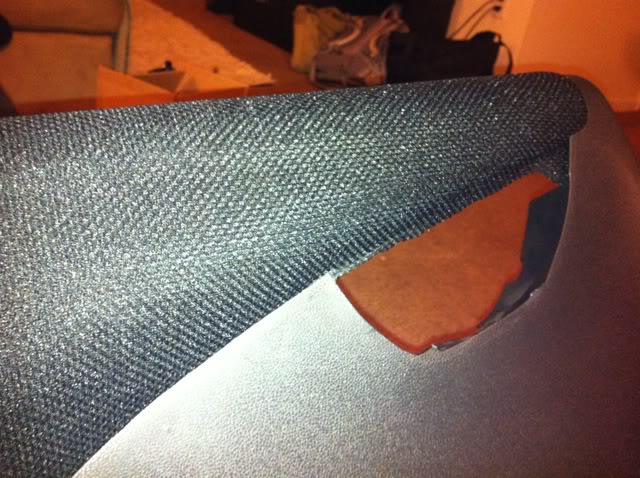
Stand back and admire the door panel�.
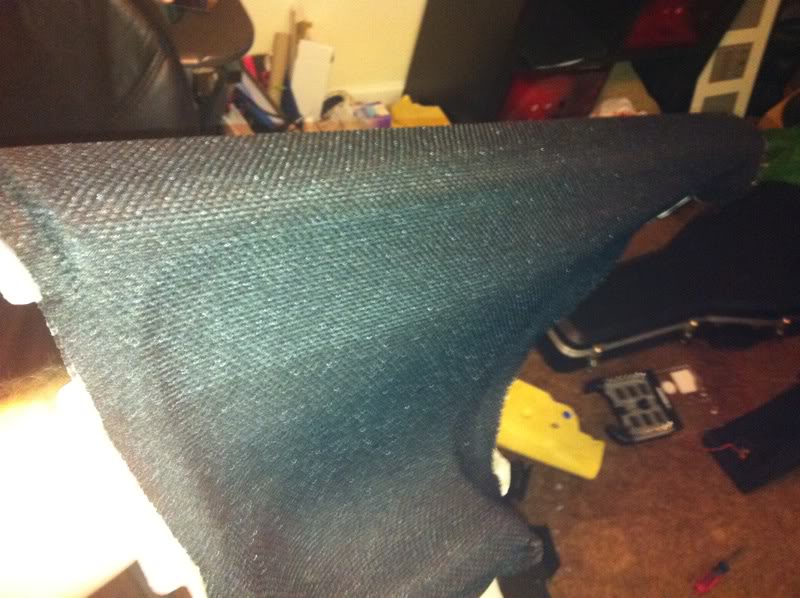
Here's a close up of the fabric, see what I mean about the black?
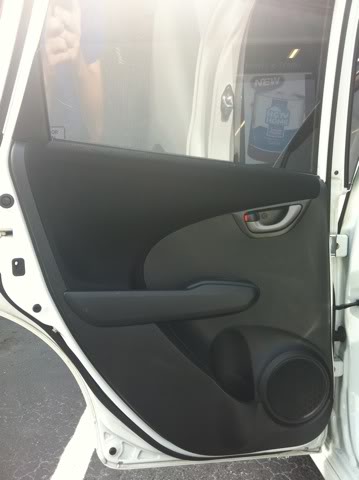
Alright, now don't forget the door seal thing!! Then go put your panel back on. It's the reverse of removal. Check it out! No more blue lines!!
I haven't decided what I'm gonna do about the seats yet. Maybe Wet Okole seat covers, maybe Si Seats.
If you like my door panel fabric, send me a PM and I'll get you the contact info for HollywoodLightsLA. We're working out a special for FitFreak members.
So, I wasn't a big fan of the blue stripes in the OEM fabric on our Fits. Not real sure why, I'm just not a fan. Anyhow, I know there are a couple different DIY's on here about replacing the fabric on our door panels, but it seems like there's always little things left out or the pictures are down, or something happens. So, here it is again, hopefully with just a little bit added to it.
I, nor FitFreak, or anyone else for that matter, are responsible for what you do to your car. (my lawyer made me say that)
I always like to start off with the project list. That way you don't have to keep scrolling through to find out what all I used.
-Your door panels
-LocTite 300 (1 can will probably do it, you can get it in the paint section at Lowe's with the gorilla glue)
-Philips Screwdriver
-Flathead Screwdriver
-Dremel with a cutoff wheel
-New Fabric (I got mine from HollywoodLightsLA on eBay, he has kits for a ton of cars, now including the GE Fit!! It comes in Red, Blue, or my choice�Black and look like the sparco fabric)
-Scotchguard (optional)
-Xacto knife
- 8x1/2 metal screws (about 30)
- #10 flat washers (get the 100 count box)
Step 1: Panel Removal
If you don't know how to remove your door panels, it's pretty easy. Pop off the cover on the armrest. There's a philips head screw in there, undo it. While you're there, unplug the power window switch. Where your handle is to open the door, there's another philips head screw. Remove that one. Now slide the door handle forward and it will release. Now pull around the edges of the door panel and you'll hear all the "pops" from the plastic holders. Slide the door handle through it's opening and tada!
Step 2: Remove the window seal.
Maybe seal isn't the right word, but there's the piece that feels like felt that rests against your window to keep anything from getting down in your panel. There are 6 little bent clips holding it on. Take your flathead, straighten them out, and it comes right off. Nice and Easy!
Step 3: Removing the fabric section.
This is honestly the worst part. If you look on the back of your panel you'll see a bunch of plastic rivets holding the fabric section to the rest of the door. They're all those black circles that you see on the white. Take your dermal and cut all of those off without taking off any of the white. This is what it'll look like when it's done:
This takes forever, I'm not even gonna try to sugarcoat it. There's also one philips head screw (not sure why) towards the center of the door panel:
Remove it.
Ok, at this point you should be able to take the panel apart. It'll take just a little pushing because all those rivets are still sort of holding it together. Be careful, the plastic isn't too strong on these panels. When you get it apart, it'll look like this:
Step 4: Taking off the old stuff.
There's no magic to this, grab a corner and peal it off!
Pull until it's all off!
TIME TO GET YOUR NEW FABRIC!!
Alright, here's the old stuff:
and here's the new!
I took this pic so you could see the front and back. The back is the smooth side (top) and the front has basically the same texture as spark seats or the Civic Si seat's centers. It looks thin, but when you put it against the door panel, and reinstall, it's black. Nothing shows through, don't worry.
This step is optional, we'll call it Step 4.5: The OCD step.
When I got my fabric, it had been shipped from Cali, so it was a little wrinkled. Bust out the ironing board, put it on low heat with steam, and only iron the BACK.
Step 5: Time to glue.
Alright, grab your LocTite 300. I chose this over Super 80 because it says heat and water resistant, Super 80 is not. The trade off, you only get 1 shot to get it right. There's no re-applying with this stuff. I live in Florida though, so heat resistant was a BIG factor.
You're supposed to spray this stuff to a vertical surface, so I laid the door panel against my patio wall, and my fabric on the ground. Spray out a medium coat on the bottom half of the panel and the corresponding spot of the fabric. I did mine one half at a time because like I said, No reapplying this stuff.
Let me just re-note that� Spray BOTH the fabric AND the door panel. Let them sit for 1 minute, then spray another medium coat on BOTH. Let them sit for another minute, then begin applying the fabric to the panel. I started in the middle and worked my way down to the curves of the door. Go slow, use your hands to really press into the curves, just keep rubbing the fabric on the panel. The glue sets in about 2 minutes. If it takes you longer than 2 minutes, you'll have to re-spray again whatever hasn't been pressed.
(I couldn't get any pics while i was pressing the fabric due to the time restraints)
Now, turn the panel to where you can get at what you haven't sprayed. Apply the same way. 2 coats to both the fabric and the panel, wait 1 minute, and press firmly. Make sure you really press against the "body line" in the panel. You want to be able to tell it's still there.
This is what you'll see when you're done!
Step 6: Protect it! (optional)
Alright, If you have the time and care, you can scotchguard your panels now. I did it before I started putting stuff back together. I had to let it dry over night though. I figured it was worth the wait.
Step 7: Putting it all back together.
Here's the other "fun" part. Take an xacto knife, punch the holes in the fabric where they go. You don't want the screws that you're gonna use ripping your hard work. Now, how many screws you wanna put in is up to you, but the most important thing is making sure that you don't put a screw through your door panel. (some people just use hot glue to hold it all back together, I wanted something stronger)
You can start off with the screw that Honda put in the panel, then chose a couple of the places that used to have the plastic rivets, and stick a couple washers on the screw and screw down into the left over base.
Make sure you do the corners, and I made sure to do at least one by the handle.
Stand back and admire the door panel�.
Here's a close up of the fabric, see what I mean about the black?
Alright, now don't forget the door seal thing!! Then go put your panel back on. It's the reverse of removal. Check it out! No more blue lines!!
I haven't decided what I'm gonna do about the seats yet. Maybe Wet Okole seat covers, maybe Si Seats.
If you like my door panel fabric, send me a PM and I'll get you the contact info for HollywoodLightsLA. We're working out a special for FitFreak members.


Thanks guys! I really like the way it came out.
This can be a huge issue when picking the fabric. Make sure you have something with about the same amount of stretch as the original stuff and that you really let the glue sit for a minute before you press them together. It's all about getting it to stick.
This can be a huge issue when picking the fabric. Make sure you have something with about the same amount of stretch as the original stuff and that you really let the glue sit for a minute before you press them together. It's all about getting it to stick.


Do you have an idea of what material the panel is made of? Is it cardboard? Is it foam? Some sort of recycled paper material? Do you think this is the same material of the roof lining that the headliner sticks onto? I plan to be doing a big roof liner modification where I'll be reshaping the liner and I'd like to have an idea of what I'm working with. It looks quite stiff, is it thin?
Do you have an idea of what material the panel is made of? Is it cardboard? Is it foam? Some sort of recycled paper material? Do you think this is the same material of the roof lining that the headliner sticks onto? I plan to be doing a big roof liner modification where I'll be reshaping the liner and I'd like to have an idea of what I'm working with. It looks quite stiff, is it thin?

jnesselroad
My material arrived today. He actually put in 4 pieces as cut for the front. I will tackle then once it cools down a bit.
Assuming I do not mess up I could maybe try using the extras for the rear doors.
Ah Scotchgard. I must pick some up.
My material arrived today. He actually put in 4 pieces as cut for the front. I will tackle then once it cools down a bit.
Assuming I do not mess up I could maybe try using the extras for the rear doors.
Ah Scotchgard. I must pick some up.
Last edited by Black3sr; Aug 9, 2011 at 04:18 PM. Reason: Bill don't spell good some days
Ya, I told him to start sending the kits that way because I accidentally put them on the wrong doors and the extra fabric worked out really well on the backs (which I did first) then I was stretching the fronts. So it was less confusing to have him just send 4 fronts.
Ya, I told him to start sending the kits that way because I accidentally put them on the wrong doors and the extra fabric worked out really well on the backs (which I did first) then I was stretching the fronts. So it was less confusing to have him just send 4 fronts.
I did mine yesterday. It was a fun mod. Material went on real easy. I did the second door in an hour.
Any tips on doing the rears?
bill
The pics. Before and after eh.