
Permanent rack installation: WHERE TO DRILL 8 holes?


Thread Starter
|
Member
Joined: Apr 2009
Posts: 86
From: Fort Myers, Florida, USA

Permanent rack installation: WHERE TO DRILL 8 holes?
Hello.
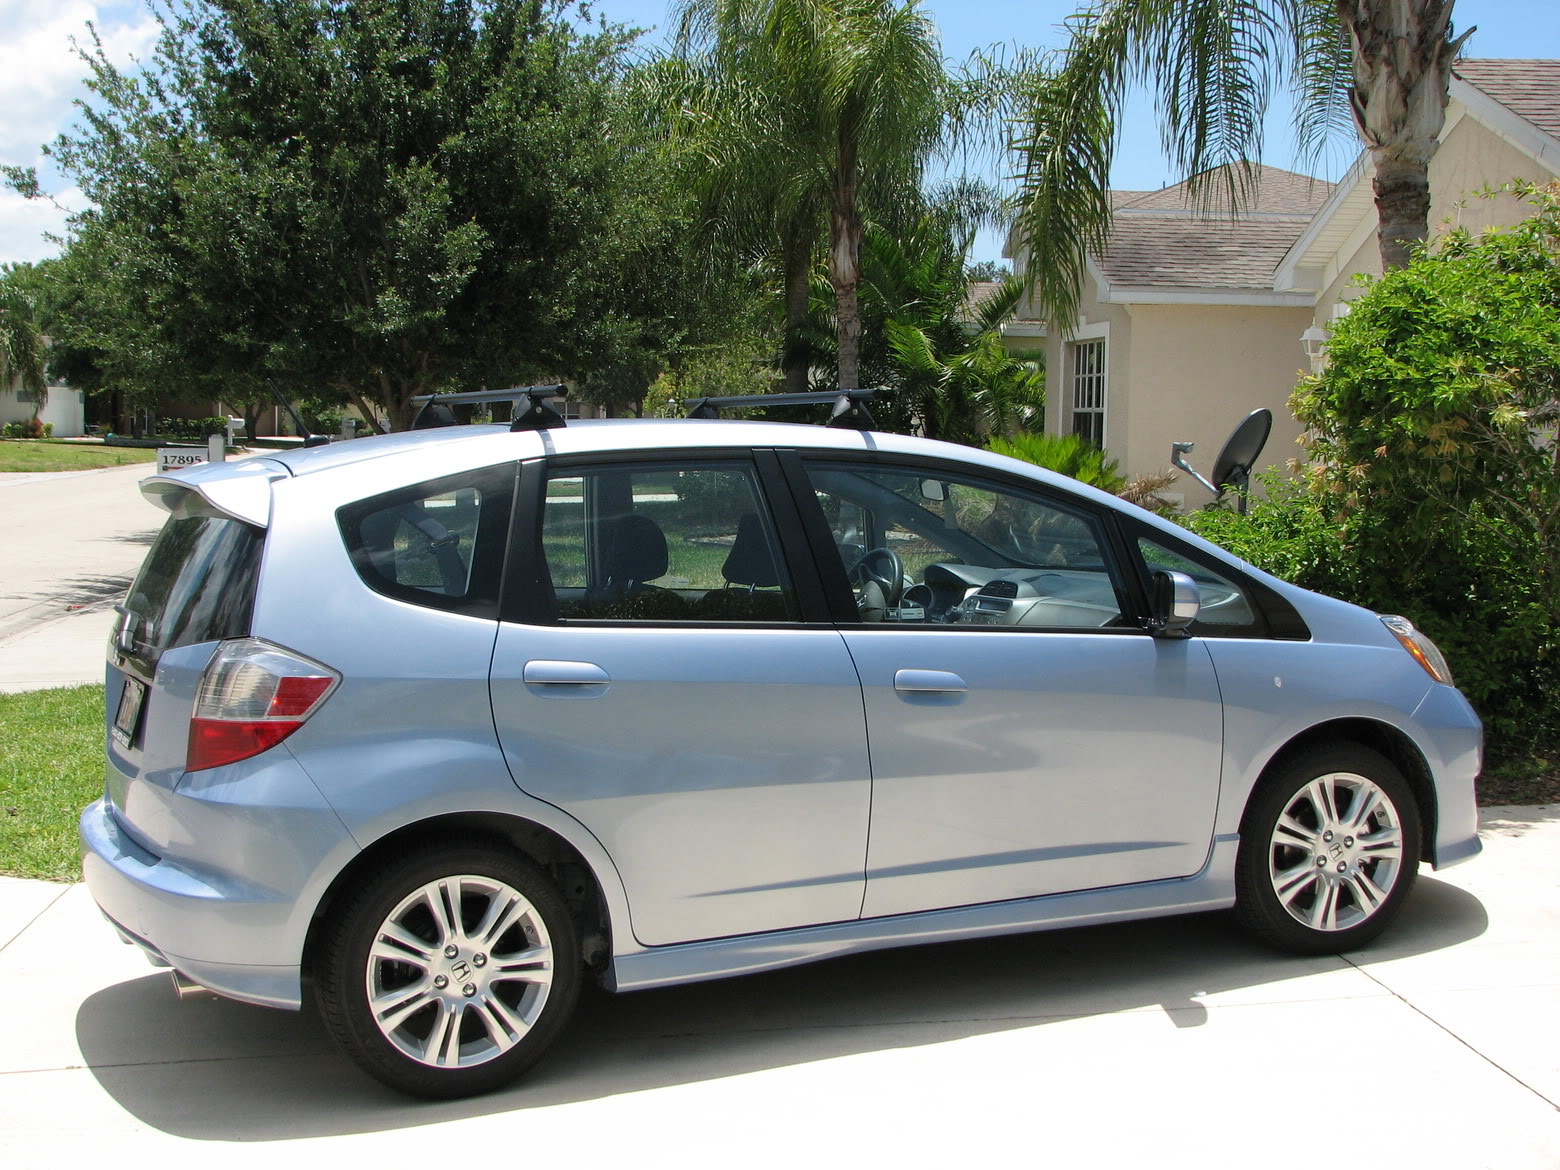
I have received my yakima rack with landing pad #7, towers and cross bar and I am about ready to install the rack.
Are there any spots I should avoid drilling into. I will place the landing pads as close the the edge of the roof as possible, where the roof structure is the strongest.
Before drilling, I want to avoid drilling through wires as well as through the rollover protective structures.
Do you guys know about this?
Any drawing of what is under the roof welcome. I am reluctant to remove the roof head liner to find out where to drill.
THANKS.
Last edited by hydrocynus; Apr 14, 2009 at 09:19 PM. Reason: rewording and grammar
Member
Joined: Dec 2008
Posts: 200
From: NSW, Australia
Hello.
I have received my yakima rack with landing pad #7, towers and cross bar and I am about ready to install the rack.
Are there any spots I should avoid drilling into. I will place the racks as close the the edge of the roof as possible, where the roof structure is the strongest.
Before drilling, I want to avoid drilling through wires as well as through the rollover protection structures.
Do you guys know about this?
Any drawing of what is under the roof welcome. I am reluctant to remove the roof head liner to find out where to drill.
THANKS.

Thread Starter
|
Member
Joined: Apr 2009
Posts: 86
From: Fort Myers, Florida, USA
Yes. drill 8 holes in the roof so that my rack has 4 permanent landing pads to accommodate the towers of my yakima rack.
I prefer this option to the Q towers from Yakima.
It is just a car and I need a roof rack for my kayak that I use at least once a week.
I prefer this option to the Q towers from Yakima.
It is just a car and I need a roof rack for my kayak that I use at least once a week.


The roof rack isn't permanent. I had this done to my yaris before I purchased my fit. Yakima sells 48" rails which are permanently affixed to the car. This is a solution if they don't manufacture q towers for your vehicle. You install the 48" stips (which sit nearly flush to the top of your vehicle) and the control tower just snap on and off.
I wish I would have gone this route before I purchased the q towers to transfer my rack to the fit. It's a pain taking the rack on and off because you have to measure and realign each side (or position all 4 towers so they are evenly spaced from the front and rear of the vehicle).
The control towers just snap in and out of the track and make taking the entire rack off a 30 second job. I say go for it.
i didn't notice any increase in noise related to the weatherstripping. my kayak is up there ~4 days+ a week now
ps: id rather wear out a weatherstrip than drill

I got the yakima rack on my fit and it only takes me a few mins to take them on and off with the q clips. Just measure it once where they should go and I put some tape and markings in the door jam to show me where they go so its fast and quick to reinstall them without having to remeasure everything. I used my rack this season and I took it on and off probly 5 or 6 times with no problems.
The roof rack isn't permanent. I had this done to my yaris before I purchased my fit. Yakima sells 48" rails which are permanently affixed to the car. This is a solution if they don't manufacture q towers for your vehicle. You install the 48" stips (which sit nearly flush to the top of your vehicle) and the control tower just snap on and off.
I wish I would have gone this route before I purchased the q towers to transfer my rack to the fit. It's a pain taking the rack on and off because you have to measure and realign each side (or position all 4 towers so they are evenly spaced from the front and rear of the vehicle).
The control towers just snap in and out of the track and make taking the entire rack off a 30 second job. I say go for it.
I wish I would have gone this route before I purchased the q towers to transfer my rack to the fit. It's a pain taking the rack on and off because you have to measure and realign each side (or position all 4 towers so they are evenly spaced from the front and rear of the vehicle).
The control towers just snap in and out of the track and make taking the entire rack off a 30 second job. I say go for it.
It's not that it's hard to take the rack on and off it's just a pain to have to remeasure and position the thing. You do have a very good idea though about markings so you can return the clips to the same position without having to measure.
I do understand why some people wouldn't want to drill to mount tracks. It's all personal opinion, that's why Yakima offers multiple solutions. Either way, the Yakima rack is the by far the most useful mod I have done thus far.
I do understand why some people wouldn't want to drill to mount tracks. It's all personal opinion, that's why Yakima offers multiple solutions. Either way, the Yakima rack is the by far the most useful mod I have done thus far.
Member
Joined: Sep 2008
Posts: 984
From: Northern Arizona
I am also interested in seeing how this project turns out.
I like the idea of the permanent landing pads and removable towers. It should allow maximum front to back spacing of the bars for stability and perhaps reduced stress.
Please post pictures when you have them.
I like the idea of the permanent landing pads and removable towers. It should allow maximum front to back spacing of the bars for stability and perhaps reduced stress.
Please post pictures when you have them.
Member
Joined: Sep 2008
Posts: 984
From: Northern Arizona
Okay... My Yakima stuff arrived today, and I bought the required 25/64"(!) drill bit.
I am perfectly comfortable with drilling holes for my rear "landing pads", but remain a bit leary about drilling up front where the side curtain airbags might be.
Anyone want to go first?
I am considering a hybrid solution, with Q-Towers in the front, and control towers in the rear, permitting a 44" spread between the bars. This is ideal for my kayak, and the maximum spread possible for several of the bike racks.
I am also working on a solution for the top of my pickup camper.
Thread Starter
|
Member
Joined: Apr 2009
Posts: 86
From: Fort Myers, Florida, USA
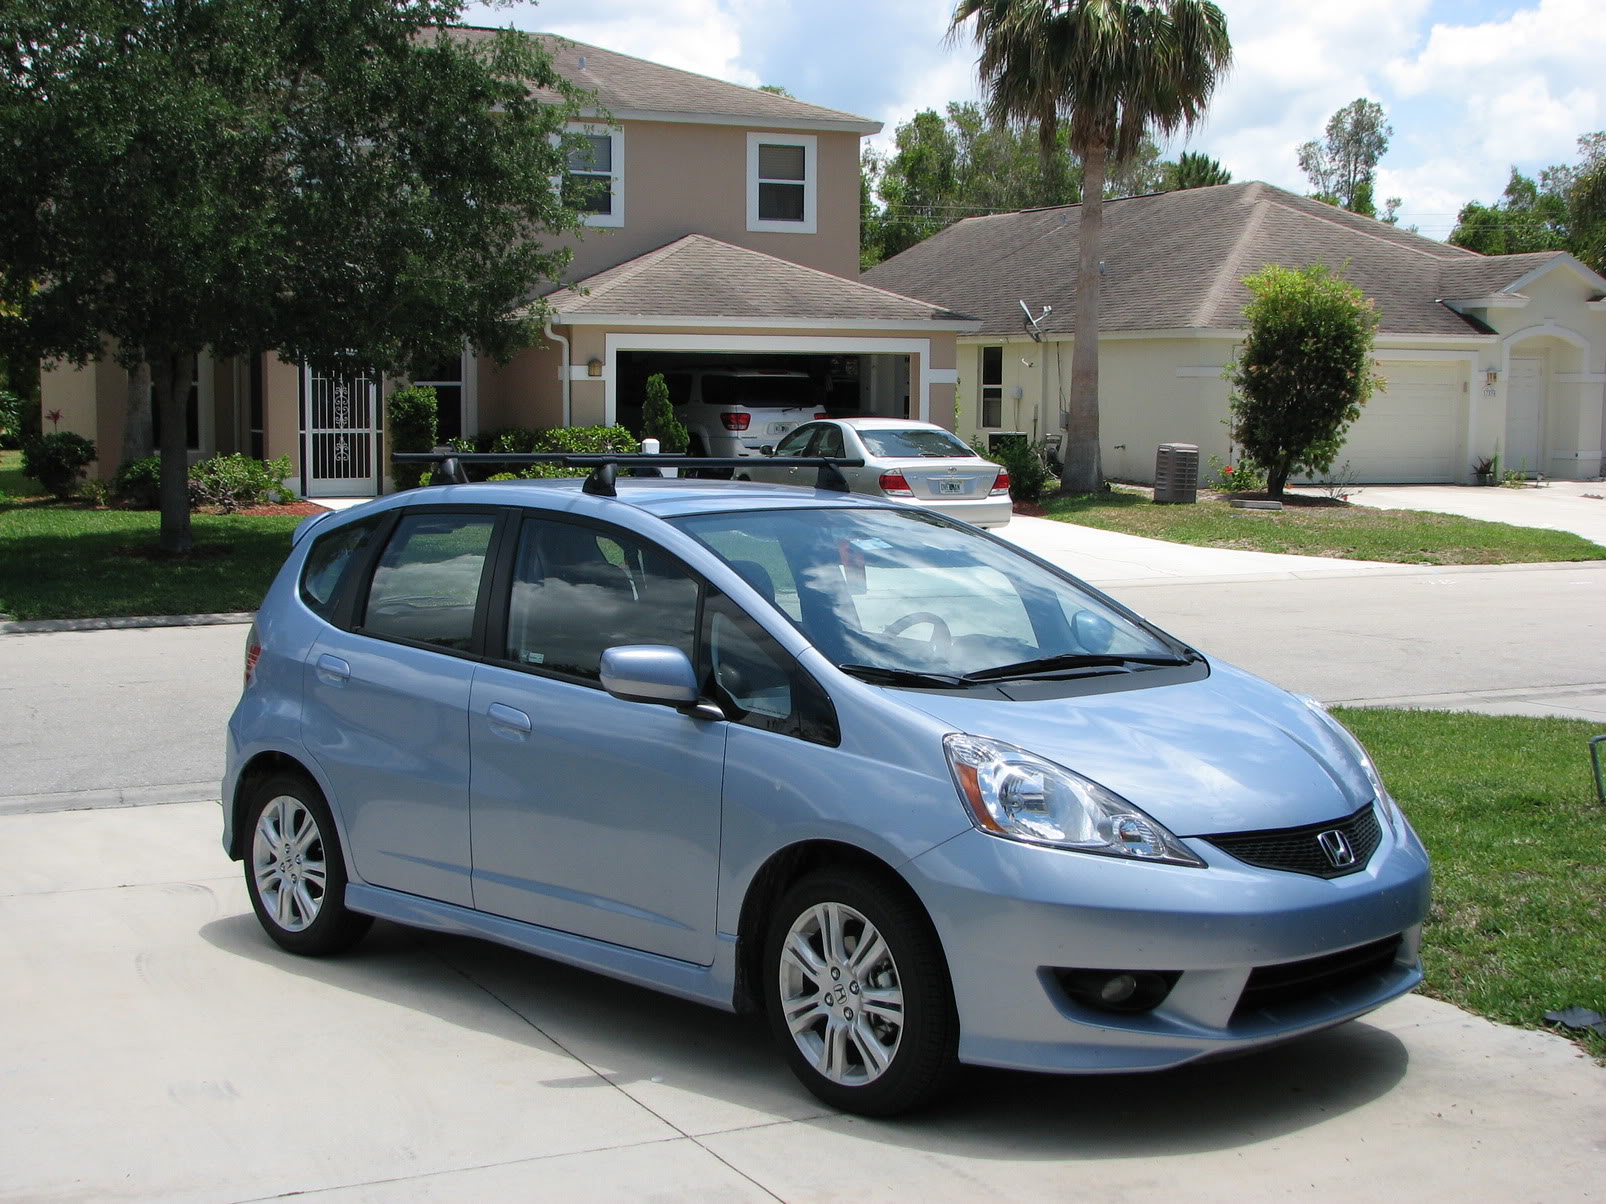
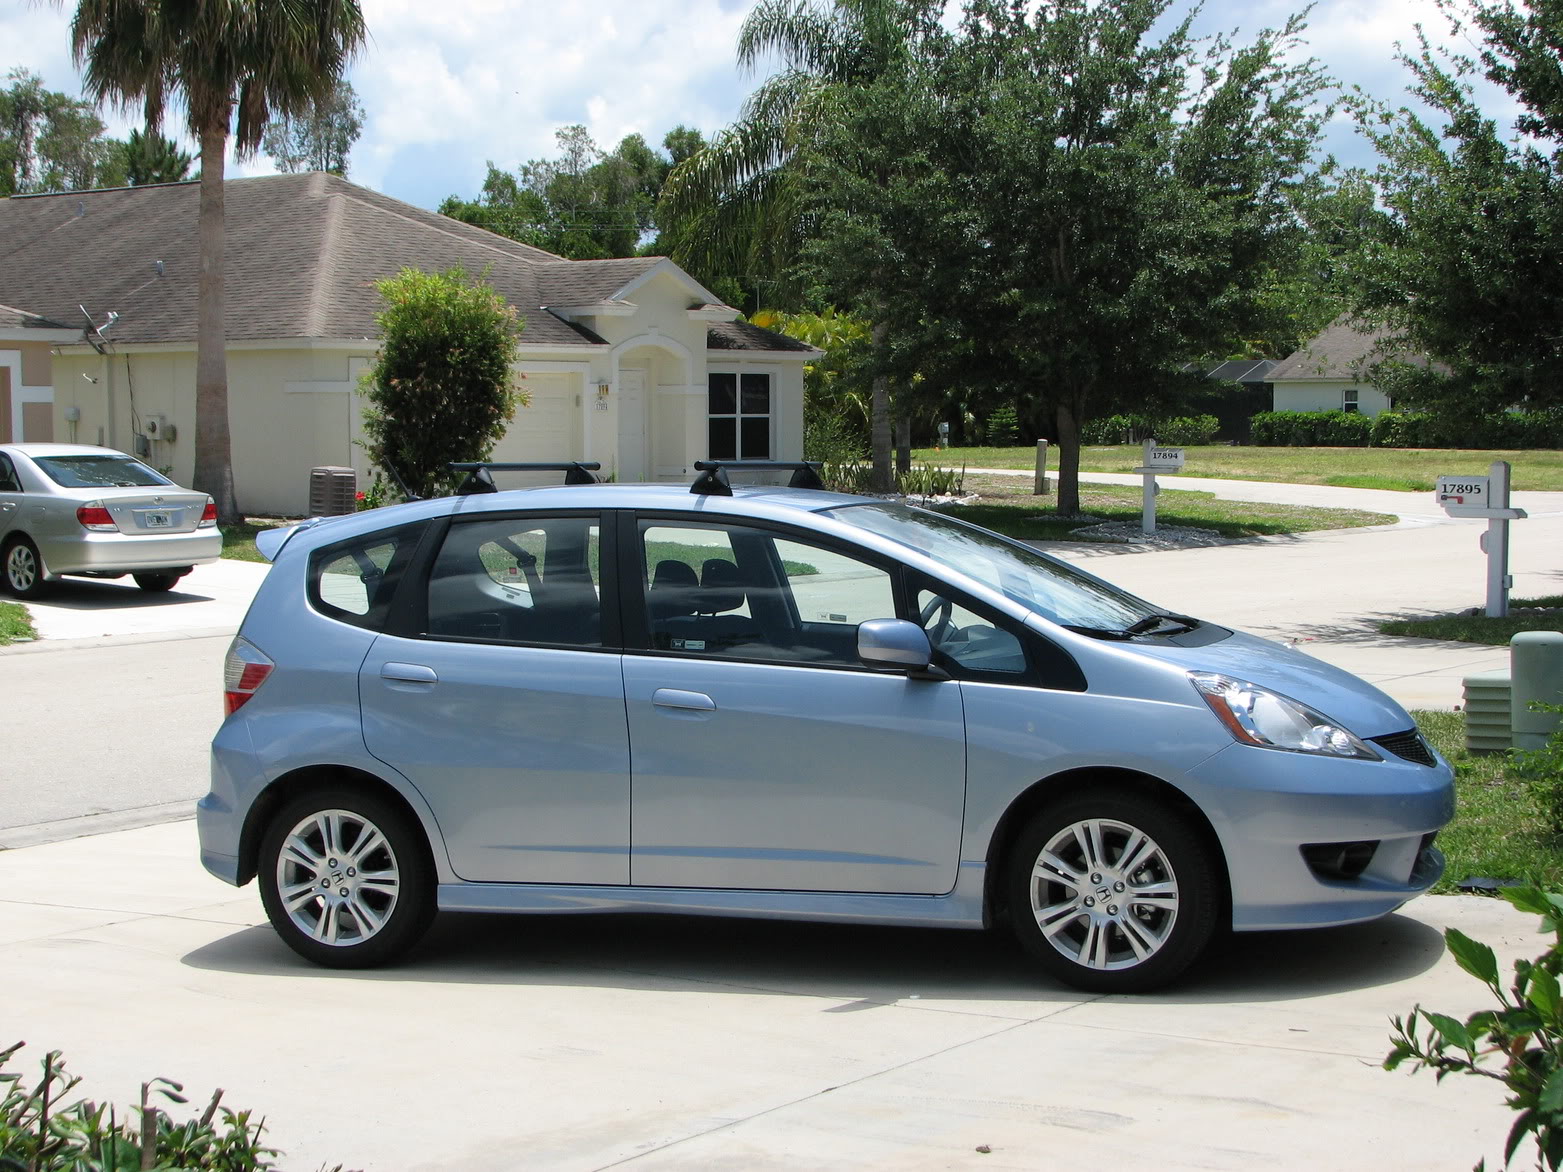
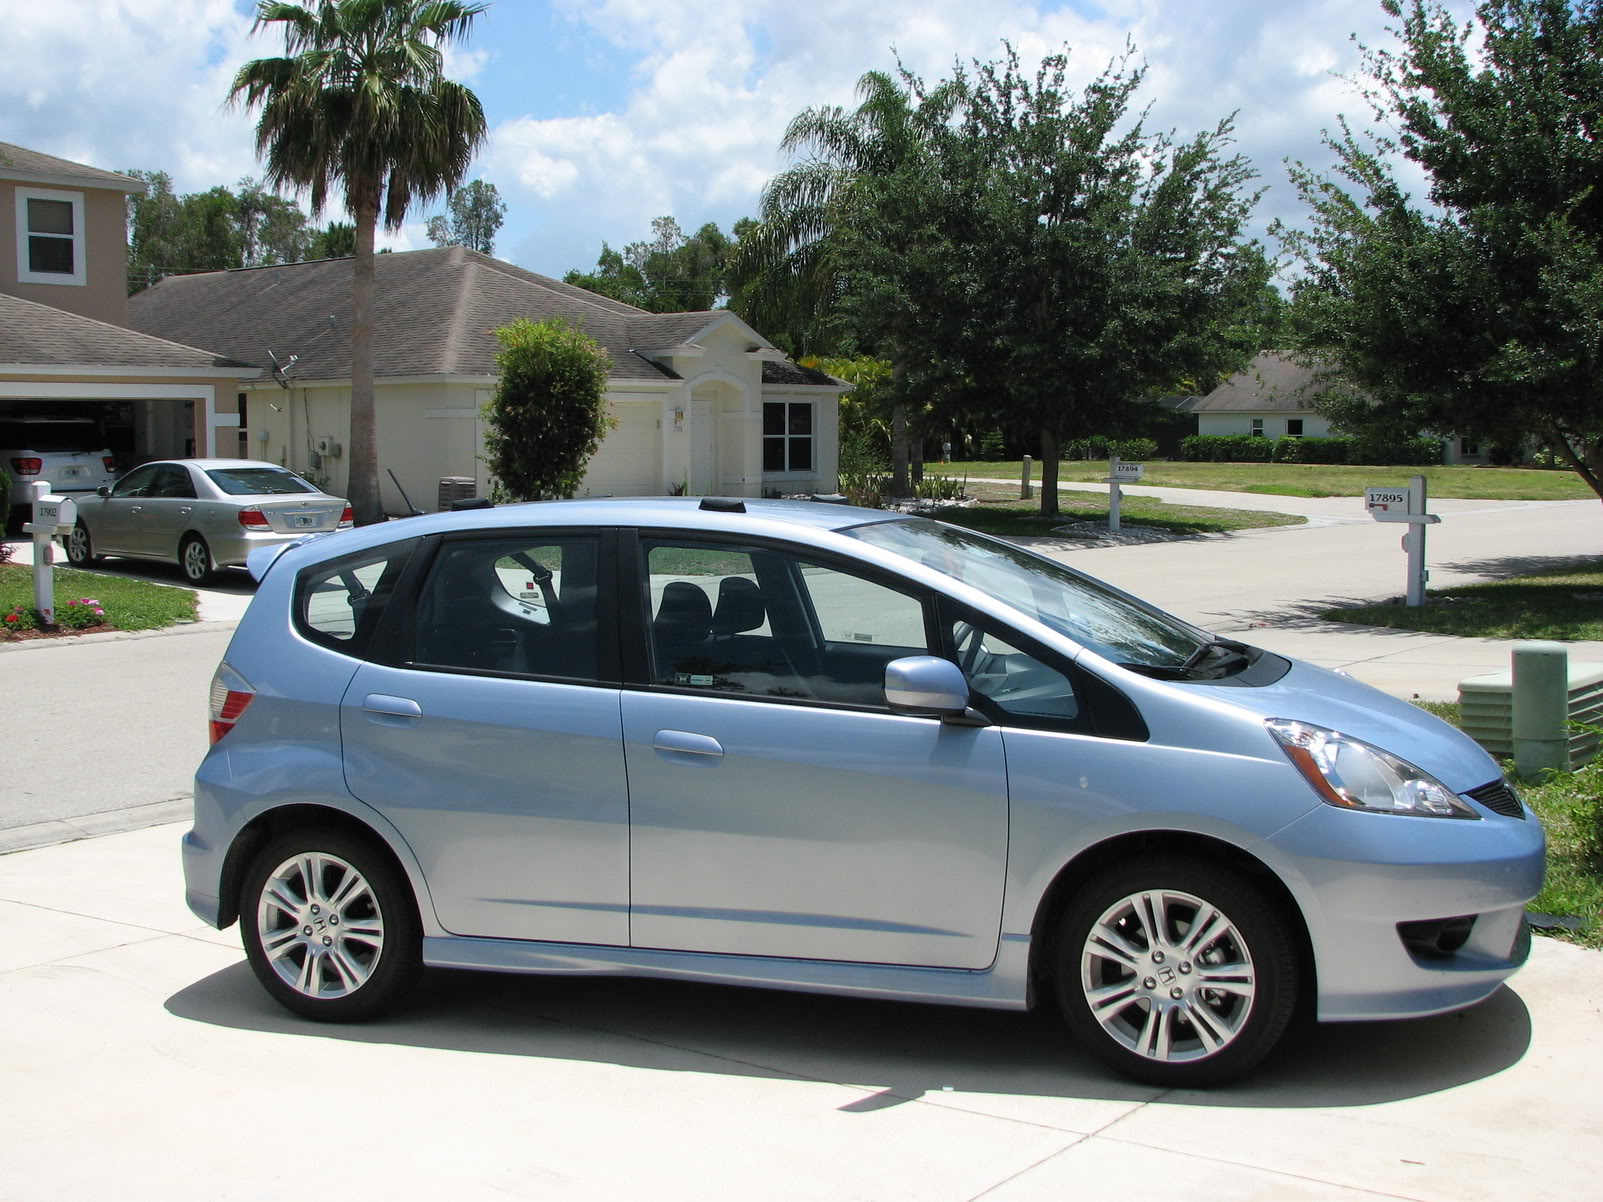
front cross bars installed. Need to do the back now.
I have been very busy at work and I did not have time to install the racks.
Yes, you have to buy the required bit to drill.
It took more than an hour to figure out where to place the landing pads.
The roof is pretty curved everywhere you look. If you have to take into account that you have to avoid the beams and want your load to stay level, that it is not easy to achieve.
I placed a plank on the cross bars with a level on it. you can have it pretty easily leveled, if your two bars are closed to each other, but as you place them apart, it becomes apparent that this is tricky.
I ended up with a spacing that I liked and everything was at level, while avoiding the beams. So, I marked the placements where to drill. Be sure you drill slowly, and shallow.
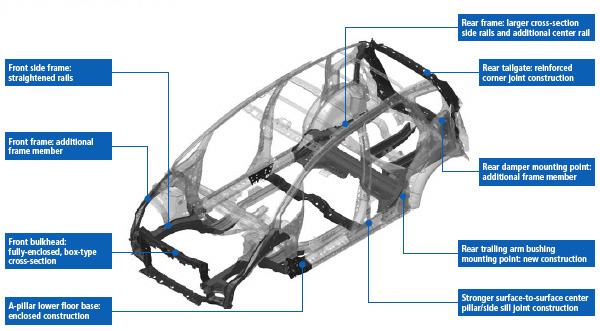
Well. Unlucky as I was, I found the front beam. I thought it was closed to the windshield, but it is actually at the middle of the front doors, a tad forward. Bummer!
I did not drill through it, but unless you remove the headliner, there is no ways you can then have the insert to bottom on the roof. I tried to enter the insert at an angle, so that I could flip its moving part, unsuccessfully.
Removing the headliner is a pain, so I drilled through the beam. I need to call my insurance to tell them about this.
So, be careful with the drawing showing the beams I placed here. I guess it is correct, but you do not see where is placed the windshield.
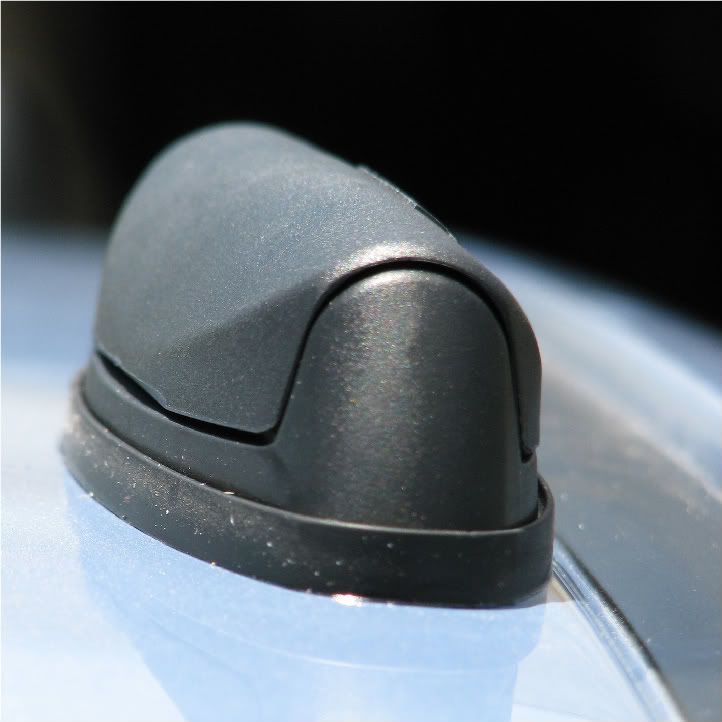
The rest is pretty easy. Be sure to not tighten all the screws until you have the two towers sitting on the pads.
I have added more silicon on the bottom on the landing pads and made a second seal around the corners of the pads. My kayak will be soaked with seawater and I do not want to have any corrosion problems.
I will do the back cross bars later. I will take pictures and tell you where not to drill. I hope that I will not find a beam at the back too.
I strongly suggest you guys remove the headliner before drilling. I wish I were not the first one doing this.
As for reselling the car, I do not care much. I will keep it until it dies. My car will be paid in less than two years and I need rack. This was a choice I made and I still stick to it.
My only concern is the fact that I drilled two holes in the beams. I will check with my father in law if that is much of a problem or not.
I really wonder how you can have a sunroof on that car while avoiding the beam. It must be well placed at the back.
Yes, you have to buy the required bit to drill.
It took more than an hour to figure out where to place the landing pads.
The roof is pretty curved everywhere you look. If you have to take into account that you have to avoid the beams and want your load to stay level, that it is not easy to achieve.
I placed a plank on the cross bars with a level on it. you can have it pretty easily leveled, if your two bars are closed to each other, but as you place them apart, it becomes apparent that this is tricky.
I ended up with a spacing that I liked and everything was at level, while avoiding the beams. So, I marked the placements where to drill. Be sure you drill slowly, and shallow.
Well. Unlucky as I was, I found the front beam. I thought it was closed to the windshield, but it is actually at the middle of the front doors, a tad forward. Bummer!
I did not drill through it, but unless you remove the headliner, there is no ways you can then have the insert to bottom on the roof. I tried to enter the insert at an angle, so that I could flip its moving part, unsuccessfully.
Removing the headliner is a pain, so I drilled through the beam. I need to call my insurance to tell them about this.
So, be careful with the drawing showing the beams I placed here. I guess it is correct, but you do not see where is placed the windshield.
The rest is pretty easy. Be sure to not tighten all the screws until you have the two towers sitting on the pads.
I have added more silicon on the bottom on the landing pads and made a second seal around the corners of the pads. My kayak will be soaked with seawater and I do not want to have any corrosion problems.
I will do the back cross bars later. I will take pictures and tell you where not to drill. I hope that I will not find a beam at the back too.
I strongly suggest you guys remove the headliner before drilling. I wish I were not the first one doing this.
As for reselling the car, I do not care much. I will keep it until it dies. My car will be paid in less than two years and I need rack. This was a choice I made and I still stick to it.
My only concern is the fact that I drilled two holes in the beams. I will check with my father in law if that is much of a problem or not.
I really wonder how you can have a sunroof on that car while avoiding the beam. It must be well placed at the back.
Member
Joined: Sep 2008
Posts: 984
From: Northern Arizona
Roof holes!
Ha!
Maybe you were not!
I just took a drill to he roof, and figured "how bad can it be?"
Well, 25/64" is a pretty big hole! Times eight!
In the end, I think it turned out great. I will to post some pictures soon.
Maybe you were not!
I just took a drill to he roof, and figured "how bad can it be?"
Well, 25/64" is a pretty big hole! Times eight!
In the end, I think it turned out great. I will to post some pictures soon.
Last edited by CBX; May 7, 2009 at 10:34 PM. Reason: fixed quote
[quote=CBX;646715]
Subscribed! When you post pics - let us know the details on your kayak. I was thinking of starting out on a decent inflatable instead..but we'll see how your setup looks/works first.
When you post pics - let us know the details on your kayak. I was thinking of starting out on a decent inflatable instead..but we'll see how your setup looks/works first.
Thread Starter
|
Member
Joined: Apr 2009
Posts: 86
From: Fort Myers, Florida, USA
Ok. I now have a rack.
CAUTION: do not drill where I drilled for the front bar or your front hole will just be above the second beam. So, be aware.
You either need to drill between the beam (good luck) or you drill ahead or behind it. Remember, if you want your load to stay at level, if you move the front pad forward, you need to move the rear pad back and vice versa. Because of the nature of the roof and to avoid the beams, that makes it tricky.
The back beam, the one last one on the drawing is where it is, quite back To be sure, I moved my landing bad forward by an inch to be sure not to drill through a beam again.
So my rear crossing bar can be moved back by at least two inches.
If you buy a drill stopper... there aren t any for the drill bit you will use... so it is a bit loose. I had the stopper moved up when I drilled through the beam, and since the beam is very close to the head liner, I superficially touched it.
If you do not hit a beam (that makes fitting the insert and flipping the moving part really difficult) it is easy to do it right.
Why didn't you use the tracks? Looks interesting with the landing pads and covers. If you had permanently mounted the tracks the towers and landing pads clip in and out easily. Looks good thought.

