
DIY - footwell illumination, ambient lights & glovebox illumination

Thread Starter
|
Member

Joined: Apr 2009
Posts: 132
From: Portland, OR
My wife requested that I put in footwell illumination lights into her Fit like I have done with my other cars, so I decided to also try out the ambient light kit�..well I didn�t like where the instructions told me to place them since the drivers seemed too far into the footwell, while the passengers would be further out and most likely visible. The color of the light modules are also more of a dark teal than 470nm wavelength blue, so I modified and also put some lights in the gloveboxes.
Well it came out better than I expected so I thought I'd share:
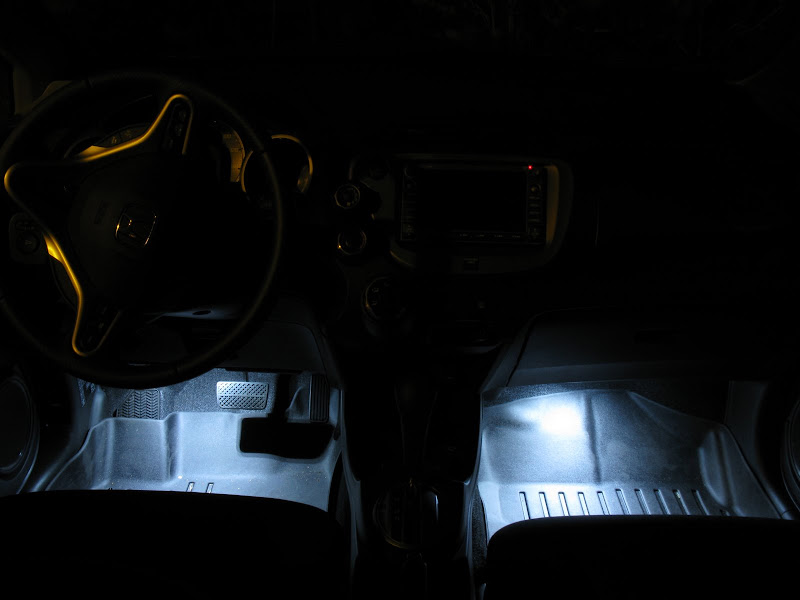
Footwell Illumination (door open/unlock)
Ambient Lights (parking lights or headlight switch on)

Ambient Lights (parking lights or headlight switch on) + upper glovebox open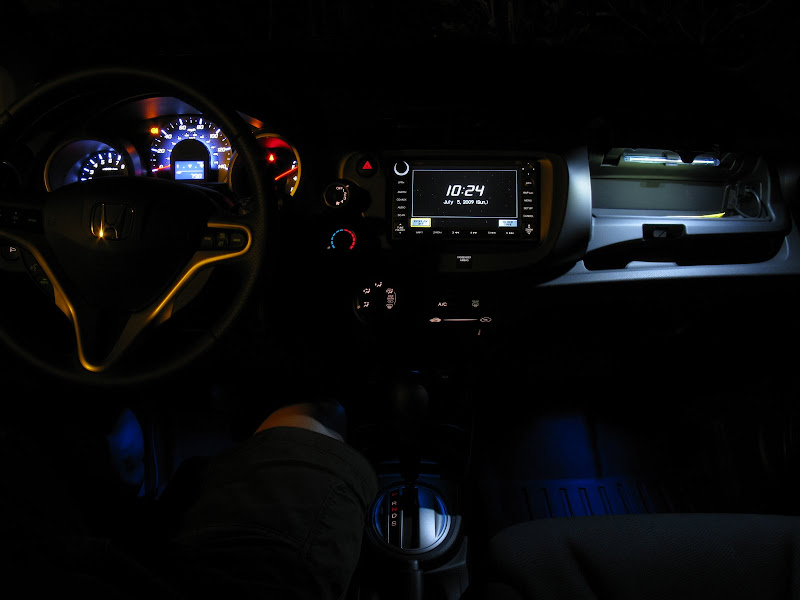
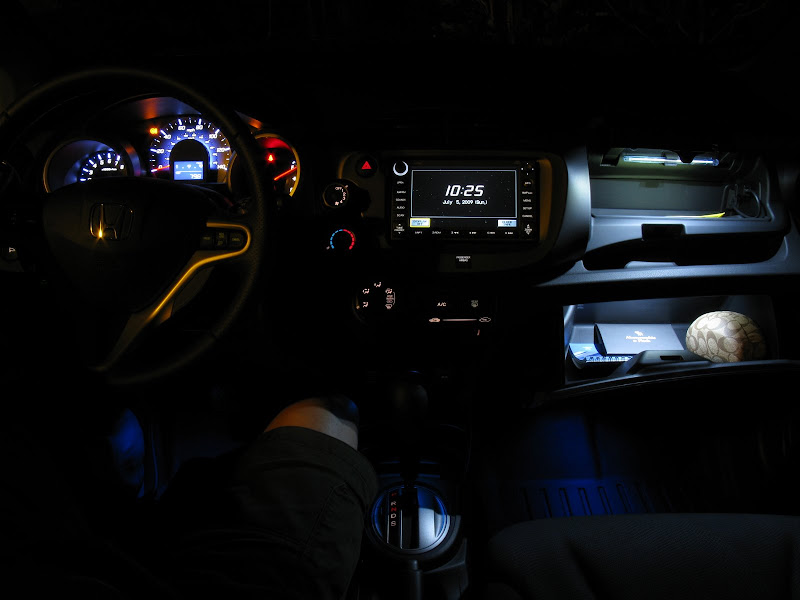
Ambient Lights (parking lights or headlight switch on) + lower glovebox open
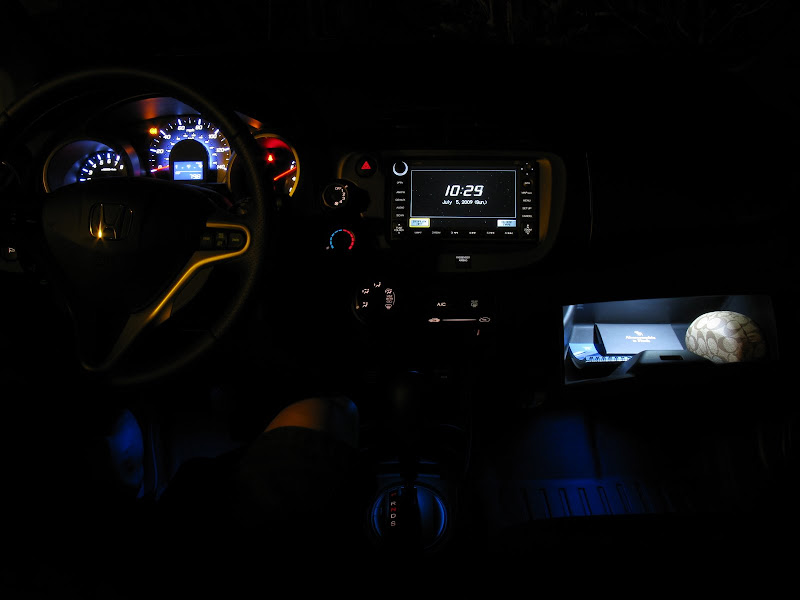
Ambient Lights (parking lights or headlight switch on) + both gloveboxes open
All open/on

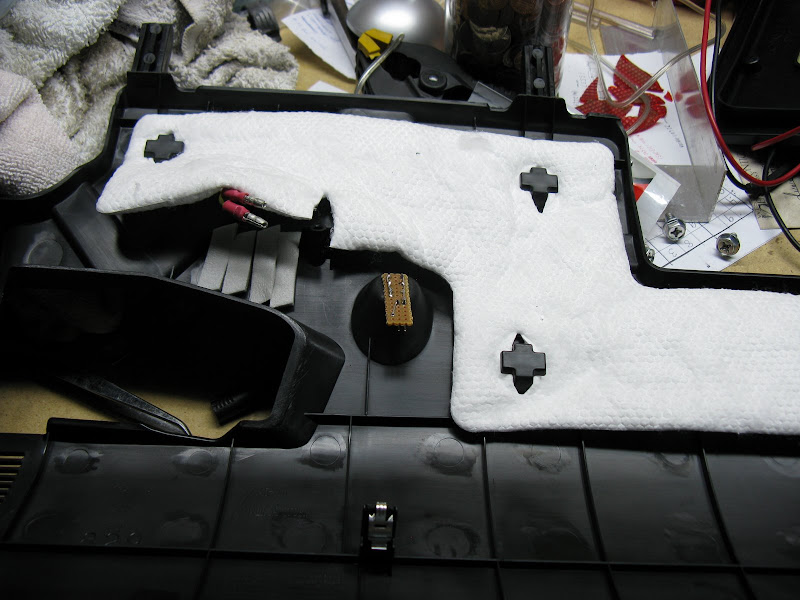
Since I didn�t like the light module placement and color of the ambient light kit, I used flux leds dimmed with 5.6kΩ resistors mounted inside the recessed area instead so that they�re completely hidden from view and angled better.
Circuits for the Flux LEDs

Flux LED

Flux LED leads through 4 holes
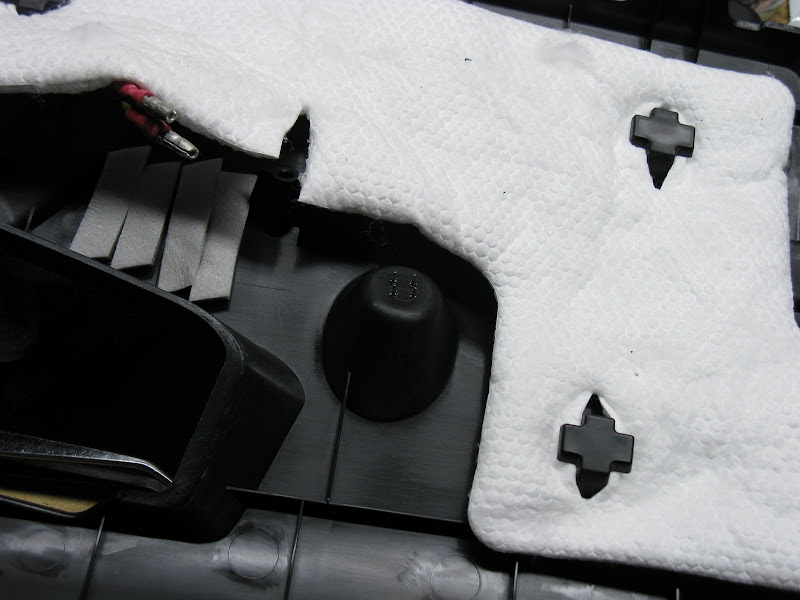
Completed passenger side

Also reused one of the light modules from the kit as the lower center cup holder area light.
Off center hole
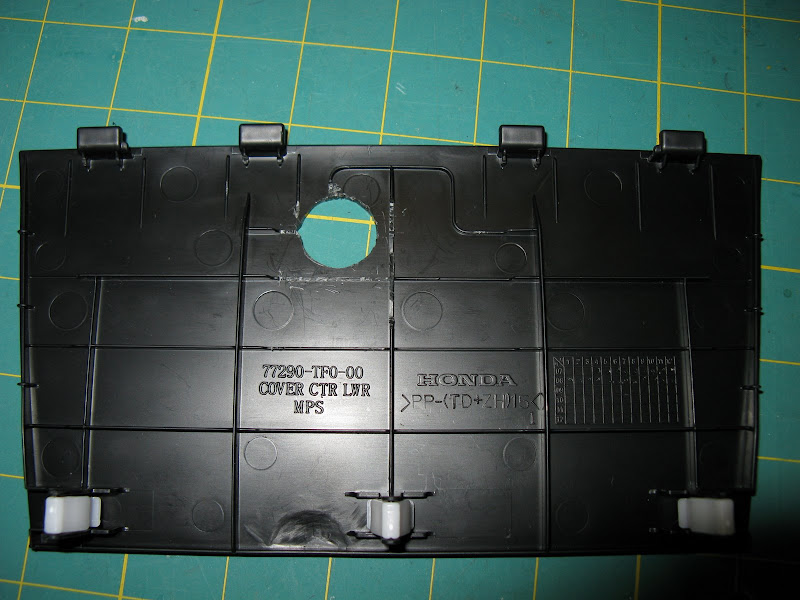
so that this

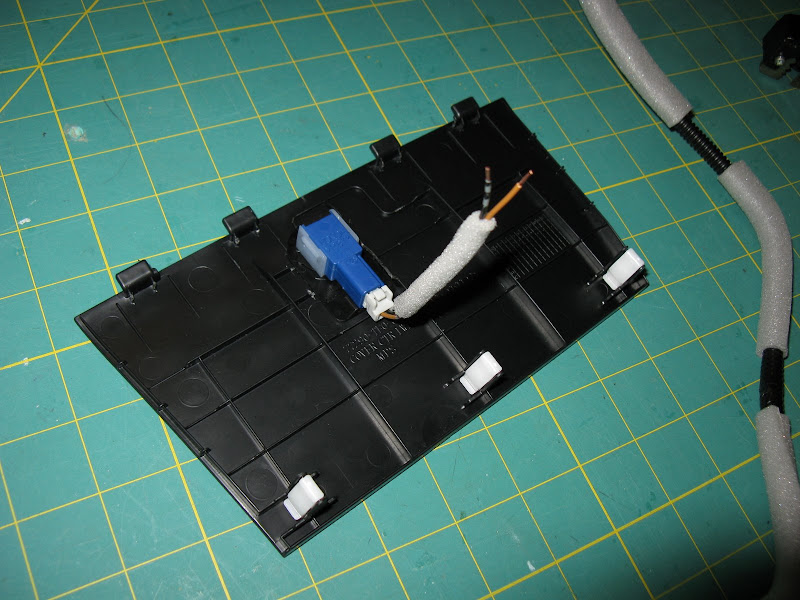
fits into this hole
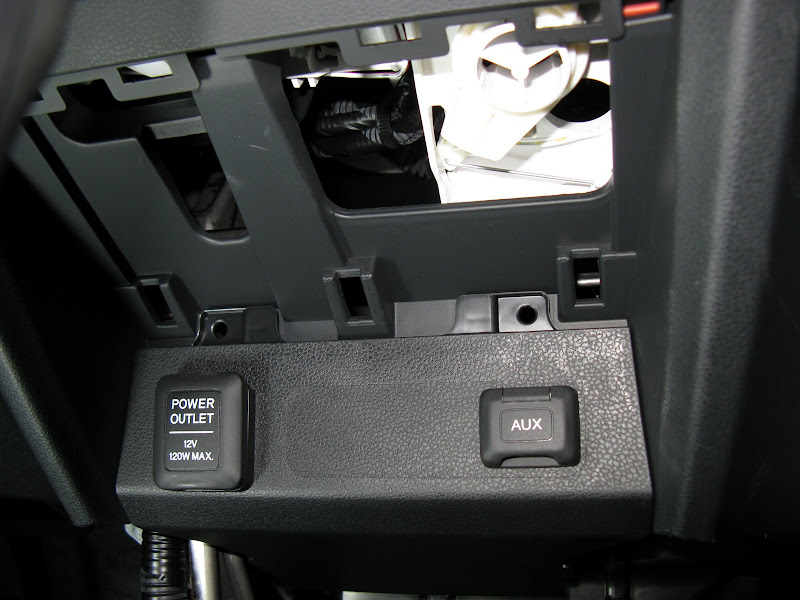
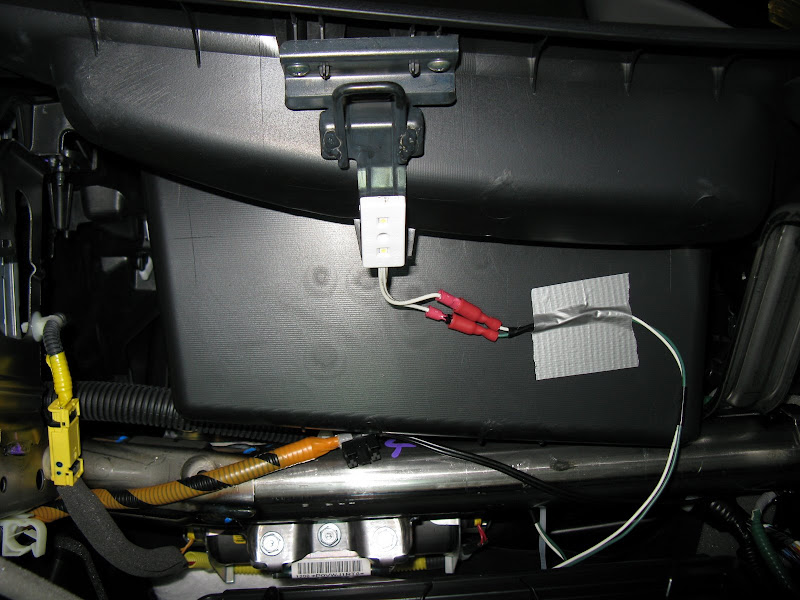
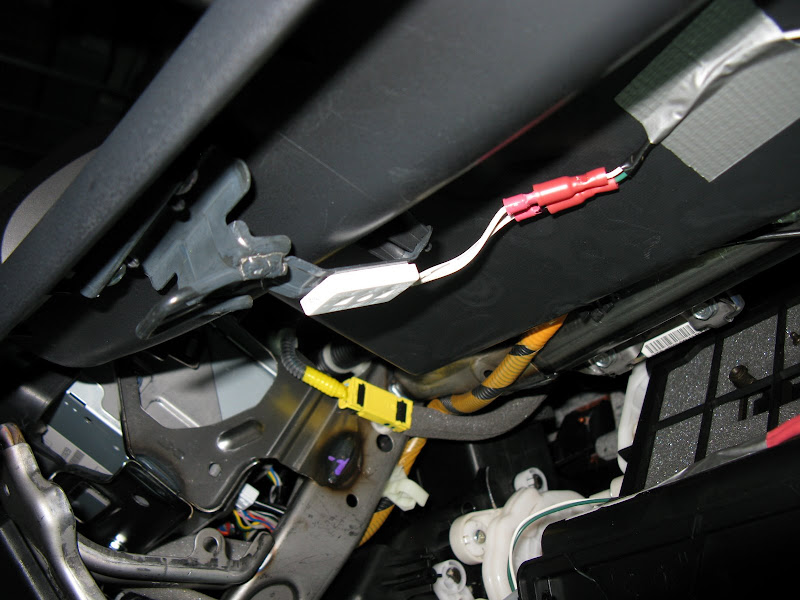
The glovebox lights are also wired to the parking lights
Upper glovebox


Lower glovebox
The switch was cut and bypassed for now so that the ambient lights & glovebox are always on with parking lights. I figured that if the blue bothers me enough I can use a switched audio potentiometer to turnoff and dim the ambient lights.
Cut and bypassed switch connector
The switch itself was rewired to the footwell illumination with a diode. This enables the driver to turn on the footwell lights without turning on the domelight. This is for times when you need to look for stuff on the floor but can�t/don�t want to open a door, similar to the domelight switch:

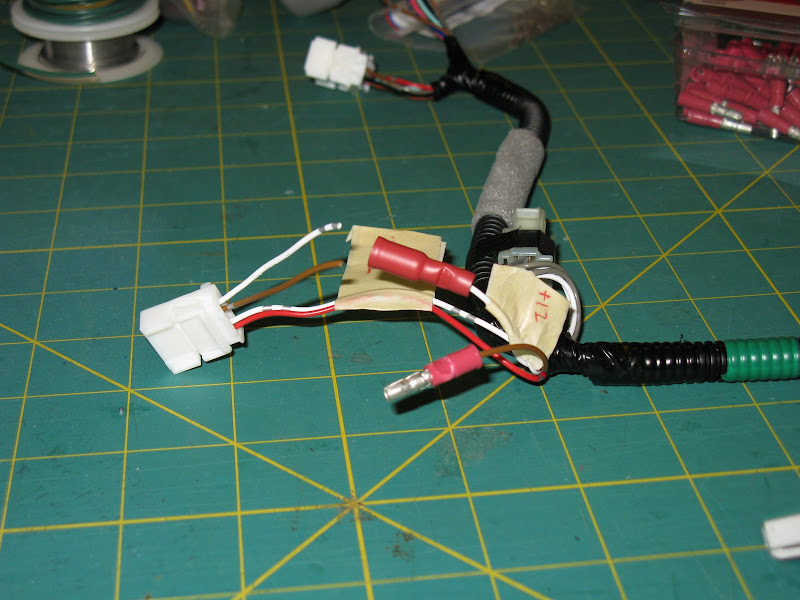
Here�s the original ambient light kit harness

Modified harness with glovebox light and center ambient
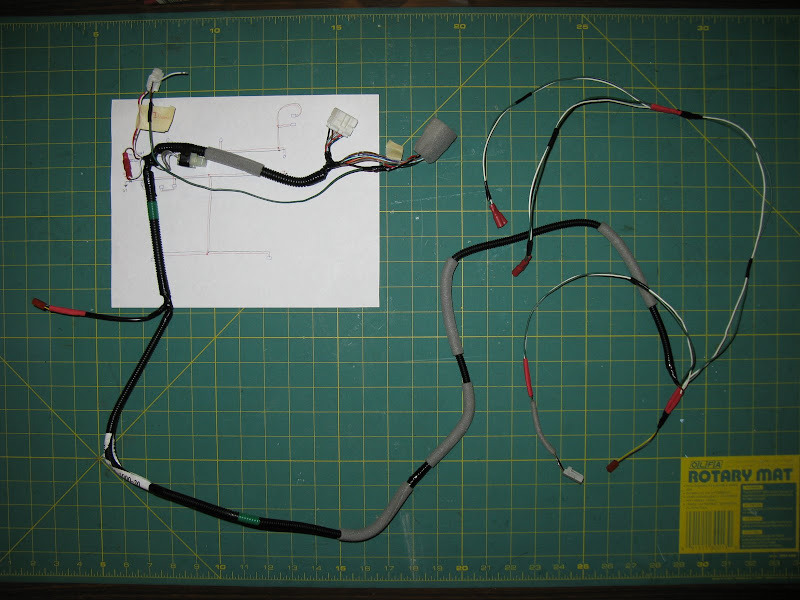
Added footwell illumination wires

G5/G7 are the pink(+12V) and blue(GND) pins on the dome light connector in the fuse box that comes from the MICU marked below. So the footwell lights will fade out and come on just like the domelights with unlocking/locking from the keyfob and opening/closing doors.
%20marked%20up.jpg)
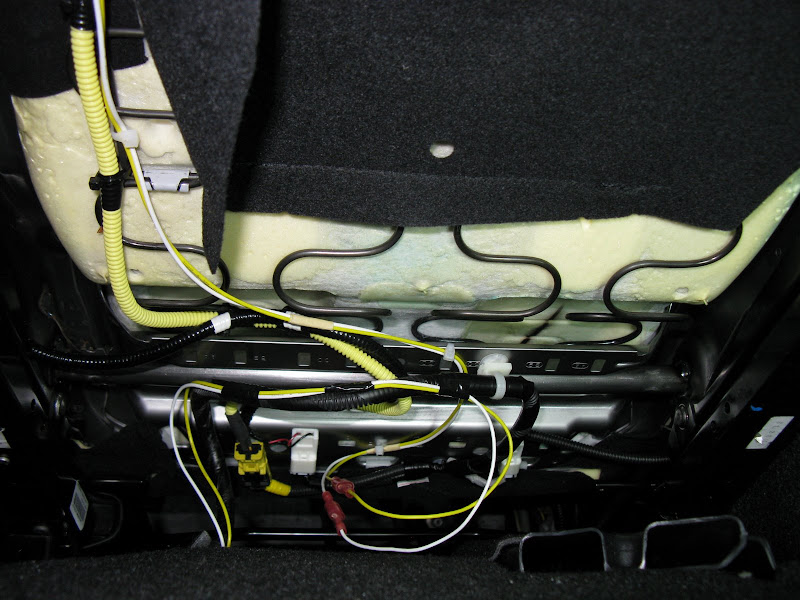
Rear footwell illumination wires


Underside of driver's seat
Underside of passenger's seat
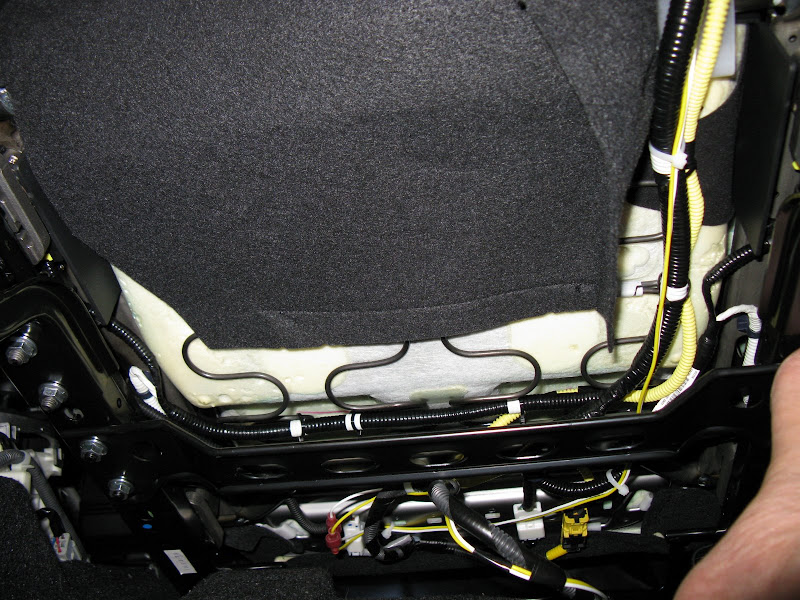
how the LED module is mounted in the seat


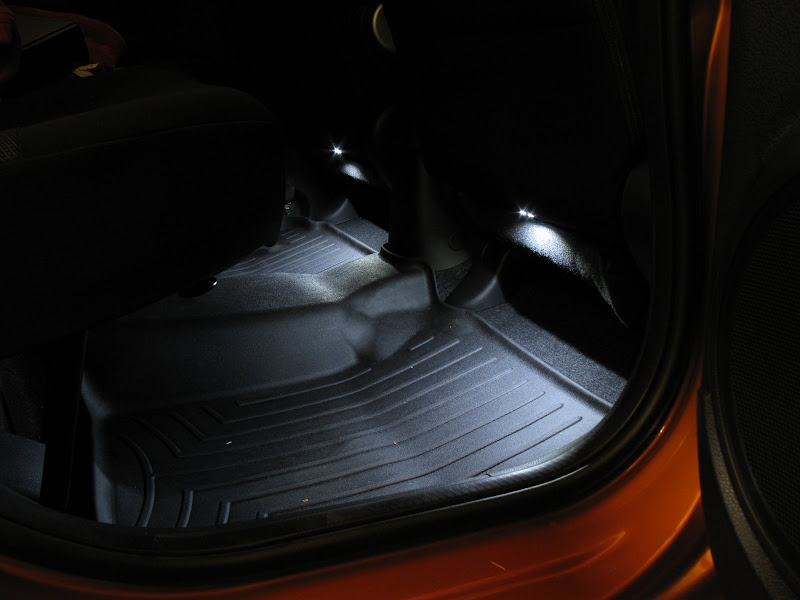
Finished rear footwell illumination
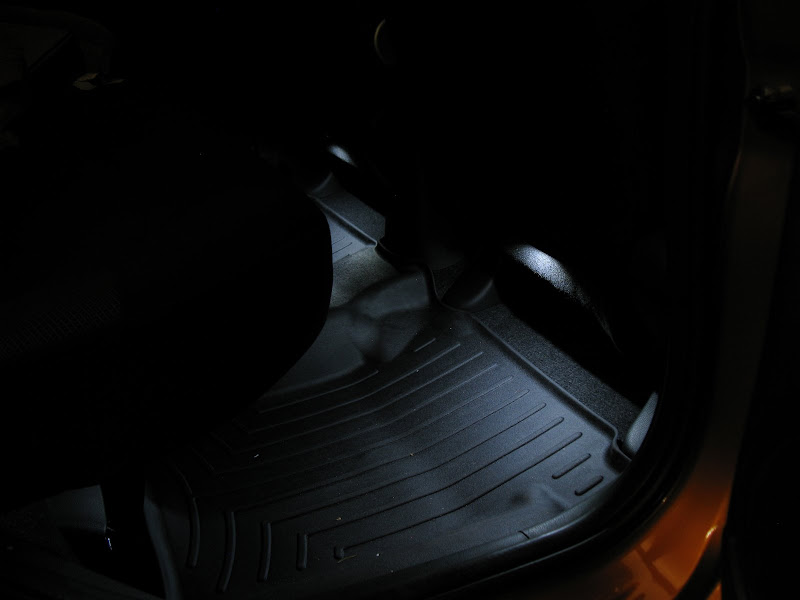
From a lower angle
Doors & Hatch open

Sources for parts used:
superbrightleds.com for LEDs and modules
cheaphondaparts.com for Ambient Light Kit
Norvac/Fry�s/RadioShack for everything else
Well it came out better than I expected so I thought I'd share:
Footwell Illumination (door open/unlock)
Ambient Lights (parking lights or headlight switch on)
Ambient Lights (parking lights or headlight switch on) + upper glovebox open
Ambient Lights (parking lights or headlight switch on) + lower glovebox open
Ambient Lights (parking lights or headlight switch on) + both gloveboxes open
All open/on
Since I didn�t like the light module placement and color of the ambient light kit, I used flux leds dimmed with 5.6kΩ resistors mounted inside the recessed area instead so that they�re completely hidden from view and angled better.
Circuits for the Flux LEDs
Flux LED
Flux LED leads through 4 holes
Completed passenger side
Also reused one of the light modules from the kit as the lower center cup holder area light.
Off center hole
so that this
fits into this hole
The glovebox lights are also wired to the parking lights
Upper glovebox
Lower glovebox
The switch was cut and bypassed for now so that the ambient lights & glovebox are always on with parking lights. I figured that if the blue bothers me enough I can use a switched audio potentiometer to turnoff and dim the ambient lights.
Cut and bypassed switch connector
The switch itself was rewired to the footwell illumination with a diode. This enables the driver to turn on the footwell lights without turning on the domelight. This is for times when you need to look for stuff on the floor but can�t/don�t want to open a door, similar to the domelight switch:
Dash Switch OFF = footwell & domelight ON only with door(s) open
Dash Switch ON = footwell ON, domelight remains OFF
1N4748A Zener shown (mistakenly grabbed from my parts bin, 1N4001 50v peak Diode is what I actually used)Dash Switch ON = footwell ON, domelight remains OFF
Here�s the original ambient light kit harness
Modified harness with glovebox light and center ambient
Added footwell illumination wires
G5/G7 are the pink(+12V) and blue(GND) pins on the dome light connector in the fuse box that comes from the MICU marked below. So the footwell lights will fade out and come on just like the domelights with unlocking/locking from the keyfob and opening/closing doors.
Rear footwell illumination wires
Underside of driver's seat
Underside of passenger's seat
how the LED module is mounted in the seat
Finished rear footwell illumination
From a lower angle
Doors & Hatch open
Sources for parts used:
superbrightleds.com for LEDs and modules
cheaphondaparts.com for Ambient Light Kit
Norvac/Fry�s/RadioShack for everything else
Last edited by Zalthras; Oct 28, 2009 at 03:21 PM. Reason: added MICU scan
 +1
+1
Member
Joined: Jul 2009
Posts: 39
From: USA
You're a DIY ninja. My old car had a sunroof so the backseat was always dark (no dome light) and I just stuck one of these in there, lol. Amazon.com: Sylvania DOT-it Self-Adhesive Bright White LED Light, Black: Home Improvement


Member
Joined: Jan 2009
Posts: 1,888
From: Para�aque City, Philippines

Wow, that's one comprehensive install you got there. Pretty much covered all the angles! Kudos!
Would love to do the same to my GD1. Right now my CCFL footwell lighting just comes on only when the doors are open - a much simpler but less versatile arrangement than yours.
Would love to do the same to my GD1. Right now my CCFL footwell lighting just comes on only when the doors are open - a much simpler but less versatile arrangement than yours.

New Member
Joined: Aug 2009
Posts: 1
From: Houston
Great Job!
Any chance you could list the part numbers for the lights you used? I checked the superbrightled website, and they have a bewildering array of choices.
Also, now that you have had it for a while, is there anything you would do different? More/brighter lights, etc?
Thanks!

John
Any chance you could list the part numbers for the lights you used? I checked the superbrightled website, and they have a bewildering array of choices.
Also, now that you have had it for a while, is there anything you would do different? More/brighter lights, etc?
Thanks!
John


