
DIY Headunit,Amp,Subwoofer guide by Vash **Lots of Pics**

This was the first time I have ever done this and I wanted to give my thanks to the following members on this forum who helped me:
circa40
Fit4Spl
FittedonEm
V-fit
B-Blue
1SickVeisideZ
kman
I wanted to make this long DIY because I had alot of mistakes even WITH alot of help, and I ended up finishing the install so perfectly... it feels that its more then professionally done... the grommet is air tight.. and there is no damage on any products... also all wiring was still hiden and tucked for a stealth installation.
Now to start....
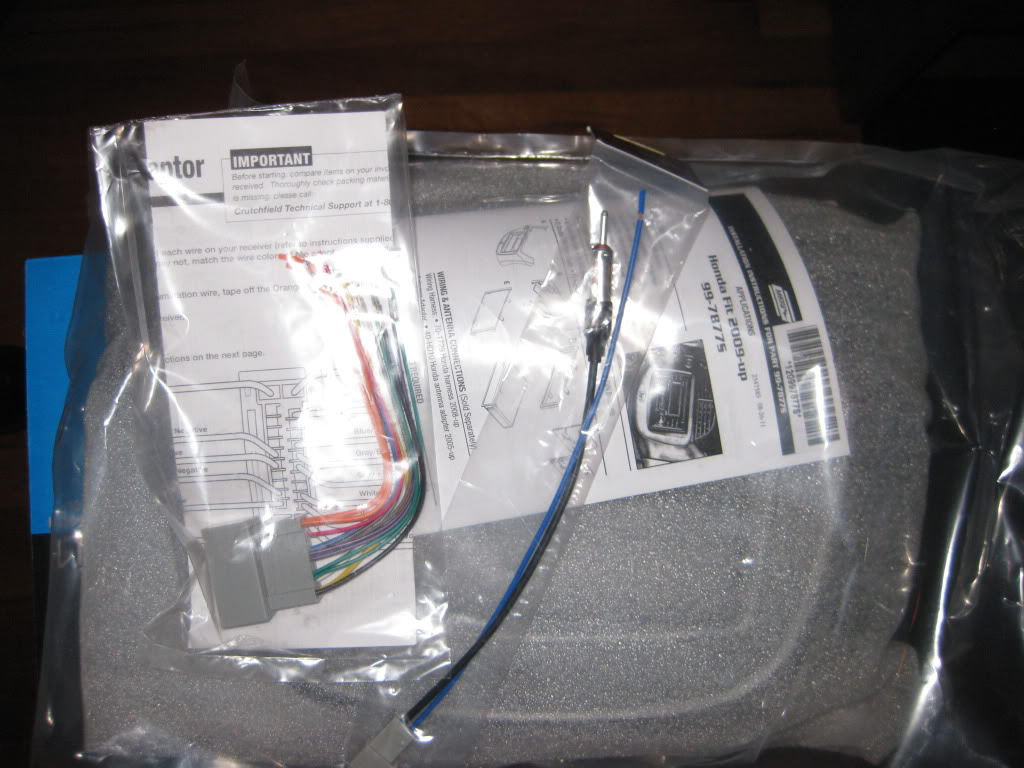
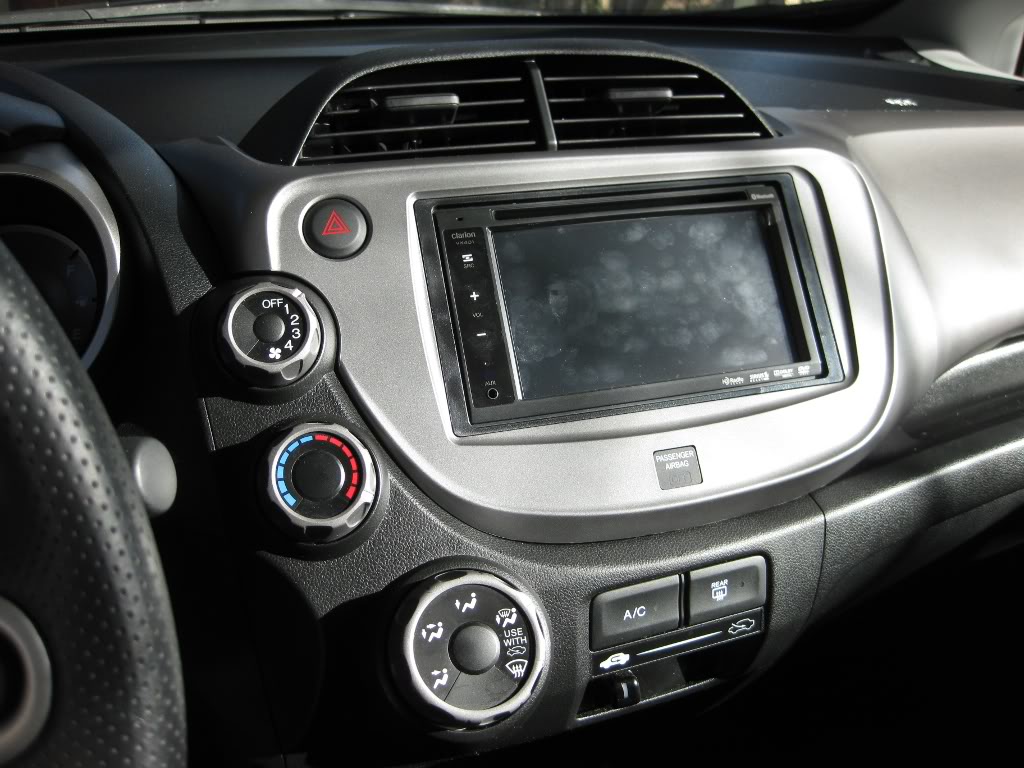
I bought a VX401 from Crutchfield, and it came with the Metra wiring harness, antenna adapter and the faceplate with various overlay frames for the headunit.
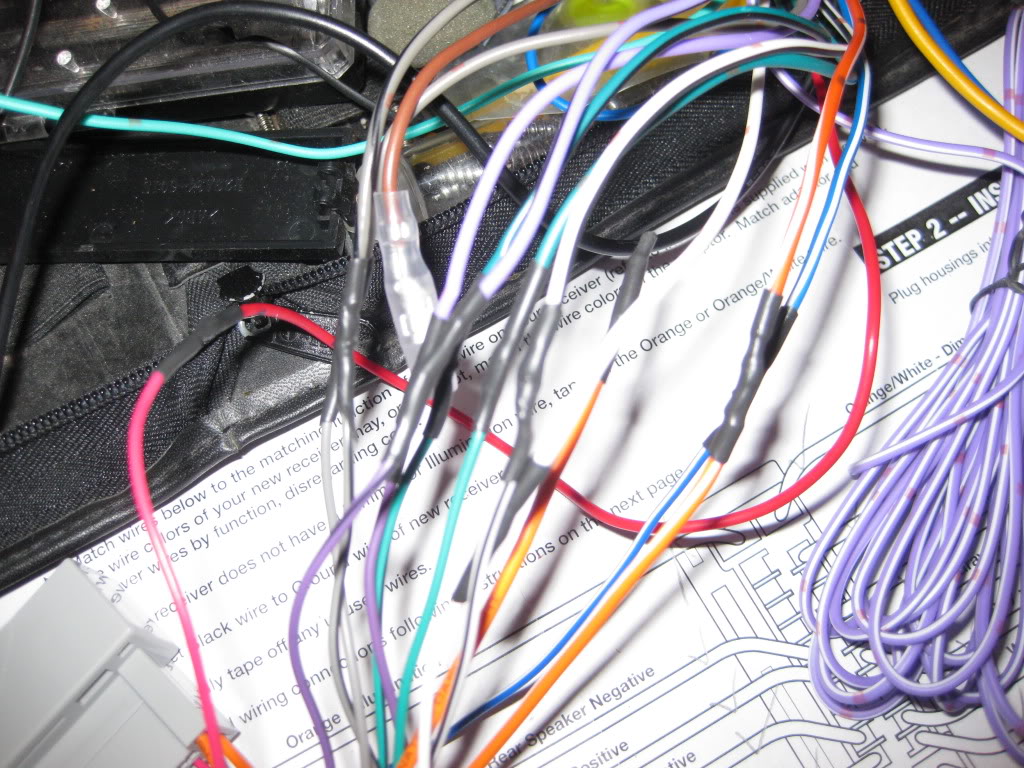
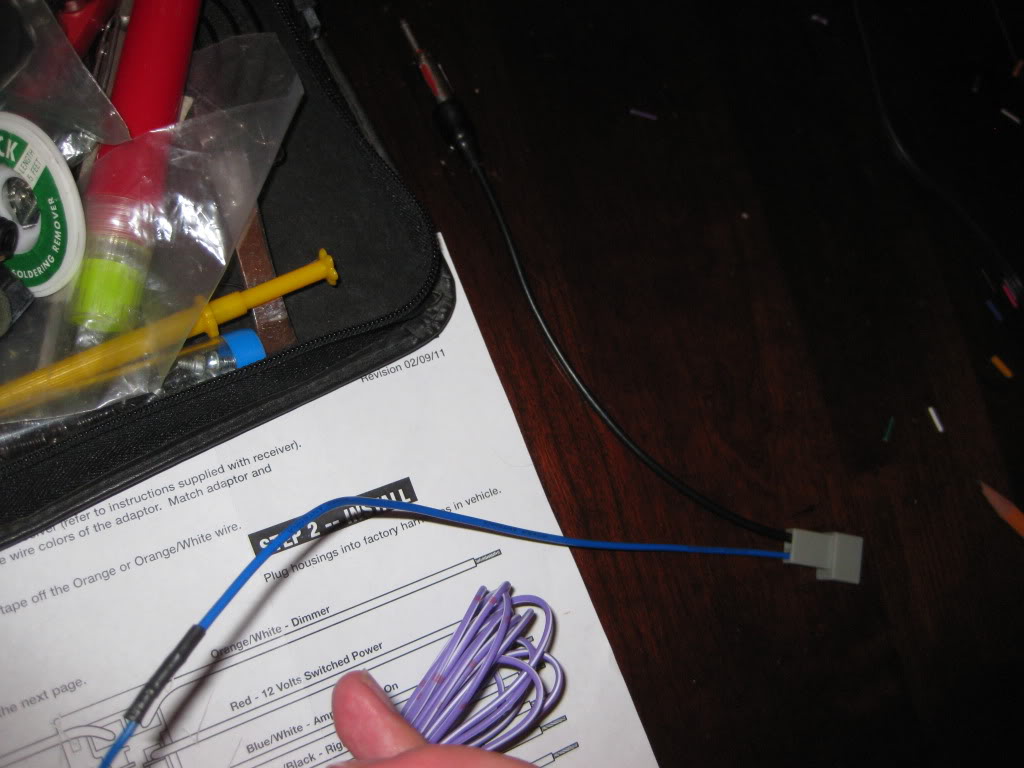
Wiring the wiring harness to the adapter to connect to the OEM harness was the first thing i did. I followed the color code instructions carefully BUT on the adapator harness there is a blue/white wire that needs to be left OUT unless your honda fit came with a stock Amp sire to the harness (which none of the fits do) . So you wire that one to a really long wire that goes all the way to the Remote terminal on the amp (i found this out the hard way because the amp wasn't turning on when I finished up everything)
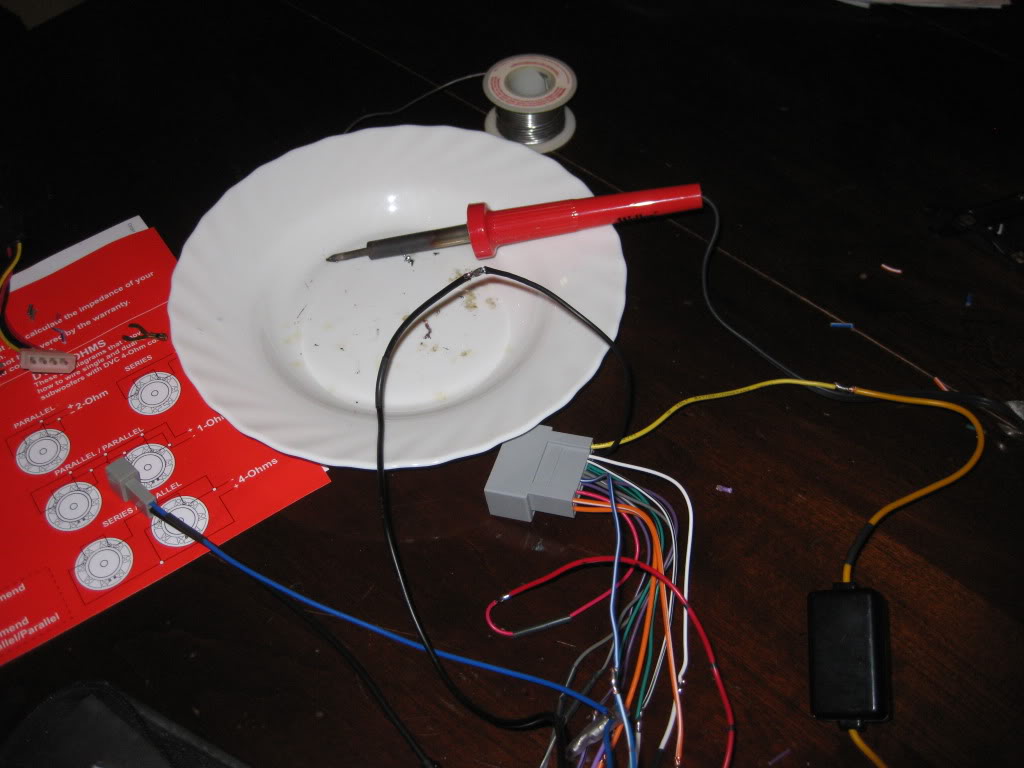
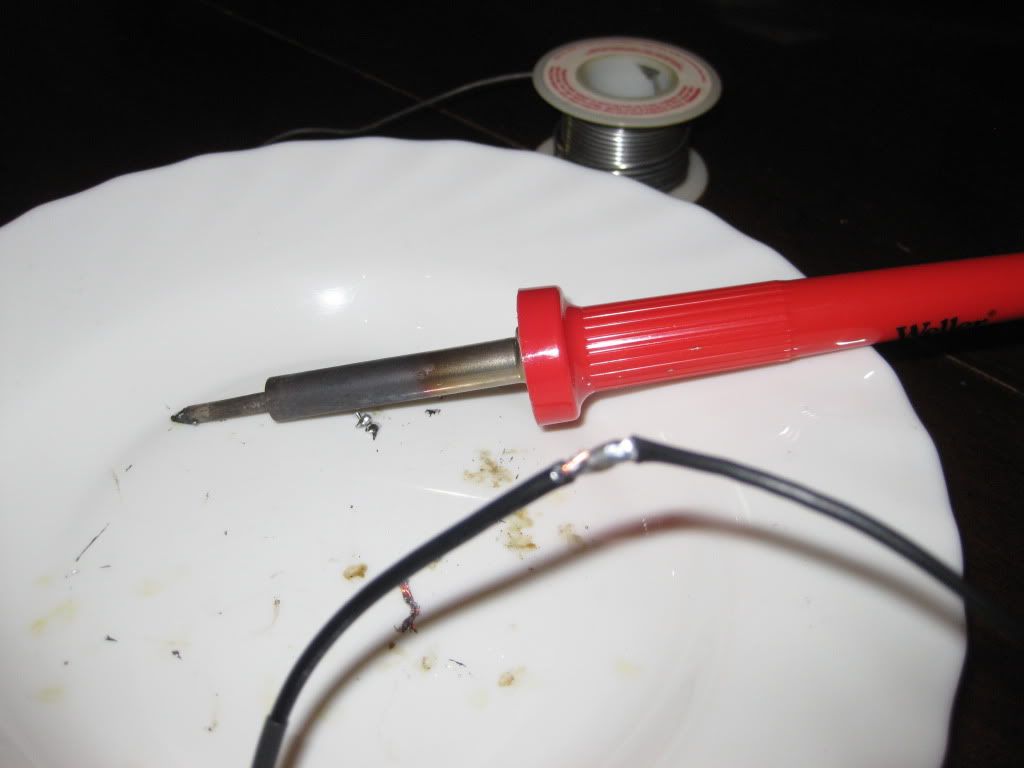
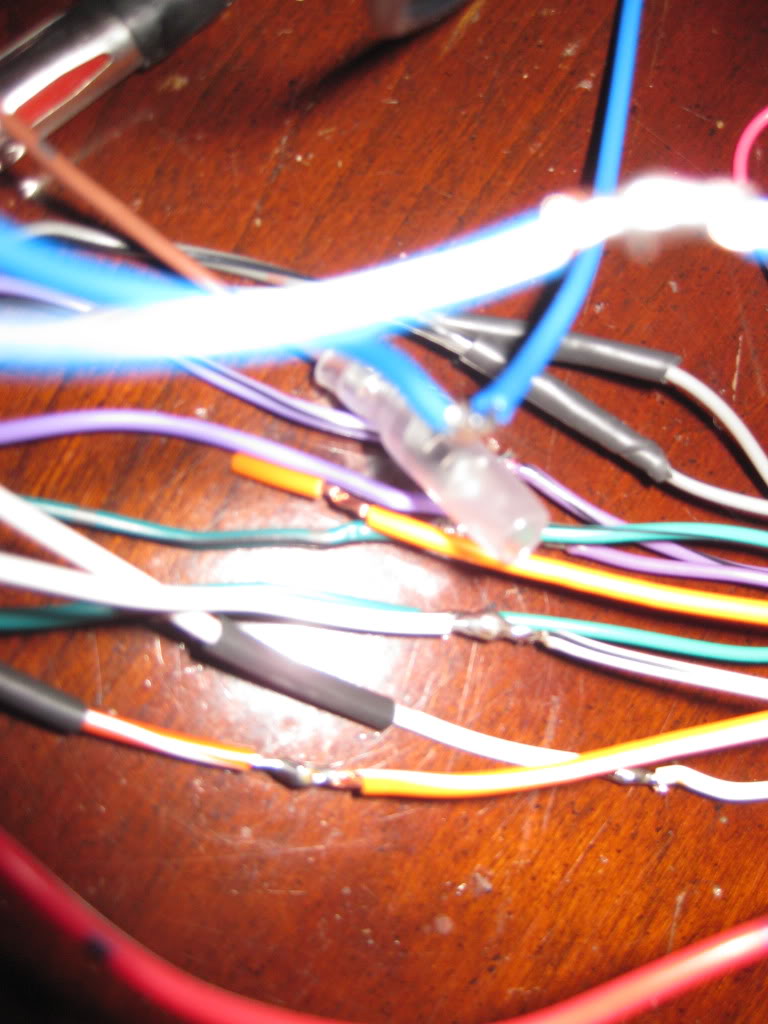
Its personal preference, but I used the wire twisting and soldering way, and I used shrink wrap to cover up the solder and unshielded parts:
The Amp kit I used specifically was:
db LINK PK4Z which is a 4 gauge amp wiring kit, it came with a really long skinny blue wire which i had no clue what to use it for... untill none of my amp stuff worked and I realized you needed a Remote wire plug in, which I soldered to wiring harness for my clarion head unit, and NOT the adapter.. because the adapter to the honda leads to the car and not to the head unit for the blue/white wire. The wire on the harness should be a white/blue and the one that came with my kit was a solid blue.. it was kinda confusing because antenna wire is also a solid blue....
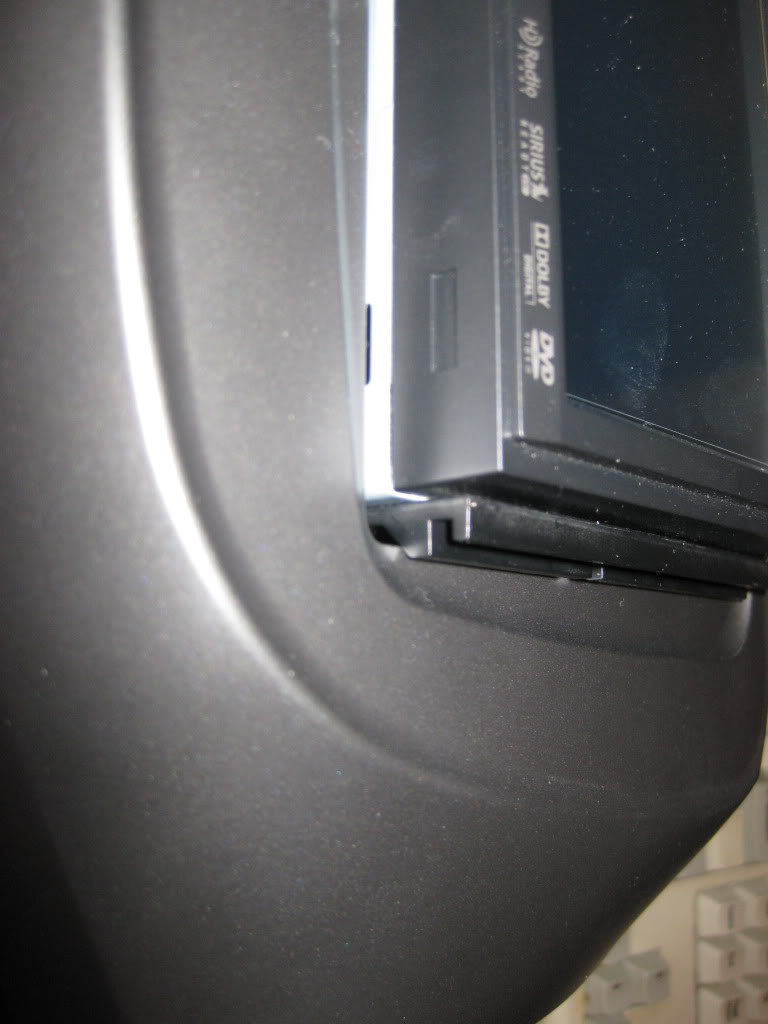
I prepared the headunit next and I did it wrong the first time, putting the brackets on first and this is what it looks like done incorrectly:
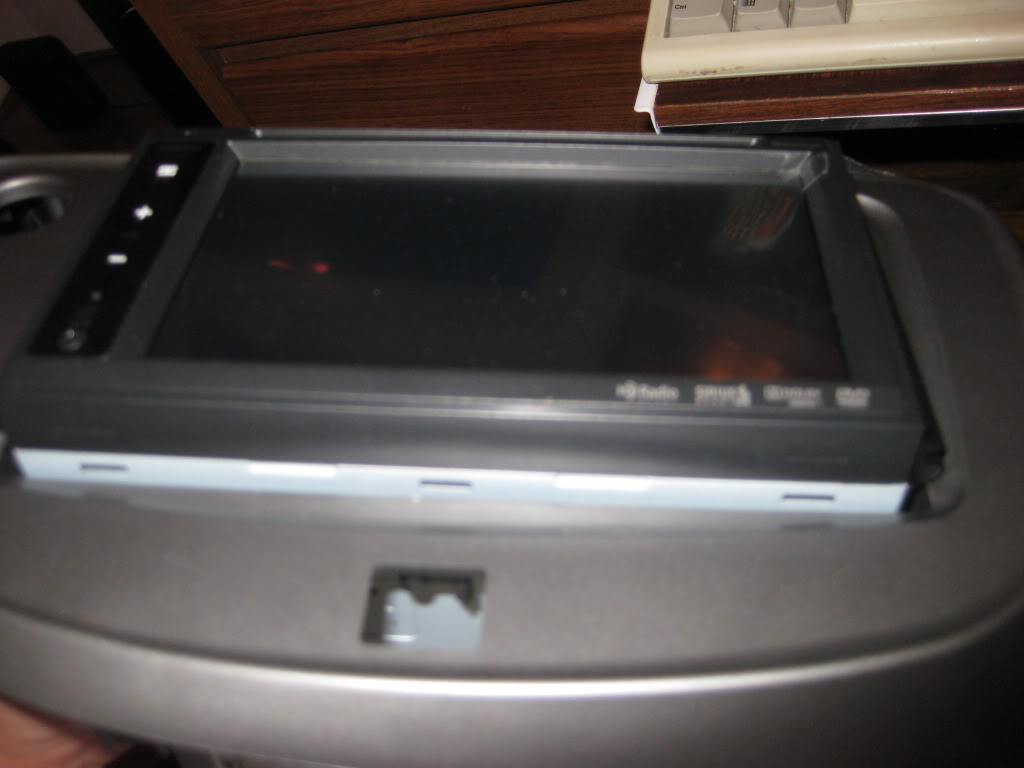
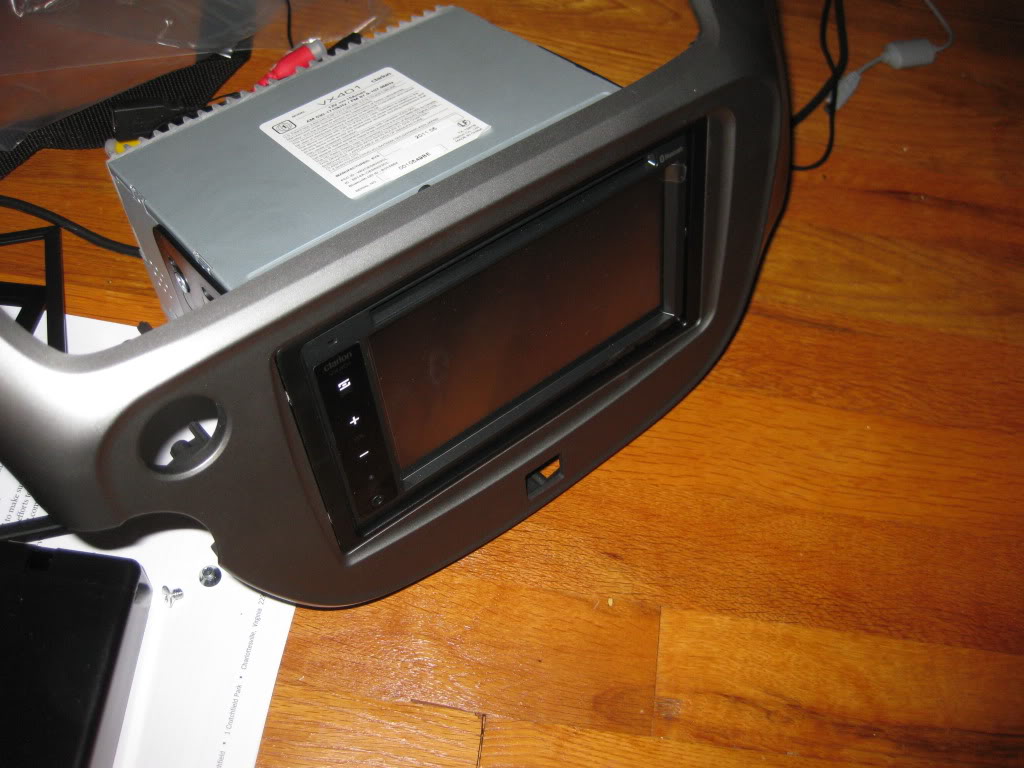
Thankgod for this forum that i did not start grinding and sanding anything because your supposed to mount the brackets first like this, and it will fit perfectly:
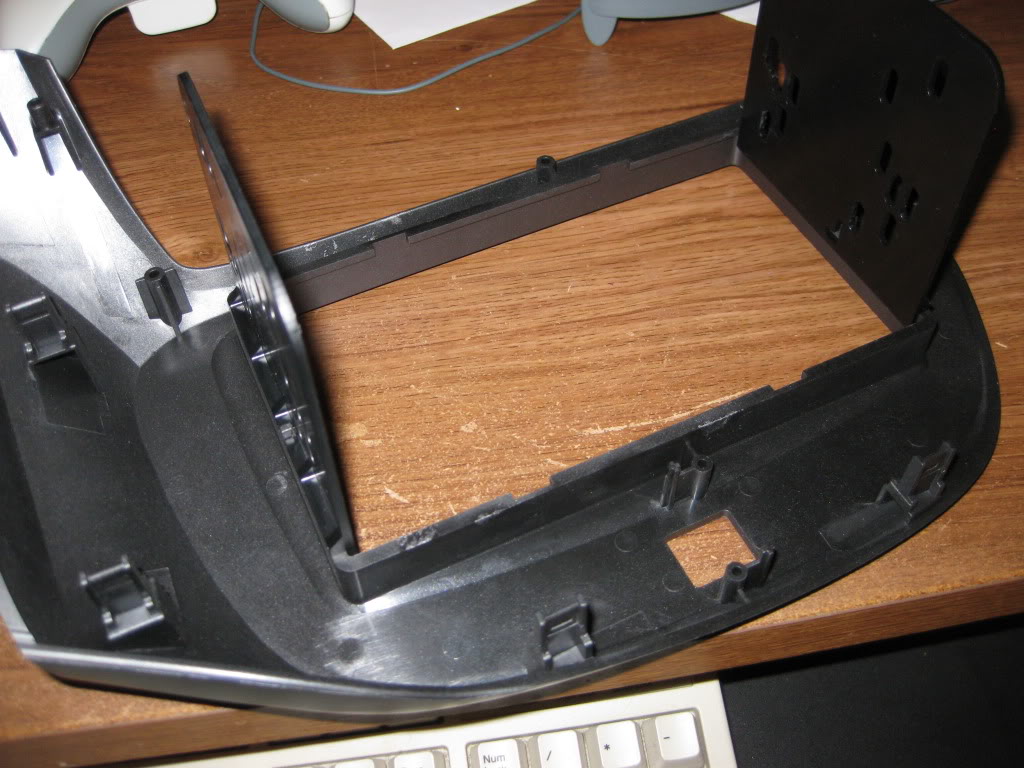
The Clarion headunit also has stamped sides, so the screw mount locations are deep and it was TOO deep for the metra screws to make it.. I went to Ace hardware and got the shortest 5M screw available and it was the exact length i needed to screw in the Metra bracket plates
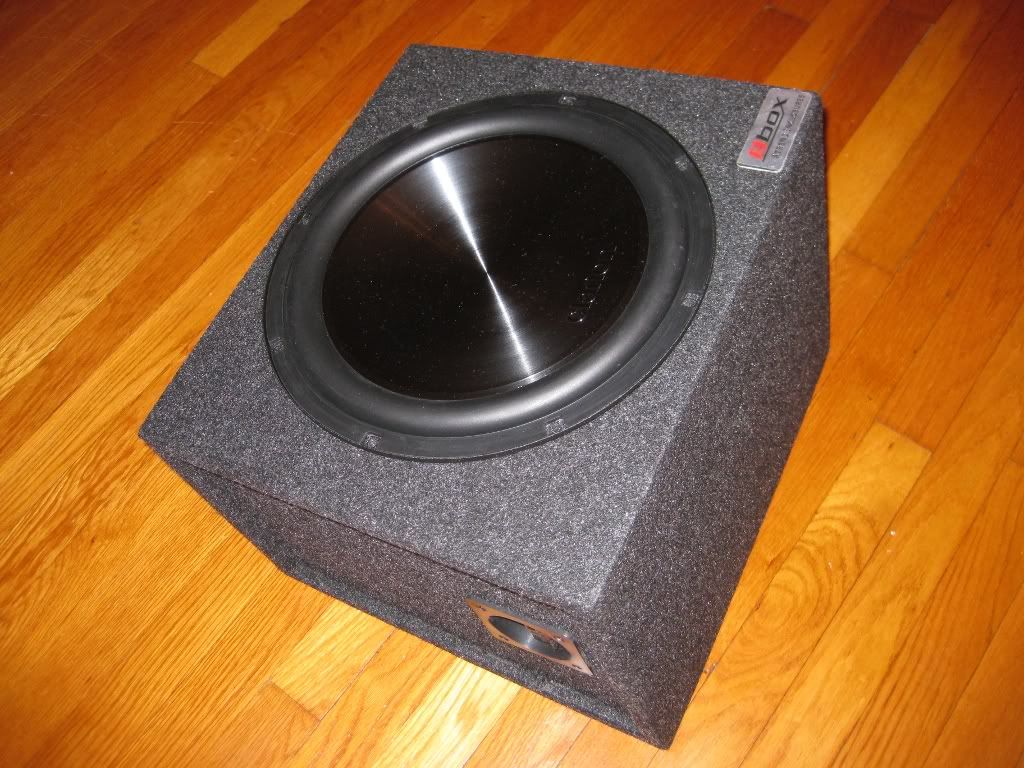
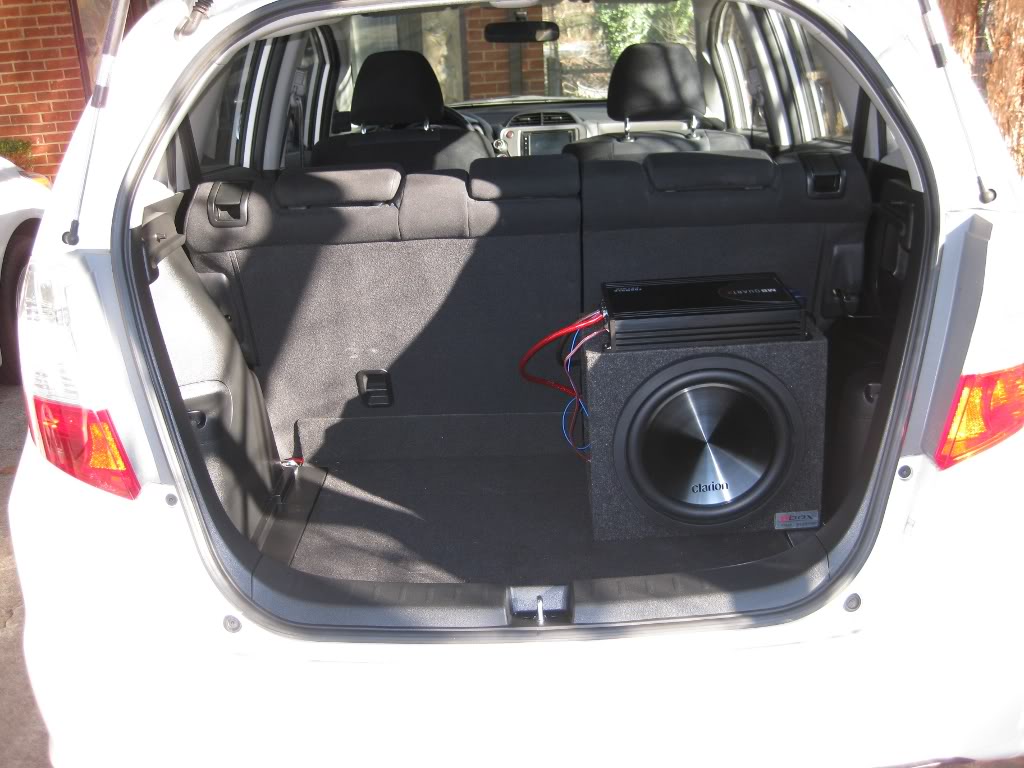
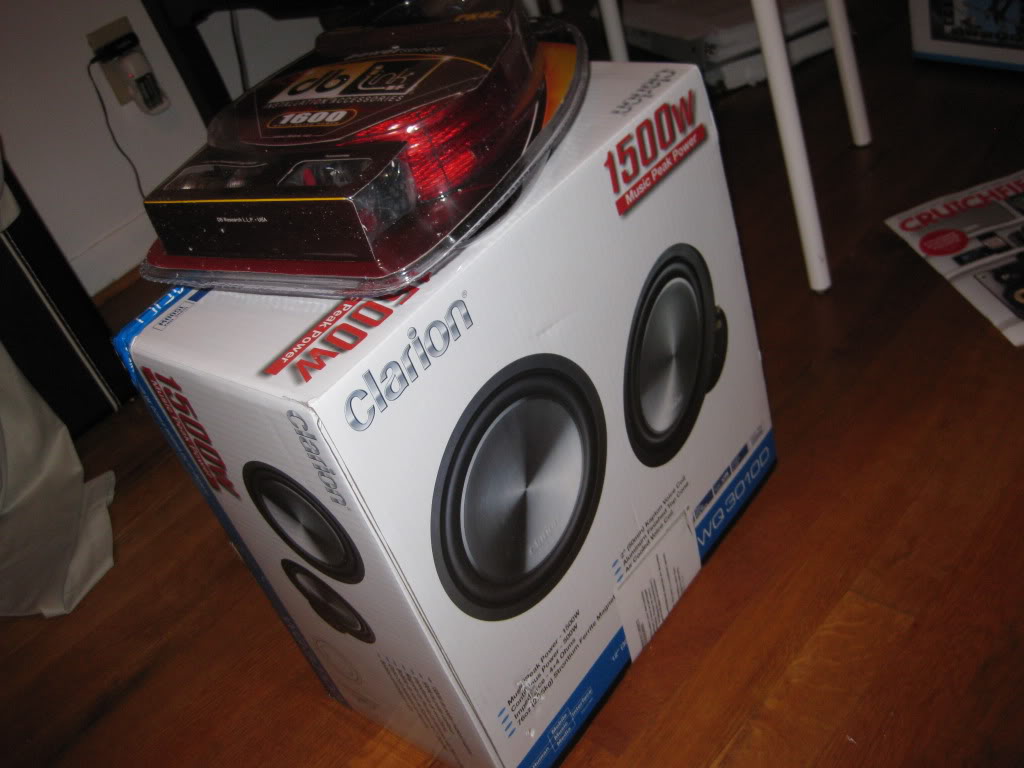
I then put the sub on the box, using a #8 wood screw (i wanted to use 6, but we had 8's laying around the house)
My specific sub is the Clarion 12 inch 4ohm DVC, I used a 4 ohm because I am wiring it in series which will drop the Ohm down to a 2 Ohm.
EDIT: UPDATE OF THIS FIX CONCLUSION ON POST #22 THIS AMP was Rewired to a different configuration that is not demonstrated in this picture.
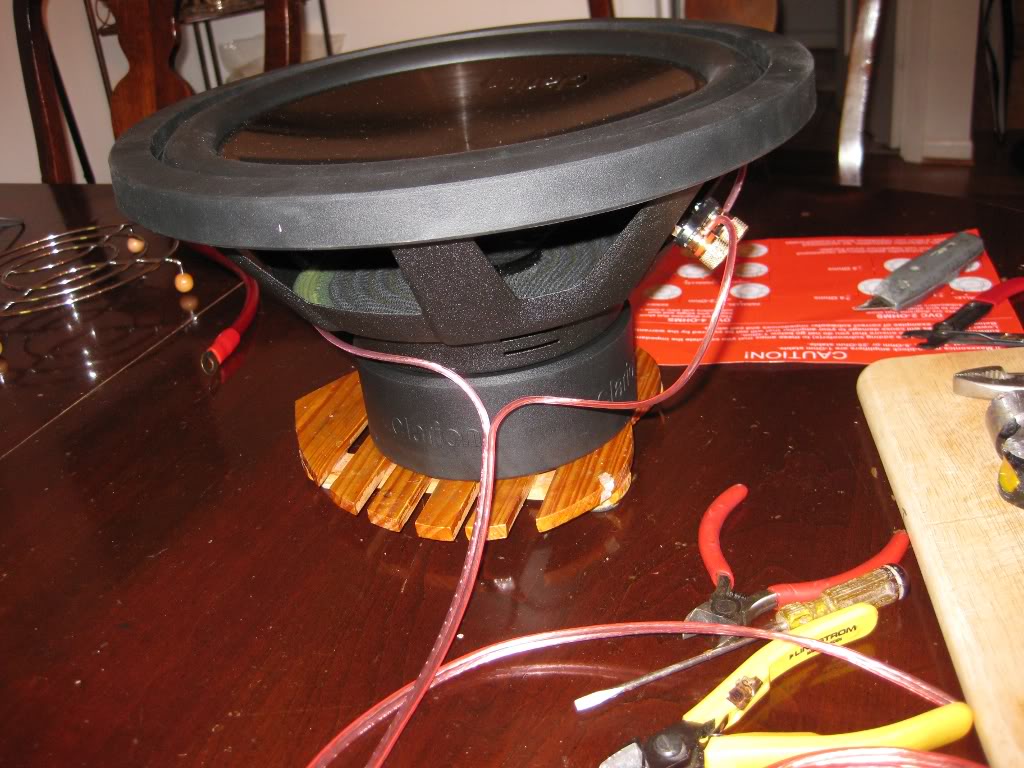
EDIT: The pic above here is wired for 4ohm and its quieter.. here is the updated way I have rewired it and its like 100% MUCH LOUDER

I then mounted my Amp, which I ended up using a MB Quart FX1.600
In this picture i also used the rubber surrounding of the Clarion woofer. I ended up predrilling the holes into the box, and then putting the rubber surrounding on, and then lifting up the rubber peice and putting the screws under it.
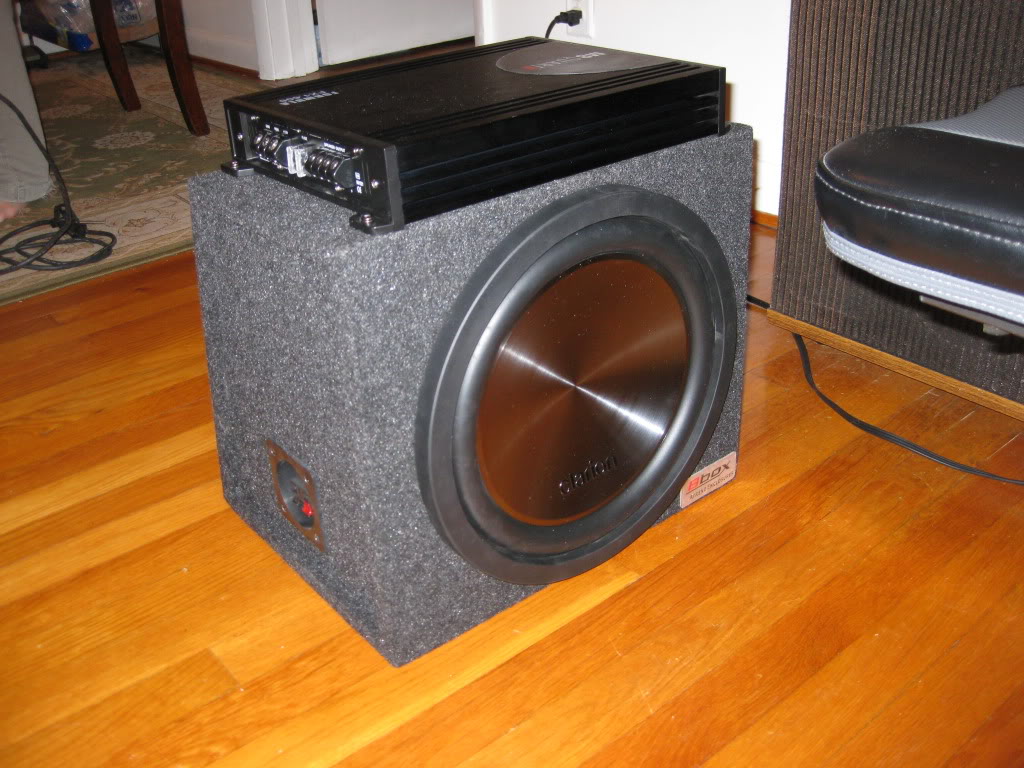
I used all the terminals that came with the Amp wiring kit, they were pretty simple, you just had to strip the wire, putting the copper wire into the terminal and clip down the ends with a plier.
These next 2 pictures are kman's pictures.. but it helped so much with the installation... the hardest things to do are this... taking out the plate below the vending switch
http://farm5.static.flickr.com/4014/...3daac12619.jpg
and then finding that screw next to that white looking vent plastic peice to unscrew.. which is a 7mm bolt or a philips screw driver... you need a LONG one.. i had a PC tools kit that had a screw driver long enough to get to that location to unscrew it... i was REALLY lucky because my dad's tool kit had really long screw drivers and none of them were long enough:
http://farm4.static.flickr.com/3409/...7c1706cfb0.jpg
kman's first post is just.... unbelievably helpful in taking out your headunit.. and installing it back on is just doing the opposite direction.
https://www.fitfreak.net/forums/2nd-...-ge8-pics.html
I personally pushed in and finished up my headunit last..
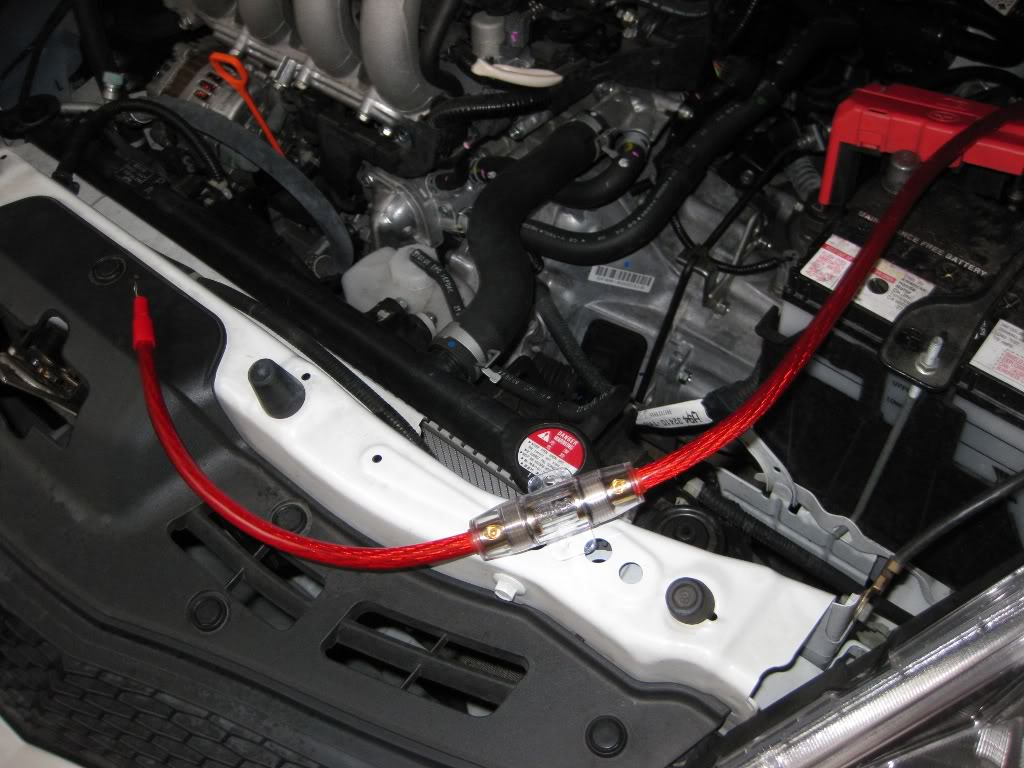
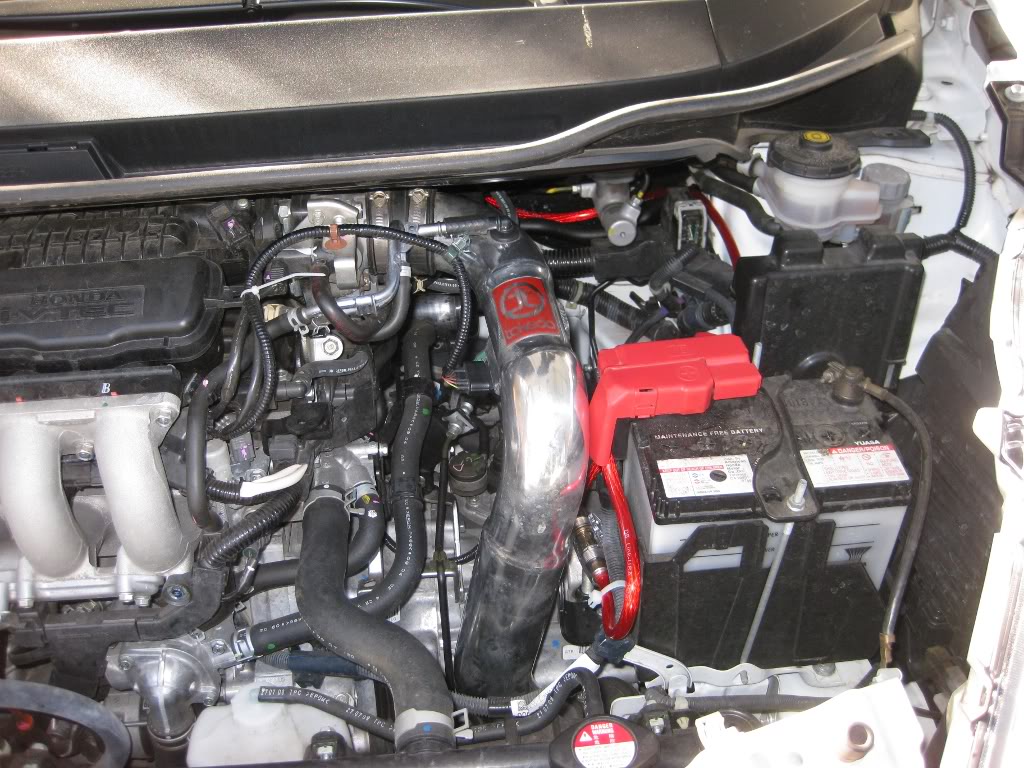
I did my battery next.. it was a simple, create the terminals with the wiring kit, and it goes in the order of:
1. Battery
2. Wire
3. Fuse
4. wire
5. Thru the firewall grommet
6. towards the back of the car
7. Amp.
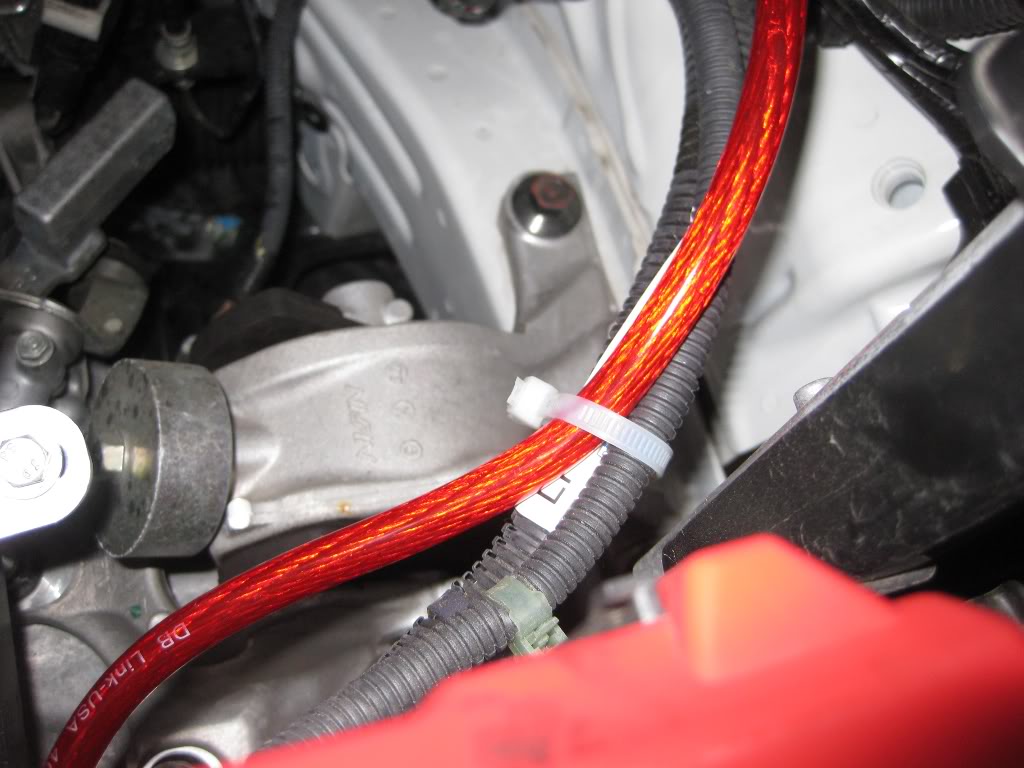
I took off my cold air intake to throw a philips screwdriver into the grommet to make a small hole.. and slowly used larger tools to open up the hole large enough to fit the wire in.. On this forum someone gave the advice of using WD40 so that it would glide easyer.. and it worked like a charm.... because i think if you DON'T use WD40 you will just create so much friction and open up the hole really wide... but the the rubber is really hard and tight, so if you use WD40 and glide it thru, the rubber would keep it air tight still... i wouldn't use and exacto knife because the rubber won't retract and be tight if you gave it a cut.
I ended up zip tieing down the 4 gauge wire into 2 different locations.
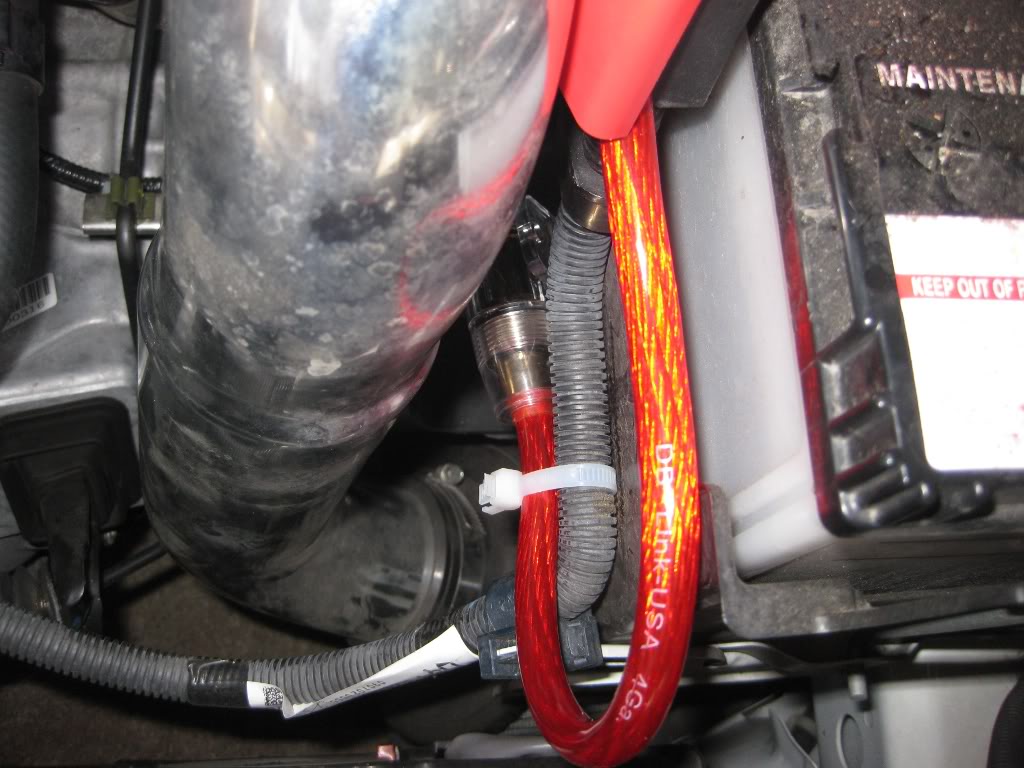
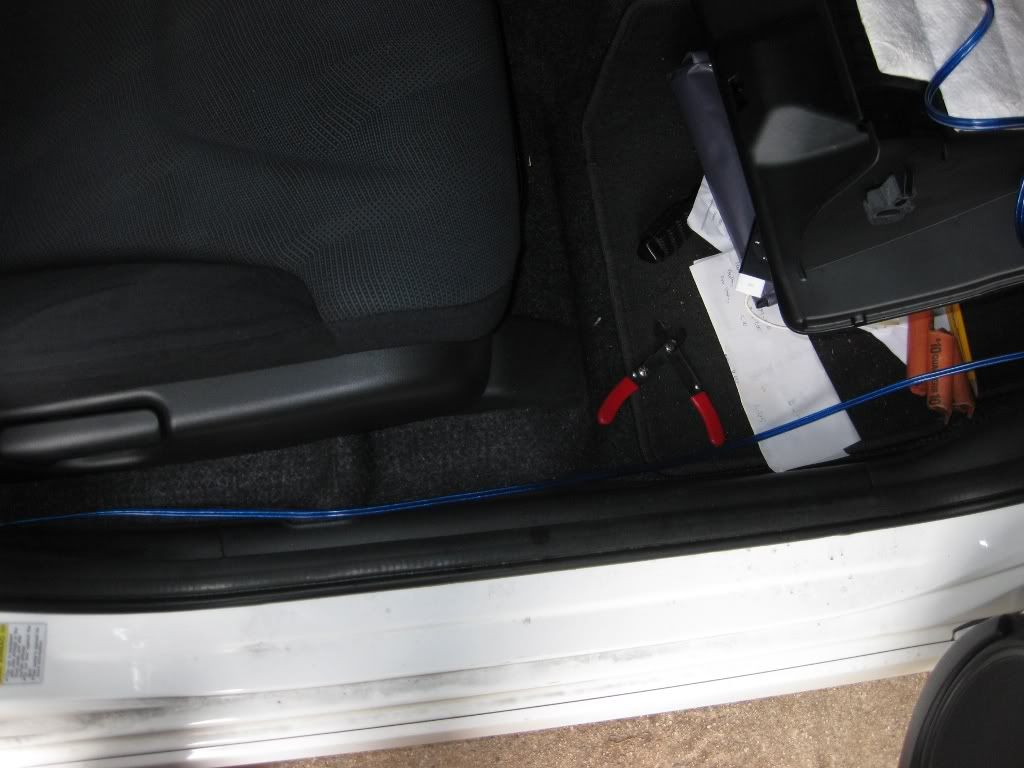
I ran the rest of the red power wire to thru the driver side door sides, and i tucked the wire underneath the plastic, I took off the plastic panel where the driver side seatbelt was to make the tucking a bit easyer.
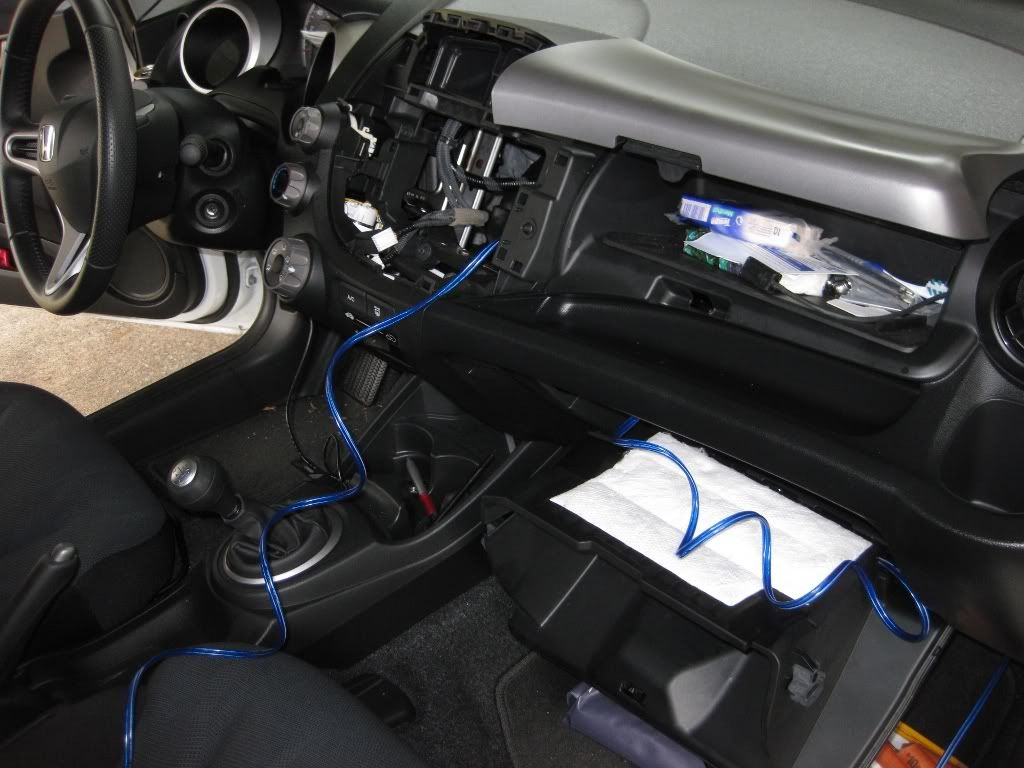
As for the passanger side of the car, i ran the RCA cables.. which is what is recommended by Crutchfield and a few other guides to put the RCA on the opposite side of the power:
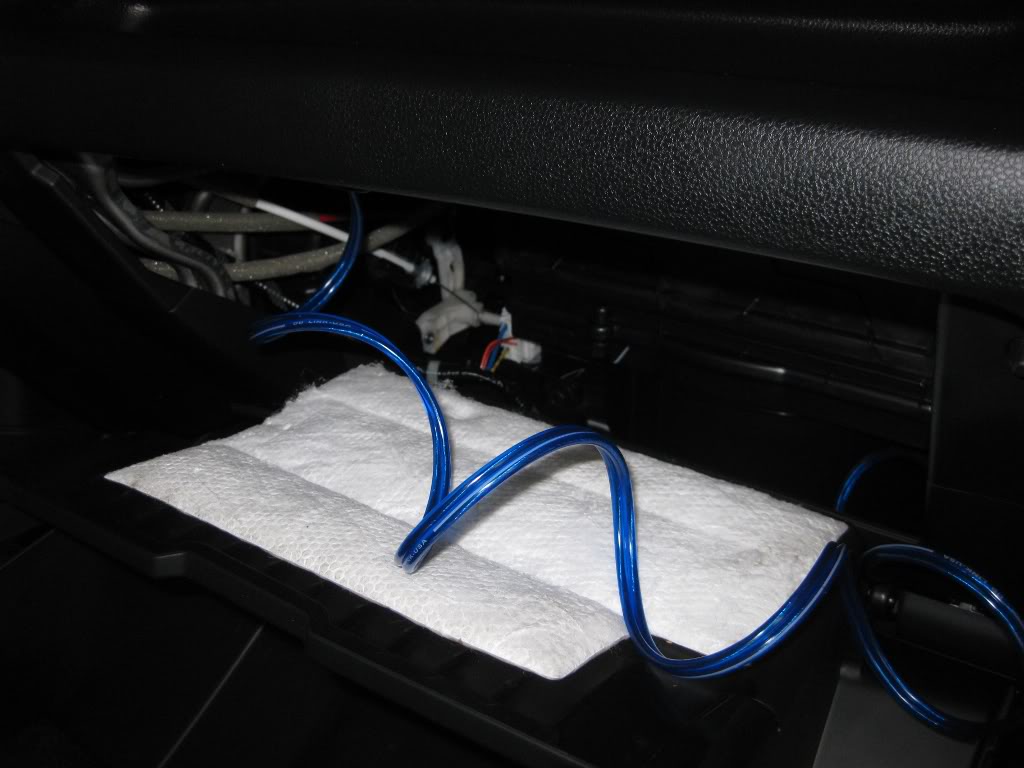
for the RCA lines from headunit to amp, you just gotta drop the glove box, as if you were changing your cabin air filter.. so just open the glove box and push inwards on the sides on the glove box, and it will drop down to its farthest position, from there, i ran remote amp turn on/turn off wire and the RCA Red and white Wire down the side into the glove comparement, and then to the side where the door is, and tucked it all under the plastic. it is completely stealth with everything closed up:
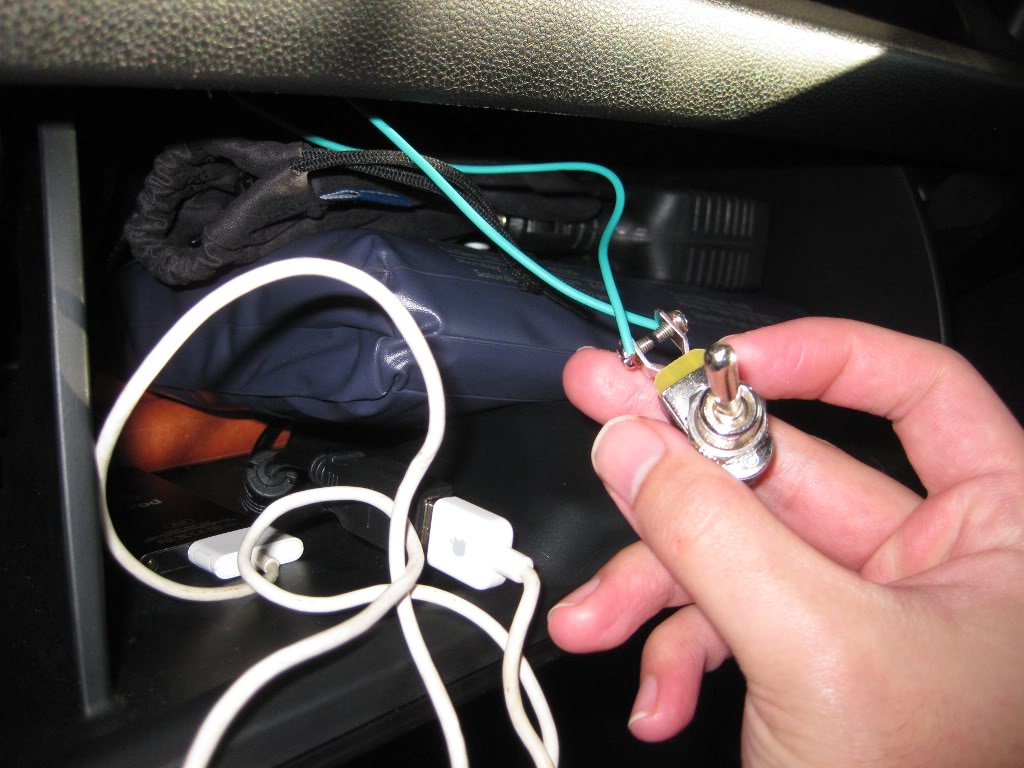
My headunit has a parking break feature to enable DVD driving play.. but the problem with JUST grounding it to by pass it, is that it won't trick the headunit unless it goes on and off.. some units are able to just be grounded and it will ALWAYS work... but this one is tricky... I ended up using a toggle, switch and screwed one line down to one of the milliion scews you can use as a negative on the frame of the dash ONTO a toggle switch.. (like a 4 dollar one from autozone one) and had the other line leading to the headunit's wiring harness.
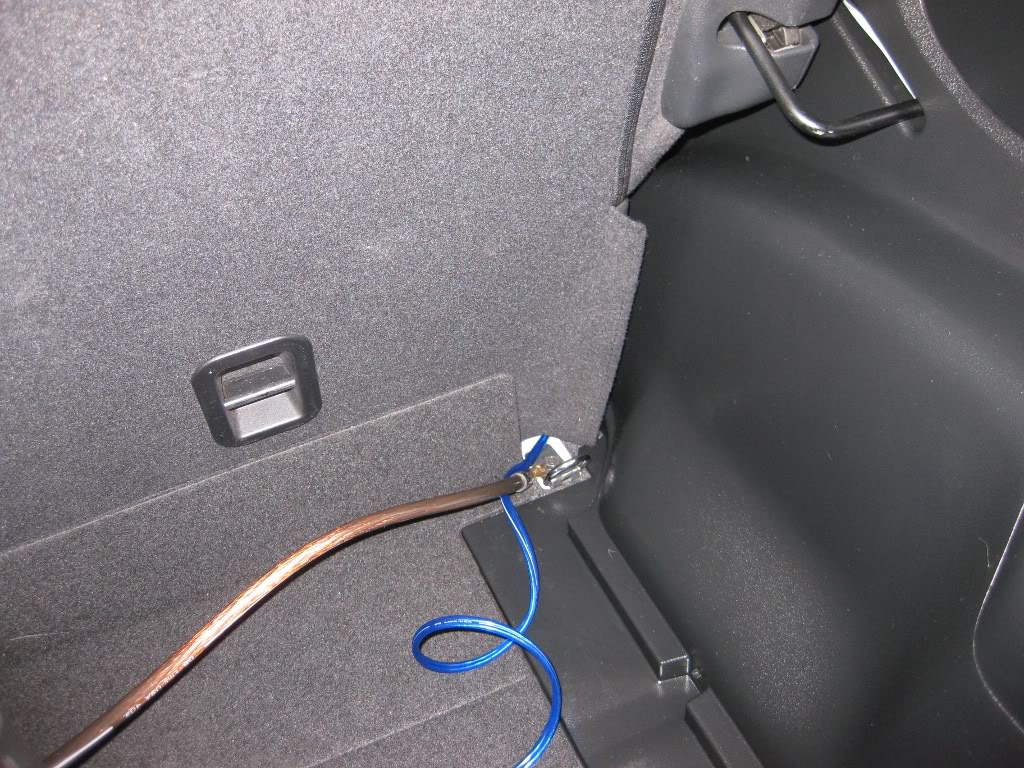
For the ground for the amp, i used that bolt with a hook thing on it in the hatchback
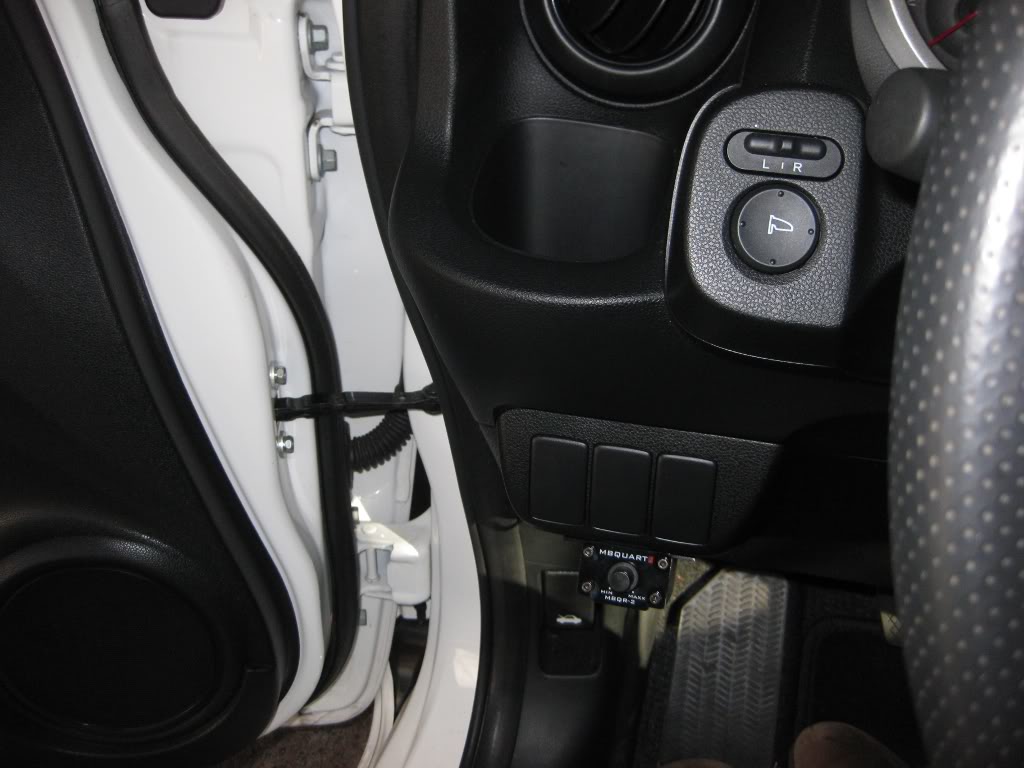
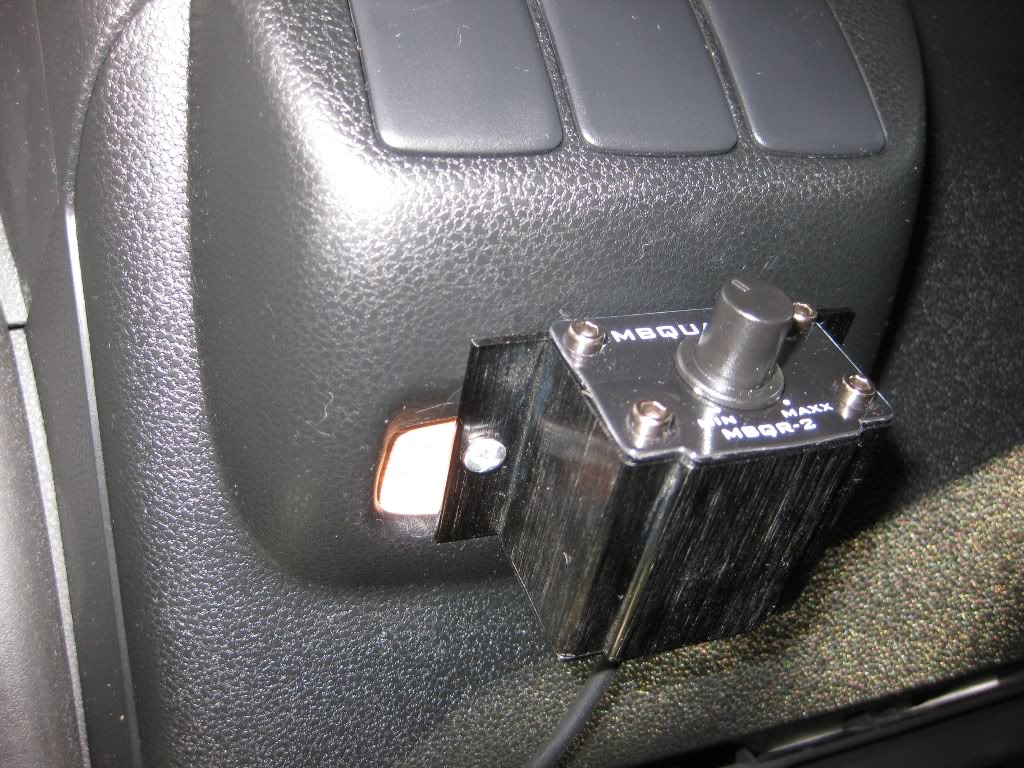
With the amp and everything wired up with the ground, RCA, Remote turnon and off, my amp also came with a controller for the bass.
I ended up putting it here using a wood block behind the plastic dash, and there was a hole underneath it, so that i did not have to put any holes into dash at all..

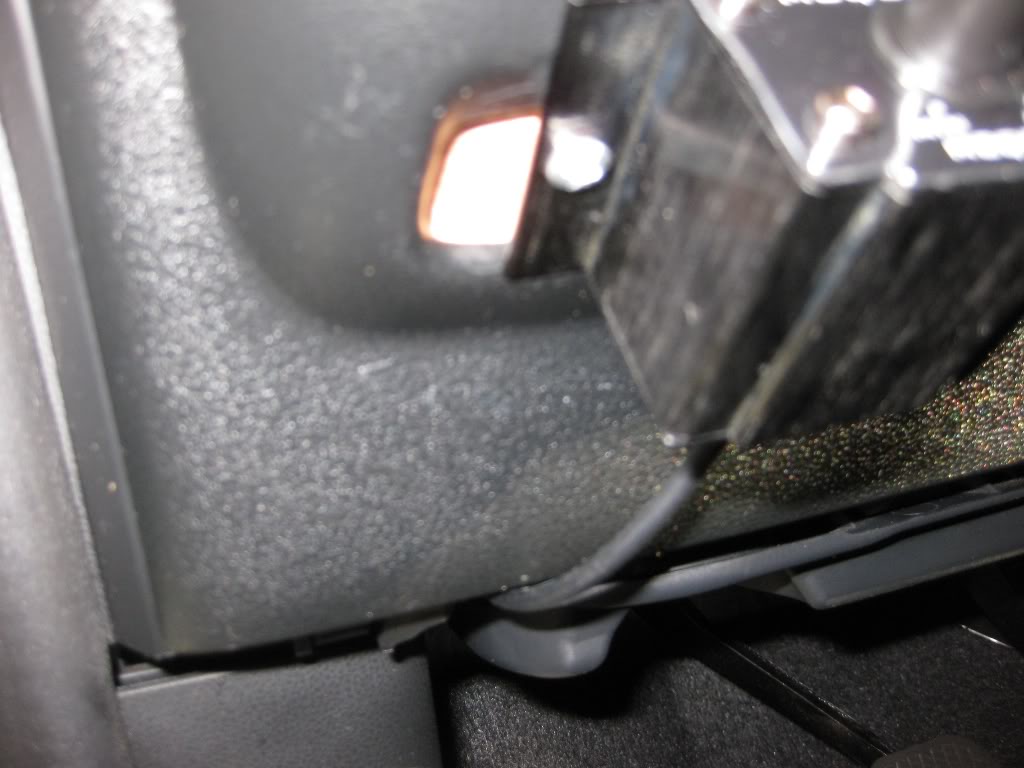
Tucked in the rest of the wires behind the plastic trim... and just close up the headunit...
First time I ever done something like this... I have done suspension and forced inductions several times.. but never audio...
I just hope this guide helps someone, thanks for reading.
Heres the stuff I used in my installation:
circa40
Fit4Spl
FittedonEm
V-fit
B-Blue
1SickVeisideZ
kman
I wanted to make this long DIY because I had alot of mistakes even WITH alot of help, and I ended up finishing the install so perfectly... it feels that its more then professionally done... the grommet is air tight.. and there is no damage on any products... also all wiring was still hiden and tucked for a stealth installation.
Now to start....
I bought a VX401 from Crutchfield, and it came with the Metra wiring harness, antenna adapter and the faceplate with various overlay frames for the headunit.
Wiring the wiring harness to the adapter to connect to the OEM harness was the first thing i did. I followed the color code instructions carefully BUT on the adapator harness there is a blue/white wire that needs to be left OUT unless your honda fit came with a stock Amp sire to the harness (which none of the fits do) . So you wire that one to a really long wire that goes all the way to the Remote terminal on the amp (i found this out the hard way because the amp wasn't turning on when I finished up everything)
Its personal preference, but I used the wire twisting and soldering way, and I used shrink wrap to cover up the solder and unshielded parts:
The Amp kit I used specifically was:
db LINK PK4Z which is a 4 gauge amp wiring kit, it came with a really long skinny blue wire which i had no clue what to use it for... untill none of my amp stuff worked and I realized you needed a Remote wire plug in, which I soldered to wiring harness for my clarion head unit, and NOT the adapter.. because the adapter to the honda leads to the car and not to the head unit for the blue/white wire. The wire on the harness should be a white/blue and the one that came with my kit was a solid blue.. it was kinda confusing because antenna wire is also a solid blue....
I prepared the headunit next and I did it wrong the first time, putting the brackets on first and this is what it looks like done incorrectly:
Thankgod for this forum that i did not start grinding and sanding anything because your supposed to mount the brackets first like this, and it will fit perfectly:
The Clarion headunit also has stamped sides, so the screw mount locations are deep and it was TOO deep for the metra screws to make it.. I went to Ace hardware and got the shortest 5M screw available and it was the exact length i needed to screw in the Metra bracket plates
I then put the sub on the box, using a #8 wood screw (i wanted to use 6, but we had 8's laying around the house)
My specific sub is the Clarion 12 inch 4ohm DVC, I used a 4 ohm because I am wiring it in series which will drop the Ohm down to a 2 Ohm.
EDIT: UPDATE OF THIS FIX CONCLUSION ON POST #22 THIS AMP was Rewired to a different configuration that is not demonstrated in this picture.
EDIT: The pic above here is wired for 4ohm and its quieter.. here is the updated way I have rewired it and its like 100% MUCH LOUDER
I then mounted my Amp, which I ended up using a MB Quart FX1.600
In this picture i also used the rubber surrounding of the Clarion woofer. I ended up predrilling the holes into the box, and then putting the rubber surrounding on, and then lifting up the rubber peice and putting the screws under it.
I used all the terminals that came with the Amp wiring kit, they were pretty simple, you just had to strip the wire, putting the copper wire into the terminal and clip down the ends with a plier.
These next 2 pictures are kman's pictures.. but it helped so much with the installation... the hardest things to do are this... taking out the plate below the vending switch
http://farm5.static.flickr.com/4014/...3daac12619.jpg
and then finding that screw next to that white looking vent plastic peice to unscrew.. which is a 7mm bolt or a philips screw driver... you need a LONG one.. i had a PC tools kit that had a screw driver long enough to get to that location to unscrew it... i was REALLY lucky because my dad's tool kit had really long screw drivers and none of them were long enough:
http://farm4.static.flickr.com/3409/...7c1706cfb0.jpg
kman's first post is just.... unbelievably helpful in taking out your headunit.. and installing it back on is just doing the opposite direction.
https://www.fitfreak.net/forums/2nd-...-ge8-pics.html
I personally pushed in and finished up my headunit last..
I did my battery next.. it was a simple, create the terminals with the wiring kit, and it goes in the order of:
1. Battery
2. Wire
3. Fuse
4. wire
5. Thru the firewall grommet
6. towards the back of the car
7. Amp.
I took off my cold air intake to throw a philips screwdriver into the grommet to make a small hole.. and slowly used larger tools to open up the hole large enough to fit the wire in.. On this forum someone gave the advice of using WD40 so that it would glide easyer.. and it worked like a charm.... because i think if you DON'T use WD40 you will just create so much friction and open up the hole really wide... but the the rubber is really hard and tight, so if you use WD40 and glide it thru, the rubber would keep it air tight still... i wouldn't use and exacto knife because the rubber won't retract and be tight if you gave it a cut.
I ended up zip tieing down the 4 gauge wire into 2 different locations.
I ran the rest of the red power wire to thru the driver side door sides, and i tucked the wire underneath the plastic, I took off the plastic panel where the driver side seatbelt was to make the tucking a bit easyer.
As for the passanger side of the car, i ran the RCA cables.. which is what is recommended by Crutchfield and a few other guides to put the RCA on the opposite side of the power:
for the RCA lines from headunit to amp, you just gotta drop the glove box, as if you were changing your cabin air filter.. so just open the glove box and push inwards on the sides on the glove box, and it will drop down to its farthest position, from there, i ran remote amp turn on/turn off wire and the RCA Red and white Wire down the side into the glove comparement, and then to the side where the door is, and tucked it all under the plastic. it is completely stealth with everything closed up:
My headunit has a parking break feature to enable DVD driving play.. but the problem with JUST grounding it to by pass it, is that it won't trick the headunit unless it goes on and off.. some units are able to just be grounded and it will ALWAYS work... but this one is tricky... I ended up using a toggle, switch and screwed one line down to one of the milliion scews you can use as a negative on the frame of the dash ONTO a toggle switch.. (like a 4 dollar one from autozone one) and had the other line leading to the headunit's wiring harness.
For the ground for the amp, i used that bolt with a hook thing on it in the hatchback
With the amp and everything wired up with the ground, RCA, Remote turnon and off, my amp also came with a controller for the bass.
I ended up putting it here using a wood block behind the plastic dash, and there was a hole underneath it, so that i did not have to put any holes into dash at all..
Tucked in the rest of the wires behind the plastic trim... and just close up the headunit...
First time I ever done something like this... I have done suspension and forced inductions several times.. but never audio...
I just hope this guide helps someone, thanks for reading.
Heres the stuff I used in my installation:
Last edited by Vash; Apr 17, 2012 at 02:22 PM.

iam not 100% sure how iam going to secure it yet

The cover for the spare tire is nothing more than mdf or compressed cardboard you can safely use L brackets from home depot paint them black and use a 1/2" screw to mount the box to the floor. It will leave a couple holes but very small ones, or you can get some velcro strips put those on the bottom of the box probably the scruffy side of velcro not the fuzzy side and it should hold decently too.

Member
Joined: Sep 2011
Posts: 36
From: India
Nice install..
don't connect your sub in series, that would endup in 8ohm impedance.. instead connect in parallel mode, 4/2 = 2..
also can you also post the pic of the grommet from which you pulled the power cable through the firewall ?
don't connect your sub in series, that would endup in 8ohm impedance.. instead connect in parallel mode, 4/2 = 2..
also can you also post the pic of the grommet from which you pulled the power cable through the firewall ?


EDIT: UPDATE OF THIS FIX CONCLUSION ON POST #22
i did mine like this, isn't this called a series?
http://a248.e.akamai.net/pix.crutchf...2-ohm_mono.jpg
http://a248.e.akamai.net/pix.crutchf...2-ohm_mono.jpg
Last edited by Vash; Apr 17, 2012 at 02:12 PM.
Member
Joined: Oct 2009
Posts: 4,295
From: Wandering around.

i did mine like this, isn't this called a series?
http://a248.e.akamai.net/pix.crutchf...2-ohm_mono.jpg
http://a248.e.akamai.net/pix.crutchf...2-ohm_mono.jpg
which is what dragonxwas was saying, you're making your 4 ohm sub into an 8 ohm load, not 2.
you have to change the wiring. instead of splitting up the pair to one on each side, you have run the pair together to one side, wire up both + and -, then run another pair of wires from there to the other side.
EDIT: UPDATE OF THIS FIX CONCLUSION ON POST #22
umm can you show me a diagram of what i should have done?
several people recommended me to put it in a series, so thats what i did... i made plenty of threads about it.. and i haven't had anything different untill AFTER i finished installing and had it all wired up....
its going to be a pain to go back in there and redo it... i knew something like this would happen....
yes, it is in series... but you'll have to note: it turns a 2 ohm sub into a 4 ohm load for the amp. it says so right at the top.
which is what dragonxwas was saying, you're making your 4 ohm sub into an 8 ohm load, not 2.
you have to change the wiring. instead of splitting up the pair to one on each side, you have run the pair together to one side, wire up both + and -, then run another pair of wires from there to the other side.
umm can you show me a diagram of what i should have done?
several people recommended me to put it in a series, so thats what i did... i made plenty of threads about it.. and i haven't had anything different untill AFTER i finished installing and had it all wired up....
its going to be a pain to go back in there and redo it... i knew something like this would happen....
Last edited by Vash; Apr 17, 2012 at 02:15 PM.


EDIT: UPDATE OF THIS FIX CONCLUSION ON POST #22
its supposed to be a 2 ohm right now according to how i have it i thought...
i have 3 options...
Option 1
I have it done like this right now.. where the sub is at at 2 ohms
http://m.seimg.net/product/img/subwo...variation1.jpg
Option 2
i can do this.. which would drop my sub down to 1 ohm...
http://m.seimg.net/product/img/subwo...variation2.jpg
Option 3
and i can go with 2 ohm on the amp, and 4 ohm with the sub like this:
http://m.seimg.net/product/img/subwo...4_ohm_mono.jpg
soooooo which one is better and why?
iam guessing you guys are recommending me to do option 3 right?
Last edited by Vash; Apr 17, 2012 at 02:15 PM.
Member
Joined: Oct 2009
Posts: 4,295
From: Wandering around.
its supposed to be a 2 ohm right now according to how i have it i thought...
i have 3 options...
Option 1
I have it done like this right now.. where the sub is at at 2 ohms
http://m.seimg.net/product/img/subwo...variation1.jpg
Option 2
i can do this.. which would drop my sub down to 1 ohm...
http://m.seimg.net/product/img/subwo...variation2.jpg
Option 3
and i can go with 2 ohm on the amp, and 4 ohm with the sub like this:
http://m.seimg.net/product/img/subwo...4_ohm_mono.jpg
soooooo which one is better and why?
iam guessing you guys are recommending me to do option 3 right?
ultimately, it's flipping the wires of one pair (the left side), which may not be a good idea. If it actually has 2 coils, they will cancel each other out (one coil pushes while the other pulls)... and if the terminals are really just splits (double pronged for a single polarity)... then you're gonna cause a short.
oops, yes, go with option 3.
Last edited by Goobers; Jan 2, 2012 at 10:33 AM.
EDIT: UPDATE OF THIS FIX CONCLUSION ON POST #22
nice joke guys... sounds like the same exact THING as i had it before....... that was a waste of time for me...
nice joke guys... sounds like the same exact THING as i had it before....... that was a waste of time for me...
Last edited by Vash; Apr 17, 2012 at 02:15 PM.
EDIT: UPDATE OF THIS FIX CONCLUSION ON POST #22
welll... BEFORE
I think it was setup so that the Amp would produce 4 ohms, and the SUB would produce 2 ohms...
NOW I changed it to option 3.
and its supposed to be opposite of what i had before... 2 Ohm for amp and 4 ohm for Sub now.
the only way to produce that 8 ohm like your thinking, is if i had a 2-channel amp.... which i don't.. iam using a Mono Amp... so iam limited to 2 and 4 ohms.
Your think of this Funkster...

but ehhh i don't care much that i changed the wiring to produce the same sound...
I guess it should be more effective if Iam running 2 ohm at the amp instead of 4 and 2 at the Sub... because when i opened it up... i actually tighten the terminals so tight that i cut one of them almost in half.. and it was hanging on by only half of the wire.... so now with it running in the way you guys recommended me.. i ended up twisting 2 wires together to merge them before screwing them in the terminal...
so hopefully its on better now.. and i made sure not to over tighten them to cut off some of the copper wiring... so all in all.. it wasn't a bad move..
but it truely does sound the same..
2 ohm amp + 4 ohm sub...
sounds almost the same as my orginal setup of 4 ohm amp + 2 ohm sub.
soooo now my final wiring setup is this:
my ORIGINAL setup i was using was this:

welll... BEFORE
I think it was setup so that the Amp would produce 4 ohms, and the SUB would produce 2 ohms...
NOW I changed it to option 3.
and its supposed to be opposite of what i had before... 2 Ohm for amp and 4 ohm for Sub now.
the only way to produce that 8 ohm like your thinking, is if i had a 2-channel amp.... which i don't.. iam using a Mono Amp... so iam limited to 2 and 4 ohms.
Your think of this Funkster...
but ehhh i don't care much that i changed the wiring to produce the same sound...
I guess it should be more effective if Iam running 2 ohm at the amp instead of 4 and 2 at the Sub... because when i opened it up... i actually tighten the terminals so tight that i cut one of them almost in half.. and it was hanging on by only half of the wire.... so now with it running in the way you guys recommended me.. i ended up twisting 2 wires together to merge them before screwing them in the terminal...
so hopefully its on better now.. and i made sure not to over tighten them to cut off some of the copper wiring... so all in all.. it wasn't a bad move..
but it truely does sound the same..
2 ohm amp + 4 ohm sub...
sounds almost the same as my orginal setup of 4 ohm amp + 2 ohm sub.
soooo now my final wiring setup is this:
my ORIGINAL setup i was using was this:
Last edited by Vash; Apr 17, 2012 at 02:15 PM.
its supposed to be a 2 ohm right now according to how i have it i thought...
i have 3 options...
Option 1
I have it done like this right now.. where the sub is at at 2 ohms
http://m.seimg.net/product/img/subwo...variation1.jpg
Option 2
i can do this.. which would drop my sub down to 1 ohm...
http://m.seimg.net/product/img/subwo...variation2.jpg
Option 3
and i can go with 2 ohm on the amp, and 4 ohm with the sub like this:
http://m.seimg.net/product/img/subwo...4_ohm_mono.jpg
soooooo which one is better and why?
iam guessing you guys are recommending me to do option 3 right?
i have 3 options...
Option 1
I have it done like this right now.. where the sub is at at 2 ohms
http://m.seimg.net/product/img/subwo...variation1.jpg
Option 2
i can do this.. which would drop my sub down to 1 ohm...
http://m.seimg.net/product/img/subwo...variation2.jpg
Option 3
and i can go with 2 ohm on the amp, and 4 ohm with the sub like this:
http://m.seimg.net/product/img/subwo...4_ohm_mono.jpg
soooooo which one is better and why?
iam guessing you guys are recommending me to do option 3 right?
You aren't changing the ohms of the subwoofer when wiring. That CAN'T be changed, it is a fixed value. You are changing the ohm load to the amplifier by changing the wiring.
If you have it wired the same as the diagram in picture #3 and you can't notice a difference something may be wrong. The difference should seriously be night and day.
welll... BEFORE
I think it was setup so that the Amp would produce 4 ohms, and the SUB would produce 2 ohms...
NOW I changed it to option 3.
and its supposed to be opposite of what i had before... 2 Ohm for amp and 4 ohm for Sub now.
the only way to produce that 8 ohm like your thinking, is if i had a 2-channel amp.... which i don't.. iam using a Mono Amp... so iam limited to 2 and 4 ohms.
Your think of this Funkster...
but ehhh i don't care much that i changed the wiring to produce the same sound...
I guess it should be more effective if Iam running 2 ohm at the amp instead of 4 and 2 at the Sub... because when i opened it up... i actually tighten the terminals so tight that i cut one of them almost in half.. and it was hanging on by only half of the wire.... so now with it running in the way you guys recommended me.. i ended up twisting 2 wires together to merge them before screwing them in the terminal...
so hopefully its on better now.. and i made sure not to over tighten them to cut off some of the copper wiring... so all in all.. it wasn't a bad move..
but it truely does sound the same..
2 ohm amp + 4 ohm sub...
sounds almost the same as my orginal setup of 4 ohm amp + 2 ohm sub.
soooo now my final wiring setup is this:
You never had a 2ohm subwoofer, you can't change that value. You were looking at a picture of a subwoofer that is internally different than yours. You were wiring with an incorrect schematic.
Last edited by Funkster; Jan 2, 2012 at 12:17 PM.