


Bluebatmobile Overlays Ready


Thread Starter
|
Frequent FitFreak Poster
Joined: Dec 2007
Posts: 446
From: FL
 Bluebatmobile Overlays Ready
Just thought you guys would like to know. Bluebatmobile has his gallery up along with prices for overlays, including foglights, headlights and taillights, for the '07-'08 Fit!
BlueBatmobile2005/Honda Fit Overlays - Photobucket - Video and Image Hosting
Email him at bluebatmobile@san.rr.com
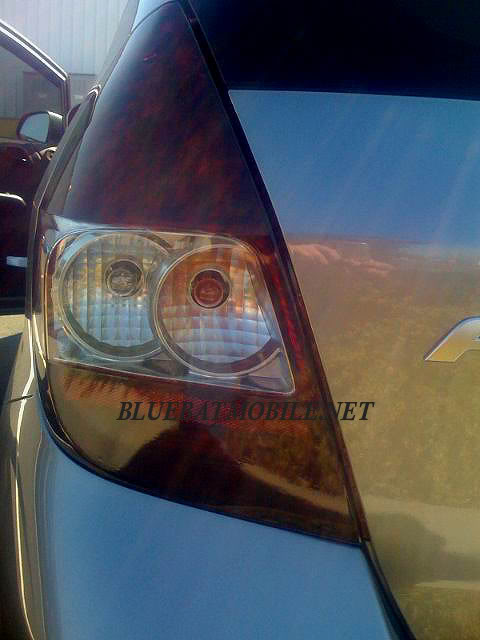
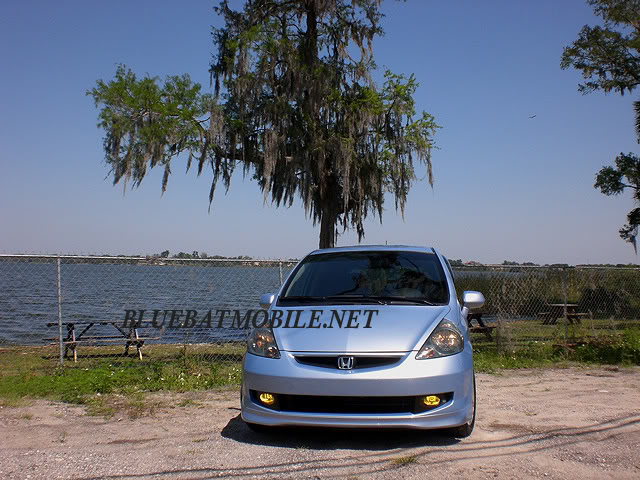
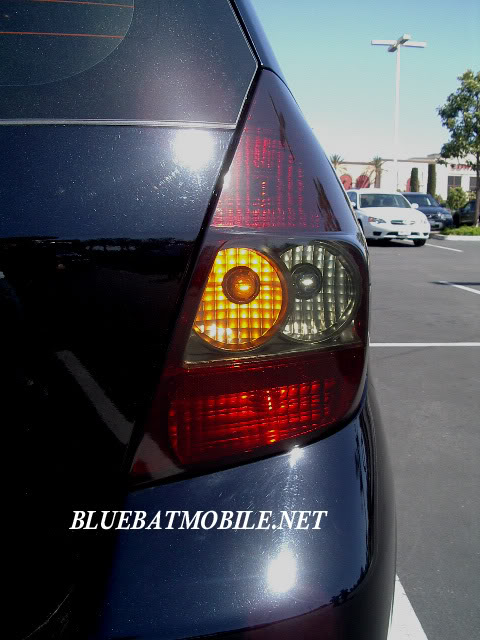
BlueBatmobile2005/Honda Fit Overlays - Photobucket - Video and Image Hosting
Email him at bluebatmobile@san.rr.com




i used VERY little water, and i used my thumbs to get the water out. and i basically stood infront of my heaters in my car to let it dry super quick.
its basically like tint, so if you let it dry, your SCREWED. unlike lamin-x you can repeal and start all over.
super easy , took me about 15 mins for both lights. at first i couldnt get the water out...but then i found the neat trick with my thumbs.
just start on 1 corner and just work your way diagnal to the other corner. that was the best way for me.
its basically like tint, so if you let it dry, your SCREWED. unlike lamin-x you can repeal and start all over.
super easy , took me about 15 mins for both lights. at first i couldnt get the water out...but then i found the neat trick with my thumbs.
just start on 1 corner and just work your way diagnal to the other corner. that was the best way for me.

Member

Joined: Apr 2007
Posts: 1,398
From: CT
Anyone have some full-car pictures with the smoked tail lights? I haven't been all that happy with my LED knock-offs as of late and I figure it'd be pretty easy to smoke my stock tail lights since they're not mounted on the car but none of these pictures really show how it looks on the car.
Preferably on a VBP
Preferably on a VBP
Thread Starter
|
Frequent FitFreak Poster
Joined: Dec 2007
Posts: 446
From: FL
Will, I can get larger pics of the smoked tails on an SSM if you'd like. I've got the smoked tails with the reverse cutout so that it stays clear (obviously an option of course).
I'm headed out of town but I'll be more then happy to take more pics when I get back if you'd like.
I'm headed out of town but I'll be more then happy to take more pics when I get back if you'd like.

Member
Joined: Jun 2006
Posts: 219
From: Chicago
i believe the problem is that i am trying to fit these to aftermarkets. the contours on them are just the slightest bit different, and the part of the stock tail that juts out for the reverse lamps is not present.
either way, i'm trying to simply use the top piece of the two pieces to cover only the white of the tail light, but the lines don't match up - any suggestions, i figured i'd put it on and cut to fit as i apply it - seems risky though...
either way, i'm trying to simply use the top piece of the two pieces to cover only the white of the tail light, but the lines don't match up - any suggestions, i figured i'd put it on and cut to fit as i apply it - seems risky though...
Thread Starter
|
Frequent FitFreak Poster
Joined: Dec 2007
Posts: 446
From: FL
If what you are doing is what I think you are doing then trimming it should work fine. He sends his overlays larger then needed so they don't have to be lined up perfect and can be trimmed.
I know when I did mine (stock tails - 2 pieces per light), a little bit of trimming needed to make the bend at the contour.
I'd suggest either tracing the curve of the white section onto a piece of paper and trimming with the paper as the guide. HOWEVER, it would probably be easier to put them on and trim them to the proper size after they are on the car (I'd suggest an exacto knife).
I know when I did mine (stock tails - 2 pieces per light), a little bit of trimming needed to make the bend at the contour.
I'd suggest either tracing the curve of the white section onto a piece of paper and trimming with the paper as the guide. HOWEVER, it would probably be easier to put them on and trim them to the proper size after they are on the car (I'd suggest an exacto knife).
Member
Joined: Jun 2006
Posts: 219
From: Chicago
If what you are doing is what I think you are doing then trimming it should work fine. He sends his overlays larger then needed so they don't have to be lined up perfect and can be trimmed.
I know when I did mine (stock tails - 2 pieces per light), a little bit of trimming needed to make the bend at the contour.
I'd suggest either tracing the curve of the white section onto a piece of paper and trimming with the paper as the guide. HOWEVER, it would probably be easier to put them on and trim them to the proper size after they are on the car (I'd suggest an exacto knife).
I know when I did mine (stock tails - 2 pieces per light), a little bit of trimming needed to make the bend at the contour.
I'd suggest either tracing the curve of the white section onto a piece of paper and trimming with the paper as the guide. HOWEVER, it would probably be easier to put them on and trim them to the proper size after they are on the car (I'd suggest an exacto knife).