Fit Exterior Modifications & JDM Styling Discussions about about exterior modifications, body-work, body-kits and JDM body styling

DIY...iKONA's Badge/Wiper Delete Trim Installation

Thread Tools
 
Search this Thread
 
Old Mar 12, 2009 | 04:24 PM
  #1  
theloxmyth's Avatar
Thread Starter
|
Fit Gadget Freak
iTrader: (5)
Joined: Aug 2008
Posts: 1,550
From: Pixburgh
5 Year Member
Exclamation DIY...iKONA's Badge/Wiper Delete Trim Installation

Name:  0Removethese3itemsthenpanel.jpg
Views: 183
Size:  33.1 KB

Panel is held on by white clips. Pull forcefully to remove trim panel.
Name:  1Remove3itemsthenpanel.jpg
Views: 221
Size:  170.3 KB

Name:  15ONLYONENUT.jpg
Views: 174
Size:  54.9 KB

Name:  2Removesanpcaponwiperblade.jpg
Views: 192
Size:  42.1 KB

Name:  3Wiperarmremoval.jpg
Views: 181
Size:  37.9 KB


I filled the remaining electrical connector with grease and wire tied it.
Name:  5SEPERATECONNECTORS.jpg
Views: 167
Size:  7.0 KB

Name:  6REMOVEBOLTS.jpg
Views: 174
Size:  52.6 KB

Remove factory trim...
Name:  7USEASOCKET.jpg
Views: 184
Size:  46.3 KB

Name:  8RELEASING.jpg
Views: 177
Size:  50.3 KB

Install iKONA's trim. Check fitment before tightening nuts! Fill connector with grease and wire tie!
Name:  9INSTALLTRIM.jpg
Views: 163
Size:  48.3 KB

Reset clips like so...
Name:  10RESETTRIMCLIPS.jpg
Views: 201
Size:  41.3 KB

Reinsert pull...
Name:  11REINSERTPULL.jpg
Views: 178
Size:  36.6 KB

Name:  12FINISHEDJOB.jpg
Views: 208
Size:  37.1 KB
The FIT badge comes off next!

Make sure not to over tighten nuts so the studs don't detach from panel.
 
Old Mar 12, 2009 | 04:31 PM
  #2  
Fitcapo's Avatar
Member
iTrader: (5)
Joined: Mar 2008
Posts: 2,257
From: Pleasant Prairie, Wisconsin
Nice job. You did what I was supposed to do awhile ago lol....
 
Old Mar 12, 2009 | 04:38 PM
  #3  
iKONA636's Avatar
Banned
iTrader: (5)
Joined: Oct 2008
Posts: 923
From: Chicago!
Lol noice writeup! Lovin the garnish hehe
 
Old Mar 12, 2009 | 04:42 PM
  #4  
iKONA636's Avatar
Banned
iTrader: (5)
Joined: Oct 2008
Posts: 923
From: Chicago!
If this thread helps you give him rep!
 
Old Mar 12, 2009 | 04:47 PM
  #5  
theloxmyth's Avatar
Thread Starter
|
Fit Gadget Freak
iTrader: (5)
Joined: Aug 2008
Posts: 1,550
From: Pixburgh
5 Year Member
Originally Posted by Fitcapo
Nice job. You did what I was supposed to do awhile ago lol....
That's because YOU don't NEED the +REP!
 
Old Mar 12, 2009 | 09:43 PM
  #6  
theloxmyth's Avatar
Thread Starter
|
Fit Gadget Freak
iTrader: (5)
Joined: Aug 2008
Posts: 1,550
From: Pixburgh
5 Year Member
Originally Posted by iKONA636
Lol noice writeup! Lovin the garnish hehe
Glad to help.

Worked well and looks gooood, too!
 
Old Mar 13, 2009 | 01:59 PM
  #7  
GD3_Wagoon's Avatar
Member
iTrader: (12)
Joined: May 2008
Posts: 5,244
From: eightONEeight
5 Year Member
awesome write-up!

if there's enough interest in the grille that i've proposed, i'll be doing a write-up with the installation for that piece soon as it's delivered to my door
 
Old Mar 13, 2009 | 03:14 PM
  #8  
theloxmyth's Avatar
Thread Starter
|
Fit Gadget Freak
iTrader: (5)
Joined: Aug 2008
Posts: 1,550
From: Pixburgh
5 Year Member
Thumbs up J...Let me know if you want any of these e-mailed!

J... and fellow FitFreaks!

These are today's pictures after washing (not drying) the car. Let me know which ones you want me to e-mail to you. PM e-mail to me, if you want to.

This VBP has got to be the worst color for water spots!

Craigster

Name:  DeleteRight.jpg
Views: 155
Size:  43.6 KB

Name:  DeleteLeft.jpg
Views: 136
Size:  42.0 KB

Name:  DeleteLeftCropped.jpg
Views: 173
Size:  27.5 KB

Name:  DeleteCenteredCropped.jpg
Views: 177
Size:  42.2 KB

Name:  CenterCropped2.jpg
Views: 164
Size:  42.7 KB

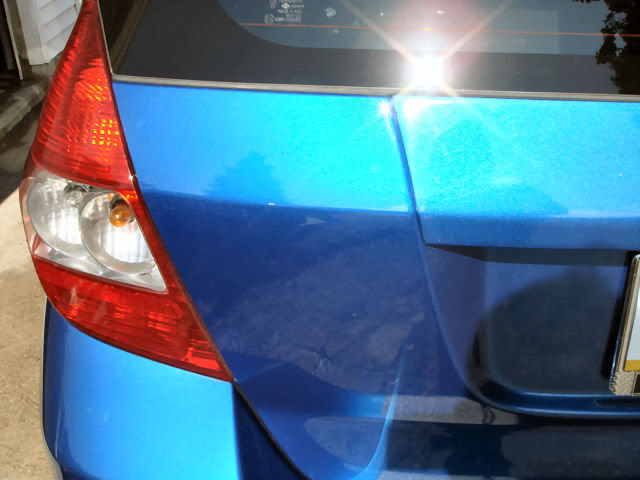
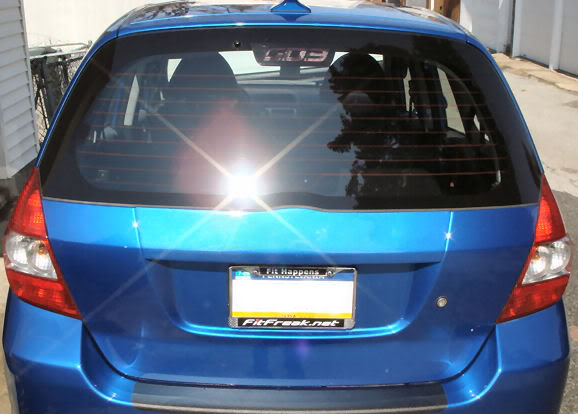
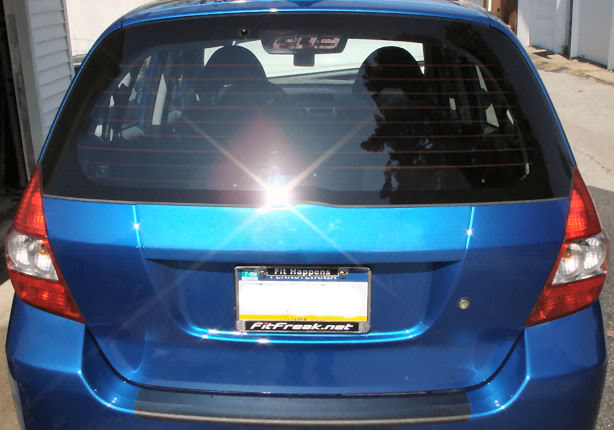
Notice something else missing?
 
Old Mar 13, 2009 | 05:21 PM
  #9  
Fitcapo's Avatar
Member
iTrader: (5)
Joined: Mar 2008
Posts: 2,257
From: Pleasant Prairie, Wisconsin
Uhh you have no rear spoiler so assuming you are a base fit. Can't think of anything else that should be there after having the badgeless wiperless garnish.
 
Old Mar 13, 2009 | 05:28 PM
  #10  
theloxmyth's Avatar
Thread Starter
|
Fit Gadget Freak
iTrader: (5)
Joined: Aug 2008
Posts: 1,550
From: Pixburgh
5 Year Member
Compare...
Name:  12FINISHEDJOB.jpg
Views: 133
Size:  37.1 KB

Name:  DeleteLeft.jpg
Views: 161
Size:  42.0 KB

 
Old Mar 13, 2009 | 05:34 PM
  #11  
Fitcapo's Avatar
Member
iTrader: (5)
Joined: Mar 2008
Posts: 2,257
From: Pleasant Prairie, Wisconsin
Ohh your fit badge is gone. I just didn't even bother looking for it because there are soo many people without them and I haven't had one for the longest time.
 
Old Mar 13, 2009 | 05:39 PM
  #12  
theloxmyth's Avatar
Thread Starter
|
Fit Gadget Freak
iTrader: (5)
Joined: Aug 2008
Posts: 1,550
From: Pixburgh
5 Year Member
Originally Posted by Fitcapo
Ohh your fit badge is gone. I just didn't even bother looking for it because there are soo many people without them and I haven't had one for the longest time.
Yeah, even though it was 35F when I washed the car, the sun really heated things up so I removed it and used GooBeGone to remove the adhesive!

Now people won't be able to tell what my "Fitster" is!
 
Old Mar 13, 2009 | 07:08 PM
  #13  
secondspassed's Avatar
Member
5 Year Member
Joined: Apr 2008
Posts: 1,271
From: CA
it looks like either the garnish sits a couple millimeters too high or the rubber seal needs to be pulled out from behind the top of it. every piece i've seen installed from iKONA looks like it has this issue, I'm not sure if it's something about his product or just an overlooked aspect of installation. anyone else see this?
 
Old Mar 13, 2009 | 07:57 PM
  #14  
trancedsailor's Avatar
Member
iTrader: (6)
Joined: Apr 2008
Posts: 4,235
From: Holmdel, NJ --Exit 114
looks great! The write-up is a bit confusing but I'll read it over and over to try and get my thick head to understand everything lol
 
Old Mar 13, 2009 | 09:16 PM
  #15  
theloxmyth's Avatar
Thread Starter
|
Fit Gadget Freak
iTrader: (5)
Joined: Aug 2008
Posts: 1,550
From: Pixburgh
5 Year Member
Originally Posted by trancedsailor
looks great! The write-up is a bit confusing but I'll read it over and over to try and get my thick head to understand everything lol
+100 REP for you, brother!

I tried to make the DIY flow, but I must not be THAT good at it.
 
Old Mar 13, 2009 | 10:03 PM
  #16  
trancedsailor's Avatar
Member
iTrader: (6)
Joined: Apr 2008
Posts: 4,235
From: Holmdel, NJ --Exit 114
Idea: add a "Tools you will need" at the beginning of the DIY. Also, the 2nd pic wtf is that? Is that what's underneath the hatch window? I have to remove the whole back panel? That worries me lol
 
Old Mar 13, 2009 | 11:02 PM
  #17  
iKONA636's Avatar
Banned
iTrader: (5)
Joined: Oct 2008
Posts: 923
From: Chicago!
To answer seccondspassed qeustion. The rubber is most definatley pinched. Like I said I test fit every garnish and they fit perfectly on the test panel here.

Name:  SSPX0219.jpg
Views: 137
Size:  7.0 KB
 
Related Topics
Thread
Thread Starter
Forum
Replies
Last Post
thefit09
2nd Generation GE8 Specific Fit Photos & Videos Sub-Forum
60
Feb 9, 2014 12:57 PM
SpoonFitGD3
Fit Photos & Videos
16
May 1, 2011 11:03 PM
markwalter
Fit Photos & Videos
11
Aug 25, 2010 07:46 PM
xonexlifex
Fit Photos & Videos
35
Oct 21, 2009 01:55 AM
mikow
Fit Photos & Videos
53
Jul 31, 2008 11:18 AM


All times are GMT -4. The time now is 04:55 PM.