
Carbon Fiber Wrap Install on Radio Surround from Headlight Armor


For those of you who may have missed some of the photos we added to our page on Facebook We just wrapped a tired radio surround trim in our 3D Carbon Fiber Wrap.
We used a 12" x 13.5" sheet of our 3D Carbon Fiber Wrap for the install. This gave us about a half an inch extra on all sides.
We used our trusty heat gun, temp gun, NT Pro A1 "Red Dot" Knife, detail towels and rubbing alcohol.
The trim panel was removed from the vehicle (in this case came out with vents, climate controls, radio, and buttons attached),and removed everything not to be wrapped. We then gave it a triple cleaning to be sure it was good and clean for maximum adhesion.
Going on
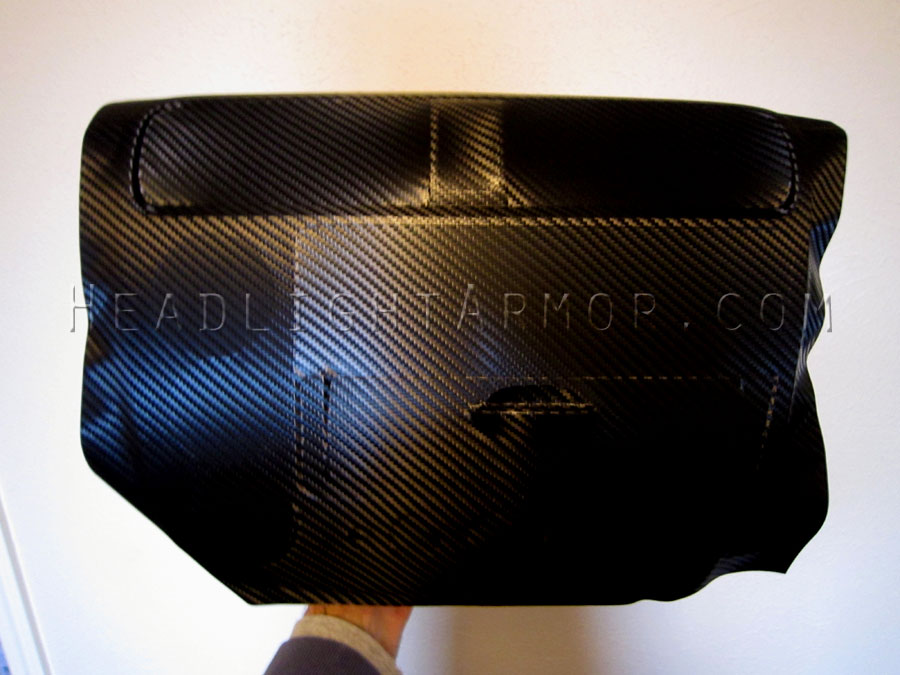
Heated all deformed areas to 176 - 194 F to lock shape
Trimmed out
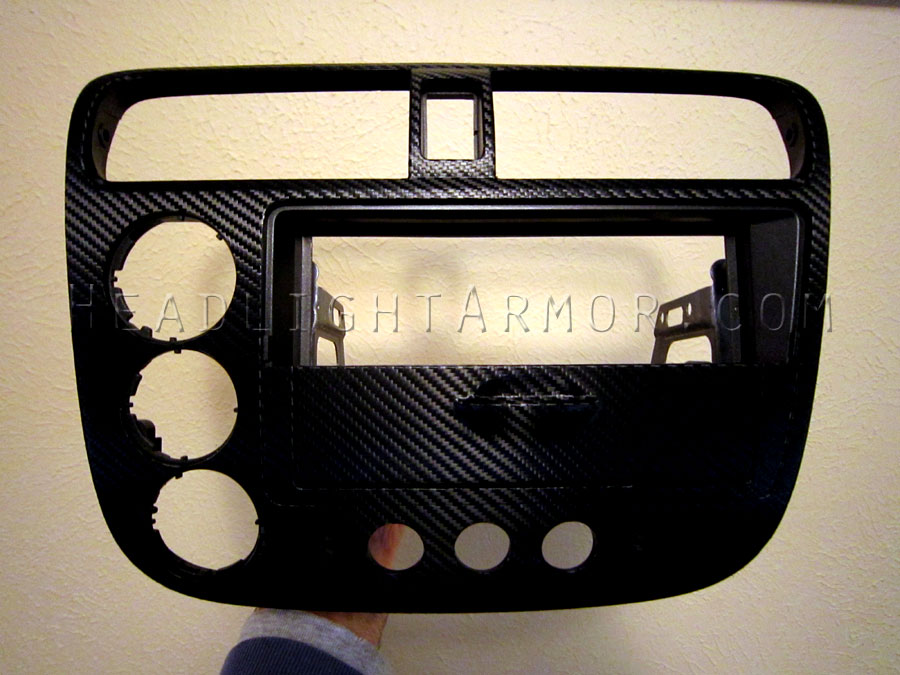
(Perimeter edge, button holes, and radio opening all trimmed flush. Edge of storage door was wrapped slightly onto the top of the door)
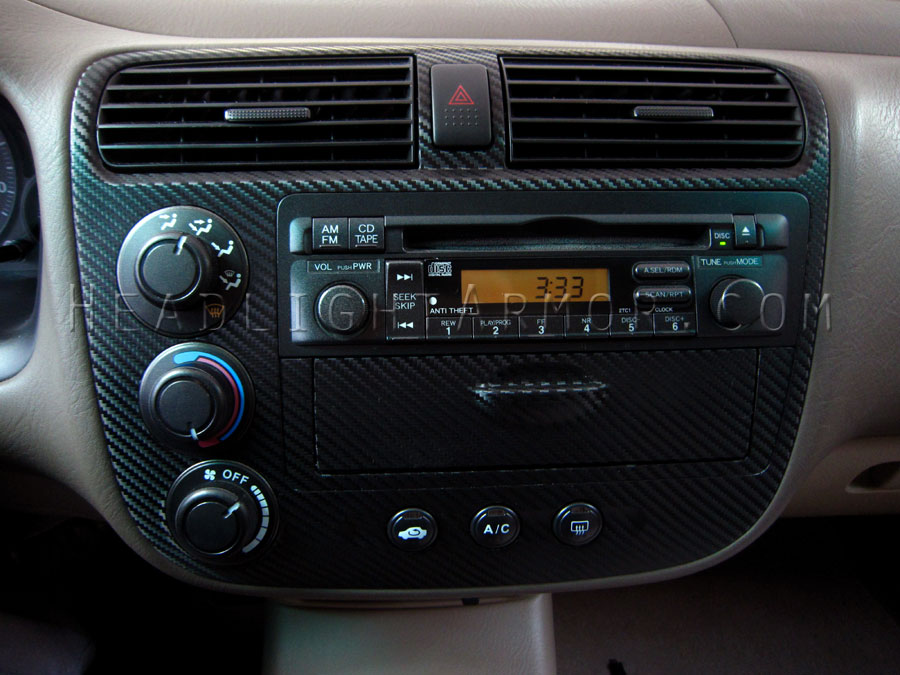
Radio and controls mounted

Installed in the car
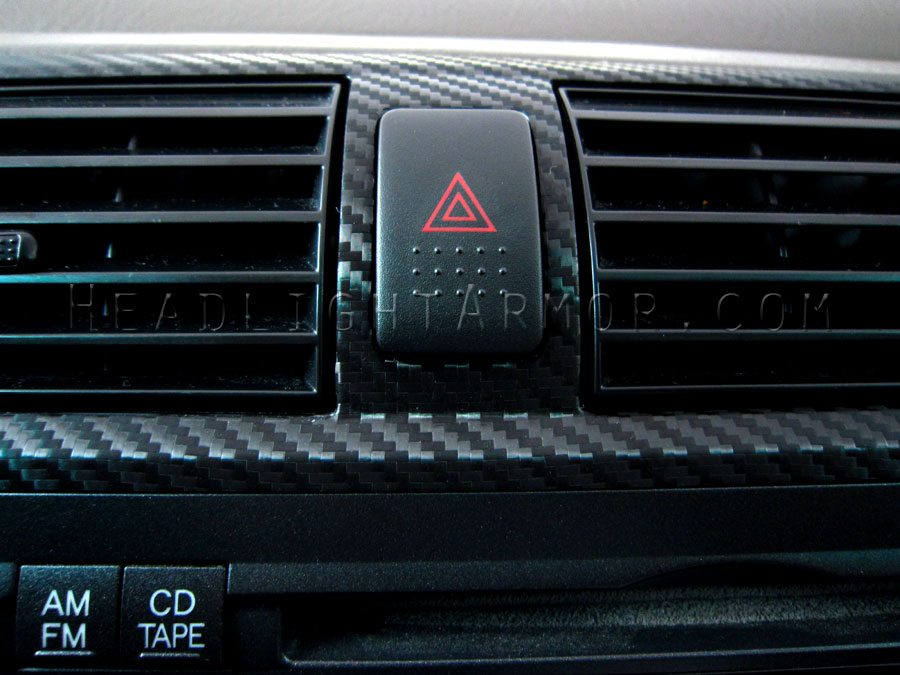
Close Up
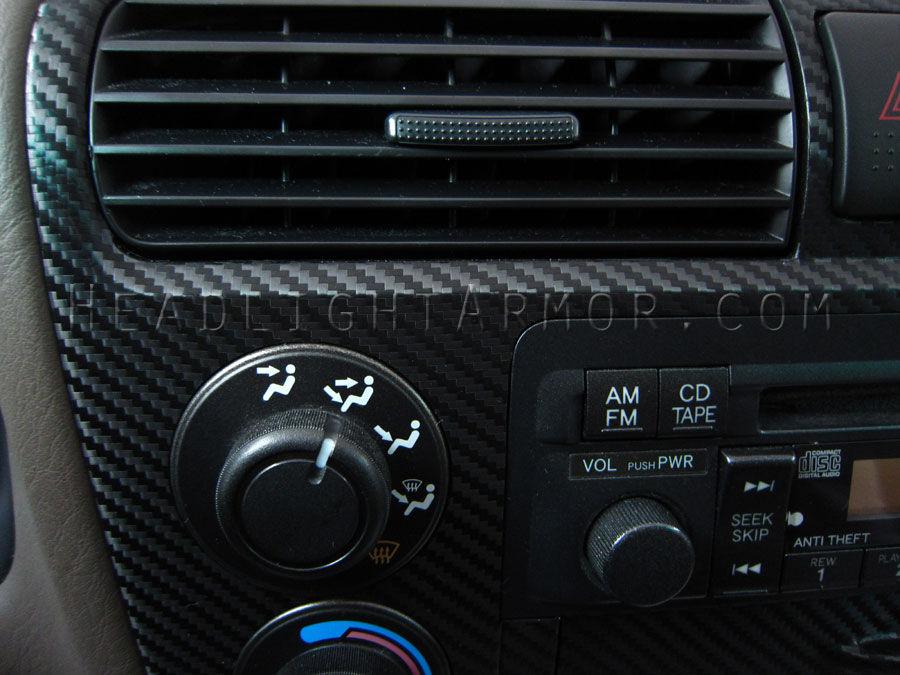
Close Up
All in all a nice winter project as everything is removed from the vehicle on worked on inside. In total it took a few hours (removal from vehicle, prep, application, trimming, reinstallation). None of the process was particularly challenging from a technical point of view.
Hope you enjoy it, let us know if you have any question about the application process.
We used a 12" x 13.5" sheet of our 3D Carbon Fiber Wrap for the install. This gave us about a half an inch extra on all sides.
We used our trusty heat gun, temp gun, NT Pro A1 "Red Dot" Knife, detail towels and rubbing alcohol.
The trim panel was removed from the vehicle (in this case came out with vents, climate controls, radio, and buttons attached),and removed everything not to be wrapped. We then gave it a triple cleaning to be sure it was good and clean for maximum adhesion.
Going on
Heated all deformed areas to 176 - 194 F to lock shape
Trimmed out
(Perimeter edge, button holes, and radio opening all trimmed flush. Edge of storage door was wrapped slightly onto the top of the door)
Radio and controls mounted
Installed in the car
Close Up
Close Up
All in all a nice winter project as everything is removed from the vehicle on worked on inside. In total it took a few hours (removal from vehicle, prep, application, trimming, reinstallation). None of the process was particularly challenging from a technical point of view.
Hope you enjoy it, let us know if you have any question about the application process.

Thread
Thread Starter
Forum
Replies
Last Post
HeadlightArmor
Merchant Group Buys and New Product Sales
261
Feb 21, 2018 02:51 PM
SixFootFiveFits
Gauge Interest in a Fit Product or Group Buy
28
Oct 8, 2013 10:56 PM
mnapuran
Gauge Interest in a Fit Product or Group Buy
35
Mar 29, 2010 03:51 PM