Unofficial Honda FIT Forums
  • LOG IN
  • REGISTER
  • Forums
    • Welcome To FitFreak
      • Fit Freak Newbie / FAQs
      • Site Feedback and Suggestions
    • The Honda Fit and Jazz Forums
      • General Fit Talk
      • 1st Generation (GD 01-08)
      • 2nd Generation (GE 08-13)
      • 3rd Generation (2015+)
      • Fit Photos & Videos
      • Car Shows, Events, and Racing
      • Other Car Related Discussions
      • Off Topic Discussion
    • Buy, Sell, Trade, Product Market Research and Group Buys
      • For Sale / Want To Buy / Classified Ads for USED Fit Items
      • FIT-Vendor Sponsored Group Buys and Sales
      • Gauge Interest in a Fit Product or Group Buy
      • Merchant Group Buys and New Product Sales
      • General For Sale Section
    • Fit Modifications
      • General Fit Modifications Discussion
      • Fit DIY: Repair & Maintenance
      • Fit Engine Modifications, Motor Swaps, ECU Tuning
      • Fit Exterior Modifications & JDM Styling
      • Fit Interior Modifications
      • Fit I.C.E.
      • Fit Wheels & Tires
      • Fit Suspension & Brake Modifications
      • Fit Interior & Exterior Illumination
    • Honda Dealer and Honda USA Discussions
      • Honda Fit Dealer Representatives
      • Honda Fit Dealer Reviews
    • Vendor Marketplace Forums
      • FIT Vendor General Discussion Area
      • FIT-Vendor Sponsored Group Buys
      • Tire, Wheel, Brake & Suspension
    • Fit Forums & Clubs
      • America East
      • America Central
      • America West
      • Canada Fit Forums & Clubs
      • Mexico Fit Forums & Clubs
      • European Fit Forums & Clubs
      • Asia Fit Forums & Clubs
  • Marketplace
    • Vendor Directory
    • Become a Vendor
  • New Posts
  • Tools
    • Car Payment Calculator
    • Tire Rim Calculator
    • Recalls
    • Technical Service Bulletins (TSBs)
    • Members List
    • Live Feed
  • Gallery
  • View Dark Mode
    • Please register or login to enable Dark Mode.
  • Log In
  • Register
Unofficial Honda FIT Forums
    • Threads
      • Advanced
Dark Mode

Please register or login to enable Dark Mode.

Log In

Forgot your Password?

By logging into your account, you agree to our Terms of Use and Privacy Policy, and to the use of cookies as described therein.
  • Recent
  • Commented
  • Albums
  • My Pictures

CyclingFit's Photos

View Profile
Sort:
Most Recent
  • Most Recent
  • Most Comments
  • Albums
  • Photos
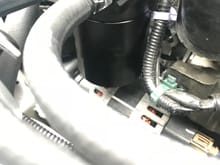
Clearance to on the alternator.  More than enough room to remove the lower can to drain and clean.
Clearance to on the alternator. More than enough room to remove the lower can to drain and clean.
0 2018/07/29 18:17:28 CyclingFit
0 2018/07/29 18:17:16 CyclingFit
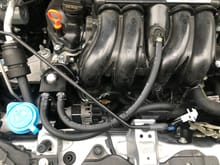
Top view
Top view
0 2018/07/29 18:16:51 CyclingFit
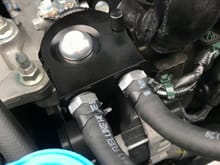
Closeup - top view
Closeup - top view
0 2018/07/29 18:16:40 CyclingFit
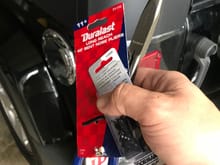
These two items made me happier than they should.  Auto Zone was the only parts store open and nearby, so I purchased needle nose pliers from them.  The clamp at the PCV valve is a breeze with these long angled pliers.  You will feel like a hero if you own a set.   I am also an addict to looking as factory as I can so I purchased two packs of spring clamps.   I had to get two packs because there are only two 3/8" clamps in each package.
These two items made me happier than they should. Auto Zone was the only parts store open and nearby, so I purchased needle nose pliers from them. The clamp at the PCV valve is a breeze with these long angled pliers. You will feel like a hero if you own a set. I am also an addict to looking as factory as I can so I purchased two packs of spring clamps. I had to get two packs because there are only two 3/8" clamps in each package.
0 2018/07/29 18:16:24 CyclingFit
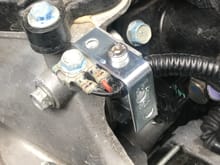
I noticed a thick aluminum flange on the passenger side of the engine, just above the alternator.  This flange already has a hole in it that is tapped with nothing installed in it.  I think the hole is M6x1.00mm or M5x0.8mm. The little bracket is from the aisle with all the gate hinges and locks at Menard's (home improvement store)  The wires going under the bracket are now going over the bracket.  I gave a very slight bend to the wires at their crimps.  You'll see in later pictures.
I noticed a thick aluminum flange on the passenger side of the engine, just above the alternator. This flange already has a hole in it that is tapped with nothing installed in it. I think the hole is M6x1.00mm or M5x0.8mm. The little bracket is from the aisle with all the gate hinges and locks at Menard's (home improvement store) The wires going under the bracket are now going over the bracket. I gave a very slight bend to the wires at their crimps. You'll see in later pictures.
0 2018/07/29 18:16:01 CyclingFit
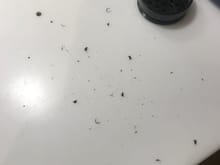
Stuff that fell out onto my counter as I improved the fit and finish.
0 2018/07/29 18:01:44 CyclingFit
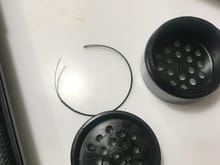
Here is the large shaving that needed removed.  You can also see the small burrs / shavings in the small holes.
Here is the large shaving that needed removed. You can also see the small burrs / shavings in the small holes.
0 2018/07/29 18:01:34 CyclingFit
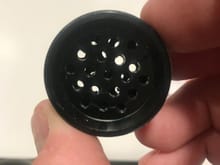
Look closely into the holes and you will see burs left behind and ready to easily break off.  I used a hex wrench and wobbled it around in each hole and the excess pieces all came off.  I then ran a rag around each side to check for more pieces sticking out.
Look closely into the holes and you will see burs left behind and ready to easily break off. I used a hex wrench and wobbled it around in each hole and the excess pieces all came off. I then ran a rag around each side to check for more pieces sticking out.
0 2018/07/29 18:01:17 CyclingFit
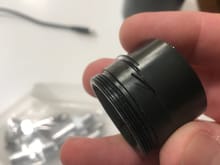
This little removable baffle had a shaving left all the way around the threads where it comes apart.  It popped off easily and I made sure it didn't leave a sharp edge.
This little removable baffle had a shaving left all the way around the threads where it comes apart. It popped off easily and I made sure it didn't leave a sharp edge.
0 2018/07/29 18:01:06 CyclingFit
0 2018/07/29 08:16:18 CyclingFit
0 2018/07/29 08:16:05 CyclingFit
0 2018/07/29 08:11:39 CyclingFit
0 2018/07/29 08:06:09 CyclingFit
0 2018/07/29 08:00:18 CyclingFit
0 2018/07/28 18:48:35 CyclingFit
0 2018/07/26 08:06:17 CyclingFit
0 2018/06/01 12:48:47 CyclingFit
Not a great pic, but you all know what they look like :)
0 2017/12/19 12:12:52 CyclingFit
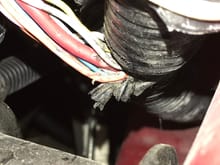
These go together like Lego's and there should not be wire showing.  They fit so tightly that there is no way this was caused by me or the so-called Honda mechanic.  Just fuel on the fire as I feel let down.
These go together like Lego's and there should not be wire showing. They fit so tightly that there is no way this was caused by me or the so-called Honda mechanic. Just fuel on the fire as I feel let down.
0 2017/11/28 06:25:15 CyclingFit
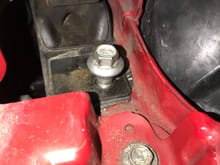
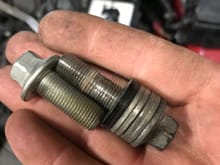
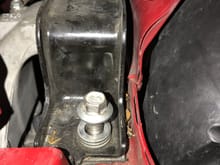
This explains the use of washers.  I know I'm still recommending the 45mm bolts the OEM uses, even though this looks like this.  There is nothing below the female threads so the bolts should work.  Maybe there is paint, primer, or maybe they are protruding head nuts that are supposed to act as lock nuts.  Too many assumptions.
This explains the use of washers. I know I'm still recommending the 45mm bolts the OEM uses, even though this looks like this. There is nothing below the female threads so the bolts should work. Maybe there is paint, primer, or maybe they are protruding head nuts that are supposed to act as lock nuts. Too many assumptions.
0 2017/11/28 06:20:30 CyclingFit
Oddly half way up the threads there is a sealant and just past that is thread damage. I'm speechless over this entire situation.
0 2017/11/28 06:16:29 CyclingFit
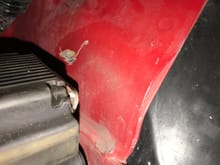
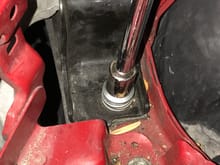
A professional would simply lay a rag there before repeated prying on the mount.  :(
A professional would simply lay a rag there before repeated prying on the mount. :(
0 2017/11/28 06:10:42 CyclingFit
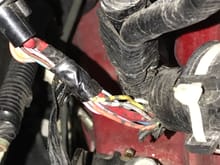
Electrical tape to the best of my ability. Not sure as to its future...
0 2017/11/28 06:02:03 CyclingFit
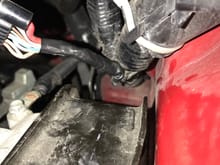
Picture I took as I noticed a little damage and stood there shocked as I noticed no wire loom and a terrible electrical tape job.
0 2017/11/28 05:56:19 CyclingFit
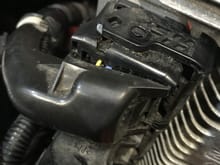
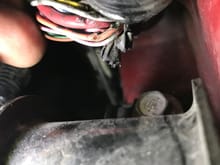
Giving this a much closer inspection since it appears this harness has been spun around a power tool and likely had the loom ripped off of it.  Notice the open wires showing.
Giving this a much closer inspection since it appears this harness has been spun around a power tool and likely had the loom ripped off of it. Notice the open wires showing.
0 2017/11/28 05:54:54 CyclingFit
This is without doing anymore than disconnecting the socket connector.
0 2017/11/28 05:53:08 CyclingFit
0 2017/11/28 05:48:04 CyclingFit
0 2017/11/28 05:43:07 CyclingFit
0 2017/11/09 10:32:43 CyclingFit
0 2017/10/20 14:10:52 CyclingFit
0 2017/10/20 14:10:44 CyclingFit
0 2017/10/20 14:10:39 CyclingFit
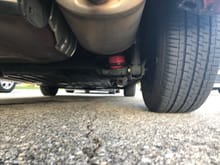
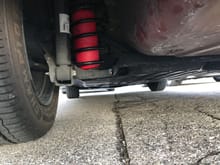
One more pic of the air valves.
0 2017/09/07 18:22:04 CyclingFit
0 2017/09/07 18:21:51 CyclingFit
Passenger side from the rear.
0 2017/09/07 18:21:14 CyclingFit
A picture from the back.  Actually taken before I realized I was going to have to cut on the insulators like I mentioned in the beginning.
A picture from the back. Actually taken before I realized I was going to have to cut on the insulators like I mentioned in the beginning.
0 2017/09/07 18:20:53 CyclingFit
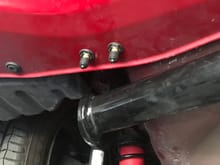
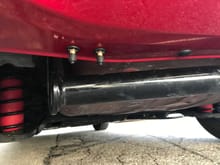
Looking from the rear, I mounted the fittings in the bumper. This is surprisingly far froward and protected by the hitch.  I ran dual air lines because of what I've read about single line systems and extreme body roll.  You don't want to push air out of one side and into the high-side, thus pushing you over even more.
Looking from the rear, I mounted the fittings in the bumper. This is surprisingly far froward and protected by the hitch. I ran dual air lines because of what I've read about single line systems and extreme body roll. You don't want to push air out of one side and into the high-side, thus pushing you over even more.
0 2017/09/07 18:20:32 CyclingFit
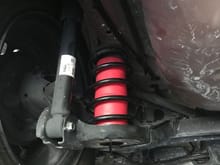
You can barely see the air lines run past the coil.  I'll get a better photo an replace this one.
You can barely see the air lines run past the coil. I'll get a better photo an replace this one.
0 2017/09/07 18:18:00 CyclingFit
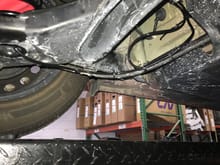
Another where I went up to the unibody.
0 2017/09/07 18:15:38 CyclingFit
First
Page
3 of 4
Last
Go To
Page
  • 1
  • 2
  • 3
  • 4
3 of 4
Go To GO
Go to page of 4 pages
  • 1
  • 2
  • 3
  • 4

Top
Unofficial Honda FIT Forums
  • Contact Us
  • FAQ
  • Archive
  • Advertising
  • Cookie Policy
  • Privacy Statement
  • Terms of Service
  • Your Privacy Choices
  • Manage Preferences

© 2026 MH Sub I, LLC dba Internet Brands


When you click on links to various merchants on this site and make a purchase, this can result in this site earning a commission. Affiliate programs and affiliations include, but are not limited to, the eBay Partner Network.