
Diy painted front airdam


Hey Guys,
so today i decided i would give it a shot and paint my
front airdam in the bumper
i think it turned out fairly well
i would like your input on it
thanks
For this project you will need:
-Black Paint (i used Rustolium Satin Black)
-Clear Coat (I found semi Gloss so that it wouldnt be overly too shiny)
-Fine Sand Paper (To roughen up the area for painting)
-Masking tape and newspaper (To cover the area you dont want paint)
Step one:
Tape all around the air dam making sure to cover all the parts you dont want to get paint on.
DSC_3589.jpg?t=1287364660
Step Two:
Cover a wider area using newspaper and make sure no overspray can get on the regular paint of the car.
DSC_3590.jpg?t=1287364823
Step Three: Sand the Area and then begin to apply coats of paint, go slowly and let each coat dry before putting on another, i applied three coats and then three of clear coat.
DSC_3593.jpg?t=1287364855
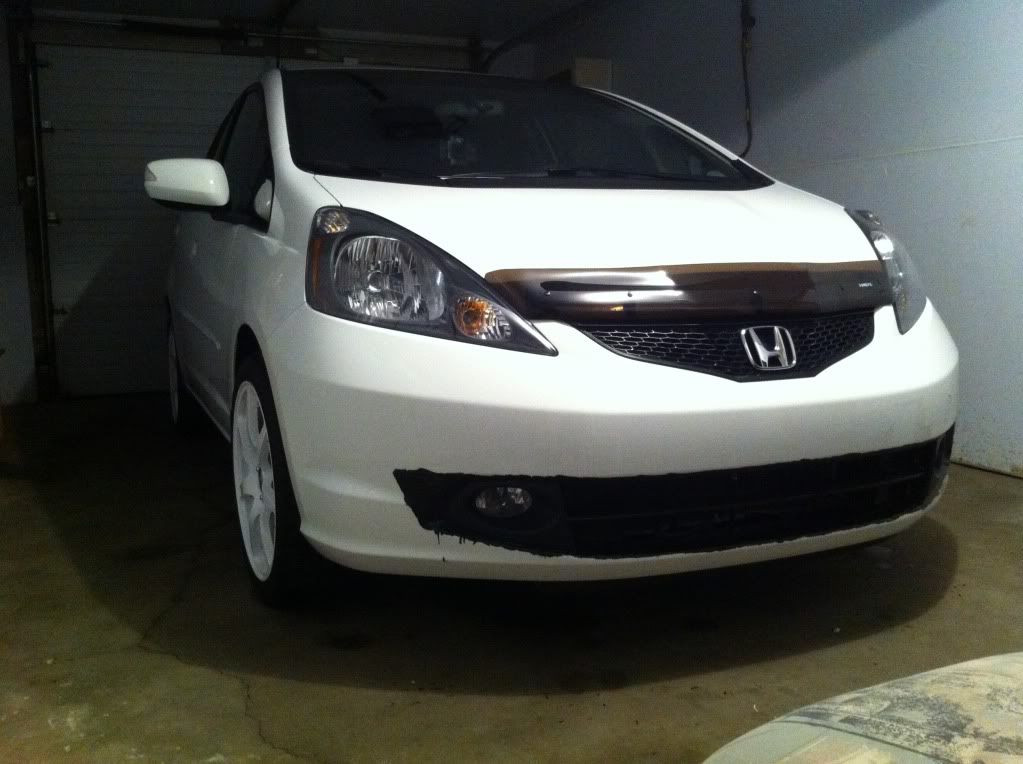
Step Four:
Remove all the tape and admire your newly painted Bumper
DSC_3595.jpg?t=1287364896
sorry my cars dirty :P
DSC_3596.jpg?t=1287364933
Hope you guys enjoy this DIY
overall project took a little over an hour to complete
and looks really nice IMO
so today i decided i would give it a shot and paint my
front airdam in the bumper
i think it turned out fairly well
i would like your input on it
thanks
For this project you will need:
-Black Paint (i used Rustolium Satin Black)
-Clear Coat (I found semi Gloss so that it wouldnt be overly too shiny)
-Fine Sand Paper (To roughen up the area for painting)
-Masking tape and newspaper (To cover the area you dont want paint)
Step one:
Tape all around the air dam making sure to cover all the parts you dont want to get paint on.
DSC_3589.jpg?t=1287364660
Step Two:
Cover a wider area using newspaper and make sure no overspray can get on the regular paint of the car.
DSC_3590.jpg?t=1287364823
Step Three: Sand the Area and then begin to apply coats of paint, go slowly and let each coat dry before putting on another, i applied three coats and then three of clear coat.
DSC_3593.jpg?t=1287364855
Step Four:
Remove all the tape and admire your newly painted Bumper
DSC_3595.jpg?t=1287364896
sorry my cars dirty :P
DSC_3596.jpg?t=1287364933
Hope you guys enjoy this DIY
overall project took a little over an hour to complete
and looks really nice IMO

I am gonna see how well this holds up, i know a few other people on this forum have done this, and it looks like theirs have held up, plus as long as your doing it right and using clear coat appropriately it holds up well.
Member
Joined: Apr 2012
Posts: 1,779
From: edmonton, canada

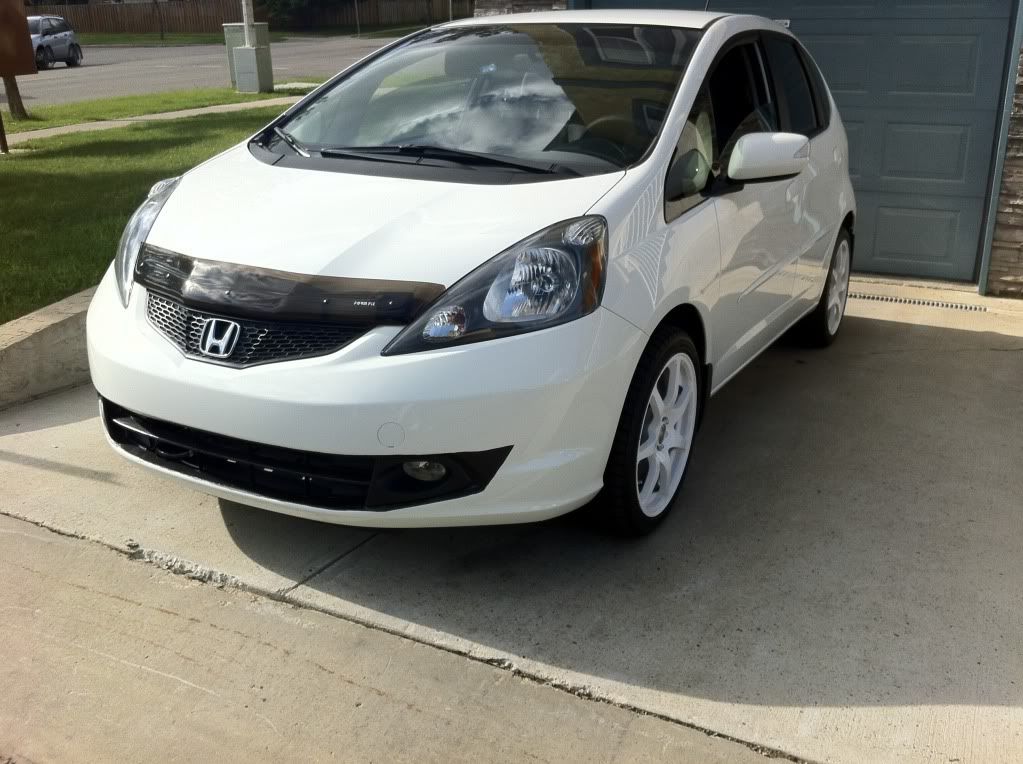
hey thanks for the tip. I plasti dipped mine to see what it would look like. Its not a clean line, but im going to cut it away with an exacto knife once it dries. im 3m'ed so im not worried about scratching the paint.
This should give you an idea of what itll look like when finished.. kinda sport like
image.jpg?t=1339125462
This should give you an idea of what itll look like when finished.. kinda sport like
image.jpg?t=1339125462

hey thanks for the tip. I plasti dipped mine to see what it would look like. Its not a clean line, but im going to cut it away with an exacto knife once it dries. im 3m'ed so im not worried about scratching the paint.
This should give you an idea of what itll look like when finished.. kinda sport like
This should give you an idea of what itll look like when finished.. kinda sport like
Member
Joined: Apr 2012
Posts: 1,779
From: edmonton, canada
You'll get a straighter line if you peel the tape off when the plastidip is wet. So, on your final layer of plastidip paint spray a heavier coat, yet not too heavy (orange-peel), and quickly peel off the tape while it's wet. Hassle-free straight line. I'm a big fan of plastidip and am sort of afraid to spray paint things so plastidip is always a worry-free option
Here it is cleaned up:
photo.jpg?t=1339379787
Last edited by connor55; Jun 10, 2012 at 10:59 PM.
 Aaaaaaaaaaaaaaand we have the same name, lol
~Connor
Member
Joined: Apr 2012
Posts: 1,779
From: edmonton, canada
That's awesome, I've only met one other person with my name haha.
I really want to lower, but being in Edmonton I'm slightly worried about getting stuck in the snow lol. Ill probably end up dropping 1.5-2 inches max. Hopefully I won't get stuck on speed bumps and other stuff.

Thread
Thread Starter
Forum
Replies
Last Post
Vash
2nd Gen GE8 Specific Fit Exterior Modifications & JDM Styling Sub-Forum
65
Apr 3, 2015 11:03 AM
F'it_ImFromTx
Fit Photos & Videos
32
Jun 12, 2010 07:53 AM
Retrofit09
General Fit Modifications Discussion
9
Sep 2, 2009 07:14 PM