
My Spoon Rigid Collar & Honda Insight Lower Control Arm

My Spoon Rigid Collar & Honda Insight Lower Control Arm
Today I install both Honda Insight ALUMINUM Lower Control Arm (LCA)
and Spoon Rigid Collar (Front Axle Set).
Here is the DIY:
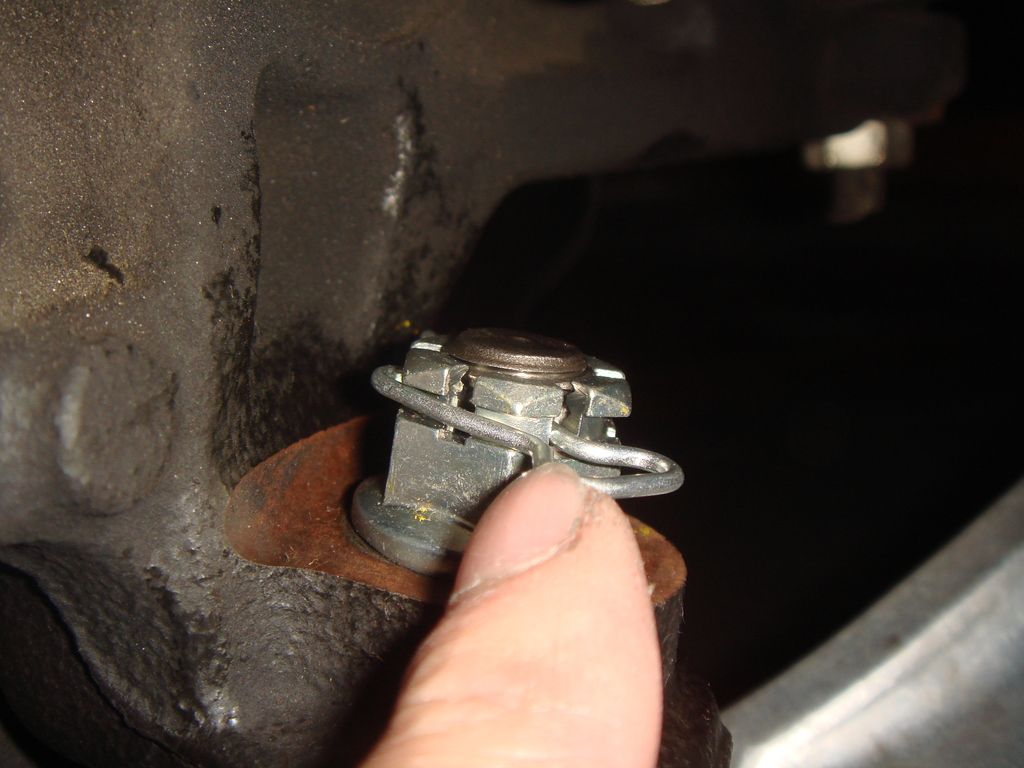
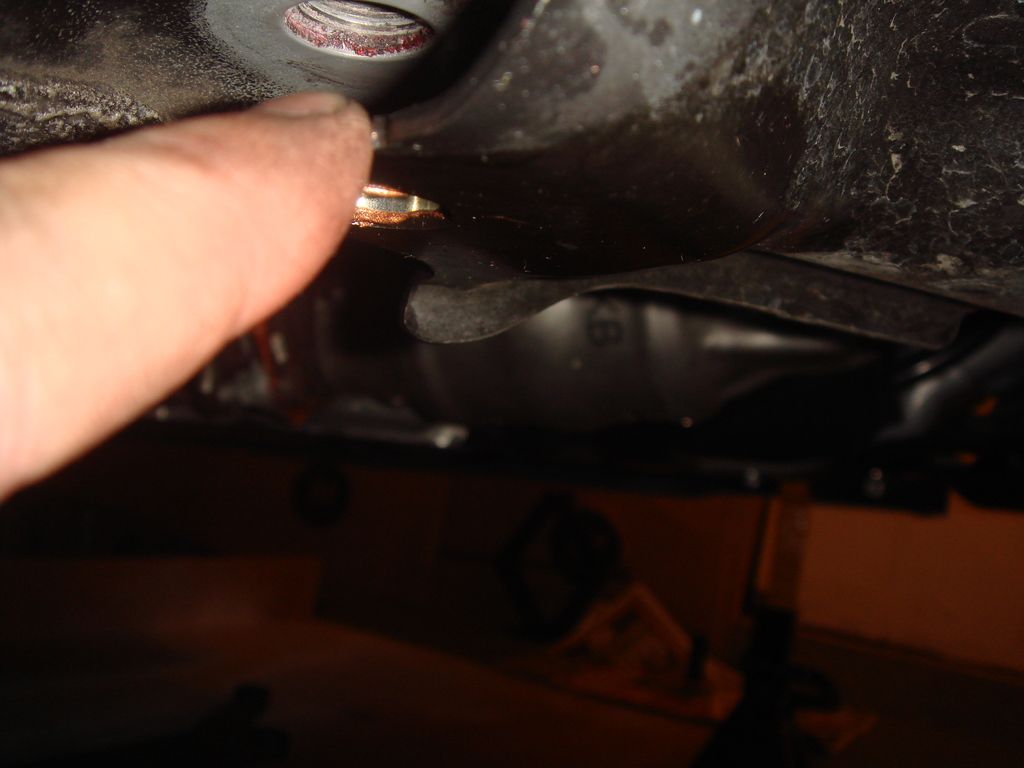
Take out The Safety Pin from the Castle Nut
that lock the Lower Control Arm to the Knuckle:
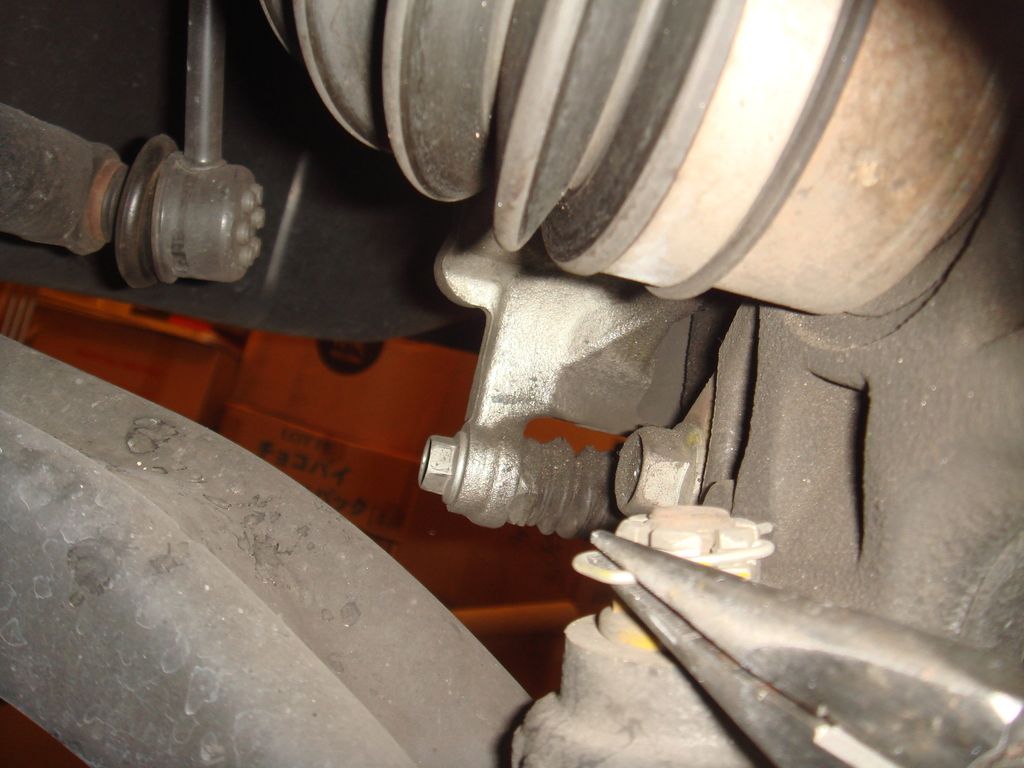
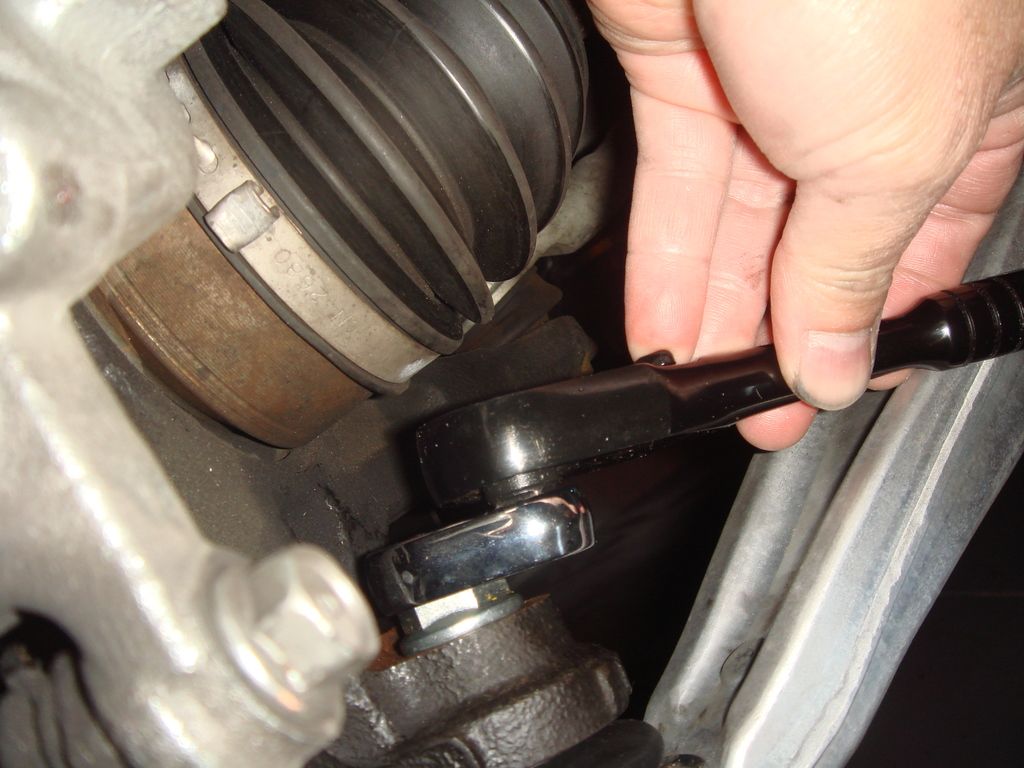
Remove the Castle Nut, I had to use a special Crowfoot Wrench
because a Socket Tool would not fit there:
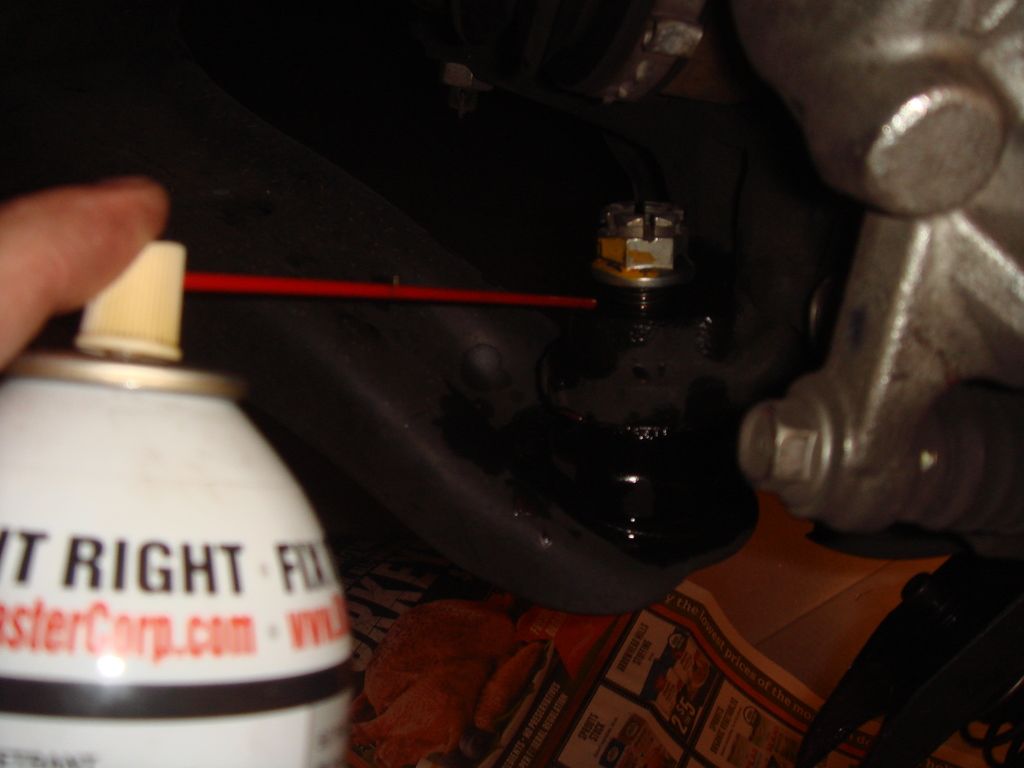
Spray with some PB Blaster to Joint to help loosen it up,
then use the Honda Special Tool to remove Ball Joint:
(I will continue tomorrow, somehow Photobucket have
problem and prevent me from uploading the pictures)...
and Spoon Rigid Collar (Front Axle Set).
Here is the DIY:
Take out The Safety Pin from the Castle Nut
that lock the Lower Control Arm to the Knuckle:
Remove the Castle Nut, I had to use a special Crowfoot Wrench
because a Socket Tool would not fit there:
Spray with some PB Blaster to Joint to help loosen it up,
then use the Honda Special Tool to remove Ball Joint:
(I will continue tomorrow, somehow Photobucket have
problem and prevent me from uploading the pictures)...
Last edited by BMW ALPINA; Nov 19, 2015 at 04:17 AM.
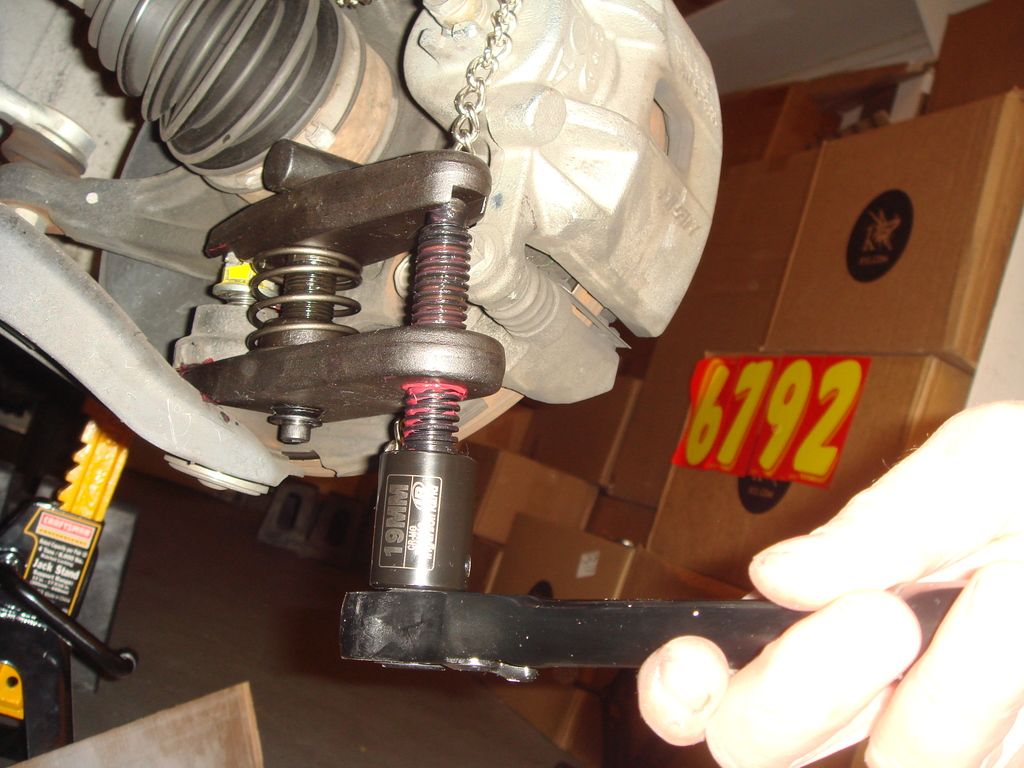
Actually it work again,
so Spray with PB Blaster:
then use the Honda Special Tool to remove Ball Joint,
warning when it finally loose, it will sound like an explosion !!!
take out all the bolt that hold the standard Honda Fit Steel LCA,
3 facing bottom and 1 facing forward,
on mine was a bit complicated since I have Cusco Version II Bar,
so I need to remove all 3 facing bottom bolt from both left and right LCA,
oh by the way, I use 2 jack stand to hold the car, the hydraulic jack to hold
the entire subframe from the front mounting point and 2 more jack stand
to act as safety device below the subframe, just in case the hydraulic jack
let the subframe down.
The 3 bolt that facing down:
The 1 bolt that facing front, oh to access this bolt, you need to unclip several plastic clip
and pair of screw per side to release the plastic splash guard inside the wheel well:
Last edited by BMW ALPINA; Nov 19, 2015 at 04:19 AM.
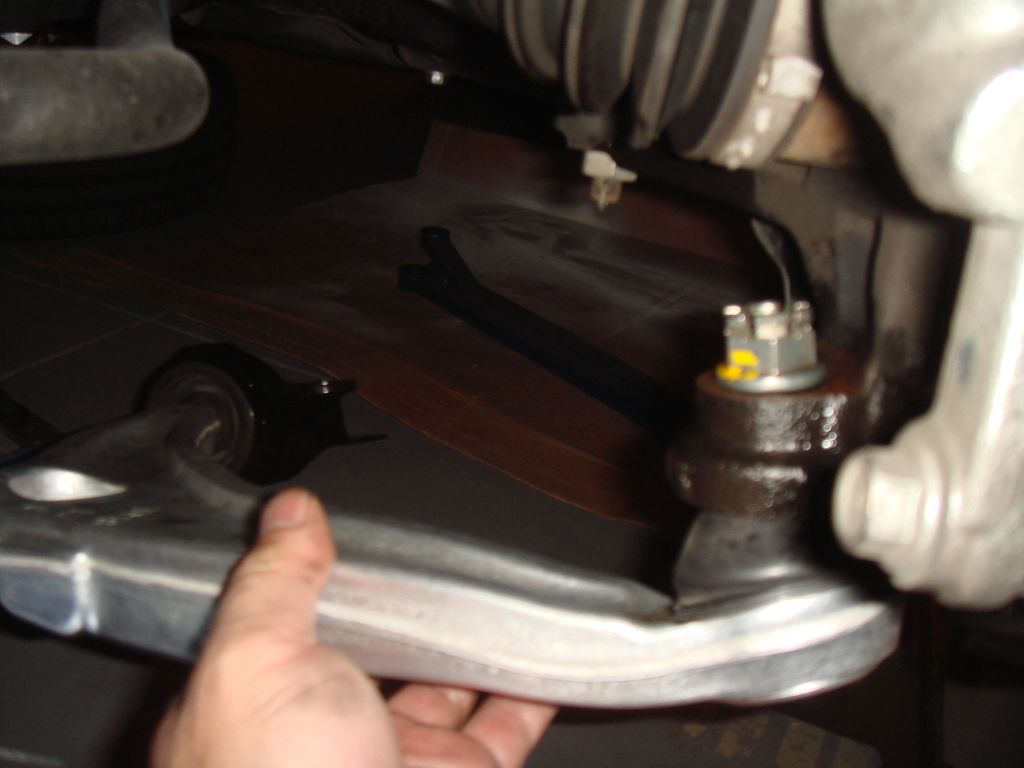
Now Take out the Honda Fit LCA and install the Honda Insight Aluminum LCA in reverse order,
but since we are going to install the Spoon Rigid Collar,
this mean when you install the LCA, do NOT tighten the 3 bolt that face the bottom all the way in,
but leave some space so the subframe can be lowered...
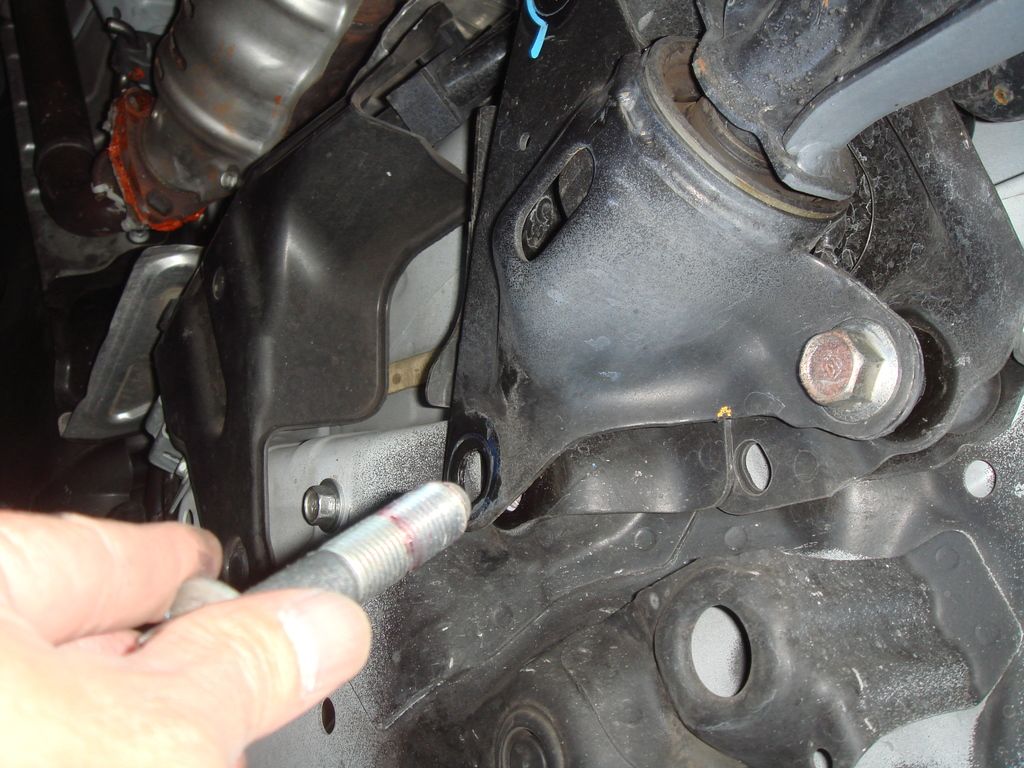
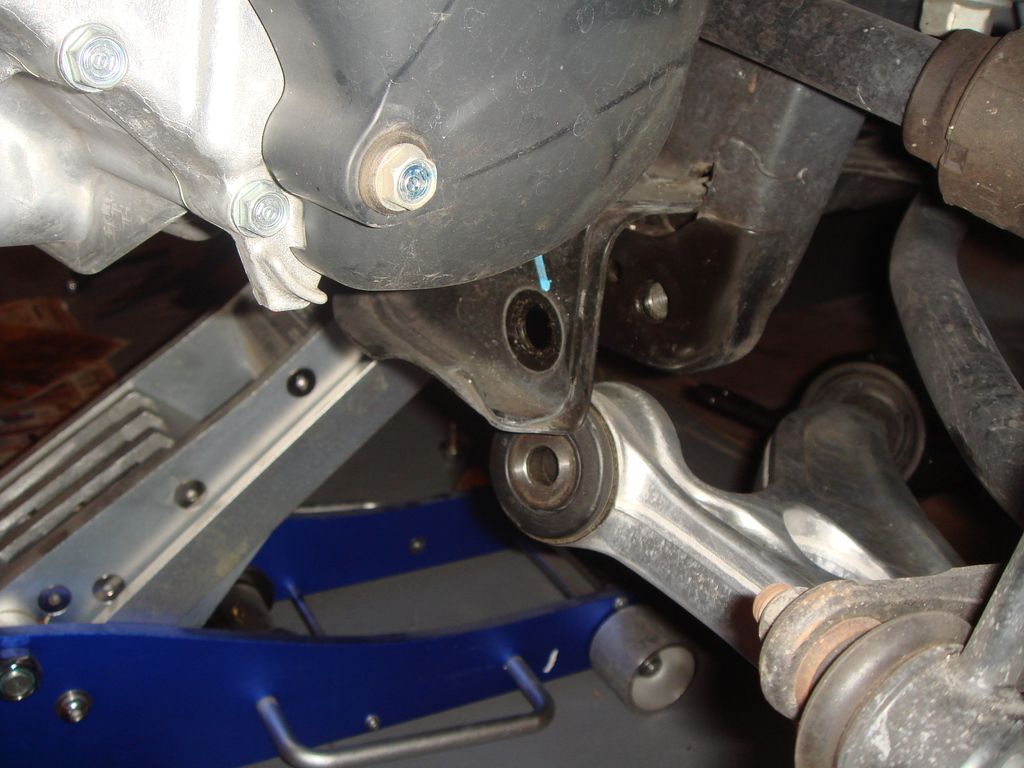
the first step to install the Honda Insight is to screw the Castle Nut:
Then the Front Facing Nut (notice the hydraulic jack on the back ground holding
the subframe and the front jack point):
Now loosen the last subframe bolt that had nothing to do with the LCA,
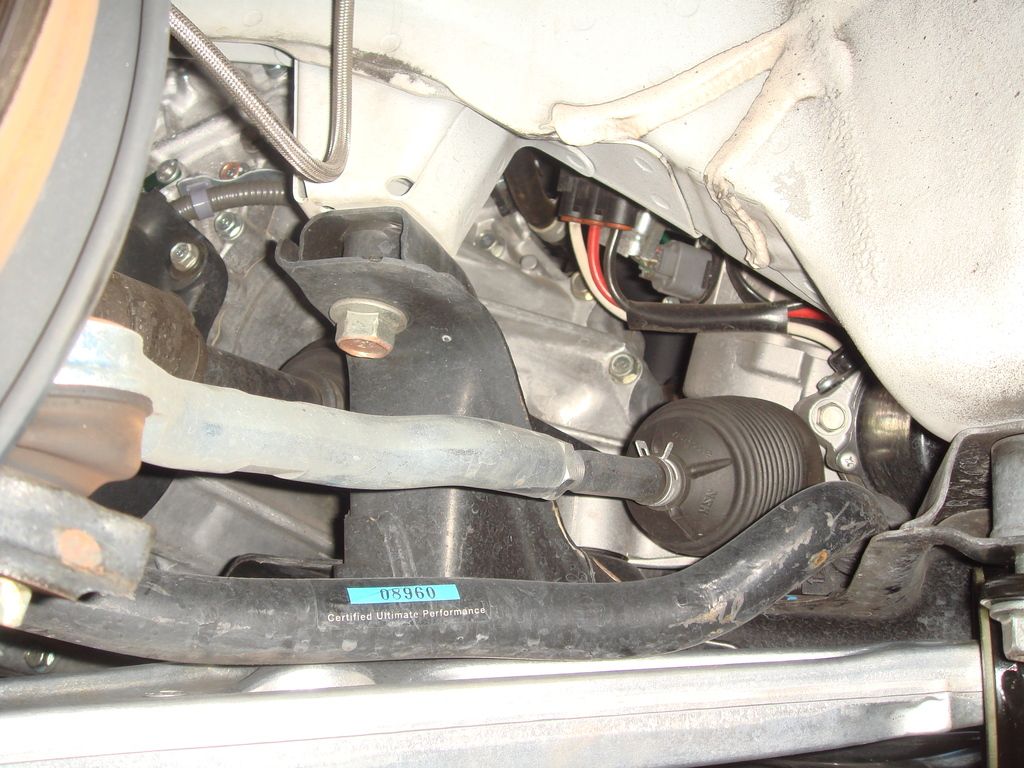
loosen mean not take it out completely but just so there is gap between the subframe
and the chassis so we can insert the Spoon Rigid Collar like this:
After that you let the hydraulic jack lowered just a few mili meters...
but since we are going to install the Spoon Rigid Collar,
this mean when you install the LCA, do NOT tighten the 3 bolt that face the bottom all the way in,
but leave some space so the subframe can be lowered...
the first step to install the Honda Insight is to screw the Castle Nut:
Then the Front Facing Nut (notice the hydraulic jack on the back ground holding
the subframe and the front jack point):
Now loosen the last subframe bolt that had nothing to do with the LCA,
loosen mean not take it out completely but just so there is gap between the subframe
and the chassis so we can insert the Spoon Rigid Collar like this:
After that you let the hydraulic jack lowered just a few mili meters...
Last edited by BMW ALPINA; Nov 19, 2015 at 04:20 AM.
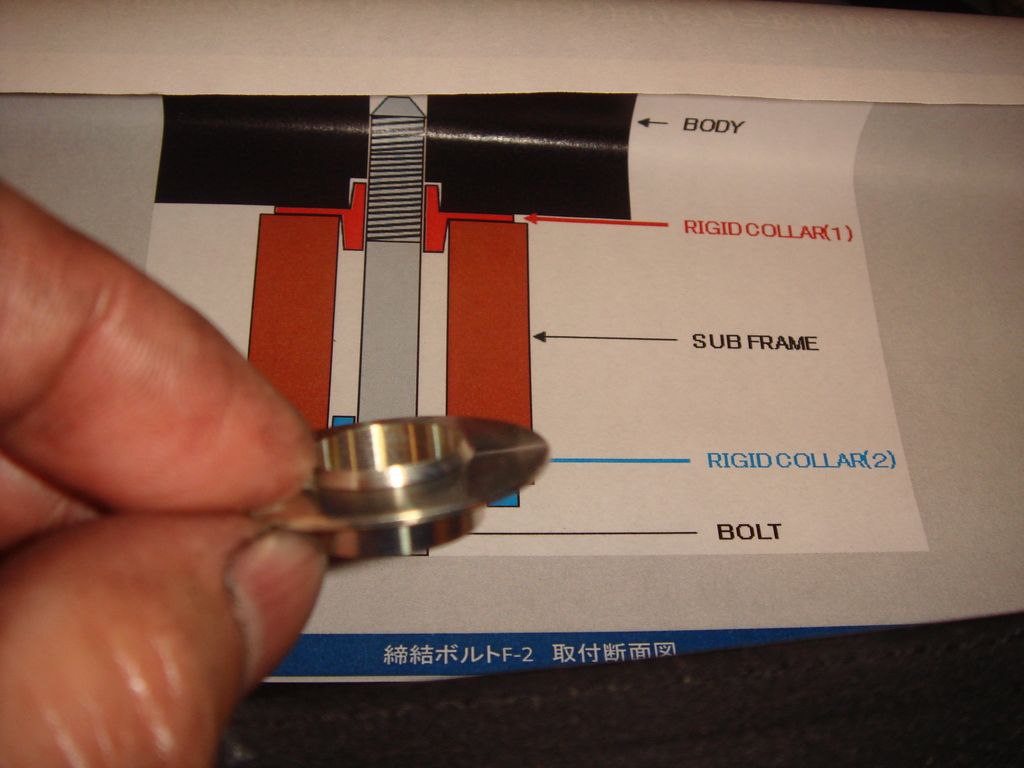
The Front Spoon Rigid Collar consist of 5 pair of rigid collar
3 pair will be between subframe and chassis
and 2 pair will be between bolt and subframe (or bolt and LCA).
the 3 pair between subframe and chassis have 3 different shape depending
on the location of the mounting point.
Spoon provide with 2 pages of instruction complete with clear pictures,
so you will now which collar shape goes where...
Like this one for example,
this will go to between subframe and chassis at the mounting point that had nothing
to do with the LCA (behind it you can see the illustration provided by Spoon):
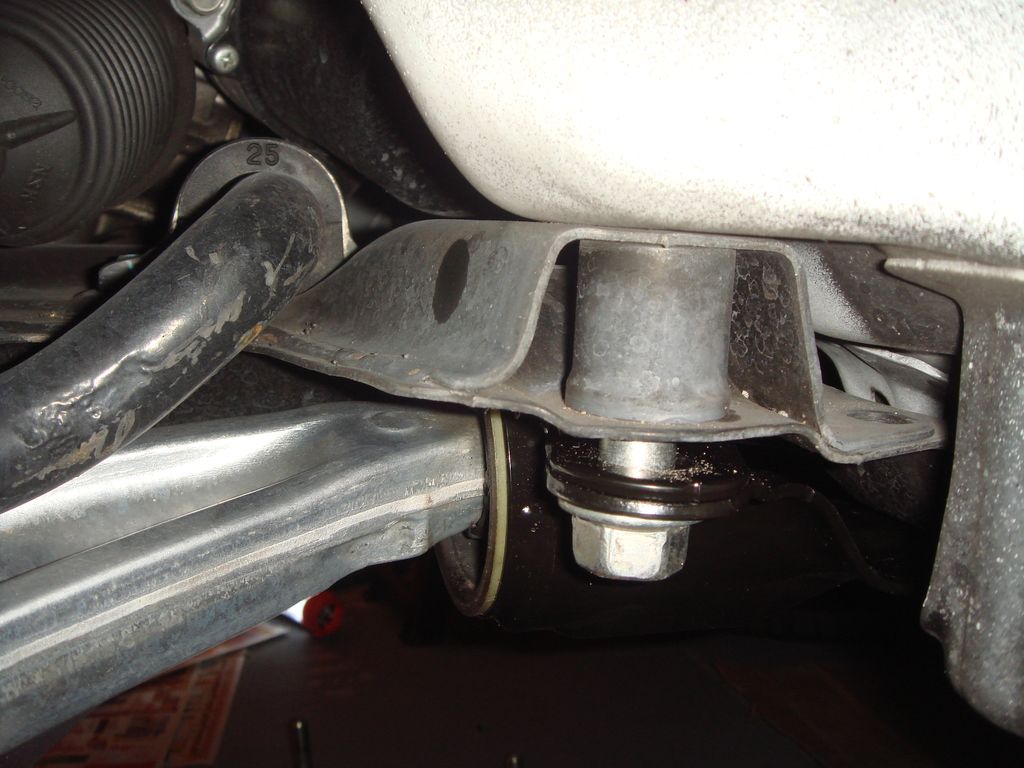
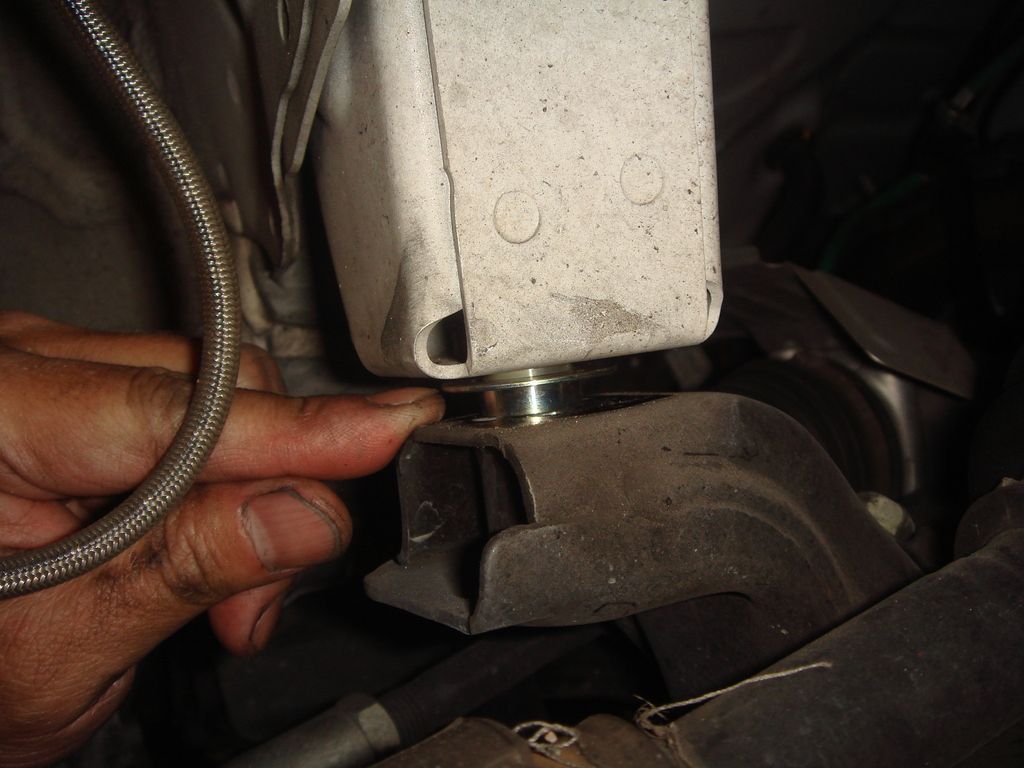
I am inserting the rigid collar to the first mounting point between subframe and chassis at the point where it had nothing to do with the LCA,
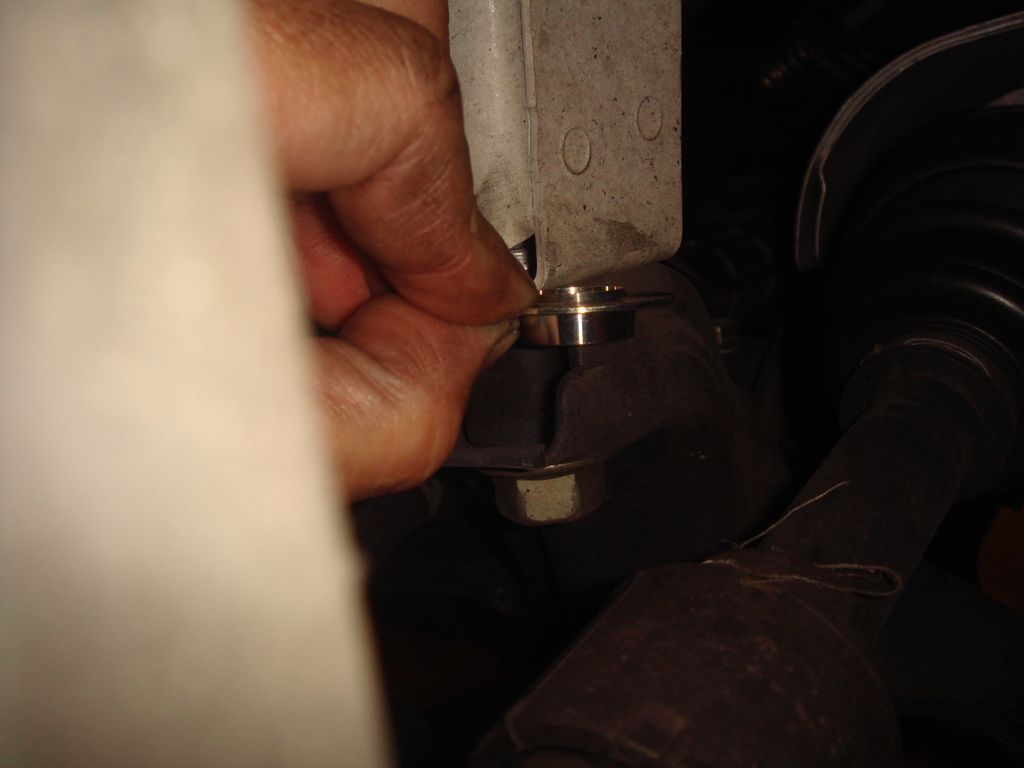
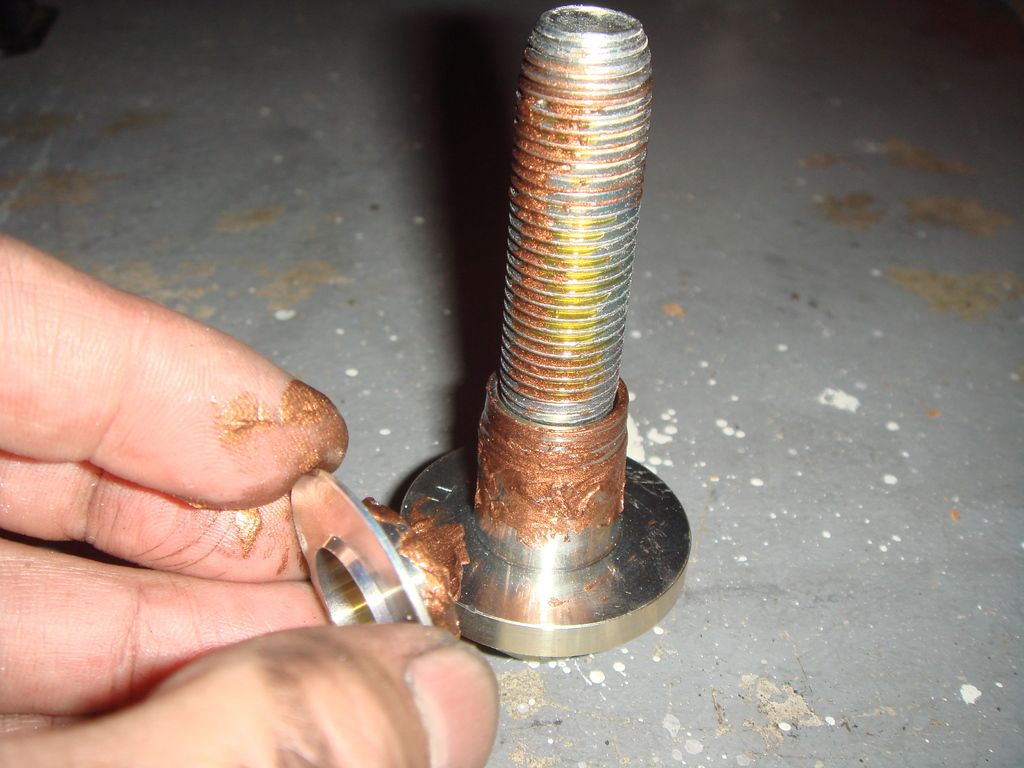
Ups, I forget to that we need to coat the spoon rigid collar and all the bolt
with grease that is provided by Spoon so I have to take it out again
and coat it with grease, notice on the bolt, I already put the other rigid collar
that suppose to go between the bolt and the the subframe:
Now insert it back:

and screw in the bolt:

3 pair will be between subframe and chassis
and 2 pair will be between bolt and subframe (or bolt and LCA).
the 3 pair between subframe and chassis have 3 different shape depending
on the location of the mounting point.
Spoon provide with 2 pages of instruction complete with clear pictures,
so you will now which collar shape goes where...
Like this one for example,
this will go to between subframe and chassis at the mounting point that had nothing
to do with the LCA (behind it you can see the illustration provided by Spoon):
I am inserting the rigid collar to the first mounting point between subframe and chassis at the point where it had nothing to do with the LCA,
Ups, I forget to that we need to coat the spoon rigid collar and all the bolt
with grease that is provided by Spoon so I have to take it out again
and coat it with grease, notice on the bolt, I already put the other rigid collar
that suppose to go between the bolt and the the subframe:
Now insert it back:
and screw in the bolt:
Last edited by BMW ALPINA; Nov 19, 2015 at 04:21 AM.
Repeat all the step above for the second mounting point,
this time it is also one of the mounting point of the LCA:
after that, another pair of rigid collar goes between the subframe and the chassis,
but on this last mounting point, it do not have any collar between the bolt and the LCA.
oh, this bolt also will hold the Cusco Version II so I better install the cusco bar at the same time.
(If you have Cusco Version II, you will know what I mean).
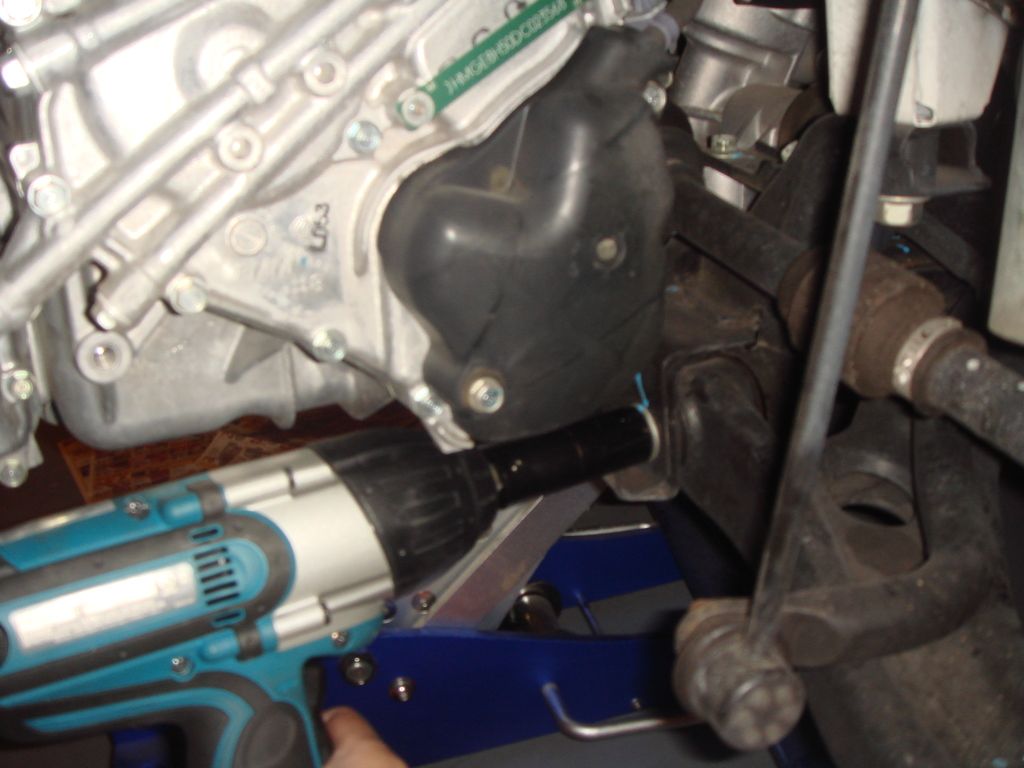
Once all bolt are in then I jack UP the hydraulic jack to push the entire subframe up
then I can tighten all the bolts but not fully torque them yet...
then I install the wheel/tire,
and then I lowered the car so the entire wheel/tire hold the weight of the car
and load the suspension.
Now, I tighten all the bolt to 93nm max torque following Honda spec.
For the castle nut, I only tighten it up to around 68nm and then put the locking pin back in.
Now, time for test drive,...
I fell the car is VERY SOLID and RIGID,
The steering is also very sensitive now,
just little input, the car already change direction.
The ride is also become softer which is strange...
probably because now the suspension moves more with less chassis flex...
it almost like the suspension also have more rebound because
the car up and down movement is more dampened...
but again when I enter a driveway (incline up a bit) at an angle,
I can really feel the car is more RIGID...
Highspeed driving on freeway become more relaxed as the car body
move less and track true while I also had to be careful
because a slight steering input will change the car direction (lane change)
very quickly...
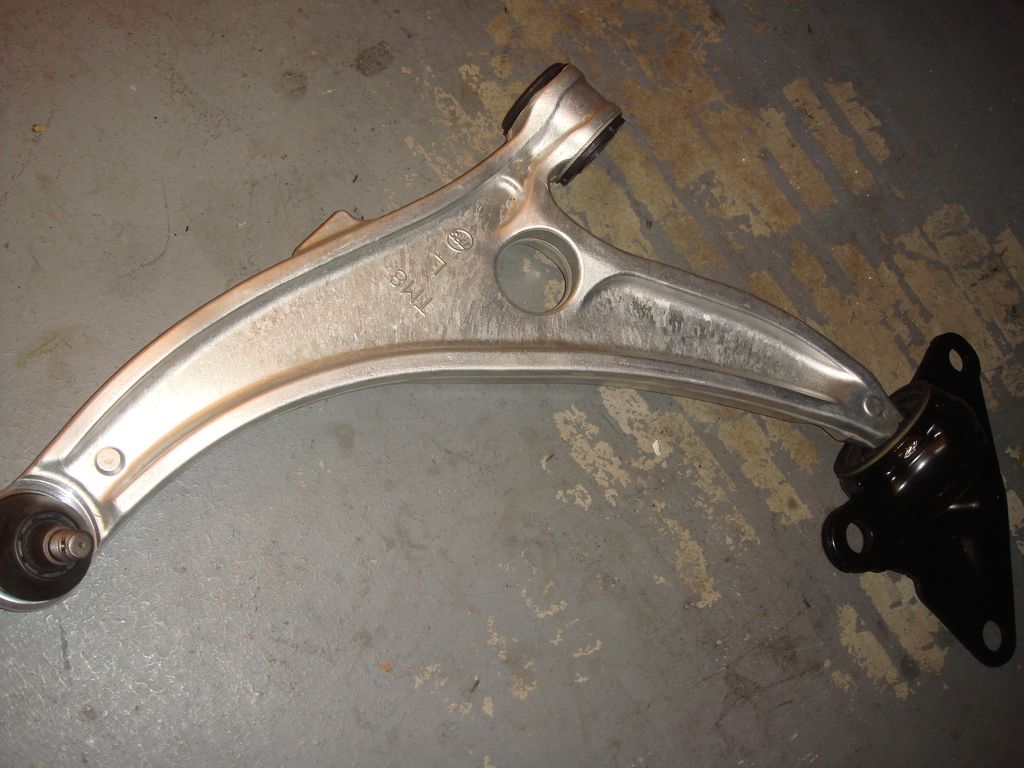
Hmm perhaps the Lighter Aluminum Lower Control Arm (LCA) from Honda Insight
also play important role here...
it is 3 pounds lighter per side (6 pounds total)
The stock Honda Fit steel one weight 11lbs and the Insight Aluminum one weight 8lbs per side.
I also think the design of the Insight LCA allow it to be more rigid
making the suspension geometry flex less and track true.
whatever it is, I am satisfied with the result.
I don't expect the Rigid Collar (and Insight LCA) to have this much effect,
but it is a pleasant surprise
The main reason for installing this Insight LCA was to allow more space
between the LCA and the Brembo Rotor because the OEM LCA had extended
lips near the ball joint that could heat my Brembo Rotor,
and the main reason for me buying the Rigid Collar is because
I need to take out most of the subframe bolt to install the Insight LCA
and those Rigid Collar should help centered the bolt easily...
well not bad for a side effect
Can't wait to install my Rear Axle Spoon Rigid Collar when
I install my rear JDM Fit RS Axle with Disc Brake conversion...
this time it is also one of the mounting point of the LCA:
after that, another pair of rigid collar goes between the subframe and the chassis,
but on this last mounting point, it do not have any collar between the bolt and the LCA.
oh, this bolt also will hold the Cusco Version II so I better install the cusco bar at the same time.
(If you have Cusco Version II, you will know what I mean).
Once all bolt are in then I jack UP the hydraulic jack to push the entire subframe up
then I can tighten all the bolts but not fully torque them yet...
then I install the wheel/tire,
and then I lowered the car so the entire wheel/tire hold the weight of the car
and load the suspension.
Now, I tighten all the bolt to 93nm max torque following Honda spec.
For the castle nut, I only tighten it up to around 68nm and then put the locking pin back in.
Now, time for test drive,...
I fell the car is VERY SOLID and RIGID,
The steering is also very sensitive now,
just little input, the car already change direction.
The ride is also become softer which is strange...
probably because now the suspension moves more with less chassis flex...
it almost like the suspension also have more rebound because
the car up and down movement is more dampened...
but again when I enter a driveway (incline up a bit) at an angle,
I can really feel the car is more RIGID...
Highspeed driving on freeway become more relaxed as the car body
move less and track true while I also had to be careful
because a slight steering input will change the car direction (lane change)
very quickly...
Hmm perhaps the Lighter Aluminum Lower Control Arm (LCA) from Honda Insight
also play important role here...
it is 3 pounds lighter per side (6 pounds total)
The stock Honda Fit steel one weight 11lbs and the Insight Aluminum one weight 8lbs per side.
I also think the design of the Insight LCA allow it to be more rigid
making the suspension geometry flex less and track true.
whatever it is, I am satisfied with the result.
I don't expect the Rigid Collar (and Insight LCA) to have this much effect,
but it is a pleasant surprise
The main reason for installing this Insight LCA was to allow more space
between the LCA and the Brembo Rotor because the OEM LCA had extended
lips near the ball joint that could heat my Brembo Rotor,
and the main reason for me buying the Rigid Collar is because
I need to take out most of the subframe bolt to install the Insight LCA
and those Rigid Collar should help centered the bolt easily...
well not bad for a side effect
Can't wait to install my Rear Axle Spoon Rigid Collar when
I install my rear JDM Fit RS Axle with Disc Brake conversion...
Last edited by BMW ALPINA; Nov 19, 2015 at 04:23 AM.
When car is assembled in production line,
Honda (or any car manufacturer) would make the holes on some parts slightly bigger then they are suppose to just so worker can insert the
bolt faster, I am talking about 1mm or 2mm larger here,
this rigid collar will center those holes and also create a better matting area
between 2 surfaces since those 2 surfaces might not perfectly flat,
and this rigid collar make of softer material will fill those gaps.
this create better contact area and centered position on the two mating surfaces.
I was skeptical too
but since it is not expensive and I had to unbolt most of the
subframe bolt to change the LCA, so I give it a try ...
and apparently it work...
perhaps because our Honda use thin and not stiff enough metal
so there is still flex and this rigid collar help reduce that flex.

this is the Parts number for the Honda Insight Aluminum Lower Control Arm:
51350-TM8-A01 (Right Side)
51360-TM8-A01 (Left Side)
Don't forget to buy the bolts too,
Honda Service manual say that if you took out those bolts that hold
the subframe/lower control arm,
you need to replace them with new bolts.
I guess because they had experience very high torque of 93nm...,
so they might be weaken after that and that is why those bolts
are one time use only...
Check Bernardi Honda Website and select your GK5 Fit to find the bolts needed,
and you will find the parts diagram there.

Member
Joined: Jul 2009
Posts: 273
From: Chicago

I believe the term is TTY (Torque To Yield).
IE bolts that are single use, once you tighten them down they are designed with a bit of elasticity to make a real solid bond.
If you are going to drop the money on the spoon collars, you are also probably the same person who buys new bolts. For things of importance like things that secure your subframe that you have a 100k miles on, I would drop those few extra bucks (if you were rebuilding a motor, I would rant up a wall that you should be replacing all TTY bolts on the block).... I don't know about the fit but I technically all the upper intake manifolds I've dealt with have been labeled as TTY..... yeeeaaaahhhh not about to listen to that.
Outside of motor blocks, I've never been a big subscriber to TTY, generally I replace bolts if I am servicing something that has a significant number of miles on (if you think something is going to be an afternoon task and you damage a specialty bolt and you rely on that car for work, those extra 40 bucks can really get you out of a pinch).
On the original note, I've always been really interested in the collars and don't doubt that they make a difference. but hate to say it for your butt dyno analysis, the perceived difference is probably entirely that you put in OEM new LCA's. Any of that rubber takes a real beating over time, and refreshing that is going to take the car very close to the day you pulled it off the dealer lot. Big kudos, I am impressed, I didn't even know there was an AL LCA option. Been there, that weight savings is a big deal.
Hi TofuShop,
this is the Parts number for the Honda Insight Aluminum Lower Control Arm:
51350-TM8-A01 (Right Side)
51360-TM8-A01 (Left Side)
Don't forget to buy the bolts too,
Honda Service manual say that if you took out those bolts that hold
the subframe/lower control arm,
you need to replace them with new bolts.
I guess because they had experience very high torque of 93nm...,
so they might be weaken after that and that is why those bolts
are one time use only...
Check Bernardi Honda Website and select your GK5 Fit to find the bolts needed,
and you will find the parts diagram there.
Member
Joined: May 2014
Posts: 1,917
From: Delaware
Hi TofuShop,
this is the Parts number for the Honda Insight Aluminum Lower Control Arm:
51350-TM8-A01 (Right Side)
51360-TM8-A01 (Left Side)
Don't forget to buy the bolts too,
Honda Service manual say that if you took out those bolts that hold
the subframe/lower control arm,
you need to replace them with new bolts.
I guess because they had experience very high torque of 93nm...,
so they might be weaken after that and that is why those bolts
are one time use only...
Has anyone weighed the aluminum control arms? Looking at Hondapartsnetwork, it's showing 13.64lbs, for both the lest and right LCAs.


