
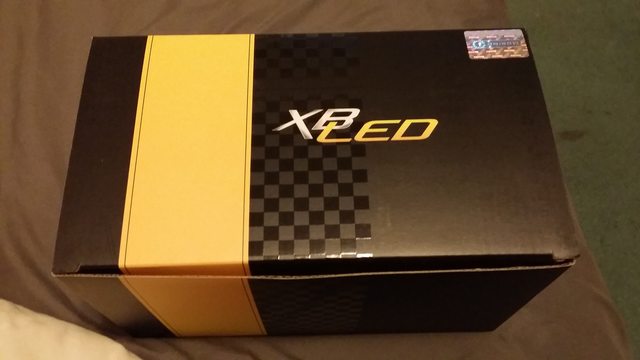
Installed those TRS Morimoto LEDs


Thread Starter
|
Member
Joined: May 2014
Posts: 340
From: Los Angeles, CA
Installed those TRS Morimoto LEDs
So I received the TRS morimoto LED foglights (Type S) a couple days ago and today I installed them after coming home from work. I wanted to take them out for a test immediately in the Angeles Forest Highway to see how well they work under very dark conditions and maybe take a video of it during the drive, but I had just sprayed the 3M paint defender on my hood (after so many paint chips and touch ups) so alas that's fun times for me for another evening.
Total time to install from bumper removal to putting bumper back ~ 30 minutes.
You will have to remove your bumper for this, although you "can" take out the foglight shrouds but risk scratching the bumper. Your choice. To remove bumper, you'll have to take out the clips on top (about 8 clips total), the two self-tapping screws on both side wheel well (four screws total), the screws that go to each foglight access under the bumper (two screws total), and about 8 clips underneath the bumper that hold it to the plastic covering under the engine.
Bumper removal instructions can also be found on College Hills honda website for the 2015 Honda Fit Sport Grille accessory. Ultimately if you've removed bumpers off cars before it's a very easy ordeal.
Excuse the crappy pictures. It's all from my phone.
Type S (circle) the Subaru one. The Type T won't fit.
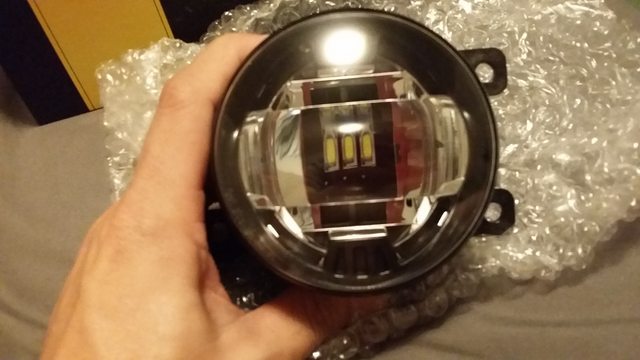
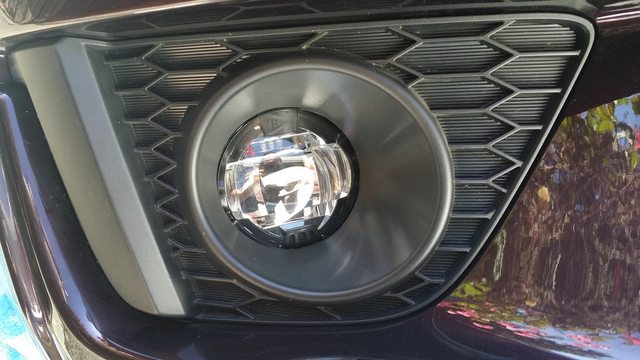
When you take out the foglight shroud, you're left with the fog light assembly, which can be easily taken off with two screws, then put the new fog lights in. It's exactly plug and play. One screw is missing because I already took out the screw.
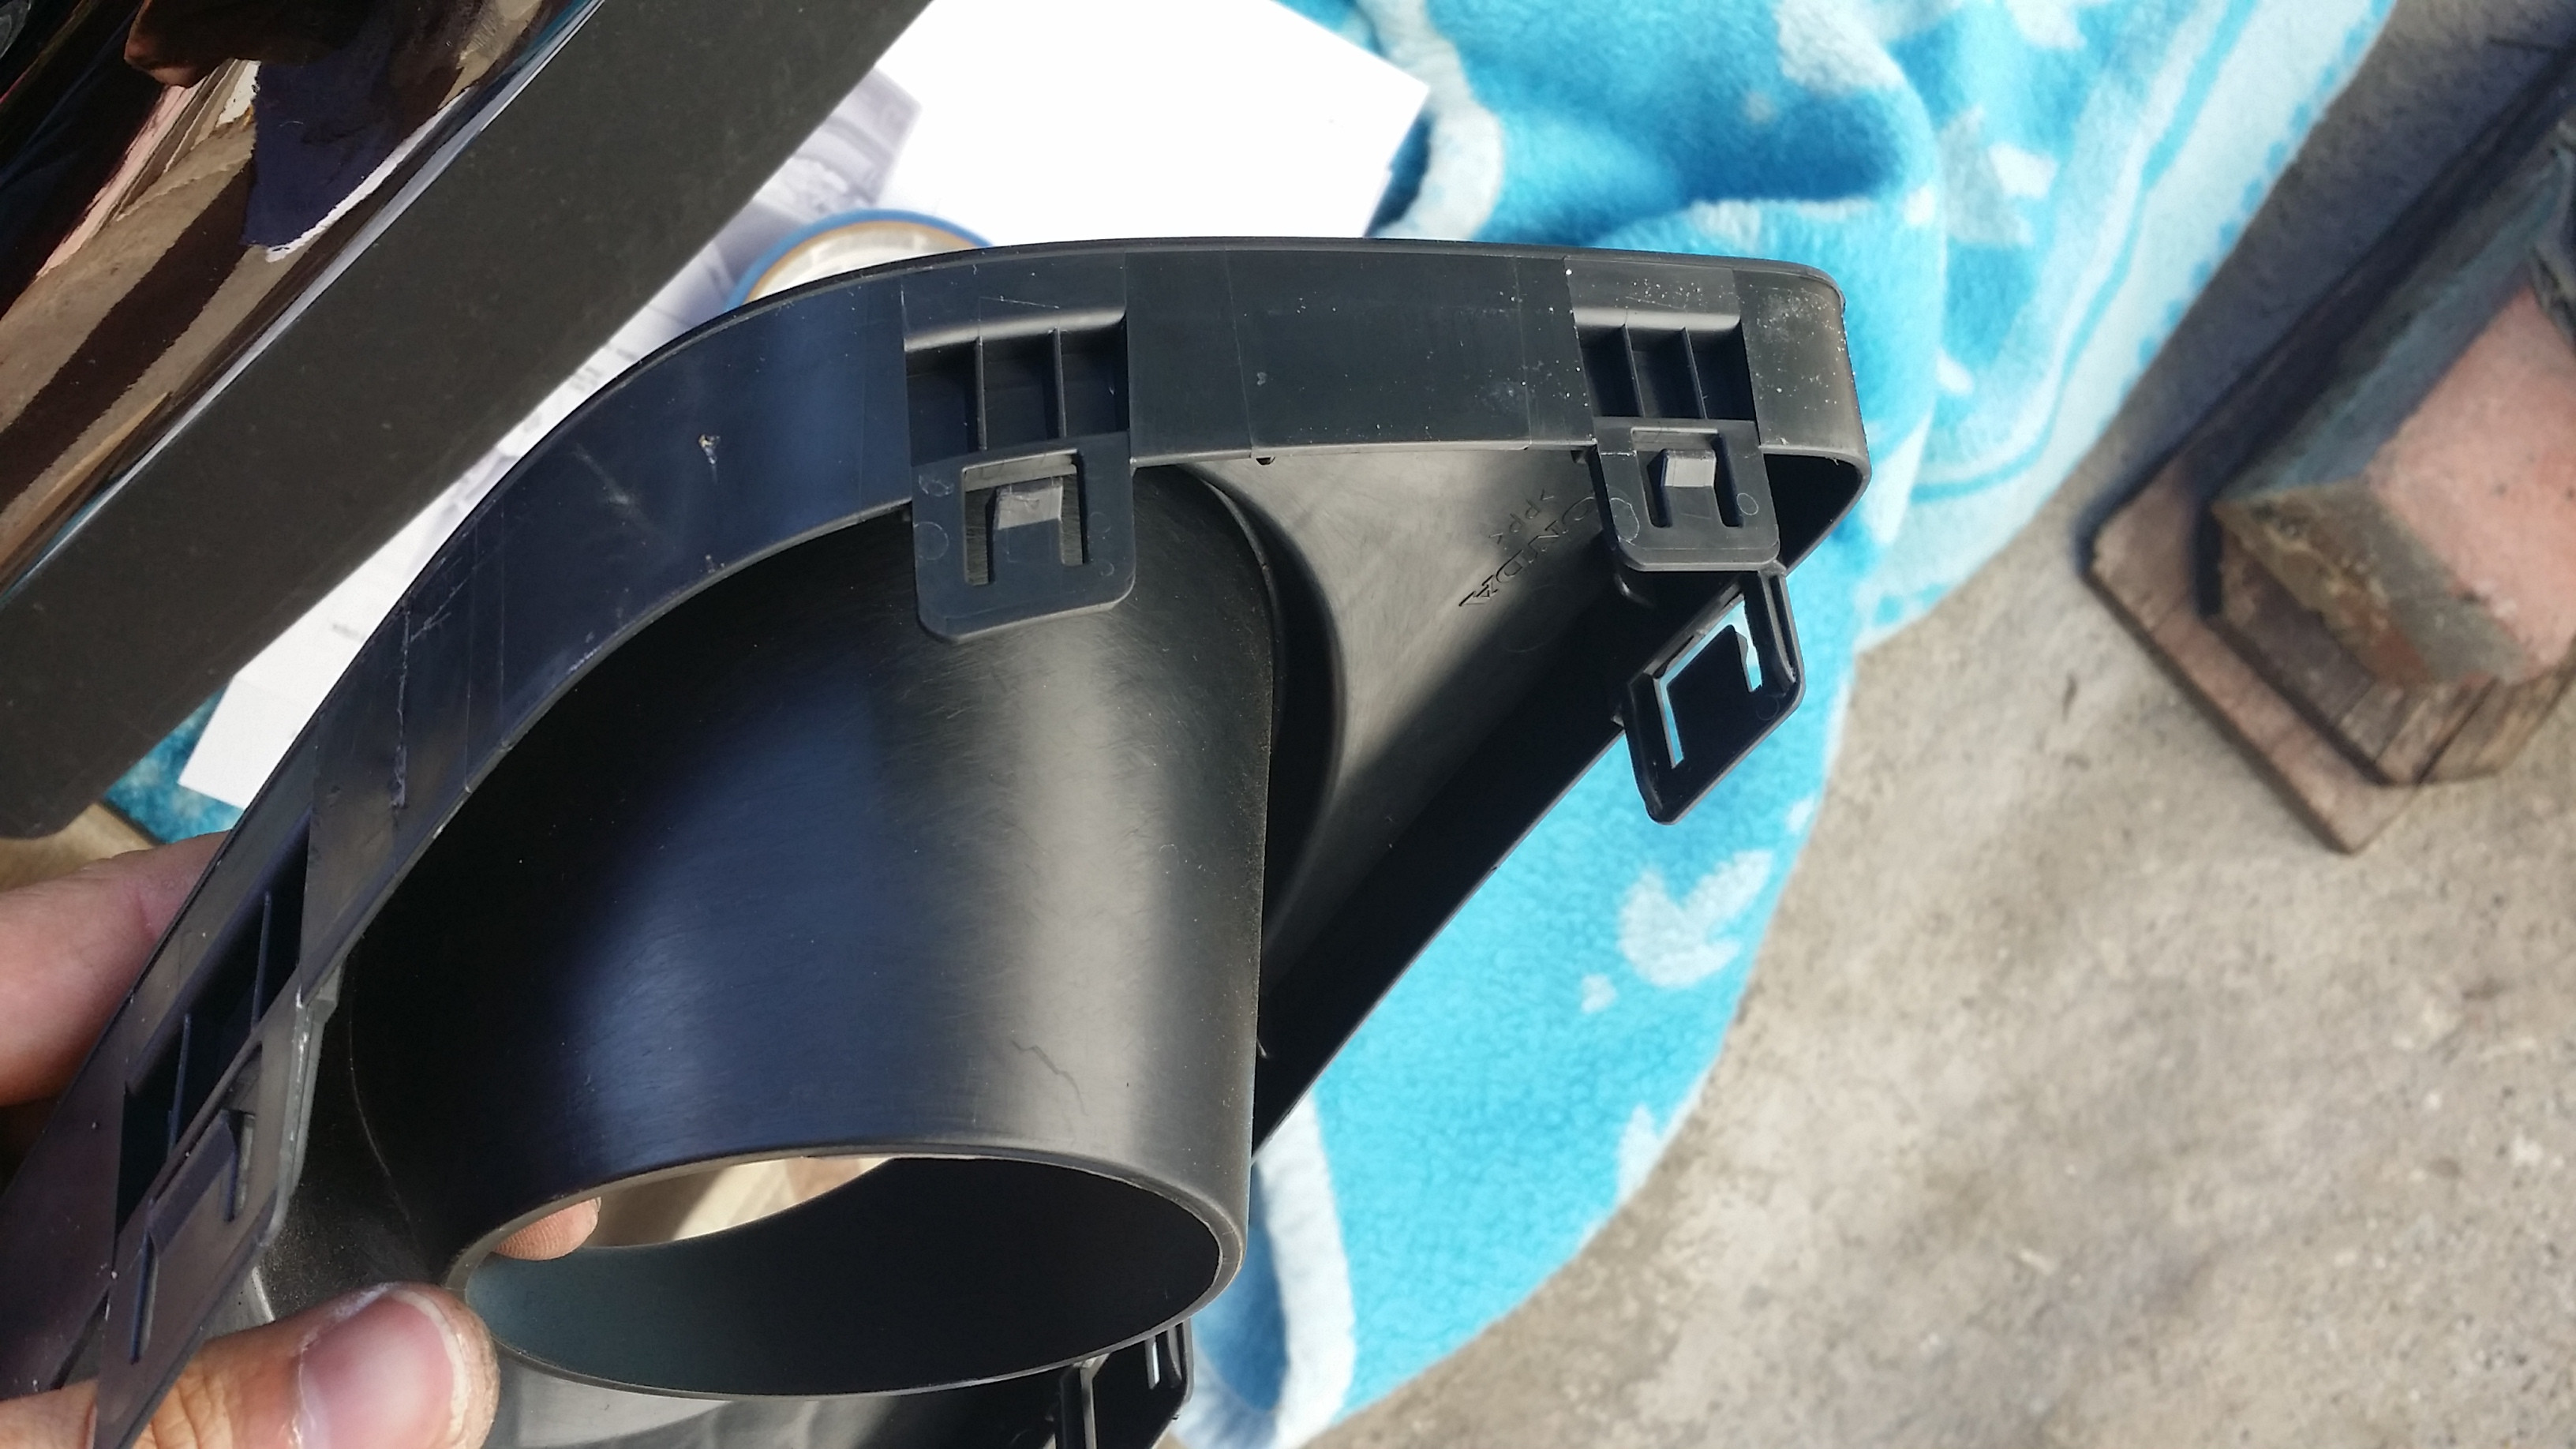
The back of the fog light shrouds look like this. Notice the little clips. You push them in from the inside of the bumper (about five of them) then the shroud pops out from the front. You 'can' push them in from outside the bumper facing the fog lights .... but .... you might scratch the bumper. I suppose if you eat a Haagan Daaz ice cream bar, you can use the leftover tongue depressor to push the clips down safely.
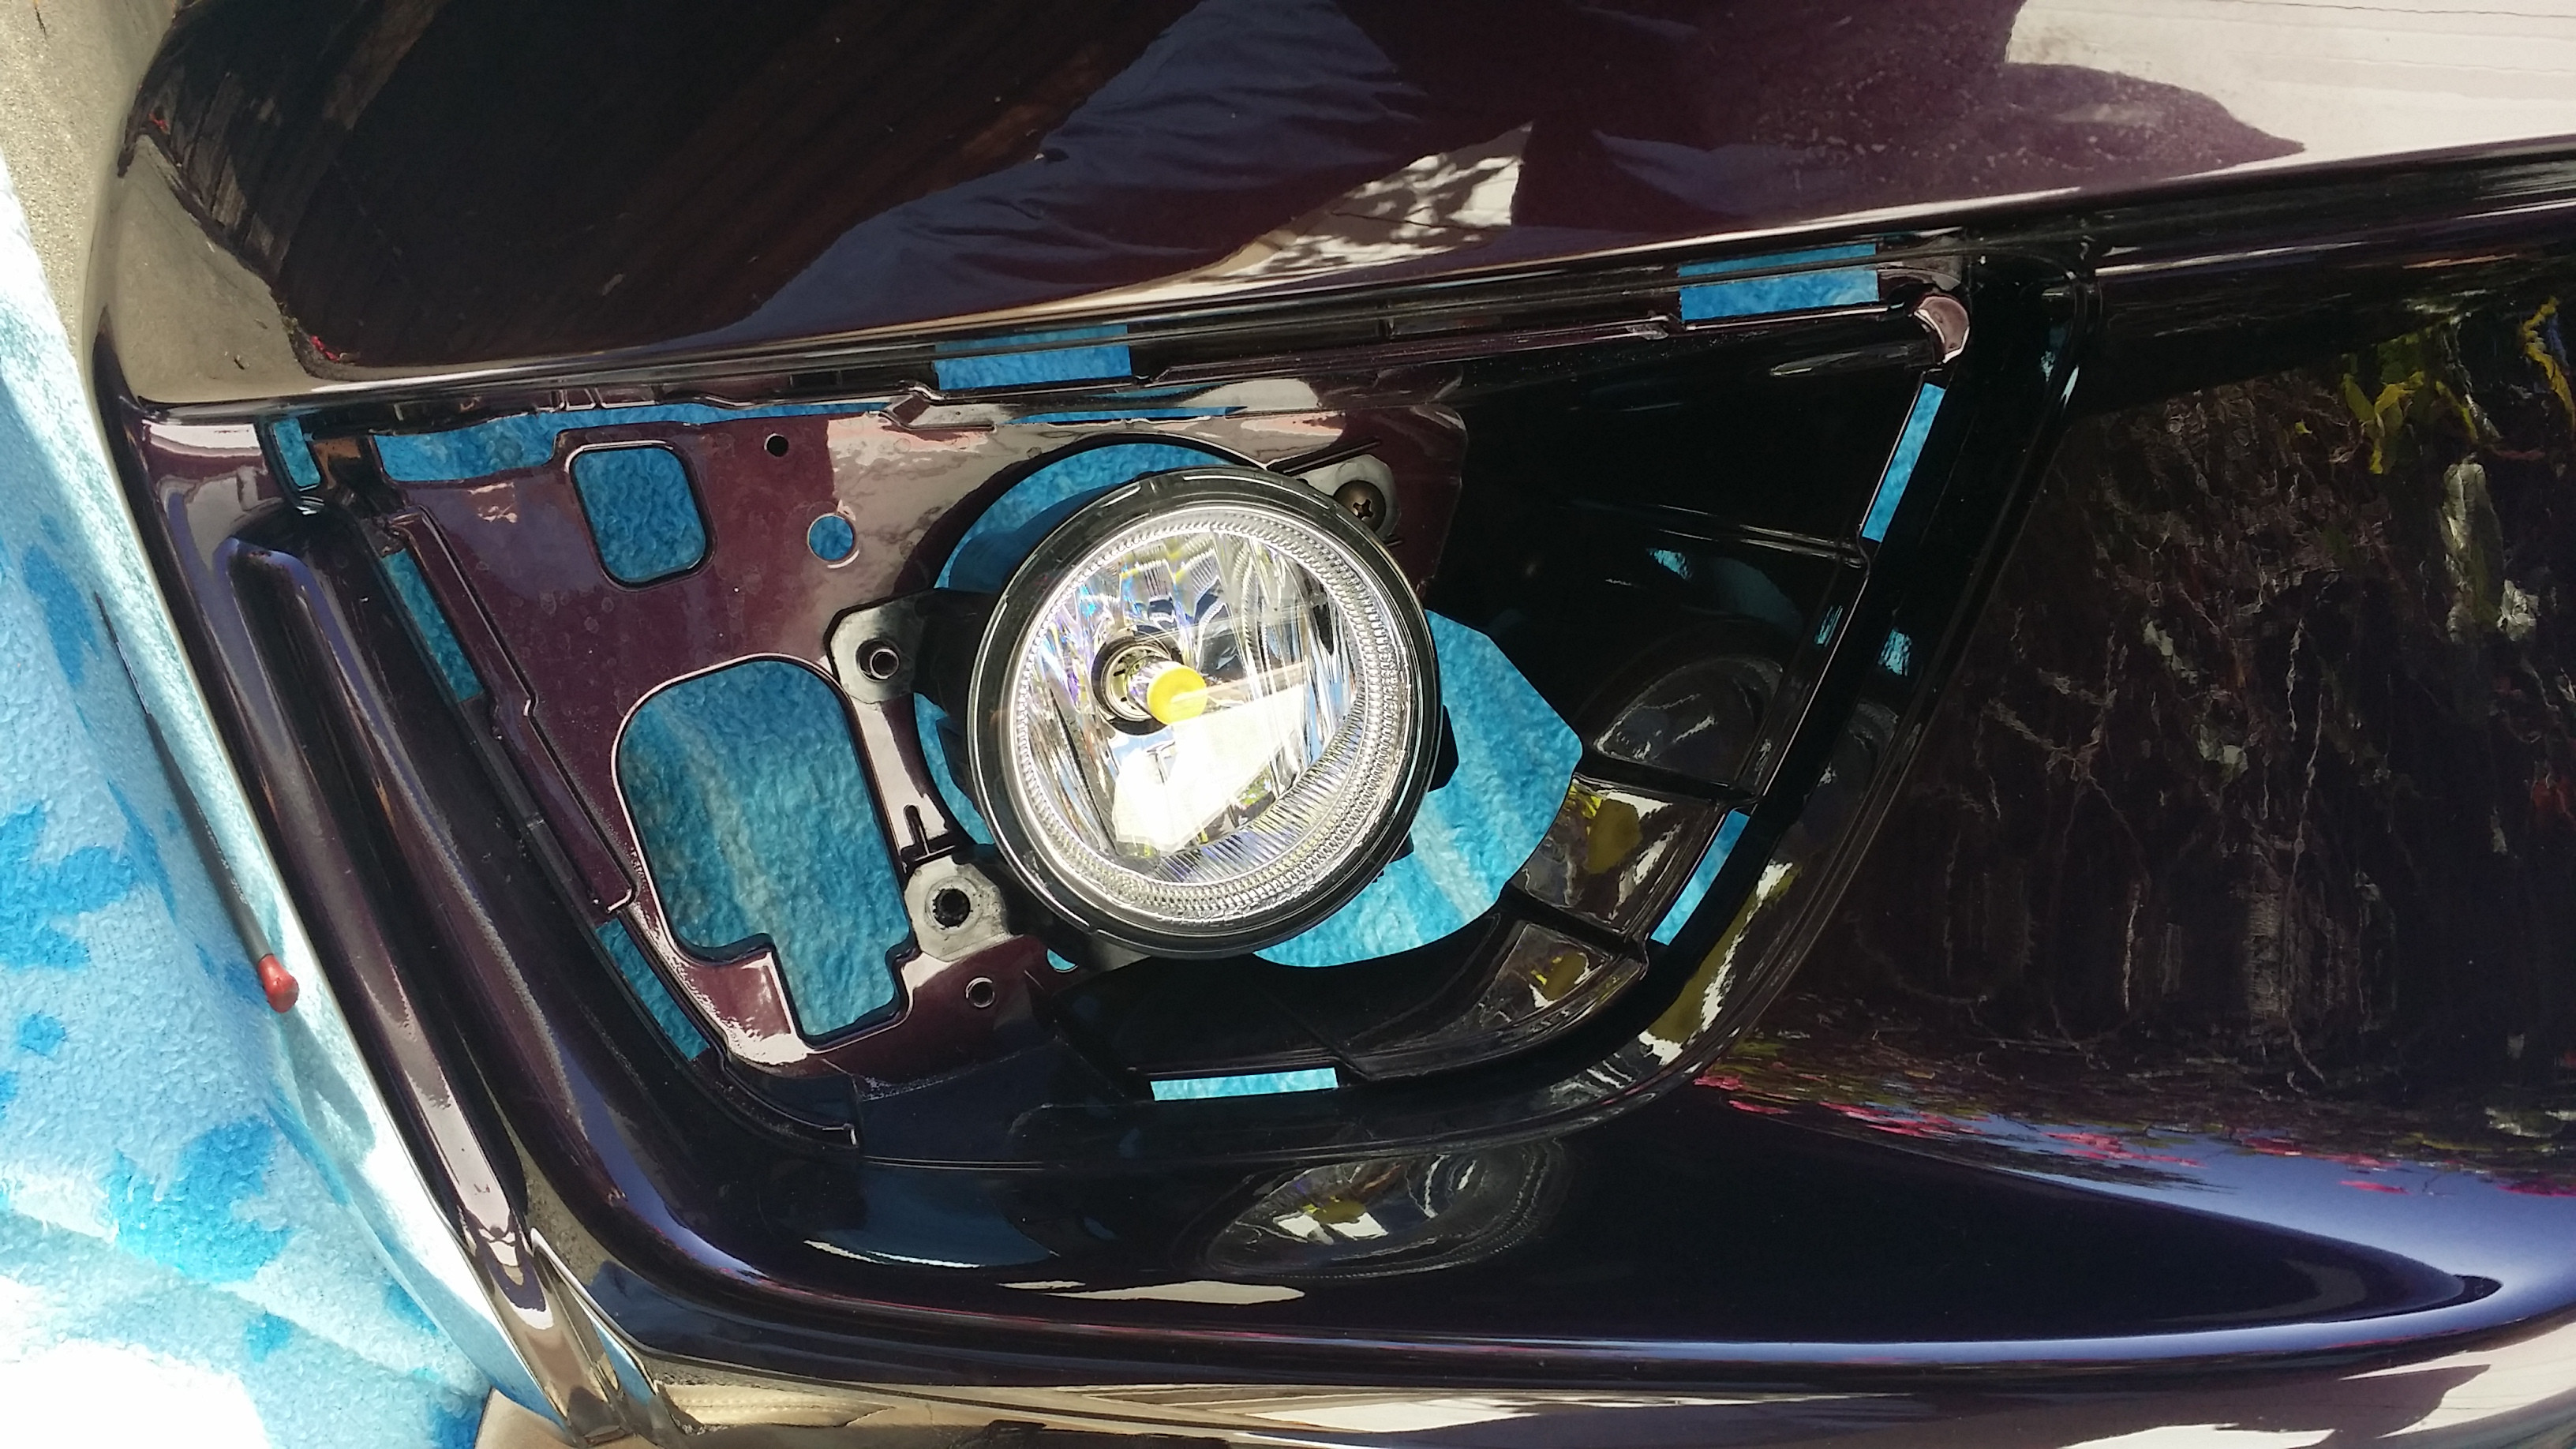
Pop the shroud back on after screwing the new fog lights in. Looks good!
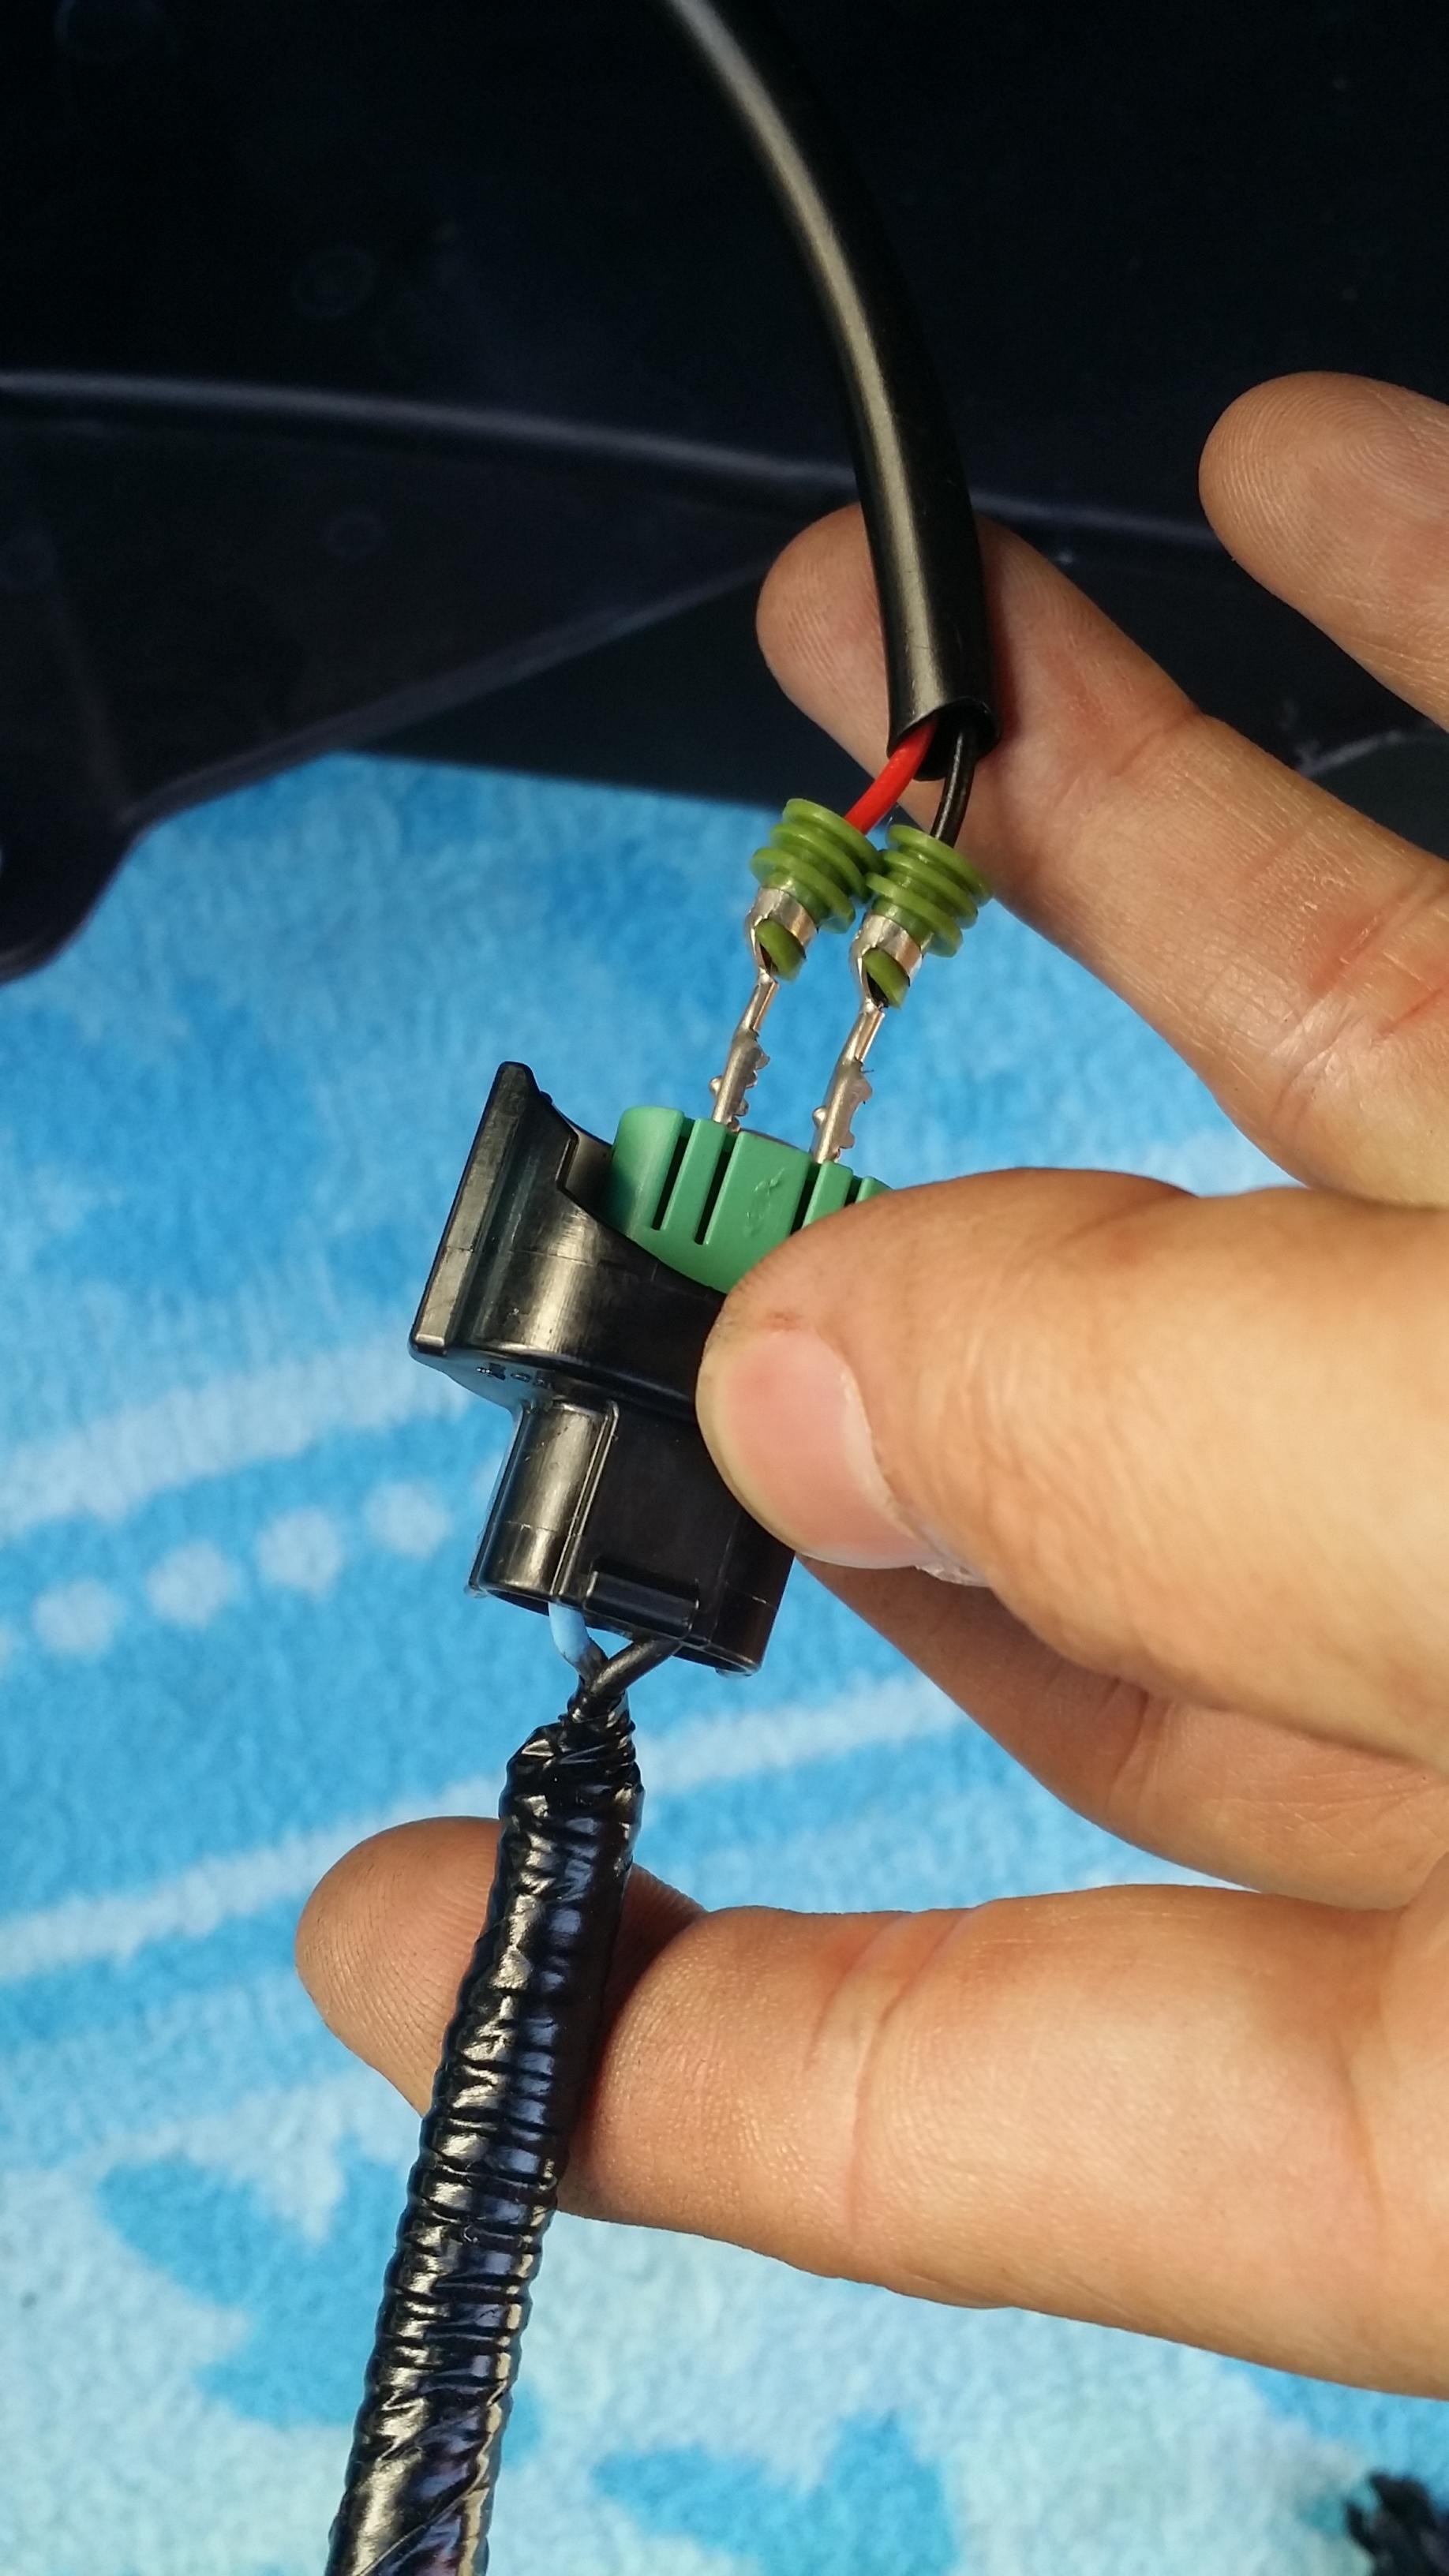
Check the polarity of the wires and turn on the fog lights before putting the morimoto led wires into the plug TRS supplies you with. But if you look at the picture, it's a simple to see that Blue (honda wire) goes to Red (morimoto wire). And obviously black to black.
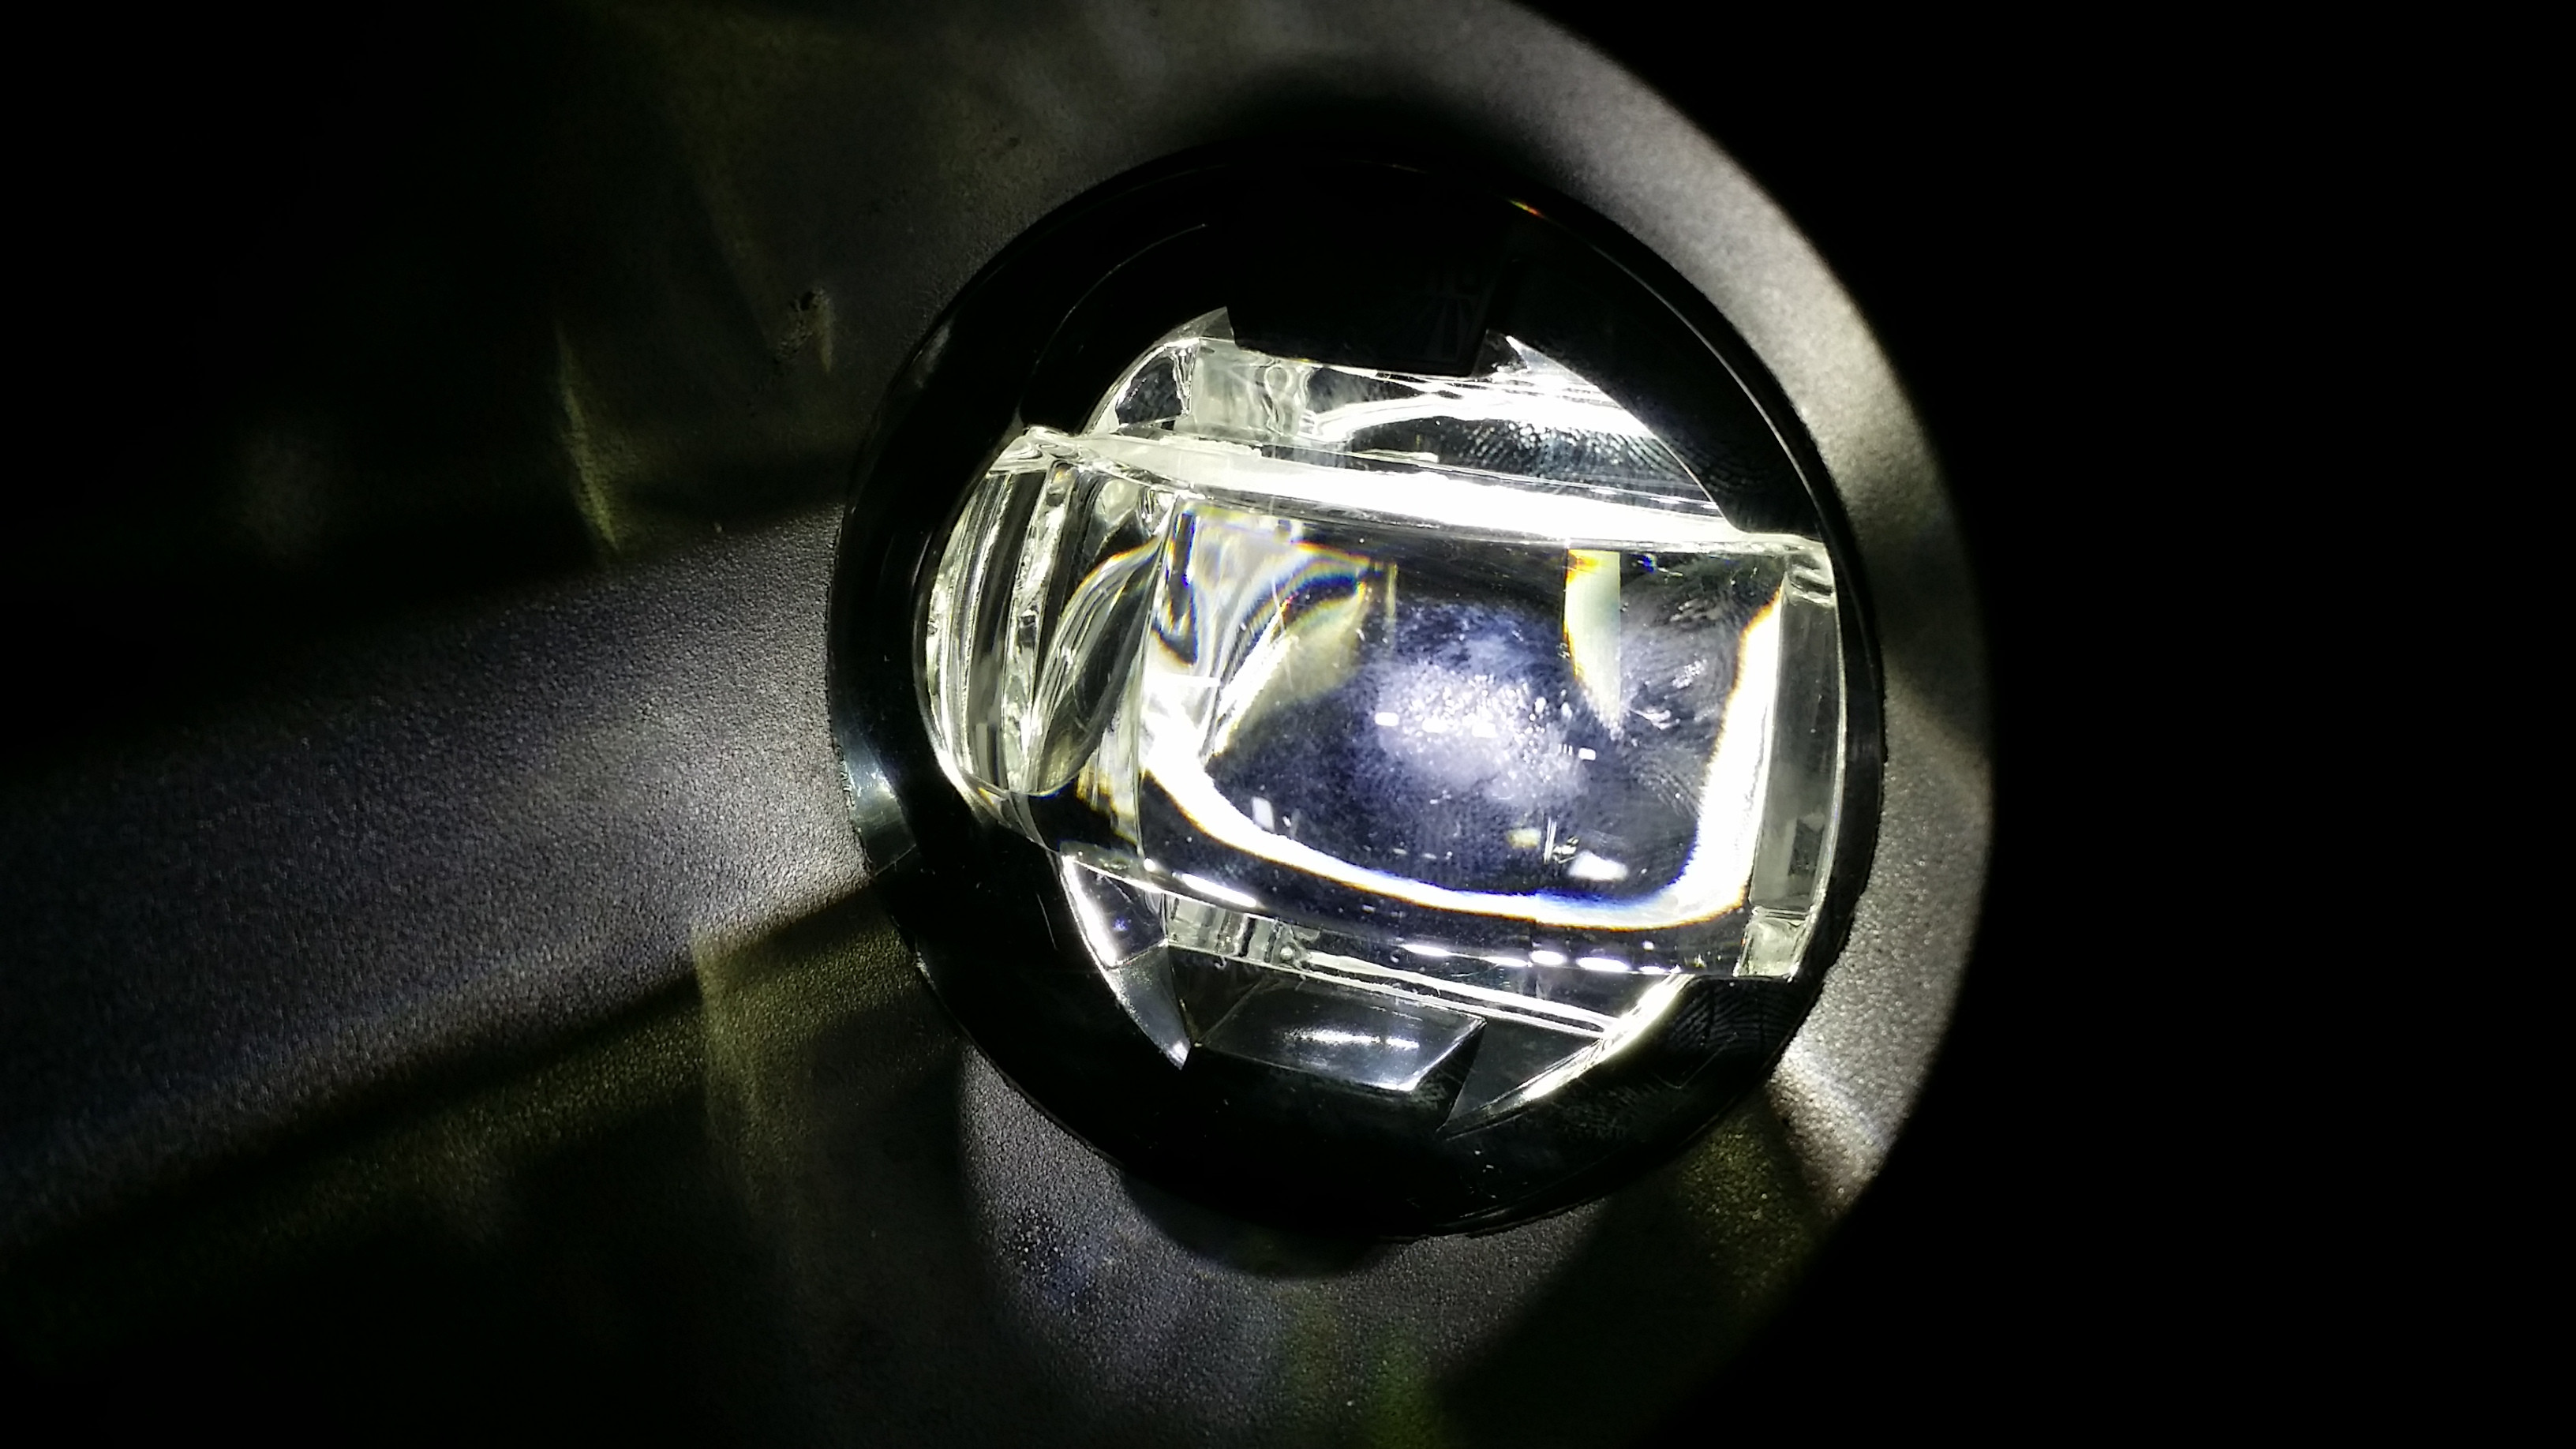
Turned on.
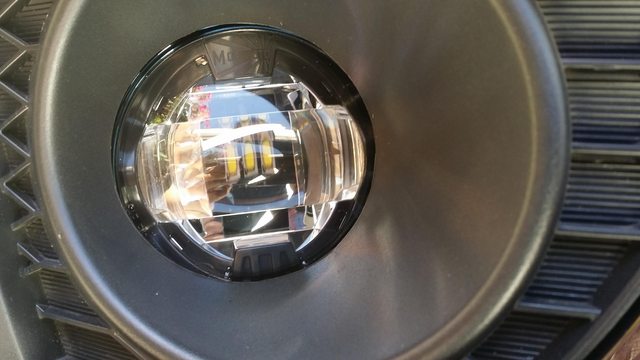
Close up
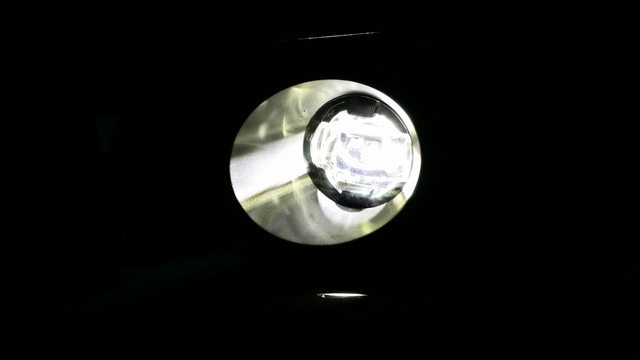
Aimed at the fridge in my garage. Lovely cutoff.
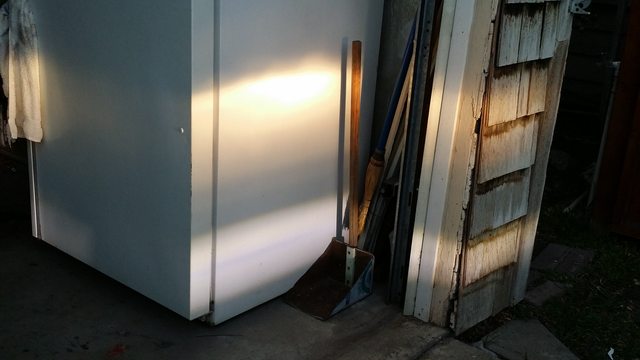
Again. Lovely cutoff. Just my fog lights were on. My headlights were covered so I could spray the 3M paint defender thing on my hood.

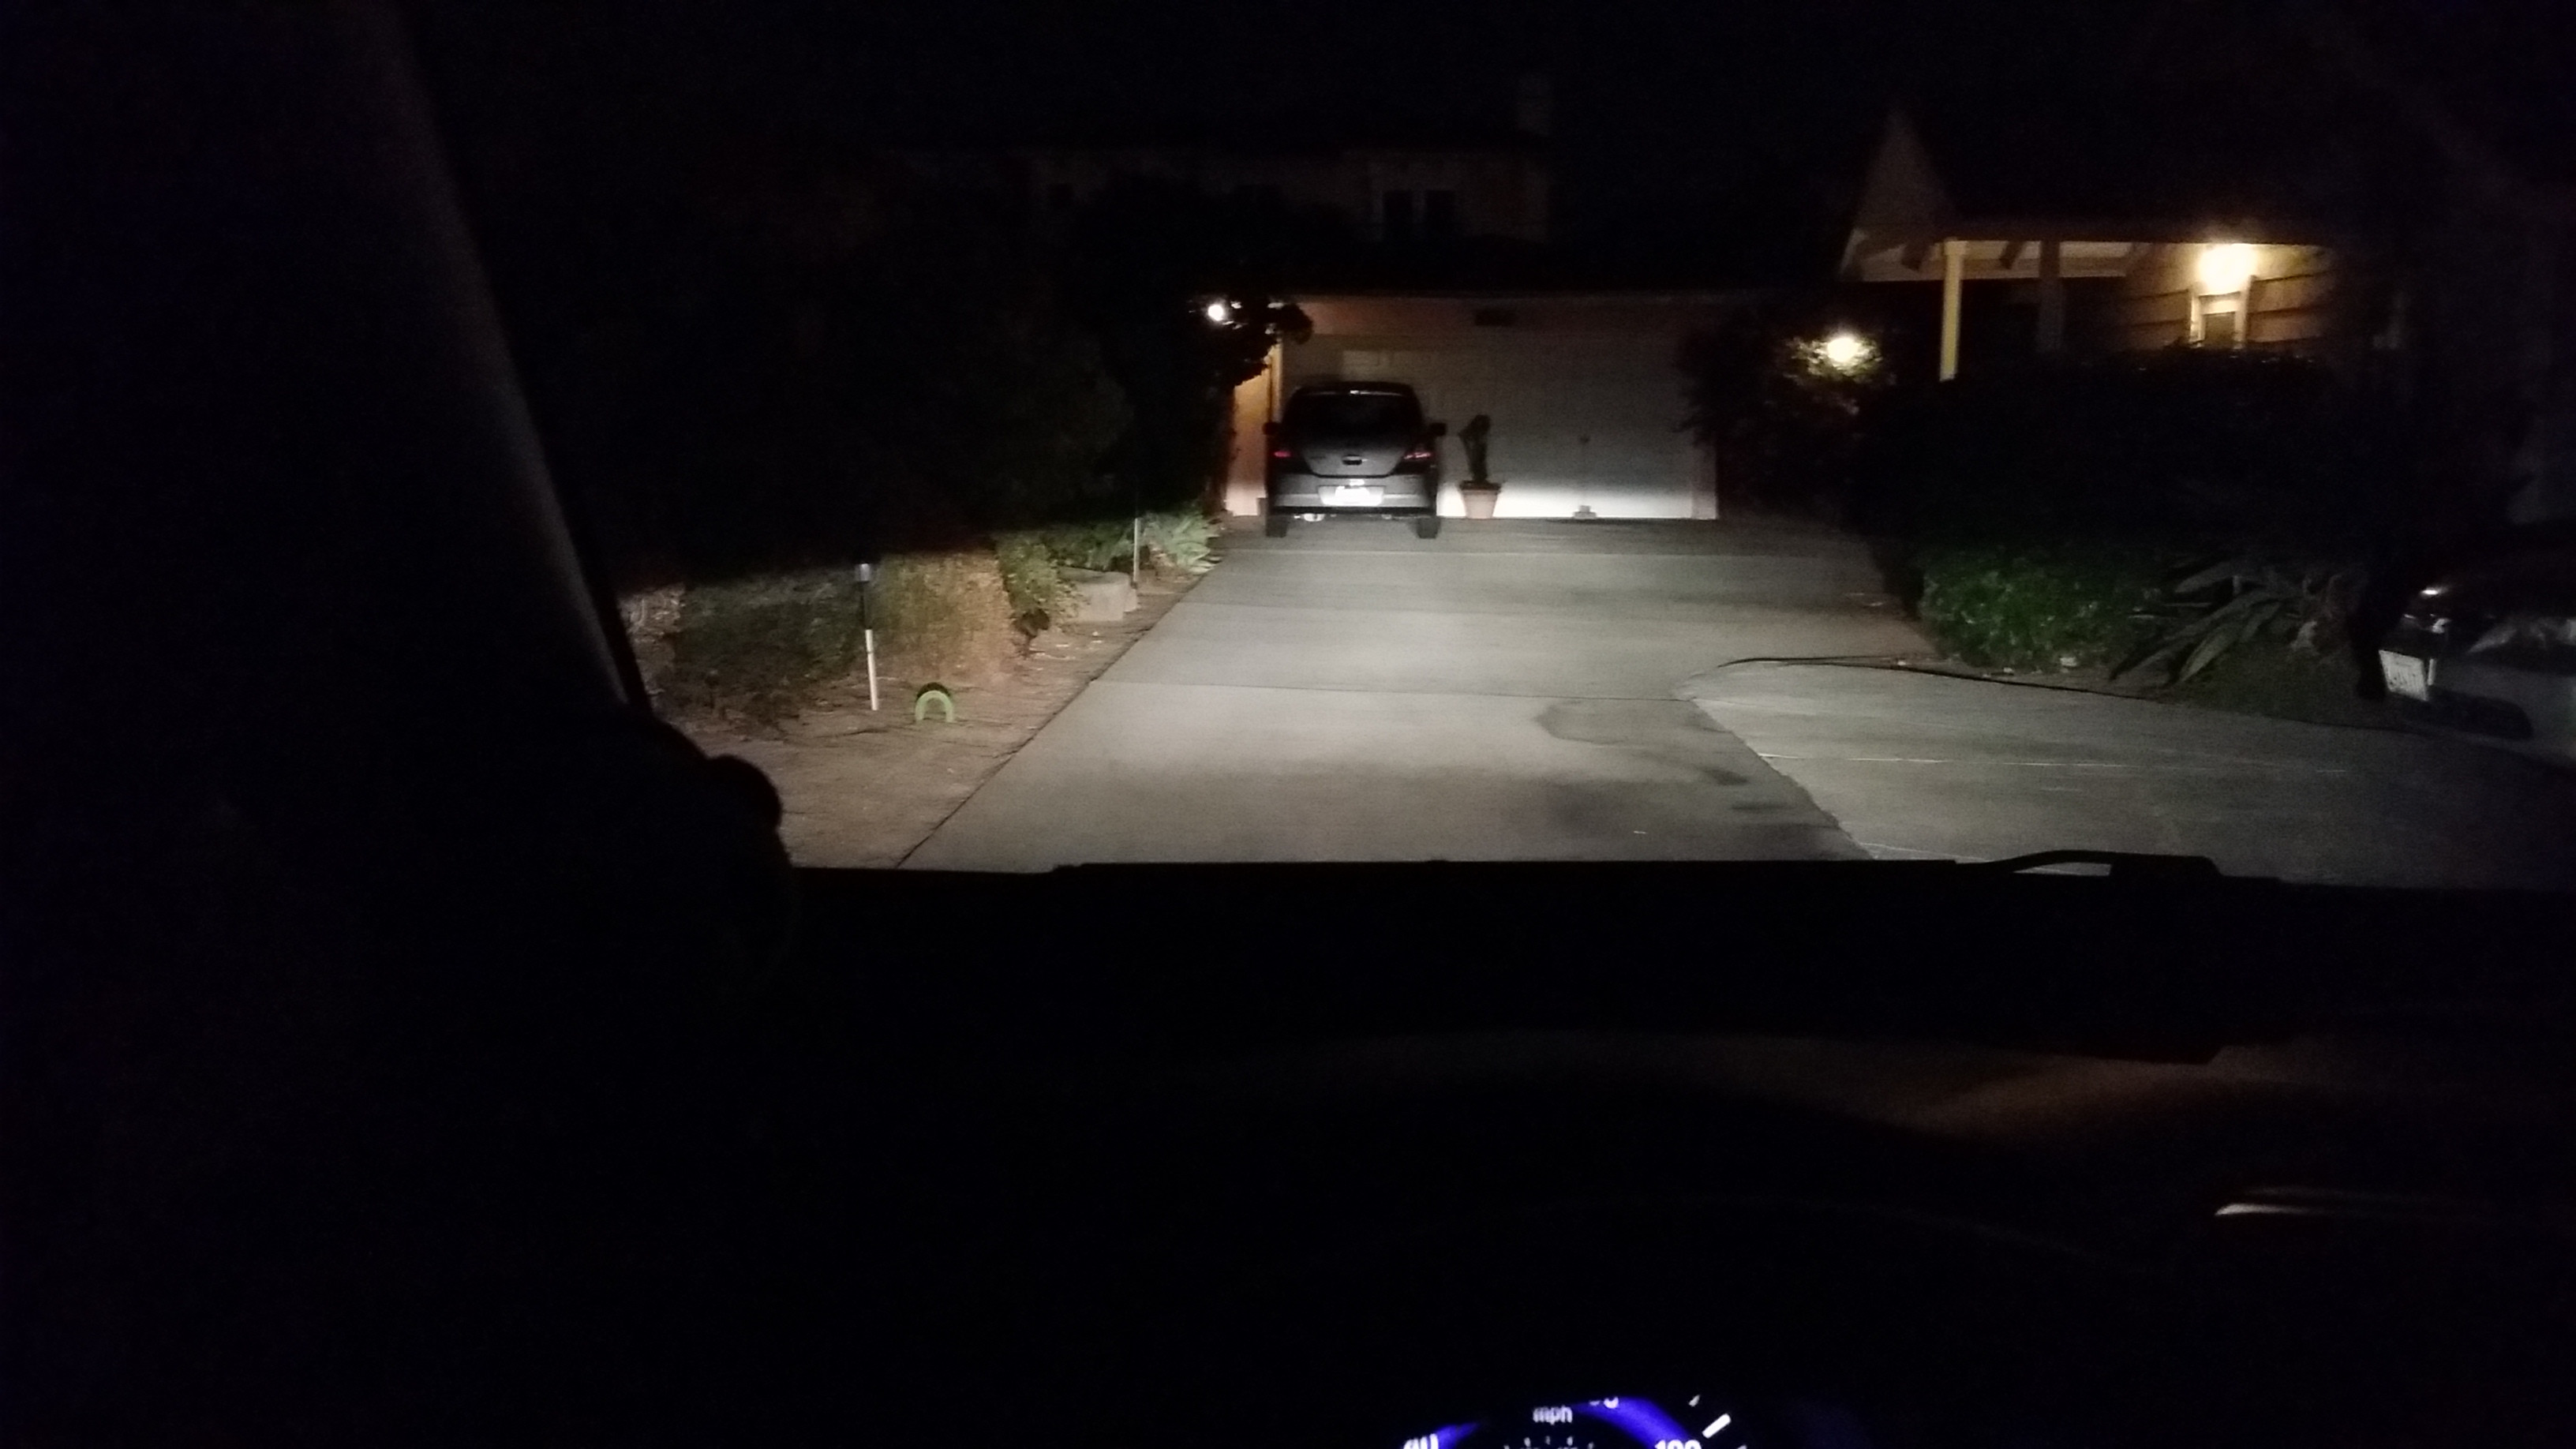
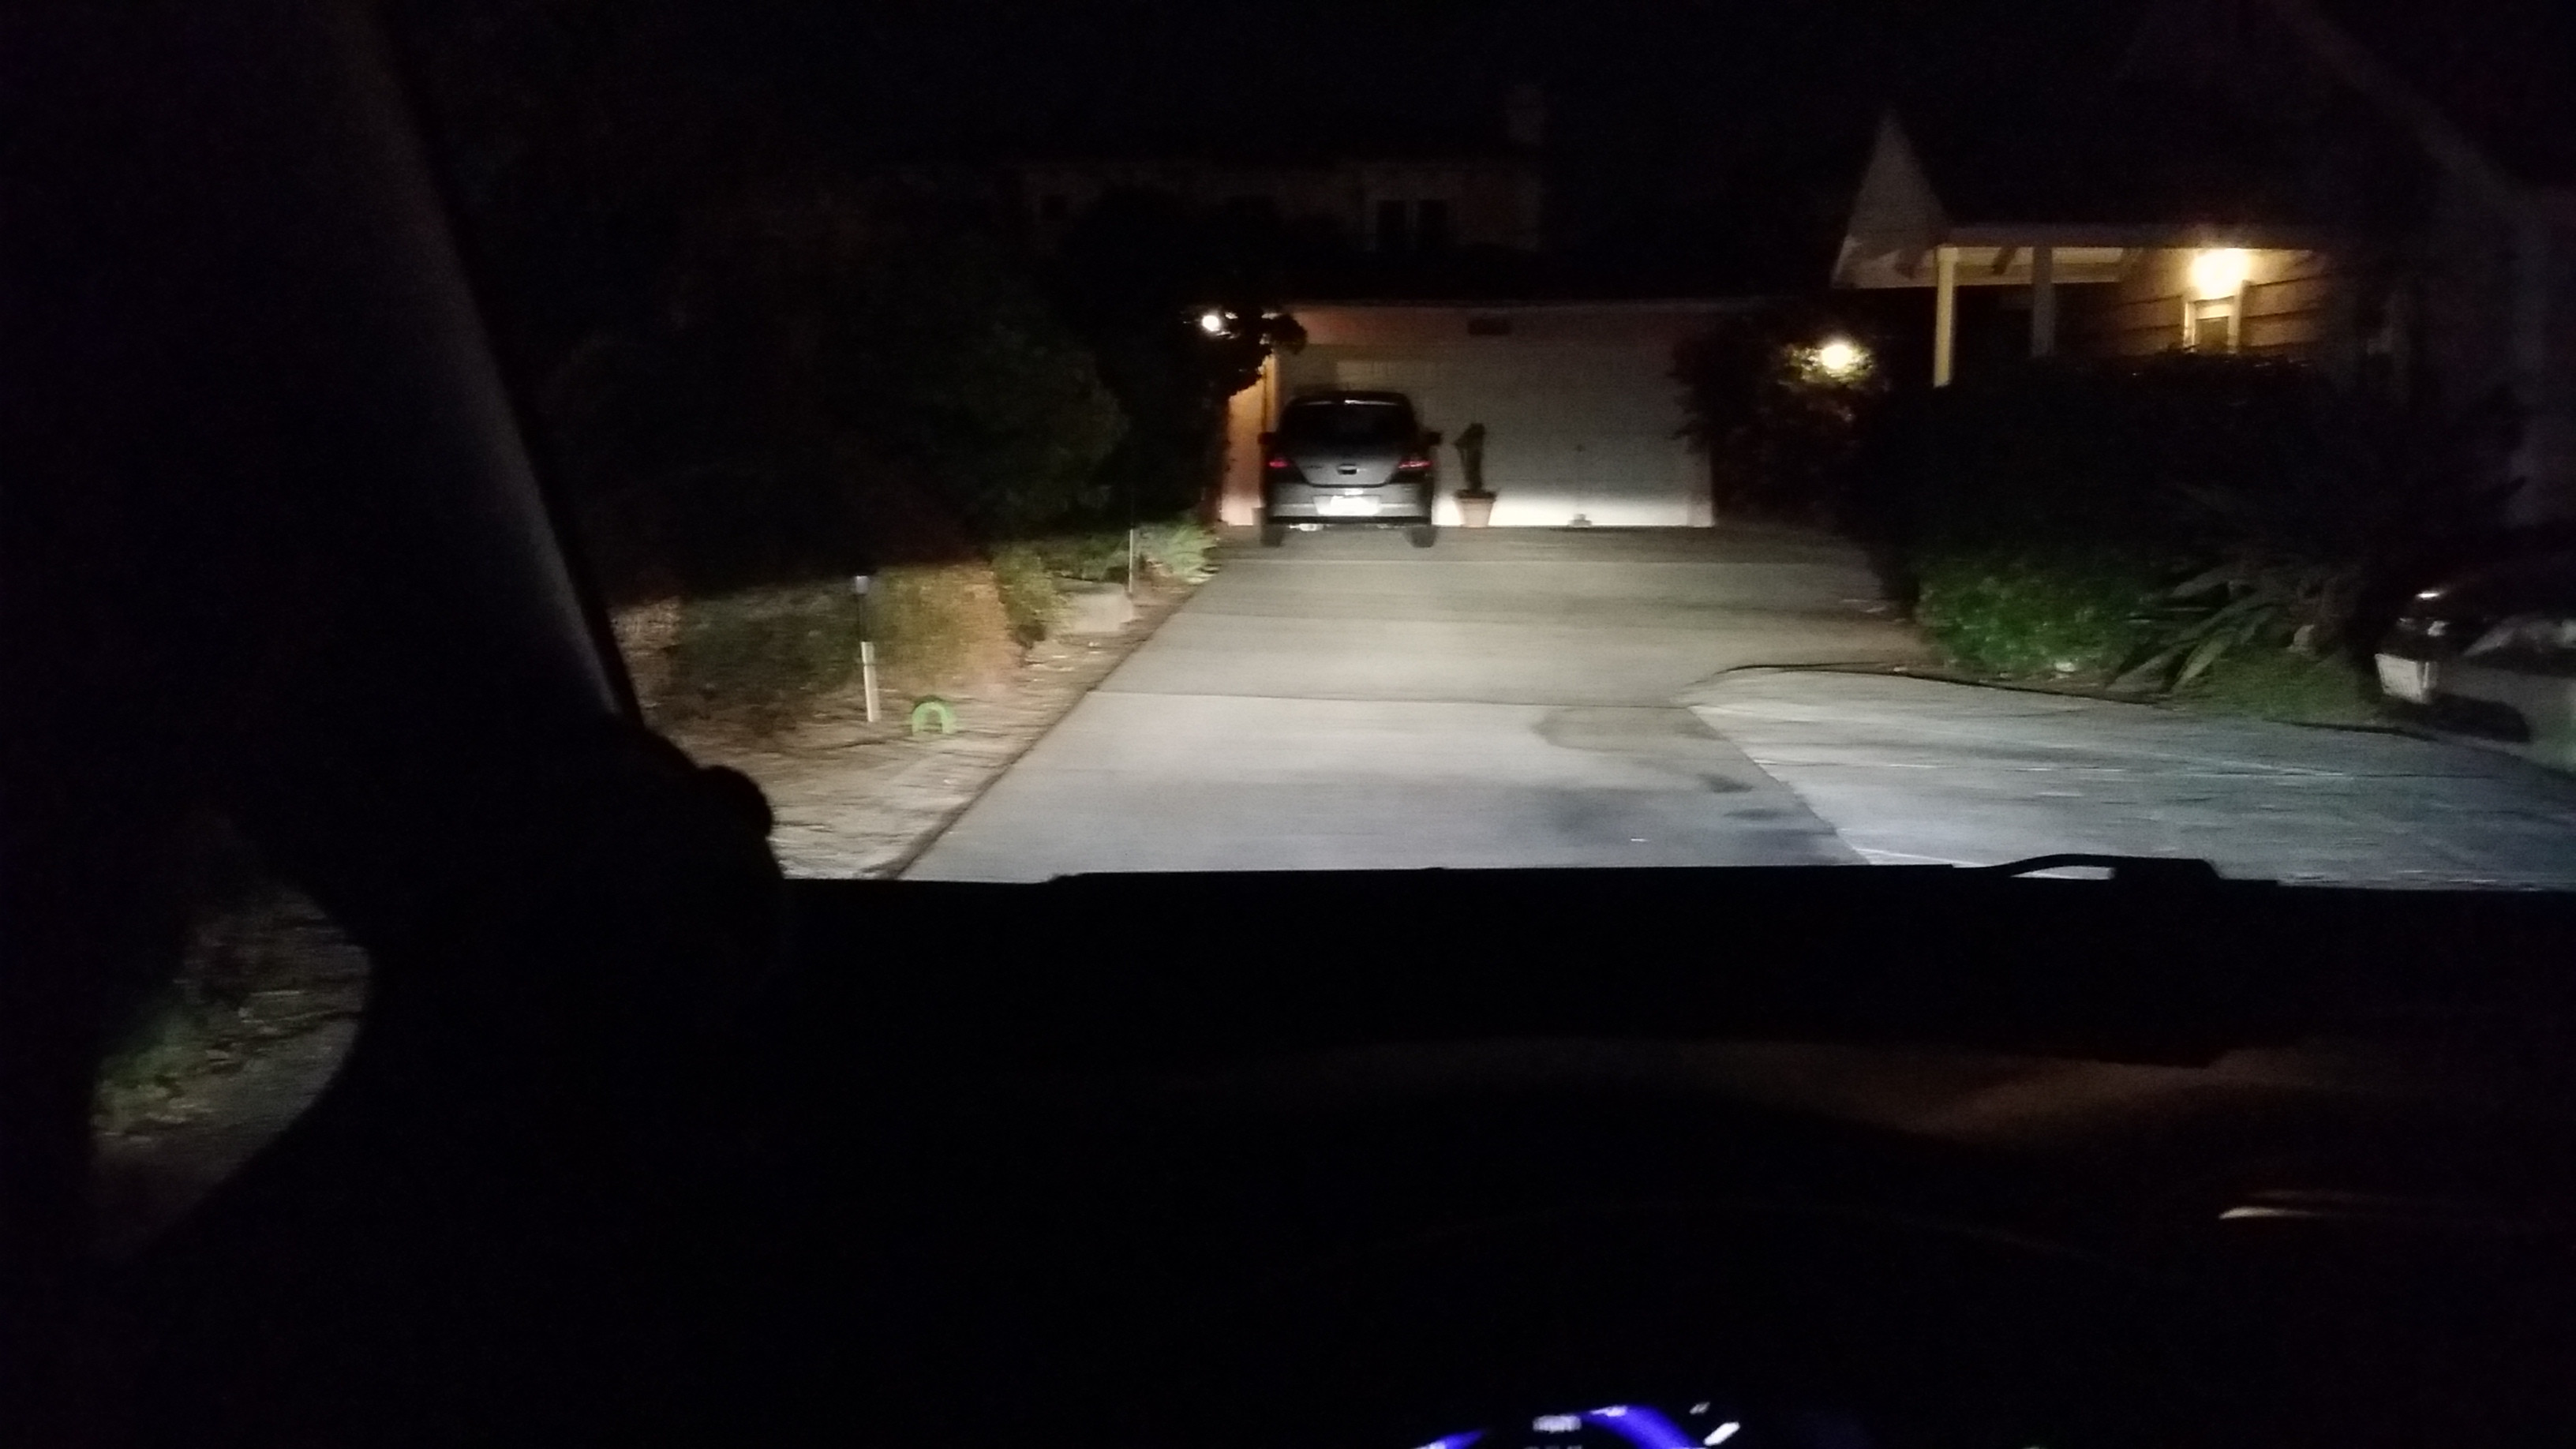
How it looks from outside the car. My pavement and garage isn't leveled (you can tell by the earthquake cracks in the pavement) so it's difficult for me to get a good idea of how the light shines or light spread is. There IS a leveled area of my drive way, but it's too far from a wall to see how the light cutoff looks, hence I wish I could take it out to a really dark area to test out the lights.
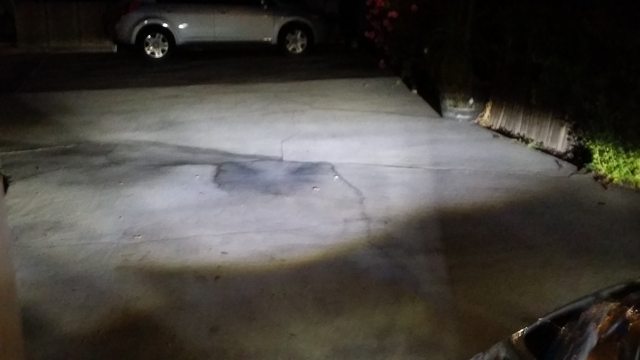
So for now. LED fogs with halogen headlights. Looks off since my halogens aren't pure white like these LEDs but I'm okay with that since I'm going for more function over form. Gonna wait for my TRS retrofits to arrive and then find good weekend where I can have the oven to myself to retrofit those other bad boys. Btw, I did not adjust the aim on the foglights, left them the way they were. Appears to be the same as stock.
Total time to install from bumper removal to putting bumper back ~ 30 minutes.
You will have to remove your bumper for this, although you "can" take out the foglight shrouds but risk scratching the bumper. Your choice. To remove bumper, you'll have to take out the clips on top (about 8 clips total), the two self-tapping screws on both side wheel well (four screws total), the screws that go to each foglight access under the bumper (two screws total), and about 8 clips underneath the bumper that hold it to the plastic covering under the engine.
Bumper removal instructions can also be found on College Hills honda website for the 2015 Honda Fit Sport Grille accessory. Ultimately if you've removed bumpers off cars before it's a very easy ordeal.
Excuse the crappy pictures. It's all from my phone.
Type S (circle) the Subaru one. The Type T won't fit.
When you take out the foglight shroud, you're left with the fog light assembly, which can be easily taken off with two screws, then put the new fog lights in. It's exactly plug and play. One screw is missing because I already took out the screw.
The back of the fog light shrouds look like this. Notice the little clips. You push them in from the inside of the bumper (about five of them) then the shroud pops out from the front. You 'can' push them in from outside the bumper facing the fog lights .... but .... you might scratch the bumper. I suppose if you eat a Haagan Daaz ice cream bar, you can use the leftover tongue depressor to push the clips down safely.
Pop the shroud back on after screwing the new fog lights in. Looks good!
Check the polarity of the wires and turn on the fog lights before putting the morimoto led wires into the plug TRS supplies you with. But if you look at the picture, it's a simple to see that Blue (honda wire) goes to Red (morimoto wire). And obviously black to black.
Turned on.
Close up
Aimed at the fridge in my garage. Lovely cutoff.
Again. Lovely cutoff. Just my fog lights were on. My headlights were covered so I could spray the 3M paint defender thing on my hood.
How it looks from outside the car. My pavement and garage isn't leveled (you can tell by the earthquake cracks in the pavement) so it's difficult for me to get a good idea of how the light shines or light spread is. There IS a leveled area of my drive way, but it's too far from a wall to see how the light cutoff looks, hence I wish I could take it out to a really dark area to test out the lights.
So for now. LED fogs with halogen headlights. Looks off since my halogens aren't pure white like these LEDs but I'm okay with that since I'm going for more function over form. Gonna wait for my TRS retrofits to arrive and then find good weekend where I can have the oven to myself to retrofit those other bad boys. Btw, I did not adjust the aim on the foglights, left them the way they were. Appears to be the same as stock.
Last edited by noripwr; Sep 5, 2014 at 11:51 PM.

Thread Starter
|
Member
Joined: May 2014
Posts: 340
From: Los Angeles, CA
BLX, afaik you should check underneath the bumper, there's a screw on each side where the "foglights" should be. Unscrew those and look under the flap to see if you already have the OEM harnesses already in the car. If you do, all you really need are the OEM foglight shrouds. AFAIK the usdm bumpers are all the same cept for the different shrouds for whichever trim.
I've done foglight installs for several of my previous cars, and luckily they all had the OEM harness already on and it was just a matter of popping off the cover, getting an appropriate foglight shroud, popping the foglight in, then putting in the new shroud.
3M paint defender dried. Took some new pics
Looks so much more amazing in person. TRS products really make a difference.
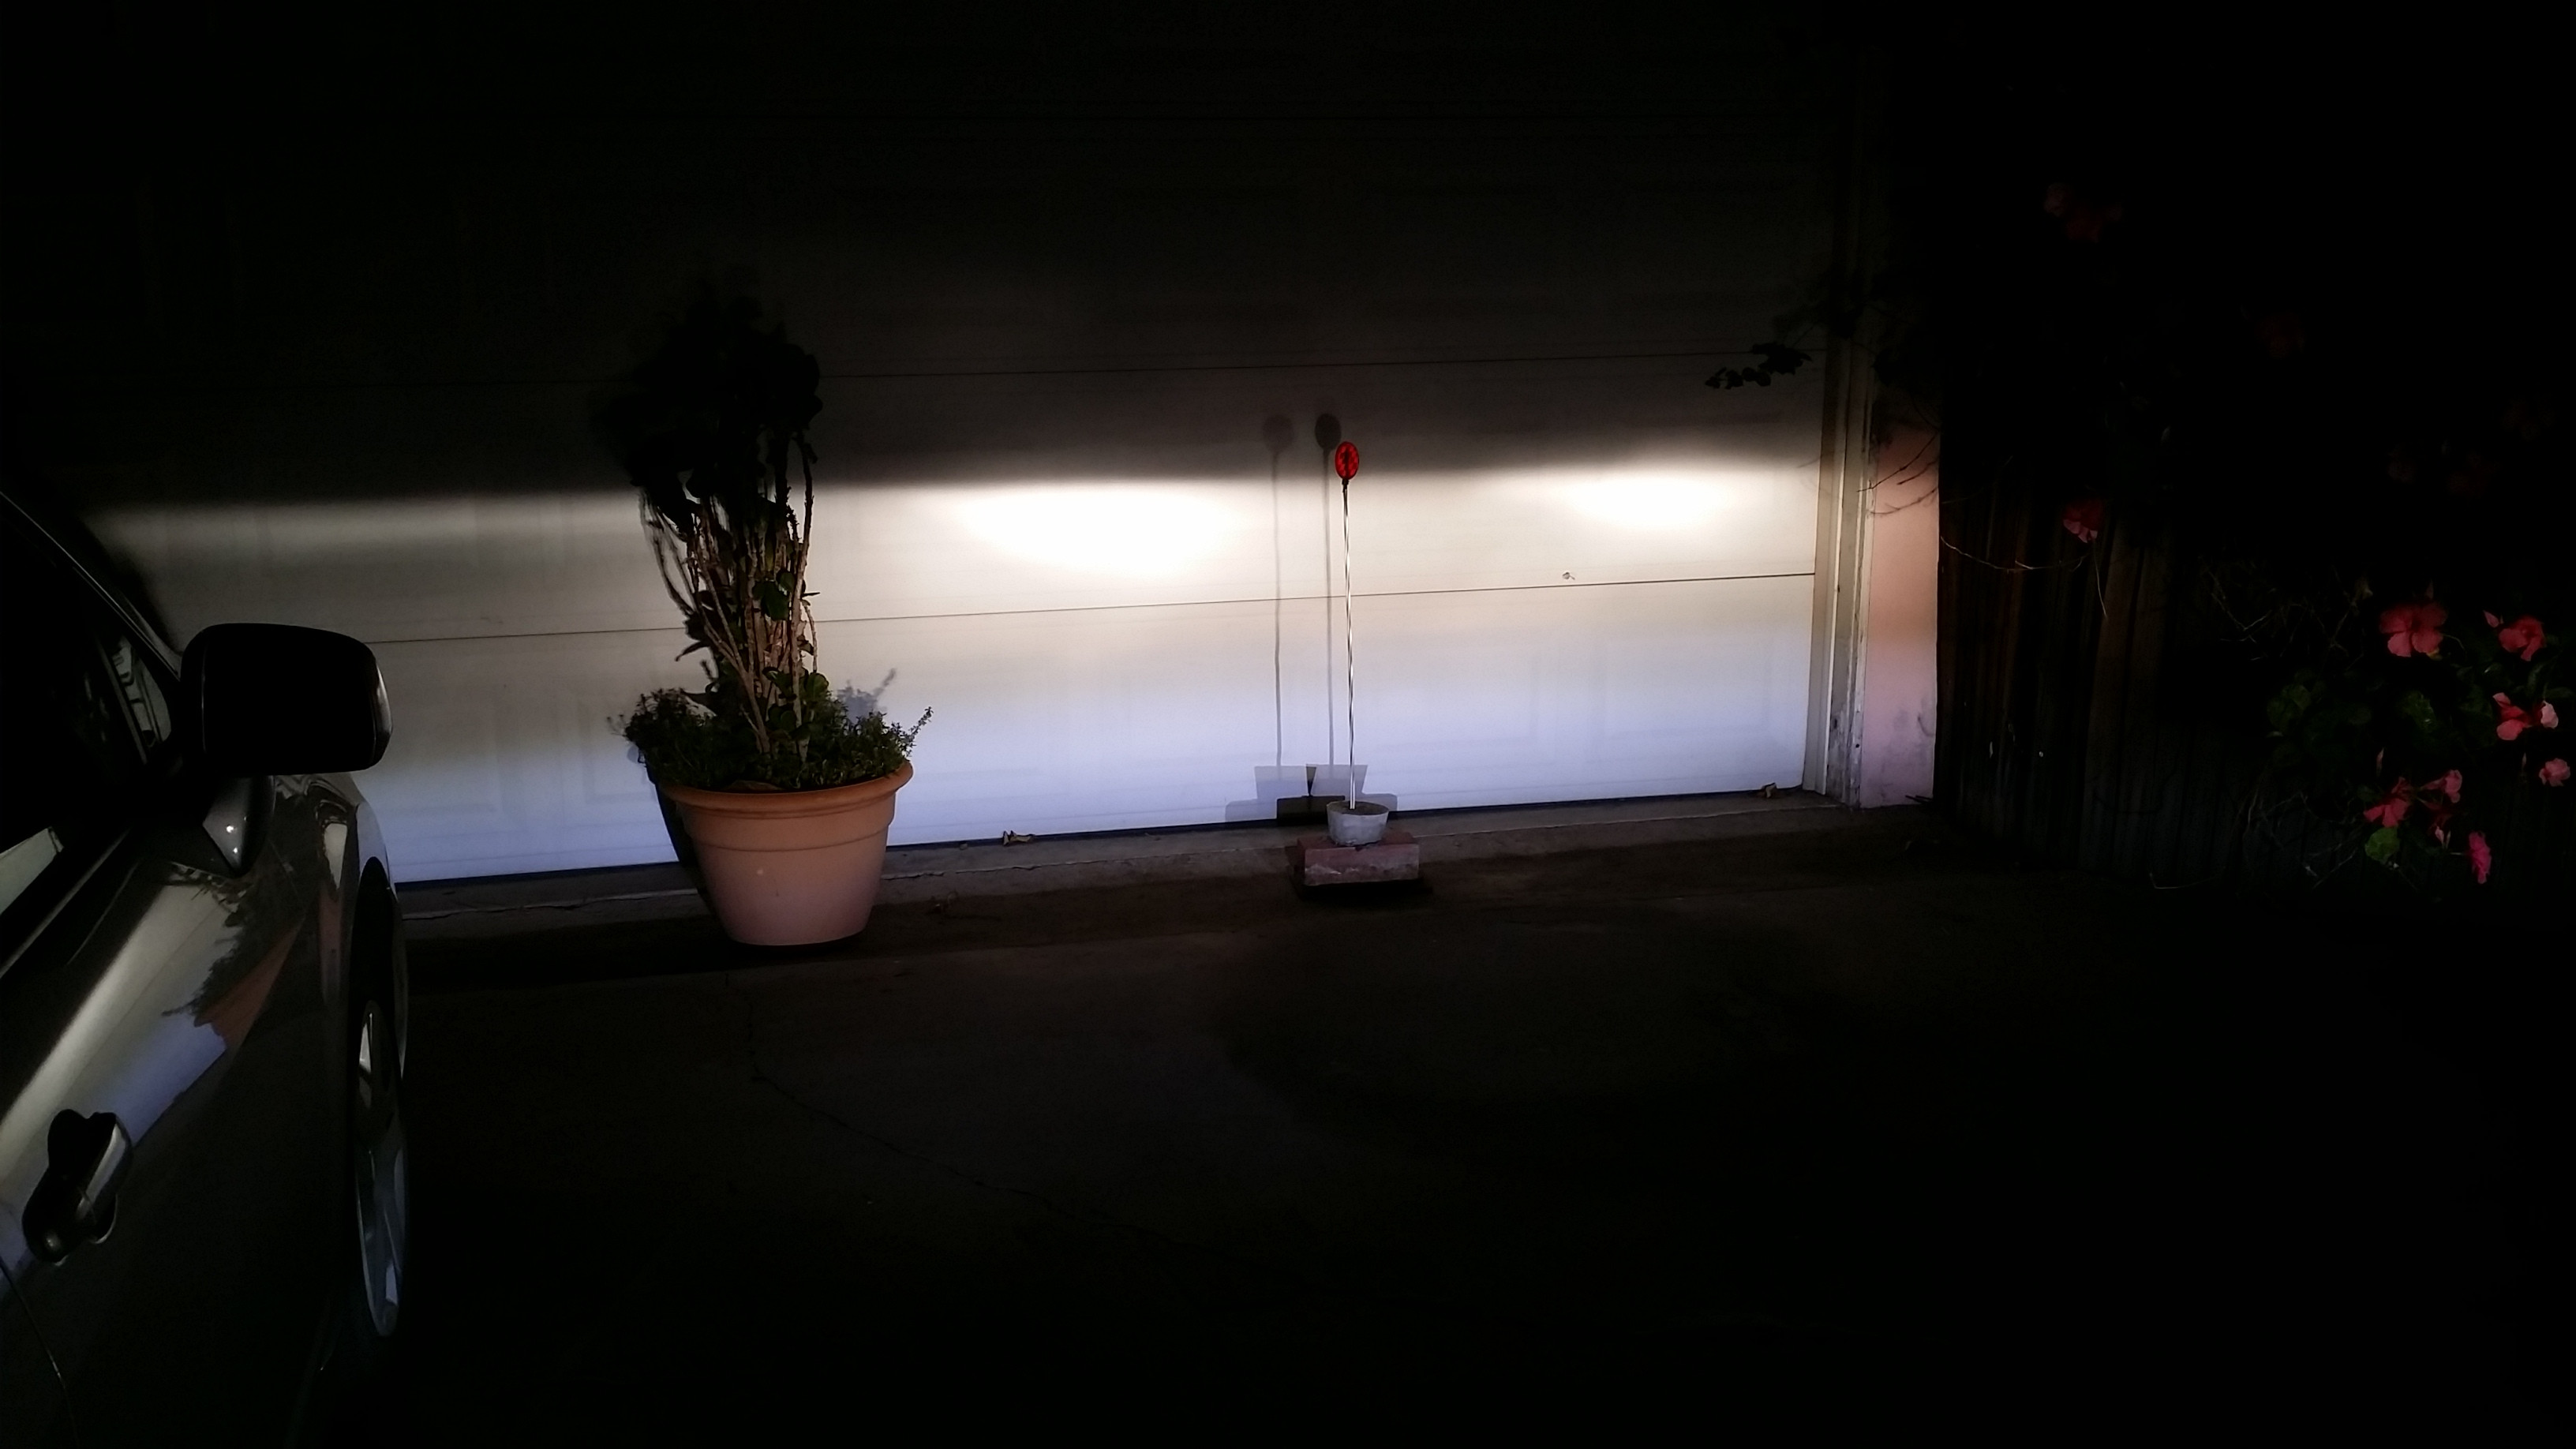
Drive way fog lights off
Drive way fog lights on
Last edited by noripwr; Sep 6, 2014 at 03:59 AM.

Thread Starter
|
Member
Joined: May 2014
Posts: 340
From: Los Angeles, CA
They were $160. +$20 for the laminx so you can have them in yellow. I wanted the laminx, but I wanted to see how bright these really were, and figured I can laminx it myself later if I wanted to.
I've seen a number of Acura Accord and CrV owners do it so I figured I'd try and see if it fits on the Fit. It fits! It is Go!
I drove around the block late last night after the 3M stuff "dried" and these fogs and the coverage they provide put PNP HID bulbs to shame.
They had better coverage and lit up the ground better than a previous gen 3 series I passed by, though I'm not sure if that 3 series is rocking OEM HIDs or aftermarket. Looked aftermarket though.
I'm a bit bummed that the stock halogen fogs appear to have better widespread coverage on our Fits than these motion to LEDs. I think it has to do with how our foglights sit deeper in the fog light shrouds. I've seen pics of these same fog lights in an Accord and there's wider coverage in that car. Then again this is all subjective.
sorry BLX, but I forget that the LX trims probably don't have the fog light stalk. You'd have to get that too, but if you know how to remove steering wheel and add leather steering wheel, changing out the stalk should be a piece of cake. They have instructions on how to swap it in a Mazda, and its pretty much similar steps.


Great post!
I’ve been thinking of getting this for our RDX but haven’t really seen any good comparison pics.
Can’t wait to see the retrofit on your car.
What projectors are you going with?
Maybe you’ll be the first GK fit with projectors.
I’ve been thinking of getting this for our RDX but haven’t really seen any good comparison pics.
Can’t wait to see the retrofit on your car.
What projectors are you going with?
Maybe you’ll be the first GK fit with projectors.
They are com ing out with an oval one.


Thread Starter
|
Member
Joined: May 2014
Posts: 340
From: Los Angeles, CA
Look under bumper flap for pre-wired OEM fog light harness.
Then buy fog light shroud, fog lights, and fog light stalk.
Remove existing LX shrouds, put fog light on, connect to harness, put new fog light shroud on. Remove steering wheel, take out stalk, put in new head light switch w/ fogs stalk on. Put steering wheel back on.
Then buy fog light shroud, fog lights, and fog light stalk.
Remove existing LX shrouds, put fog light on, connect to harness, put new fog light shroud on. Remove steering wheel, take out stalk, put in new head light switch w/ fogs stalk on. Put steering wheel back on.