
DIY cargo mat

Thread Starter
|
Member
Joined: Jun 2014
Posts: 66
From: North Carolina
DIY cargo mat
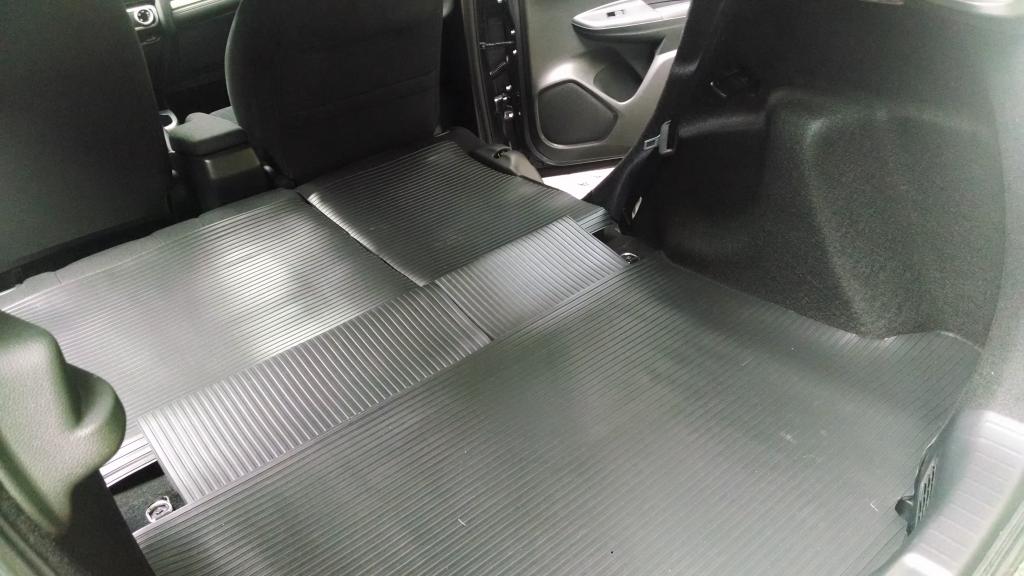
I know this is nothing new, but I'm pretty pleased and thought I'd pass along a few (crappy) pics. I didn't weight the vinyl before I cut it, so it's still got a bit of a bow/curve to it. That should settle out, but it's visible in some of these pics. The covers are much less rippled than they photograph, and don't sag at all.
Materials:
-9' of vinyl runner @ $2.27/lf ( Multy Home Black 27 in. x 72 in. Vinyl Runner-MT5310063US at The Home Depot)
-18" of adhesive-back Velcro $1.50 (might need more, we'll see)
-heavy duty scissors
-newspaper
-chalk
-marker
-about an hour of time
seats down:
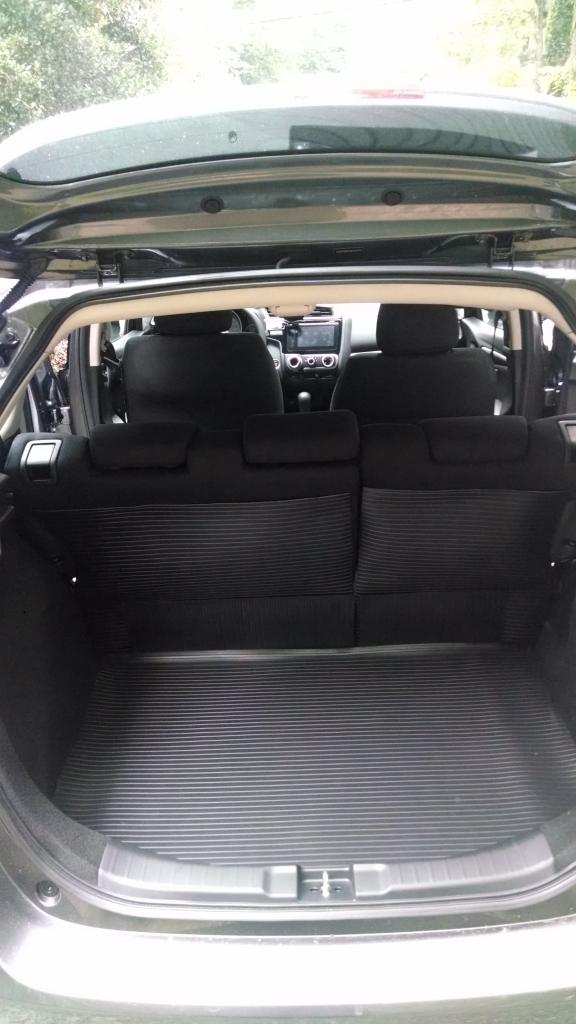
seats up:
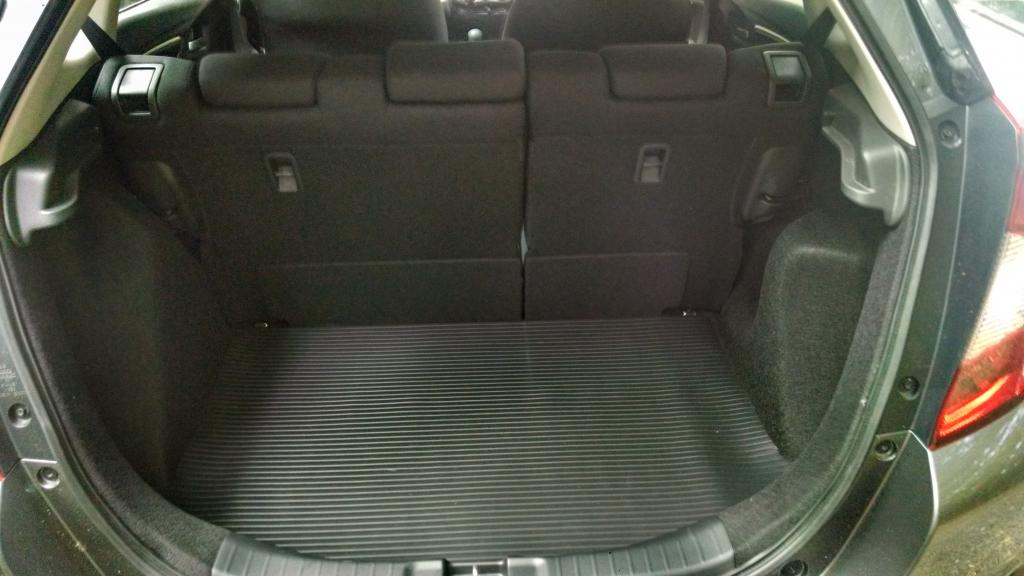
no seat back covers or flaps (this uses a hair over 4' of mat):
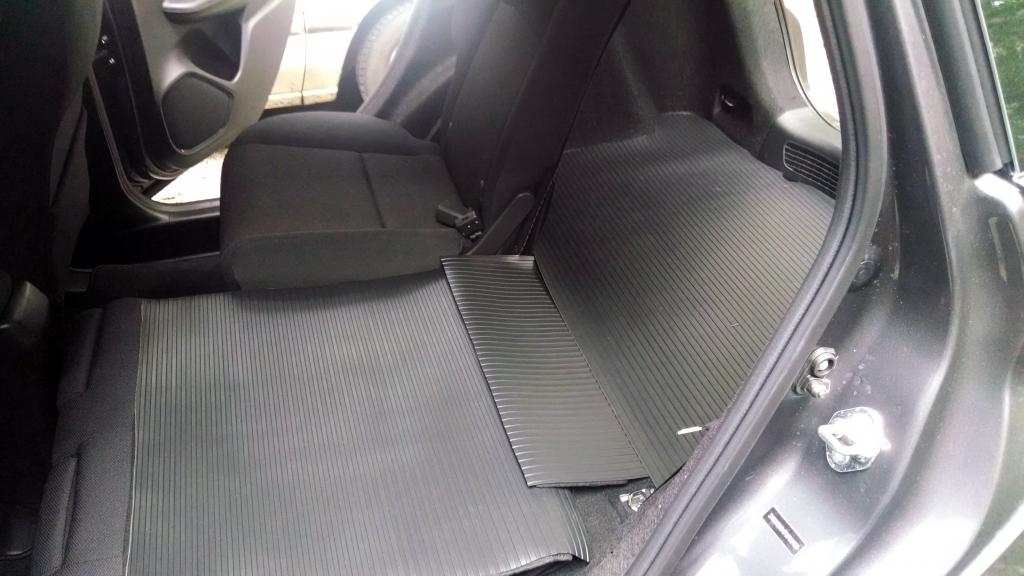
60/40 split:
Overall, I'm super pumped at this $22 project! This is for everyday sorts of stuff. It doesn't cover everything with the seats down, so if it's a messy job, I'll use a tarp.
A few more photos at the link: Cargo Mat Photos by BMOfit | Photobucket
Materials:
-9' of vinyl runner @ $2.27/lf ( Multy Home Black 27 in. x 72 in. Vinyl Runner-MT5310063US at The Home Depot)
-18" of adhesive-back Velcro $1.50 (might need more, we'll see)
-heavy duty scissors
-newspaper
-chalk
-marker
-about an hour of time
seats down:

seats up:

no seat back covers or flaps (this uses a hair over 4' of mat):

60/40 split:

Overall, I'm super pumped at this $22 project! This is for everyday sorts of stuff. It doesn't cover everything with the seats down, so if it's a messy job, I'll use a tarp.
A few more photos at the link: Cargo Mat Photos by BMOfit | Photobucket

Someone that spends his life on FitFreak.net
Joined: Mar 2014
Posts: 1,116
From: Hawaii: relocated to Western Canada Sept, 2015
That's what I call putting minor effort (and expense) into great results!!!

BTW, not only did you achieve boot protection, vinyl is an excellent sound deadener!!!


New Member
Joined: Jul 2014
Posts: 4
From: Lansing,NY
Brought my first fit home today (2015, red) and interested in your cargo mat idea. Looks like you cut all the pieces and then velcro them to the seat back and bottom of cargo area? And you leave all in place as you put the seat up and down? Any tips welcome.
Creative. I went with the cargo tray. Yes pricey but I like the lip should you have a spill it will be contained.
As mentioned always have a tarp in the trunk. It really saves your interior from those messy items.
As mentioned always have a tarp in the trunk. It really saves your interior from those messy items.
Thread Starter
|
Member
Joined: Jun 2014
Posts: 66
From: North Carolina
Awesome! Glad to help!
Thread Starter
|
Member
Joined: Jun 2014
Posts: 66
From: North Carolina
I decided not to go with the tray partially because it was pricey, but also because I didn't like that the lip was there when the seats were down. I wanted a smoother surface for cargo. This method won't catch spills well, so that's the trade off.
Thread Starter
|
Member
Joined: Jun 2014
Posts: 66
From: North Carolina
 I did seats, cargo area, and flaps separately so it all stays in place whatever the configuration is.
Two things I forgot to mention earlier that may be relevant:
1) The cargo area is around 27 3/8" at its widest part. The vinyl runner is 27" wide. This means a small gap somewhere. I decided to have the 3/8" gap where the cargo area bows out at the hatch latch. That bowed part is only a few inches on each side, so it's a small gap. You could choose to have the gap at the back where the seats are and try to cover it with extra length on the flap covers.
2) The carpet provides sufficient "loops" for the velcro. So all you have to do is adhere the "hooks" side to the back of your mats and stick them to the carpet. This means that if/when you remove your mats, it's instantly back to factory. No other fasteners left behind and no permanent changes to the car. I did not use industrial-strength velcro, just regular.
If you need more tips, I'm happy to share!
Member
Joined: Jun 2014
Posts: 31
From: Nashville, TN
Bought a roll of the stuff for 12 bucks yesterday, then measured, cut out, and placed in the back. Looks great and beats the heck out of 80 bucks. I don't expect to put anything but groceries or suitcases back there, so I'm not too concerned about spillage, just keeping the carpet looking new. I got the Fit all-weather mats for the rest of the car, but this works fine for the back. Thanks for the tip!
Someone that spends his life on FitFreak.net
Joined: Mar 2014
Posts: 1,116
From: Hawaii: relocated to Western Canada Sept, 2015
I forsee many GK owners saving coin due to this unselfish thread alone!!!!


Member
Joined: Jul 2014
Posts: 3,276
From: Shokan, NY

I know this is nothing new, but I'm pretty pleased and thought I'd pass along a few (crappy) pics. I didn't weight the vinyl before I cut it, so it's still got a bit of a bow/curve to it. That should settle out, but it's visible in some of these pics. The covers are much less rippled than they photograph, and don't sag at all.
Materials:
-9' of vinyl runner @ $2.27/lf ( Multy Home Black 27 in. x 72 in. Vinyl Runner-MT5310063US at The Home Depot)
-18" of adhesive-back Velcro $1.50 (might need more, we'll see)
-heavy duty scissors
-newspaper
-chalk
-marker
-about an hour of time
Overall, I'm super pumped at this $22 project! This is for everyday sorts of stuff. It doesn't cover everything with the seats down, so if it's a messy job, I'll use a tarp.
Member
Joined: Sep 2014
Posts: 641
From: Ohio
First, thanks for taking the time to document and share your solution.
Precisely why the Honda and WeatherTech trays are a non-starter for us.
We carry a 5'x7' poly tarp down with the spare tire. It'll be used under anything wet.
We carry a 5'x7' poly tarp down with the spare tire. It'll be used under anything wet.