
Wheelskins Leather Cover Review

Thread Starter
|
Member
Joined: Jul 2014
Posts: 178
From: GA
Wheelskins Leather Cover Review
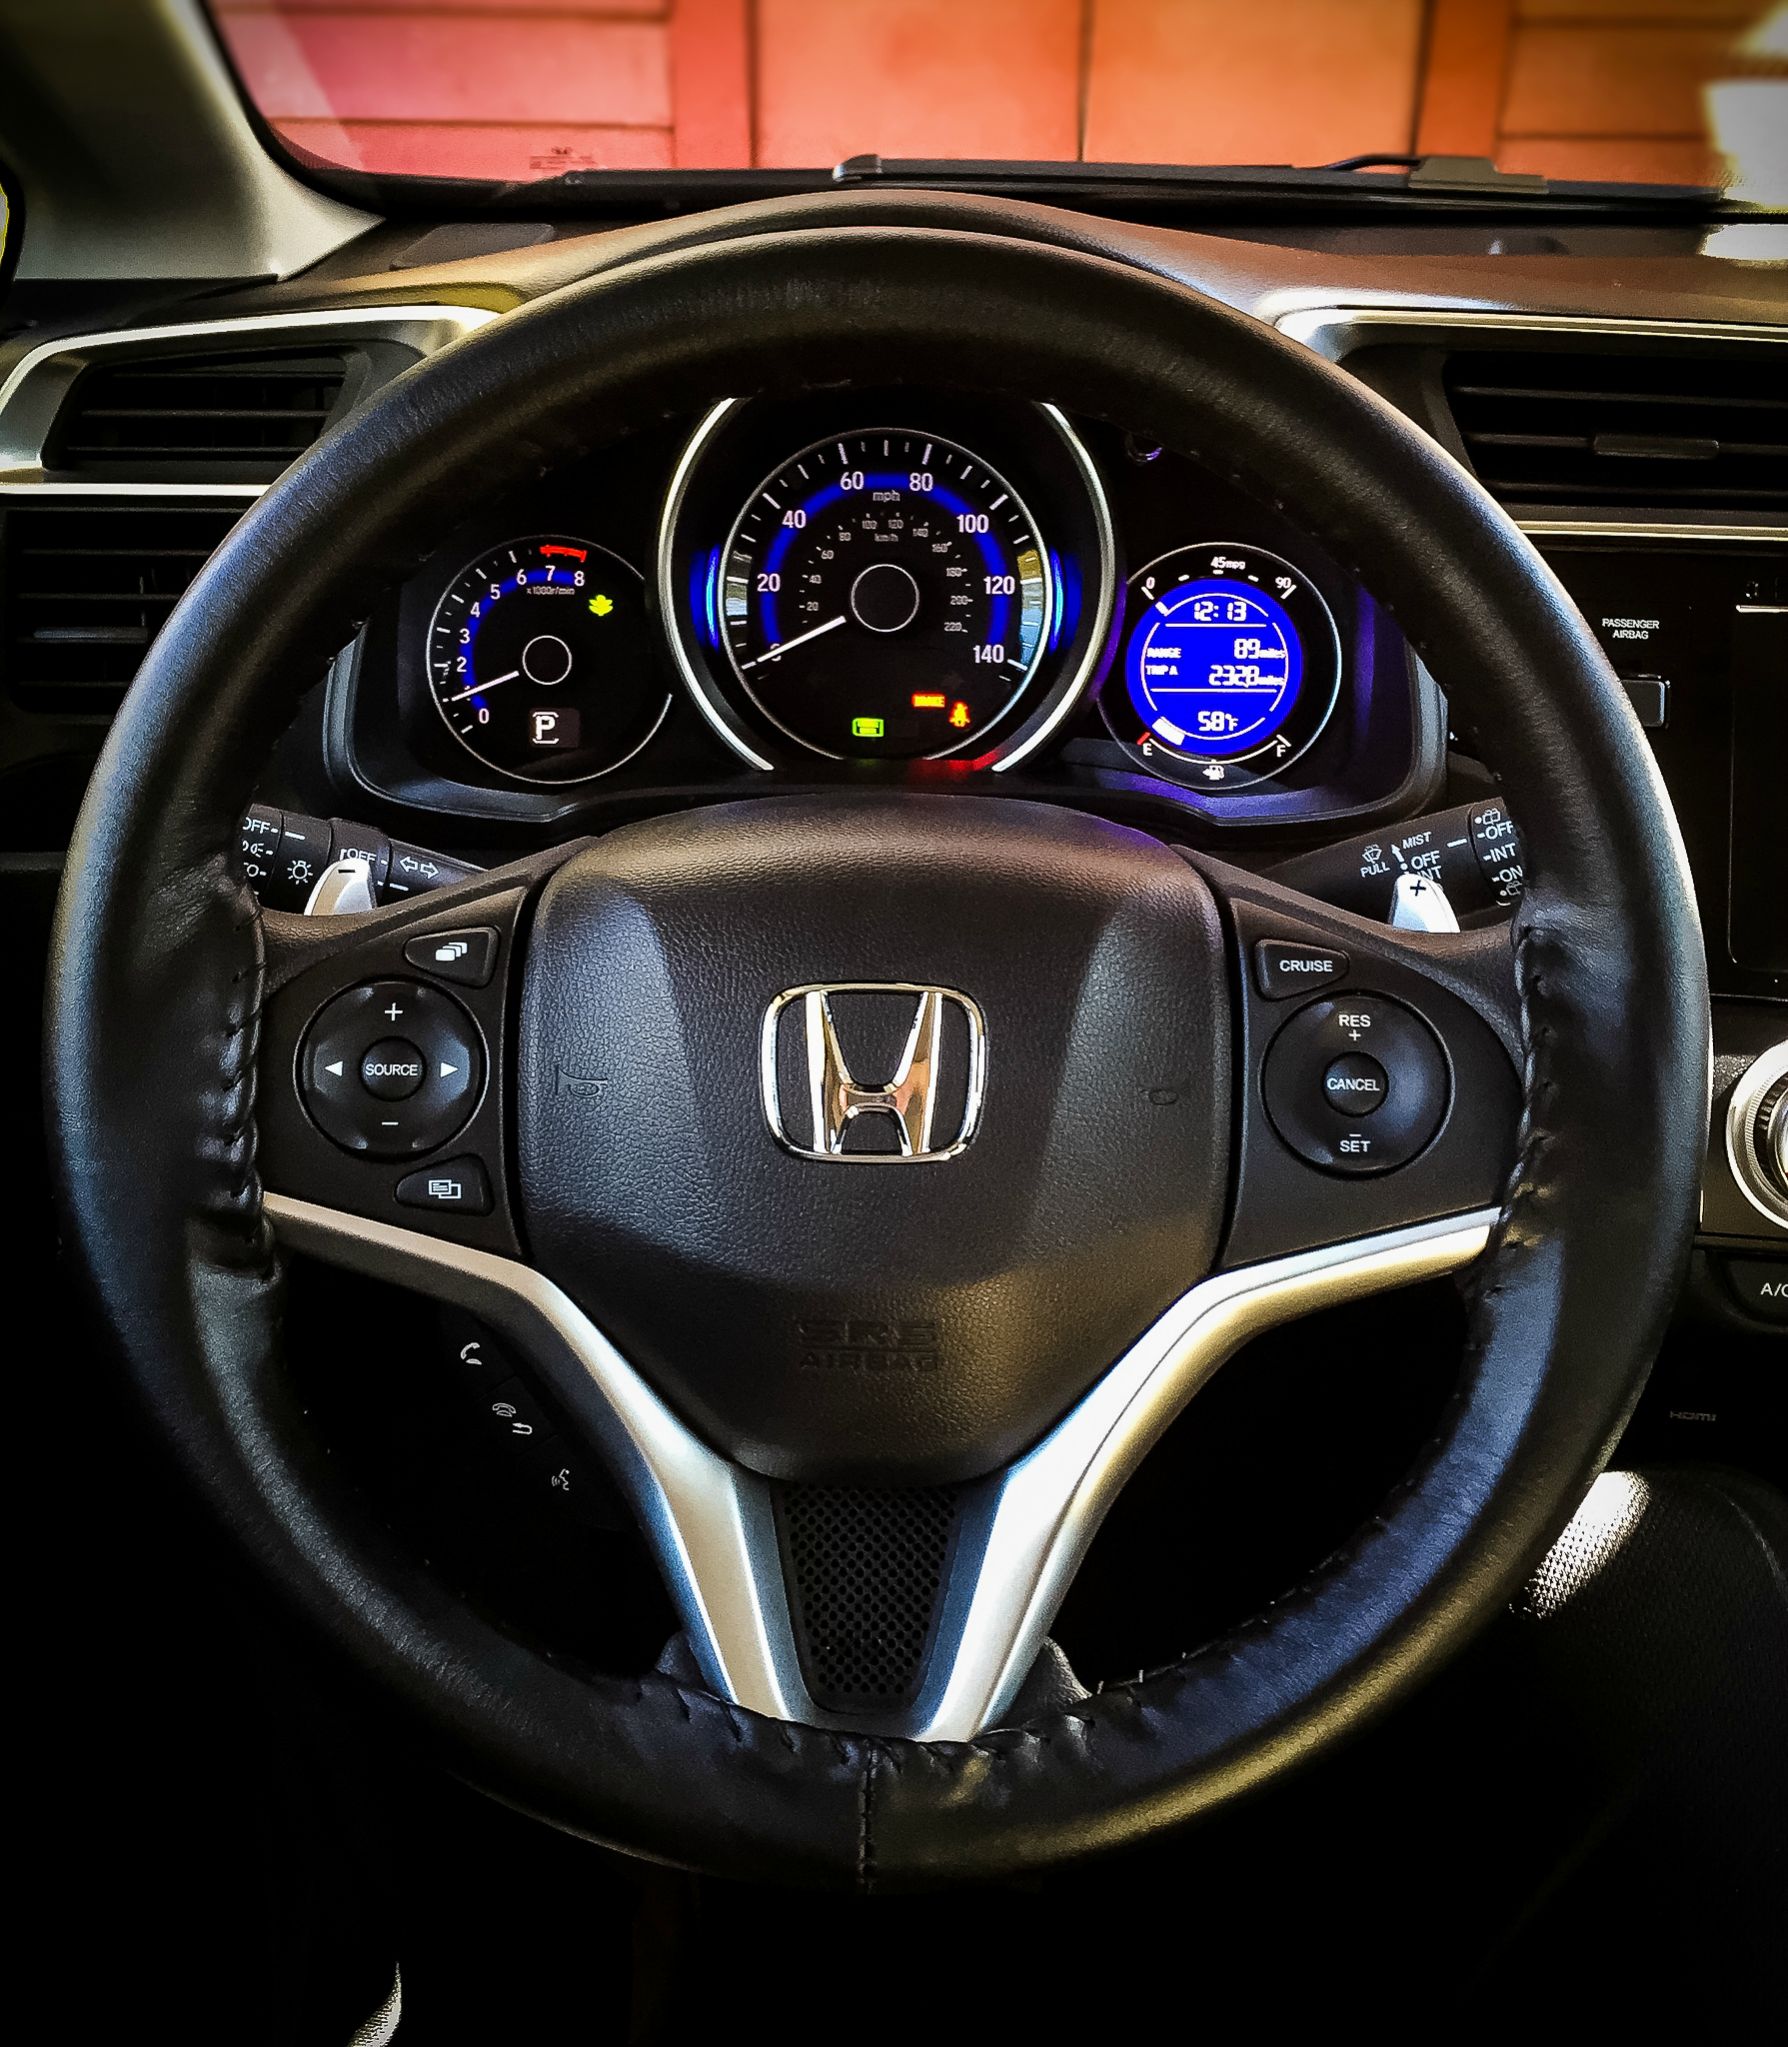
Hey guys, just got done finalizing the install of my Wheelskins leather steering wheel cover. Now that the install is complete and I have it shrunk down a bit, I'm very happy but I thought I'd give a few notes and tips that worked for me for others that might pick one up.
Notes:
-Quality of the leather is very nice, a few perforations were not all the way and needed to be pushed through with the needle. Overall though the quality is fantastic, feels like a new BMW
-fit around normal parts of the wheel (non-spokes) is fantastic
-Fit around the spokes is a little loose even after fitting, without fitting, it is VERY loose around the spokes, which is very annoying
Installation tips:
-Follow the installation guide to the T and really pull the string tight after every stitch.
-After the install, the leather will be very loose around the spokes I tried two methods to firm it up, both were efffective
1 Take a rag and place it in a bowl of water, microwave until the water is boiling then take the rag out, shake it a bit, and lay it over the loose part of the leather for several minutes.
2 Using a heat gun (shield the plastic with a leather glove or something) blast the loose leather until it snugs up being careful not to damage the leather by overheating it.
All in all I am very happy with the cover, now that it is fitted properly.
Member
Joined: Dec 2014
Posts: 647
From: San Diego - Carlsbad, CA

Looks great!
Good idea on the spokes. I took a slightly different approach and used left over thread and went around front and back which really helped pull it tight.
Couple of pics:
Front showing stitch going oposite direction
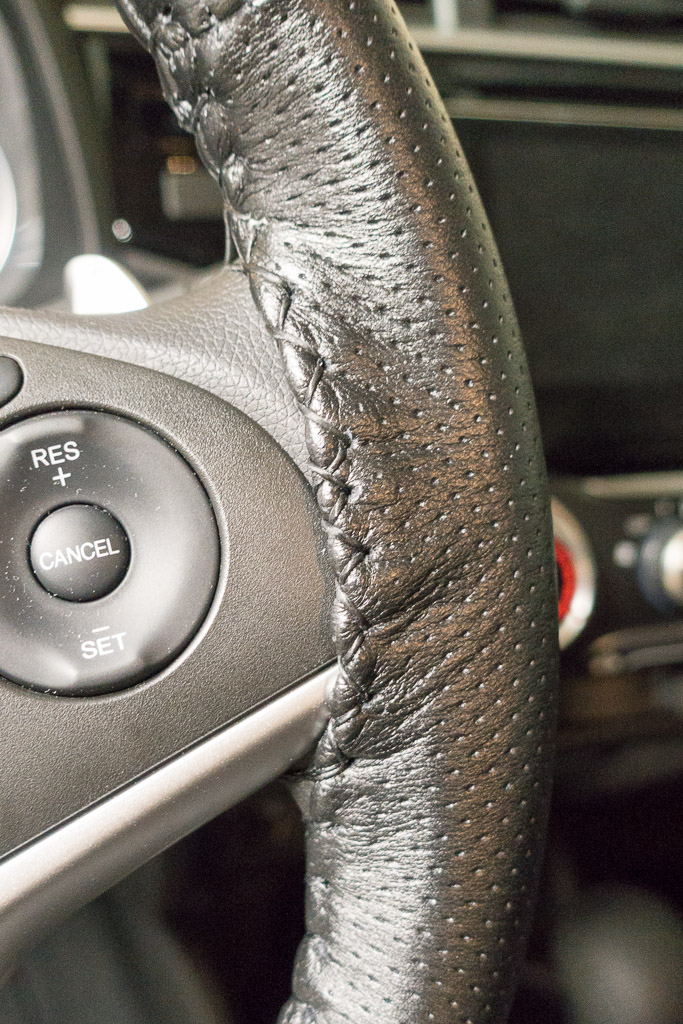
Back showing stitch. Tied and tucked the knot in the rear.
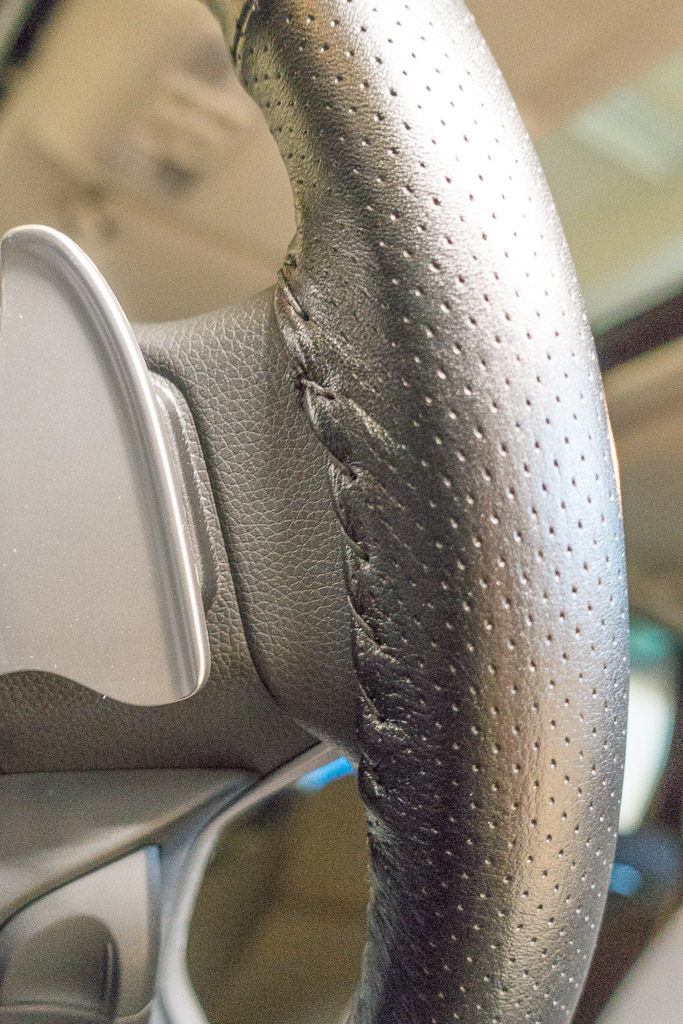
Added another hour to the install but worth it. I'm very pleased with the feel and quality.
Photo and info on my install here:
https://www.fitfreak.net/forums/3rd-...ml#post1285212
This is the second wheelskin I've used and the first one still looked great after 11 years.
Good idea on the spokes. I took a slightly different approach and used left over thread and went around front and back which really helped pull it tight.
Couple of pics:
Front showing stitch going oposite direction
Back showing stitch. Tied and tucked the knot in the rear.
Added another hour to the install but worth it. I'm very pleased with the feel and quality.
Photo and info on my install here:
https://www.fitfreak.net/forums/3rd-...ml#post1285212
This is the second wheelskin I've used and the first one still looked great after 11 years.

Thread
Thread Starter
Forum
Replies
Last Post
Mr Onion
2nd Gen GE8 Specific Fit Interior Modifications Sub-Forum
2
Nov 2, 2019 06:20 AM
TofuShop
3rd Gen GK Specific Fit Interior Modifications Sub-Forum
9
Nov 18, 2017 04:24 PM
Mr Onion
2nd Gen GE8 Specific Fit Interior Modifications Sub-Forum
1
Jan 4, 2016 10:13 AM
Desmond Lamar MacRae
2nd Gen GE8 Specific Fit Interior Modifications Sub-Forum
10
Mar 20, 2015 10:32 PM