When you click on links to various merchants on this site and make a purchase, this can result in this site earning a commission. Affiliate programs and affiliations include, but are not limited to, the eBay Partner Network.
I've been lurking for awhile, but after a recent car accident, my beloved 2010 Fit has moved on. But I decided to stick with the Fit, and got a 2016. I am sad they are no longer available in orange in the U.S. Also a little bummed about the moon roof, not because its not cool, but because I'm now sliiiightly too tall with the lowered sections of the head liner to make way for the mechanical bits for it.
Came out mostly unscathed. But! Now for the real reason of my post.
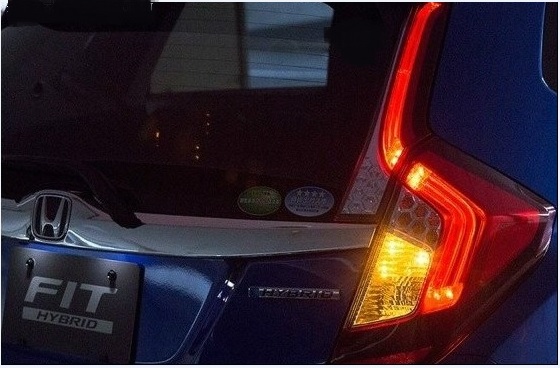
For whatever reason, Honda decided that Amber turns signals are no longer to be in the U.S. version. I've seen a couple of posts here and there about these aftermarket ones. I was curious if anyone has any video of the turn signals? Day or night, doesn't really matter.
No, not really, I already bought the new car. However I've always appreciated the turn signal being amber as it's easier for me to tell if its someone actually turning as opposed to having one break light while pumping the brakes.
Of course, 90% of the people I see have no idea what signaling even means.
Originally Posted by KikeDiaz
Are they really a deal breaker? I have never notice the color of them.
For whatever reason, Honda decided that Amber turns signals are no longer to be in the U.S. version. I've seen a couple of posts here and there about these aftermarket ones. I was curious if anyone has any video of the turn signals? Day or night, doesn't really matter.
I'm happy at least one other person out there finds this annoying! You know, the important things...
I prefer amber signal lights as well. Both of our vehicles now have red turn signal lights on the back (the Fit and a Hyundai Santa Fe). I've long wondered about the move to all red signal lights... many vehicles seem to be doing this now. Must be cheaper. I would think the different colour would make the turn signal more obvious - I certainly think so.
One plus: at least the turn signal lamp is separate from the brake lamp. There are cars out there that incorporate the turn signal into the same lamp as the brake light.
I, too, wanted amber turn signals. The colour contrast from red makes it much easier for other drivers to see. Alas, like marriage, buying any specific model is a compromise, and in the end I lost.
I don't think there is any replaceable lens we can buy for the rear. is it Europe that requires cars to have amber turn signals. Maybe I'll just move there.
Interesting! I like the amber turn signal, and those LED backup lights look a lot brighter than the LEDs I put in (and those are bright). Just not sure about the block lights all the way up. If they were strips running top to bottom (ish) then I would be a lot more intrigued.
My old Ford Escort wagon had amber turn signals. I wanted red turn signals like the more expensive Mercury Tracer version. So rare I never found a used pair to put on. I like the all red look on the Fit. I guess you sometimes want something different from what you have.
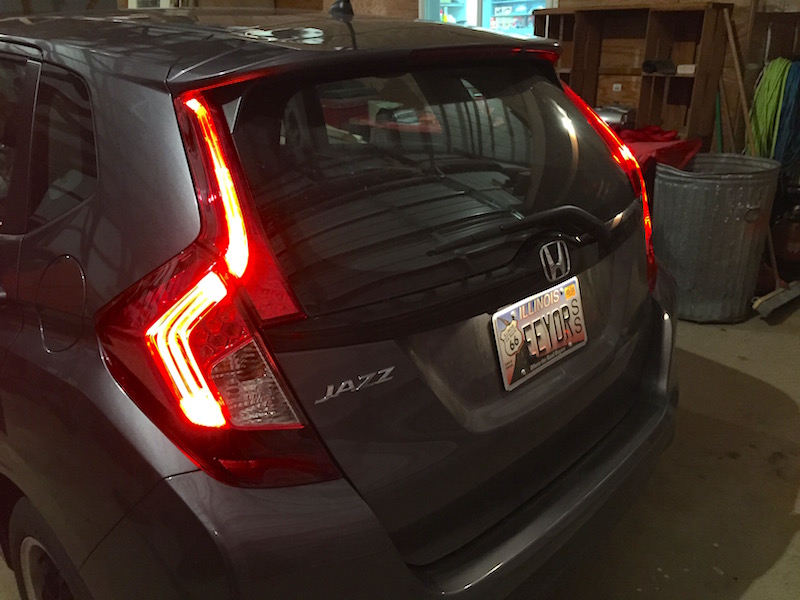
YES, it can be done! For added safety, I�ve FINALLY converted our 2016 Honda Fit LX to rear amber turn signals. If you are interested in how to do it, WITHOUT cutting any factory wiring or soldering, grab a sandwich - it�s gonna be a long posting!
I tried to go the least expensive route first, and had MANY failed experiments, which I listed at the end. I probably spent $200 trying alternatives, before caving in to buy factory Jazz tail lights from overseas. Note that I am not an auto electrical expert, so I�m sure there�s a better way to do this. But, this is the route that I took, which should be safe and trouble-free. Perform at your own risk. :-)
MY INSTALLATION CRITERIA
1. Plug & play (i.e., could easily be changed back to stock, if needed)
2. No cutting of any factory wiring, or modifying factory parts
3. No soldering
4. Safety first!
HIGH LEVEL INSTALL SUMMARY
This cost me around $365 (not including all my failed experiments, or the items that I didn�t use and missed the return window on). Totally worth it, but obviously could have been cheaper if I opted to cut factory wiring & solder. This looks more difficult than it is � I tried to include A LOT of DETAILS, to anticipate some questions that you may have. I�ve also done testing of halogen vs LED bulbs (so you don�t have to!) The issue with many LED�s is that they look brighter before installation. However, when you factor in the optics of the reflectors inside the tail light assembly, many LED�s actually appear dimmer when installed! This is due to the reflectors designed to maximize the output & positioning of the filament of halogen bulbs.
For the install, I found a great deal on Ebay for factory Jazz tail lights. However, the wiring and sockets are different from the Fit. Here�s the overview of the electrical connections and wiring for the FIT vs the new JAZZ tail light assembly:
� Turn signals � plug & play w/ slight modification to JAZZ socket
� Reverse lights � different wiring, so a bit more work; due to smaller-sized bulbs & sockets in Jazz (T16 / 921 bulb) vs FIT (7440 bulb), so I made an adapter
1. JDM (Japanese Domestic Market) Honda Jazz factory brake/tail light assembly - (PAIR) DM 2016 Honda Jazz GK3 GK LED Taillights Tail Lights Lamps OEM. Mine came with light sockets and bulbs. (Purchased used from Ebay, but in mint condition!) Shipped from Japan (free shipping!), took 1 month to arrive. Not sure if he will have more to sell, but Ebay seller was �tictacya�. $225. I had read that new they were around $900/pair from an overseas dealer.
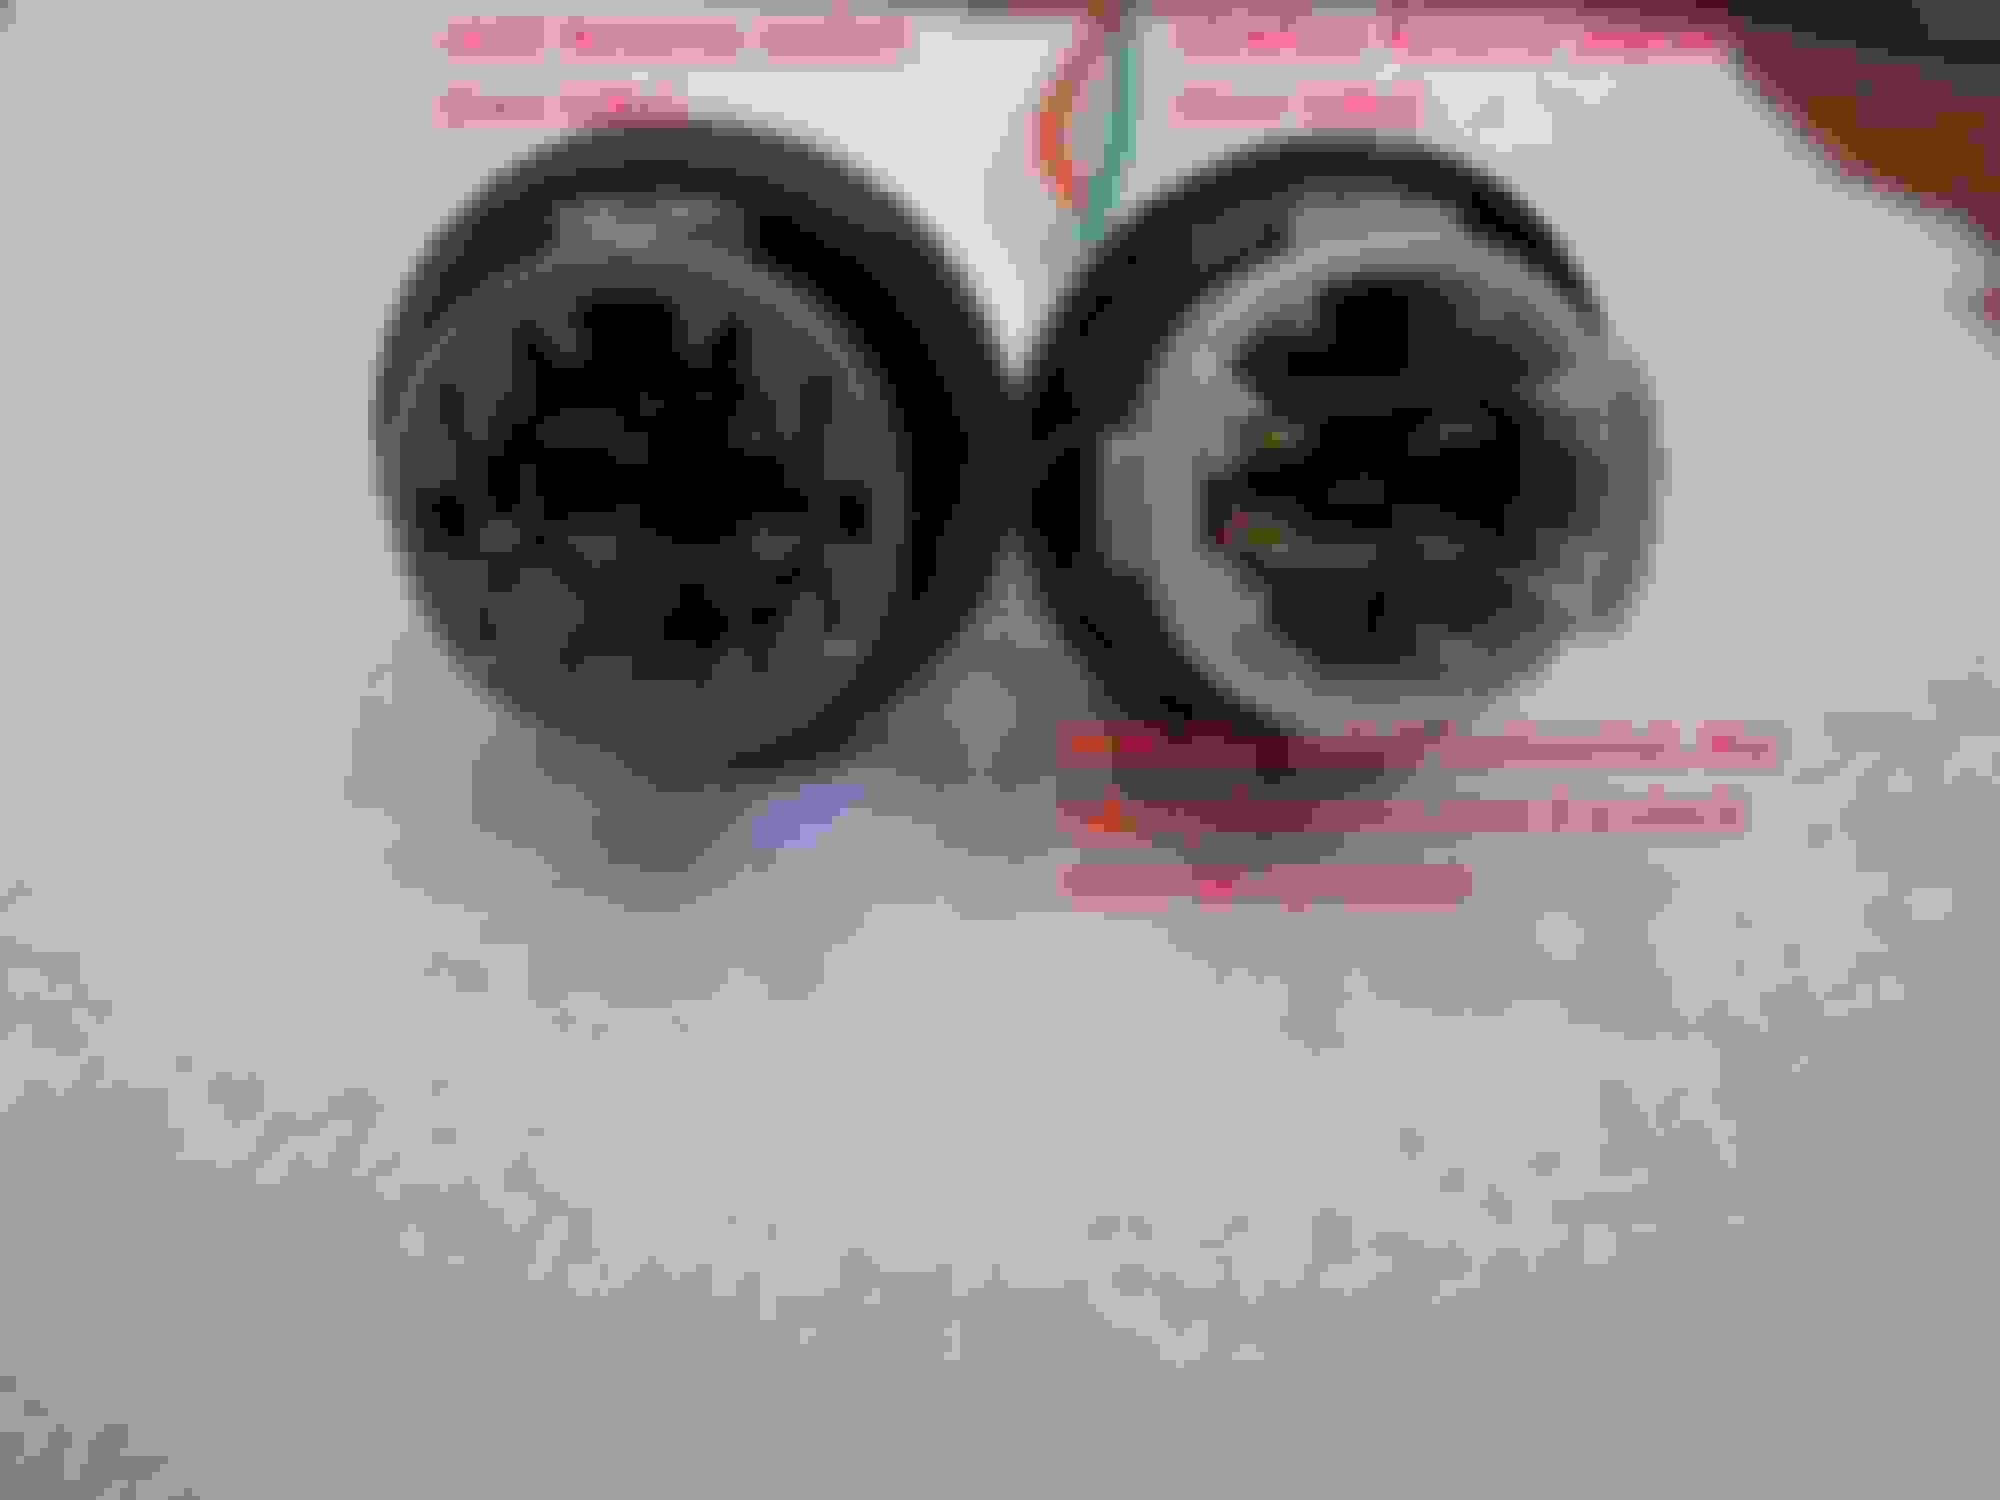
a. No part numbers were listed in the Ebay posting that I bought from. Be careful if you try to order aftermarket Jazz tail lights on Ebay, some had the wrong configuration of holes. My photo shows the differences between the two tail light assemblies, both front and back sides. Both the Fit & Jazz tail lights are exactly the SAME SIZE, though appear to be different in this photo (due to the angle/lighting).
b. Not sure, but the Honda Jazz part #�s for the tail light assemblies that I purchased might be:
i. 33500-T5A-G11 (RH/passenger)
ii. 33550-T5A-G11 (LH/ drivers side)
2. Shrink tubing assortment - Ginsco 152Pcs 3:1 Shrink Ratio Tubing Tube 6 Size Dual Wall Adhesive Lined Heat Shrink KIT Black 6 Sizes: 1/16"(70 pcs), 3/32"(30 pcs), 1/8"(20 pcs), 3/16"(20 pcs), 1/4"(8 pcs), 3/8"(4 pcs)1/4in. dia. (from Amazon) $7. Can also find some at Harbor Freight. Used when making the Reverse Light wiring adapter; I used the 1/4 in diameter.
3. OPTIONAL- Fabric wire loom - 1/8" Split F6 Braided Cable Sleeving Wrap, Split Loom, Techflex (10FT) (from Amazon $6; only used small piece (for added protection against electrical short) when making the Reverse Light wiring adapter). Could use electrical tape instead.
4. Plastic wire loom tubing assortment -Alex Tech 10ft-1/4" 10ft-3/8" 10ft-1/2" Split Wire Loom Tubing Wire Conduit (from Amazon) $14 � I only used the 1/2" diameter; used for making the Reverse Light wiring adapter
5. Dielectric grease - Permatex 81150 Dielectric Tune-Up Grease, 0.33 oz. Tube, $4 (from Amazon). Used to protect the back of factory wiring (in plugs) from moisture and corrosion.
6. OPTIONAL - Plexus Plastic cleaner and Protectant - Expensive at $28 (Amazon). Used to treat the outside of the tail light assembly, to clean and protect from sun damage � I live in the Southwest, and the UV rays are strong.
7. Liquid Electrical tape - I used Gardner Bender brand, $7 (from Amazon)
Reverse Lights Parts
8. Honda Jazz T15 Reverse socket w/Pigtail - iJDMTOY (2) 912 920 921 T15 Nylon Base Socket/Base w/ Pigtail Wiring Harness (part # AA1282) As Repair, Replacement or Retrofit. (From Amazon, seller iJDMTOY Store)
Price: $9 (for the pair). 2 pieces pre-wired W16W T15 socket/base adapters, 15mm (0.6") diameter heat resistant nylon base socket with a 6" pigtail wires. Compatible bulb size: wedge base 901 902 904 906 908 909 912 914 915 916 917 918 920 921 922 923 926 927 928 939 W16W etc.
a. FAQ � Why use the pigtail? Why can�t you use the factory Jazz reverse socket? Without cutting the Jazz socket and soldering, you need to find a Jazz plug for this socket, which is very difficult. Having this pigtail with wires already attached is much easier.
b. I tried to find the OEM Jazz connector / pigtail that would plug into the Jazz reverse socket, but found the junkyard too expensive. For example, in the US, I think that this Jazz reverse light pigtail might be equivalent to a 2016- Honda Civic Sedan / front sidemarker pigtail. I was quoted $75 for a pair from the salvage yard. You could purchase the plastic shell (comes in a 5-pack) from the Honda dealer, but it is just the connector itself, WITHOUT any internals or wiring (which could be ordered separately, and were expensive). Even the parts guy at the Honda dealer suggested that I�d be better off finding them used. But no luck finding the reverse pigtail connector, not even on Ebay.
9. T15 / 921 Reverse Light Bulbs of your choice.
a. You could go with a standard halogen 921 bulb. I wanted brighter reverse lights, so I went with an LED.
b. I steered clear of the LEDs with a thicker base (with metal strips and 3-4 holes on each side of the base); it�s likely too thick to insert into the iJDMtoy socket. Also avoided the ones with exposed circuit boards (potential damage from moisture/condensation).
c. They make some high-powered LED reverse lights with a FAN (GTR Ultra, Auxito, etc.), but I was concerned that it would be too bulky for the space between the back of the tail light, and the body. Plus, another potential failure with the fan. It might have worked, but I didn�t try it. Since I�ve also added extra wiring and sockets back there to make this work, it might have been too crowded back there to squeeze in.
d. I chose the SEALIGHT 912 LED Bulbs, 912 921 LED Backup Light Bulbs, 912 921 LED Reverse Light 6000K 2600 Lumens Super Bright, T15 906 904 902 W16W for Back Up Lights Reverse Lights, Pack of 2. (from Amazon). Price: $23. They have a projector lens, thinner base, and wires on the base (vs the thick base with metal contact strips). Very bright. I think that it is 1300 lumen on each side (1300 x 2 = 2600).
e. I also tried the 2020 JDM ASTAR High Performance Bright White Vision 3030 Chipsets 921 912 LED Bulbs For Backup Reverse Lights, 6000k (from Amazon) $16, but the SEALIGHT�S seemed a bit brighter.
f. FAQ � Bulb numbering is confusing! I�ve also seen T10 for reverse lights. What�s the difference? The bases are identical, but the bulb size may differ. A T10 LED bulb is roughly 0.8 inches in length, 0.375 inches in diameter; T15 LED bulb is 1.1 inches in length, 0.5 inches in diameter. The T10 led bulb could be absorbed a T15 socket, but T15 led bulb cannot utilize in T10 socket (it would be too long).
10. OPTIONAL - Honda Fit T20 (7440) Reverse Socket - to be used as connection between factory Fit Reverse connector, and the smaller Jazz T16. (I wanted to keep all my original sockets with the original Fit Tail lights after removal, so I bought these.) ZUK Headlight Reflector Light T20 S Bulbs Socket For HONDA CIVIC CRV ELYSION INSIGHT STREAM FIT SALOON RL TL RDX. Honda part # 33303-S5A-003, $6.97 ea x 3 (bought one extra, in case of a problem) = $21. (From Aliexpress, seller MoTeng Trading Corporation Store). Took 2 � weeks to arrive.
11. 7440 male wire harness (pair) - iJDMTOY (2) 7440 T20 Male Adapter Wiring Harness For Car Motorcycle Headlight Tail Lamp Turn Signal Lights Retrofit, (from Amazon) $9.
12. Thicker rubber washers for the pigtail � Need OD .85 in, ID .58 in, thickness .11 in. The washers that came with the iJDMtoy pigtail seemed too thin to seat properly. Since my tail light assembly came with bulb sockets, I was able to use the thicker washer that it came with. $0
Turn Signals Parts
13. Honda Jazz T20 (7440) Turn Socket - Must TRIM down ridges, to allow it to plug into factory Fit turn connector (Note: if your JDM tail light assembly came with these, and you don�t mind trimming them, you can skip buying these). Car Auto Rear Tail Lamp Taillight Bulb Socket Base, Part # 33303-SAA-003 Fits for Honda Accord JAZZ CITY Civic FIT C-rv, US $2.87US x3 (ordered 1 extra, in case I made a mistake cutting, or one was defective) =$12, (from Aliexpress seller: Lighting Our Car Store), took 3 weeks to arrive.
FAQ - Since both the Fit and Jazz use a 7440 socket/bulb, you may be wondering why you can�t simply use the Fit 7440 socket? It�s because the 4 notches are spaced differently, so the Fit Socket will NOT screw into the Jazz tail light assembly.
14. 7440 Amber turn signal bulbs of your choice.
a. I tested both Amber LEDS�s and halogens, against the reflector housings, and I stuck with the amber Halogens. I saw no difference in brightness. The amber halogens were included in my tail light assembly purchase. LED�s do offer some other advantages � crisp on/off, last longer. $0.
b. The Amber LED�s that I tested were a projector type: JDM ASTAR Extremely Bright 4014 Chipsets 7440 7441 LED Bulbs with Projector,Amber Yellow $20 (from Amazon).
c. Since I originally thought I was going to install the amber LED�s, I did order resistors to prevent hyperflashing (super quick flashing, due to less resistance of LED�s vs halogens). I opted for a very high quality one, (made by Diycarmodz). It is car model-specific, and are super easy Plug and Play. It stays much cooler than the cheap resistors on Amazon. They plug into the FRONT turn signal sockets for less clutter / ease of installation. I tested them and they worked great, but didn�t install them, since I went with halogen. $80. Here is his channel for more info: https://www.youtube.com/channel/UCF-...VRQsTRB4GtuQqw
TOOLS
1. Philips screwdriver, or 8 mm socket wrench (to remove tail light)
2. Towel (to protect paint from scratches when removing/reinstalling tail light)
3. Wire cutters / strippers
4. Liquid electrical tape (to apply to back of aftermarket T15 Reverse socket w/pigtail from iJDMTOY)
5. Electrical tape
6. Utility knife (w/fresh blade) � to modify the reverse socket pigtail
7. OPTIONAL - Multimeter/Voltmeter (inexpensive at Harbor Freight (to have the proper color wiring connection for the Reverse Light adapter; I�ve indicated it below in photos to save you a step)
8. Heat gun (use lower setting to heat shrink tubing on wiring) and a heavy duty extension cord)
9. Work table
10. Gloves (never touch bulbs, especially halogens, with bare hands � oils from skin cam make it burn out faster)
11. Flashlight
12. OPTIONAL � Camera (to document things as you take them apart)
13. Black and silver markers (to indicate polarity, indicate position to screw in sockets)
14. Scrap wiring (to practice wiring connections)
15. OPTIONAL � label maker (to document wiring upon disassembly)
. You slide over a piece of shrink tubing, strip off about 1-1 � in of insulation from each wire, twist the wire braids together, form an �n�, fold the �n� down flat, slide the heat shrink tube over and heat it up. I suggest practicing making this wire connection on scrap wire first, and then practicing using heat tubing. Other options include:
b. Heat Shrink Self-Solder Butt Splice Connectors
c. Posi Lock connectors (looked appealing, but pricey)
d. Crimp connectors (risk of wiring slipping out, plastic can become brittle)
e. Scotch lock T connectors (heard horror stories of these causing a fire)
2. Reverse lights � Build an adapter
The Honda Fit has large 7440 / T20 reverse sockets with 7440 (white) bulbs. However, the Honda Jazz has a much smaller reverse socket T15 / W16W with 921 bulbs. So, you cannot plug the factory Honda Fit reverse light wiring connector into the Honda Jazz socket, because they are two different sizes. So, I started with the iJDMToy T15 / 921 Reverse socket / pigtail (part # AA1282), and had to modify as follows:
a. Shave off tabs � The iJDMToy pigtail has FOUR tabs, while there are only TWO slots to screw into the Jazz tail light assembly. You will need to shave off two tabs, but you need to ensure that you have the CORRECT ORIENTATION. The reason is that the bulb is oriented a particular way, is to work with the optics inside the tail light lens. Hold the pigtail so that the LARGEST tab of the JDMtoy on top (noon position), and the bulb socket is horizontal. Shave off the side tabs (9 and 3 o�clock positions). Also, be sure to put a new blade in your utility knife, to shave off those two tabs much quicker.
b. Seal the rear of pigtail � There are gaps where the wires insert into the socket, and a little bit of play. To prevent moisture, SEAL the junction of the iJDMToy pigtail (where the red and green wires enter the back of the socket) with liquid electrical tape. Be sure to glob it on thick; I put the first application on neatly and light, and it began to peel off. I removed it and put on a much thicker coat. Let it dry thoroughly. Note that it is flammable, so in later steps, be careful with using the heat gun near it.
c. Install thicker washer - The pigtail does come with rubber grommets/washers, but unfortunately it is too thin to seat properly. So, the socket/pigtail will NOT lock in place with this thinner rubber washer (only 0.06 in thick). Fortunately, I could use the grommet from the Jazz socket, which is about twice as thick (0.11 in). If you don�t have that, you will need to find a replacement washer.
d. Shorten & strip wires � On both the pigtail, and the 7440 male wire harness, cut wires to 1 3/4 in of length, and strip off 1 in of insulation.
e. Heat shrink tubing - Cut two pieces of 1/4 in diameter heat shrink tubing to 1 1/4 in length, and slide them down, into the tubing of the 7440 male harness.
f. Connect wiring � Connect the two black & green wires together. I used the method in Step #1 above. Slide the heat shrink over the connection. I used tape to move the red wires out of the way, to protect them from the heat gun. Use the heat gun (on lower setting) to shrink the tubing on the black wires. Repeat the process for the red wires. I did mark the positive / red side of the wiring with �+� sign, using a silver marker.
g. Protect red wires � Not sure if small strands of wire could possibly poke through the heat shrink at some point. For added protection, I cut a small piece of fabric wire loom (1/8 in diameter) and placed around the positive wire. To save cost, you could use electrical tape instead.
h. Finish Reverse light adapter - Wrapped all wiring with � in inner diameter plastic wire loom. Wrapped it all with electrical tape. Came out to be about 4 3/4 in long. The shorter the better, so some other wire connection approaches might make for an even more compact adapter. You will need to make TWO of these � one for each side.
INSTALLATION
I worked on one side at a time, and started with the driver�s side.
1. Open rear hatch, and remove two screws from tail light with Phillips screwdriver
2. Pull/slide the tail light towards the rear of the car to remove.
3. Place a towel underneath the tail light, and position it with the lens down / wires up
4. Wipe inside and wiring looms with damp rag
5. Label each wiring loom with label maker (or masking tape). Top is Brake/Tail, middle is Reverse, bottom is Turn
6. Detach wiring from FIT tail light
a. Brake / Tail light - Squeeze tab on harness and slide out plug. Rock/wiggle up zip-tied clip from holder; if you are having trouble, pull the bottom of the clip towards you and lift up.
b. Reverse � Depress tab to remove plug from socket
c. Turn � Depress tab to remove plug from socket
7. TURN Signal
a. Try plugging the T20 JAZZ TURN Bulb Socket Base 33303-SAA-003 into factory FIT wiring harness � it doesn�t fit. Note both the two TOP raised ridges, AND two SIDE ridges will need to be trimmed off. TRIM, being careful not to damage the center locking tab. It will still fit snugly into plug after trimming. (FYI - You can�t simply trim off the top ridges, and insert the socket upside down, because the contacts in the socket will NOT line up with the plug)
b. Line up the socket in the new JAZZ tail light hole, and make with a black marker (on the socket) and grey marker (on the housing) where the insertion point is.
c. Using a gloved hand, insert your 7440 amber bulb of choice into the turn socket. As mentioned, I went with the stock halogen; if you opt for LED�s, you�ll need the resistors to prevent hyperflashing.
d. Screw turn socket into housing
8. Reverse Lights
a. I had tested the polarity of the FIT 7440 reverse socket using a multimeter with a 7440 male wiring harness, and I labeled everything to show what is positive. This is really not necessary, but I wanted all my wiring to be color coded (moot point, because the adapter is wrapped, and you can�t see the wire colors anyway). If you do decide to do this, be extremely careful not to touch wires together (i.e., positive with negative), as you will have an electrical short, and blow fuses. Here is the polarity, in case you are interested (note locking tab is on top):
b. On the new adapter that you made, line up the socket in the new JAZZ tail light hole, and make with a black marker (on the socket) and grey marker (on the housing) where the insertion point is.
c. Using a gloved hand, insert your T15 / 921 bulb of choice into the reverse socket.
d. Screw reverse socket (with the whole adapter) into the housing
9. Protect factory wiring
a. I noticed that on the back of each of the 3 plugs, there seemed to be a bit of corrosion. The electrical tape from the factory did not completely cover the plugs. I opted to apply some dielectric grease with a toothpick for added protection
10. Protect lens of tail light assembly (optional)
a. Before installing, I cleaned and treated the outside of assembly w/Plexus and a microfiber towel. Helps prevent clouding up from UV rays.
11. Reconnect plugs / wiring / assembly
a. Reconnect brake/tail plug, and clip
b. Connect Turn plug
c. Connect Reverse plug to adapter
d. Make sure car is on a level surface. Apply emergency brake. Turn on key to �on�, but don�t start. Apply brake, and shift in reverse. Turn on hazards. Look to ensure that turn and reverse lights are working.
e. Apply brake and shift back into park, and turn off hazards.
f. Turn on lights to see if tail lights are working. Have someone apply the brakes (or wedge a rod against the brake) to ensure brake lights are operational.
g. You may want to apply some electrical tape to the top of the reverse adapter, since the factory wires are now vertical instead of horizontal.
Big applause to @joejturn for the incredible dedication to amber turn signals.
I'm honestly flabbergasted that US DOT allows red turn signals in the rear at all.
And I think it's crazy Honda bothered to make a different tail light assembly with red turn signals just for the US market.
I've been looking for the JDM units on and off since I bought my Fit, but I just couldn't justify the expense.
Now that I know the plugs don't even match, I have even less motivation.
I might just buy two stick-on amber lights meant for trailer turn signals wire them up to the turn signal wires.
Thanks for the kind words, saveMT! Yes, I find it odd that the older Fits had amber turns, and then were no longer available in the U.S. I totally get it about installing some auxiliary turn signals - so much easier! That was the very first approach that I was going to take, and I ordered amber police strobes, to mount in the black decorative panels in the rear bumper. Good luck if you decide to go with the stick-on amber turns!
YES, it can be done! For added safety, I�ve FINALLY converted our 2016 Honda Fit LX to rear amber turn signals. If you are interested in how to do it, WITHOUT cutting any factory wiring or soldering, grab a sandwich - it�s gonna be a long posting!
I tried to go the least expensive route first, and had MANY failed experiments, which I listed at the end. I probably spent $200 trying alternatives, before caving in to buy factory Jazz tail lights from overseas. Note that I am not an auto electrical expert, so I�m sure there�s a better way to do this. But, this is the route that I took, which should be safe and trouble-free. Perform at your own risk. :-)
MY INSTALLATION CRITERIA
1. Plug & play (i.e., could easily be changed back to stock, if needed)
2. No cutting of any factory wiring, or modifying factory parts
3. No soldering
4. Safety first!
HIGH LEVEL INSTALL SUMMARY
This cost me around $365 (not including all my failed experiments, or the items that I didn�t use and missed the return window on). Totally worth it, but obviously could have been cheaper if I opted to cut factory wiring & solder. This looks more difficult than it is � I tried to include A LOT of DETAILS, to anticipate some questions that you may have. I�ve also done testing of halogen vs LED bulbs (so you don�t have to!) The issue with many LED�s is that they look brighter before installation. However, when you factor in the optics of the reflectors inside the tail light assembly, many LED�s actually appear dimmer when installed! This is due to the reflectors designed to maximize the output & positioning of the filament of halogen bulbs.
For the install, I found a great deal on Ebay for factory Jazz tail lights. However, the wiring and sockets are different from the Fit. Here�s the overview of the electrical connections and wiring for the FIT vs the new JAZZ tail light assembly:
� Turn signals � plug & play w/ slight modification to JAZZ socket
� Reverse lights � different wiring, so a bit more work; due to smaller-sized bulbs & sockets in Jazz (T16 / 921 bulb) vs FIT (7440 bulb), so I made an adapter
1. JDM (Japanese Domestic Market) Honda Jazz factory brake/tail light assembly - (PAIR) DM 2016 Honda Jazz GK3 GK LED Taillights Tail Lights Lamps OEM. Mine came with light sockets and bulbs. (Purchased used from Ebay, but in mint condition!) Shipped from Japan (free shipping!), took 1 month to arrive. Not sure if he will have more to sell, but Ebay seller was �tictacya�. $225. I had read that new they were around $900/pair from an overseas dealer.
a. No part numbers were listed in the Ebay posting that I bought from. Be careful if you try to order aftermarket Jazz tail lights on Ebay, some had the wrong configuration of holes. My photo shows the differences between the two tail light assemblies, both front and back sides. Both the Fit & Jazz tail lights are exactly the SAME SIZE, though appear to be different in this photo (due to the angle/lighting).
b. Not sure, but the Honda Jazz part #�s for the tail light assemblies that I purchased might be:
i. 33500-T5A-G11 (RH/passenger)
ii. 33550-T5A-G11 (LH/ drivers side)
2. Shrink tubing assortment - Ginsco 152Pcs 3:1 Shrink Ratio Tubing Tube 6 Size Dual Wall Adhesive Lined Heat Shrink KIT Black 6 Sizes: 1/16"(70 pcs), 3/32"(30 pcs), 1/8"(20 pcs), 3/16"(20 pcs), 1/4"(8 pcs), 3/8"(4 pcs)1/4in. dia. (from Amazon) $7. Can also find some at Harbor Freight. Used when making the Reverse Light wiring adapter; I used the 1/4 in diameter.
3. OPTIONAL- Fabric wire loom - 1/8" Split F6 Braided Cable Sleeving Wrap, Split Loom, Techflex (10FT) (from Amazon $6; only used small piece (for added protection against electrical short) when making the Reverse Light wiring adapter). Could use electrical tape instead.
4. Plastic wire loom tubing assortment -Alex Tech 10ft-1/4" 10ft-3/8" 10ft-1/2" Split Wire Loom Tubing Wire Conduit (from Amazon) $14 � I only used the 1/2" diameter; used for making the Reverse Light wiring adapter
5. Dielectric grease - Permatex 81150 Dielectric Tune-Up Grease, 0.33 oz. Tube, $4 (from Amazon). Used to protect the back of factory wiring (in plugs) from moisture and corrosion.
6. OPTIONAL - Plexus Plastic cleaner and Protectant - Expensive at $28 (Amazon). Used to treat the outside of the tail light assembly, to clean and protect from sun damage � I live in the Southwest, and the UV rays are strong.
7. Liquid Electrical tape - I used Gardner Bender brand, $7 (from Amazon)
Reverse Lights Parts
8. Honda Jazz T15 Reverse socket w/Pigtail - iJDMTOY (2) 912 920 921 T15 Nylon Base Socket/Base w/ Pigtail Wiring Harness (part # AA1282) As Repair, Replacement or Retrofit. (From Amazon, seller iJDMTOY Store)
Price: $9 (for the pair). 2 pieces pre-wired W16W T15 socket/base adapters, 15mm (0.6") diameter heat resistant nylon base socket with a 6" pigtail wires. Compatible bulb size: wedge base 901 902 904 906 908 909 912 914 915 916 917 918 920 921 922 923 926 927 928 939 W16W etc.
a. FAQ � Why use the pigtail? Why can�t you use the factory Jazz reverse socket? Without cutting the Jazz socket and soldering, you need to find a Jazz plug for this socket, which is very difficult. Having this pigtail with wires already attached is much easier.
b. I tried to find the OEM Jazz connector / pigtail that would plug into the Jazz reverse socket, but found the junkyard too expensive. For example, in the US, I think that this Jazz reverse light pigtail might be equivalent to a 2016- Honda Civic Sedan / front sidemarker pigtail. I was quoted $75 for a pair from the salvage yard. You could purchase the plastic shell (comes in a 5-pack) from the Honda dealer, but it is just the connector itself, WITHOUT any internals or wiring (which could be ordered separately, and were expensive). Even the parts guy at the Honda dealer suggested that I�d be better off finding them used. But no luck finding the reverse pigtail connector, not even on Ebay.
9. T15 / 921 Reverse Light Bulbs of your choice.
a. You could go with a standard halogen 921 bulb. I wanted brighter reverse lights, so I went with an LED.
b. I steered clear of the LEDs with a thicker base (with metal strips and 3-4 holes on each side of the base); it�s likely too thick to insert into the iJDMtoy socket. Also avoided the ones with exposed circuit boards (potential damage from moisture/condensation).
c. They make some high-powered LED reverse lights with a FAN (GTR Ultra, Auxito, etc.), but I was concerned that it would be too bulky for the space between the back of the tail light, and the body. Plus, another potential failure with the fan. It might have worked, but I didn�t try it. Since I�ve also added extra wiring and sockets back there to make this work, it might have been too crowded back there to squeeze in.
d. I chose the SEALIGHT 912 LED Bulbs, 912 921 LED Backup Light Bulbs, 912 921 LED Reverse Light 6000K 2600 Lumens Super Bright, T15 906 904 902 W16W for Back Up Lights Reverse Lights, Pack of 2. (from Amazon). Price: $23. They have a projector lens, thinner base, and wires on the base (vs the thick base with metal contact strips). Very bright. I think that it is 1300 lumen on each side (1300 x 2 = 2600).
e. I also tried the 2020 JDM ASTAR High Performance Bright White Vision 3030 Chipsets 921 912 LED Bulbs For Backup Reverse Lights, 6000k (from Amazon) $16, but the SEALIGHT�S seemed a bit brighter.
f. FAQ � Bulb numbering is confusing! I�ve also seen T10 for reverse lights. What�s the difference? The bases are identical, but the bulb size may differ. A T10 LED bulb is roughly 0.8 inches in length, 0.375 inches in diameter; T15 LED bulb is 1.1 inches in length, 0.5 inches in diameter. The T10 led bulb could be absorbed a T15 socket, but T15 led bulb cannot utilize in T10 socket (it would be too long).
10. OPTIONAL - Honda Fit T20 (7440) Reverse Socket - to be used as connection between factory Fit Reverse connector, and the smaller Jazz T16. (I wanted to keep all my original sockets with the original Fit Tail lights after removal, so I bought these.) ZUK Headlight Reflector Light T20 S Bulbs Socket For HONDA CIVIC CRV ELYSION INSIGHT STREAM FIT SALOON RL TL RDX. Honda part # 33303-S5A-003, $6.97 ea x 3 (bought one extra, in case of a problem) = $21. (From Aliexpress, seller MoTeng Trading Corporation Store). Took 2 � weeks to arrive.
11. 7440 male wire harness (pair) - iJDMTOY (2) 7440 T20 Male Adapter Wiring Harness For Car Motorcycle Headlight Tail Lamp Turn Signal Lights Retrofit, (from Amazon) $9.
12. Thicker rubber washers for the pigtail � Need OD .85 in, ID .58 in, thickness .11 in. The washers that came with the iJDMtoy pigtail seemed too thin to seat properly. Since my tail light assembly came with bulb sockets, I was able to use the thicker washer that it came with. $0
Turn Signals Parts
13. Honda Jazz T20 (7440) Turn Socket - Must TRIM down ridges, to allow it to plug into factory Fit turn connector (Note: if your JDM tail light assembly came with these, and you don�t mind trimming them, you can skip buying these). Car Auto Rear Tail Lamp Taillight Bulb Socket Base, Part # 33303-SAA-003 Fits for Honda Accord JAZZ CITY Civic FIT C-rv, US $2.87US x3 (ordered 1 extra, in case I made a mistake cutting, or one was defective) =$12, (from Aliexpress seller: Lighting Our Car Store), took 3 weeks to arrive.
FAQ - Since both the Fit and Jazz use a 7440 socket/bulb, you may be wondering why you can�t simply use the Fit 7440 socket? It�s because the 4 notches are spaced differently, so the Fit Socket will NOT screw into the Jazz tail light assembly.
14. 7440 Amber turn signal bulbs of your choice.
a. I tested both Amber LEDS�s and halogens, against the reflector housings, and I stuck with the amber Halogens. I saw no difference in brightness. The amber halogens were included in my tail light assembly purchase. LED�s do offer some other advantages � crisp on/off, last longer. $0.
b. The Amber LED�s that I tested were a projector type: JDM ASTAR Extremely Bright 4014 Chipsets 7440 7441 LED Bulbs with Projector,Amber Yellow $20 (from Amazon).
c. Since I originally thought I was going to install the amber LED�s, I did order resistors to prevent hyperflashing (super quick flashing, due to less resistance of LED�s vs halogens). I opted for a very high quality one, (made by Diycarmodz). It is car model-specific, and are super easy Plug and Play. It stays much cooler than the cheap resistors on Amazon. They plug into the FRONT turn signal sockets for less clutter / ease of installation. I tested them and they worked great, but didn�t install them, since I went with halogen. $80. Here is his channel for more info: https://www.youtube.com/channel/UCF-...VRQsTRB4GtuQqw
TOOLS
1. Philips screwdriver, or 8 mm socket wrench (to remove tail light)
2. Towel (to protect paint from scratches when removing/reinstalling tail light)
3. Wire cutters / strippers
4. Liquid electrical tape (to apply to back of aftermarket T15 Reverse socket w/pigtail from iJDMTOY)
5. Electrical tape
6. Utility knife (w/fresh blade) � to modify the reverse socket pigtail
7. OPTIONAL - Multimeter/Voltmeter (inexpensive at Harbor Freight (to have the proper color wiring connection for the Reverse Light adapter; I�ve indicated it below in photos to save you a step)
8. Heat gun (use lower setting to heat shrink tubing on wiring) and a heavy duty extension cord)
9. Work table
10. Gloves (never touch bulbs, especially halogens, with bare hands � oils from skin cam make it burn out faster)
11. Flashlight
12. OPTIONAL � Camera (to document things as you take them apart)
13. Black and silver markers (to indicate polarity, indicate position to screw in sockets)
14. Scrap wiring (to practice wiring connections)
15. OPTIONAL � label maker (to document wiring upon disassembly)
17. Thick work gloves (to avoid injury when trimming with utility knife)
18. Toothpick (to apply dielectric grease)
19. Rags, paper towel PREP FOR INSTALL
1. Decide how you will connect wires together, and practice with scrap wire.
a. I opted to do a unique splice that is very strong. https://www.youtube.com/watch?v=lrIefG-bbj8 . You slide over a piece of shrink tubing, strip off about 1-1 � in of insulation from each wire, twist the wire braids together, form an �n�, fold the �n� down flat, slide the heat shrink tube over and heat it up. I suggest practicing making this wire connection on scrap wire first, and then practicing using heat tubing. Other options include:
b. Heat Shrink Self-Solder Butt Splice Connectors
c. Posi Lock connectors (looked appealing, but pricey)
d. Crimp connectors (risk of wiring slipping out, plastic can become brittle)
e. Scotch lock T connectors (heard horror stories of these causing a fire)
2. Reverse lights � Build an adapter
The Honda Fit has large 7440 / T20 reverse sockets with 7440 (white) bulbs. However, the Honda Jazz has a much smaller reverse socket T15 / W16W with 921 bulbs. So, you cannot plug the factory Honda Fit reverse light wiring connector into the Honda Jazz socket, because they are two different sizes. So, I started with the iJDMToy T15 / 921 Reverse socket / pigtail (part # AA1282), and had to modify as follows:
a. Shave off tabs � The iJDMToy pigtail has FOUR tabs, while there are only TWO slots to screw into the Jazz tail light assembly. You will need to shave off two tabs, but you need to ensure that you have the CORRECT ORIENTATION. The reason is that the bulb is oriented a particular way, is to work with the optics inside the tail light lens. Hold the pigtail so that the LARGEST tab of the JDMtoy on top (noon position), and the bulb socket is horizontal. Shave off the side tabs (9 and 3 o�clock positions). Also, be sure to put a new blade in your utility knife, to shave off those two tabs much quicker.
b. Seal the rear of pigtail � There are gaps where the wires insert into the socket, and a little bit of play. To prevent moisture, SEAL the junction of the iJDMToy pigtail (where the red and green wires enter the back of the socket) with liquid electrical tape. Be sure to glob it on thick; I put the first application on neatly and light, and it began to peel off. I removed it and put on a much thicker coat. Let it dry thoroughly. Note that it is flammable, so in later steps, be careful with using the heat gun near it.
c. Install thicker washer - The pigtail does come with rubber grommets/washers, but unfortunately it is too thin to seat properly. So, the socket/pigtail will NOT lock in place with this thinner rubber washer (only 0.06 in thick). Fortunately, I could use the grommet from the Jazz socket, which is about twice as thick (0.11 in). If you don�t have that, you will need to find a replacement washer.
d. Shorten & strip wires � On both the pigtail, and the 7440 male wire harness, cut wires to 1 3/4 in of length, and strip off 1 in of insulation.
e. Heat shrink tubing - Cut two pieces of 1/4 in diameter heat shrink tubing to 1 1/4 in length, and slide them down, into the tubing of the 7440 male harness.
f. Connect wiring � Connect the two black & green wires together. I used the method in Step #1 above. Slide the heat shrink over the connection. I used tape to move the red wires out of the way, to protect them from the heat gun. Use the heat gun (on lower setting) to shrink the tubing on the black wires. Repeat the process for the red wires. I did mark the positive / red side of the wiring with �+� sign, using a silver marker.
g. Protect red wires � Not sure if small strands of wire could possibly poke through the heat shrink at some point. For added protection, I cut a small piece of fabric wire loom (1/8 in diameter) and placed around the positive wire. To save cost, you could use electrical tape instead.
h. Finish Reverse light adapter - Wrapped all wiring with � in inner diameter plastic wire loom. Wrapped it all with electrical tape. Came out to be about 4 3/4 in long. The shorter the better, so some other wire connection approaches might make for an even more compact adapter. You will need to make TWO of these � one for each side.
INSTALLATION
I worked on one side at a time, and started with the driver�s side.
1. Open rear hatch, and remove two screws from tail light with Phillips screwdriver
2. Pull/slide the tail light towards the rear of the car to remove.
3. Place a towel underneath the tail light, and position it with the lens down / wires up
4. Wipe inside and wiring looms with damp rag
5. Label each wiring loom with label maker (or masking tape). Top is Brake/Tail, middle is Reverse, bottom is Turn
6. Detach wiring from FIT tail light
a. Brake / Tail light - Squeeze tab on harness and slide out plug. Rock/wiggle up zip-tied clip from holder; if you are having trouble, pull the bottom of the clip towards you and lift up.
b. Reverse � Depress tab to remove plug from socket
c. Turn � Depress tab to remove plug from socket
7. TURN Signal
a. Try plugging the T20 JAZZ TURN Bulb Socket Base 33303-SAA-003 into factory FIT wiring harness � it doesn�t fit. Note both the two TOP raised ridges, AND two SIDE ridges will need to be trimmed off. TRIM, being careful not to damage the center locking tab. It will still fit snugly into plug after trimming. (FYI - You can�t simply trim off the top ridges, and insert the socket upside down, because the contacts in the socket will NOT line up with the plug)
b. Line up the socket in the new JAZZ tail light hole, and make with a black marker (on the socket) and grey marker (on the housing) where the insertion point is.
c. Using a gloved hand, insert your 7440 amber bulb of choice into the turn socket. As mentioned, I went with the stock halogen; if you opt for LED�s, you�ll need the resistors to prevent hyperflashing.
d. Screw turn socket into housing
8. Reverse Lights
a. I had tested the polarity of the FIT 7440 reverse socket using a multimeter with a 7440 male wiring harness, and I labeled everything to show what is positive. This is really not necessary, but I wanted all my wiring to be color coded (moot point, because the adapter is wrapped, and you can�t see the wire colors anyway). If you do decide to do this, be extremely careful not to touch wires together (i.e., positive with negative), as you will have an electrical short, and blow fuses. Here is the polarity, in case you are interested (note locking tab is on top):
b. On the new adapter that you made, line up the socket in the new JAZZ tail light hole, and make with a black marker (on the socket) and grey marker (on the housing) where the insertion point is.
c. Using a gloved hand, insert your T15 / 921 bulb of choice into the reverse socket.
d. Screw reverse socket (with the whole adapter) into the housing
9. Protect factory wiring
a. I noticed that on the back of each of the 3 plugs, there seemed to be a bit of corrosion. The electrical tape from the factory did not completely cover the plugs. I opted to apply some dielectric grease with a toothpick for added protection
10. Protect lens of tail light assembly (optional)
a. Before installing, I cleaned and treated the outside of assembly w/Plexus and a microfiber towel. Helps prevent clouding up from UV rays.
11. Reconnect plugs / wiring / assembly
a. Reconnect brake/tail plug, and clip
b. Connect Turn plug
c. Connect Reverse plug to adapter
d. Make sure car is on a level surface. Apply emergency brake. Turn on key to �on�, but don�t start. Apply brake, and shift in reverse. Turn on hazards. Look to ensure that turn and reverse lights are working.
e. Apply brake and shift back into park, and turn off hazards.
f. Turn on lights to see if tail lights are working. Have someone apply the brakes (or wedge a rod against the brake) to ensure brake lights are operational.
g. You may want to apply some electrical tape to the top of the reverse adapter, since the factory wires are now vertical instead of horizontal.
Complete!
They look super nice!! Always been a fan of amber turn signals....
I also dig these .... Which may be the route I'll go....
Amber on the middle and reverse on the bottom....
😈😈😈😈😈😈
Those tail light assemblies look great, elkaku! I've never seen those before. Do you know if those are plug & play, or are wiring mods needed? Any info on the cost, part numbers, or where to find them? Thanks for the additional info!


 However I've always appreciated the turn signal being amber as it's easier for me to tell if its someone actually turning as opposed to having one break light while pumping the brakes.