


Radio removal on a 2015 fit


Thread Starter
|
New Member
Joined: Sep 2014
Posts: 5
From: Miami Fl
Radio removal on a 2015 fit
I was hoping to find some info on removing the radio. I have the non navi touch screen radio. I want to integrate a bazooka sub woofer......also has anyone located the ground wire that disables the video playback to function while driving. Driving off road of course....

Someone that spends his life on FitFreak.net
Joined: Mar 2014
Posts: 1,116
From: Hawaii: relocated to Western Canada Sept, 2015
Now there are three of us wanting some HU removal tips.
If someone could post pics and a step-by-step procedure, I, for one, will be eternally gratefull.
Should be starting the stereo component install by next week when all the sound-deadening is complete.
If someone could post pics and a step-by-step procedure, I, for one, will be eternally gratefull.
Should be starting the stereo component install by next week when all the sound-deadening is complete.

Member
Joined: Sep 2014
Posts: 57
From: Cincinnati, OH

OK, maybe these will help.
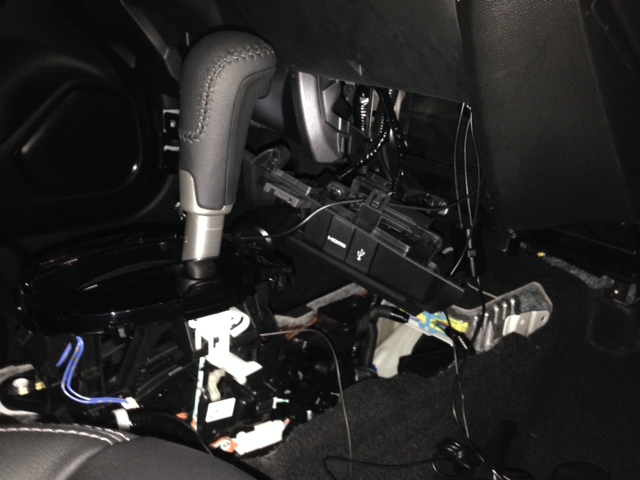
This is the lower piece with the aux jacks. There is one screw on the front, not hard to find. Then pull. The rest is clips.
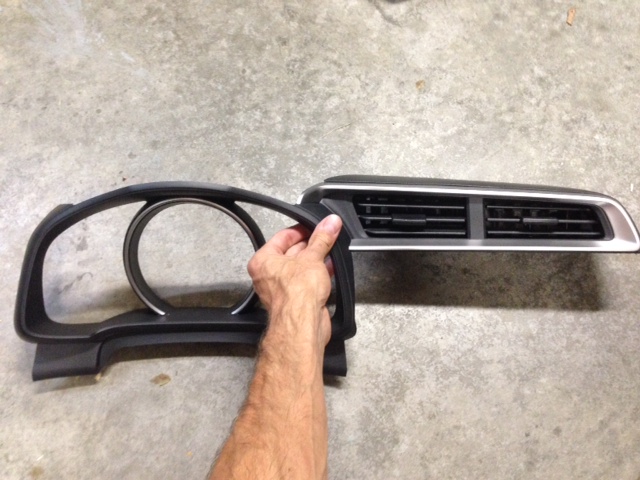
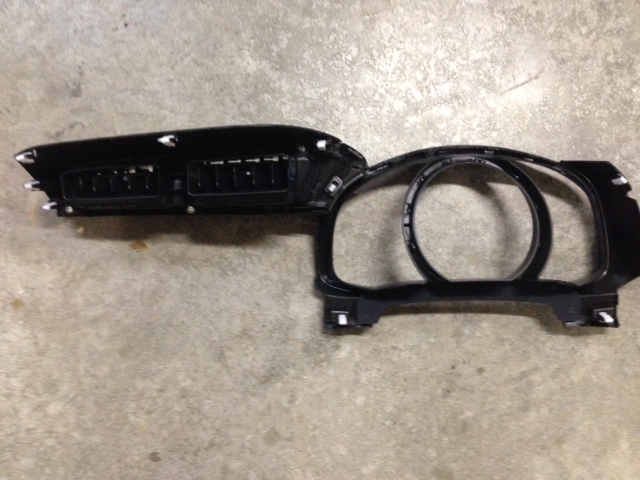
Next remove the gauge trim, then the vent piece above the radio. You have to pull on them. They're only held in with clips but the gauge trim has to come out first.
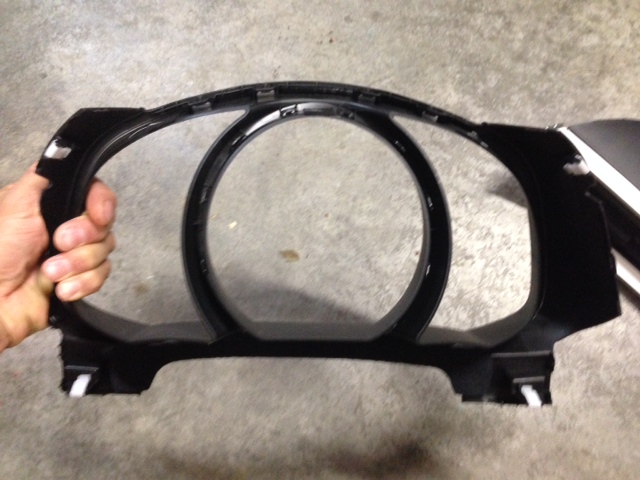
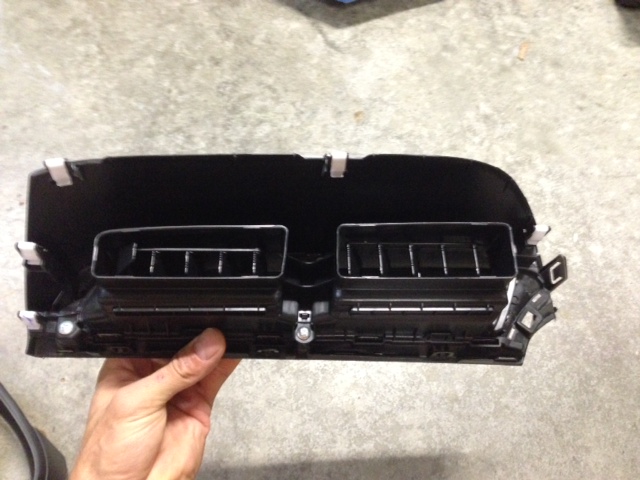
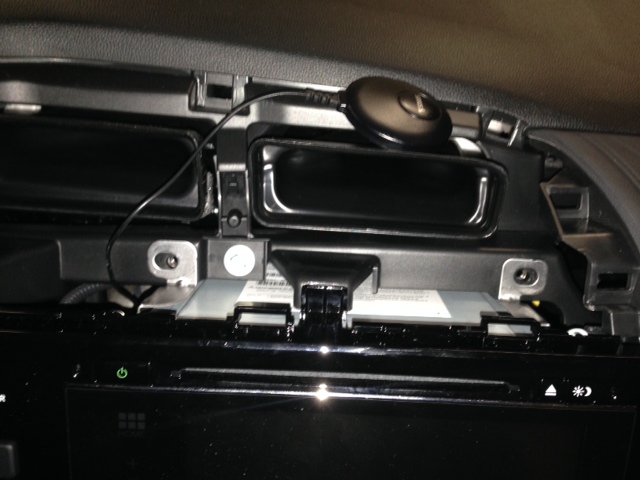
Then remove the two 8mm bolts on top of the radio.
Finally, one 8mm bolt going up into the radio. It's already removed in the pic but if you remove the glovebox you can see it under the radio.
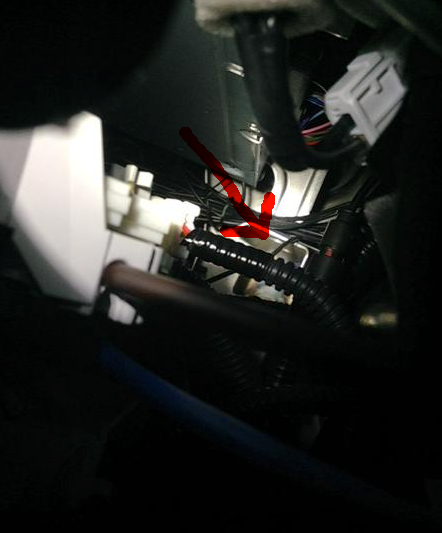
After that, just grab the top of the radio and pull. It will unclip.
This is the lower piece with the aux jacks. There is one screw on the front, not hard to find. Then pull. The rest is clips.
Next remove the gauge trim, then the vent piece above the radio. You have to pull on them. They're only held in with clips but the gauge trim has to come out first.
Then remove the two 8mm bolts on top of the radio.
Finally, one 8mm bolt going up into the radio. It's already removed in the pic but if you remove the glovebox you can see it under the radio.
After that, just grab the top of the radio and pull. It will unclip.
Someone that spends his life on FitFreak.net
Joined: Mar 2014
Posts: 1,116
From: Hawaii: relocated to Western Canada Sept, 2015
[QUOTE=Superfly;1269678].....OK, maybe these will help.............[QUOTE]
Superfly, helpful as always. The pics posted sez it all!!!
A thousand thanks!!!
Superfly, helpful as always. The pics posted sez it all!!!
A thousand thanks!!!

Member
Joined: Aug 2014
Posts: 179
From: Some where
Dude this helps a lot man. Do you also have info on which plug holds the speaker wires? If I can find the speaker wires maybe I won't have to have my amps installed by someone else.
Member
Joined: Sep 2014
Posts: 57
From: Cincinnati, OH
It's the big plug on the upper right as you're looking at the back of the unit. After doing some resistance tests I found the red and green pair is right front (red is -,green is +), the black and white pair is left front (white is -, black is +). I know the colors seem backwards from typical +- but they tested correctly on charge when I tested the voltage on them.
I didn't test the rear lines as I'm not going to use them. Just concerned with front soundstage however I do know there are 2 more pairs of wires that are them. There are also 5 more wires but they're all together, not in pairs, and then 2 bigger wires that are obviously main power and ground.
I didn't test the rear lines as I'm not going to use them. Just concerned with front soundstage however I do know there are 2 more pairs of wires that are them. There are also 5 more wires but they're all together, not in pairs, and then 2 bigger wires that are obviously main power and ground.

Member
Joined: Sep 2014
Posts: 121
From: Coppell,Texas
I have my TomTom GPS center mounted above the vents but I don't like that its power cable (traffic antenna) has to be routing down to the power outlet in the accesessary area.
Is there any space on the vent trim to mount a 12V Power Outlet?
Like this one:
http://www.ebay.com/itm/110890384306?autorefresh=true
If so, can the new power outlet wiring be sent down inside past the radio to the lower accesessary port area where the other power outlet is?
Thanks


Is there any space on the vent trim to mount a 12V Power Outlet?
Like this one:
http://www.ebay.com/itm/110890384306?autorefresh=true
If so, can the new power outlet wiring be sent down inside past the radio to the lower accesessary port area where the other power outlet is?
Thanks
Member
Joined: Sep 2014
Posts: 57
From: Cincinnati, OH
That piece looks overly complicated. Just buy this, Robot Check
cut the wire and splice it into the wires on the back of the accessory outlet, run the wires for the all behind the dash and plug it in back there. No need to mount the new outlet, just tuck it in behind the radio/dash.
cut the wire and splice it into the wires on the back of the accessory outlet, run the wires for the all behind the dash and plug it in back there. No need to mount the new outlet, just tuck it in behind the radio/dash.
Someone that spends his life on FitFreak.net
Joined: Mar 2014
Posts: 1,116
From: Hawaii: relocated to Western Canada Sept, 2015
While doing sound deadening to the boot area yesterday, decided to tackle trim removal to access the HU.
Follow Superfly's steps and removal is a breeze.
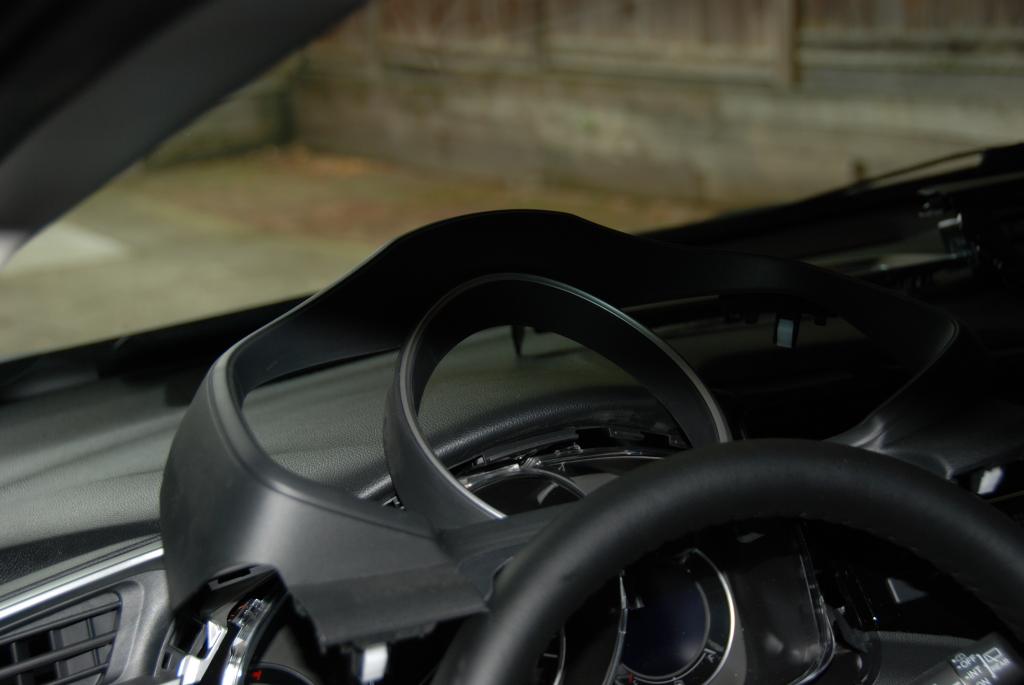
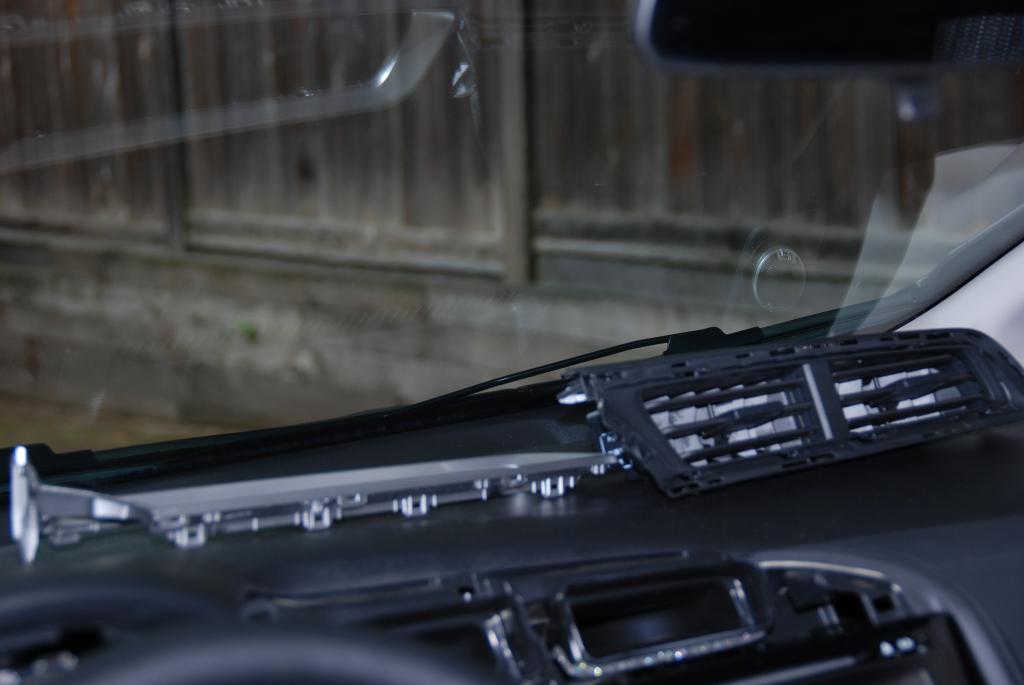
Should be able to start wiring and component testing by this weekend once I figure out the harness.
Follow Superfly's steps
and removal is a breeze.

Should be able to start wiring and component testing by this weekend once I figure out the harness.

Member
Joined: Sep 2014
Posts: 32
From: Nova
anybody know if the EX-L 2015 fit has a factory amp powering the speakers? I am looking to upgrade the factory speakers as well as adding an amplifier to power them as well as a sub but wasn't sure if something like this would work on our cars...
Alpine KTP-445U Power Pack Upgrade any car radio to 45 watts RMS X 4 at Crutchfield.com
Alpine KTP-445U Power Pack Upgrade any car radio to 45 watts RMS X 4 at Crutchfield.com
Someone that spends his life on FitFreak.net
Joined: Mar 2014
Posts: 1,116
From: Hawaii: relocated to Western Canada Sept, 2015
Update Oct. 18, 2014:
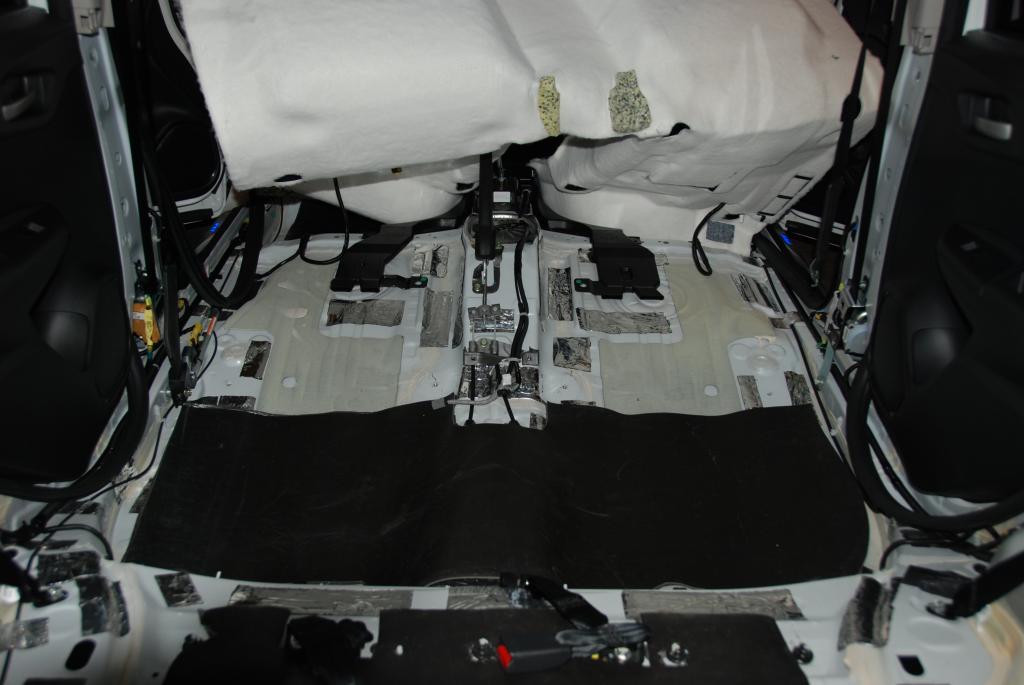
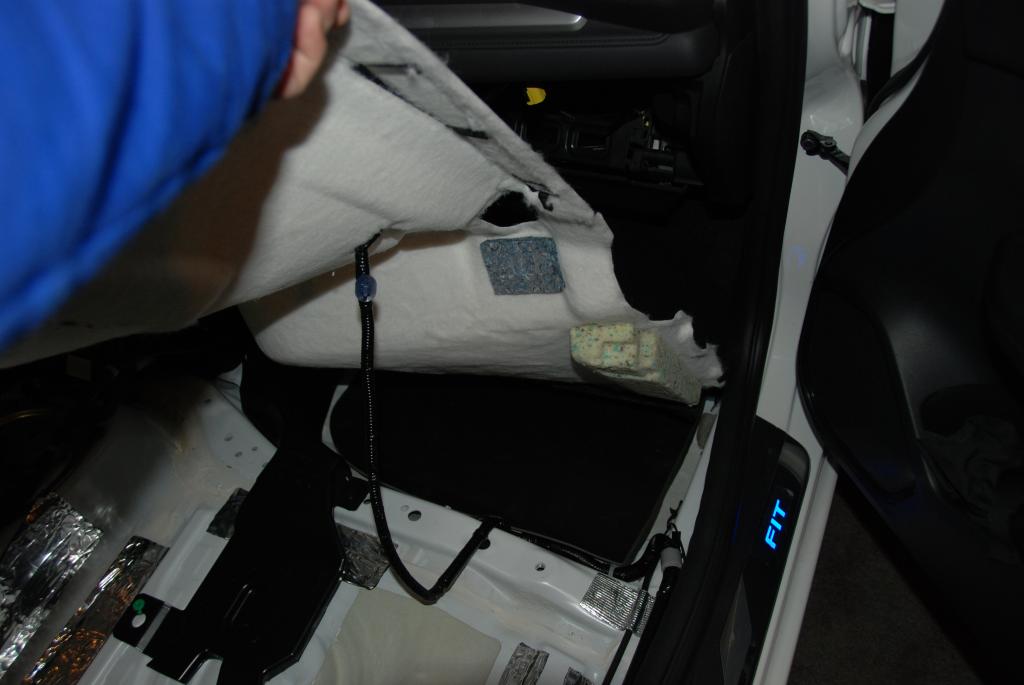
Seats are out and proceeded to install CLD, CCF and MLV in the front and rear floor area.
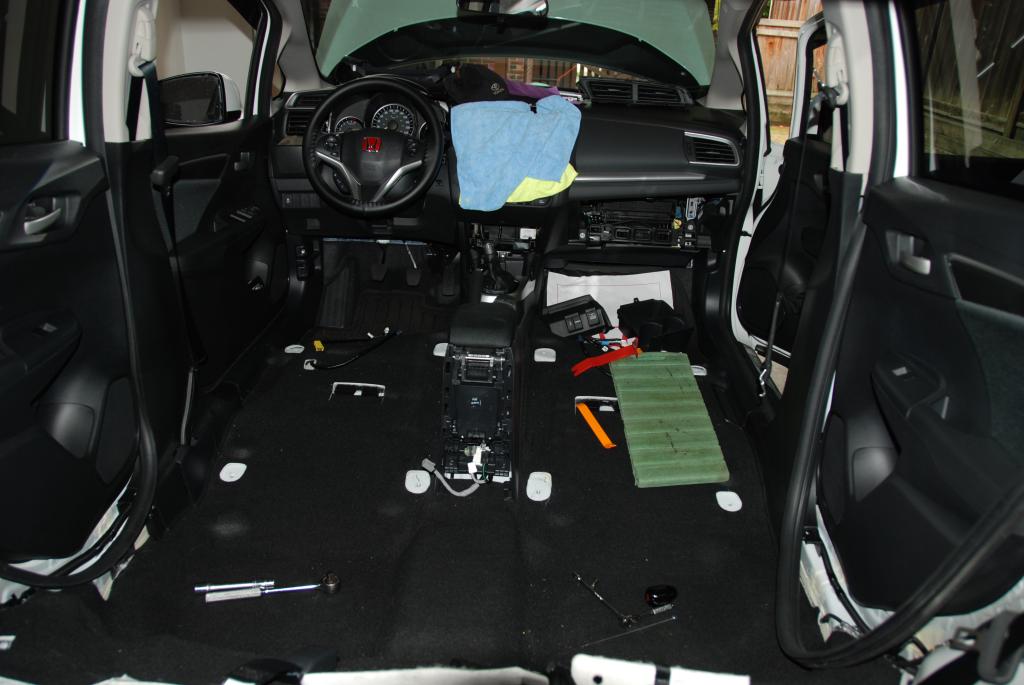
Factory Sound deadener (no need to overlap these) Rear seat floor
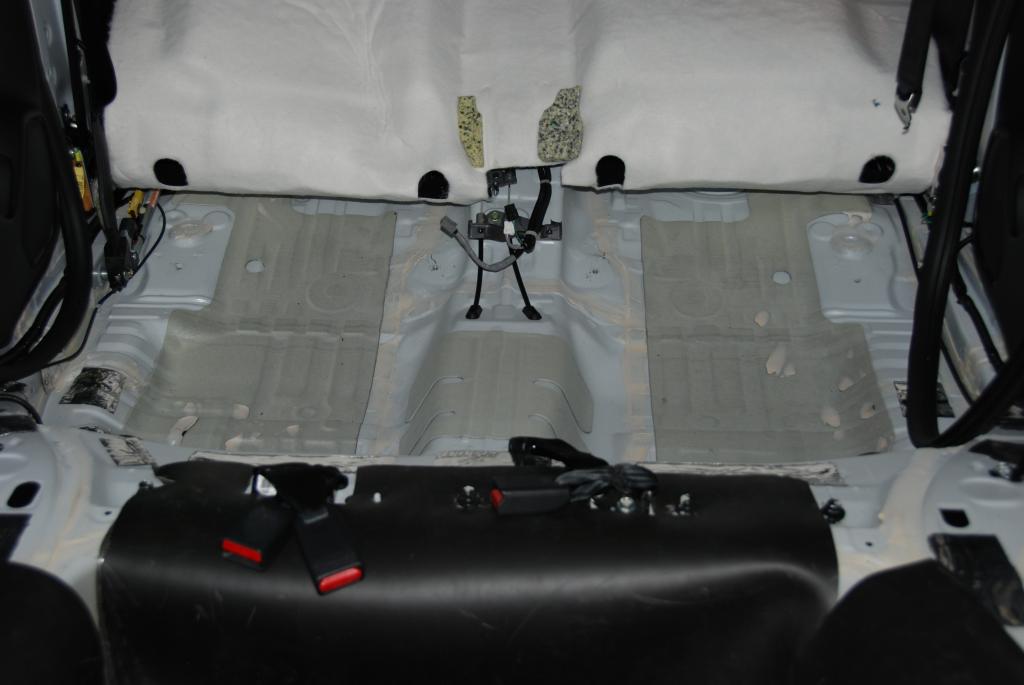
CLD Tiles in Rear floor area
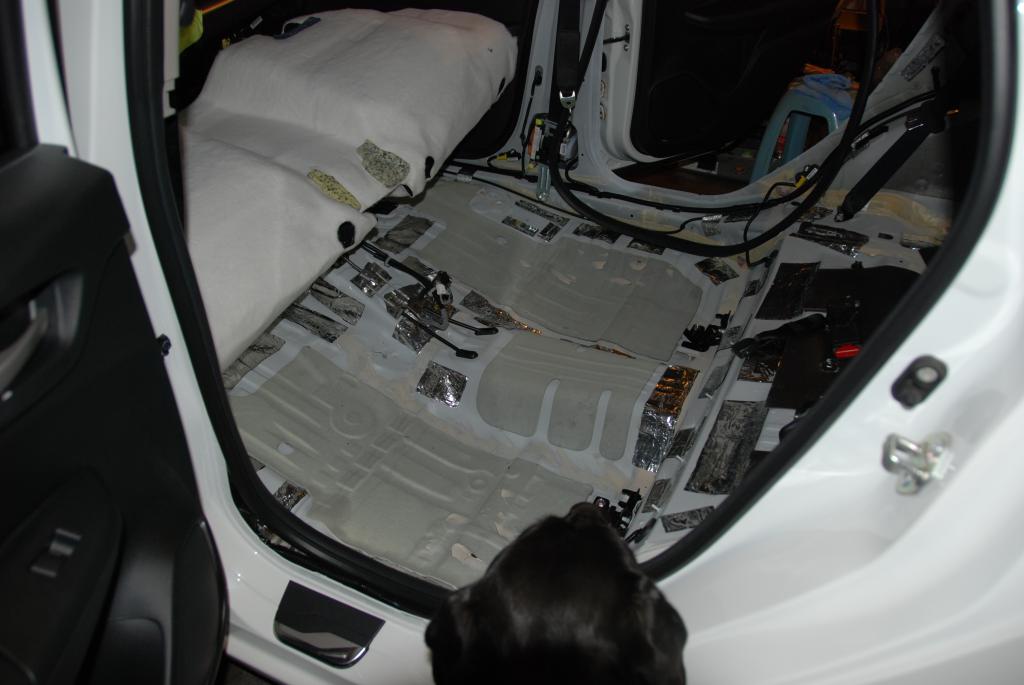
MLV/CCF installed REar seat floor
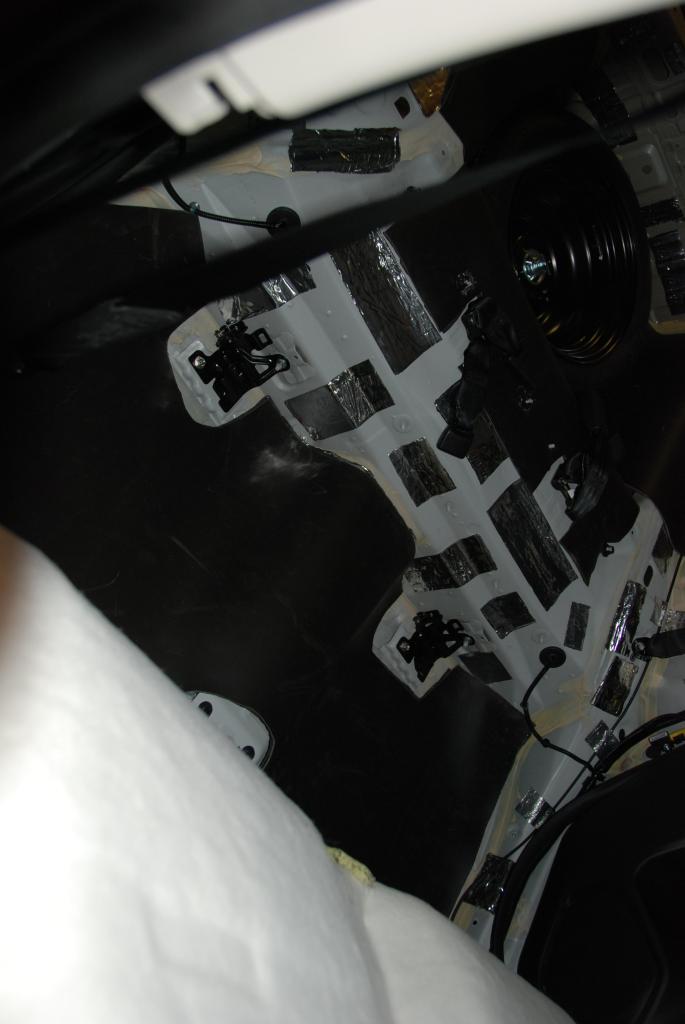
CLD on Front floor area
MLV/CFF on right front floor
Will lay out the wiring on Monday and hoping I can dry-run the system by next weekend.
Last edited by ROTTBOY; Oct 18, 2014 at 07:21 PM.
Someone that spends his life on FitFreak.net
Joined: Mar 2014
Posts: 1,116
From: Hawaii: relocated to Western Canada Sept, 2015
Started wire layout and install
Here's the latest (likewise posted in the What Mods...... thread):
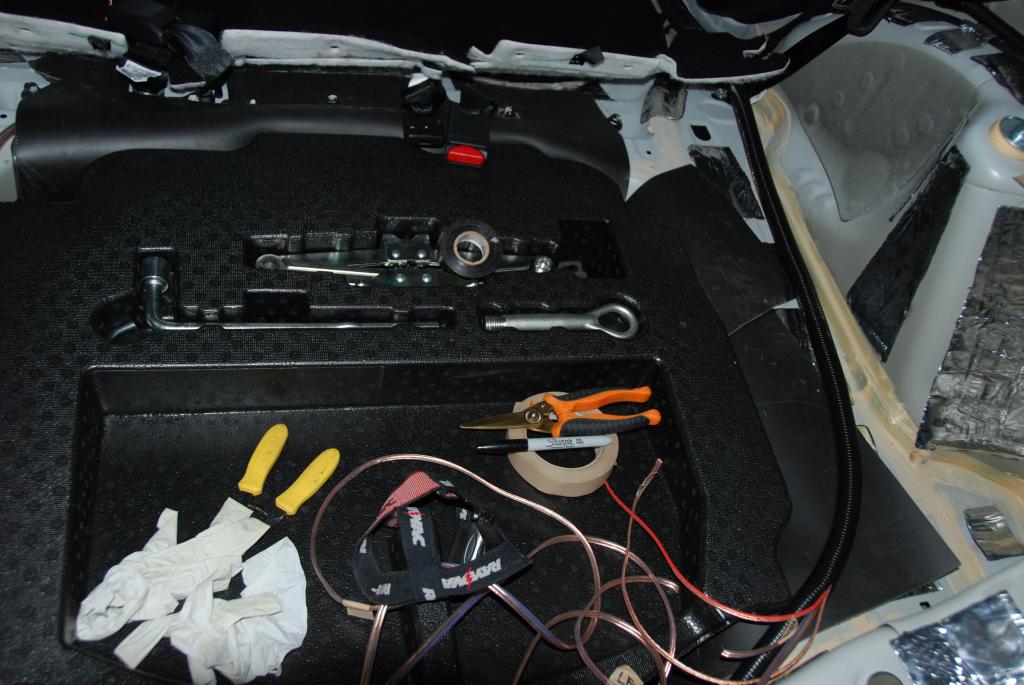
..........started on the wiring from the HU to the spare tire storage area.
HU wires will be connected directly to the OEM speaker connector for both the F & R speaker as well as the tweeters on top of the dash.
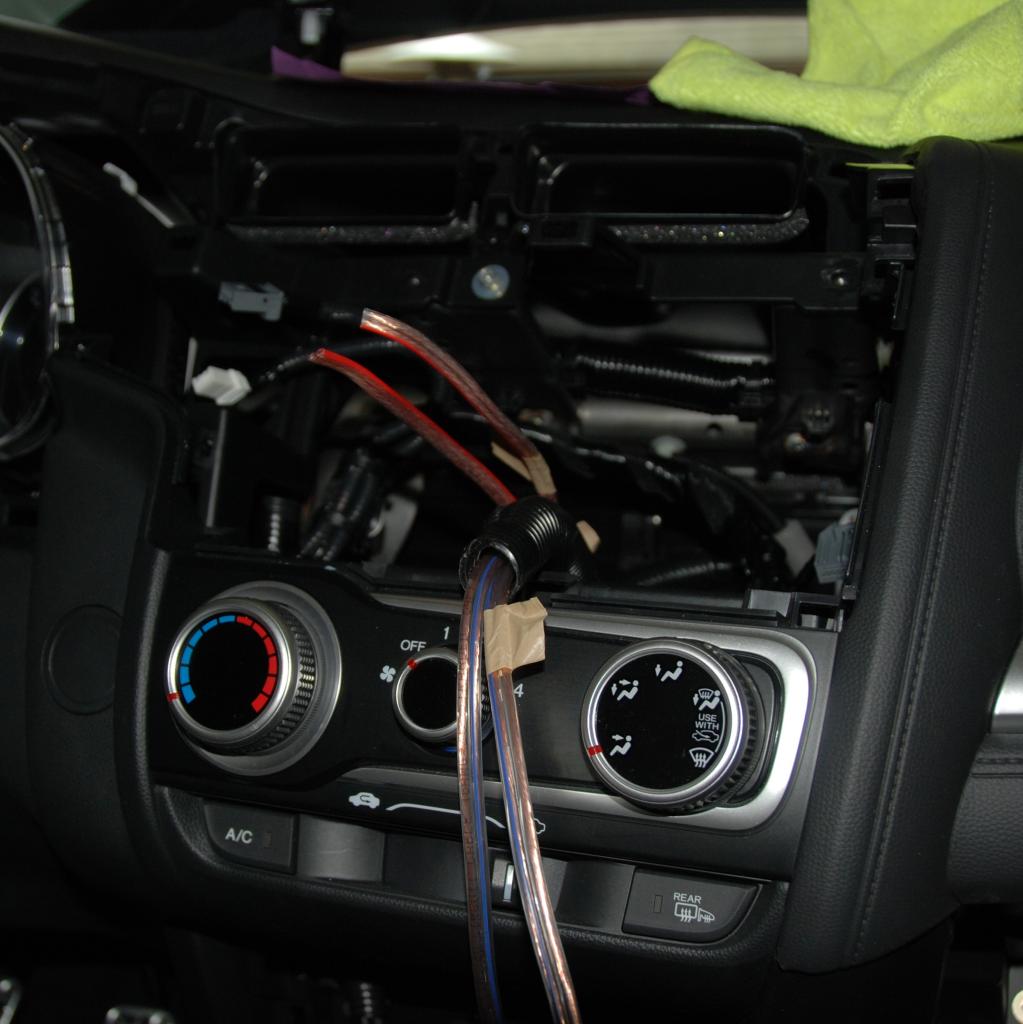
Wires in its own harness cover passing through the center console
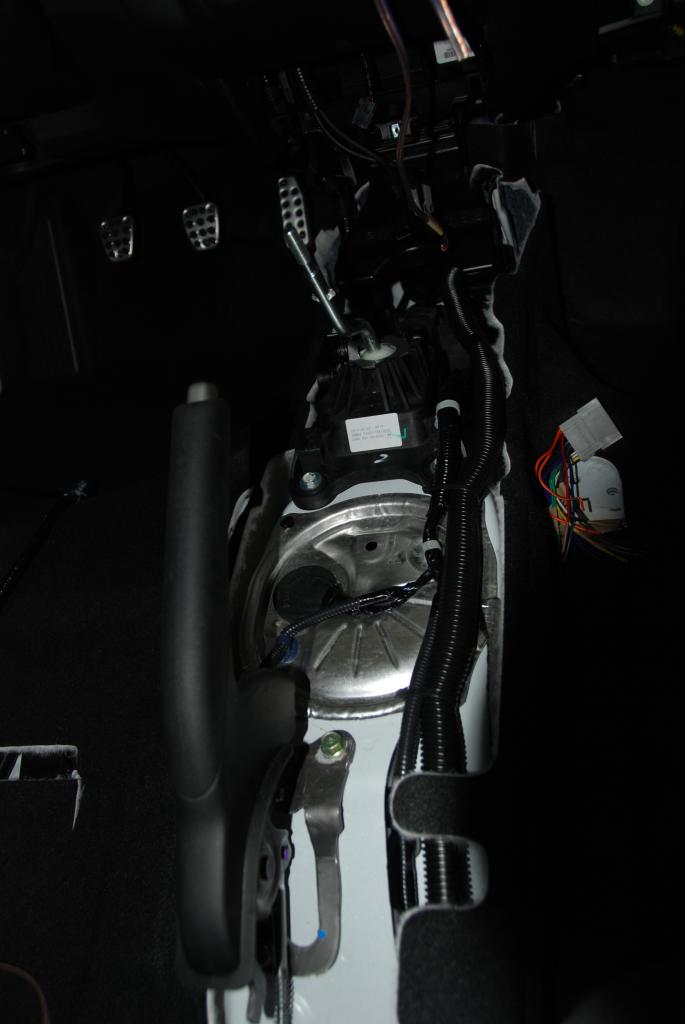
Wires in harness cover to the spare tire cover
Tomorrow will finish up the layout of speaker wires to the doors (finished routing to the left rear door) and to the sub (under the right front seat).
Left rear door wire and speaker install:
Speaker wire from crossover fished through door grommet
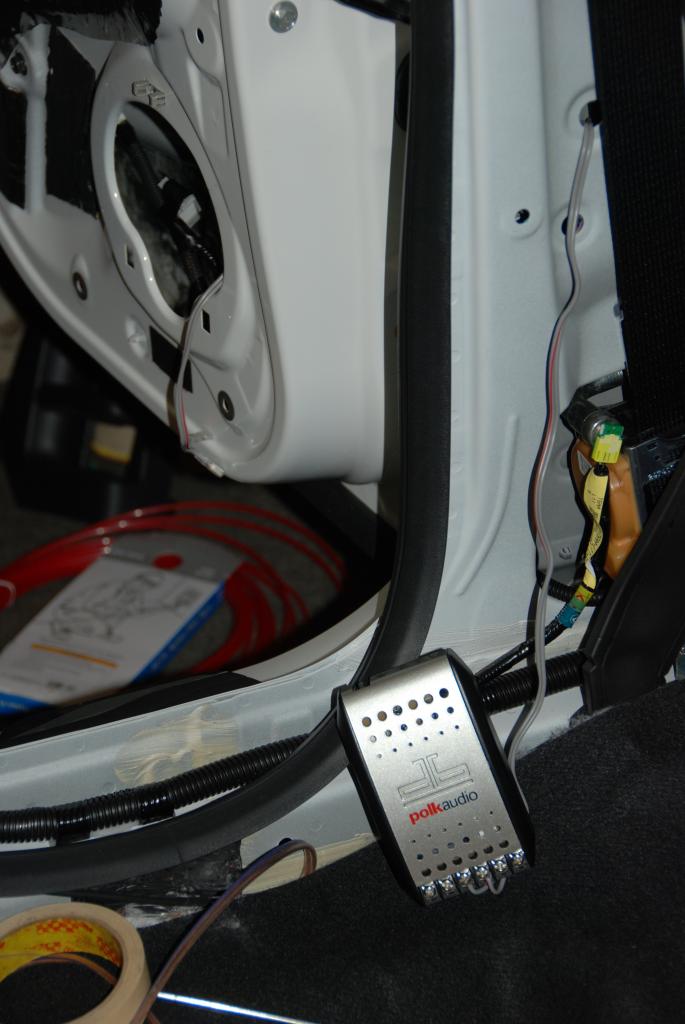
Speaker wire through inner door grommet
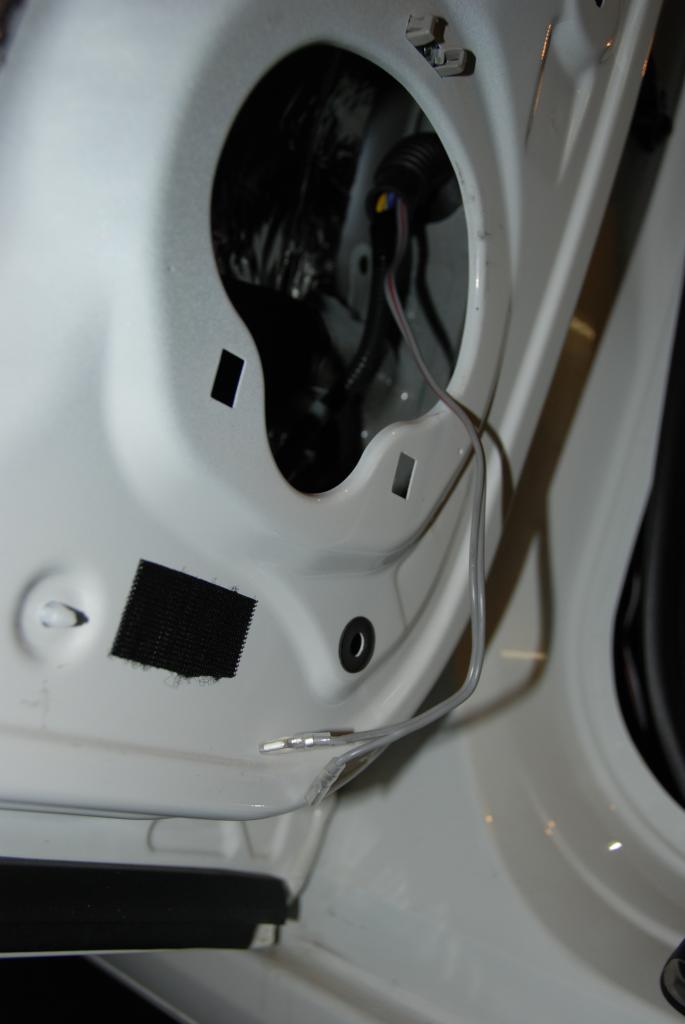
Speaker wire loom covered
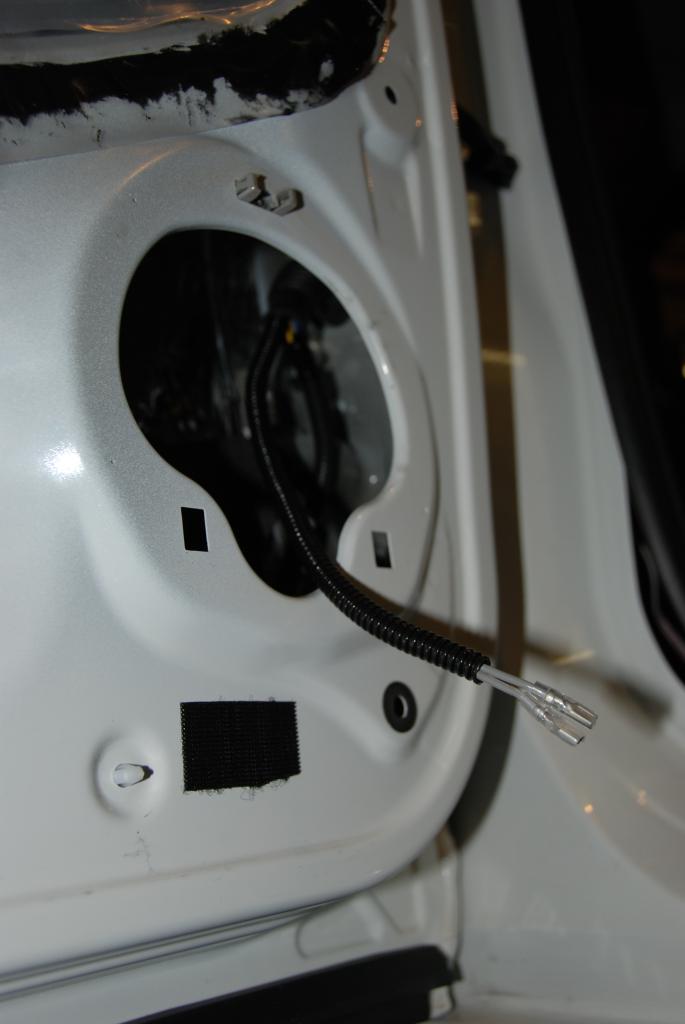
Speaker installed using adaptor brackets.
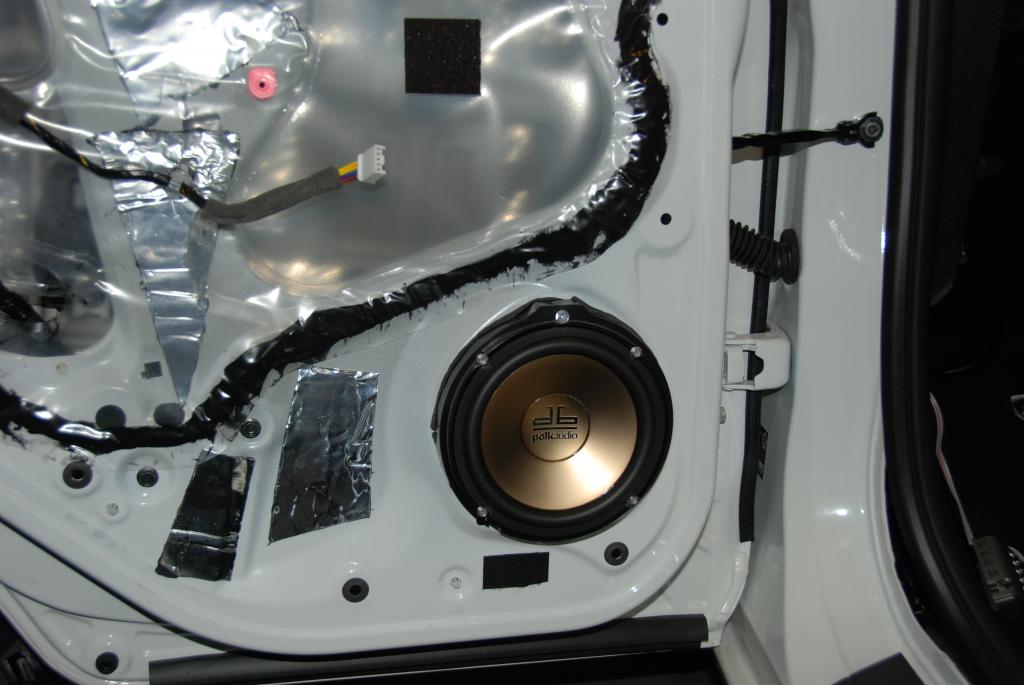
Speaker and crossover wired. Crossover will be installed on the pillar (middle portion) behind the seat belt. There's lotsa space there. Being very light, most probably will use industrial double-sided tape. Am not a fan of drilling when I don't really have too.
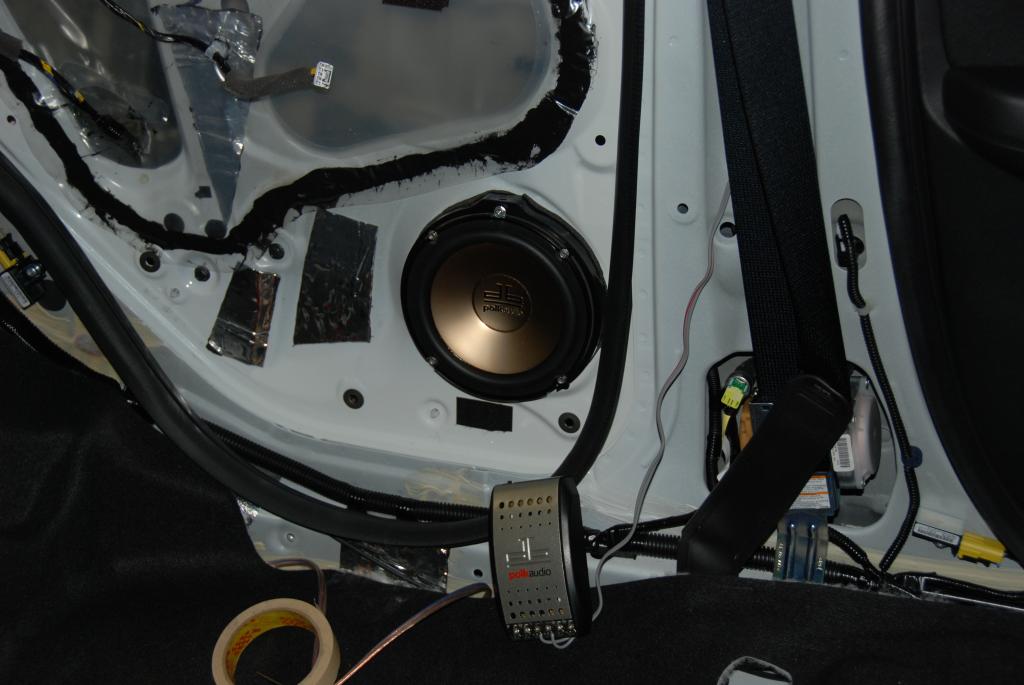
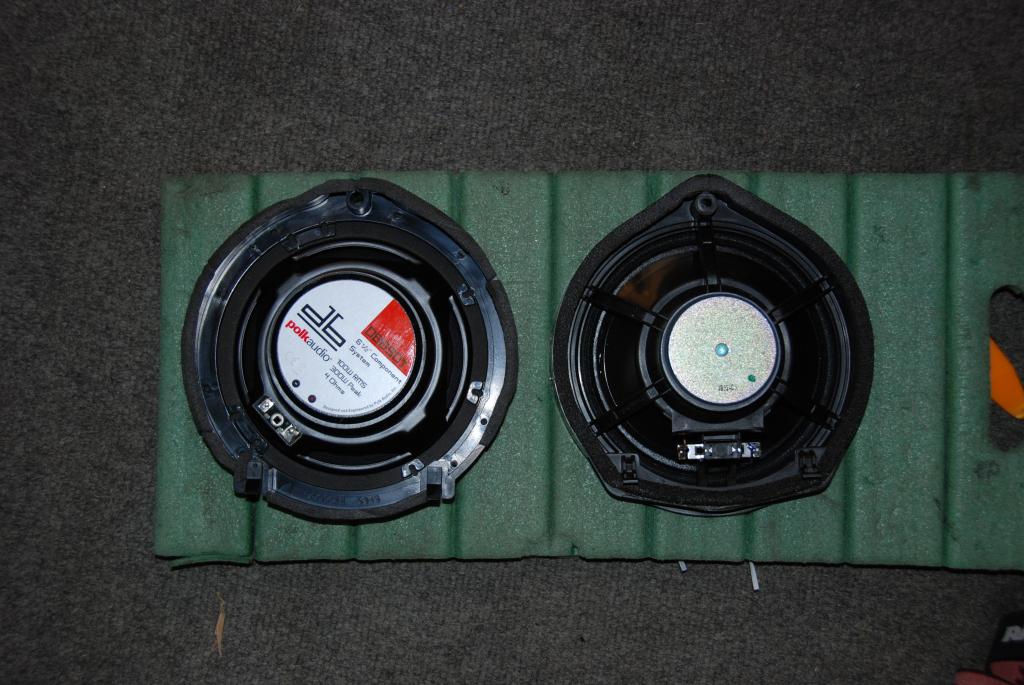
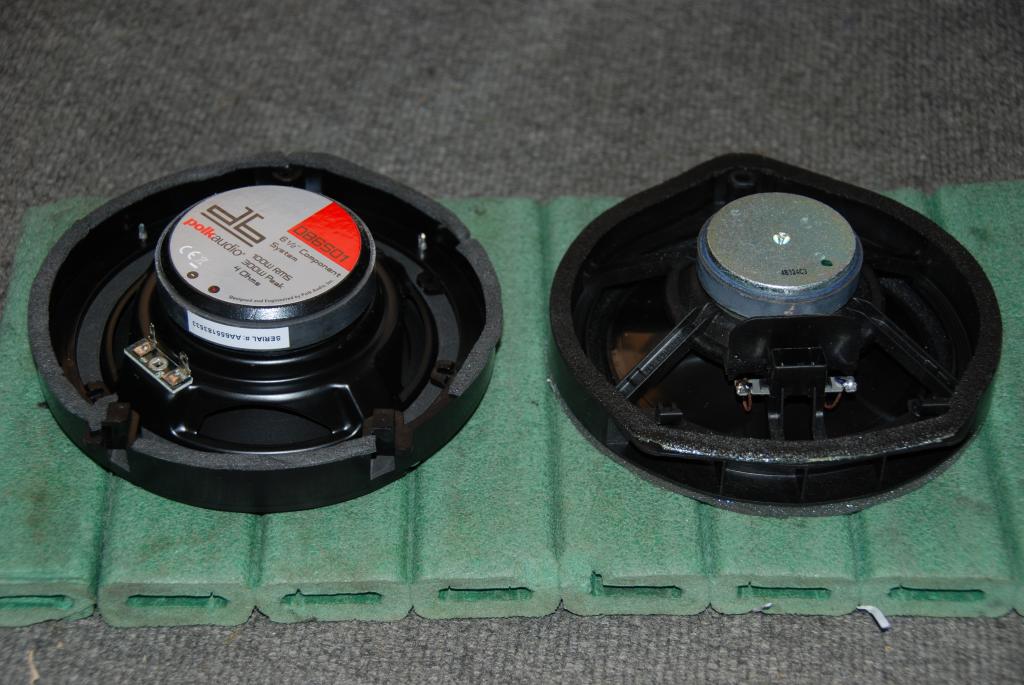
Compare the factory OEM speakers with the mid-range priced Polks. Bigger magnets and twice the weight. Easy to figure out why Honda had to boost equalization from the OEM HU to make those factory tinny speakers sound decent.
Update: remaining doors done today 10/20:
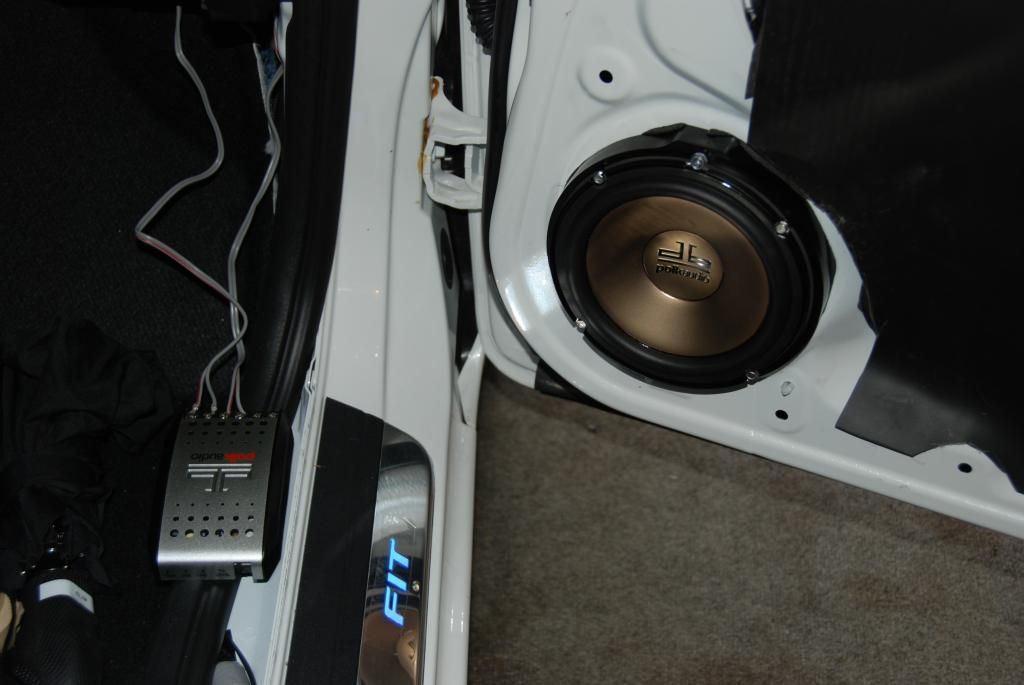
Finished install of speakers and crossovers on the remaining doors. Feeding through the door-grommet was easy enough except for the front driver's door. On the rubber boot attached to the body, there is a plastic surround base. To add to the difficulty, once past, there is a double wall so fishing the wire was tedious.
Rear Right door bare wire
REar right door. Wire with conduit.
Speaker connected to crossover - Right rear door
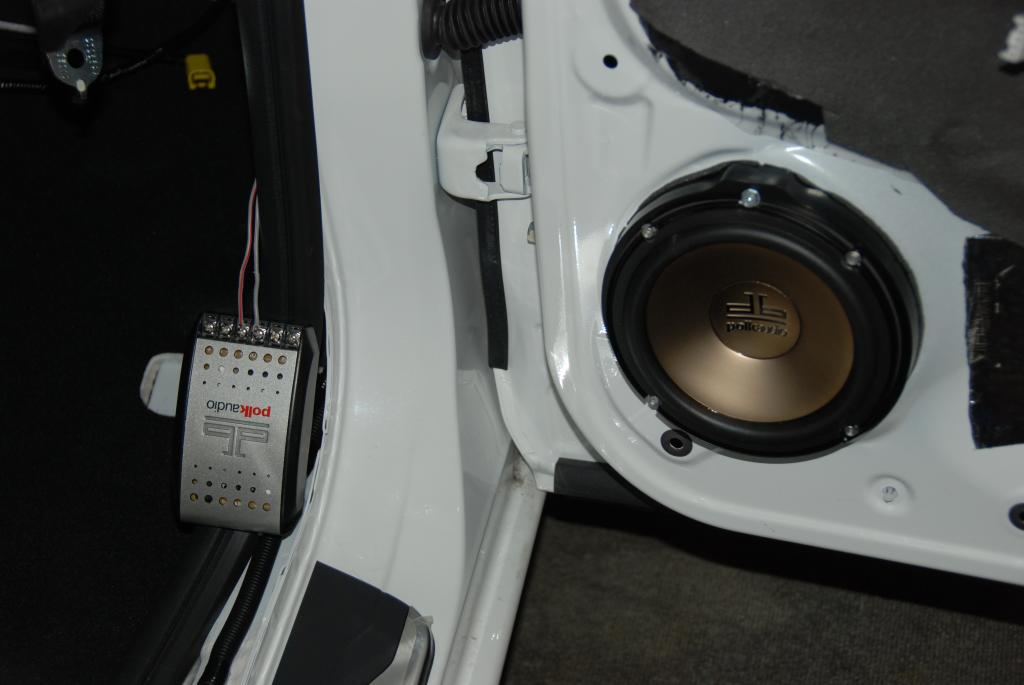
Right front door Wire ready for install w/ conduit
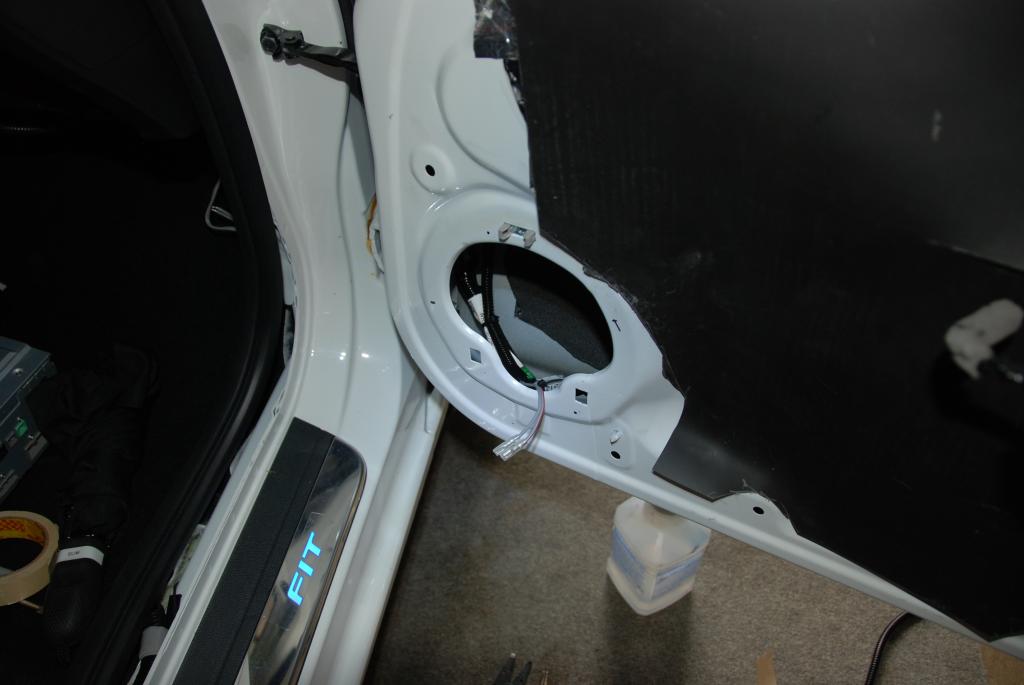
Speaker, tweeter connected to crossover Right front door
Speaker ready for install Left front door
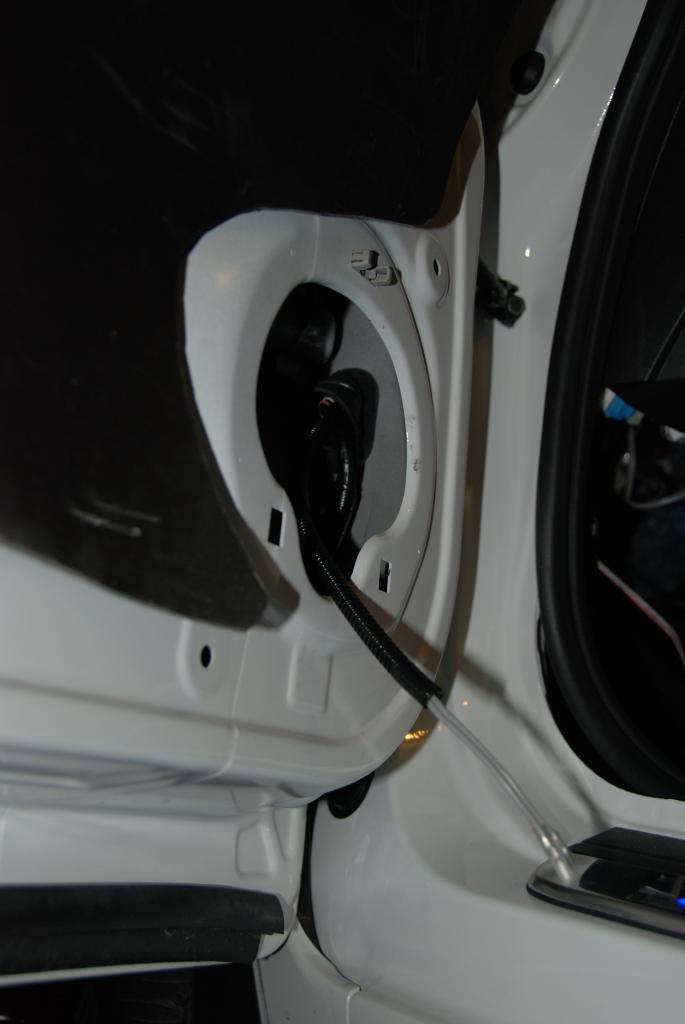
Speaker, tweeter connected to crossover Left Front door
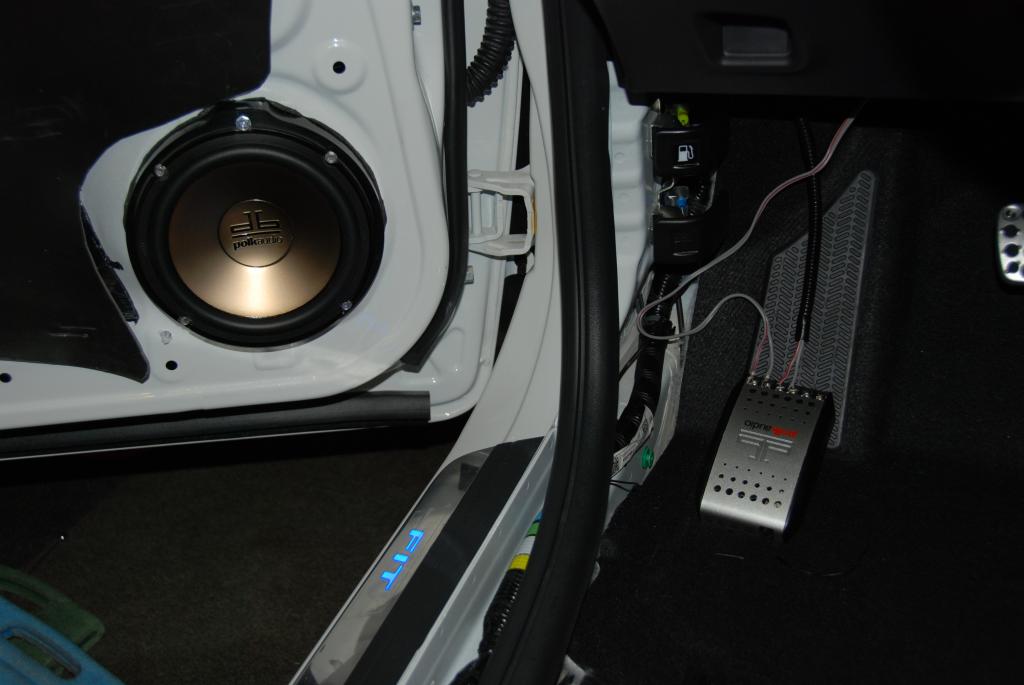
Next, will layout the remaining wires and will make a temporary hook-up to the powered components. Can't wait to test.
Won't be till this weekend though - wife arrives in a couple of days so will be busy doing my regular errands.
UPDATE: Wires, wires and more wires 10/21
Speaker wires laid out from sound processor and connected to crossovers.
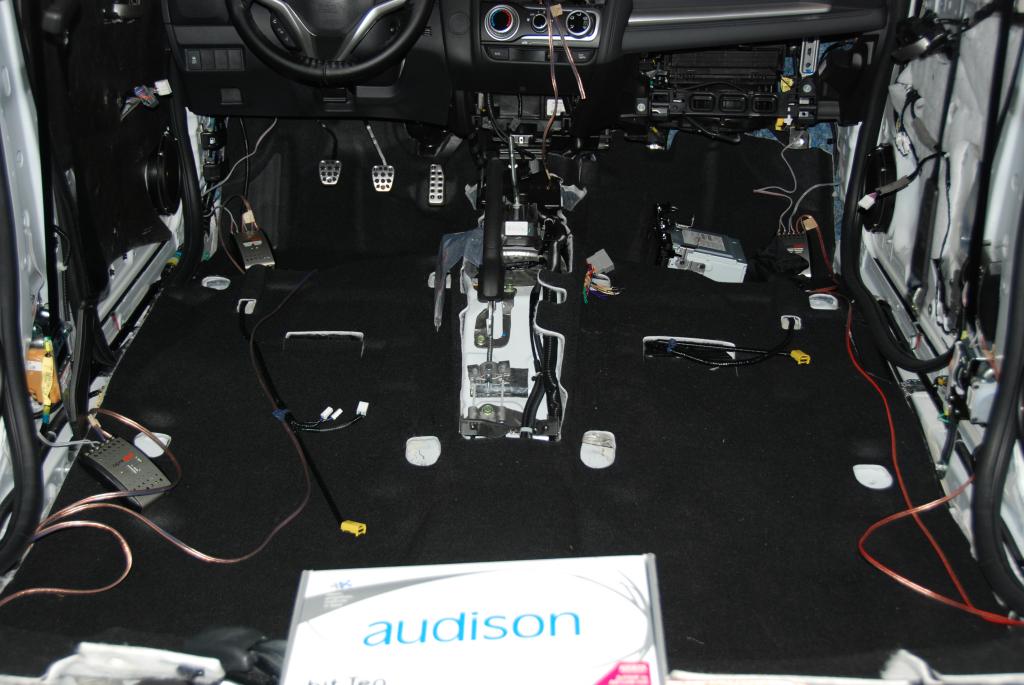
A mess of wires getting ready for hook-up to sound processor (to be mounted on spare tire cover right beside the amp.)
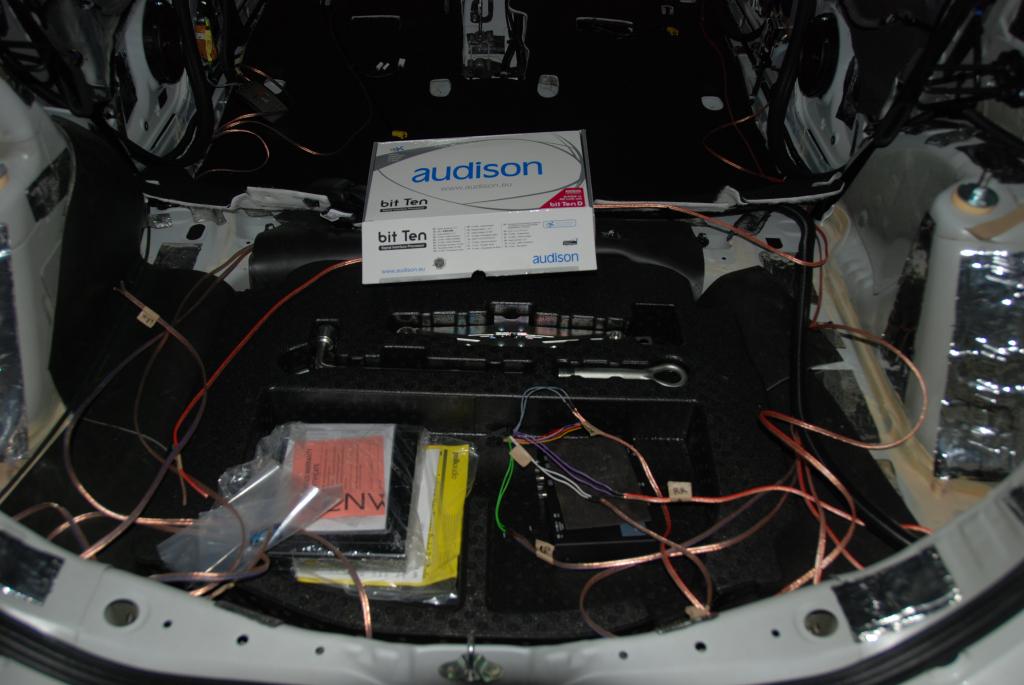
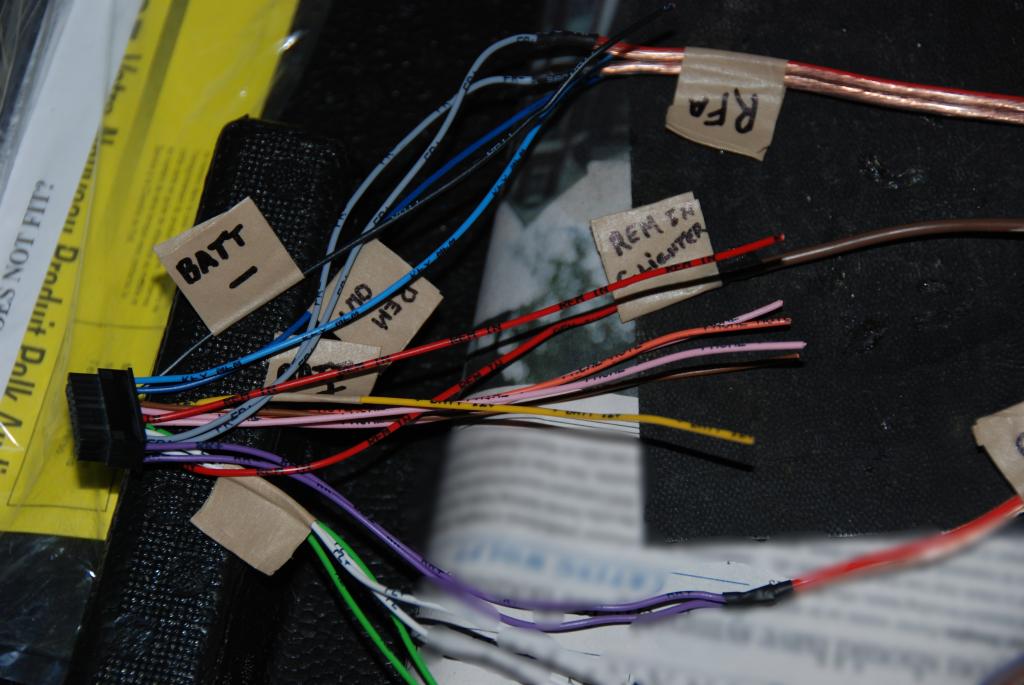
Speaker wires and Remote ON soldered and shrink-wrap connected to sound processor harness.
Tomorrow will mount and wire the power and negative cables from the battery will go to respective blocks to provide "juice" for the processor, amp. and powered sub.
..........started on the wiring from the HU to the spare tire storage area.
HU wires will be connected directly to the OEM speaker connector for both the F & R speaker as well as the tweeters on top of the dash.
Wires in its own harness cover passing through the center console
Wires in harness cover to the spare tire cover
Tomorrow will finish up the layout of speaker wires to the doors (finished routing to the left rear door) and to the sub (under the right front seat).
Left rear door wire and speaker install:
Speaker wire from crossover fished through door grommet
Speaker wire through inner door grommet
Speaker wire loom covered
Speaker installed using adaptor brackets.
Speaker and crossover wired. Crossover will be installed on the pillar (middle portion) behind the seat belt. There's lotsa space there. Being very light, most probably will use industrial double-sided tape. Am not a fan of drilling when I don't really have too.
Compare the factory OEM speakers with the mid-range priced Polks. Bigger magnets and twice the weight. Easy to figure out why Honda had to boost equalization from the OEM HU to make those factory tinny speakers sound decent.
Update: remaining doors done today 10/20:
Finished install of speakers and crossovers on the remaining doors. Feeding through the door-grommet was easy enough except for the front driver's door. On the rubber boot attached to the body, there is a plastic surround base. To add to the difficulty, once past, there is a double wall so fishing the wire was tedious.
Rear Right door bare wire
REar right door. Wire with conduit.
Speaker connected to crossover - Right rear door
Right front door Wire ready for install w/ conduit
Speaker, tweeter connected to crossover Right front door
Speaker ready for install Left front door
Speaker, tweeter connected to crossover Left Front door
Next, will layout the remaining wires and will make a temporary hook-up to the powered components. Can't wait to test.
Won't be till this weekend though - wife arrives in a couple of days so will be busy doing my regular errands.
UPDATE: Wires, wires and more wires 10/21
Speaker wires laid out from sound processor and connected to crossovers.
A mess of wires getting ready for hook-up to sound processor (to be mounted on spare tire cover right beside the amp.)
Speaker wires and Remote ON soldered and shrink-wrap connected to sound processor harness.
Tomorrow will mount and wire the power and negative cables from the battery will go to respective blocks to provide "juice" for the processor, amp. and powered sub.
Last edited by ROTTBOY; Oct 22, 2014 at 01:49 AM.
Someone that spends his life on FitFreak.net
Joined: Mar 2014
Posts: 1,116
From: Hawaii: relocated to Western Canada Sept, 2015
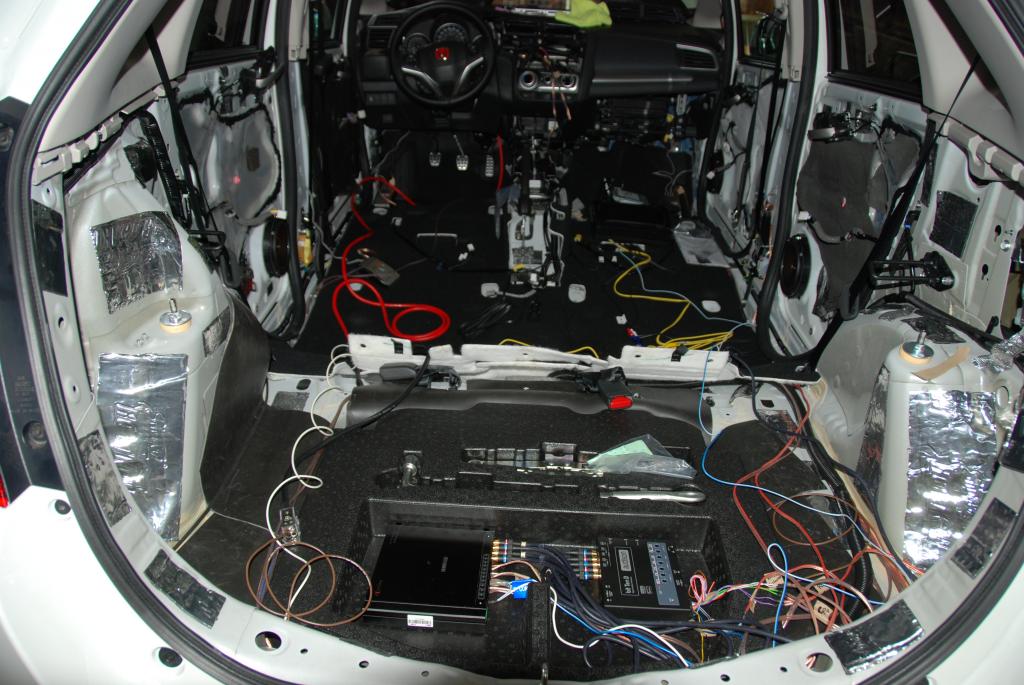
Power and components wired
Wires and components finally laid out
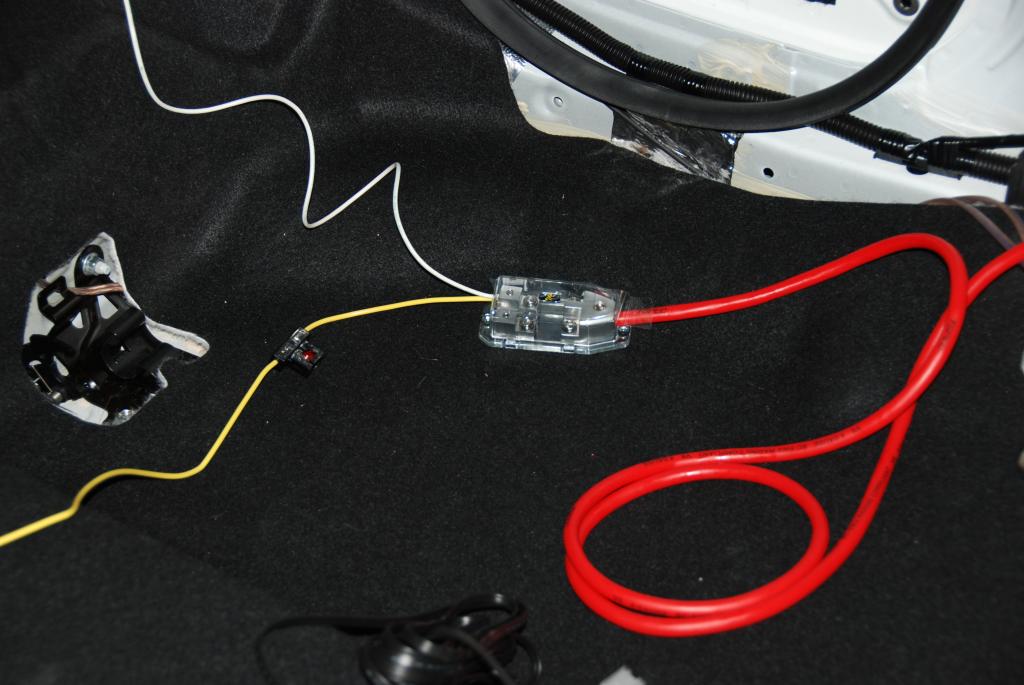
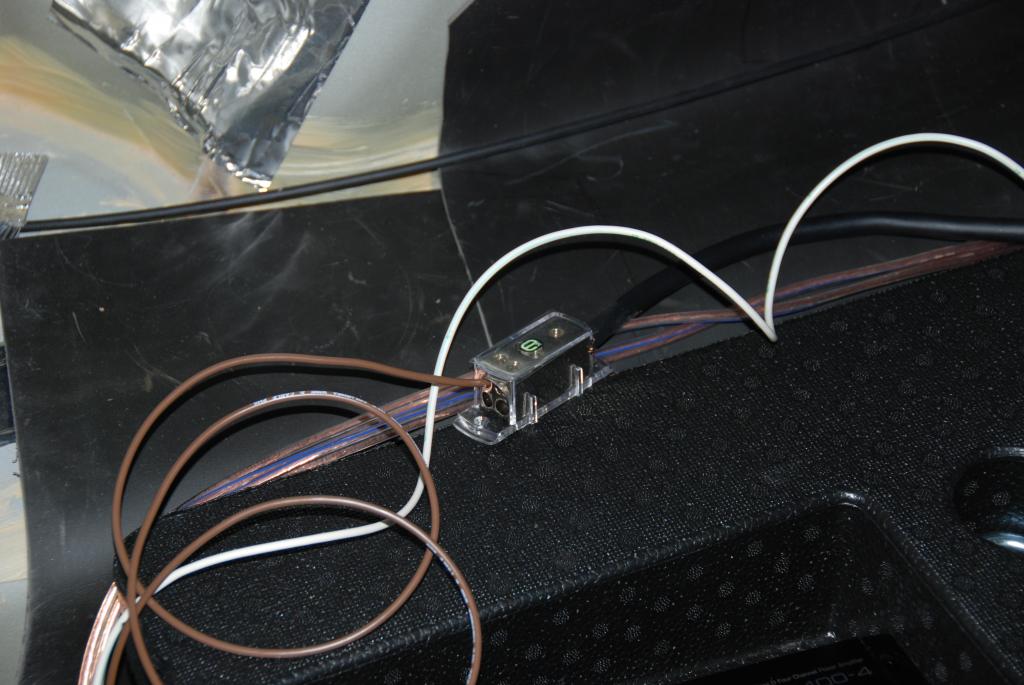
Power Blocks installed.
Positive block straight to battery. 4 gauge cable was fished through the rubber boot located on the engine firewall slightly below the brake reservoir.
Negative block connected to rear seat bolt
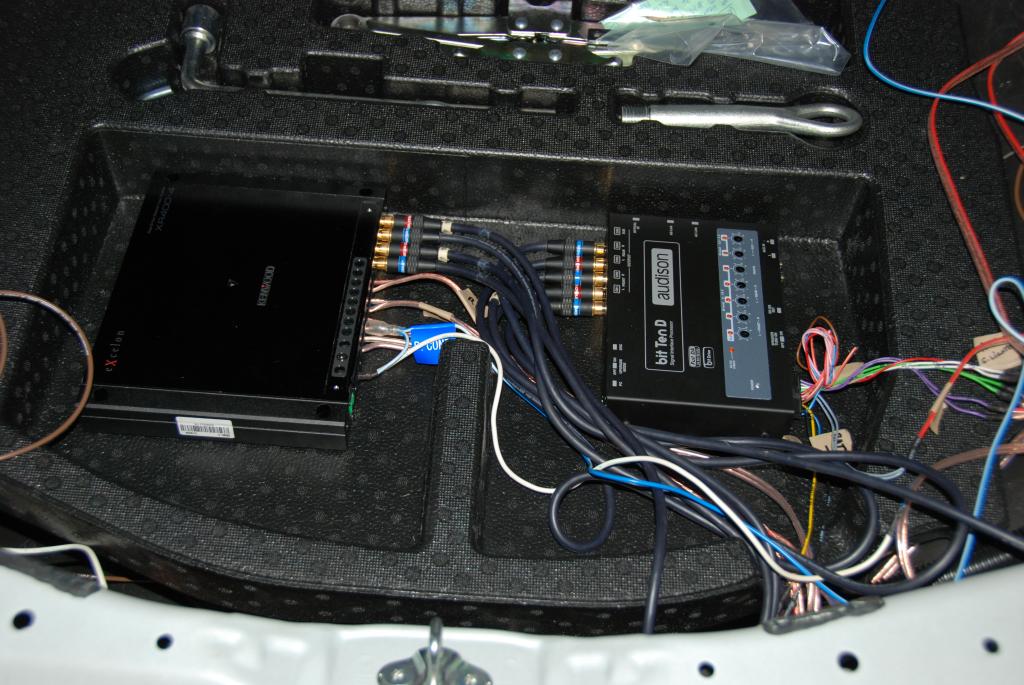
Kenwood Amp and Sound processor wired
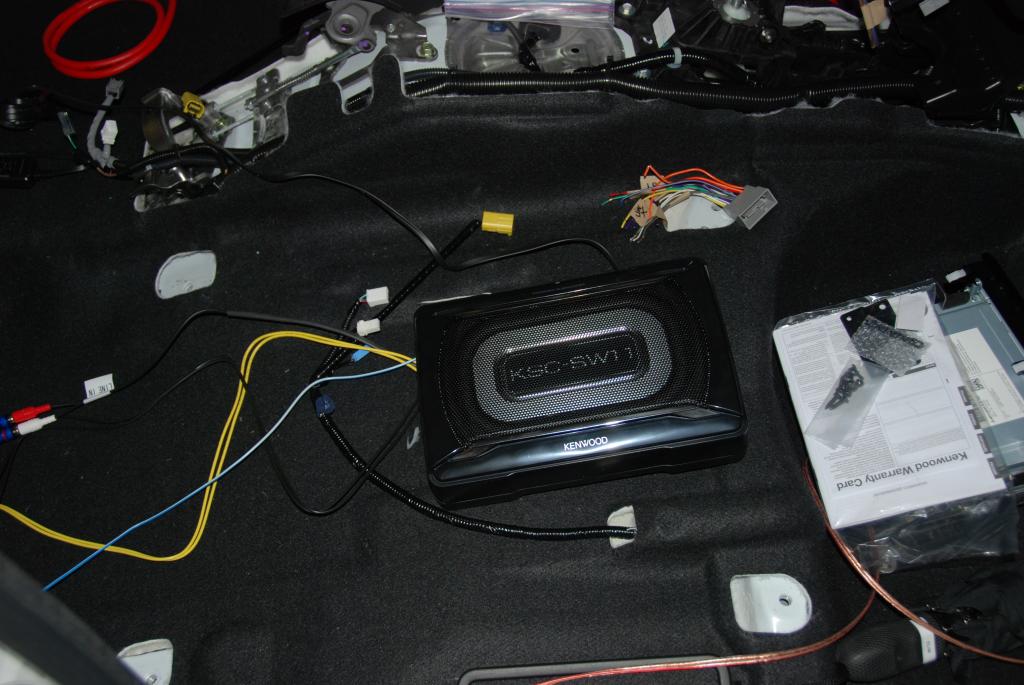
Kenwood powered sub wired
Before starting all my projects, had so much time and thought everything was covered. NADA! Will go to Autozone or our local parts store tmrw and score 4 gauge and 6 gauge power cables for the amp.
As previously mentioned, OEM HU connector should arrive this weekend and am targeting Sat. for the first sound test. Should that fare well, it'll be another couple of days to tidy and secure up all wires, power blocks, components.
Finally, interior reinstall and then DRIVE, DRIVE, DRIVE at long last!!!!!!!!!
UPDATE 10/23: Clean-up of wires started today. Will make things permanent once the testing and calibration are done.
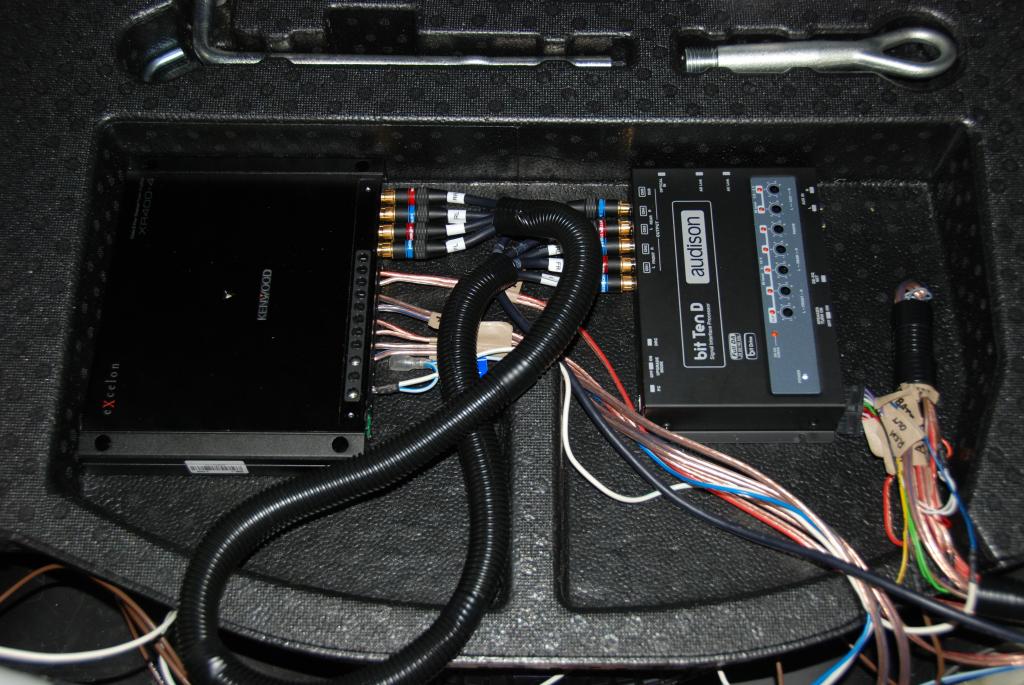
UPDATE 10/25: Sound test done today with temporary power wires in place.
Let me say that the objective of getting the sounds to be as good than my wife's OEM Mark L. has not only been achieved but surpassed.
The sound processor is amazing. Volume can be pumped up all the way resulting is super clean sound w/ zero distortion. The key is to get the initial sensitivity right. That took me less than 10 minutes to finalize.
De-equalizing the HU was a different story. After finally figuring out the blinking light sequence, it achieved Equalization. That took 1 hour.
Hooked up the amp and sub. The initial sounds were already better than the HU but not up to par with the money spent. Proceeded to adjust the amp. sensitivity and hi/lo filters.
THAT DID IT! IMO, it now sounds audiophile quality or damn close to it. Clean, undistorted music with a full firm bass. That little self-powered Kenwood sub is pretty amazing for its size.
After 3 hours of listening, will take a break and re-listen tomorrow after my football games. Am quite stoked with these results!!!!
Power Blocks installed.
Positive block straight to battery. 4 gauge cable was fished through the rubber boot located on the engine firewall slightly below the brake reservoir.
Negative block connected to rear seat bolt
Kenwood Amp and Sound processor wired
Kenwood powered sub wired
Before starting all my projects, had so much time and thought everything was covered. NADA!
Will go to Autozone or our local parts store tmrw and score 4 gauge and 6 gauge power cables for the amp. As previously mentioned, OEM HU connector should arrive this weekend and am targeting Sat. for the first sound test. Should that fare well, it'll be another couple of days to tidy and secure up all wires, power blocks, components.
Finally, interior reinstall and then DRIVE, DRIVE, DRIVE at long last!!!!!!!!!
UPDATE 10/23: Clean-up of wires started today. Will make things permanent once the testing and calibration are done.
UPDATE 10/25: Sound test done today with temporary power wires in place.
Let me say that the objective of getting the sounds to be as good than my wife's OEM Mark L. has not only been achieved but surpassed.
The sound processor is amazing. Volume can be pumped up all the way resulting is super clean sound w/ zero distortion. The key is to get the initial sensitivity right. That took me less than 10 minutes to finalize.
De-equalizing the HU was a different story. After finally figuring out the blinking light sequence, it achieved Equalization. That took 1 hour.
Hooked up the amp and sub. The initial sounds were already better than the HU but not up to par with the money spent. Proceeded to adjust the amp. sensitivity and hi/lo filters.
THAT DID IT! IMO, it now sounds audiophile quality or damn close to it. Clean, undistorted music with a full firm bass. That little self-powered Kenwood sub is pretty amazing for its size.
After 3 hours of listening, will take a break and re-listen tomorrow after my football games. Am quite stoked with these results!!!!
Last edited by ROTTBOY; Oct 25, 2014 at 09:26 PM.

Member
Joined: Jul 2014
Posts: 227
From: Los Angeles
I know what you mean by de-equalizing, but the head unit cannot do this on its own right? You are using your sound processor to de-equalize?
Any way to get signal going to the front speakers that ISN'T jacked up, without additional hardware?
Any way to get signal going to the front speakers that ISN'T jacked up, without additional hardware?
Member
Joined: Sep 2014
Posts: 32
From: Nova
The sound processors purpose is to de-equalize whatever signal the factory HU is sending to the speakers. In this case, his audison is whats performing this process.
I don't know of any other way to do this (signal processor) other than adding an aftermarket HU, meaning you will need some type of hardware.
Instead of the Audison Rottboy is using, I purchased the Audiocontrol LSQ-1. It's not as pricey and not as customizable as the Audison and it's also not able to be tuned using a laptop like the Audison is. There are also a few complaints the Audiocontrol introduces sound (hiss) into the speakers whereas the Audison is silent. Hope that helps
ADDL. comments: There are many SP's in the market (e.g. JL Clean Sweep, JBL MS8, Mosconi 6to8, Alpine EX series, and the list goes on). It all depends on what you want to accomplish as they mostly do a good job.
In my case, will be going to a audio shop in the next two weeks, once I've installed some other non-ICE related accessories, and finally reinstall the interior. Sadly, will be paying the bucks to have my system professionally EQ'd (was quoted a range from $50 - $150 depending on time spent). Its good now but since the time and money was spent, I figure, might as well do it right all the way.
Superfly is on the right track. He's using the laptop to configure the EQ settings to get the optimum sound for his listening. Have to admit that my computer skills leave lots to be desired, plus my listening abilities are not what they used to be.
NovaFit, am sure you can eliminate the "hiss" from the LSQ-1. Join DIY Audio Forum and those guys are always ready to give a helping hand. Just from reading the various threads, my learning curve jumped dramatically making my install less stressful.
Good luck and keep us informed.
- rttby
Last edited by ROTTBOY; Oct 28, 2014 at 04:44 PM.
Member
Joined: Sep 2014
Posts: 57
From: Cincinnati, OH
Just installed a bit ten this weekend and got to tweak it last night on the laptop. It's a really cool piece of hardware and definitely allows you to fine tune in a way you couldn't do otherwise. I can definitely notice a difference already and I'm not finished tweaking. I've got plenty of equalizing to do on that 31 band eq.
Someone that spends his life on FitFreak.net
Joined: Mar 2014
Posts: 1,116
From: Hawaii: relocated to Western Canada Sept, 2015
XM radio hooked
Before and in between today's football games, found to time to temporarily power-up the sat radio. Pre-fed the line the day before.
Except for a faulty audio cable (had to take apart the center console again - which serves me right for not testing first), it works great and sounds deadly, clear and firm. Have the sat radio's audio out (mini-jack) go into the Audison SP's Aux input thereby having its volume controlled by the Audison's DRC (Digital Remote Control). Very clean sounding indeed!!!
Haven't decided on the best placement for the XM radio. Most probably will attach it to the cubby hole in front of the dual cupholders on the center console.
The ICE installs are now complete. System sounds great but will report once the professional EQ'ing is done. Let's see if they can get the Fit to sound better than my B&W home system.
Except for a faulty audio cable
(had to take apart the center console again - which serves me right for not testing first), it works great and sounds deadly, clear and firm. Have the sat radio's audio out (mini-jack) go into the Audison SP's Aux input thereby having its volume controlled by the Audison's DRC (Digital Remote Control). Very clean sounding indeed!!!Haven't decided on the best placement for the XM radio. Most probably will attach it to the cubby hole in front of the dual cupholders on the center console.
The ICE installs are now complete. System sounds great but will report once the professional EQ'ing is done.
Let's see if they can get the Fit to sound better than my B&W home system.

Member
Joined: Aug 2014
Posts: 1,620
From: Connecticut
There are some beautiful installs on this thread! Love them! Its too bad the stock speakers and head unit don't have the balls to push out some decent Hi-Fi sound. I looked at the door speakers yesterday and man they are weak. Sure built tough for the application but not meant for high power application. Even just changing out the speakers for more power handling ones will help.
The trouble when putting in custom systems I've found is matching the driver for the cubic space inside the door itself. The technical/engineer side of me would want to do the Thiel/Small calculations for the volume of air the driver displaces is most efficient at. Sometimes even the highest priced speaker will not yield a good sound. Often times a cheaper driver is the better choice. Not doing this calculation means less sound db's and more heat which leads to driver failure.
With all the pro audio gear I have, the quicker and easier method for me is to throw a few powered PA speakers in the back running off my pure sine power inverter, run some volume control to them and let'er rip!
The trouble when putting in custom systems I've found is matching the driver for the cubic space inside the door itself. The technical/engineer side of me would want to do the Thiel/Small calculations for the volume of air the driver displaces is most efficient at. Sometimes even the highest priced speaker will not yield a good sound. Often times a cheaper driver is the better choice. Not doing this calculation means less sound db's and more heat which leads to driver failure.
With all the pro audio gear I have, the quicker and easier method for me is to throw a few powered PA speakers in the back running off my pure sine power inverter, run some volume control to them and let'er rip!

