
DIY: Fog Light Lens Fix/Replacement

DIY: Fog Light Lens Fix/Replacement
One of my fog lights broke this morning. After reading the forums (thanks to all who contributed), I decided to try fixing the fog light myself along with some step-by-step pictures. Here is what I used (the shot glosses are optional, depends on how bad of a time you have doing this) All in all, I spent $20 excluding the tools and items I already had. IMO, much more better than spending 200-500$ on replacements. Let me know if you have any q's:

4 Tiny Spring Clamps (home depot)
1 Small sheet of lexan plexi-glass (home depot carries them)
1 Silicone Sealant and Caulk Gun (home depot)
1 Dremel tool with bits (already had this for years)
Some needle nose pliers, flathead (to pry the glass out)
First, here's a pic of the broken mess I started with:
Last edited by heymikesays; Sep 7, 2010 at 09:32 PM.
Step 2
Make sure you take out the light bulb first for obvious reasons. Then carefully take out the broken pieces using the needle nose pliers and/or flathead. (Finished result to left, pieces to the right). I would recommend using gloves and eye protection for this because the glass crumbled into tiny pieces and it was not pretty.

Step 3
Use the fog light to trace the desired lens shape on the lexan glass (Do NOT take off the film until you are ready to install the plexi glass, otherwise you will more than likely scratch/scuff it up prior to install):

Once you dremel the desired shape out, sand/dremel-sand the edges to round them out. I used a red sharpie to mark the areas that needed to be sanded in order for it to fit better in the housing.

Once you dremel the desired shape out, sand/dremel-sand the edges to round them out. I used a red sharpie to mark the areas that needed to be sanded in order for it to fit better in the housing.
Step 4
Once you have the right shape out, clean up all the mess/dirt and peel off the film.


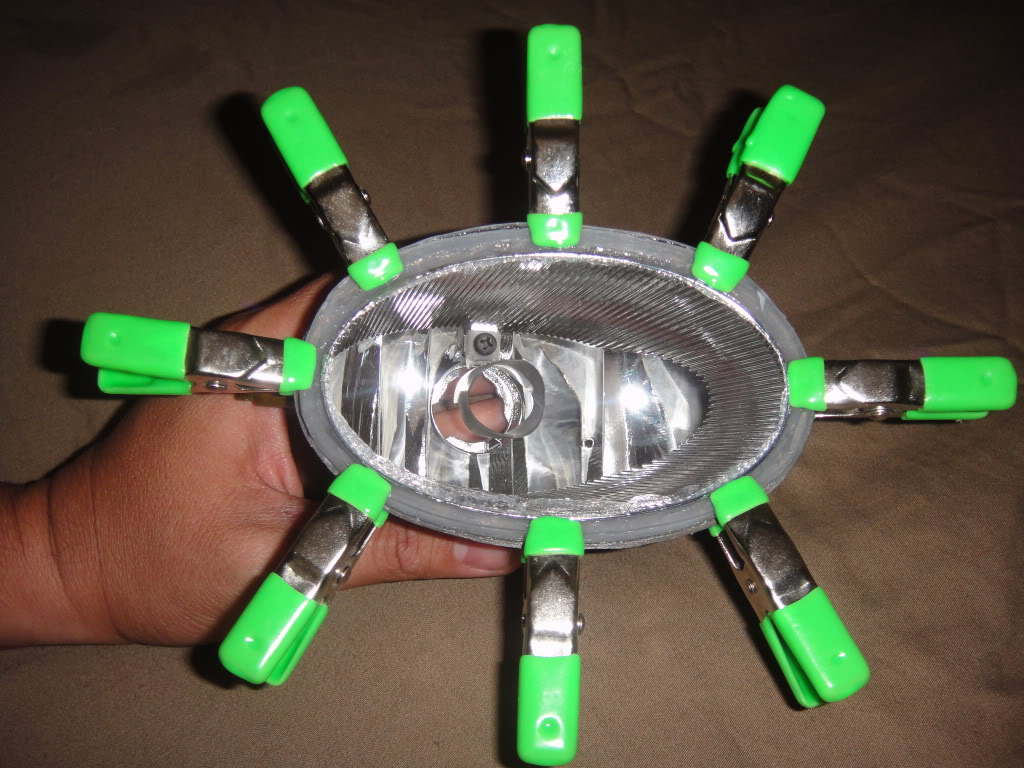
Apply the sealant around the housing border and lay the lens on top. Use the small spring clamps to secure it to the fog light (those clamps only cost $0.38 at home depot).


Apply the sealant around the housing border and lay the lens on top. Use the small spring clamps to secure it to the fog light (those clamps only cost $0.38 at home depot).
Step 5
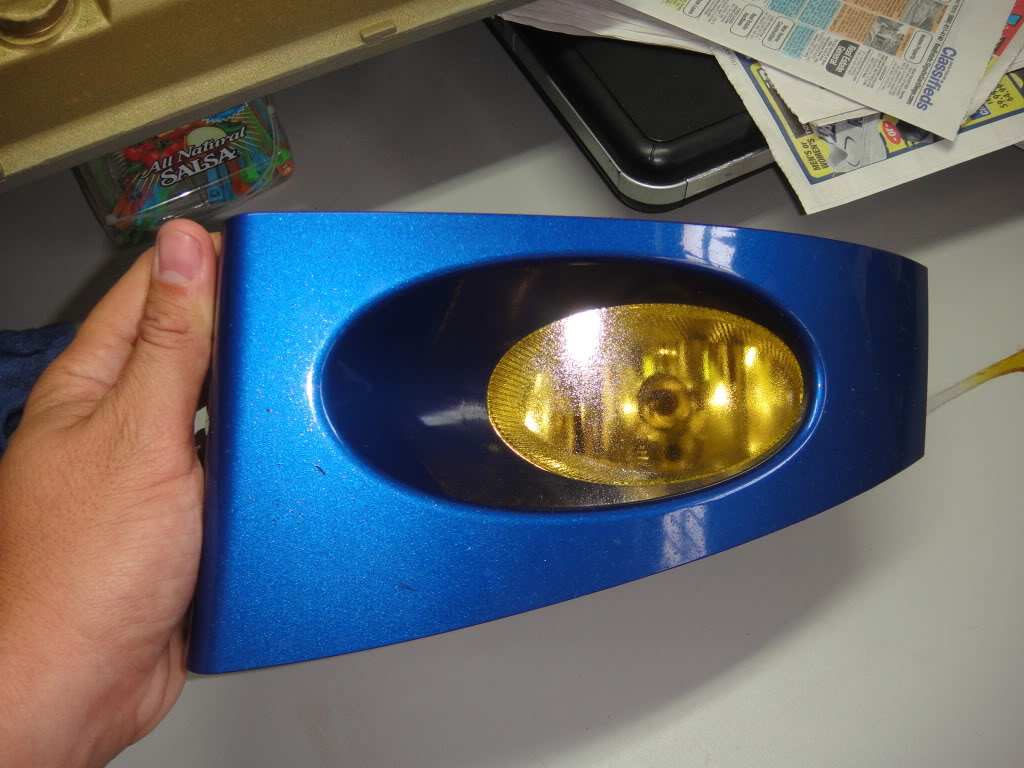
Let it dry for a good 30min to an hour (try to wait longer to ensure a good dry and not be antsy like me) I reapplied my fog light housing trim and here is what the end product looked like (I can see the excess sealant I applied  but I guess it's better than not having enough sealant and leaking):

Back in it's home.

but I guess it's better than not having enough sealant and leaking):Back in it's home.

Member

Joined: Mar 2008
Posts: 218
From: San Diego, Ca.
Thanks to Hey Mike for the sweet step by step, here is how mine turned out today.
And I also fabbed up some armor for my other glass foglight and see how long it lasts.

more pics to come today after I get my repaired light to dry...
And I also fabbed up some armor for my other glass foglight and see how long it lasts.
more pics to come today after I get my repaired light to dry...
Member
Joined: Mar 2008
Posts: 218
From: San Diego, Ca.
As promised, here are some pics of what I just completed in my garage for the foglight repair.
Painted to match my glass foglight...
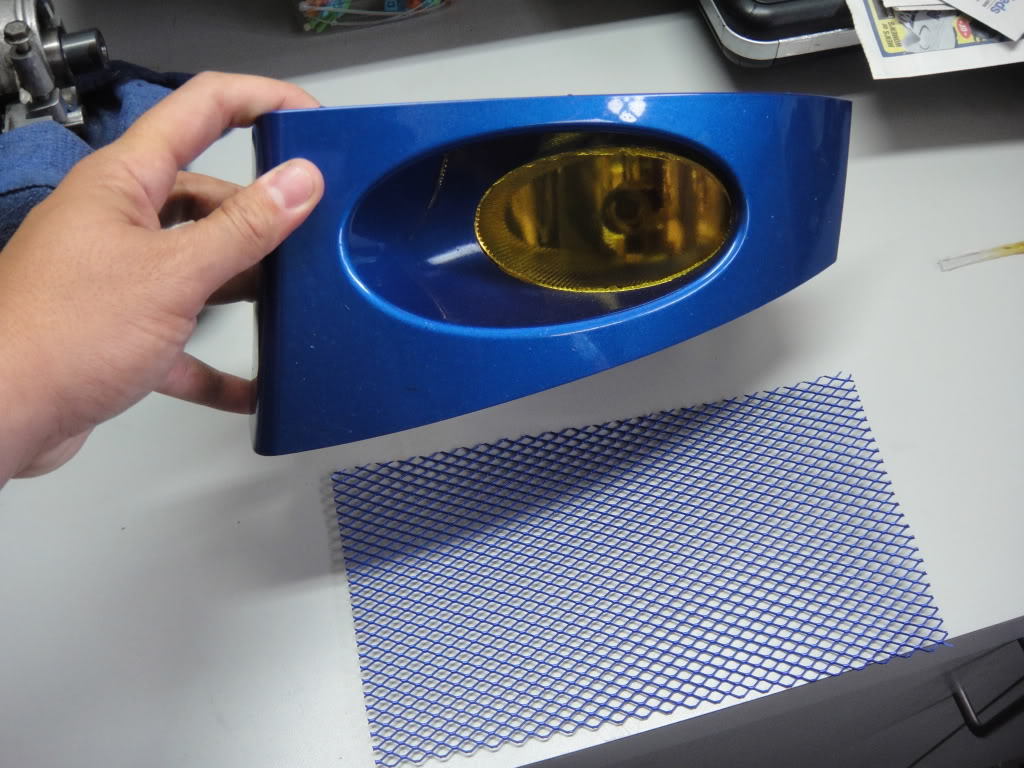
Debating to install my armor screen..
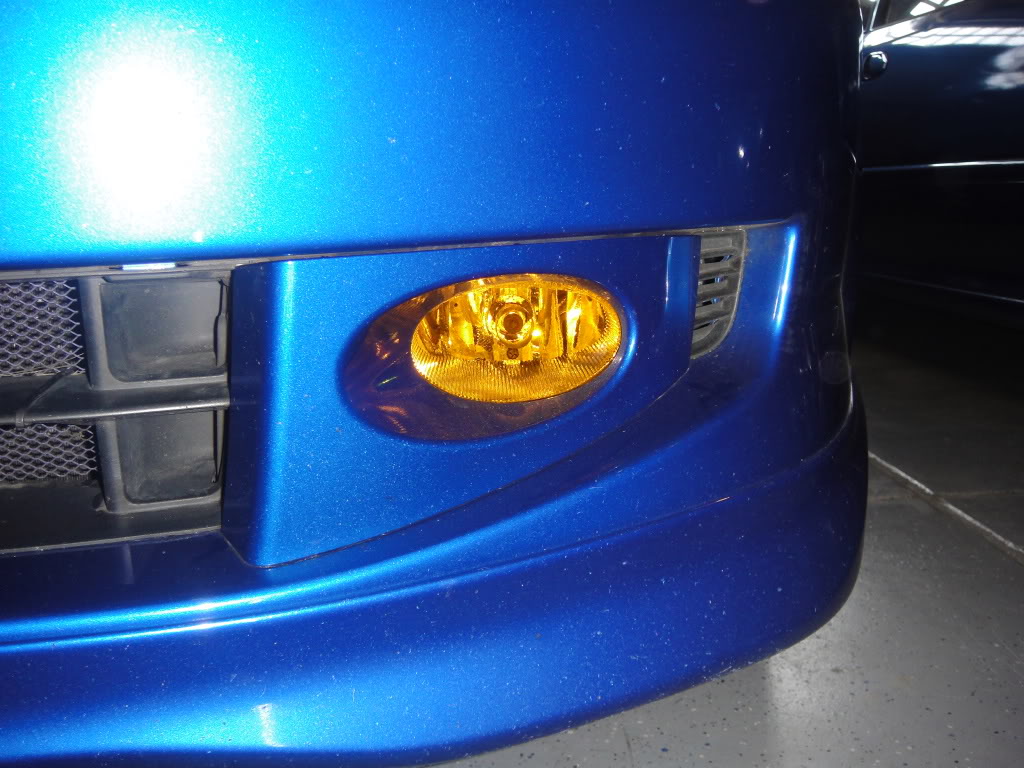
Installed back on Fit...
Painted to match my glass foglight...
Debating to install my armor screen..
Installed back on Fit...


New Member
Joined: Jan 2011
Posts: 1
From: Fortaleza - Cear� - Brazil
Nice DIY.
Here in Brazil, on Civic Club, some guys have been doing that job using polycarbonate and Loctite sealant for high temperatures.
I do really think it's much better than replacing the foglight, especially for us here; unfortunately, dealers in Brazil sell only complete kits... so the buyer has to keep harness and all the stuff for a "small price" of U$ 800.00.
Last edited by alexandrebr; Feb 9, 2011 at 02:05 AM.


Member
Joined: May 2009
Posts: 46
From: Moscow

Glasses can to be drilled, it is enough to heat up in an oven to 50 degrees on Celsius and accurately to pull out from hermetic
Also glasses from Mazda car here a code will approach MZX0303-080-Z

It is necessary a little подтачить a headlight and here is how it looks in gathering

Also glasses from Mazda car here a code will approach MZX0303-080-Z
It is necessary a little подтачить a headlight and here is how it looks in gathering
Last edited by Jazzfitman; Sep 20, 2011 at 12:02 PM.


I just did this today
 just waiting for glue to dry. VERY happy so far. One of my fog lenses was busted and I decided id do both so they looked alike and found the other was cracked anyways.

Replacement Fog Lights
The DIY plastic lense replecement info. was good for people on a low budget, but the Lexan lenses will deform if you use any high-power bulbs, from sources like PIAA (because of heat produced by the bulb). Also, polycarbonate plastic scratches easily.
If your lense breaks from a rock impact, you can find enitre replacement light assemblies on eBay that cost less than OEM lights from a dealer. I recently bought a replacement light assembly, with a glass lense and a fit exactly the same as OEM for less than OEM price from eBay. The light BRAND was TYC, and it was an exact copy of the OEM light that I removed from the car. Seemed a shame to pitch the old OEM light assembly into the trash.
I also installed impact resistant yellow films from "Headlight Armor", and the film fit was exact and easy to install. The Headlight Armor product was thick and of good quality, and the shipping was quick.
I would be happy to post the eBay vendor's name, but I bought the replacement light assembly about 1-1/2 months ago and threw away the packing slip. Just got around to installing it today- a carbon copy of OEM lights.
Member
Joined: Jul 2008
Posts: 216
From: Austin, TX
Has anyone had issues with the Lexan melting? I have a broken fog and I'd like to get going on a repair for it. I don't want to have to re-do it after melting though.
Last edited by D50boy; Jun 4, 2012 at 12:34 PM.